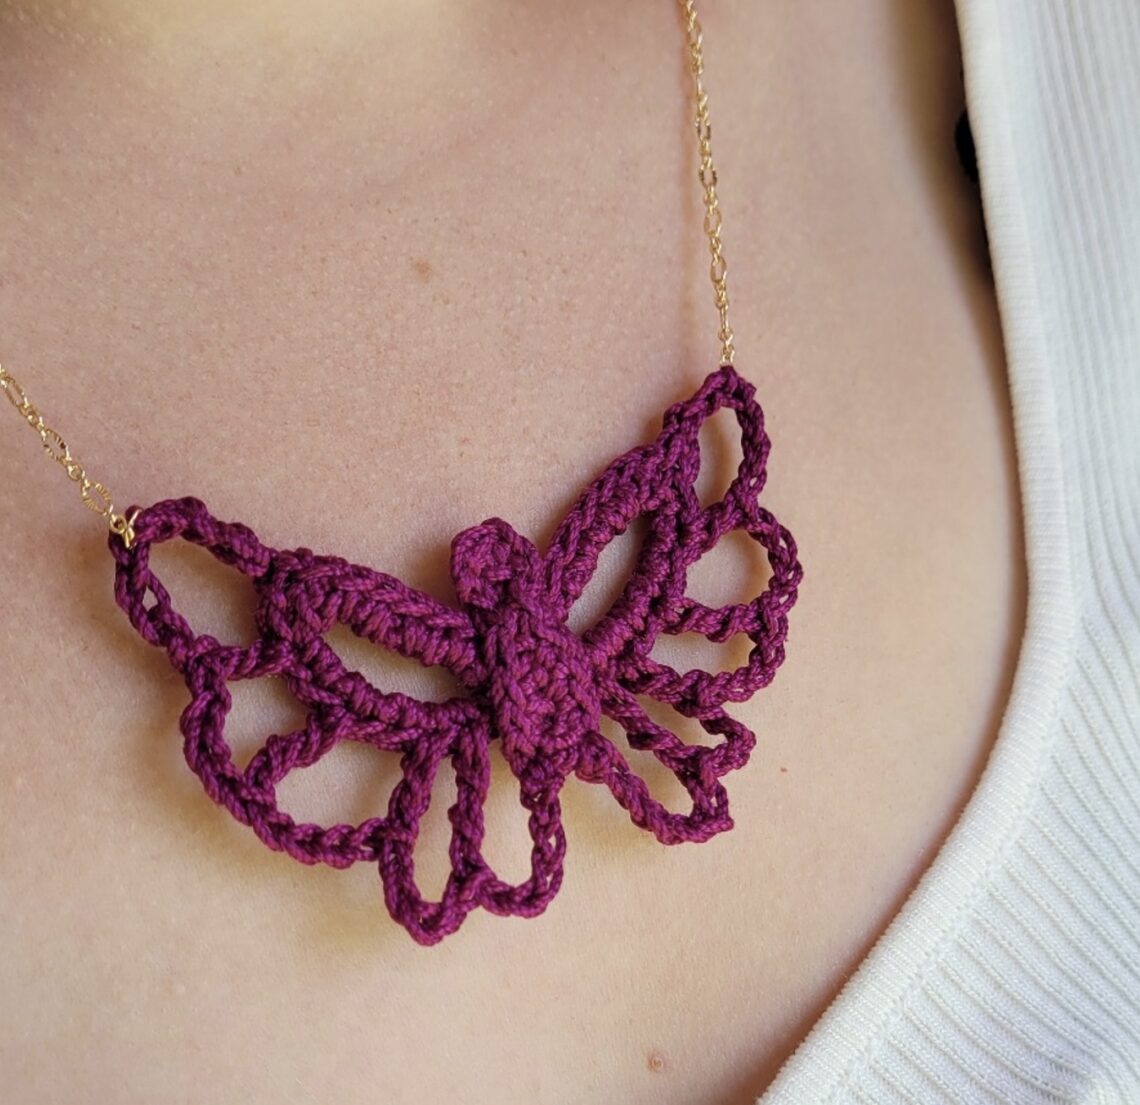
Butterfly Pendant Necklace!
Hello! It’s Jennifer Ryan, the designer and blogger behind Celtic Knot Crochet. I am excited to be sharing the Butterfly Necklace project here on the Clover blog! I love butterflies and think they are so beautiful. I love to incorporate butterflies into my crochet projects and thought this one would make a great necklace since it uses basic crochet stitches and a small amount of cotton crochet thread. Let’s get started!
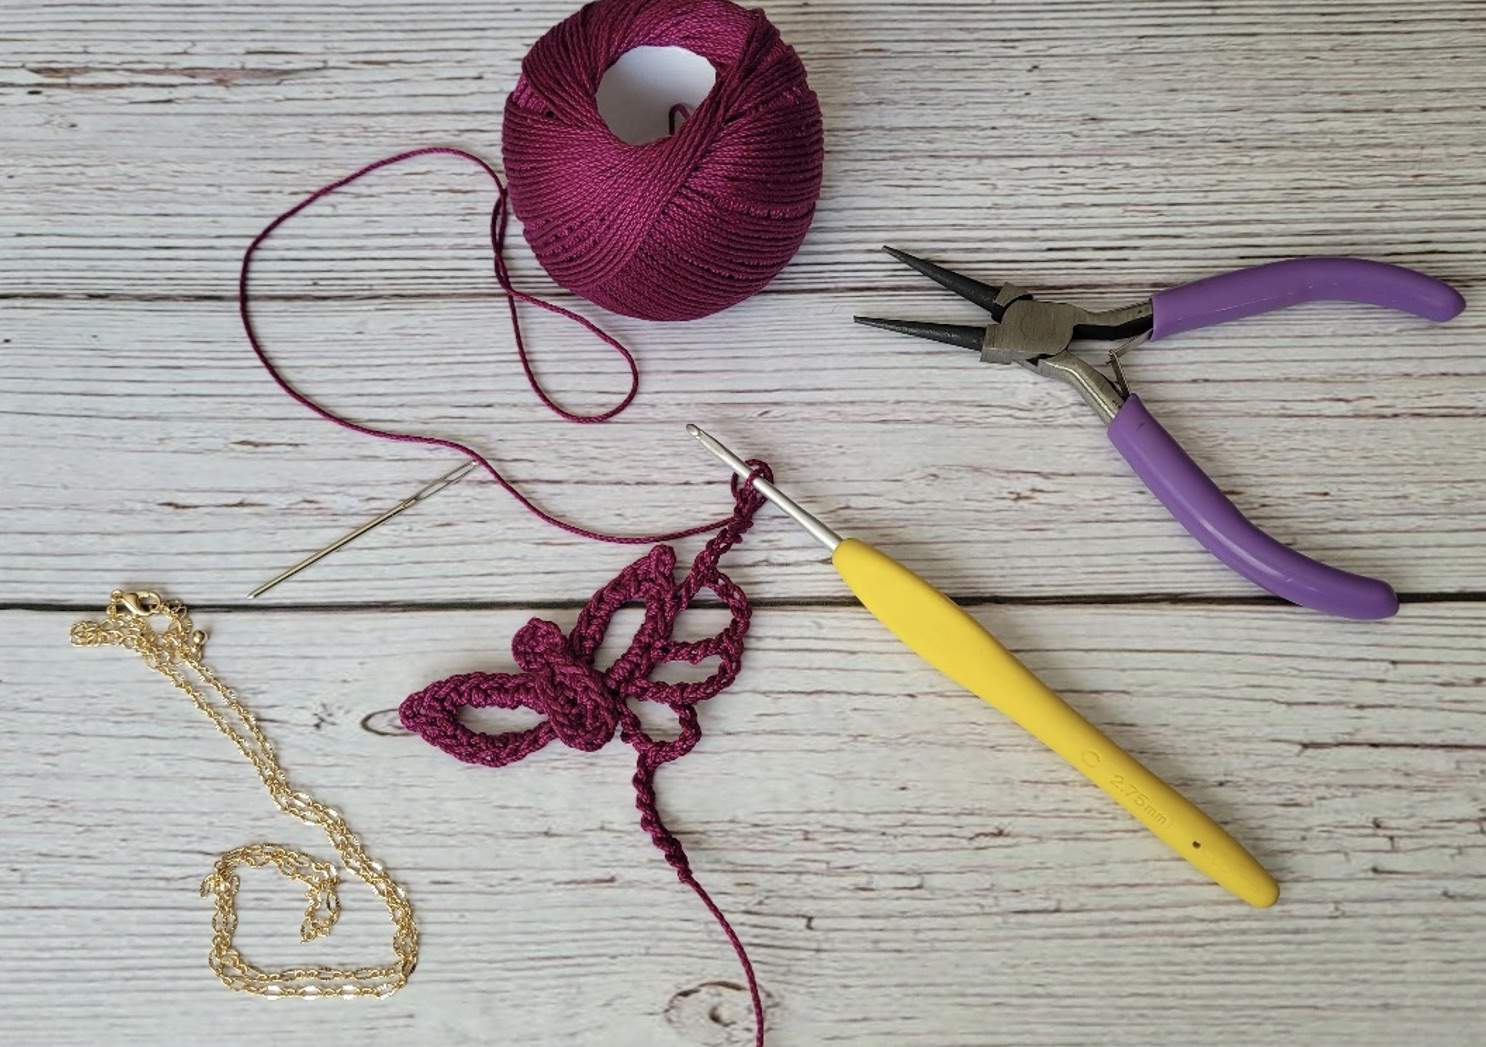
Supplies:
- Cotton Crochet Thread – Size 3 – 1 ball
- 2.75 mm hook by Clover
- Tapestry needle
- Fabric Stiffener
- Small square of aluminum foil and paintbrush
- Rust-proof sewing pins
- Necklace chain with clasp
- Optional: 2 jump rings & Jewelry pliers
Skill Level: Easy
Finished Measurements: 3” across at widest point; 2 ¼” long from top of wing to bottom of wing at center
Gauge: Gauge is not necessary for this project
Abbreviations:
- YO (yarn over)
- Hk (hook)
- Lp (loop)
- Ch (chain)
- St (stitch)
- Sl st (slip stitch)
- Dc (double crochet)
- Sk (skip)
Special Stitches: Ch-2 picot = ch 2, sl st in back bump of 2nd chain from hook
Notes: Butterfly is made in 3 sections – the first 2 sections (the body and upper wing) are crocheted and then sewn together. Lastly, stitches are added along outer edges to complete the wings.
Instructions:
Special stitches are printed in bold and italicized text are defined above.
BODY:
Ch 5
Sl st in 2nd ch from hk; sc in each of the next 3 chs;
Ch 1, sc in same ch, ch 1;
Now working on the other side of the chain, sc in each of the next 3 sts; sl st in last st; sl st in 1st sc. Do not fasten off.
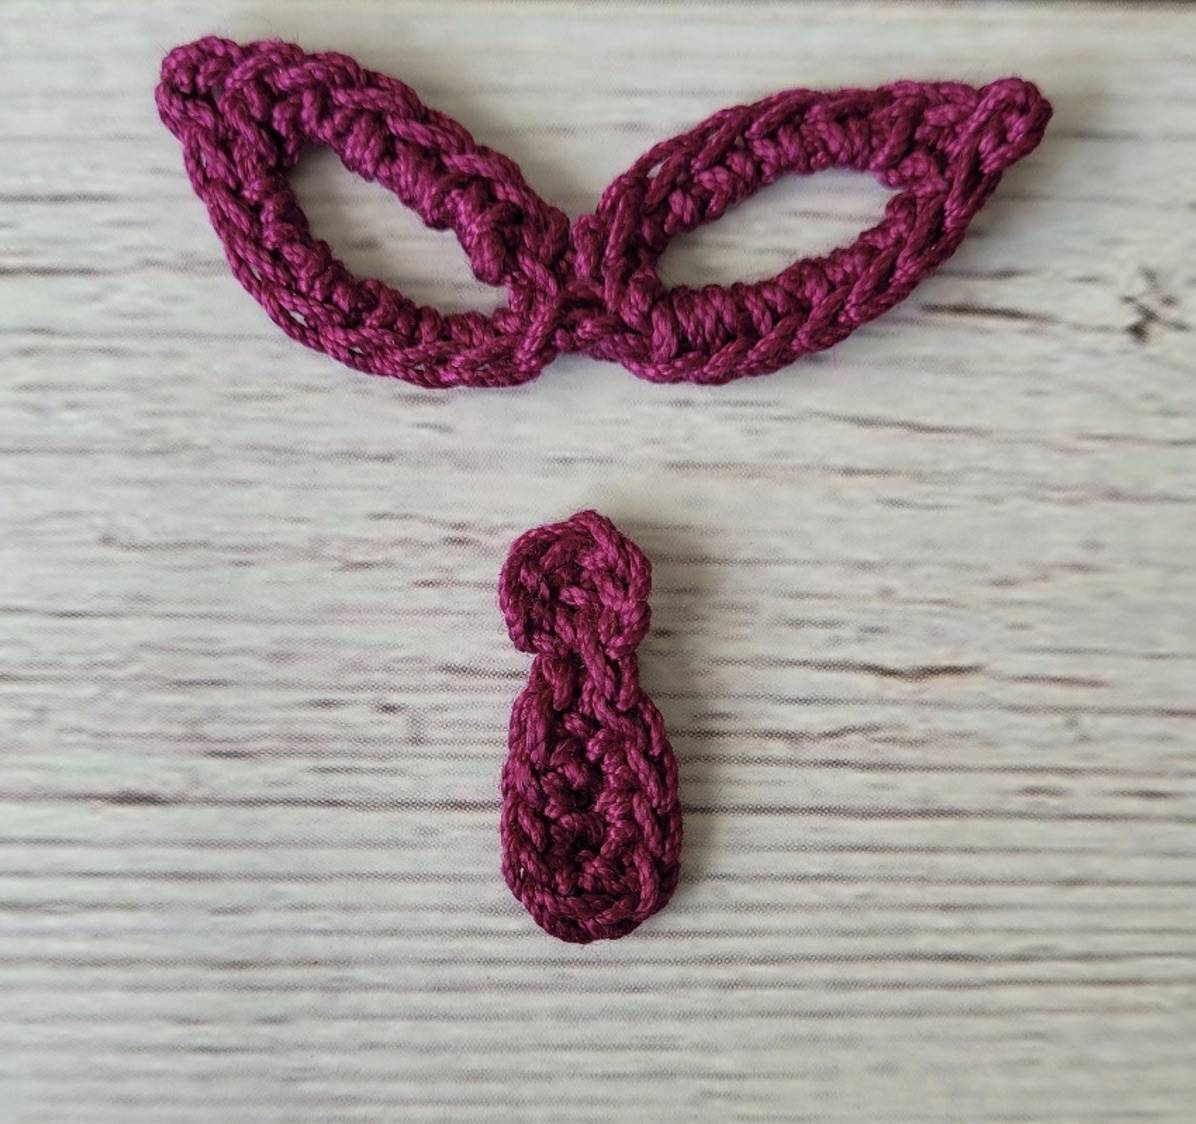
HEAD:
Ch 3, dc in same st, ch 2 – Fasten off.
Using needle sew end of ch-2 length to base of head working needle through same st as the dc was worked into (as shown by arrow in photo below)
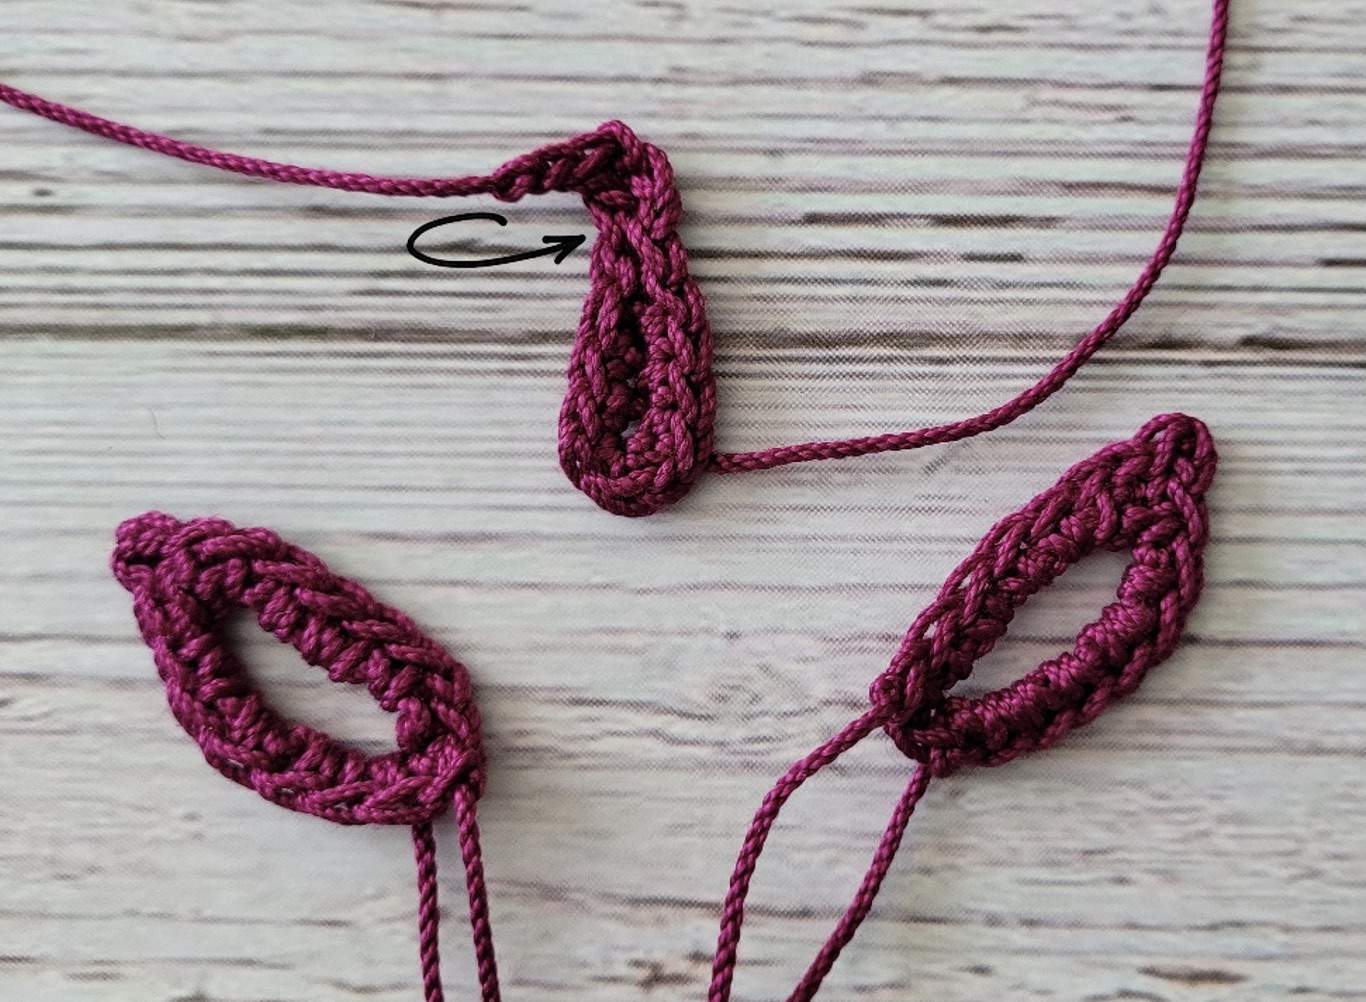
This photo also shows the Right Wing Top and the Left Wing Top
(Please note that for left-handed crocheters, you will do the same stitches written below but each section will be the opposite; (ie. Complete the stitches for the Right Wing Top but it will end up being the Left Wing Top)
RIGHT WING – top:
Round 1: Ch 6, ch-2 picot; ch 5, sl st in 1st ch.
Round 2: Ch 1, 6 sc in ch-6 sp; sc in 1st ch of next ch-2 picot; ch-2 picot; sl st in next ch and next sl st; 4 sc in next ch-5 sp; sl st in last ch. Fasten off.
LEFT WING – top:
Round 1: Ch 5, ch-2 picot, ch 6, join with sl st to 1st ch.
Round 2: Ch 1, 4 sc in same sp; sl st in each of next 2 chs; ch-2 picot; sc in next st; 6 sc in next ch-6 sp; sl st to 1st sc. Fasten off.
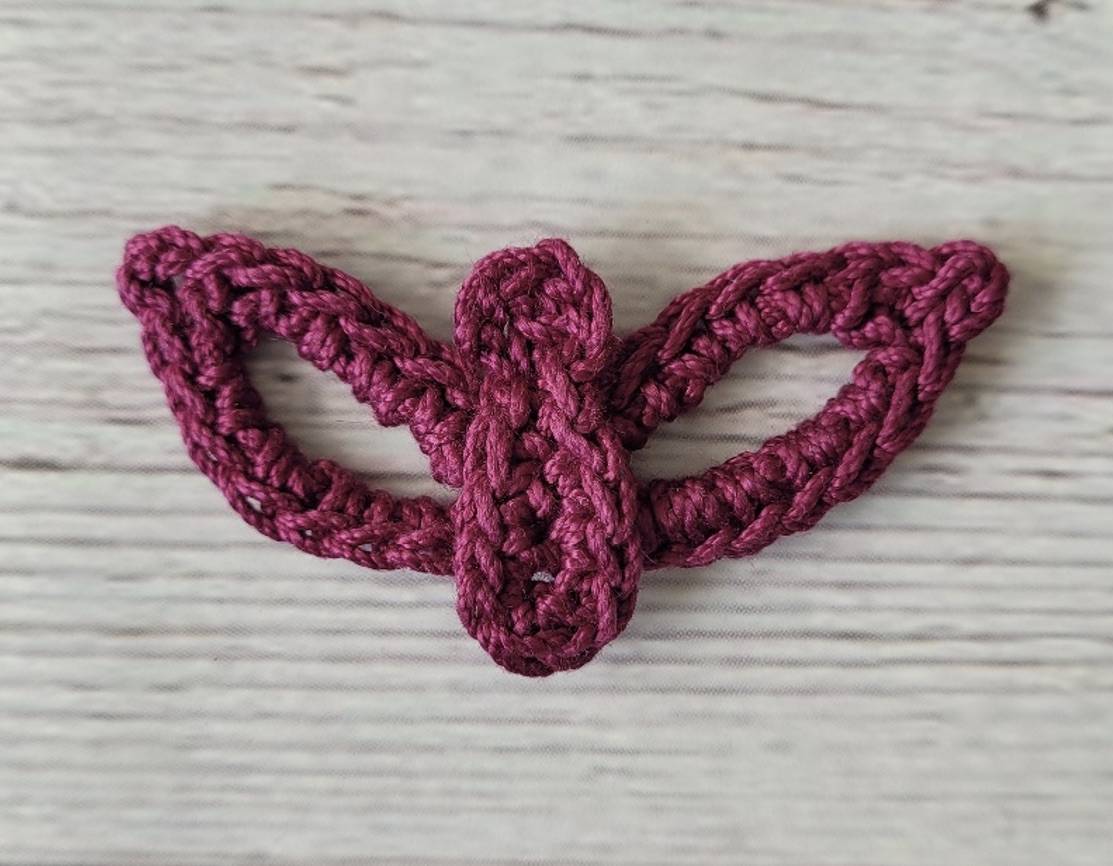
Sew wing tops together and weave in all ends. Then sew body to top of wing tops.
RIGHT WING – outer stitches:
Ch 6
Tr in 1st sc (on lower side of Right Wing Top);
Ch 4, dc in next sc, ch 4, sk next sc, tr in next sc, ch 4, sk next sc, dc in next sc, ch 6. Fasten off.
*Note that the ends of the starting and ending chain lengths for both the Right Wing Outer Stitches and the Left Wing Outer Stitches will be attached to the body and Top sections using the tapestry needle*
LEFT WING – outer stitches:
Ch 6;
Dc in st 1 st away from ch-2 picot on Left Wing Top;
Ch 4, sk next st, tr in next st, ch 4, sk next st, dc in next st, ch 4, tr in next st, ch 6. Fasten off.
Finishing/Assembly:
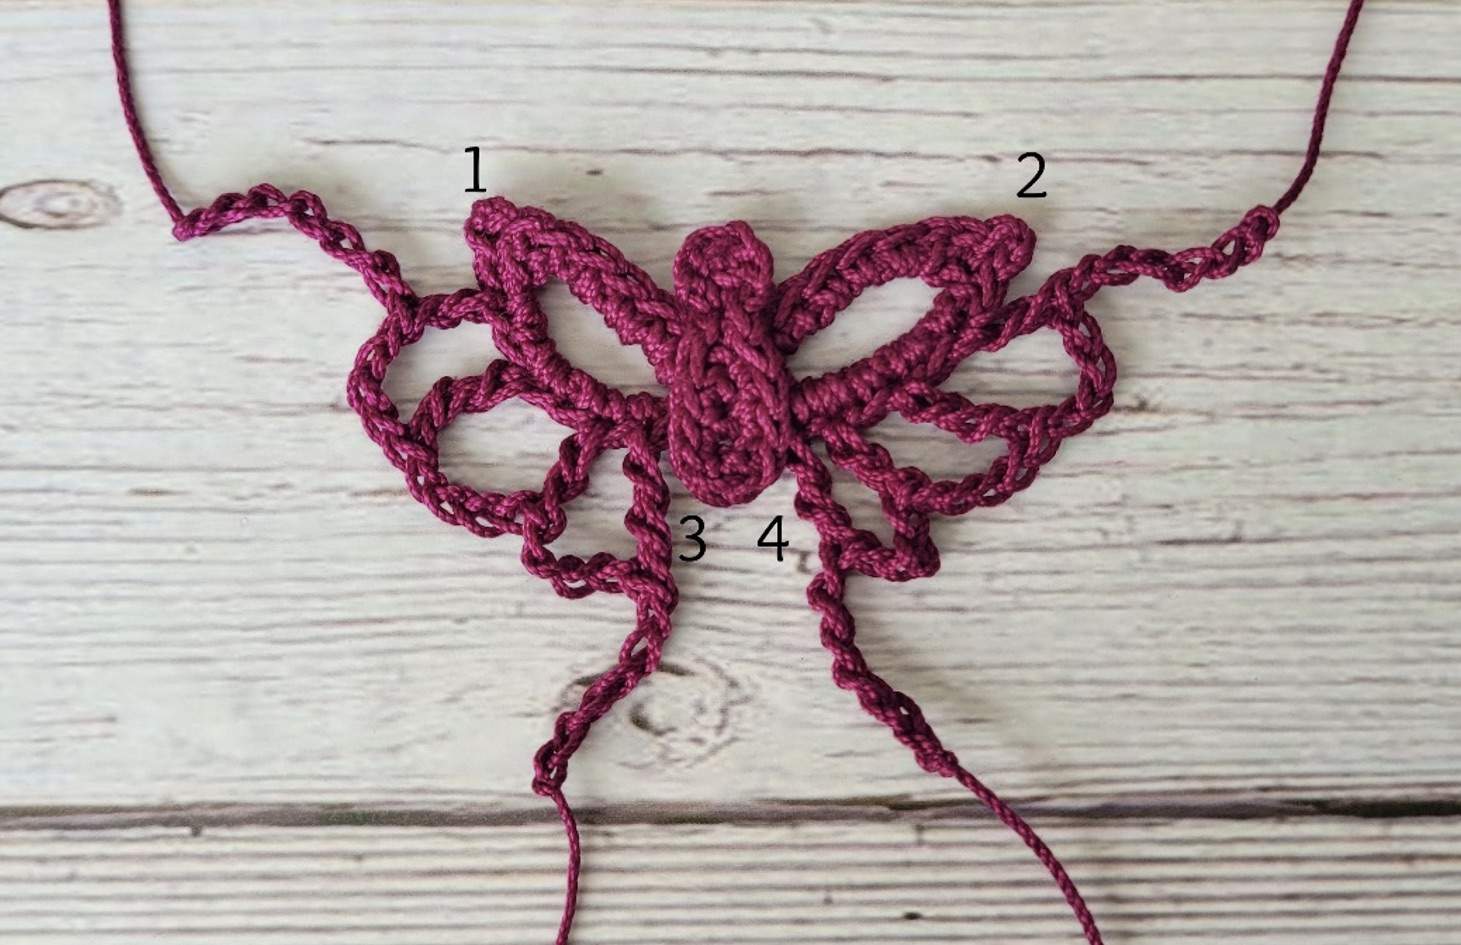
With tapestry needle and yarn tails, secure ends of chain lengths to ch-2 picot areas (1 & 2) and bottom of body section (3 & 4) using photo as a guide.
Wet block butterfly and pin stitches in place to be even on both sides. Let dry completely.
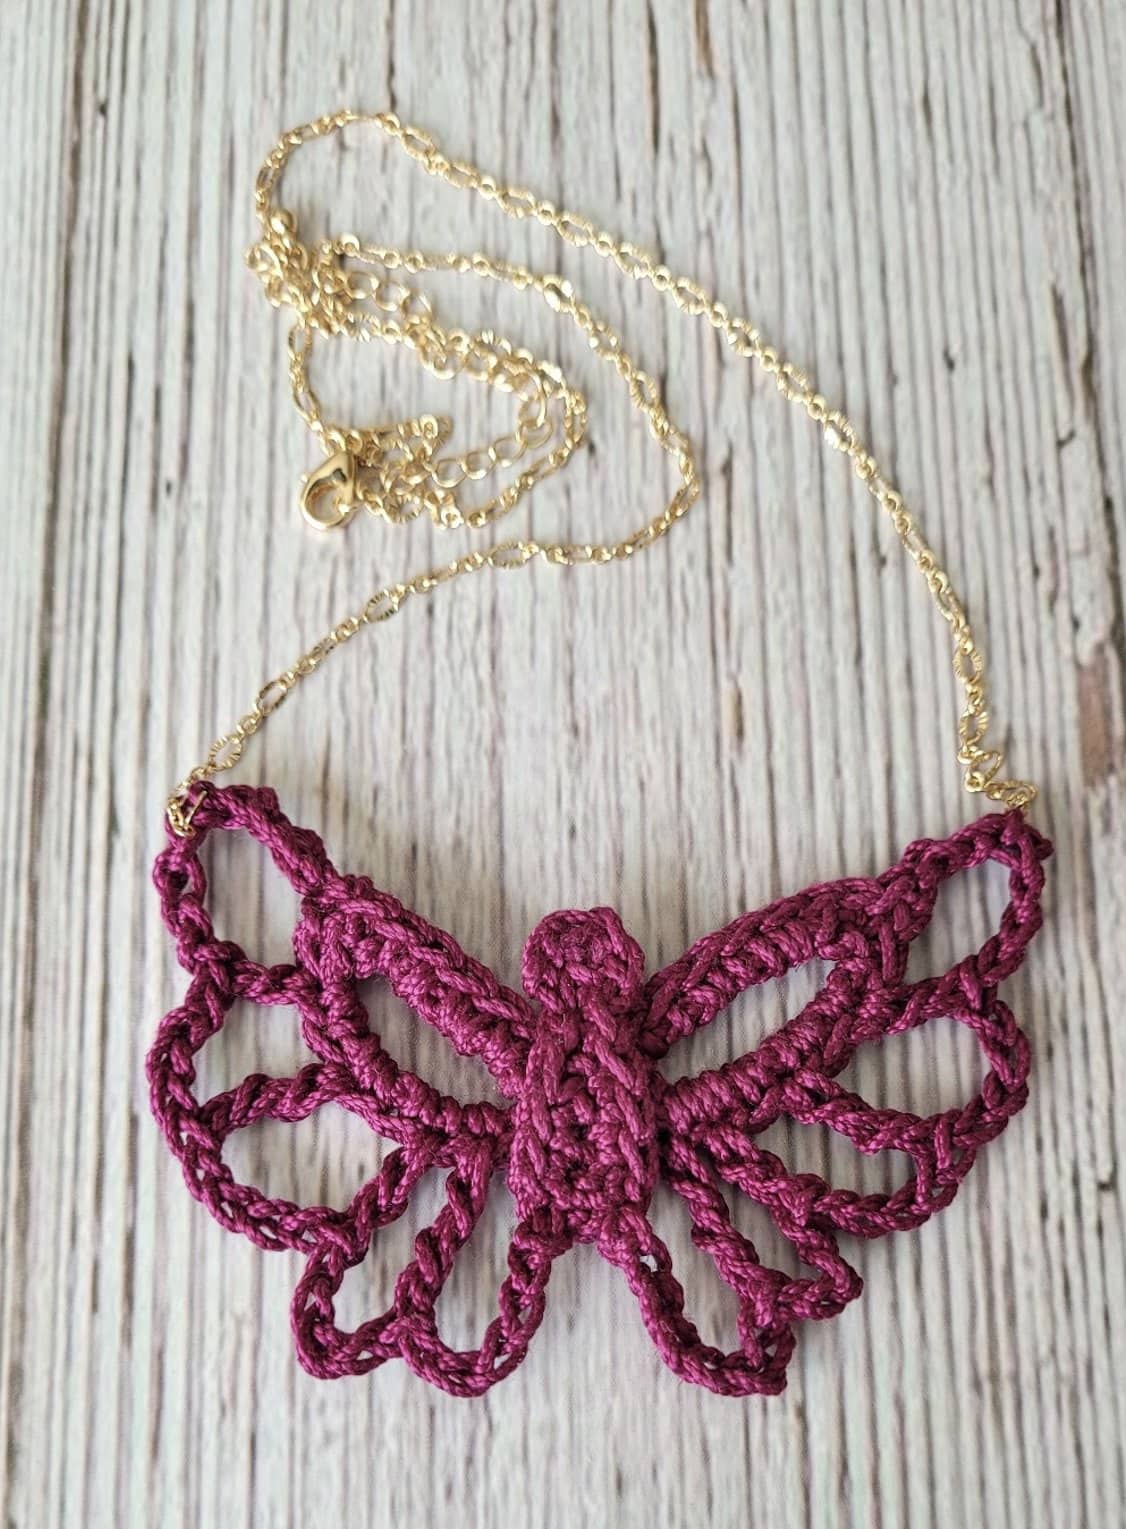
Cut necklace chain in half and sew each end to one side of each wing.
(Alternative chain joining option explained below)
Lay butterfly Right Side down on aluminum foil and being careful to not get any stiffener on necklace chain, paint Wrong Side with several coats of fabric stiffener. Let dry completely.
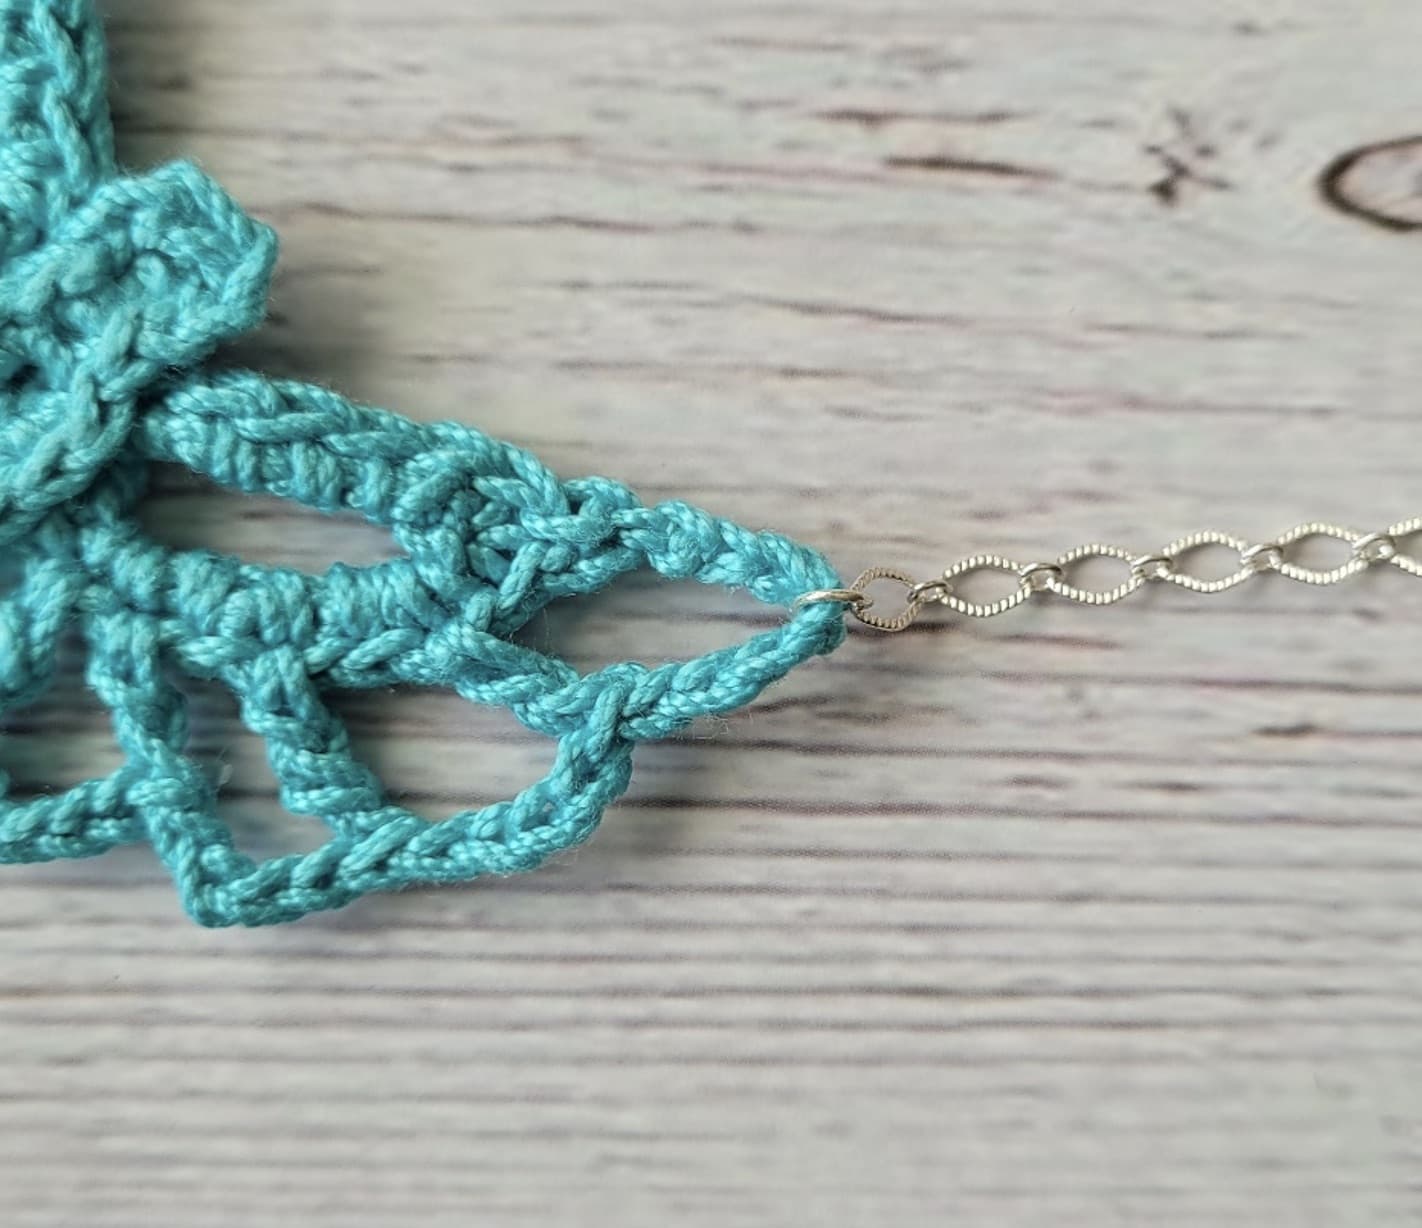
Optional Joining: Using jewelry pliers attach jump rings to wings and to necklace chain
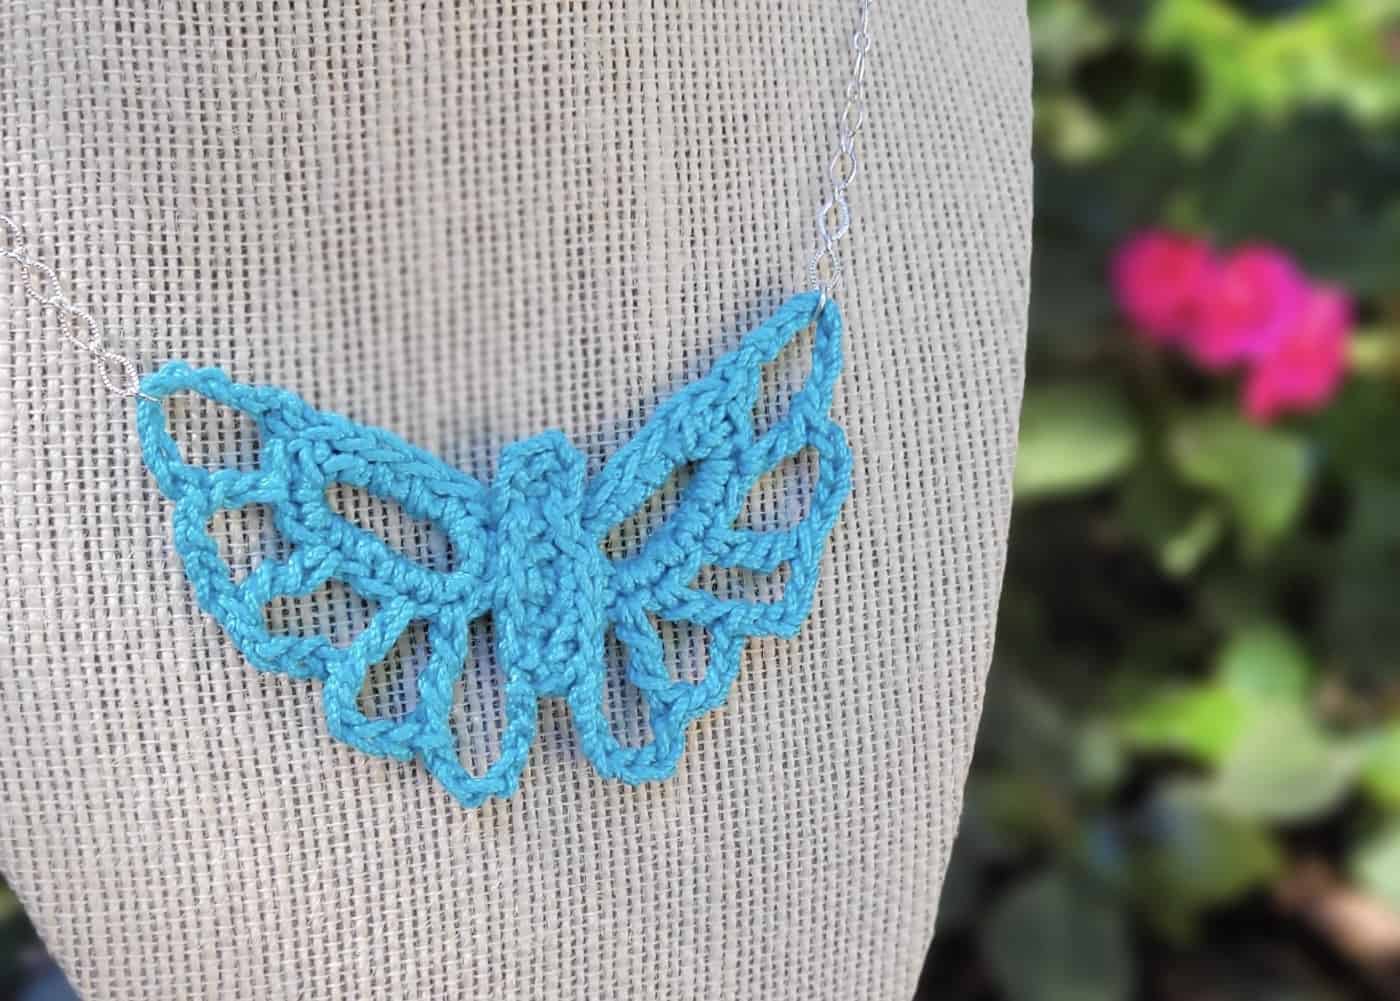
Tada! Your Butterfly Necklace is complete ? I hope you enjoyed making this project. This butterfly works up very quickly and looks very elegant with a simple necklace chain. I think it would make a great gift for celebrating National Daughter’s Day on September 25th! <3
You can find a large-print instant downloadable PDF of this pattern by clicking here and purchasing it in my Etsy shop.
[Etsy shop link: https://www.etsy.com/shop/CelticKnotCrochet]
Please tag me @celticknotcrochet and use the #celticknotcrochet on Instagram – I would love to see your necklace!
Find Celtic Knot Crochet on the internet: Blog Youtube Instagram Etsy Pinterest