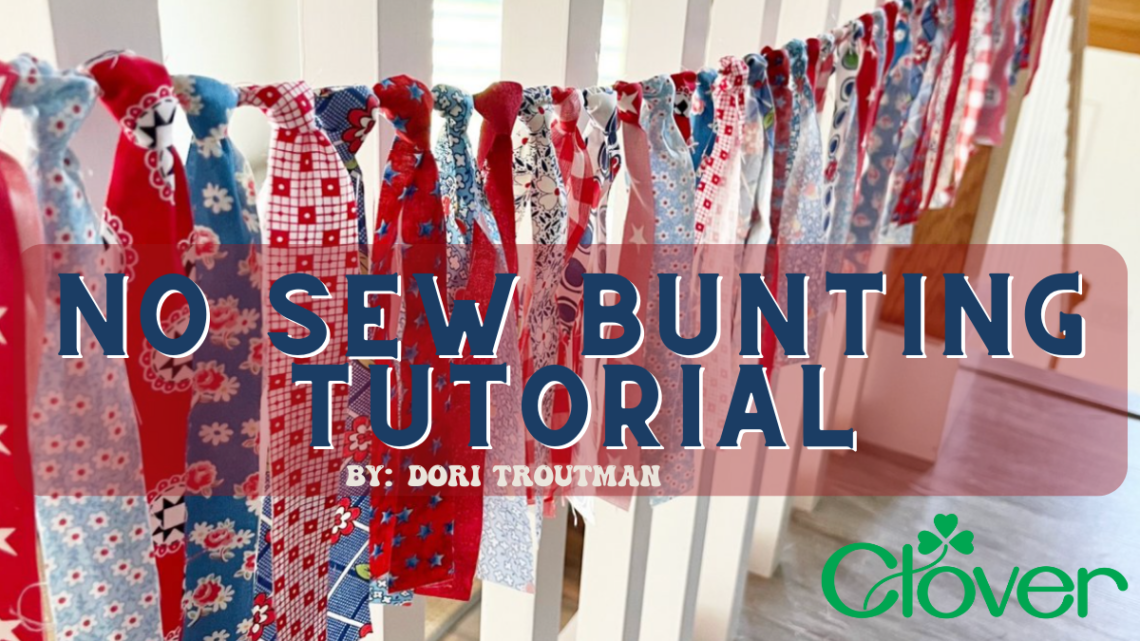
No Sew Flag Bunting – Craft Tutorial
Hello Friends!
Its almost July and I had on my mind to make a super easy new bunting to hang. I absolutely adore buntings! It’s one of my favorite ways to make a quick change-up with the holidays. So I decided to just use up some fabric scraps and make a “no sew” bunting that ANYONE can make! Dig through your red/white/blue fabric scraps and lets make one together!
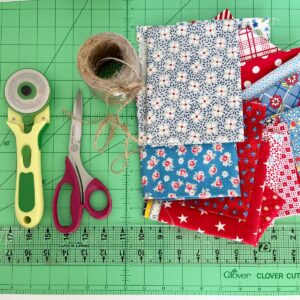
Necessary Supplies
- Cutting Mat- Art No. 7520
- Clover rotary cutter- Art No. 7502
- Scissors- Art No. 4941(these are my favorite ones)
- Clover Wonder Clips- Art No. 3185
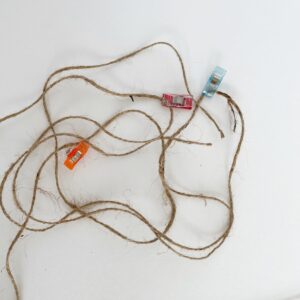
- Twine
- Fabric Scraps
Instructions
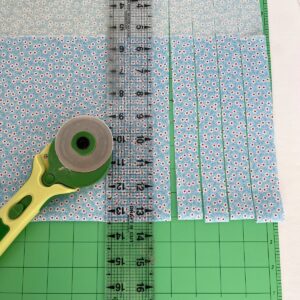
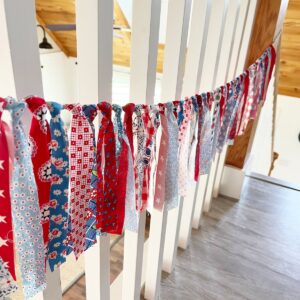
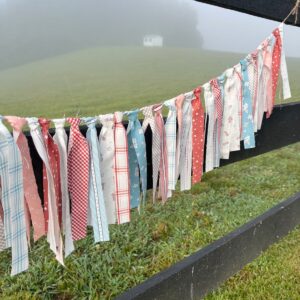
Step One: First of all lets talk about your fabric strips: the size and how many you’ll need! This bunting is 8 feet long with 2 feet of twine on each side of the fabric strips. SO your strips will be hung on the middle four feet. They are one inch wide so you will need 48 strips to cover that space. I chose to use 12 different fabrics and so I cut four strips from each piece of fabric. If you don’t use that many fabrics (or you use more) you can calculate how many you’ll need to cut. But for this tutorial, we’ll just assume you have 12 different fabrics. (I made several buntings. Each of them were from different shades of red/white/blue fabric.) Gather all your fabrics.
Step Two: Iron your fabric pieces to make them easier to cut and work with!
Step Three: Lay each fabric piece on the Clover cutting mat and use your Clover rotary cutter with a sharp blade to cut four strips one inch wide by 18 inches long. (If you plan to make more than one bunting, you can double this amount.) Continue cutting until you have 4 strips from each of the 12 fabrics with a total of 48 strips. (If you use fewer fabrics, just make sure that you cut 48 strips.)
Step Four: Cut your twine 8 feet in length. Fold it in half and mark the half way point by using a Clover wonder clip at that spot. I also marked the half way point on each side of the mid section. Really you only need one in the middle; but I liked knowing where my beginning and end was on the entire piece of twine. Wonder clips work perfect for this!
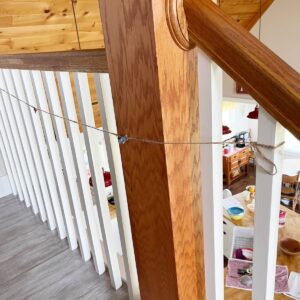
Step Five: Find a place to tie and hang your twine so that it’s easy to work with. I chose the landing at the top of my stairs and tied each end to the stair rails. You’ll want to tie it firmly because as you add the fabric strips it’ll sag.
Step Six: Get comfortable! I sat on a little stool with all my fabric strips laid out next to me on a trunk.

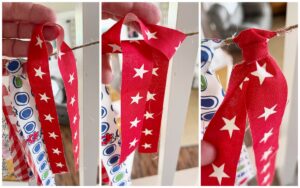
Step Seven: You can lay your strips out according to how you intend to hang them, or you can just do it randomly. Starting at the middle point of your twine, where you have your wonder clip, you’ll tie your first fabric strip. (Either to the right or the left of that, it doesn’t matter.) Using the picture below, hang each fabric strip. It goes really fast as you aren’t actually tying a knot, just creating a loop and putting the fabric through, and pulling it snug. It might take you a few times to get it just right.
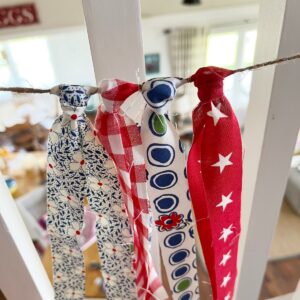
Step Eight: At that point you will then start on the other side of the twine and attach the remaining 24.
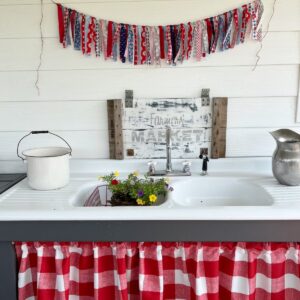
You are finished and it’s time to hang your bunting! You should have two feet of twine on each side of the fabric strips so it gives you plenty to attach it wherever you choose to hang it.
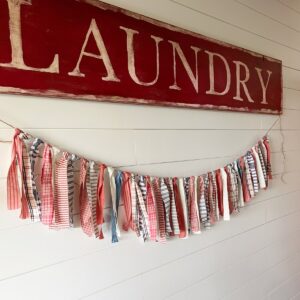
My favorite bunting might be the one I made out of colors that created more of an Americana theme versus a Flag color. It matched my home-made laundry sign perfectly!
This project is so fast and so very rewarding. It’s also a great project to do with young children. You can do the cutting and they can help with the tying!
I hope you have a wonderful Fourth of July! It is one of my favorite holidays and decorating in patriotic colors is always special for me. I’d love to hear if you make a no sew bunting and where you hang it!
~ Dori ~