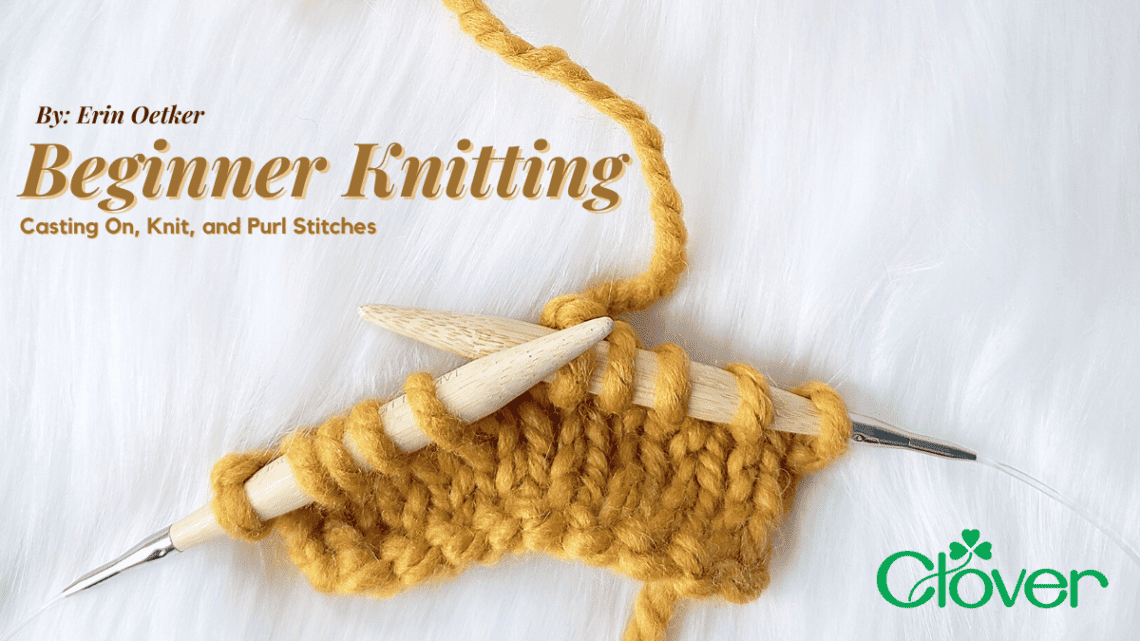
Beginner Knitting – Casting On, Knit, and Purl Stitches
Do you want to learn to knit? Have you tried before and it didn’t work or maybe you don’t have time or can’t find the right tutorial that makes everything click? Today I’m going to show you how to do the basics to get started knitting.
I learned to crochet about 5 years before I learned to knit so I found it very difficult at first. I tried multiple times and got really frustrated. I finally got the right needles and video to make things click and here I am! I tried to use metal straight needles at first; something I definitely don’t recommend for newbies. I got some Clover bamboo circular needles that made it so much easier to learn. Bamboo has much better grip AND circular needles make the stitches far more difficult to drop because, let’s face it, new knitters live in deep fear of dropping stitches.
The best part about the internet is that there are so many different tutorials out there that you are sure to find someone who explains it so you can understand. If photos are your jam, I got you covered in this post and there will also be video links too. I encourage you to look around after reading this post too. Use search engines, look at different tutorials and I promise there is one out there for you!

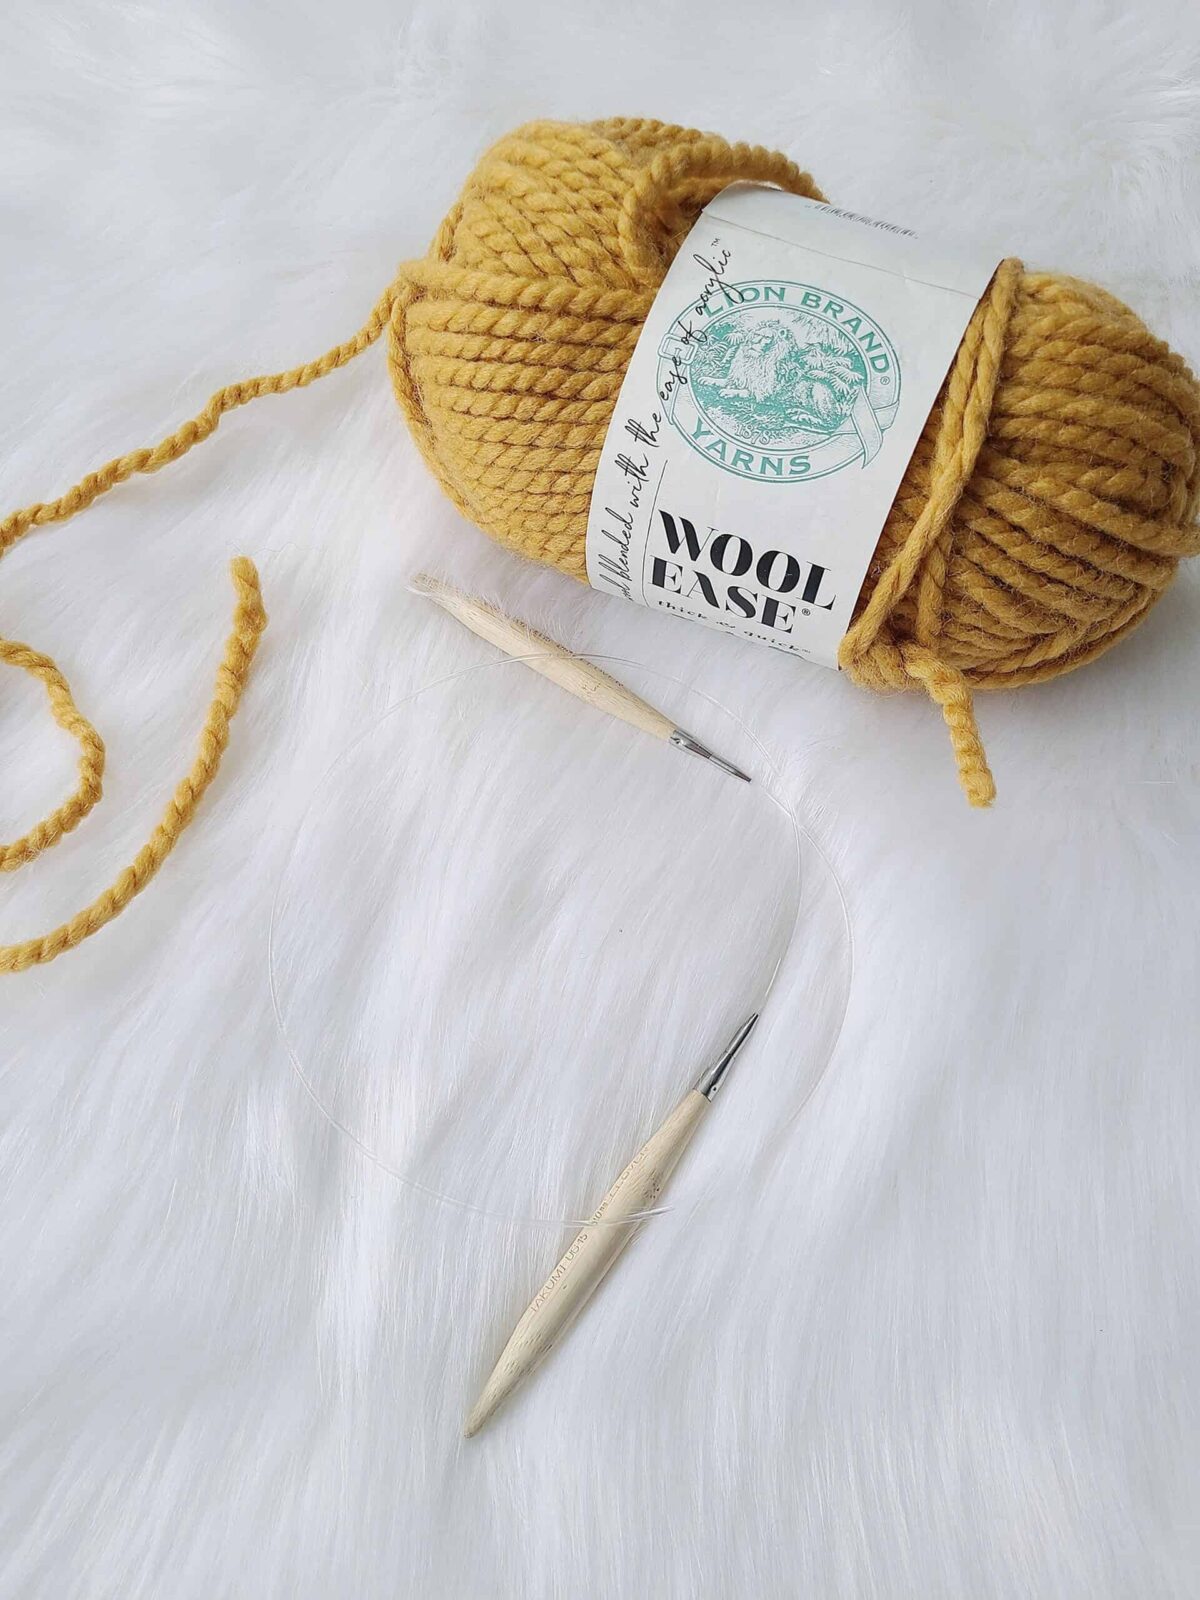
For this, you’ll need 10 mm US 15 24″ circular knitting needles and super bulky yarn. Bigger needles and yarn are easier to work with and see stitches on so they are what I recommend beginning with. This tutorial is geared towards right-handed people and teaches the English knitting style. Let’s get started!
Skill Level
Beginner (Easy)
Materials
- Takumi Bamboo Knitting Needles (10 mm) – Art. No 3644
- Interchangeable Cord 24 in. – Art. No 3646
- Super Bulky yarn
Video Links
Casting On
Before you begin knitting, you will need to know how to cast on stitches. I have included two of the many ways that you can cast on stitches that I have found to be the most useful and beginner-friendly.
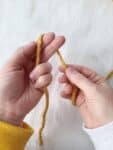
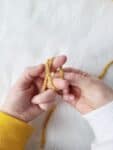
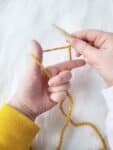
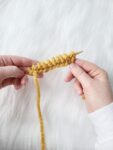
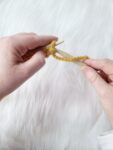
The first step will be to make a slip knot. Your tail will be longer or shorter depending on which cast on method you use.
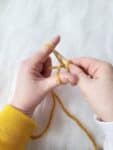
Step 1 – Hold the tail of the yarn in your hand and wrap the working yarn around the top of your fist two fingers.
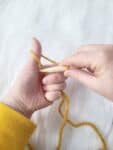
Step 2 – Continue wrapping the working yarn until it meets in a circle.
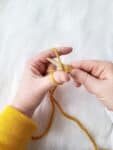
Step 3 – Then wrap the yarn half-way around your fingers again until you can see the working yarn when you hold your fingers apart.
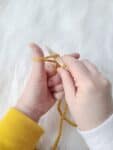
Step 4 – Bring the working yarn through the space between your fingers and the circle of yarn.
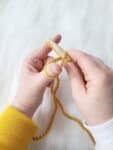
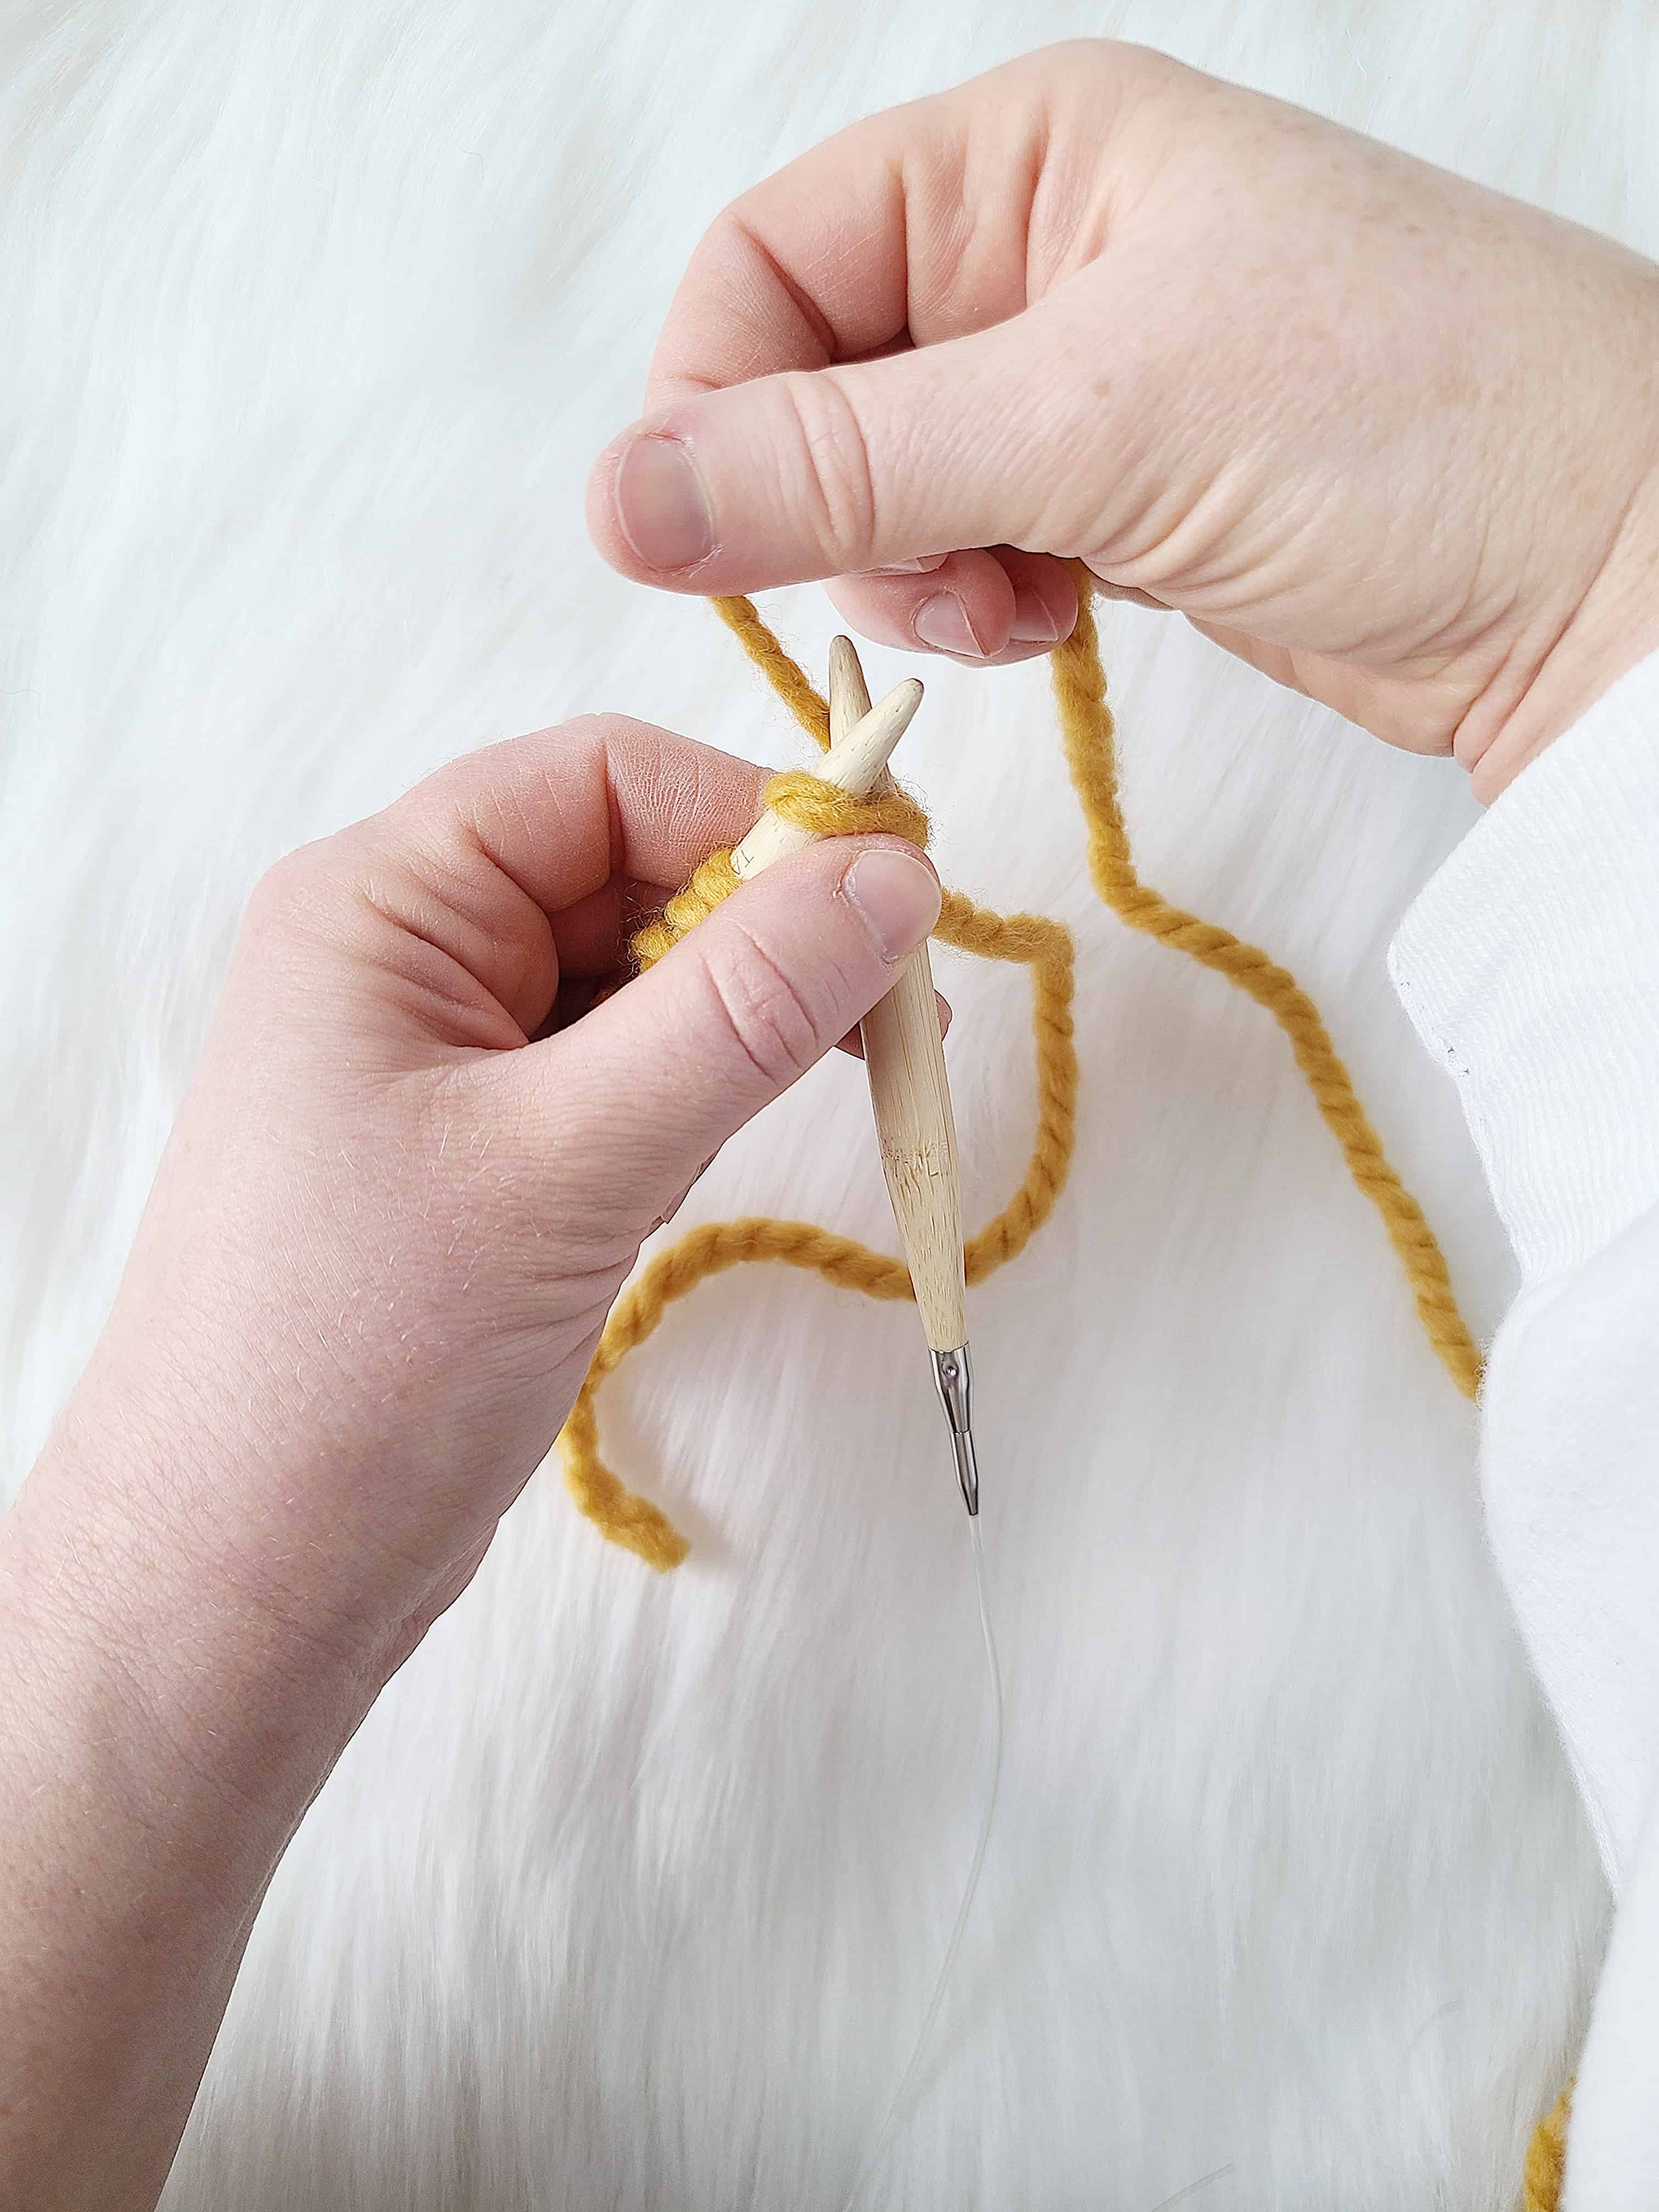
Step 5 – Pull tight and slide the knot until it is the size you need for your needles.


Backwards Loop Cast On
Step 1 – Make a slip knot with a short yarn tail and place it on your right needle. Your yarn tail is in the back and your working yarn (the yarn that comes out of the ball) is in the front, closest to you. Hold your working yarn in your left hand.
Step 2 – Wrap the working yarn around your thumb by moving your thumb away from your body and under the yarn. You will now have the yarn wrapped around your thumb.
Step 3 – Push the needle tip under the yarn at the base of your thumb from bottom to top.
Step 4 – Bring the needle up through the yarn loop and remove it from your thumb. One stitch cast on.
Step 5 – Repeat steps 1-4 until you have the number of stitches needed.


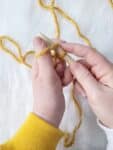

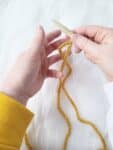
Longtail Cast On
Step 1 – Make a slip knot with a long tail (approximately 1 wrap around your needle per stitch that is needed plus about 6″) and place it on your right needle with your yarn tail in the front and your working yarn in the back.
Step 2 – Grab both strands of yarn in your palm, being careful to keep them in the same position (tail in front and working in back) and insert your thumb and index finger between the two strands.
Step 3 – Pull your thumb and index finger apart to make a triangle with the yarn.
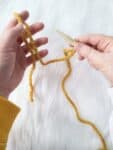
Step 4 – Bring the needle tip under the yarn at the base of your thumb from bottom to top.
Step 5 – Bring your needle over the top of the back strand of yarn (wrapped around your index finger) and scoop the needle underneath of the yarn strand from top to bottom and through the yarn circle created by your fingers.
Step 6 – Pull both strands so that the loop tightens down on your needle. One stitch cast on.
Step 7 – Repeat steps 1-6 until you have the number of stitches needed.


Stitches
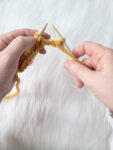
Knit Stitch
Step 1 – Begin with the needle with stitches in your left hand, working yarn in the back and tail in the front. Your empty needle will be in your right hand.
Step 2 – Insert the tip of the right hand needle through the first loop on the left needle from front to back. Your right needle will cross behind the left needle and make an X.
Step 3 – Grab your working yarn with your right hand and wrap it around the right hand needle (the one at the back of the X) until it is fully wrapped around the needle and creates a loop caught between the two needles in the X.
Step 4 – Bring the right needle tip with the new loop back through the existing loop on the left needle.
Step 5 – Drop the old loop from the left needle off as you tighten the new loop on the right needle. One new knit stitch created.


Purl Stitch
Step 1 – To purl, you will flip your needle with all the knit stitches on it back over to your left hand with the working yarn at the end of the needle. Your empty needle will be in your right hand underneath your yarn.
Step 2 – Insert the tip of the right hand needle through the first loop on the left needle from back to front. Your right needle will cross in front of the left needle and make an X.
Step 3 – Grab your working yarn with your right hand and wrap it around the right hand needle (the one at the front of the X) until it is fully wrapped around the needle and is crossing over the front of the X made by the needles.
Step 4 – Bring the right needle tip with the new loop down (away from your left hand) through the existing loop on the left needle.
Step 5 – Drop the old loop from the left needle off as you tighten the new loop on the right needle. One new purl stitch created.


Now that you’ve learned the basics of knitting, make sure to show it off on social media by tagging me @craftseverywhere so I can cheer with you about your new skills on Instagram or Facebook! Check out my knitting patterns on Ravelry and Etsy too.
If you have any questions regarding this tutorial, don’t hesitate to contact me at erin.oetker@gmail.com or through my messages on Etsy or Instagram.
Erin
Find CraftsEverywhere on social media! Instagram | Facebook | Ravelry | Etsy
Stay connected with Clover on Facebook | Twitter | Instagram | Pinterest | YouTube | Ravelry
[mc4wp_form id=”11289″]