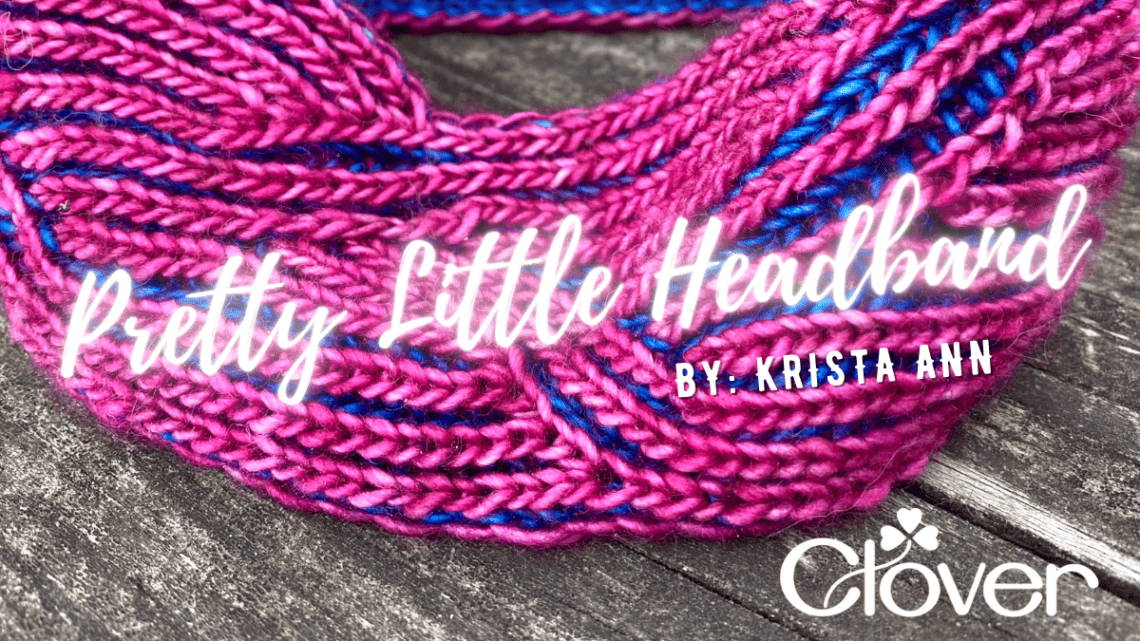
Pretty Little Headband- Knitting Pattern
Making one-of-a-kind gifts for loved ones is one of the best parts about being a knitter. Anyone that knows you well enough and knows your passion for the craft would be a welcome recipient for such a special present.
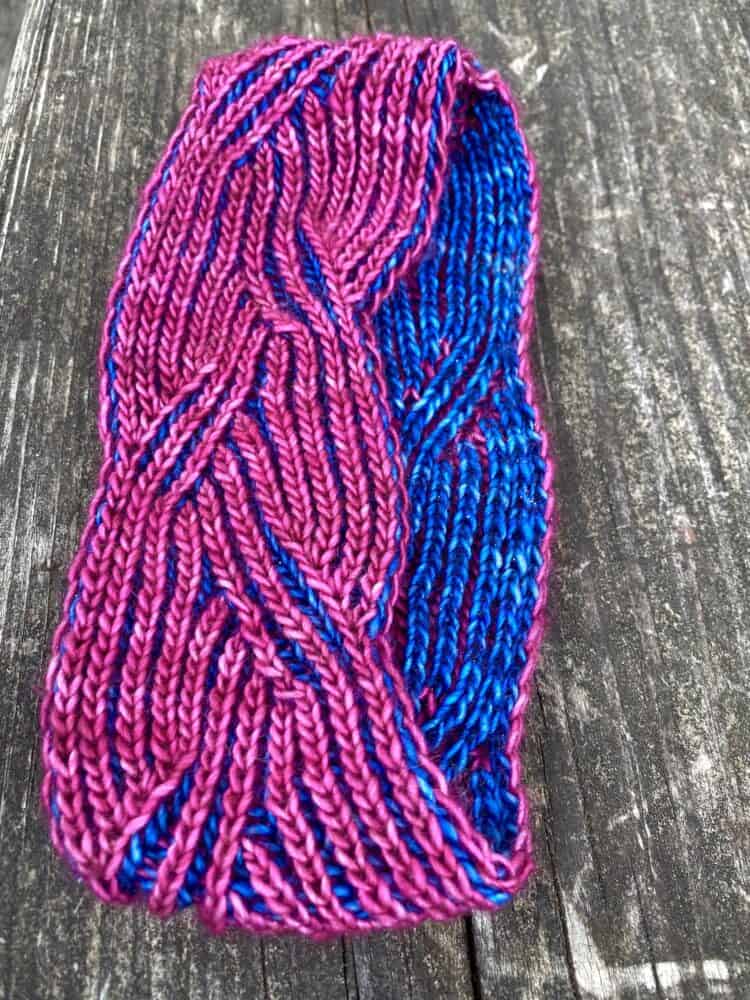
The Pretty Little Headband is a really fun and fairly quick brioche project that will have you wanting to knit one out of every color under the Unicorn Tails rainbow!
Brioche increases and decreases are required to make the pattern on this headband. If you know the basics of brioche, but want a bit more of a challenge…this is the perfect next project in your quest to conquer the brioche technique.
If you are new to brioche, it is recommended that you utilize lifelines at the end of each repeat to allow yourself the comfort of knowing that if you make a mistake, you don’t have to start back from the beginning.
Make the Pretty Little Headband for yourself or this would make a delightful Mother’s Day gift or birthday gift for someone special in your life. Choose colors that remind you of them and that will look perfect holding hair back out of their face in the most stylish of ways!
It’s amazing what two tiny skeins of yarn in some magical colors, a couple of needles, and a little of your precious time can create.
Enjoy the Pretty Little Headband!
MATERIALS
- (2) US 1 / 2.5mm Takumi Bamboo Knitting Needles Circular 16” (SKU 3106/16-01)
- (The second needle is used for three-needle bind-off.)
- Takumi Bamboo Knitting Needles Circular 16” No. 2 (2.25mm) (SKU: 3016/16-02)
- Darning Needle Set (SKU: 339)
- Scissors (SKU: 493/CW)
Yarn
Madelinetosh “Unicorn Tails”
100% Superwash Merino Wool
52 yards/48 meters; Fingering Weight
2 Colors
C1: Coquette-Deux (1 skein)
C2: Arctic (1 skein)
Notions
Darning Needle (SKU: 339)
Scissors (SKU: 493/CW)
Scrap Yarn (for provisional cast on)
Gauge
10 sts = 1 inch / 2.5 cm in brioche pattern
Finished Measurements
2.5 inches / 6.5 cm wide and 15 inches / 38 cm around
Abbreviations
brk – brioche knit stitch
brp – brioche purl stitch
CO – Cast On
K – Knit
P – Purl
sl1 – slip one stitch
sl1YO – slip one yarn over
st/sts – stitch/stitches
wyib – with yarn in back
wyif – with yarn in front
Notes
Use your desired method for a provisional cast on. Be sure your scrap yarn is not thicker than your working yarn.
This headband is designed to fit snuggly on your noggin so that it will actually stay on. Try on your headband by wrapping it around your head before you begin your bind off and holding the CO and BO ends together. Be sure it is going to fit you nicely. It’s better to be a little too snug than too loose, but don’t force the band to stretch more than it should.
The Pattern
Using C1, and provisional cast on, CO 25 sts. Slide sts to other end of the needle.
Set Up Row 1A (C1) RS: wyif sl1, *sl1YO, K1* to last 2 sts, sl1YO, P1. Do not turn. Slide sts to other end of the needle.
Set Up Row 1B (C2) RS: wyif sl1, *brp, sl1YO* to last 2 sts, brp, wyif sl1. Turn.
Row 1A (C1) WS: wyib sl1, *sl1YO, brp* to last 2 sts, sl1YO, P1. Do not turn. Slide sts to other end of the needle.
Row 1B (C2) WS: wyib sl1, *brk, sl1YO* to last 2 sts, brk, wyib sl1. Turn.
Row 2A (C1) RS: wyib sl1, *sl1YO, brk* to last 2 sts, sl1YO, P1. Do not turn. Slide sts to other end of the needle.
Row 2B (C2) RS: wyif sl1, *brp, sl1YO* to last 2 sts, brp, wyif sl1. Turn.
Row 3A (C1): wyib sl1, *sl1YO, brp* to last 2 sts, sl1YO, P1. Do not turn. Slide sts to other end of the needle.
Row 3B (C2): wyib sl1, *brk, sl1YO* to last 2 sts, brk, wyib sl1. Turn.
Row 4A (C1): wyib sl1, sl1YO, brkYObrk, sl1YO, brk, sl1YO, brLsldec, *sl1YO, brk* 7 times, sl1YO, P1. Do not turn. Slide sts to other end of the needle.
Row 4B (C2): wyif sl1, brp, sl1YO, P1, *sl1YO, brp* to last st, wyif sl1. Turn.
Row 5A (C1): wyib sl1, *sl1YO, brp* to last 2 sts, sl1YO, P1. Do not turn. Slide sts to other end of the needle.
Row 5B (C2): wyib sl1, *brk, sl1YO* to last 2 sts, brk, wyib sl1. Turn.
Row 6A (C1): wyib sl1, sl1YO, brk, sl1YO, brkYObrk, sl1YO, brk, sl1YO, brLsldec, *sl1YO, brk* 6 times, sl1YO, P1. Do not turn. Slide sts to other end of the needle.
Row 6B (C2): wyif sl1, *brp, sl1YO* 2 times, P1, *sl1YO, brp* to last st, wyif sl1. Turn.
Row 7A (C1): wyib sl1, *sl1YO, brp* to last 2 sts, sl1YO, P1. Do not turn. Slide sts to other end of the needle.
Row 7B (C2): wyib sl1, *brk, sl1YO* to last 2 sts, brk, wyib sl1. Turn.
Row 8A (C1): wyib sl1, *sl1YO, brk* 2 times, sl1YO, brkYObrk, sl1YO, brk, sl1YO, brLsldec, *sl1YO, brk* 5 times, sl1YO, P1. Do not turn. Slide sts to other end of the needle.
Row 8B (C2): wyif sl1, *brp, sl1YO* 3 times, P1, *sl1YO, brp* to last st, wyif sl1. Turn.
Row 9A (C1): wyib sl1, *sl1YO, brp* to last 2 sts, sl1YO, P1. Do not turn. Slide sts to other end of the needle.
Row 9B (C2): wyib sl1, *brk, sl1YO* to last 2 sts, brk, wyib sl1. Turn.
Row 10A (C1): wyib sl1, *sl1YO, brk* 3 times, sl1YO, brkYObrk, sl1YO, brk, sl1YO, brLsldec, *sl1YO, brk* 4 times, sl1YO, P1. Do not turn. Slide sts to other end of the needle.
Row 10B (C2): wyif sl1, *brp, sl1YO* 4 times, P1, *sl1YO, brp* to last st, wyif sl1. Turn.
Work Rows 1 – 2 twice.
Row 13A (C1): wyib sl1, *sl1YO, brp* to last 2 sts, sl1YO, P1. Do not turn. Slide sts to other end of the needle.
Row 13B (C2): wyib sl1, *brk, sl1YO* to last 2 sts, brk, wyib sl1. Turn.
Row 14A (C1): wyib sl1, *sl1YO, brk* 7 times, sl1YO, brRsldec, sl1YO, brk, sl1YO, brkYObrk, sl1YO, P1. Do not turn. Slide sts to other end of the needle.
Row 14B (C2): wyif sl1, *brp, sl1YO* 10 times, P1, sl1YO, brp, wyif sl1. Turn.
Row 15A (C1): wyib sl1, *sl1YO, brp* to last 2 sts, sl1YO, P1. Do not turn. Slide sts to other end of the needle.
Row 15B (C2): wyib sl1, *brk, sl1YO* to last 2 sts, brk, wyib sl1. Turn.
Row 16A (C1): wyib sl1, *sl1YO, brk* 6 times, sl1YO, brRsldec, sl1YO, brk, sl1YO, brkYObrk, sl1YO, brk, sl1YO, P1. Do not turn. Slide sts to other end of the needle.
Row 16B (C2): wyif sl1, *brp, sl1YO* 9 times, P1, *sl1YO, brp* 2 times, wyif sl1. Turn.
Row 17A (C1): wyib sl1, *sl1YO, brp* to last 2 sts, sl1YO, P1. Do not turn. Slide sts to other end of the needle.
Row 17B (C2): wyib sl1, *brk, sl1YO* to last 2 sts, brk, wyib sl1. Turn.
Row 18A (C1): wyib sl1, *sl1YO, brk* 5 times, sl1YO, brRsldec, sl1YO, brk, sl1YO, brkYObrk, *sl1YO, brk* 2 times, sl1YO, P1. Do not turn. Slide sts to other end of the needle.
Row 18B (C2): wyif sl1, *brp, sl1YO* 8 times, P1, *sl1YO, brp* to last st, wyif sl1. Turn.
Row 19A (C1): wyib sl1, *sl1YO, brp* to last 2 sts, sl1YO, P1. Do not turn. Slide sts to other end of the needle.
Row 19B (C2): wyib sl1, *brk, sl1YO* to last 2 sts, brk, wyib sl1. Turn.
Row 20A (C1): wyib sl1, *sl1YO, brk* 4 times, sl1YO, brRsldec, sl1YO, brk, sl1YO, brkYObrk, *sl1YO, brk* 3 times, sl1YO, P1. Do not turn. Slide sts to other end of the needle.
Row 20B (C2): wyif sl1, *brp, sl1YO* 7 times, P1, *sl1YO, brp* to last st, wyif sl1. Turn.
Row 21A (C1): wyib sl1, *sl1YO, brp* to last 2 sts, sl1YO, P1. Do not turn. Slide sts to other end of the needle.
Row 21B (C2): wyib sl1, *brk, sl1YO* to last 2 sts, brk, wyib sl1. Turn.
Row 22A (C1): wyib sl1, *sl1YO, brk* to last 2 sts, sl1YO, P1. Do not turn. Slide sts to other end of the needle.
Row 22B (C2): wyif sl1, *brp, sl1YO* to last 2 sts, brp, wyif sl1. Turn.
Repeat Rows 1 – 22 a total of 5 times.
Work Rows 1A and 1B one more time.
Carefully pull out the provisional cast on and place sts on second needle.
Holding piece so that the right sides face each other (the C1 colors are facing each other). Work a three needle bind off across all the sts.
Weave in your ends and trim your tails.
Voila! You now have a super cute and stylish headband for yourself or a loved one!
Stay connected with Clover on Facebook | Twitter | Instagram | Pinterest | YouTube | Ravelry