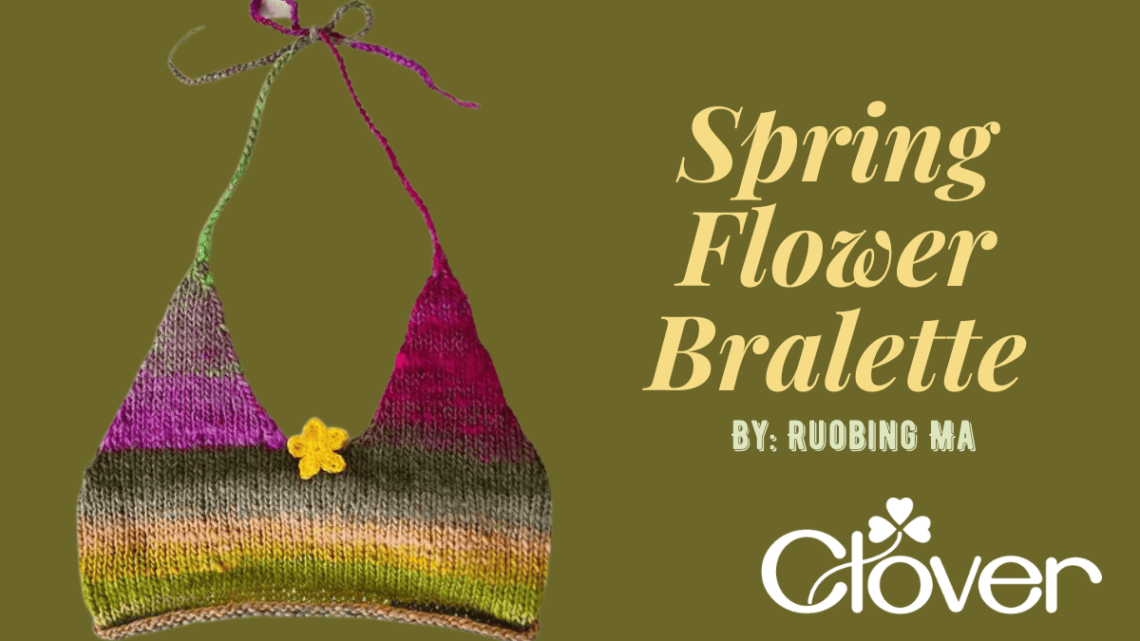
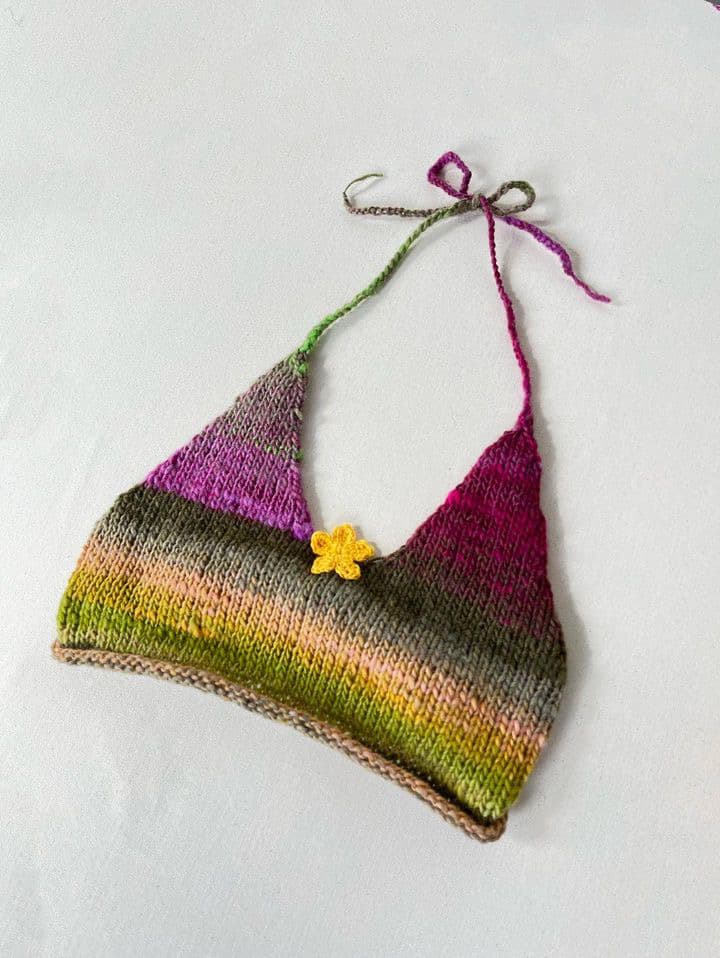
Spring Flower Bralette- Knitting Pattern
Hi! I’m Ruo, also known as freaky444yarn. Today I will be sharing a knitted halter bralette pattern. Cropped halter tops are perfect for a warm summer day. The crochet flower appliques give it extra special flair and the placement and amount of appliques is customizable. The pattern is made to measure so you will use your own measurements to create a top that fits you. Wool or wool-blend yarn is recommended because this top has negative ease, so it’s important to use a stretchy fiber yarn.

Materials
Clover Takumi 6.5mm circular knitting needles- Art No. 3016/36-10.5
Clover Amour 4.5mm crochet hook- Art No. 1046/7
Clover Amour 2.25mm crochet hook- Art No 1040/B
weight 4 wool or wool-blend yarn
weight 1 yarn for flower appliques
darning needle
stitch markers
scissors
Abbreviations
st – stitch/stitches
ssk – slip slip knit
k2tog – knit 2 together
ssp – slip slip purl
p2tog – purl 2 together
sl st – slip stitch (crochet)
ch – chain (crochet)
Gauge (4×4 in)
13 stitches x 20 rows
Numbers and Measurements
gauge st / 4 = st per inch
Measurement A = underbust measurement – 2 inches
Measurement B = measurement A / 2. Round up to the nearest whole number.
Cast on number = measurement A x st per inch. Round to the nearest whole number.
Bust st number = measurement B x st per inch. Round to the nearest whole number.
The pattern
- Using elastic cast on method, cast on your determined cast on number.
- Knit 2 rows stockinette. On the knit side, slip the first st knit wise and knit the rest of the row normally. On the purl side, slip the first st purl wise and purl the rest of the row normally.
- Starting on the right side, you will now decrease until you reach your determined bust st number. The decrease pattern consists of 2 rows. You will decrease 2 st every single row, on both knit and purl rows.
- Slip the first st knit wise. ssk, knit until last 3 st. k2tog and knit last st.
- Slip the first st purl wise. p2tog, purl until last 3 st. ssp and purl last st.
- Repeat decrease pattern until you reach your determined bust st number. At this point hold the piece up to your body to make sure the bottom comfortably wraps around and meets in the back. It’s okay if there’s curling, it can be fixed with blocking later. The top of the piece should roughly land where your armpits are. If there’s excessive stitches, continue to decrease. End on the purl side, meaning your last row should be a row A repeat.
- To work the bust sections, you will place stitch markers first.
- If your total number of stitches is odd, you will bind off 3 stitches in between the bust sections.
- If your total number of stitches is even, you will bind off 4 stitches in between the bust sections.
Using 2 stitch markers, mark the center stitches that will be bound off, making sure the number of stitches on the outside of the stitch markers is the same. For example, I had 44 stitches for my bust section, so I will bind off 4 in the center with 20 stitches for each side.
- Slip the first st purl wise and purl until you reach the first stitch marker. Slip marker, purl 2 st, using left needle slip first st over the second one on your right needle, binding off 1 st. **Purl next st. Using left needle, slip first st over the second one on your right needle, binding off 1 st.** Repeat ** until you have bound off all your center stitches.
- Continue purling until the end of the row. This is the left side of the halter which will be worked first.
- You will now knit rows with no decreases, for some coverage. I knit 2 rows, but if you have a fuller bust feel free to knit more rows. Your last row with no decreases should be a purl row.
- On the right side of the top, you will begin to decrease. You will always decrease on a knit row. The decrease pattern consists of 4 rows: 1 decrease row and 3 rows with no decreases.
- Slip first st knit wise. ssk, knit until last 3 st. k2tog and knit last st.
- Purl all st.
- Knit all st.
- Purl all st.
Repeat until you have 10 st.
- Once you have 10 st, you will decrease faster to reach 2 st. Repeat rows a and b only, from the previous step.
- Once you have 2 st left, k2tog. Remove your needle from the last st and replace with crochet hook. Chain to create a strap.
- Repeat steps 8-11 on the right half of the top.
- To make the back ties, use a crochet hook to sl st into the base of the top and chain to create a strap. Repeat for other side.
Applique
These appliques use weight 1 yarn and a 2.5mm or 2.75mm crochet hook and Tunisian crochet. The flowers are made up of 5 petals, with each petal having 3 rows.
Row 1: steps 2-6
Row 2: steps 7-10
Row 3: steps 11-15
- Create magic ring, pull loop through and ch 1 to secure it.
- ch 3.
- Insert hook into back bump of first ch, yarn over, pull up a loop.
- Repeat and pull up loops from the next 2 back bumps. You should now have 4 loops on the hook. Skip the first ch you made to secure the magic ring.
- Insert hook into magic ring, yarn over, pull up a loop, you should have 5 loops on the hook.
- Yarn over, pull through first 2 loops. Yarn over, pull through next 2 loops. Repeat until you have one loop left on the hook.
- ch 1.
- Insert hook into back bump of the ch you just made and pull up a loop, as well as the back bumps of next 3 st. You should have 5 loops on the hook.
- Insert hook into magic ring, yarn over, pull up a loop, you should have 6 loops on the hook.
- Yarn over, pull through first 2 loops. Yarn over, pull through next 2 loops. Repeat until you have one loop left on the hook.
- sl st into first back bump. Insert hook into back bump of next st and pull up a loop. Pull up loops from next 2 st.
- Insert hook into magic ring, yarn over, pull up a loop, you should have 5 loops on the hook.
- Yarn over, pull through first 2 loops. Yarn over, pull through next 2 loops. Repeat until you have one loop left on the hook.
- To end the petal, sl st into back bump of 3 st.
- sl st into magic ring.
- Repeat steps 2-15 to create 4 more petals, for a total of 5 petals.
- After finishing the 5th petal, sl st into first ch of first petal. Leave a long tail to use to sew the applique.
- Pull magic ring closed, weaving in the loose end.
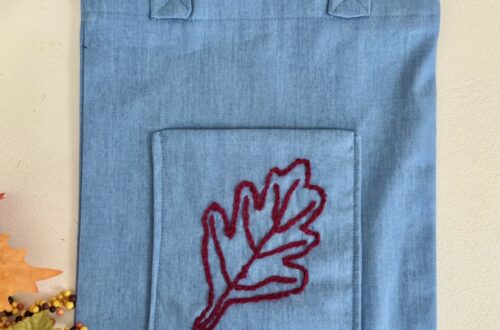
- Use the long tail you left at the end of the work to thread through a darning needle. Placing the applique where you want it on the fabric, sew it to the fabric by going through the tops of the stitches on the outside of the flower.
- Weave in all loose ends.
Stay connected with Clover on Facebook | Twitter | Instagram | Pinterest | YouTube | Ravelry