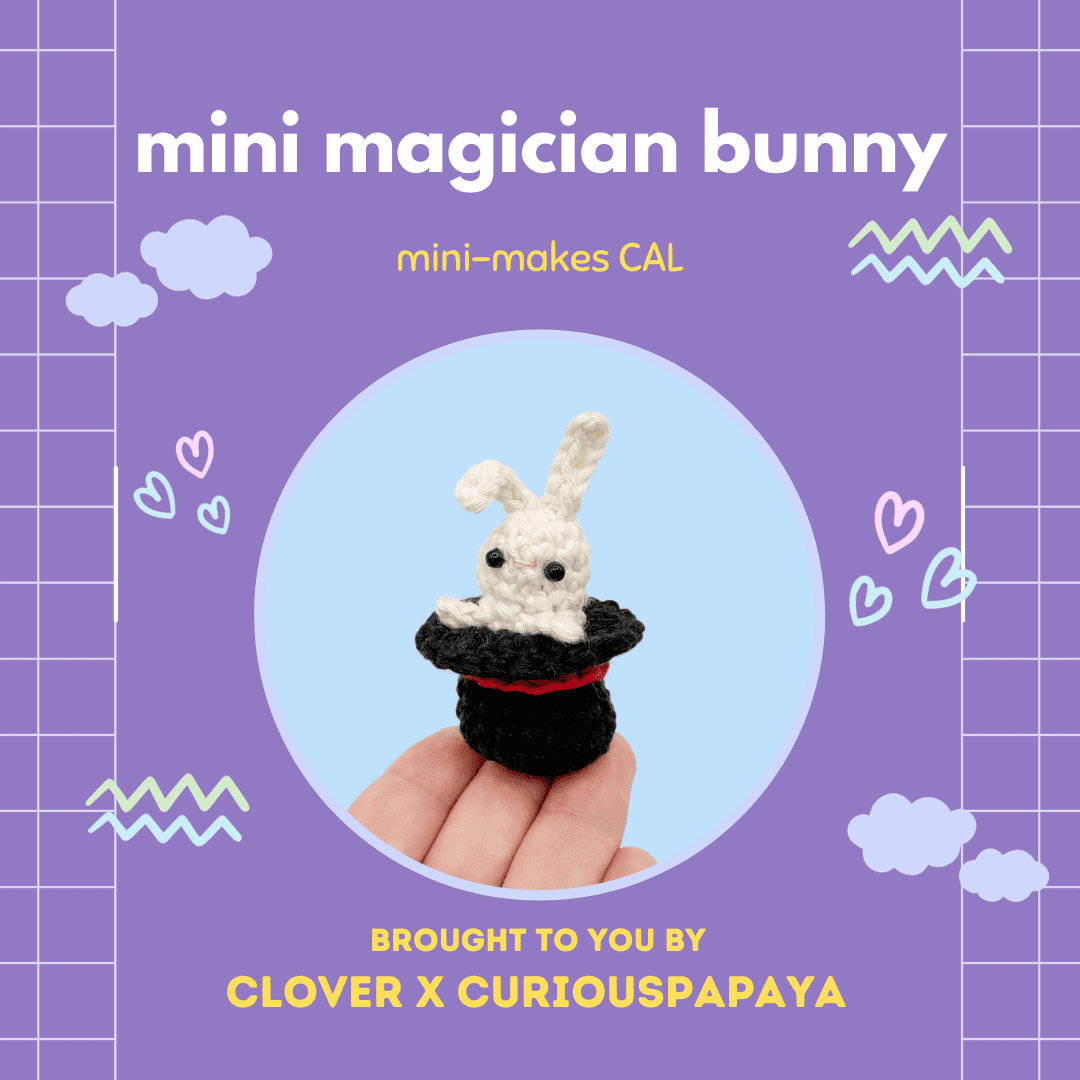
Mini-Makes Crochet Along – Mini Magician Bunny Crochet Pattern
The holiday cheer is in full swing with Christmas only being a couple of weeks away! We invite you to join us for our crochet-along event from December 6-21. Read the blog post HERE for all of the details including the fun prizes we will be offering for our participants.
Our fourth pattern is this MINI MAGICIAN BUNNY! Time: ~1 hr.
NOTES
- Please do not copy/redistribute any part of this pattern as your own. This includes reposting/translating without permission.
- Tag your creations with #cloversquad and #curiouspapaya so we can feature you!
- We will be working in joined rounds for the hat and a spiral for the bunny. We will use the YUYU method (yarn under, yarn under).
- This pattern is written in US terminology.
- Measurements: 2 in. x 1 in. [5.08 cm x 2.54 cm] if using the prescribed materials.
- Difficulty: Intermediate-beginner +
MATERIALS
- #3 light worsted yarn (Hobbii Friends Cotton Yarn 8/8)
–Black, Tomato, White
- Embroidery thread
-Light Pink
- 2 mm safety eyes
- 2.75 mm hook
- Stitch marker, yarn needle, scissors, tweezers
- Stuffing (or yarn scraps)
- UHU glue
ABREVIATIONS
- blo: back loops only
- ch: chain
- flo: front loops only
- dc: double crochet
- dec: (invisible) decrease
- inc: increase
- sc: single crochet
- slst: slip stitch
- st(s): stitch(es)
- rnd(s): round(s)
Let’s get started!
Magician’s Hat (in Black yarn)
* = slst into the first st to join the rnd
Find the premium PDF for purchase HERE. The pattern bundle can be found at its discounted price for the duration of the CAL. Thank you for supporting my designs!
rnd 1: Make a magic circle and (sc) x10, * [10]
rnd 2: ch 1, (counts as the first st), sc into the same st, (inc) x9, * [20]
rnd 3: (blo) – ch 1, sc all around, * [20]
rnd 4: ch 1, sc all around, * [20]
rnd 5: ch 1, 7 sc, dec, 8 sc, dec, * [18]
rnd 6: ch 1, 6 sc, dec, 7 sc, dec, * [16]
rnd 7: ch 1, 5 sc, dec, 6 sc, dec, * [14]
Next, make the brim.
rnd 8: ch 2 (counts as the first dc), (flo) – dc into the same st, dc into the next st, (dc-inc, dc) x6, * [21]
Fasten off and leave a short tail for weaving in.
Red Ribbon (in Tomato yarn)
step 1: Hold the hat with the brim facing upwards.
step 2: Create a slipknot in Tomato yarn and insert your hook into the hat 1 rnd away from the brim (from the outside in). We will be making “surface stitches”.
step 3: Pull the slipknot through from the inside out. Loosely slst all around the hat. [14]
step 4: Bury the tails into the inside of the hat.
Do not stuff. Stretch out the brim so it lays flat.
Bunny (in White yarn)
*Working in a spiral
rnd 1: Make a magic circle and (sc) x6 [6]
rnd 2: (inc) x6 [12]
rnds 3-4 (2 rnds total): sc all around [12]
rnd 5: (2 sc, dec) x3 [9]
Next, we will create the body and arms.
rnd 6: (flo) – slst, ch 4, slst into the second st from the hook, slst into the next 2 ch, slst into the same st we originally came out of. This completes one arm. (In both loops) sc into the next 2 sts, repeat the colored text to create the other arm, (in both loops) 5 sc [9]
Insert the safety eyes between rnds 3-4, 3 sts apart. Stuff the head well and stuff the body as you go. You may also choose to insert the eyes at the end with glue as I show in the video tutorial.
rnd 7: sc all around, going into the loops left behind from each arm [9]
rnd 8: sc all around [9]
rnd 9: (sc, dec) x3 [6]
Fasten off and leave a short tail for sewing. Stuff a little more.
Sew the hole closed with your yarn needle by going through the (flo) of each st and then pulling tight.
Ears (make two in white yarn)
Make a slipknot and ch 7, slst into the second ch from the hook, 5 slst [5]
Fasten off and leave a short tail for sewing.
Assembly
Ears: Sew each ear between rnds 1-2, centering them with the eyes. Fold them over.
Nose: Cut a strand of coral embroidery thread and create the nose between the eyes, 1 st wide. You’ll need to go in between the “x” shaped sts.
Bunny/Hat: Secure the bunny into the hat with glue.
You’re finished!