Christmas Cookie Ornament
Hello! It’s Jennifer Ryan, the designer and blogger behind Celtic Knot Crochet. I am excited to be sharing the Christmas Cookie Ornament project here on the Clover blog! I enjoy the tradition of decorating Christmas cookies each year but sometimes it is sad to see your artwork get eaten. ? But with this crochet cookie design your project won’t disappear and it will look great on your Christmas tree for many years! Let’s get started. ?
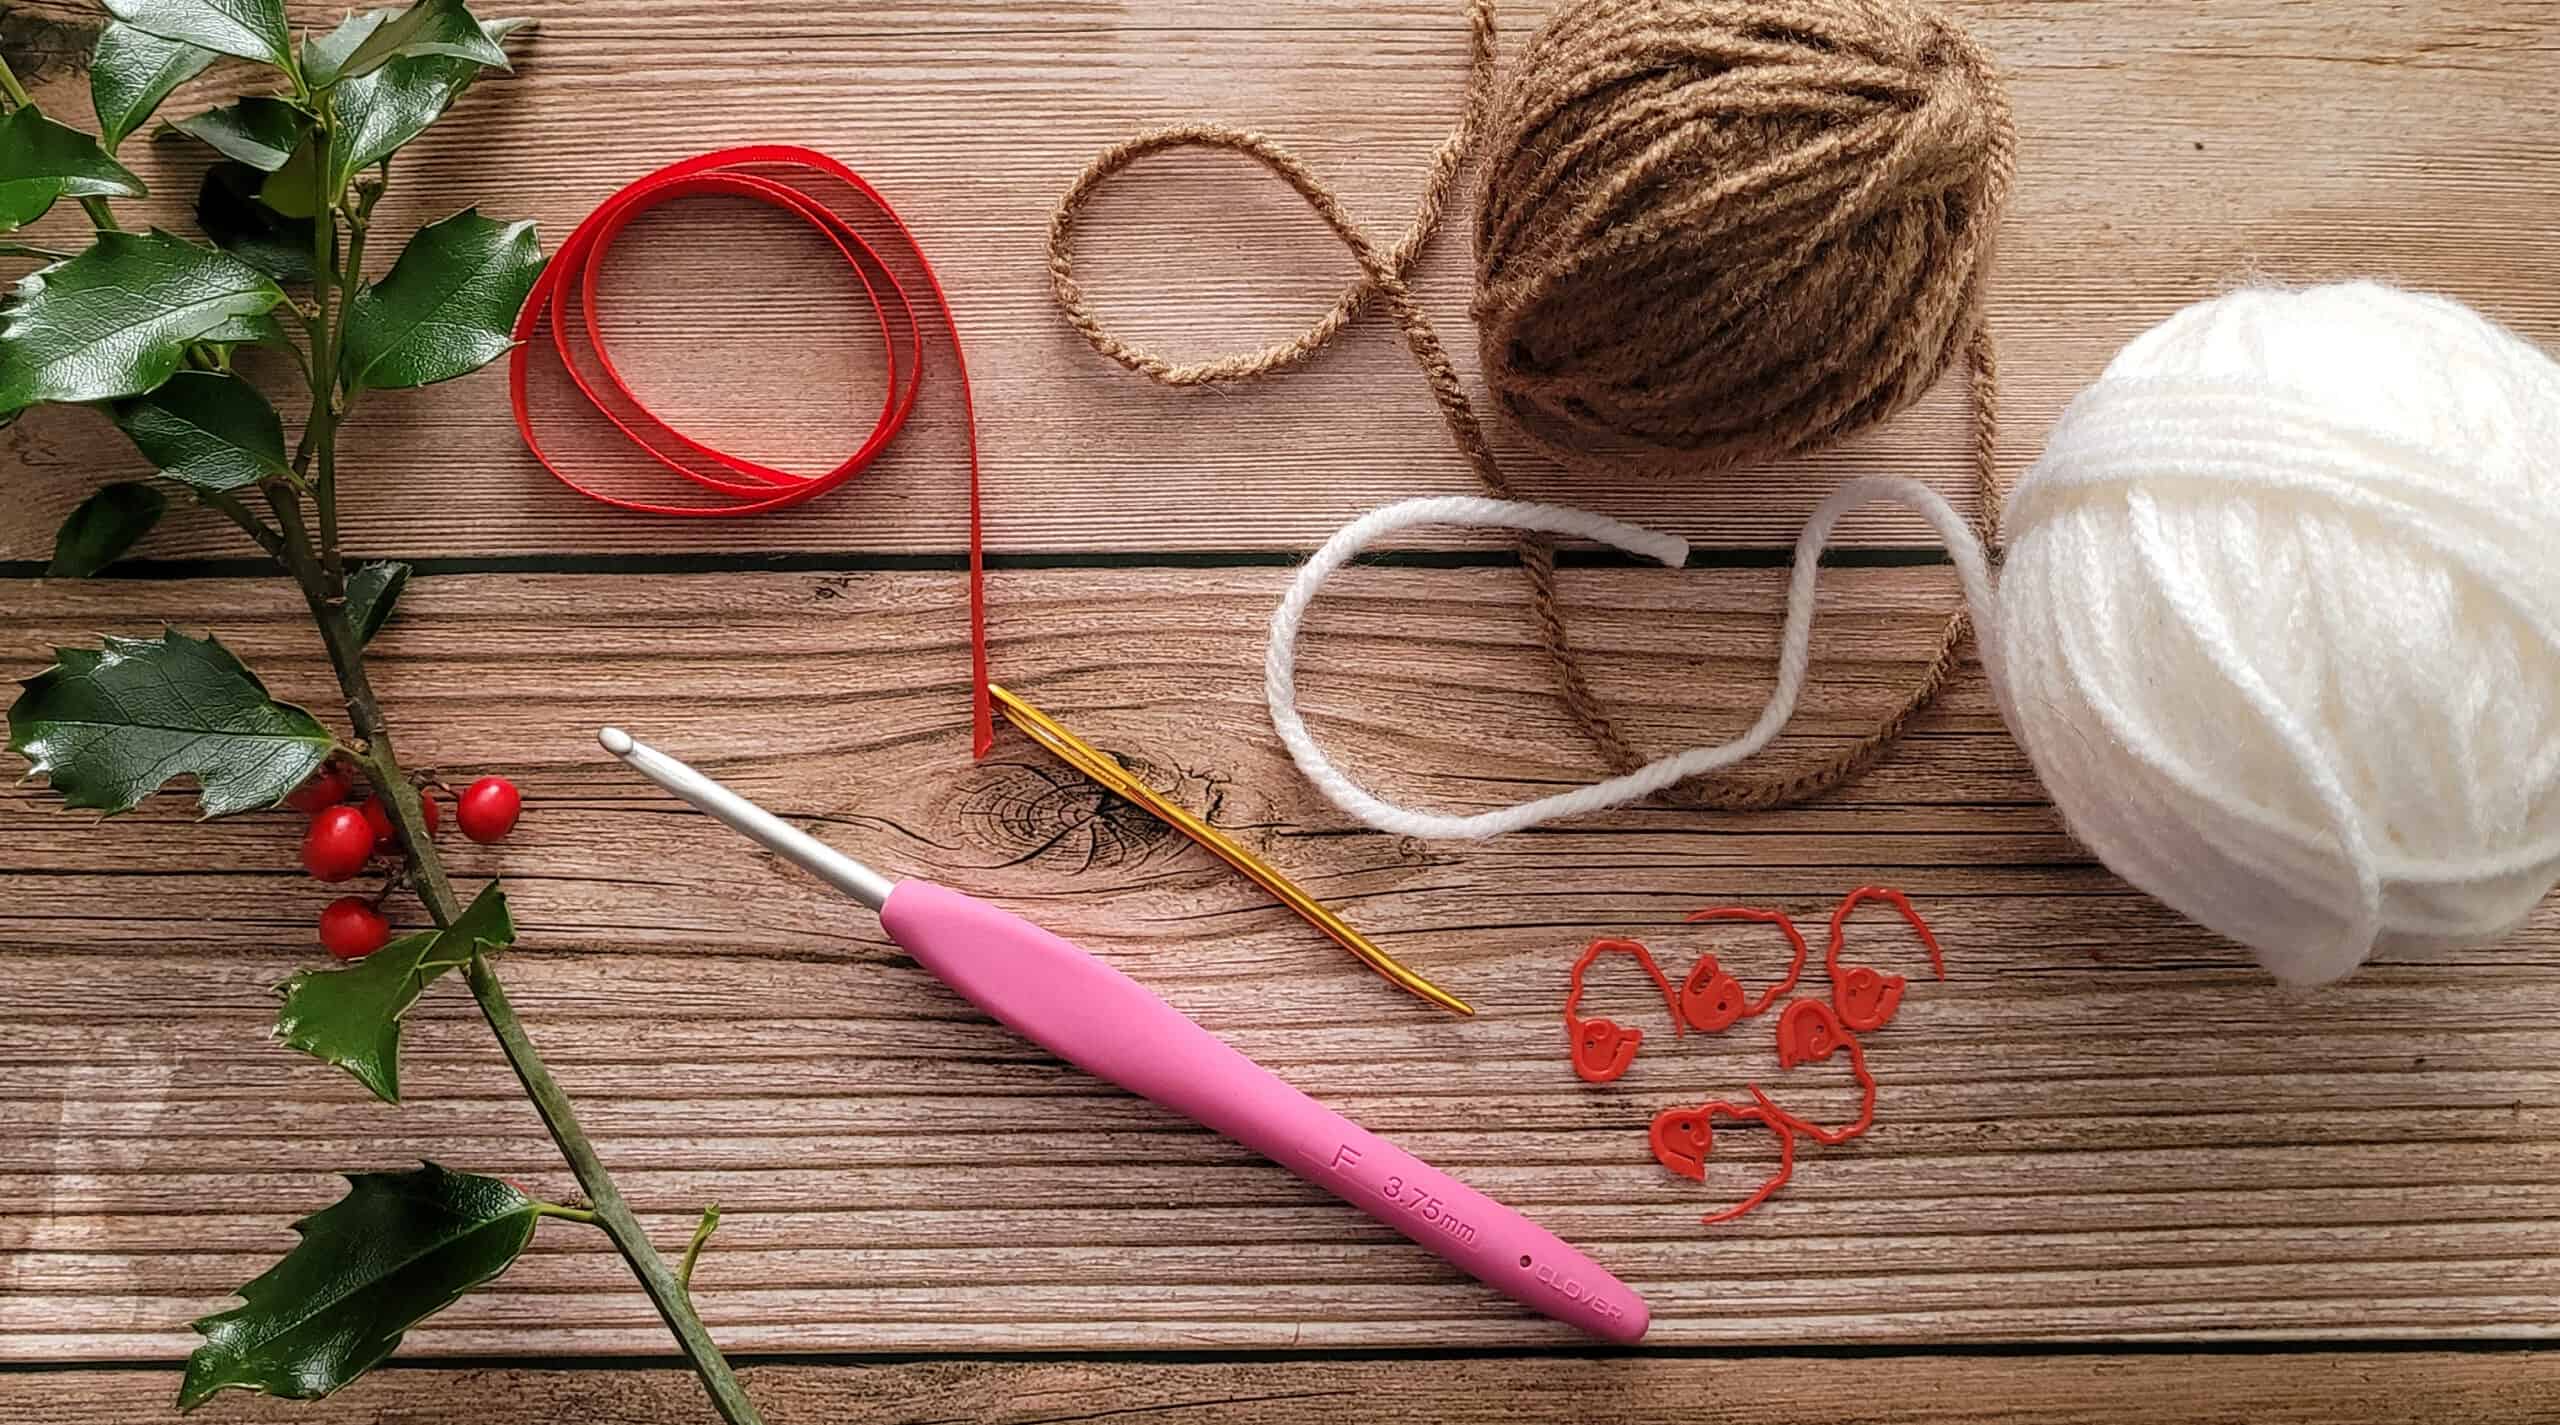
MATERIALS:
- Medium weight acrylic yarn (one skein of each color will make many ornaments!)
- brown gingerbread cookie color
- white icing color
- Clover Amour Crochet Hook (3.75mm)
- Clover Stitch Markers
- Clover Jumbo Tapestry Needle
- optional:
- 3/8” wide red ribbon
- small amount of brown felt and hot glue gun/glue sticks
NOTES:
- skill level: easy
- finished measurements: 4” across from point to point
- gauge: gauge is not necessary for this project
ABBREVIATIONS:
- yo: yarn over
- hk: hook
- lp: loop
- ch: chain
- st: stitch
- sl st: slip stitch
- dc: double crochet
- sk: skip
SPECIAL STITCHES:
- Adjustable ring: Wrap yarn around hand to create a loop; pull working end of yarn through loop with hook;
- *Watch a short video tutorial of this technique here*
- Sc2tog (single crochet 2 together): (Insert hook into next st, YO, draw up a loop) twice, YO, pull through all 3 loops on hook
- *Watch a short video tutorial of this technique here*
- Join with a sc (join with a single crochet): With slip knot on hook, insert hook into stitch; YO, draw up a loop; YO, pull through 2 loops on hook
- *Watch a short video tutorial of this technique here*
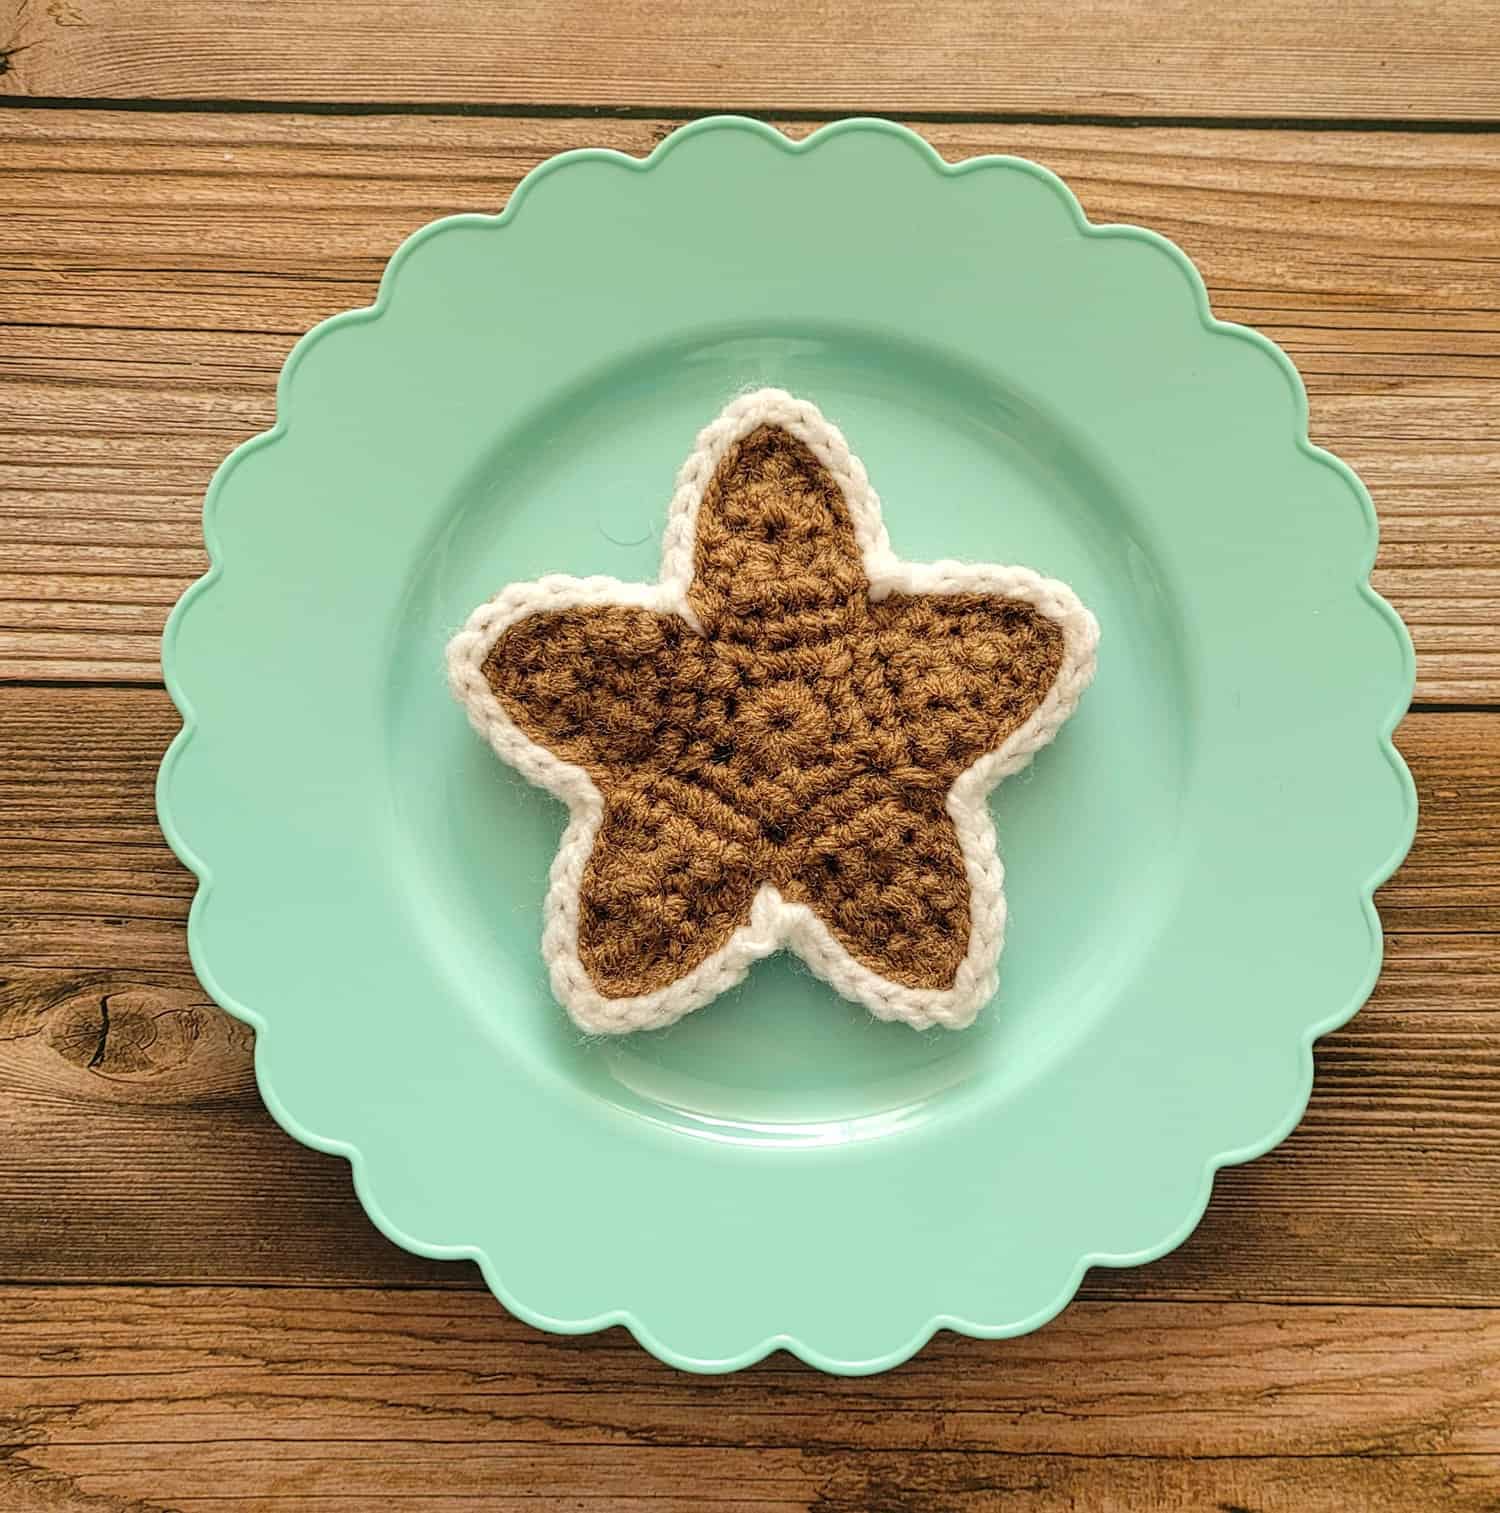
PATTERN (star cookie shape):
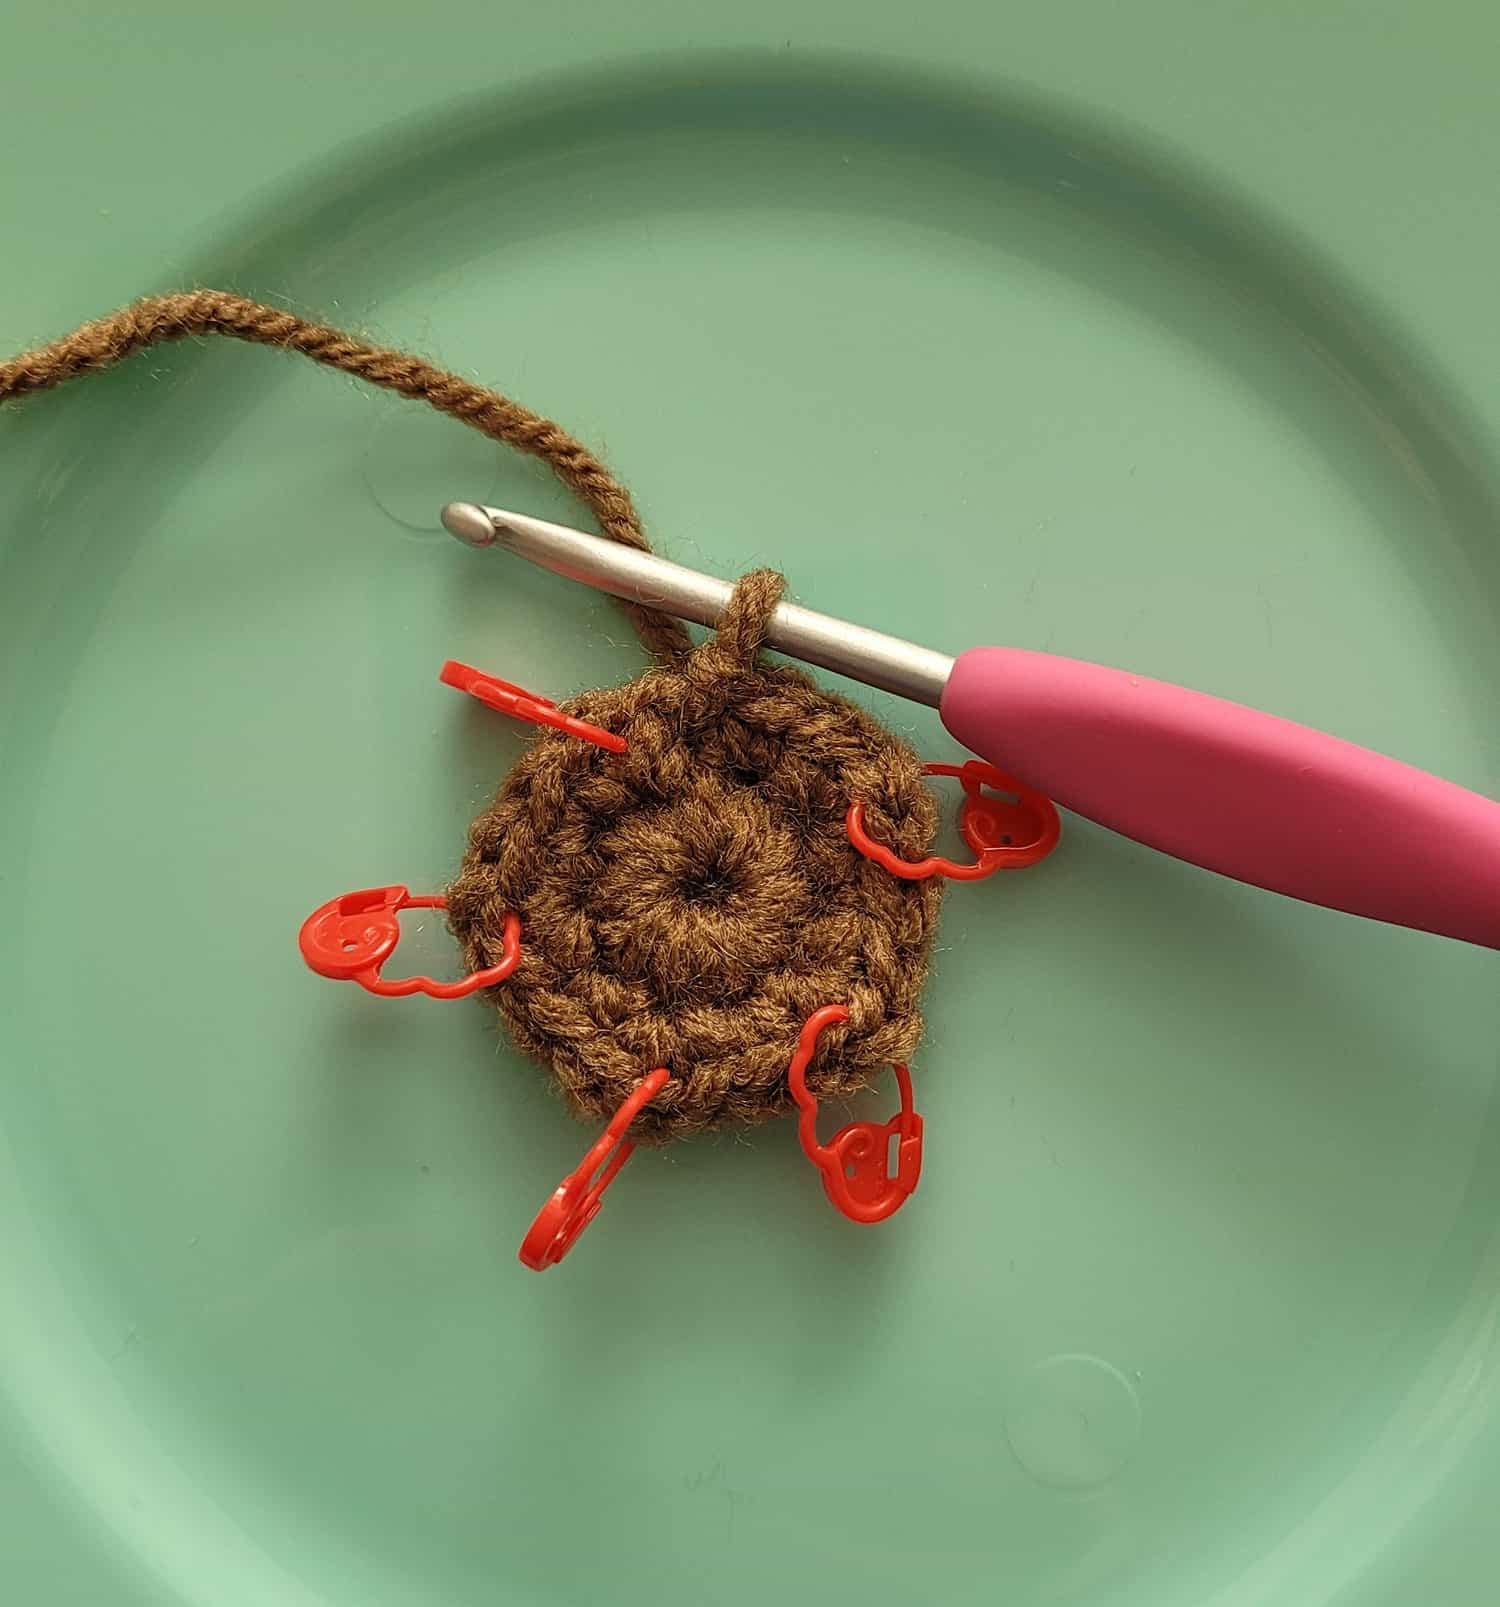
- Round 1: With brown yarn work 10 sc in an adjustable ring – do not join to 1st sc with a sl st.
- Round 2: [(Sc, ch 1, sc) in next st – mark ch-1 sp with a stitch marker; sc in next st] around; sl st to 1st sc. (5 ch-1 sps marked with stitch markers)
- Now working in rows back and forth for each star point:
- Row 1: Sc in next ch-1 sp; sc in each of the next 3 sts; sc in next ch-1 sp; Turn. (5 sc)
- Row 2: Ch 1, Sc2tog over the next 2 sts, sc in next st, sc2tog over next 2 sts. Turn. (3 sc)
- Row 3: Ch 1, sc in each st across. Turn. (3 sc)
- Row 4: Ch 1, sc2tog over the 1st and 2nd st; sc2tog over the 2nd and 3rd st. Turn. (2 sts)
- Row 5: Ch 1, sc2tog over the 2 sts in row. Fasten off.
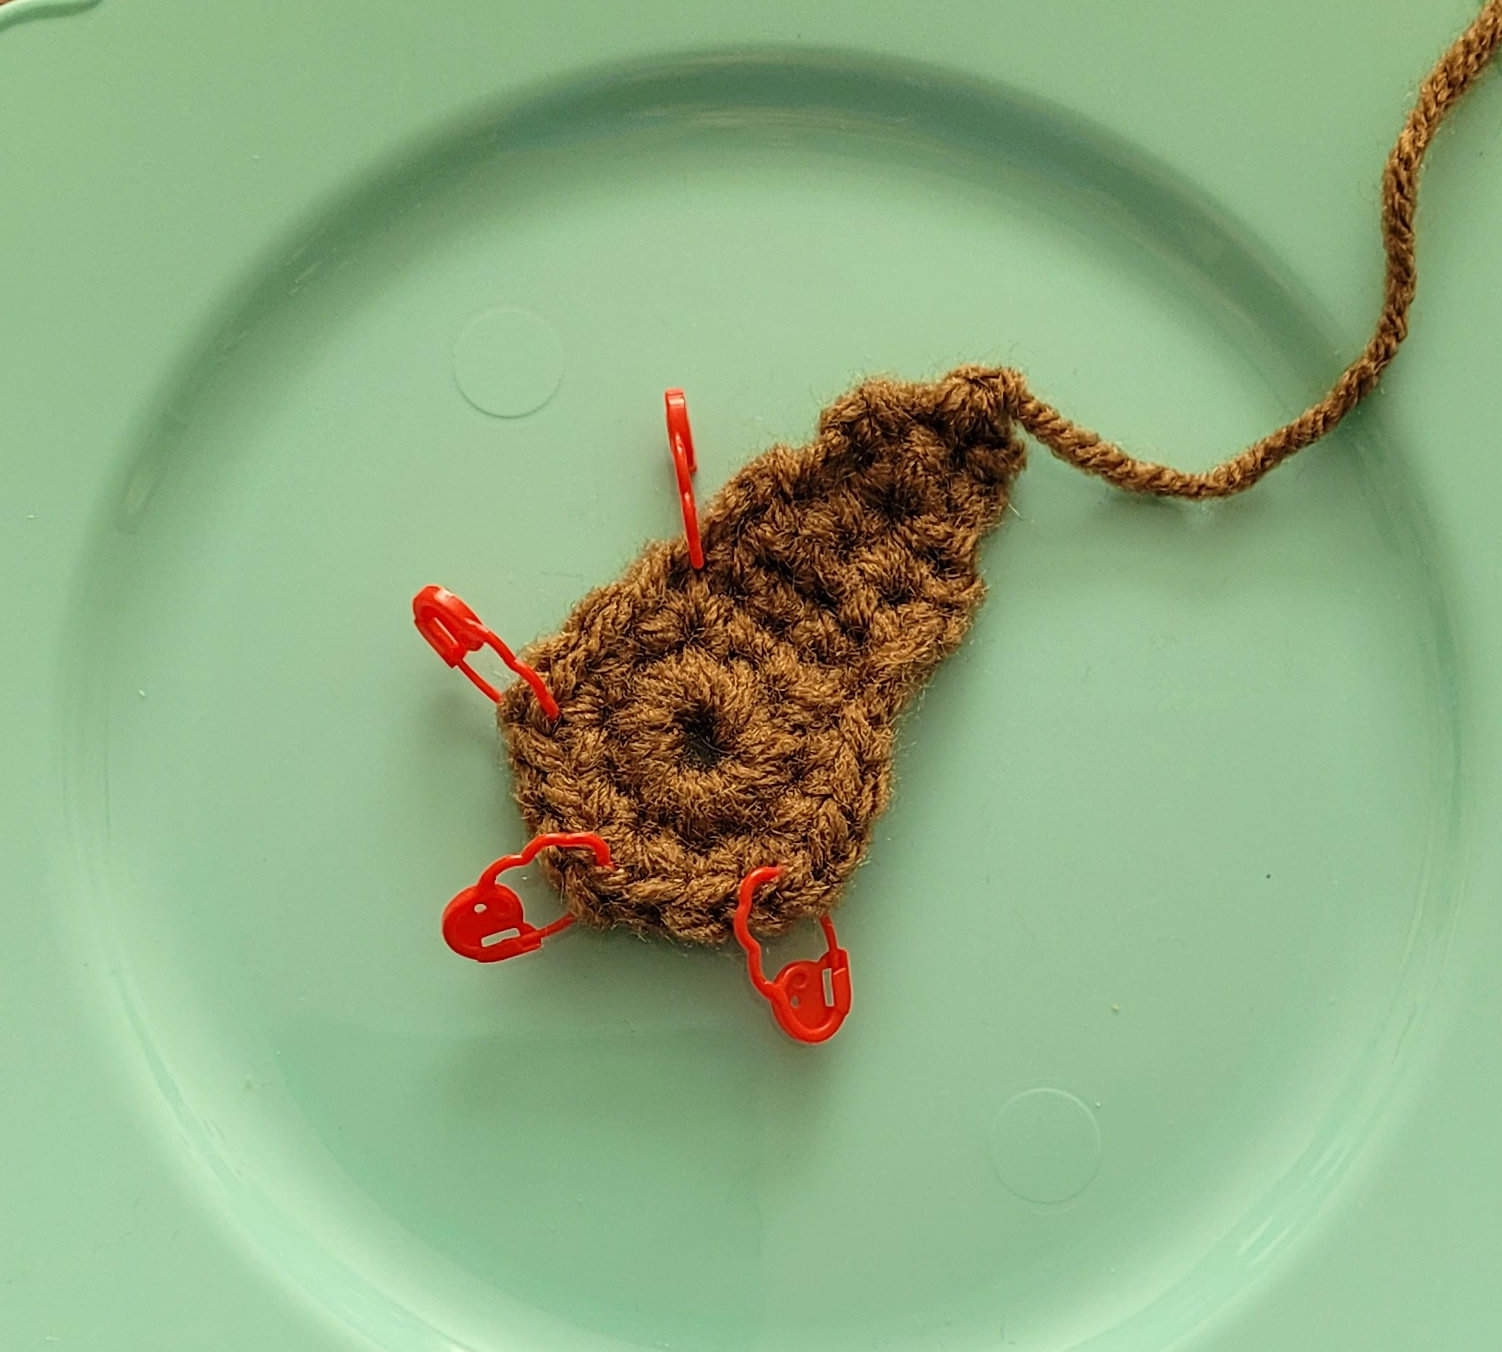
- Repeat Rows 1-5 in between all stitch markers marking ch-1 sps joining in 2nd ch-1 sp of previous star point with a sc (this will replace the section marked with blue highlight above)
- see “join with single crochet” definition in “special stitches” above
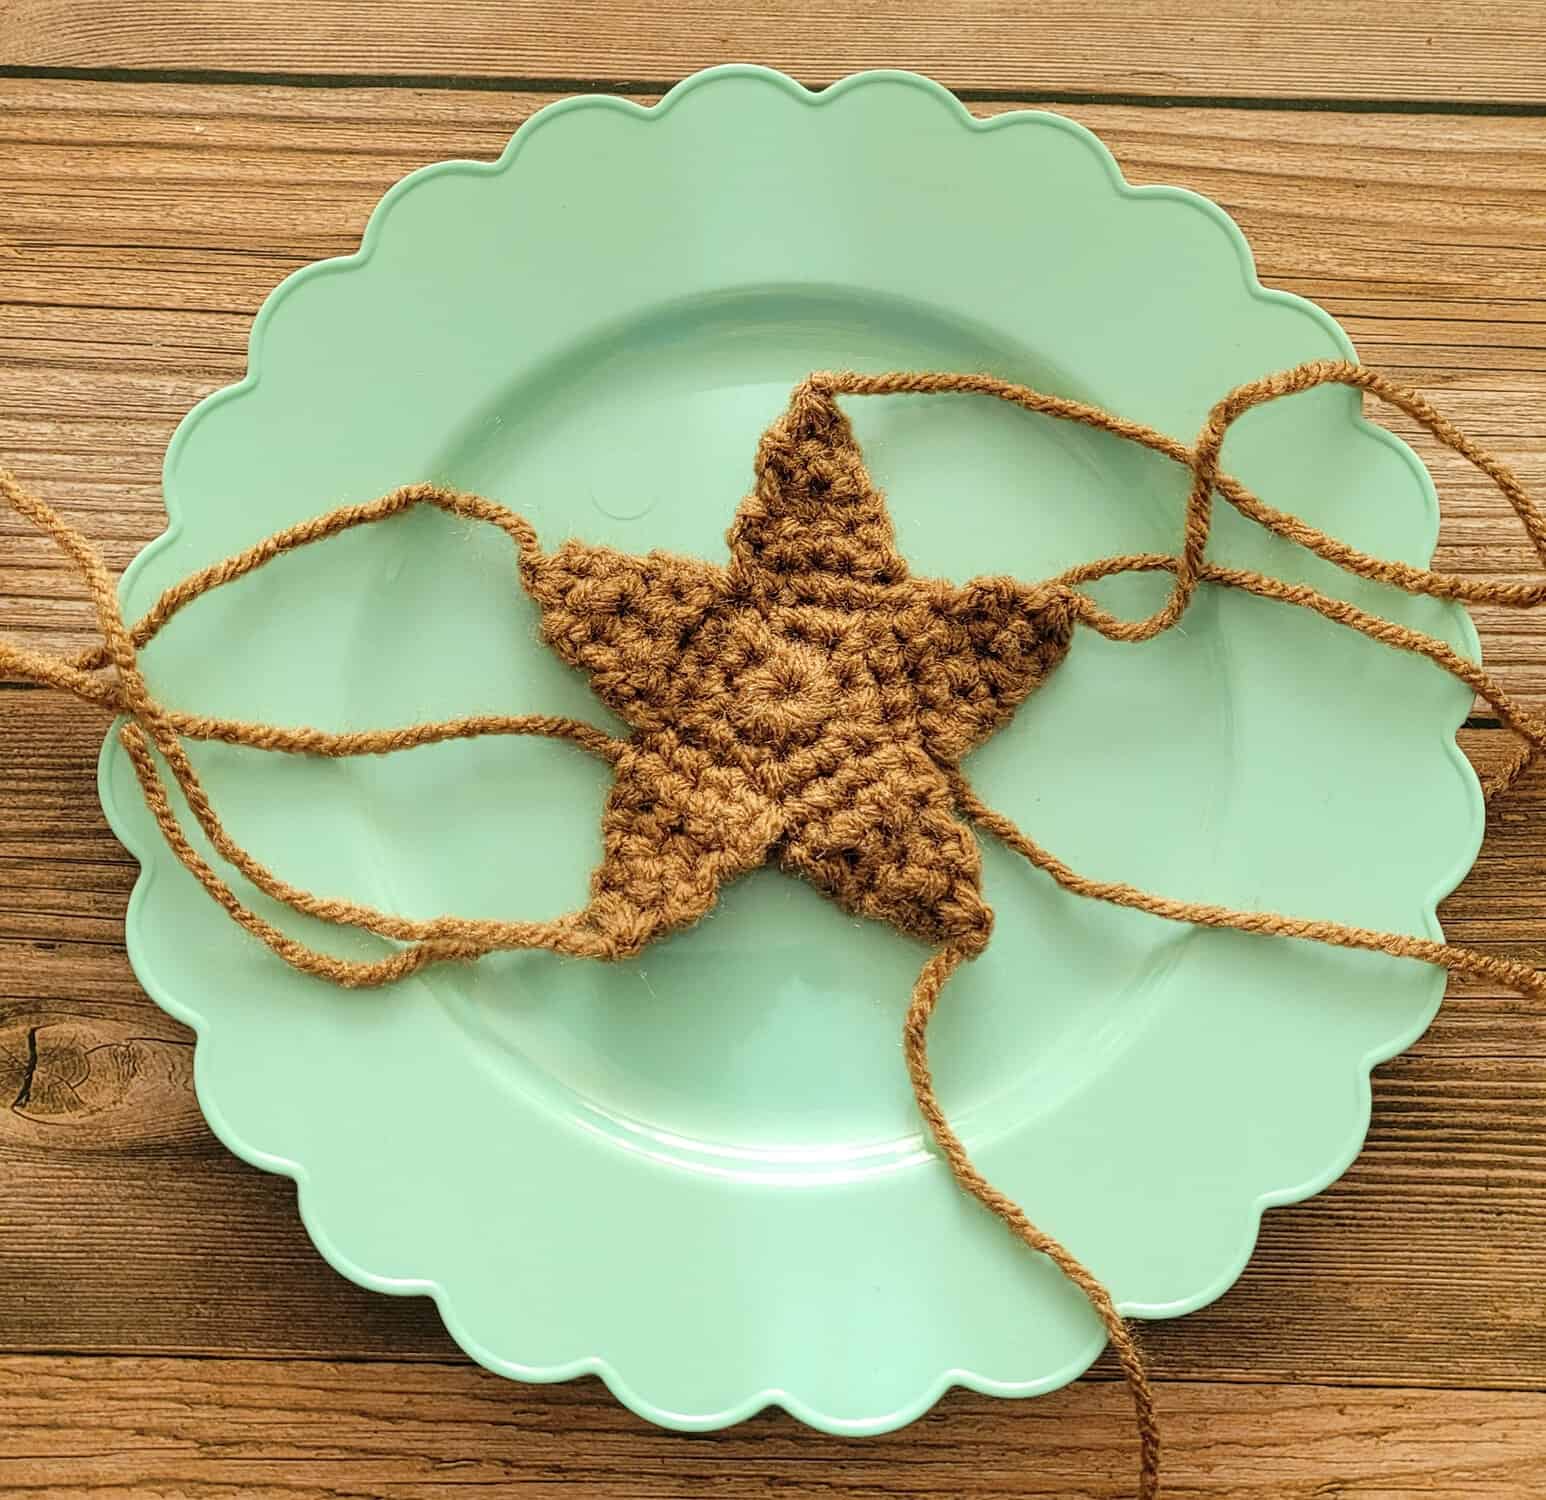
EDGING:
- With brown yarn work sc around entire star shape making sure to work (sc, ch 1, sc) in each point and a sl st in all ch-1 sps from Round 2
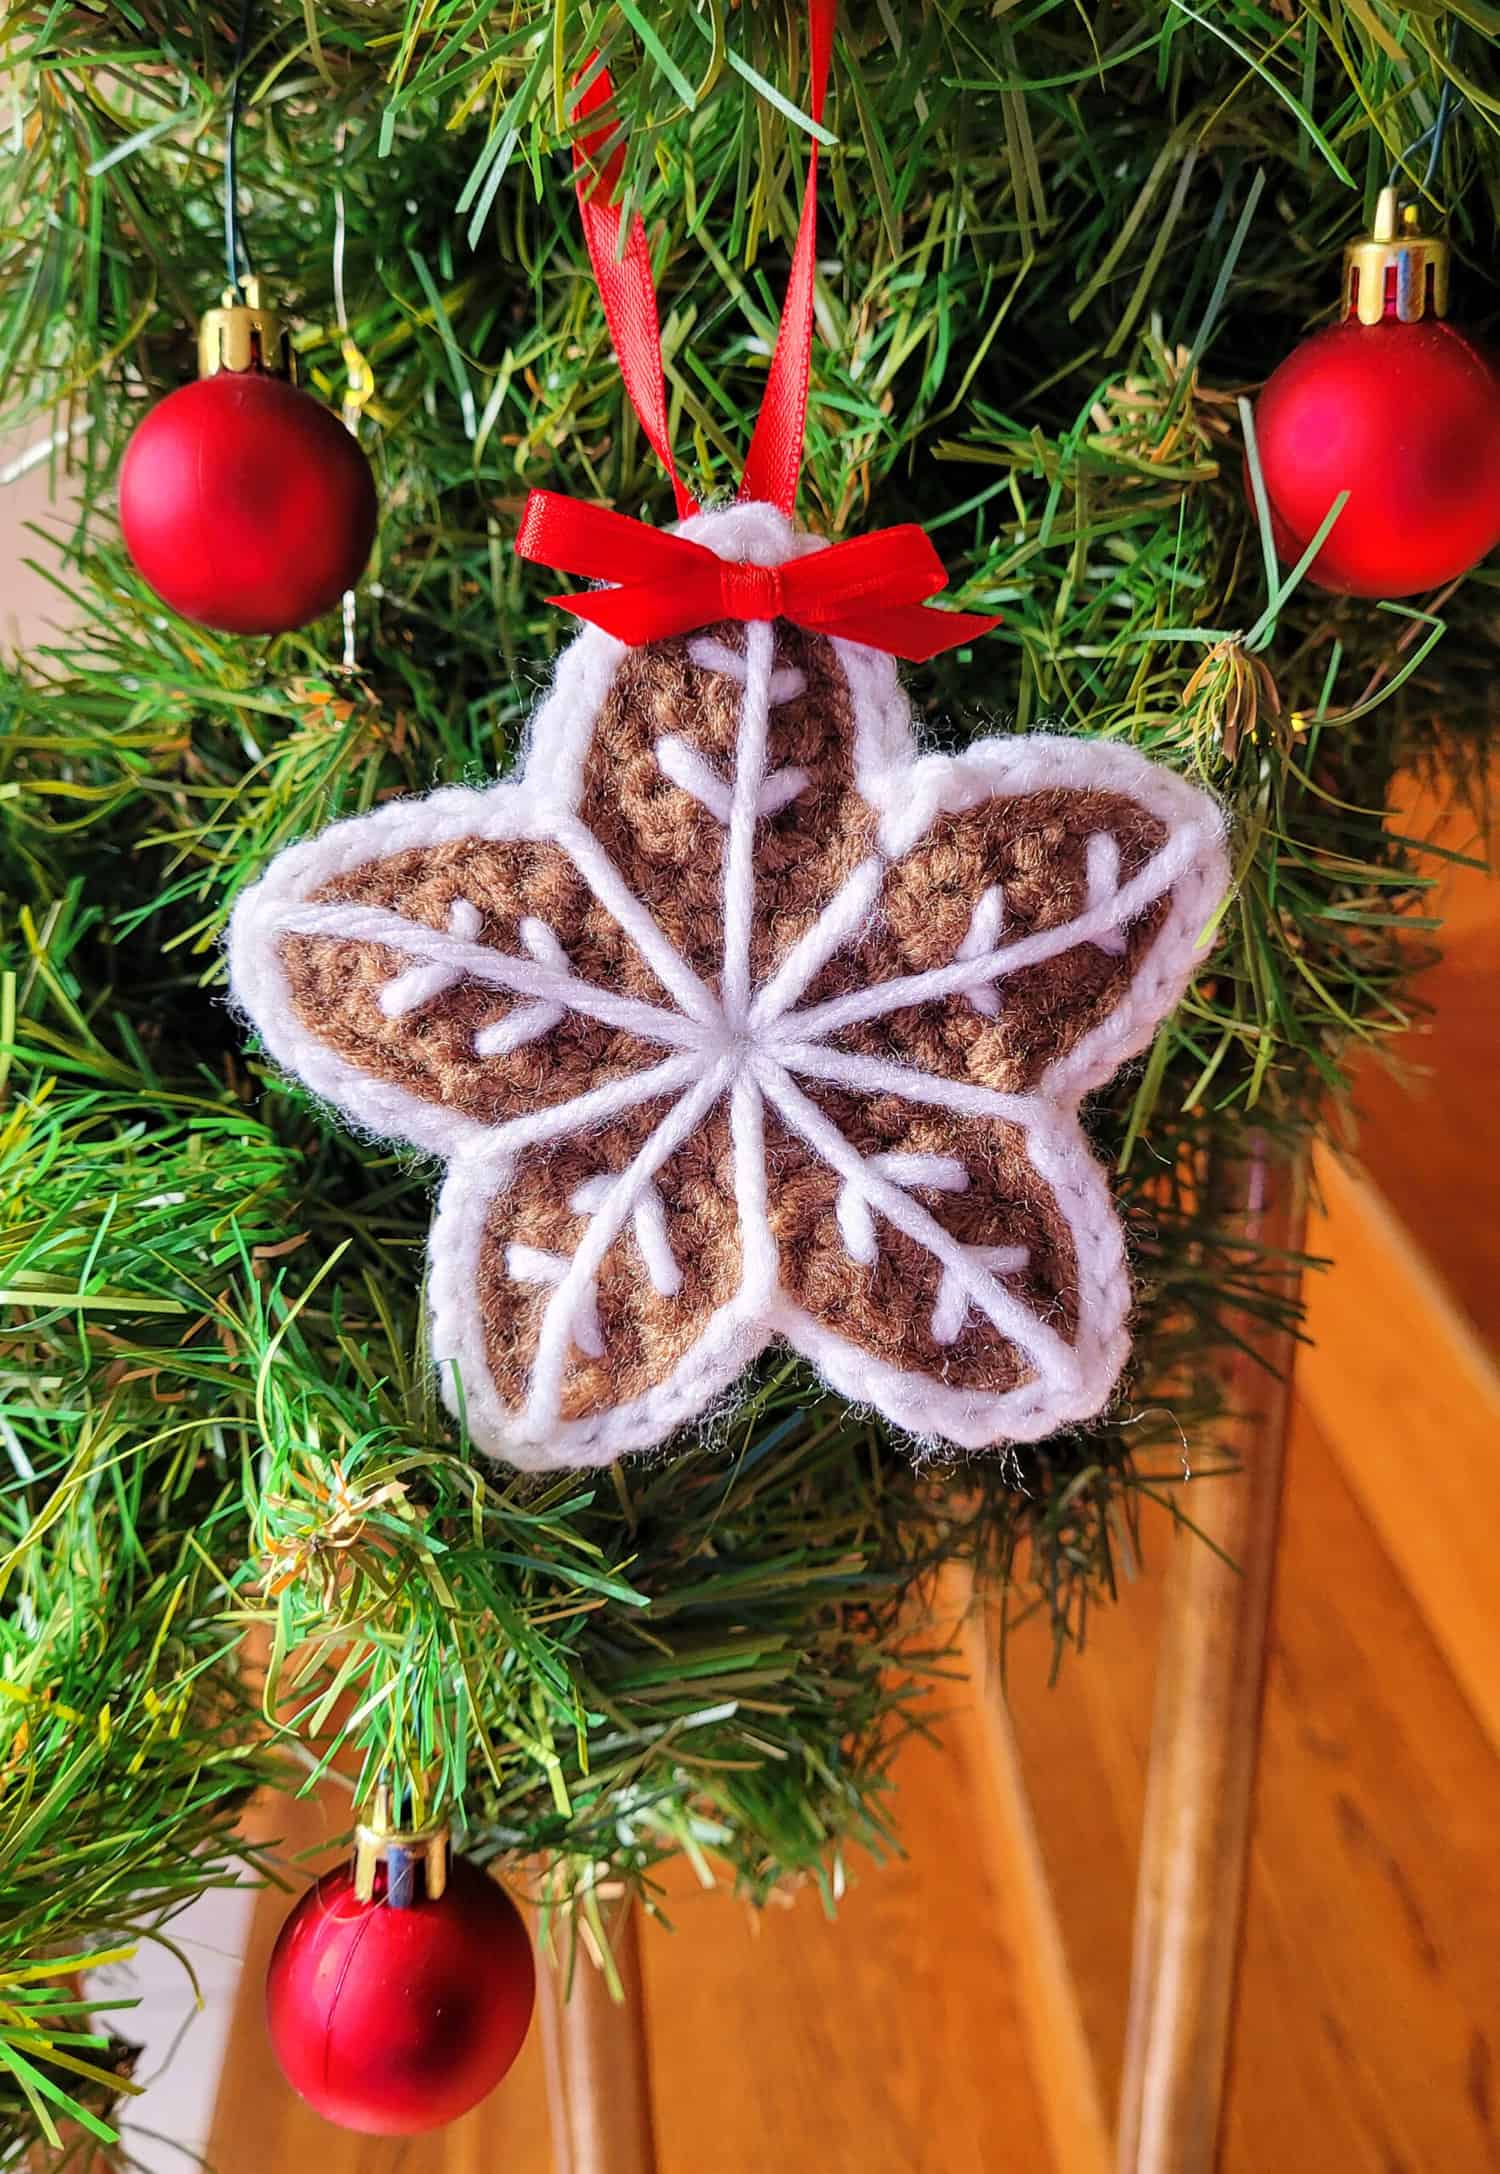
FINISHING/ASSEMBLY:
- icing edging:
- With white yarn and working in the back loop only, join with sl st in any sl st of edging round; Work a sl st in each st around making sure to work (sl st, ch 1, sl st) at each point
ICING DETAILS:
- With tapestry needle, weave in all ends on Wrong Side of ornament
- With tapestry needle and white yarn, add icing details using photo as a guide
- First, work through center of cookie and add stitching to all angles between points
- Then, add stitching to all points again working through the center
- Lastly, add small angled stitches along longer lengths of stitching
- Weave in all ends
- optional:
- Hot glue brown felt to “wrong side” of cookie
- Attach a red ribbon hanger and bow with hot glue
Tada! Your Christmas Cookie Ornament is complete ? I hope you enjoy making this project! Please tag me @celticknotcrochet and use the #celticknotcrochet on Instagram – I would love to see your Christmas cookie ornaments!
If you want to keep up with me, Jennifer, on social media for other fun projects, follow me on social media: Blog Youtube Instagram Etsy Pinterest
If you want to keep up with all things Clover, follow us on: Facebook | Twitter | Instagram | Pinterest | YouTube | Ravelry