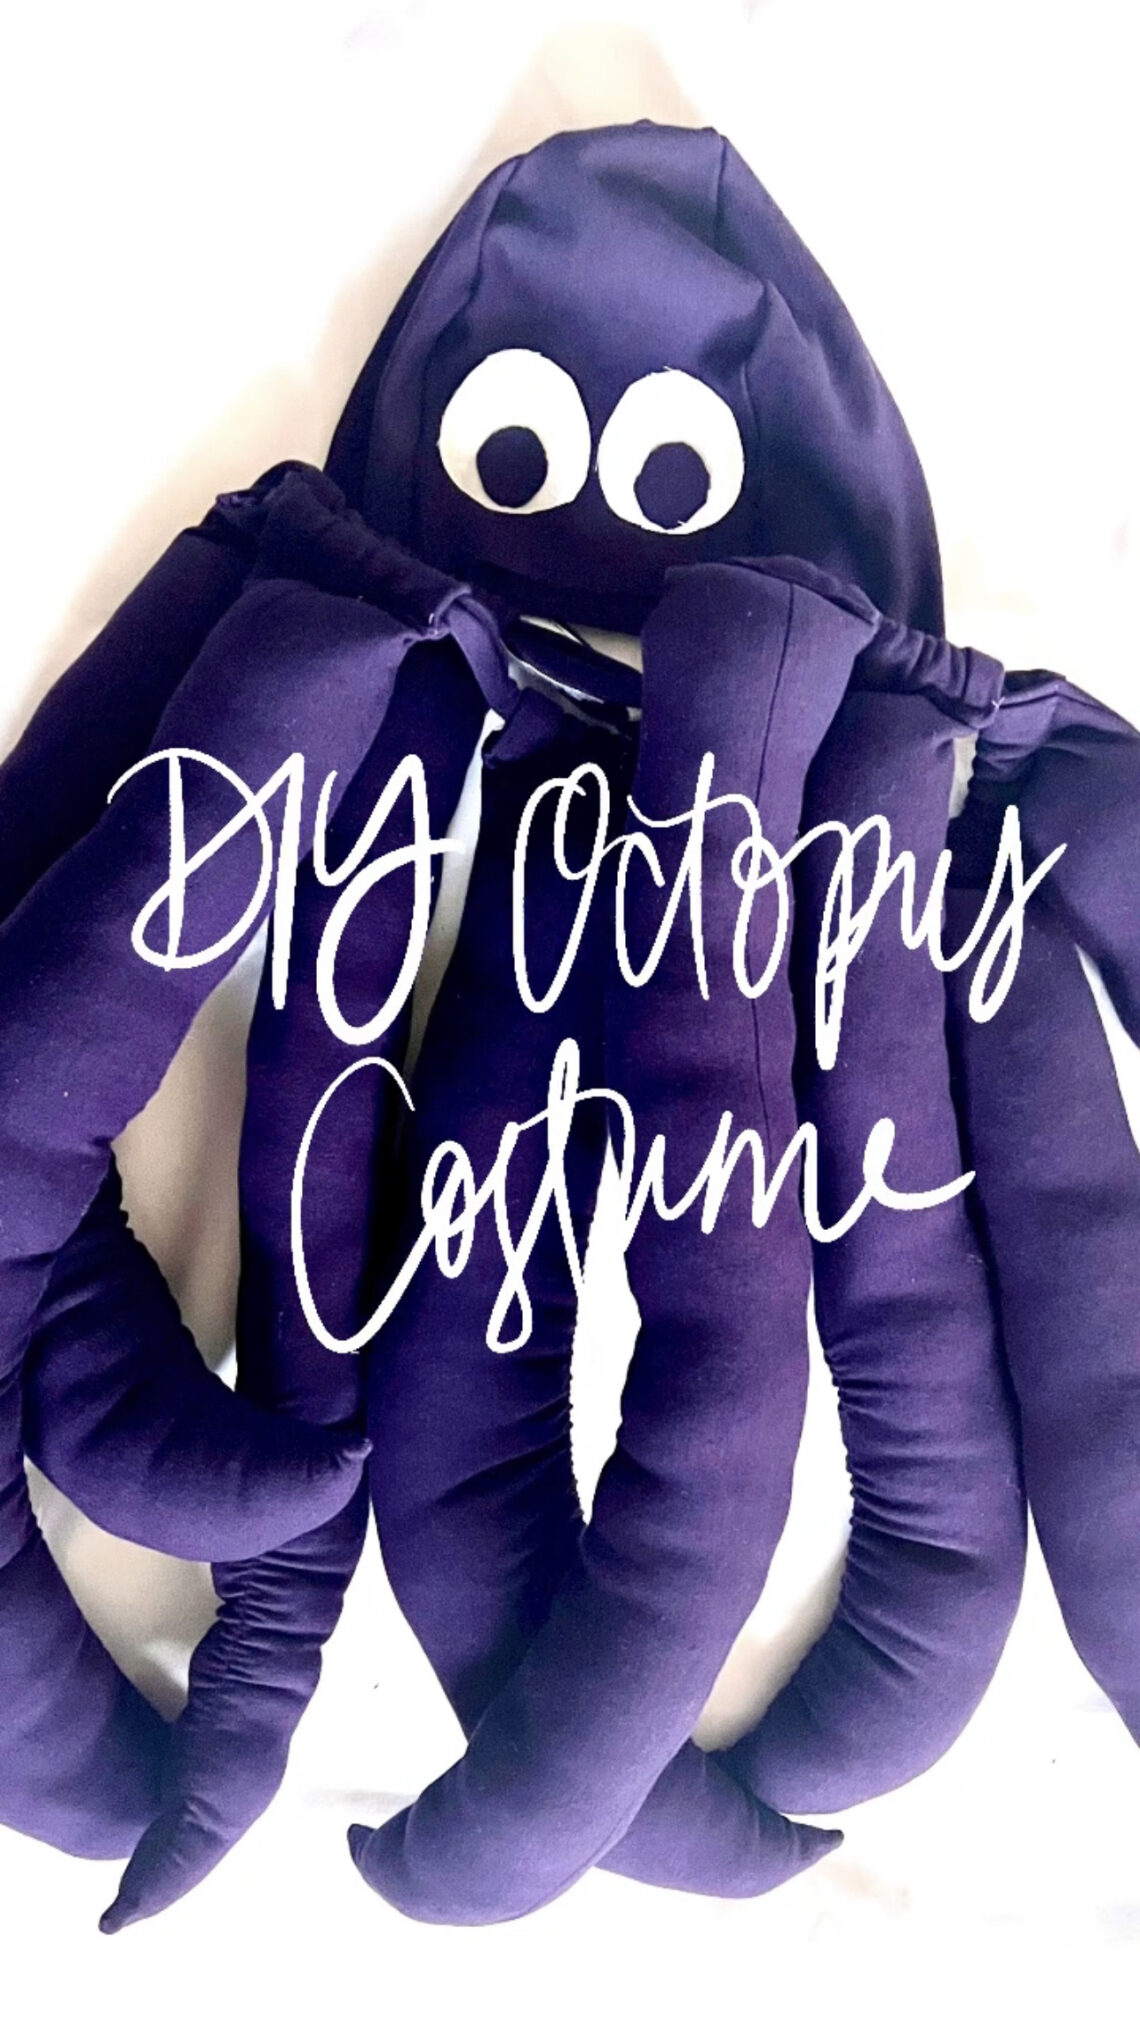
DIY Octopus Halloween Costume!
Hi all, it’s Rumer from @rumer_has_it on IG! With Halloween soon approaching, I hope you’ve got your costumes ready! If not, never fear! I’ve got a relatively quick DIY costume that you could complete this weekend. Growing up, I wasn’t super into Halloween and rarely dressed up. But now as an adult, I work in a department that is really enthusiastic about dressing up every year and very competitive at the costume contests. So this year, we voted on our costume theme and came up with the idea of “from the sea.” Now that I possess the skills of sewing, I figured why not use what I already have at home to make my costume!? I settled on the idea of being an octopus by constructing a belt with tentacles and a beanie with its eyes. Here’s how the process went down….
MATERIALS:
- ~1 yd scrap jersey/knit fabric
- Clover Point 2 Point Turner
- White and black scrap fabric (enough to cut 2 eyes and irises)
- Matching thread
- Pins
- Clover Wonder Clips
- ¼” wide elastic
- Fusible bonding web
- Iron
- Hump jumper
- Beanie in matching color (or make your own)
- Fabric scissors
- Ruler
- Polyfill or scraps for stuffing
- Velcro

INSTRUCTIONS:
Using the diagram below, cut 8 tentacles on fold. To give it a more organic feel, vary the lengths of the tentacles.
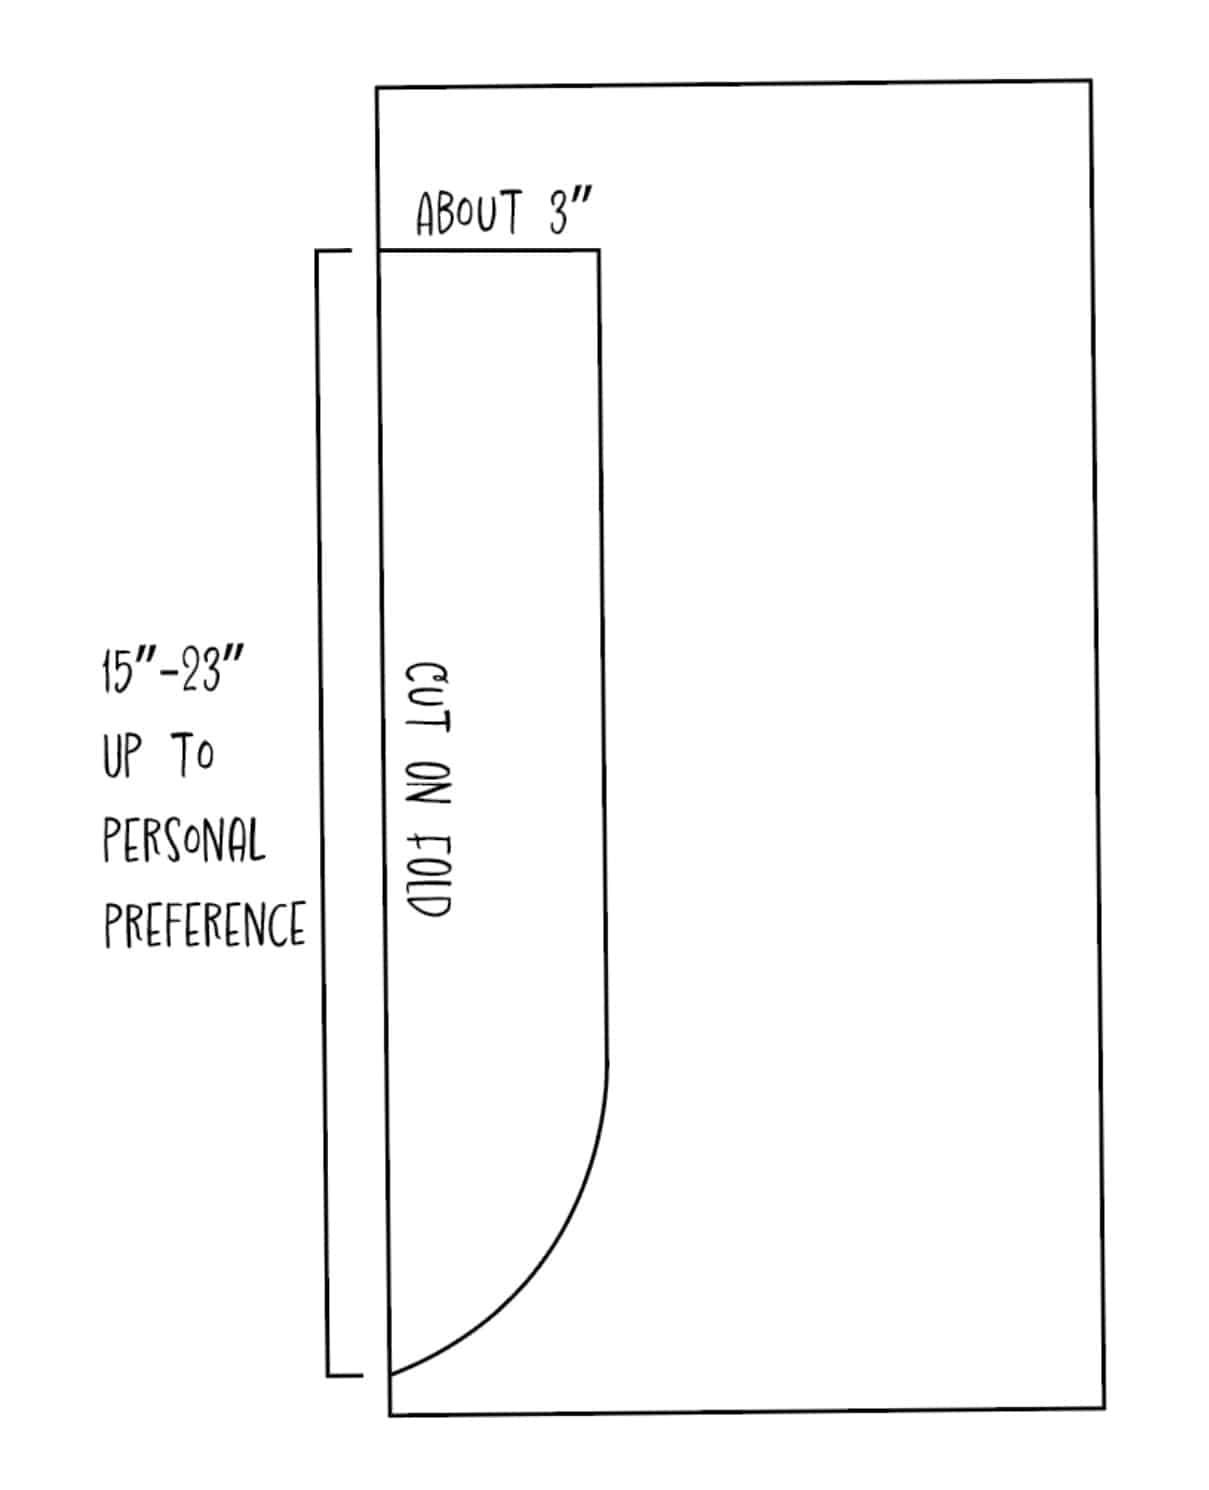
- Cut 8 pieces of ¼” wide elastic (the length of my pieces varied from 7”-11” depending on the length of the tentacle fabric). Take the corresponding piece of elastic and place it in the center of the tentacle on the wrong side starting approximately 0.5” away from the tip. Sew a straight stitch along the center of the elastic making sure to apply tension as you do so. The more tension you apply, the more curled your tentacle will become. Repeat on all other tentacles.
- Place the tentacle right sides together, folded along the elasticated center. Sew from the tip all the way down to the edge using a ?” seam allowance. The side opposite of the tentacle tip should be left open. Trim the corner of the tentacle tip being careful not to snip into the stitches. Repeat on all other tentacles.
- Turn all the tentacles right sides out. Use a point 2 point turner to get the tentacle tip as pointed as possible.
- Stuff each tentacle using fabric scraps or polyfill. Leave about 2-3” of the top of the tentacle unfilled. This will allow the tentacle to be secured to the belt.
- To create the belt that the tentacles will sit on, figure out where on your body you’d like it to be. For my costume, I wanted the belt to sit just above my hips (I took my hip measurement and subtracted 4 to get the length of my belt). Keep in mind that when the tentacles are added, it places a little more weight on the belt so you might want to consider shortening the length a little bit more than I did to accommodate for that. The width of the belt is 2”. Cut 1 belt piece out in your main fsbric.
- Fold the belt piece in half, hotdog style with right sides together. Using wonder clips or pins, secure the long edges together. Sew using a ¼” seam allowance along the long edge and along one of the short edges. Trim the corners along the short edge, being careful not to snip into the stitches.
- Use a loop turner to turn the belt right side out. Close the remaining opening along one of the short sides by pushing the fabric back into the tube about ½”. Then edgestitch closed. Press the belt with an iron.
- To secure each tentacle to the belt, fold the raw edge to the back of the tentacle 0.5” and then create a little loop by folding the top of the tentacle down the back by ~1.5” with pins and clips to hold this in place along the belt. Be sure to play with the angle and direction of the tentacle’s curve. To create a more organic look, vary how the angle and direction of the curves will sit on the belt. Edgestitch along this fold, making sure that you are not catching the belt in your stitches. A hump jumper might come in handy here, as all the folds make the fabric a bit thick under the foot. You should still be able to move the tentacles freely along the belt.
- Try on the belt and see where you would like to place velcro to secure it, ensuring it will be tight but comfortable enough to be worn. Pin or clip the velcro in place and edgestitch. Now the belt is complete.
- Moving on to the beanie…you can use a store bought one that’s in a matching color to your main fabric or you can make your own. I opted to create my own rough pattern and quickly whipped it up with my very limited scraps of the scraps.
- Using white scrap fabric, cut out 2 circles about 2.5” diameter (it’s okay to eyeball it…it’s for the eyeball).
- Using black fabric (or your main fabric if you prefer), cut out 2 circles about 0.75” diameter (it’s okay to eyeball it, it’s for the iris of the eyeball).
- Secure the iris to the white eyeball using an iron and fusible bonding web, which will go on the right side of the white eyeball and the wrong side of the iris. Repeat with other eye pieces.
- Secure the eyeballs to the beanie using an iron and fusible bonding web, which will go on the right side of the beanie and the wrong side of the eyeball.
There you have it, your DIY octopus costume is complete! It’s so cute and easy since you just repeat the same steps for all 8 tentacles. If you join the octo-squad with me for Halloween, tag me on IG @rumer_has_it! 🙂