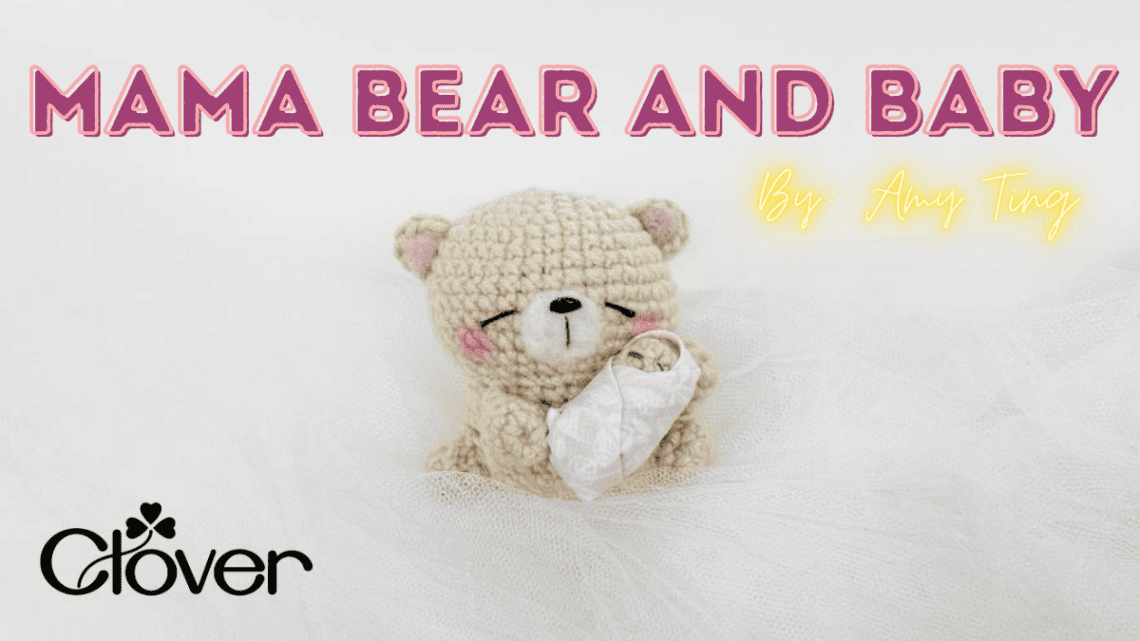
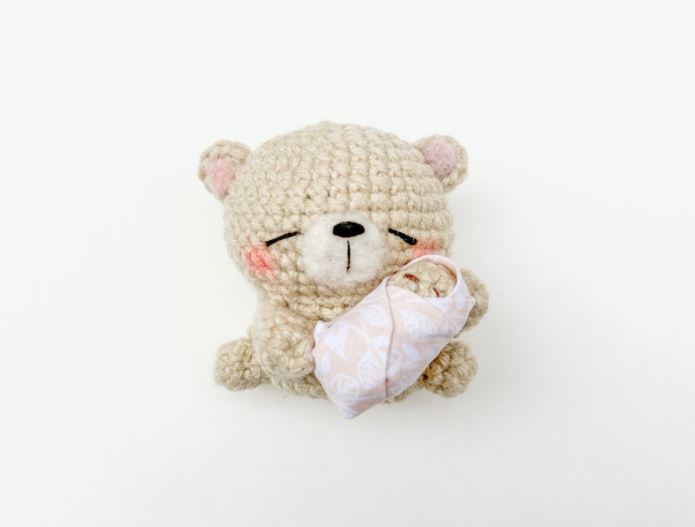
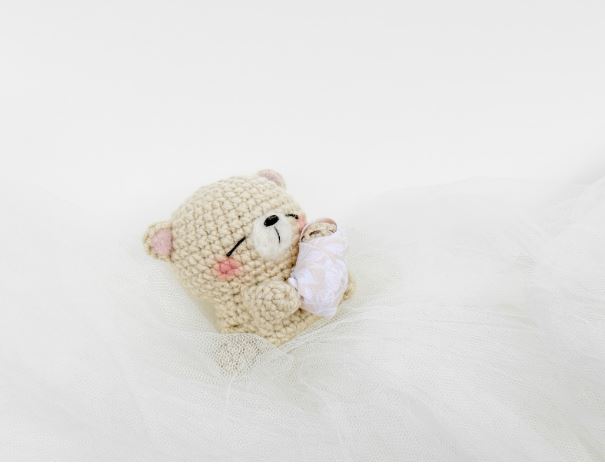
Mama Bear and Baby- Crochet Pattern
Happy Mother’s Day to all the amazing mamas out there! Whether you’re a brand new mama or a seasoned one… a mama-to-be, or maybe a mama-figure to many – you are all so amazing. They say that “there is no love like a mother’s love” – and it’s true. Let’s celebrate our mamas and their amazing love with this Mama bear and baby.
——————–——————–——————–——————–——————–——————–——-
PATTERN NOTES:
*If you prefer to purchase the premium, printable PDF, you can find it on sale HERE for this week only.
*Watch the video HERE.
*We will be working in a spiral.
*Please do not copy/redistribute any part of this pattern as your own. This includes reposting/translating without permission. Feel free to sell your finished products in small quantities – I only ask that you give credit to help support my designs. Tag #curiouspapaya to share your work!
MATERIALS:
- Clover Amour Crochet Hook (2.75 mm)
- #4 medium worsted yarn – Here, I’m using Impeccable Solids in Golden Beige but you may substitute with whatever you’d like
- Natural Wool Roving Off White- Art No. 7920
- Natural Wool Roving Pink – Art No 7926
- Needle Felting Mat- Art No 8910
- Needle Felting Pen- Art No 8901
- Mini Patchworks Scissors
- Stitch Marker
- Yarn Needle
- Polyfill stuffing – 2 oz
- Hot Glue
- 4 in. x 4 in. of scrap cloth (for the swaddle)
TERMS:
- dec – (invisible) decrease
- flo – front loops only
- inc – increase
- sc – single crochet
- st(s) – stitch
- rnd(s) – round(s)
- [#] – stitch count
- (…) x # – repeat the instructions within the parentheses # of times
——————–——————–——————–——————–——————–——————–——-
BABY BEAR (in Golden Beige yarn)
Rnd 1: Make a magic circle and (sc) x10 [10]
Rnd 2-8 (7 rnds total): sc all around [10]
Stuff and fasten off. Sew the hole closed by using a yarn needle and going through the flo and cinching the hole closed tight.
FACIAL FEATURES
Step 1: Cut a long strand of dark brown embroidery thread and separate 2 strands from it (if it’s the kind with 6 strands) to make it finer. Embroider the nose between rnds 3-4 and go over the nose 3x to make it thicker.
Step 2: Embroider the sleepy eyes between rnds 3-4, 1 st away from both sides of the nose.
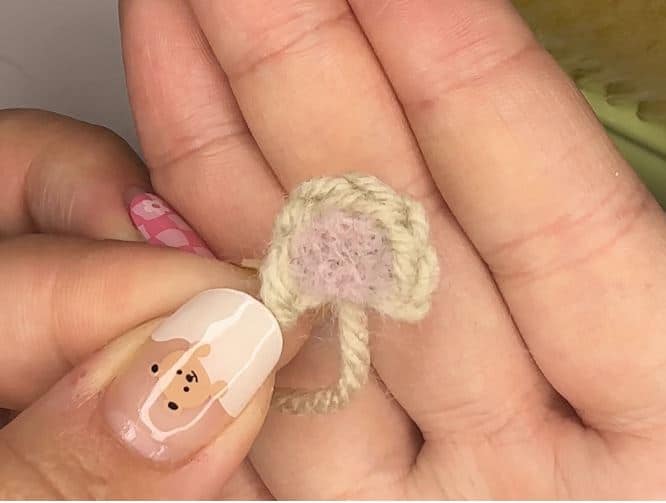
SWADDLE
Step 1: Cut a square of scrap fabric to be ~4 in. x 4 in. I got a small sample square of a cute floral pattern at Joann’s.
*Tip: Make sure the material is thin! This will help when we fold the swaddle.
Step 2: Fold the top corner and secure it down with hot glue.
Step 3: Wrap the swaddle around the face so that the eyes and nose are visible. With each fold, add a dab of hot glue to secure it in place.
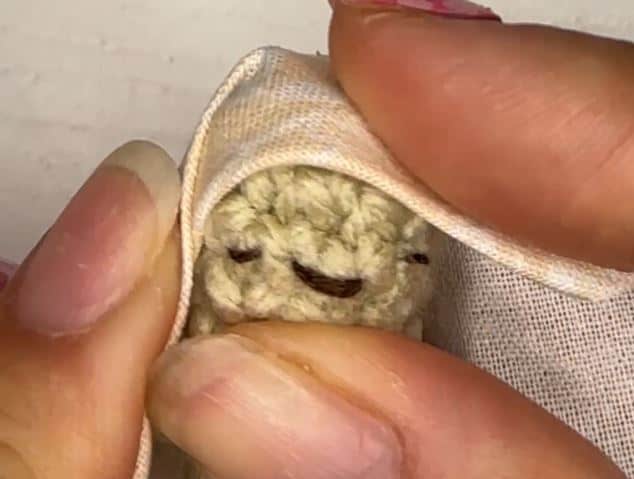
Step 4: Make sure that the final fold faces the side of the body that will be against the mama bear so that it’s not visible. If you have excess fabric, trim it off as needed. 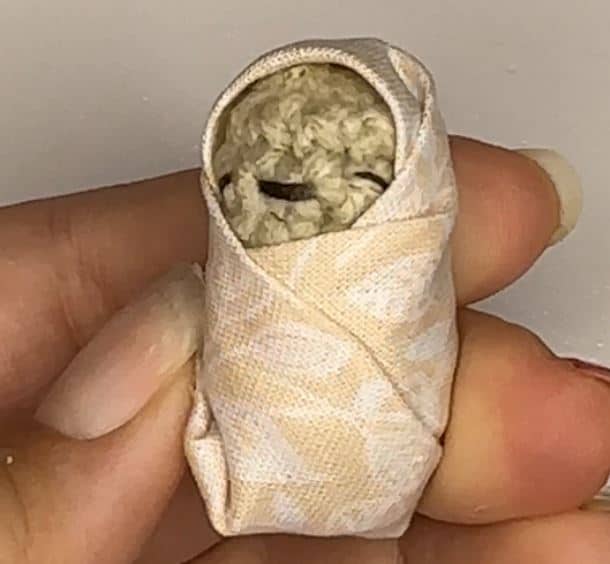
MAMA BEAR HEAD (whole body will be in Golden Beige yarn)
“Though the nights are long, the years are short.”
Rnd 1: Make a magic circle and (sc) x6 [6]
Rnd 2: (inc) x6 [12]
Rnd 3: (sc, inc) x6 [18]
Rnd 4: sc, inc, (2 sc, inc) x5, sc [24]
Rnd 5: (3 sc, inc) x6 [30]
Rnd 6: 2 sc, inc, (4 sc, inc) x5, 2 sc [36]
Rnd 7-8 (2 rnds total): sc all around [36]
Rnd 9: (5 sc, inc) x6 [42]
Rnd 10-12 (3 rnds total): sc all around [42]
Rnd 13: (5 sc, dec) x6 [36]
Rnd 14: (4 sc, dec) x6 [30]
Rnd 15: (3 sc, dec) x6 [24]
Stuff and be sure to fill out the cheeks well. Continue onto the body.
MAMA BEAR BODY
Rnd 1: sc all around [24]
Rnd 2: (3 sc, inc) x6 [30]
Rnd 3-6 (4 rnds total): sc all around [30]
Rnd 7: (3 sc, dec) x6 [24]
Rnd 8: (2 sc, dec) x6 [18]
Stuff.
Rnd 9: (sc, dec) x6 [12]
Fasten off. Sew the hole closed by using a yarn needle and going through the flo and cinching the hole closed tight.
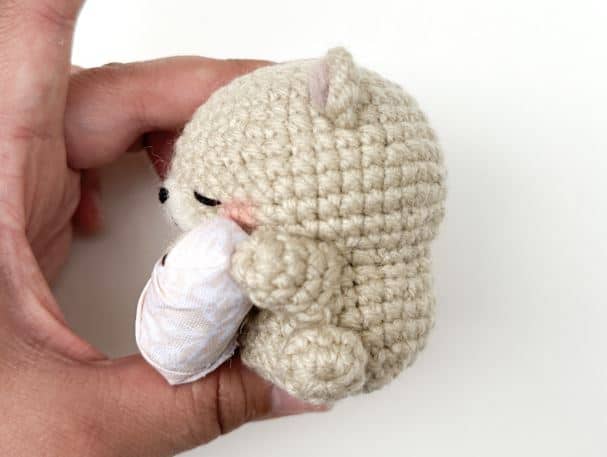
EARS (make two)
Rnd 1: Make a magic circle and (sc) x6 [6]
Gently pull the magic circle closed – it should look like a semi-circle. Fasten off and leave a tail for sewing.
Pinch off a small amount of pink roving wool and separate it with your fingers to fluff it up. Using your needle felting pen and felting mat, poke the wool onto the center of each ear to create the inner ears.
*Tip: Work slowly and be careful not to poke your finger!
ARMS (make two)
Rnd 1: Make a magic circle and (sc) x7 [7]
Rnd 2-4 (3 rnds total): sc all around [7]
Lightly stuff. Flatten the opening and make ~4 sc across to crochet each arm closed. Leave a tail for sewing.
LEGS (make two)
Rnd 1: Make a magic circle and (sc) x8 [8]
Rnd 2: (3 sc, inc) x2 [10]
Rnd 3: sc all around [10]
Lightly stuff. Fasten off and leave a tail for sewing.
ASSEMBLY
EARS: Sew each ear between rnds 5-8, ~15 sts apart.
ARMS: Align the right arm to be directly under where the right ear is sewn. Sew the right arm onto the body between rnds 1-3. Align the left arm ~10 sts to the left (modify as needed). It will be off centered from the ears, and that’s what we want.
*Tip: Position the baby in the mama bear’s arms to get a better idea of where to position the arms.
LEGS: Align the right leg to be in-line with the right ear and right arm. Sew the left leg ~10 sts to the left (modify as needed).
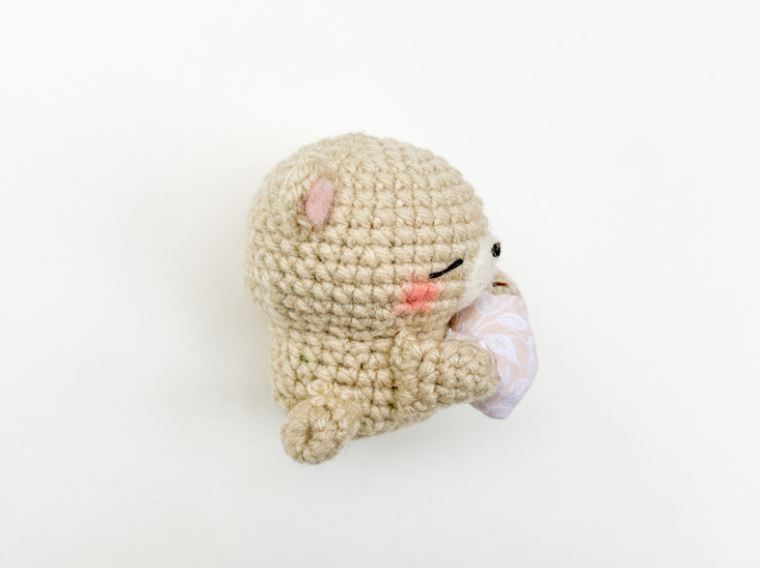
MUZZLE
Step 1: Pinch off a small amount of off-white roving wool and separate it with your fingers to fluff it up. Using your needle felting pen and felting mat, poke the wool into a “patty” shape, ~1.5 cm in diameter (adjust as needed if you modified your materials).
Step 2: Poke the muzzle onto the face between rnds 10-13.
FACIAL FEATURES
*Note: Cut an arm’s length of dark brown embroidery thread and thread it through your needle. DON’T cut it, as all of the features will be made with it.
EYES:
Step 1: Create the inner corner of the eyes between rnds 10-11, 1 st away from the muzzle.
Step 2: Go 2 sts over and 1 rnd below to create downward “sleepy” eyes.
NOSE: Thread your needle to the top of the muzzle and create a nose ~2 sts wide. Keep the eyes and nose aligned in a straight line for a cuter effect.
*Tip: It should be easy enough to pierce through the wool, but if you are struggling, take a sharper sewing pin and poke your holes before embroidering!
MOUTH: Create a straight line ~2 sts wide for the mouth.
CHEEKS: Use a Q-tip to dab some blush on each cheek. Blend it out and build up the color as necessary.
As the final step, use hot glue to secure the baby bear into the mama bear’s arms.
Stay connected with Clover on Facebook | Twitter | Instagram | Pinterest | YouTube | Ravelry