Projector Cover- Sewing Pattern
To all my fellow sewists out there, have you ever felt the slow back pain creeping in when you’re cutting, taping, and cutting (again) paper patterns? (Maybe it’s because I often do this when I’m sitting on the floor since I don’t have a big enough table.) But anyway, if I’m being honest, putting paper patterns together is one of my least favorite parts of sewing. Not only that, but you also have to consider how to store these patterns after you’re done both physically and electronically (for printed PDF patterns). I’ve found that after printing my PDF patterns, it’s helpful to sort them into a printed and unprinted folder on my desktop so I can keep track of things.
One remedy for this situation is the implementation of projector sewing into my practice. By using a projector, you’re able to project patterns directly onto the fabric and cut them out straight from there, thus eliminating the need for paper. There are many resources available on the Projectors for Sewing facebook page if this is intriguing to you.
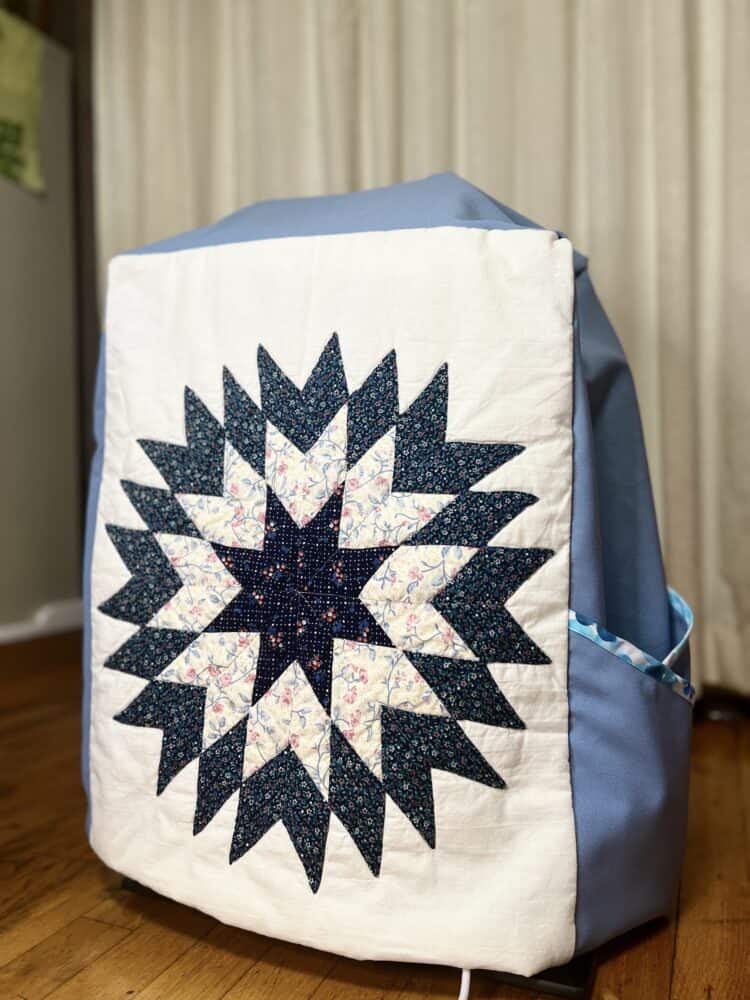
I ordered a secondhand ultra short throw projector and found there is a bit of a learning curve to using this. Currently, I’m stuck on the calibration phase and am working out how to stabilize the projector to the tv stand that I attached it to as it sits unevenly now. In the meantime, I figured I would create a projector cover using some vintage cutter quilt blocks to protect it from the elements. Ironically, this will require some paper to use to trace out a good pattern. But with the new pattern cutting guide tool, it’s a lot less painful than before!
What you’ll need:
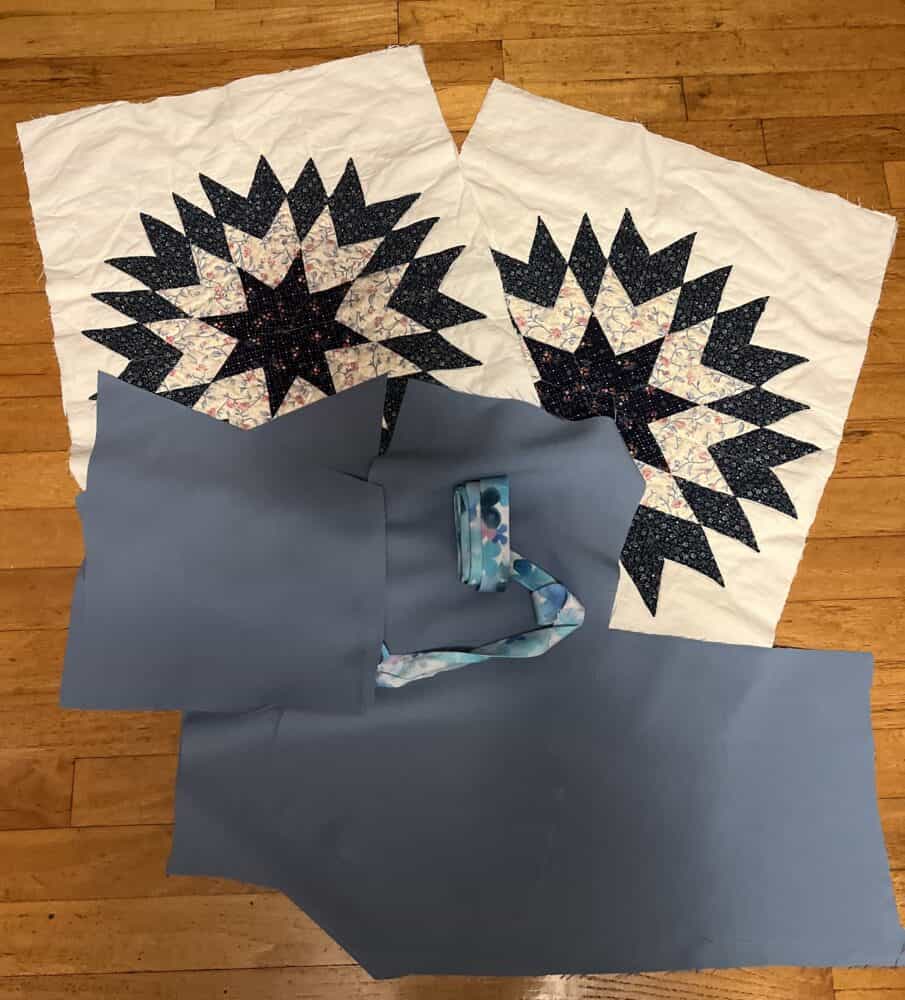
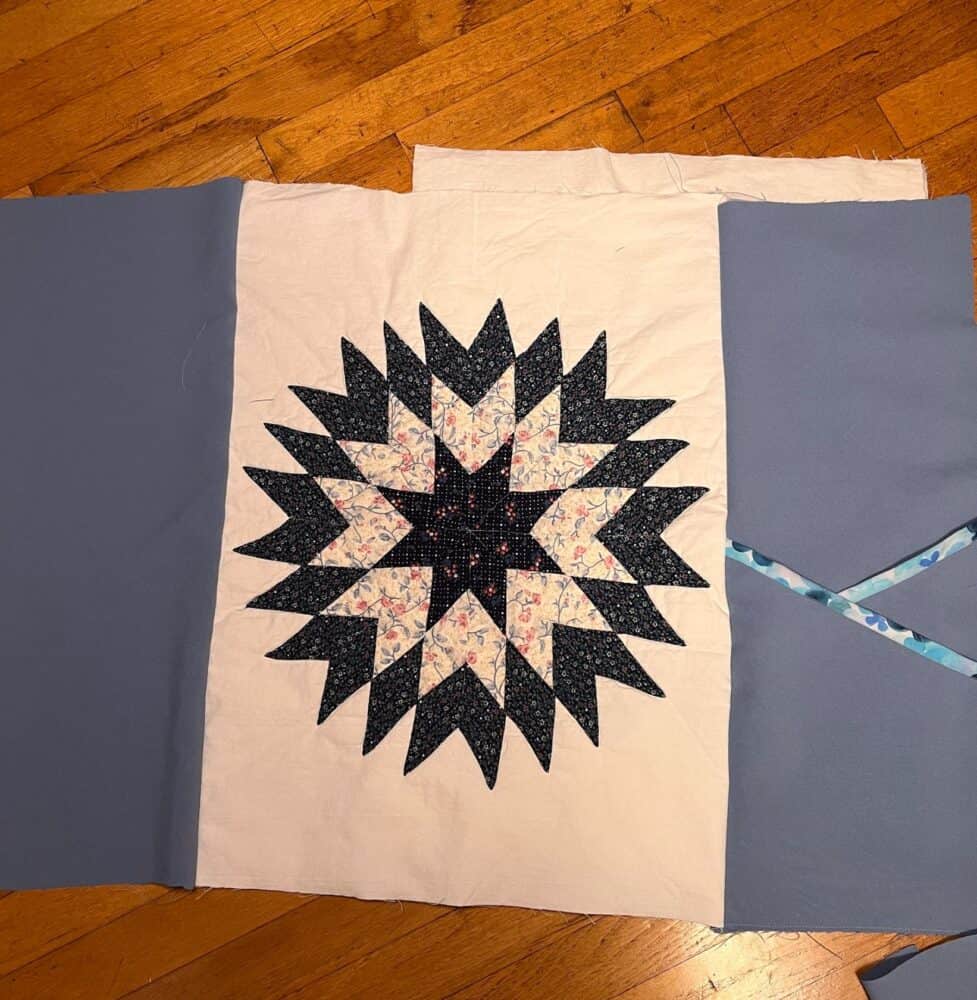
- 2 Quilt blocks (I had some in my stash that were 18”x24” to be used for the front and back, but you can also use regular unquilted fabric too)
- ½ yard of coordinating fabric (for the top and sides of the cover + pocket)
- 1” bias binding
- Needle
- Matching thread
- Measuring tape
- Clover Pattern Cutting Guide- Art No. 7007
- Xacto knife
- Pen
- Cutting mat
- Ruler
- Paper
- Clover Wonder clips- Art No. 3190
Instructions:
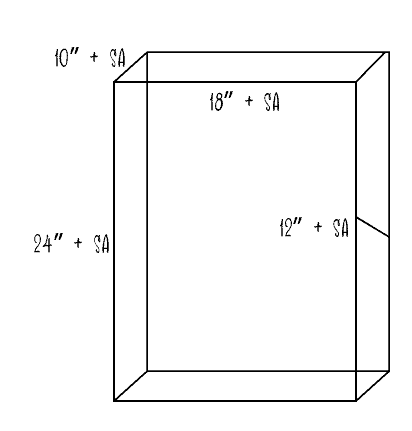
- Use the measuring tape to measure the dimensions of your projector as it hangs on the stand. Here is a diagram of what I based my project off of:
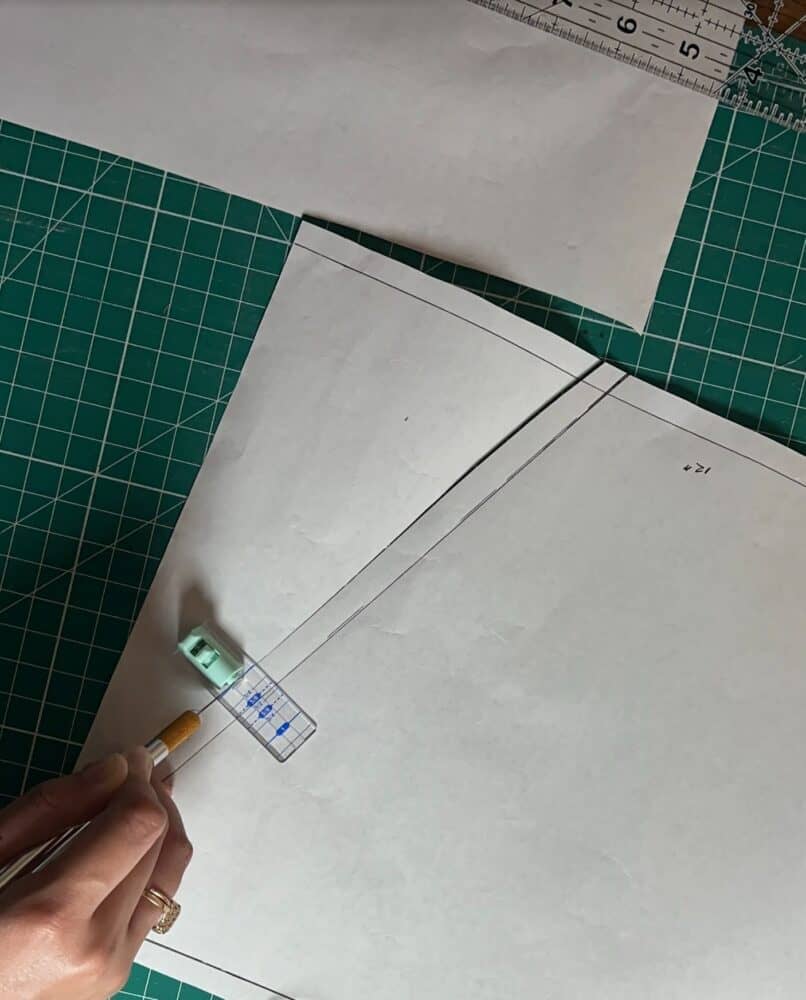
- Transfer these measurements to paper using a pen and ruler as a guide. You will need two pieces to make up the front and back (18”x24” plus seam allowance (SA)), two side pieces (10”x24” plus SA), one top piece (10”x18” plus SA), and two pocket pieces (10”x12” plus SA).

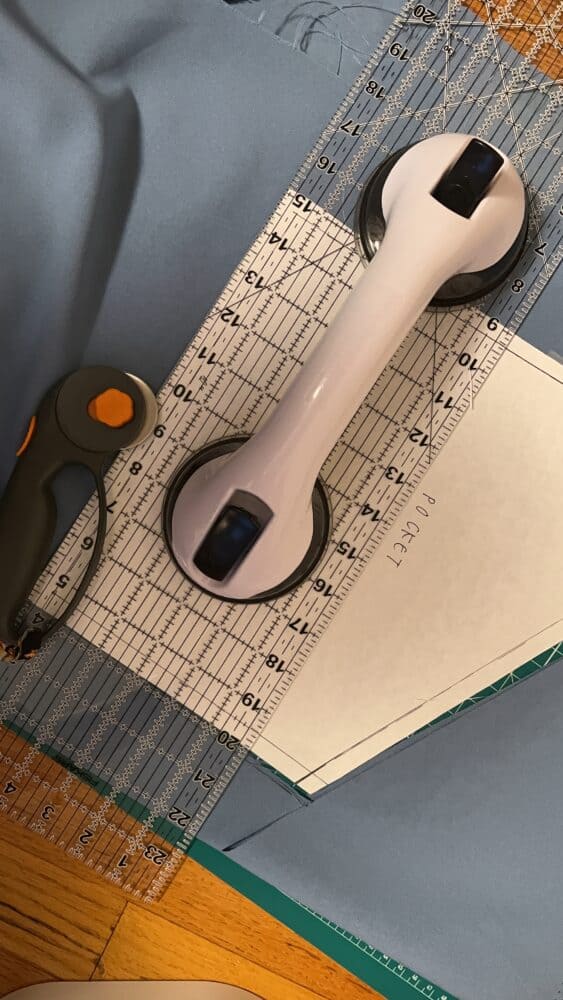
- Then use the pattern cutting tool with Xacto knife blade to cut out the pattern with a ?” SA, do this by aligning the ?” mark on the guide with the line that you drew in step 2. Make sure to do this on your cutting mat.
- Cut out the pattern pieces from the fabric.
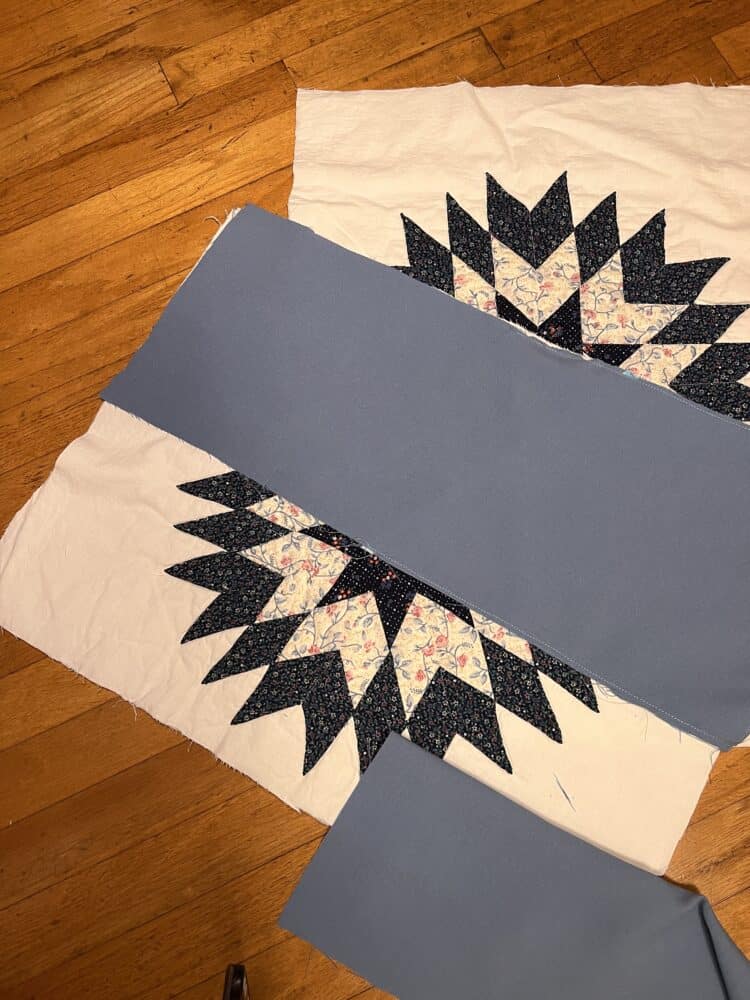
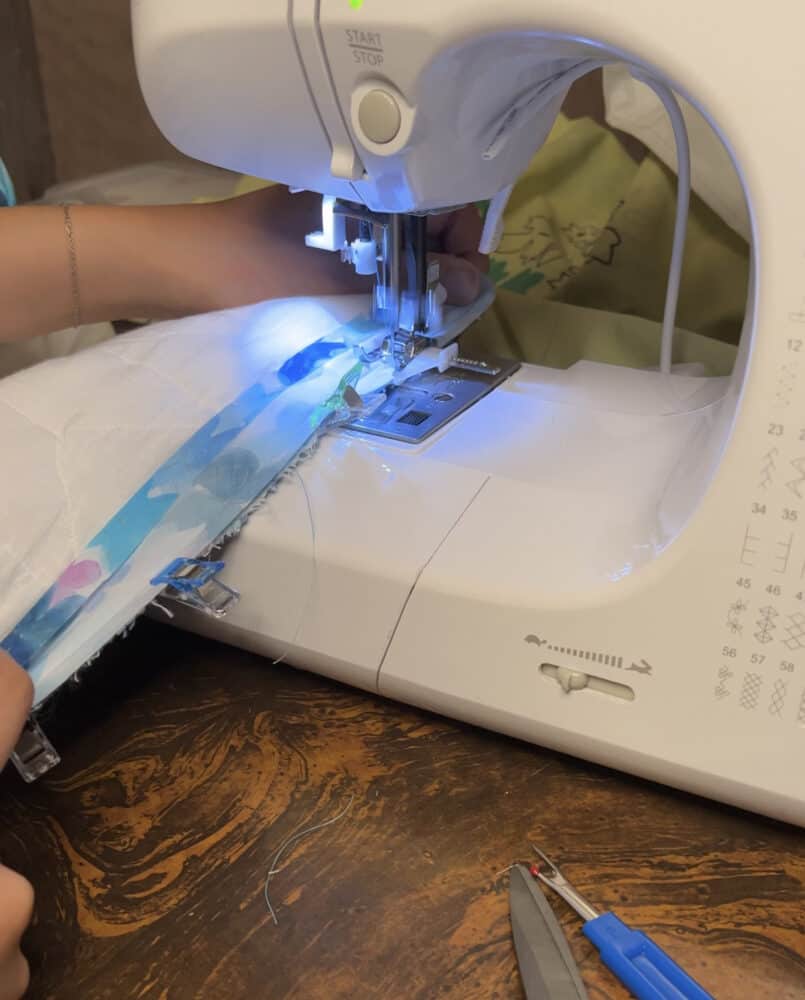
- Sew the pocket pieces right sides together on 3 sides (leaving one side open to turn right side out). (I deviated from my original plan and chose to bias bind the top diagonal portion of each pocket piece so that I could attach 2 side pockets.)
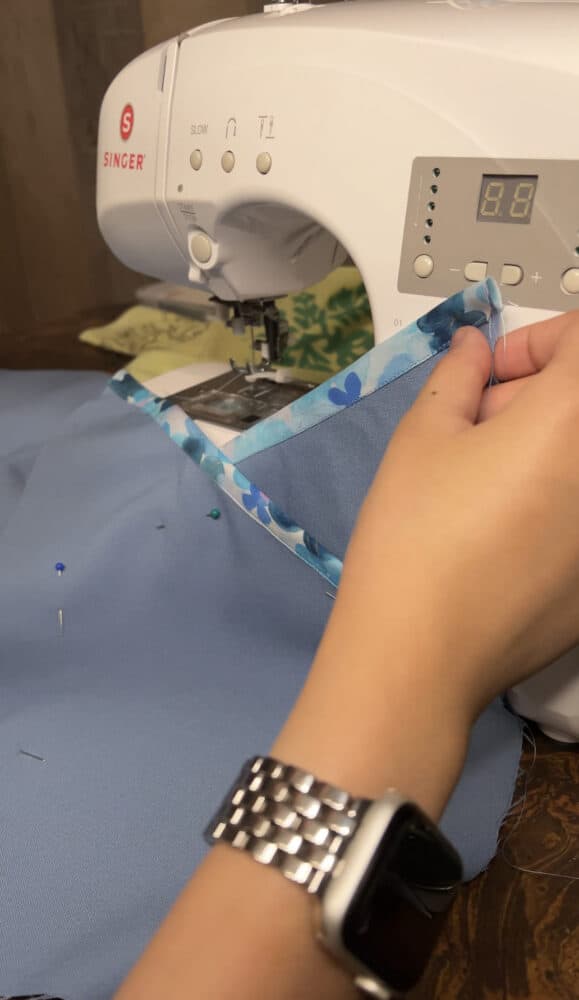
- Baste the pocket(s) to one of the side panels right sides out.
- Sew the side panels to the long side of the front and back pieces leaving a 1cm gap at the top (to help ease in the top panel).
- Slowly sew and ease in the top panel to the 4 sides making sure to drop the needle down at each corner and pivot the fabric.
- Optional: Bias bind the seams.
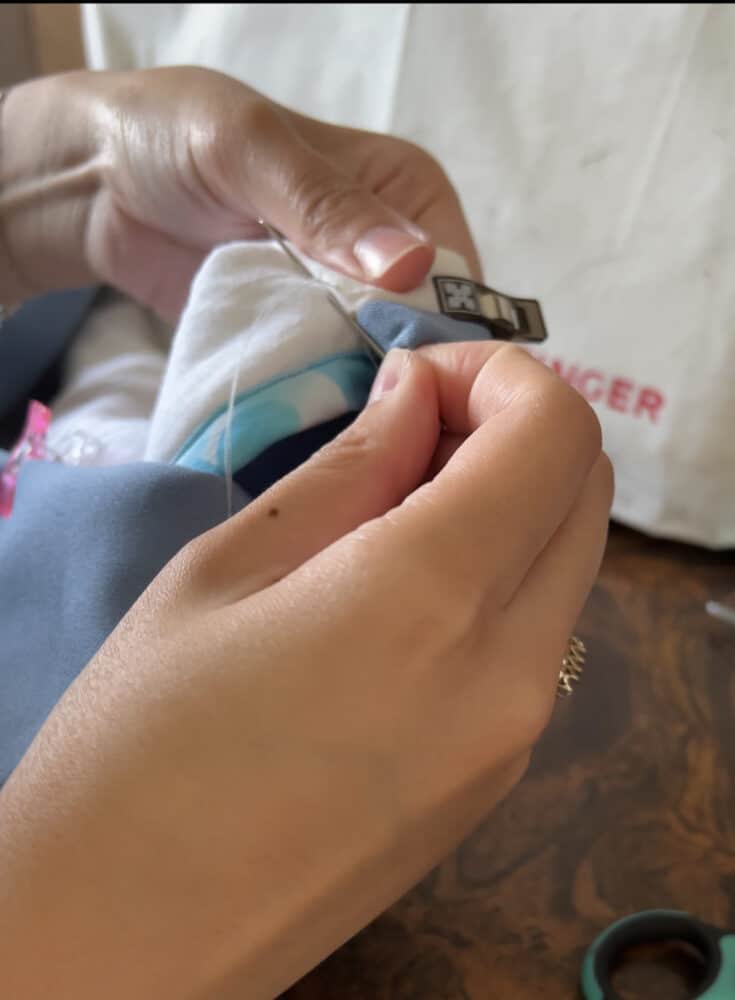
- Hem the bottom of the cover. You may want to fit it over your projector first just to see how it falls. To hem my cover, I folded the bottom in ½” and then folded again by 1”, then clipped it using wonder clips. I wanted to use an invisible stitch for the bottom hem so that it wouldn’t interfere with the quilt block design. You might also want to consider bias binding the bottom hem as another option.
 If you make your own projector cover or have any words of projector wisdom, tag me on Instagram @rumer_has_it.
Blog | Instagram | YouTube | Facebook | Pinterest | Etsy | Ravelry