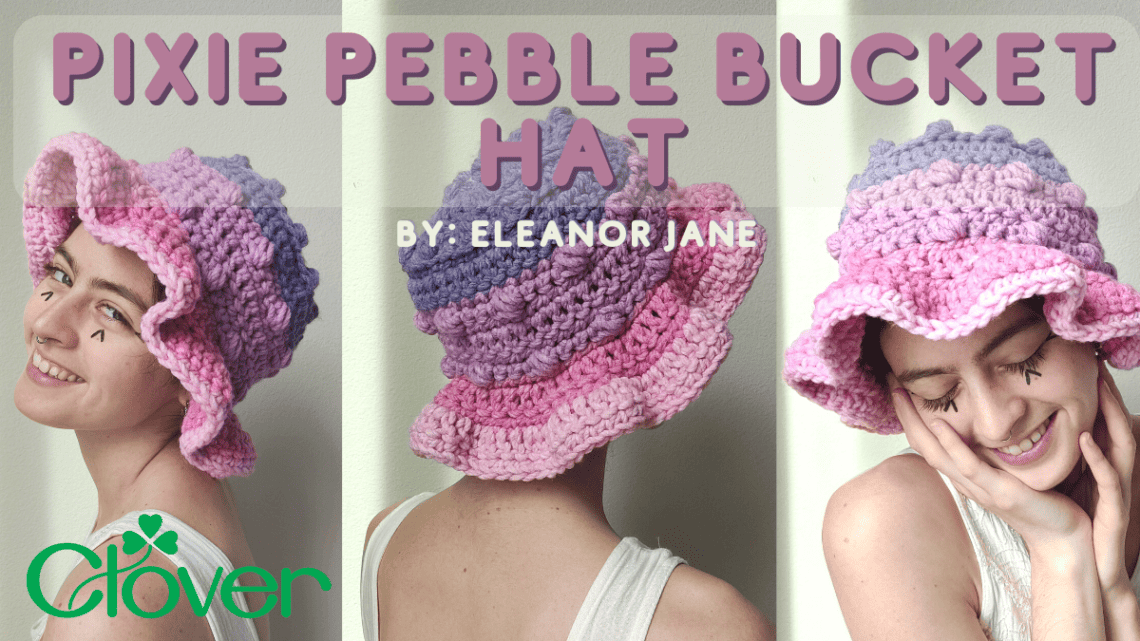
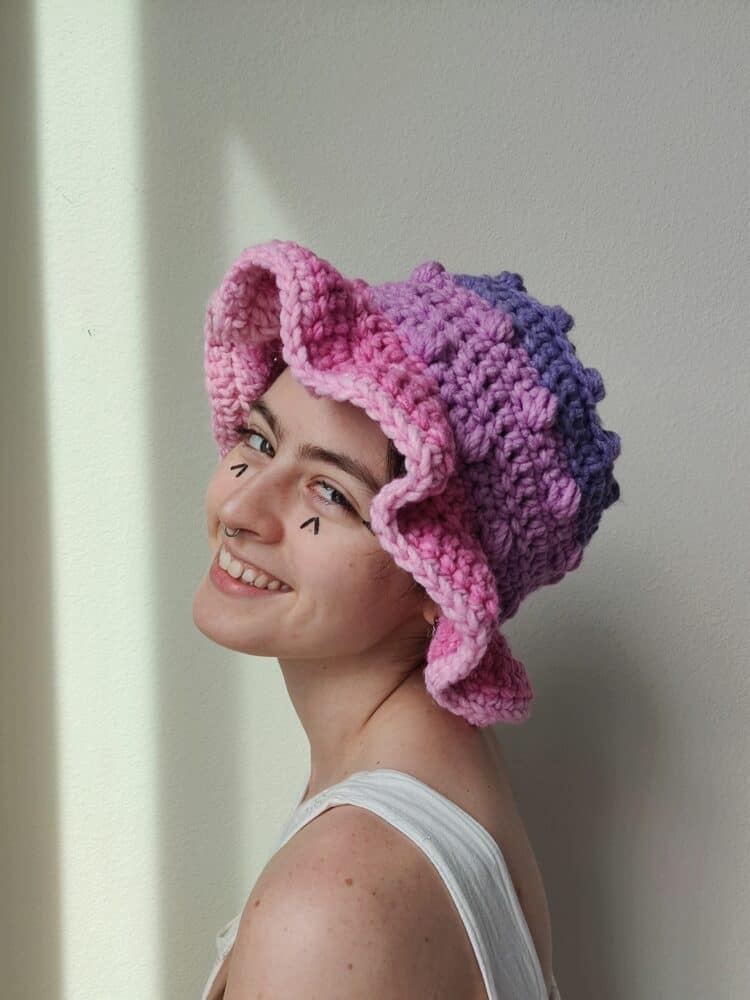
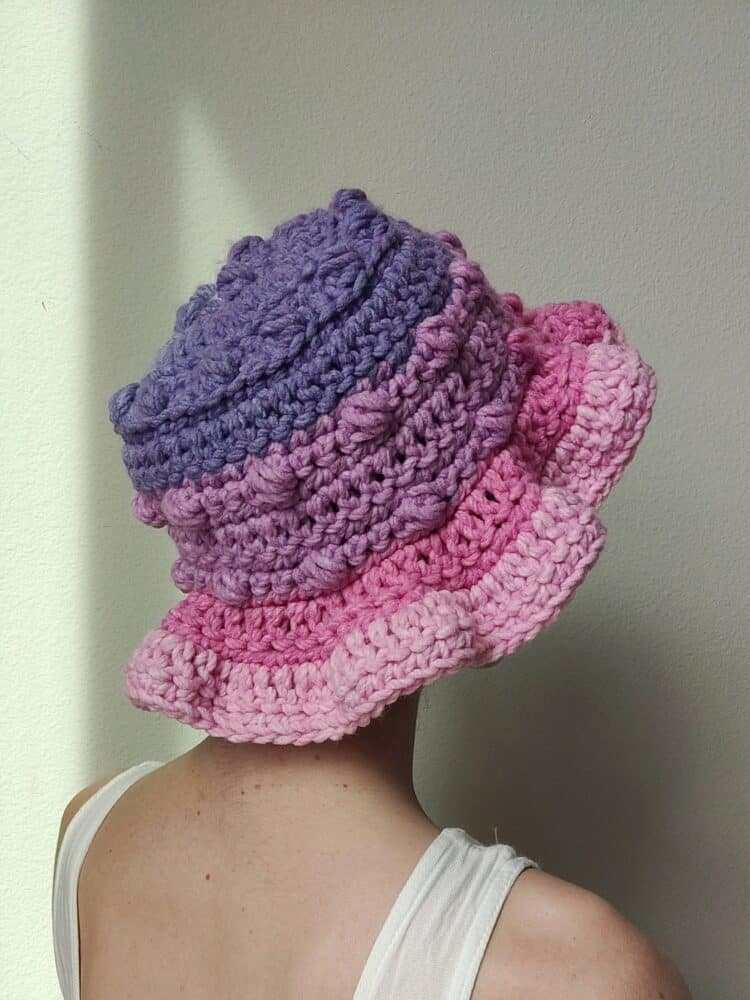
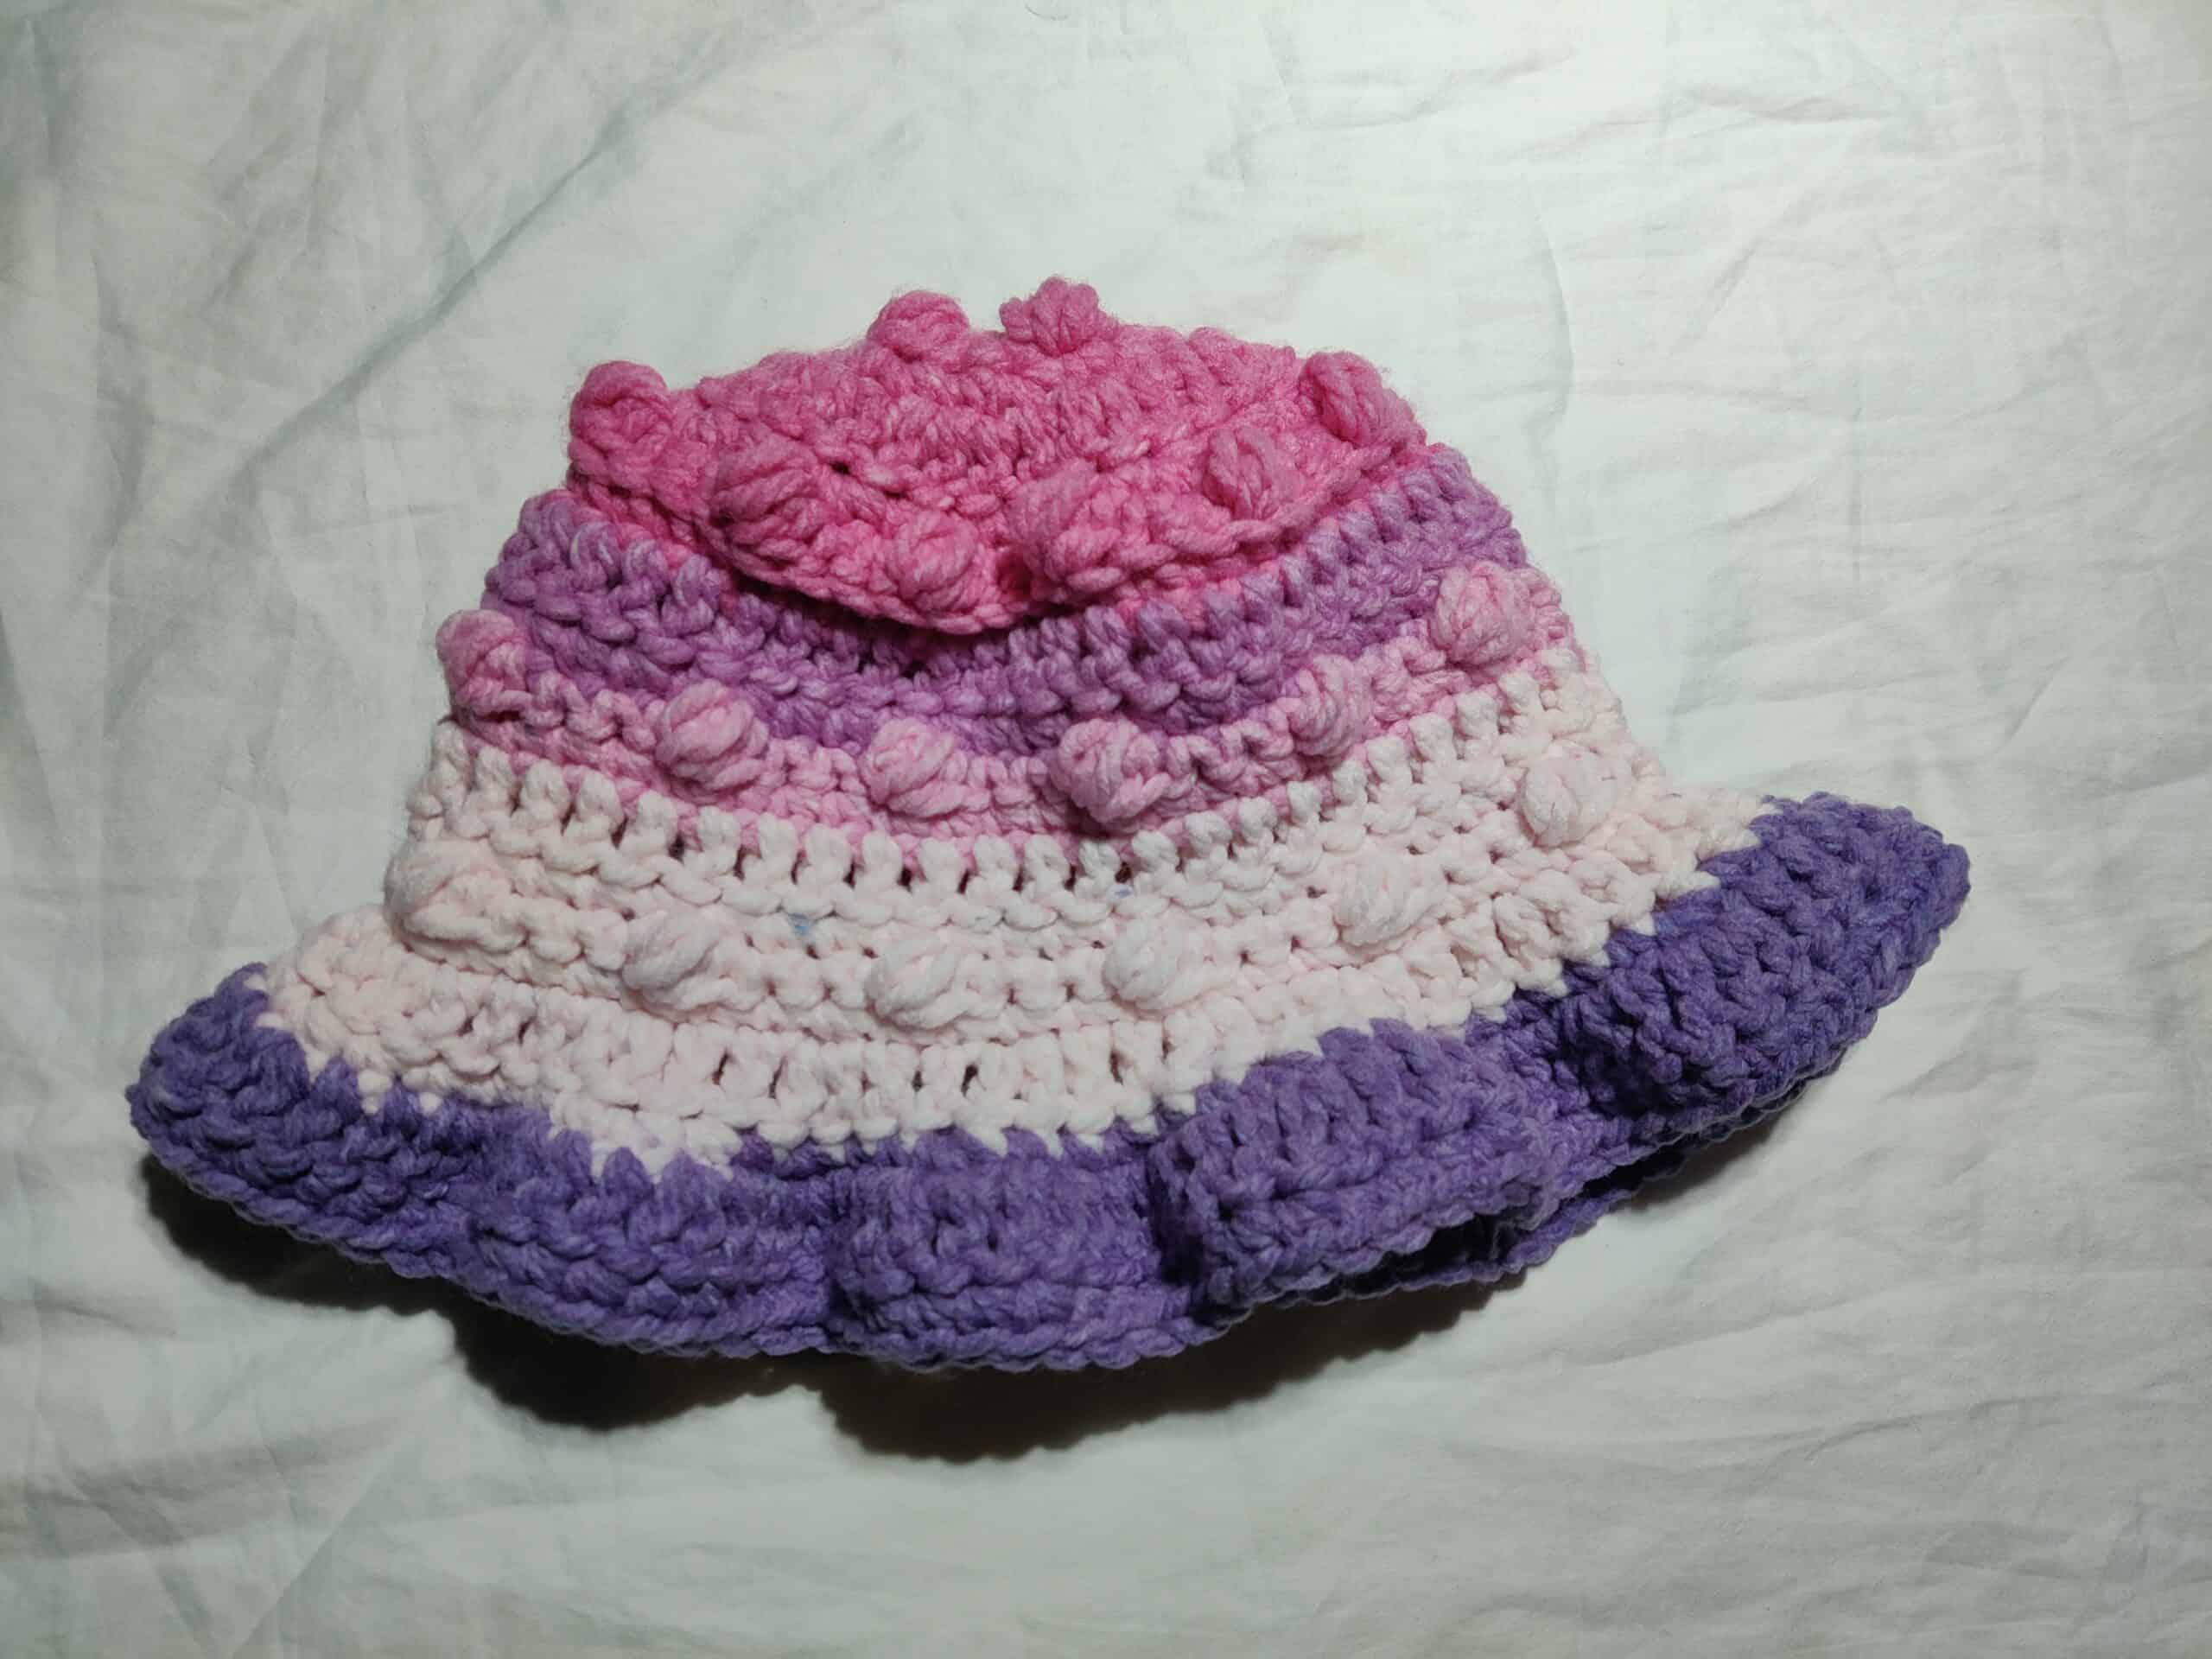
Pixie Pebble Bucket Hat- Crochet Pattern
Hi loves! It’s me, The Crochet Faerie, back with ANOTHER Pixie Pebble Design. I just can’t help myself, but can you blame me? This stitch pattern is cute, fun, easy, and works up so quickly! What’s not to love? I will eventually advance my focus to more intricate patterns and textures, but I think it’s essential to also enjoy where we are at the given moment.
The Pixie Pebble series was something I started as a chronically ill person in the midst of extreme brain fog. I struggled to come up with basic beginner-level patterns, but I did what I could with the cognitive abilities I had at the time, rather than giving up and not creating at all. Though my potential is exponentially greater, I am proud of what I accomplished during that time.
Wherever you are in life, even if you know you can reach greater heights, I hope you acknowledge the progress you’ve made so far. Keep growing, keep improving, and keep dreaming, but don’t discredit the effort you’ve put in and the progress you’ve made so far. It’s a vital part of the journey.
If you’ve been following this series and have enjoyed some of the other patterns, thank you for sticking around! <3 Below are the instructions for you to fashion your own Pixie Pebble Bucket Hat. If you would like a version of the pattern with photo guidelines or would like to check out my other patterns, visit my shop:
I truly hope you have as much fun creating this as I did designing it! Seeing you magical beings express yourselves through my designs fills my heart in the most lovely sort of way. Thank you for accepting and spreading the love I put into my work.<3
Materials:
Yarn: Weight 6 (I use 1 skein of Caron Jumbo Cakes)
Hook: Amour Crochet Hook L ( 8mm) – Art No. 1055/L
Gauge: 8DC x 2 rows = 4” wide x 2” tall
Materials: Yarn, hook, scissors, darning needle, measuring tape
Abbreviations:
Chain – Ch
Stitch – St
Slip Stitch – Sl St
Single Crochet – SC
Double Crochet – DC
Back Loop Only SC – BloSC
Back Loop Only DC – BloDC
Pebble Stitch – PBS
Right Side – RS
Yarn over – YO
PBS: in specified ST – *YO, insert hook, YO, pull through** repeat from * to ** twice, YO, pull through all 7 loops
Instructions:
TURN WORK after each row
Ch 1 & Ch 2 at end of rows do NOT count as stitches
When working the body of your project, the RS should always be a SC row
IMPORTANT:
When working a circular row, end that row by slip stitching into the 1st stitch of that row. Do NOT slip stitch into the Ch 1 or Ch 2.
Process: This hat is started by creating a flat circular shape for the top of your bucket hat, then moving onto the sides, and lastly the brim. All of the project is worked in circular rows.
Top of Hat:
Start by making a magic circle
Row 1: 8 SC in magic circle, Sl St into 1st SC from beginning of row, Ch 1 [8 Sts total]
Row 2: [3 SC in next St, PBS in next St]x4 (you should have 4 PBS total), Sl St into 1st SC from beginning of row, Ch 1 [16 Sts total]
Row 3: [2 SC in next St, 1 SC in next St]x8, Sl St into 1st SC from beginning of row, Ch 2 [24 Sts total]
Row 4: [2 DC in next St, DC in the next 2 Sts]x8, Sl St into 1st DC from beginning of row, Ch 1 [32 Sts total]
Row 5: [2 SC in next St, SC in the next 2 Sts]x10, SC in final two Sts, Sl St into 1st SC from beginning of row, Ch 1 [42 Sts total]
Row 6: [2 SC in next St, SC in next St, PBS in next St, SC in next 3 Sts, PBS in next St]x6, (you should have 12 PBS total), Sl St into 1st SC from beginning of row, Ch 1 [48]
The diameter of your circle (straight across, from one side to the other) should now equal approximately 6.5″ do NOT cut yarn and proceed to Hat Body <3
Hat Body:
Row 1: BloSC in each St across, Sl St into 1st SC from beginning of row, Ch 2 [48 Sts total]
Row 2: DC in each St across, Sl St into 1st DC from beginning of row, Ch 1 [48 Sts total]
Row 3: SC in each St across, Sl St into 1st SC from beginning of row, Ch 1 [48 Sts total]
Row 4: *SC in next 3 Sts, PBS in next St* repeat from * to ** across, Sl St into 1st SC from beginning of row, Ch 1 [48 Sts total]
Row 5: Repeat Row 3
Repeat Rows 2 – 5 once more. At this point, the hat body (measuring from the first row of BloSC, not including the top of your hat, down to the bottom border) should equal 3.5″ – 4″ (feel free to add more or less rows for a deeper or more shallow body). Do NOT cut yarn, continue to Hat Brim
Hat Brim:
Row 1: *2 BloDC in next St, 1 BloDC in next two Sts* repeat from * to ** across, Sl St into 1st DC from beginning of row, Ch 1 [64 Sts total]
Row 2: *2 SC in next St, SC in next two Sts* repeat from * to ** across, 2 SC in final St, Sl St into 1st SC from beginning of row, Ch 2 [86 Sts total]
Row 3: *2 DC in next St, DC in next two Sts* repeat from * to ** across, SC in final 2 Sts, Sl St into 1st DC from beginning of row, Ch 1 [114 Sts total]
Row 4: Sc in each St across, Sl St into 1st SC from beginning of row [114 Sts total]
Cut and fasten off your yarn, weave in any ends, and tadah! You have a perfectly adorable Pixie Pebble Bucket Hat <3
I really hope this pattern was easy to follow along, but if you need instructional photographs, you can find a more detailed, step-by-step, beginner-friendly version of this pattern (and all of my other designs) in my shop TheCrochetFaerie.com
Until our next artistic adventure 🙂
Love,
Eleanor Jane <3
Blog | Instagram | YouTube | Facebook | Pinterest | Etsy | Ravelry