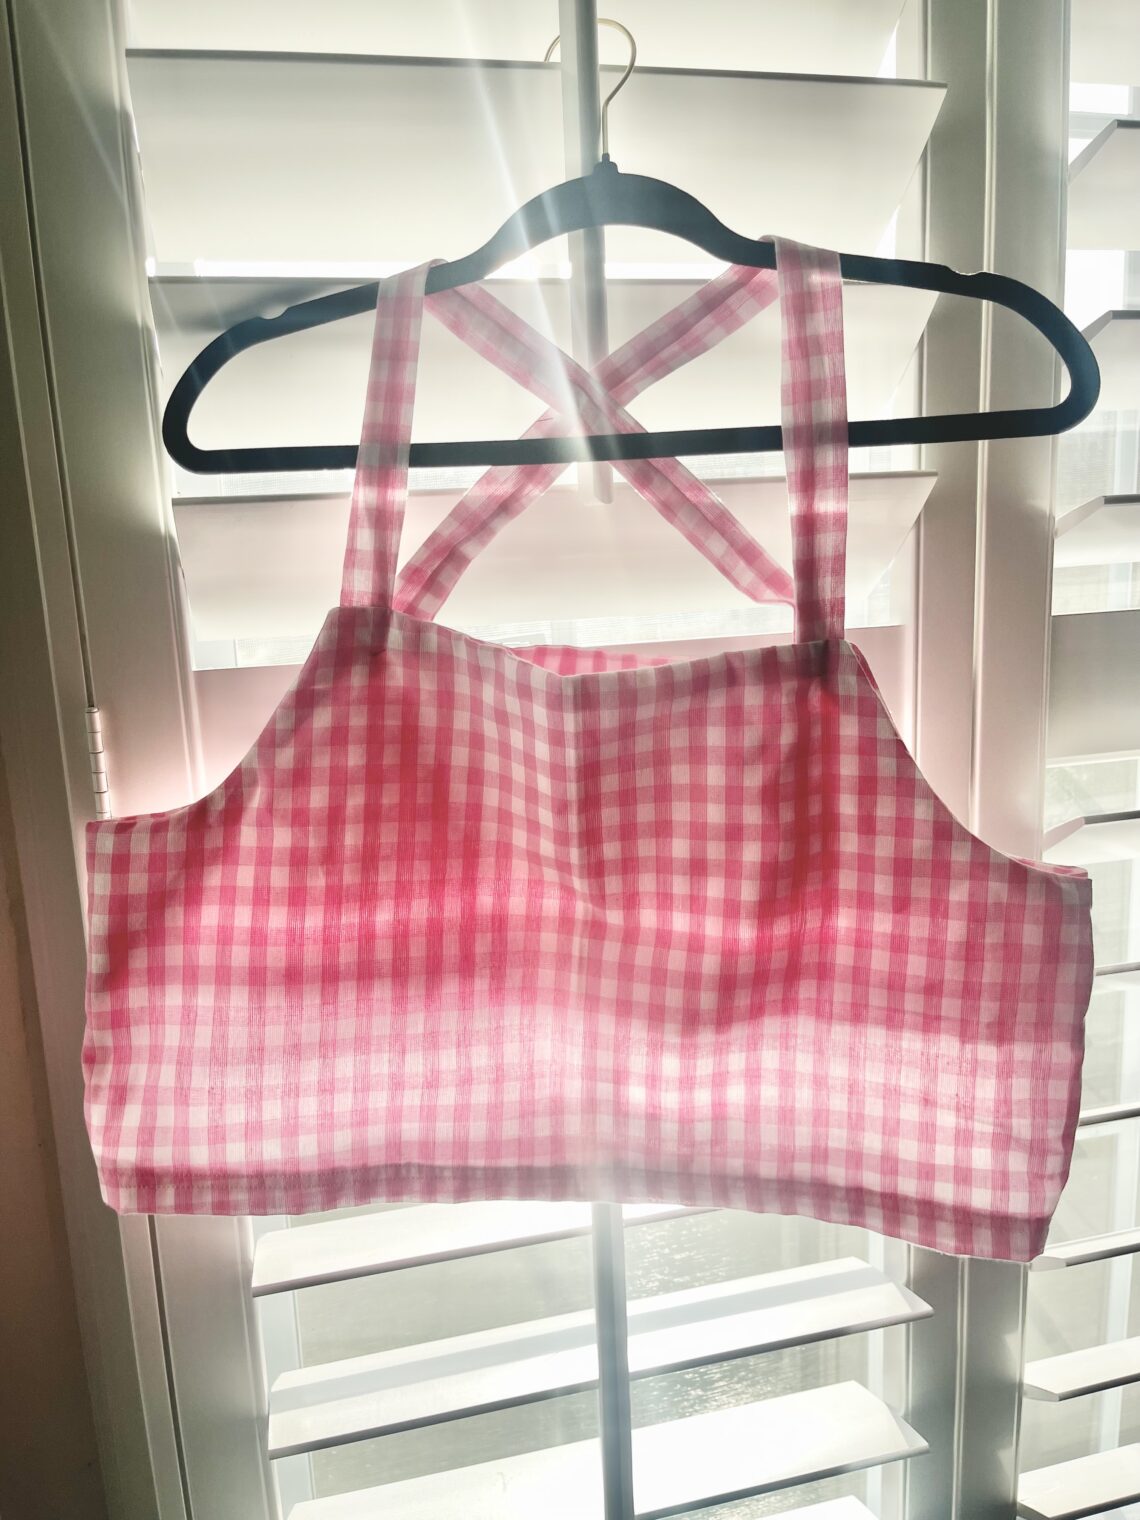
DIY Pink Gingham Top *perfect for spring!*
Hello, my name is Duana from @duana_m_chandler & @duanastudio on IG! It’s almost springtime and I CANNOT wait. I’m ready to start sewing up my spring wardrobe, so I’m starting with an easy cami-style top with a crossed back. I love these because they are easy to make and you don’t need a pattern; all you need is some of your measurements. If it’s still too cold where you are, you can also wear them as spring transitions with a t-shirt or long sleeve shirt underneath. With all that said, let’s get right to it!
MATERIALS:
- 1 yard of fabric
- Marking Pen
- Wonder Clips
- Rotary Cutter
- Loop Turner
- thread
- ruler

INSTRUCTIONS:
1. The first thing you’re going to need to do is get measurements.
a. (Bust Circumference divided by 4) + 1 inch seam allowance and cut 2 of these on the fold.
b. Length from Above bust to the overall length. I generally use 13-15 inches. You can make it longer and into a dress or shorter to make it a crop. Then,
add 1 inch for seam allowance.
c. Strap length + 1 inch seam allowance. Be generous with the strap length because it’s better to have more than less. Cut two of these.
d. Strap width + 1 inch seam allowance. This will tell you how thick your straps would be.
2. Cut the fabric based on these measurements and instructions. Mark 4.5 inches from the edge where the armhole is. Do this on both sides. You can use a french curve ruler or something that has a curve and shape the armhole. Cut it out so that you now have the armhole.
3. Create a facing piece using the top half of the front and back pieces. Usually, I have it end around 2-3 inches under the armhole.
4. Create the straps by first cutting the fabric and then folding the fabric right sides together and using wonder clips to hold them together. Stitch those using a ½ inch seam allowance.
5. Use the loop turner to turn it right sides out. If you have a hard time using the loop turner, you can also use a safety pin.
6. Baste the straps right sides facing to the front. Attach one of the facings and stitch around the armhole and top.
7. Turn right sides out and press with an iron.
8. This part can get a little complicated, but I wanted to do a cross back so I crossed the straps and did the same thing to the back pieces. This is a good place to adjust your straps to the right length. I ended up cutting my straps a few inches. Stitch across the armhole and top of the back and turn the right sides out. Press with an iron.
9. When both front and back are done, stitch the front and back together at the sides right sides facing.
10. Fold in the bottom twice to create the hem. I did two stitches at the bottom for the hem. Make sure you give your cami a good press and you’re done!
Hope you enjoyed this quick and easy tutorial on how to make this cami. As the weather warms up, I hope you’re able to try some new easy DIY’s like this one to start up your Spring wardrobe. Happy Stitching!
If you want to keep up with me, Duana, on social media for other fun projects, follow me on social media: Personal Instagram | Crafting Instagram
If you want to keep up with all things Clover, follow us on: Facebook | Twitter | Instagram | Pinterest | YouTube | Ravelry