Punch Needle Bunny- DIY Craft
Hey everyone! It’s Amy from curiouspapaya. Maybe it’s this exceptionally cold weather – but it feels like this year’s winter has been EXTRA long! I’m itching to feel the sunshine again. (Okay, I know I shouldn’t be complaining because I live in California – but even here, we’ve been needing to gear up in uggs and heavy parkas for the 30 degree mornings and freeze warnings).
Anywho, what better time to try out a new hobby while we’re bundled up at home? Ever since I saw Country Peony’s punch needling tutorial LIVE on Instagram the other month, I began itching to try out this new craft since I had an abundance of what you need the most for this project – yarn!
——————–——————–——————–——————–——————–——————–——-
MATERIALS:
*Comes with a darning needle
- Monk’s Cloth
- Mini Patchworks Scissors
- Pencil for sketching your design
- Fabric glue and felt (for finishing off your piece)
——————–——————–——————–——————–——————–——————–——-
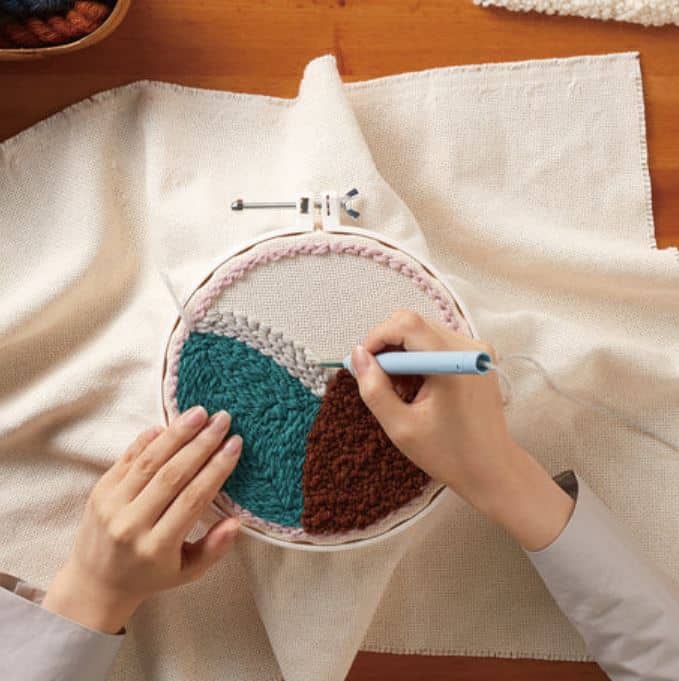
Getting Started
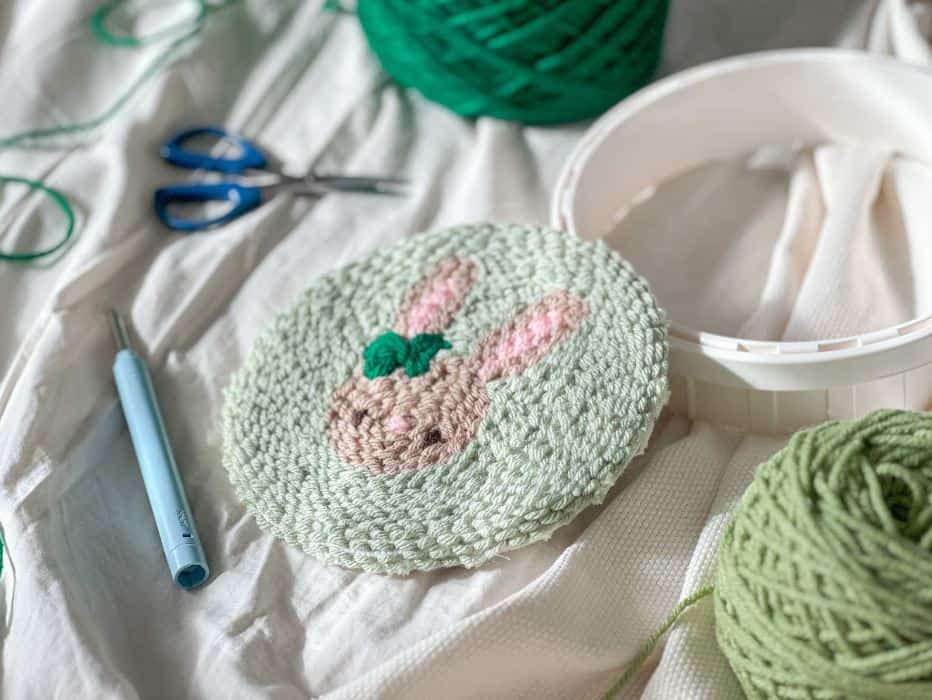
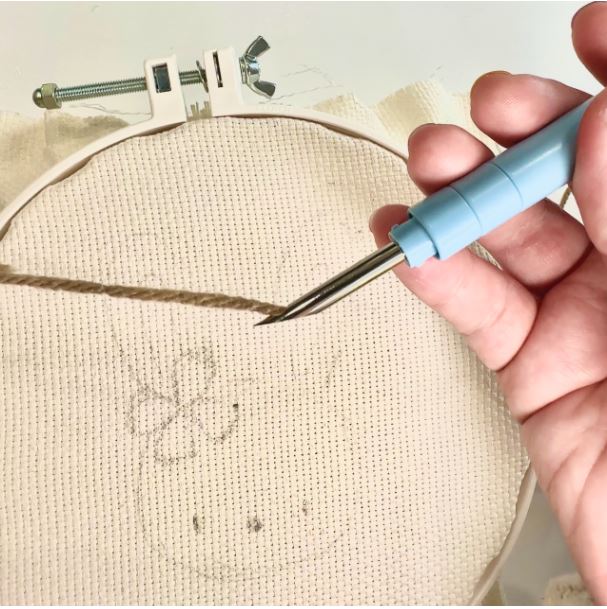
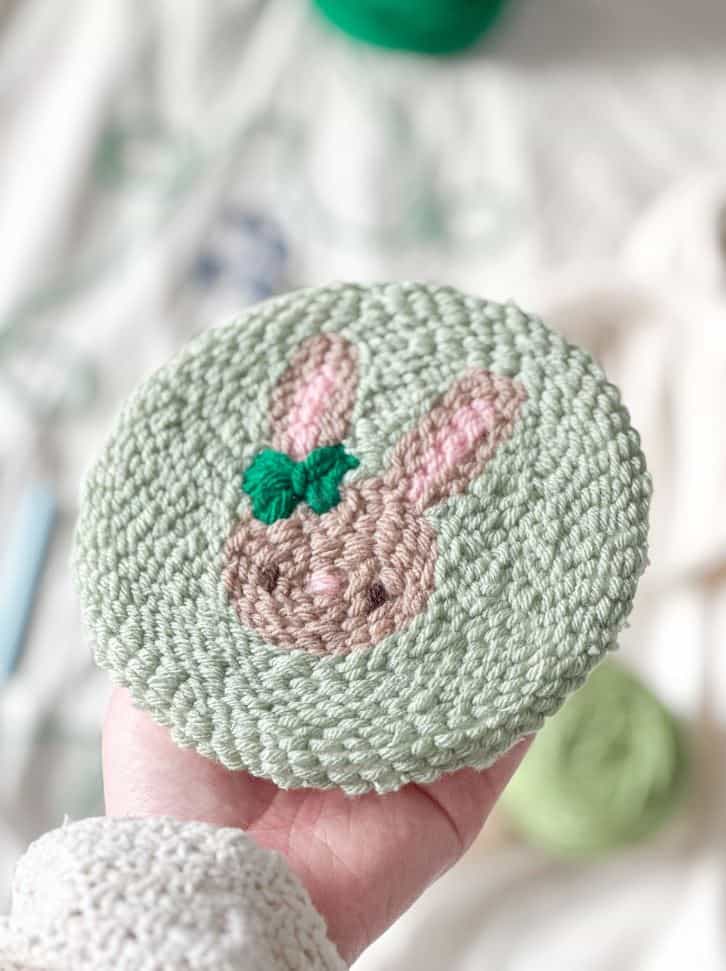
After I cut off a square of monk’s cloth and secured it in, it was time to decide on a design! With St. Patrick’s day and Spring just around the corner, I decided to sketch out a bunny wearing a clover.
Threading the yarn into the punch needle took me a bit to get the hang of – a helpful tutorial is linked below!
https://www.youtube.com/watch?v=DnRlq0GGVCU&ab_channel=Clover
But, I did discover a trick – After feeding the darning needle that’s attached to your yarn through the pen, give it a little shake until it pops right out of the other side.
First Impressions
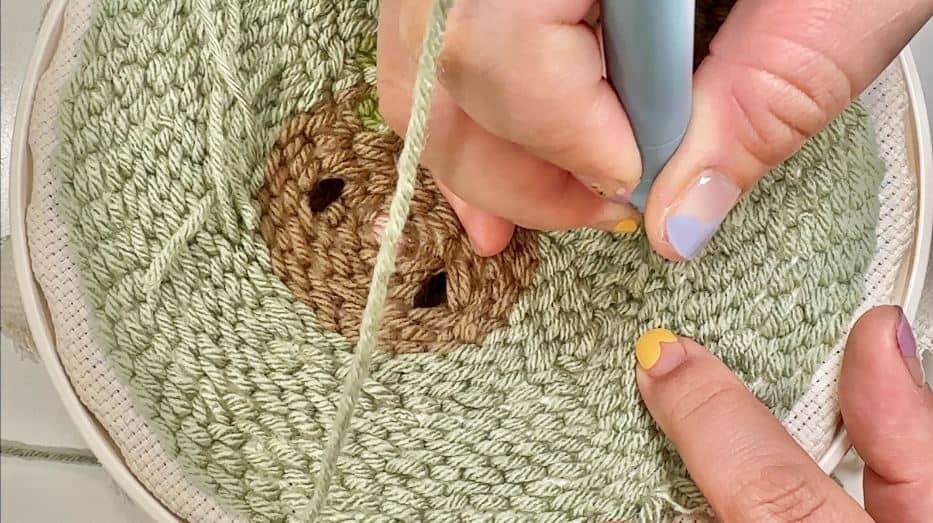
I was pleasantly surprised at how easy it was to jump right in! Punching had a similar feel to drawing or painting. There were a couple of pokes that I didn’t go deep enough in and so they kept coming out – but right away, this showed me how forgiving this craft was. All I had to do was unravel the yarn and repunch away.
As a crocheter, this was SO much less anxiety about messing up! (If you’ve ever spotted a mistake a few rows below, I’m sure you know the pain of frogging).
Punch Needle Hoop Features
I super appreciated the “raised feet” attachments that came with this hoop! While you can also use an embroidery hoop, it becomes a bit of a pain to have to always be holding it at a specific angle (so as to not stab the table – or yourself)!
This was really nice for me personally since I was starting to develop some wrist pain from overusing it from other things. This elevation also allowed me to work flat against a table and rotate the piece with ease so that my yarn didn’t get tangled up as I was working.
Future Plans
It was super quick and easy to make this little bunny design. Shortly after I finished it off with some fabric glue, I Facetimed my mom to show it off! She immediately claimed it and said she needed a new potholder ?.
While I’m only sharing my thoughts and experiences on trying this out for the first time, I’m definitely excited to try out different designs and techniques on my second one!
Overall, this was a SUPER easy craft and I just had the perfect idea to host a punching craft night for a girls’ night!
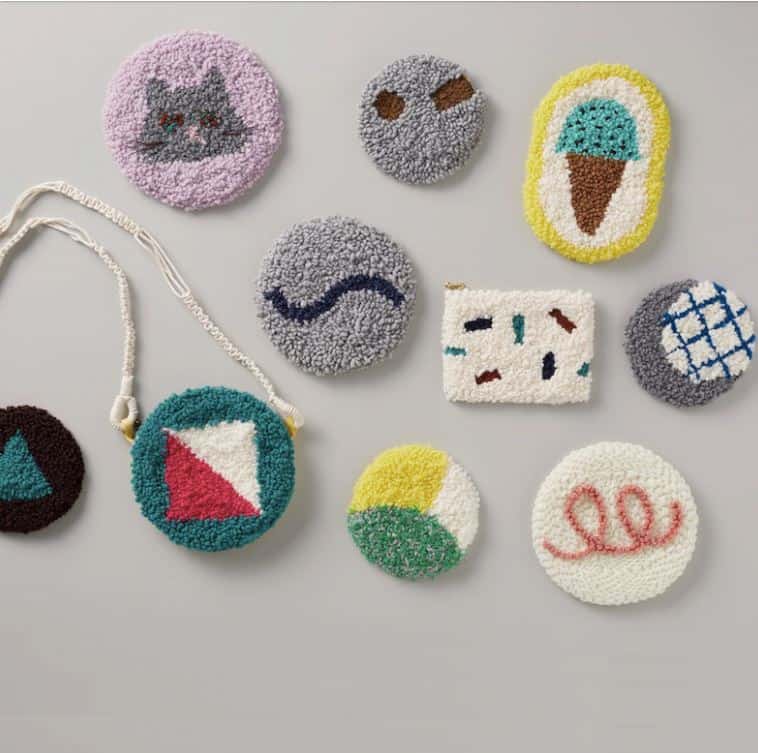
Check out the photos below for inspo on what you can create with punch needling:
If you decide to try out this new hobby too, be sure to tag #cloversusa and #curiouspapaya on Instagram with your creations. We’d love to see your work 🙂
Stay connected with Clover on Facebook | Twitter | Instagram | Pinterest | YouTube | Ravelry