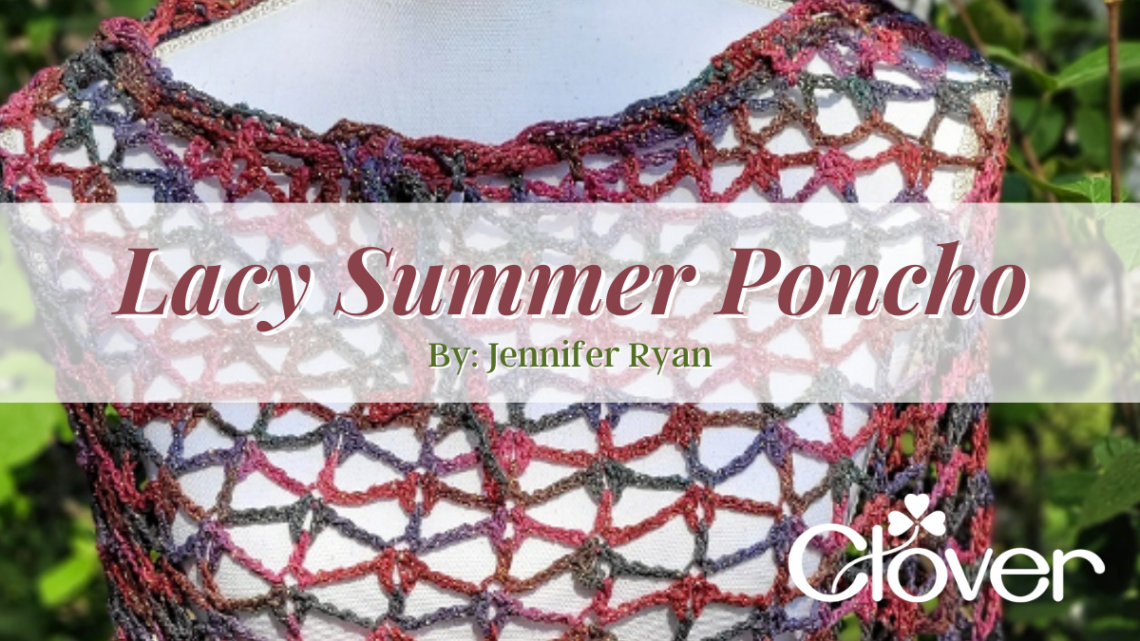
Lacy Summer Poncho- Crochet Pattern
Hello! It’s Jennifer Ryan, the designer and blogger behind Celtic Knot Crochet. I am excited to be sharing the Lacy Summer Poncho project here on the Clover blog!
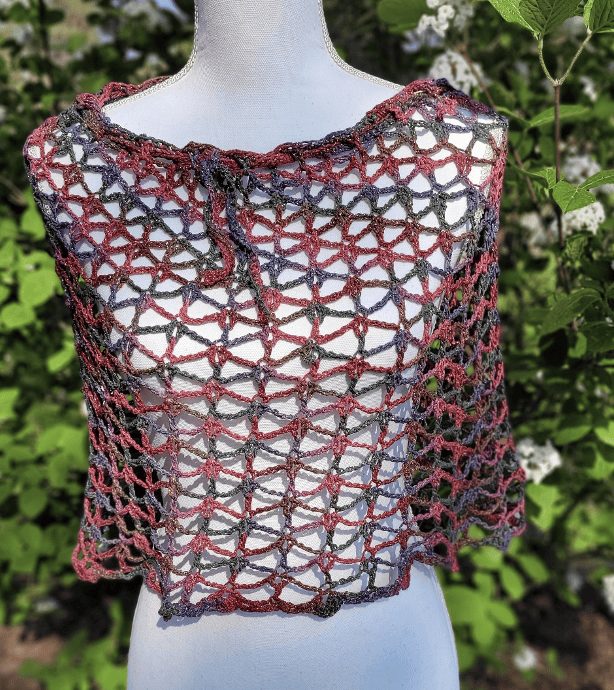
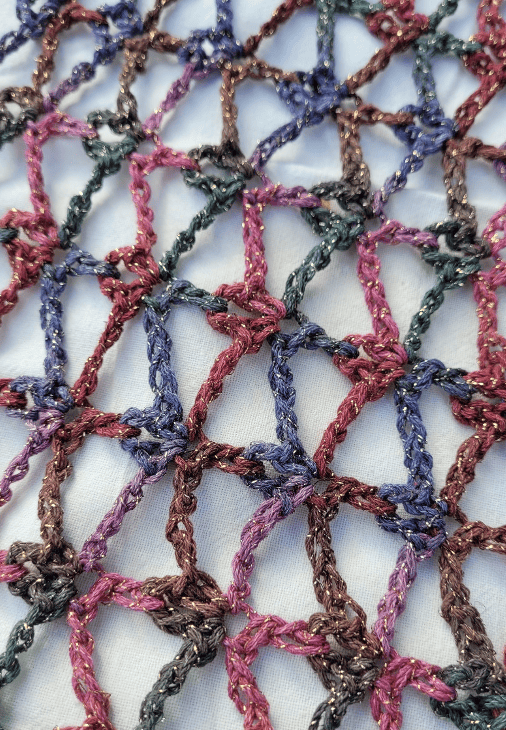
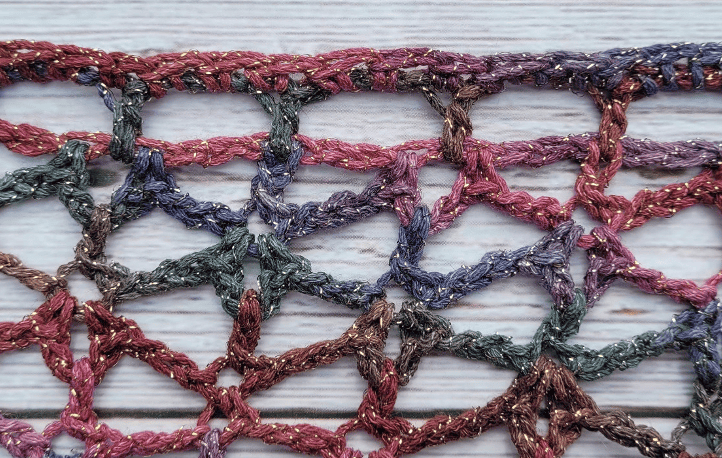
This poncho uses a very simple open-work stitch pattern that works up quickly. All you need to know is how to crochet the chain, single crochet and double crochet. I love to wear summer ponchos over a basic tank top – they are flattering and cool. I used a pretty variegated cotton yarn that has a metallic sparkly thread in it so it shimmers in the sunshine.
Let’s get started!
Skill Level: Easy
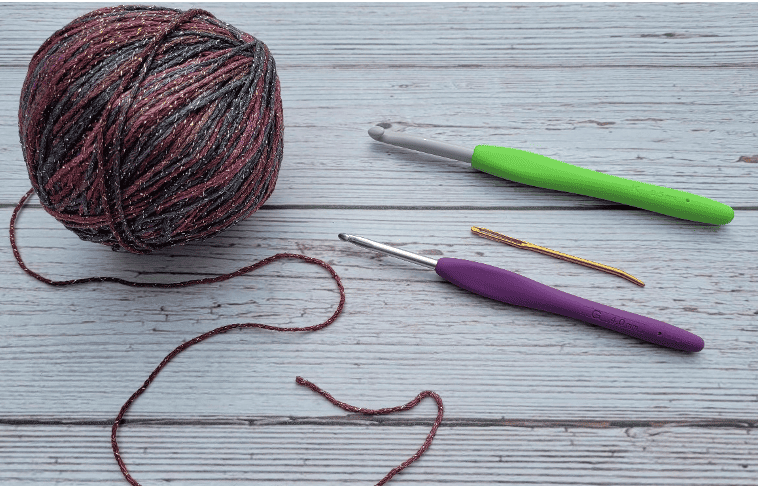
Supplies:
Size 3 (Light/DK weight) cotton yarn – about 300yds/300m
K/6.5 mm Clover crochet hook- Art No. 1053/k
G/4 mm Clover crochet hook- Art No. 1045/G
Jumbo Tapestry Needle- Art No. 219
Blocking supplies (Water, 2 towels, Rust-proof pins, Blocking board)
Approximate Finished Measurements: Small = 14” wide x 13 ½” long
Medium = 16” wide x 16” long
Large = 18” wide x 18 ½” long
Gauge: Gauge is not necessary for this project
Abbreviations:
YO (yarn over)
Hk (hook)
Lp (loop)
Ch (chain)
St (stitch)
Sl st (slip stitch)
Sc (single crochet)
Dc (double crochet)
Special Stitches:
Sc-picot = (sc, ch 3, sc) all in same st
Back bar of the Chain = When looking at the right side of a chain, you see many “V’s” and the chain looks like a braid. Turn the chain over and you see a series of bumps – it is in these bumps that you will work across the chain to produce a cord with even edges along both sides
Click here to watch a short video tutorial on this technique
Notes:
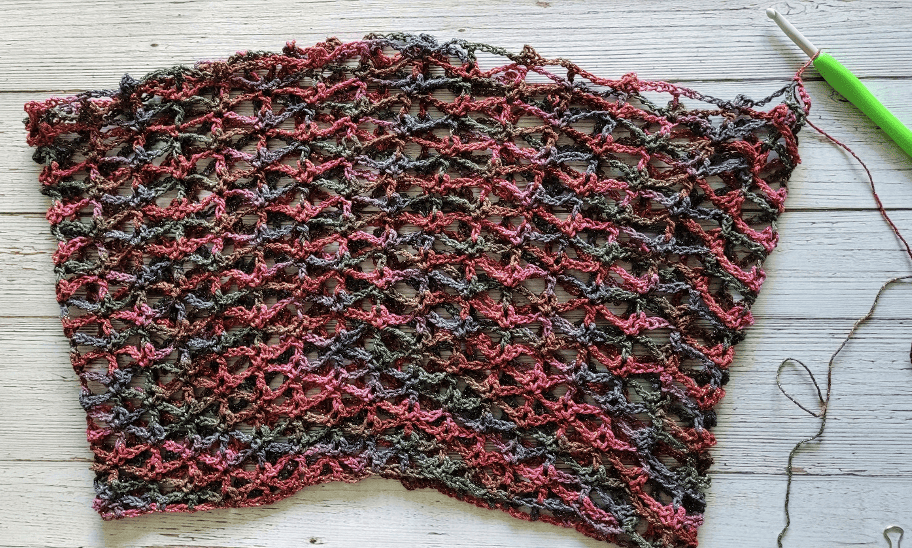
This poncho is worked from the top down
A hook that is larger than usual is used so that the poncho has better drape
Directions are given for size Small – Sizes Medium and Large are in parentheses
**You can purchase an instant downloadable PDF of the project here in my Etsy shop**
[Esty shop link: https://www.etsy.com/shop/CelticKnotCrochet]
Instructions:
Special stitches are written in bold and italicized text and defined above
With 6.5mm hook ch 109 (123, 137)
Row 1: Sc in 9th ch from hk, [ch 3, sc in next ch, ch 3, sk each of next 2 chs, dc in next ch, ch 3, sk each of next 2 chs, sc in next ch] across up to last 5 chs; ch 3, sc in next ch, ch 3; leave remaining 2 chs unworked (Will join them to beginning later). Do not turn.
Now working in Rounds:
Round 2: Making sure not to twist Row 1, sl st in 4th ch from 1st sc of Row 1; Now working in rounds, *(ch 1, sc-picot) all in joining sl st; [ch 3, dc in next ch-3 sp, ch 3, sc-picot in next dc] around up to ch-3 sp of last sc-picot; ch 3, dc in ch-3 sp of last sc-picot, ch 3, sl st in ch-3 sp of 1st sc-picot of round. *
Round 3: Ch 6 (counts as 1st dc and 1st ch-3 sp); (sc-picot in next dc, ch 3, dc in ch-3 sp of next sc-picot, ch 3) around up to last dc; sc-picot in last dc, ch 3, join with sl st to 3rd ch of starting ch-6.
Round 4: Repeat * to * of Round 2
Round 5: Repeat Round 3
Round 6: Repeat * to * of Round 2
Round 7: Repeat Round 3
Round 8: (Ch 1, sc-picot) all in joining sl st; [ch 4, dc in next ch-3 sp, ch 4, sc-picot in next dc] around up to ch-3 sp of last sc-picot; ch 4, dc in ch-3 sp of last sc-picot, ch 4, sl st in ch-3 sp of 1st sc-picot of round.
Round 9: Ch 7 (counts as 1st dc and 1st ch-4 sp); (sc-picot in next dc, ch 4, dc in ch-3 sp of next sc-picot, ch 4) around up to last dc; sc-picot in last dc, ch 4, join with sl st to 3rd ch of starting ch-7.
For Small – Rounds 10-21: Repeat Rounds 8 and 9
For Medium – Rounds 10 – 25: Repeat Rounds 8 and 9
For Large – Rounds 10-29: Repeat Rounds 8 and 9
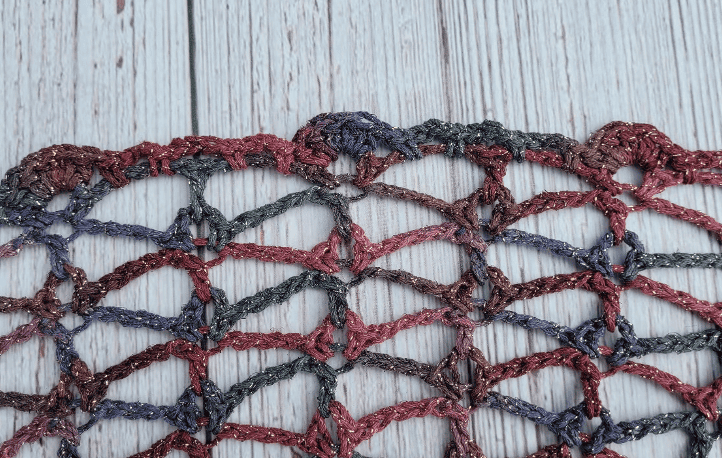
Bottom Edging (Last Round for all sizes): Sl st into next ch-4 sp, ch 1, sc in same sp,, ch 3, sc in same sp; [5 hdc in ch-3 sp of next sc-picot, (sc, ch 3, sc) in next ch-4 sp, ch 3, (sc, ch 3, sc) in next ch-4 sp] around up to last sc-picot; 5 hdc in ch-3 sp of last sc-picot, (sc, ch 3, sc) in last ch-4 sp, ch 3, sl st to 1st sc of round. Fasten off.
Top Edging:
Using yarn tail at end of Row 1 and yarn needle, join unworked 2 chs to 6th ch from very 1st sc of Row 1 (this completes the bottom edge of Row 1 so there is no break in the line of stitches and the following Round 1 can be easily worked)
Round 1: Now working along top edge of poncho (which is bottom edge of Row 1) and with 6.5 mm hook ; join with sl st in sp below any (sc, ch 3, sc); ch 6 (counts as 1st dc and 1st ch-3 sp), (dc in base of next dc, ch 3, dc in next sp below next (sc, ch 3, sc), ch 3) around ending with sl st to 3rd ch of starting ch-3.
Round 2: Ch 1, sc in same st as sl st; (2 sc in next ch-3 sp, sc in next dc) around ending with 2 sc in last ch-3 sp, sl st to 1st sc of round. Fasten off.
Tie:
With 4mm hook ch until measures 40”
Working in back bar of the ch, sc in 2nd ch from hk and in each ch across. Fasten off.
Finishing/Assembly:
Weave in all ends
Wet block shawl and let dry overnight – I highly recommend doing this step for this project because it will make the stitches and spaces look their best
(To wet block: Wet poncho with cold water so soaked through
Roll up poncho in a clean towel and press out excess water
Lay out poncho on dry towel and flat surface pulling out spaces and stitches so lay flat and evenly;
Place corkboard/foam core board/cardboard under towel and pin poncho taut at edges and along sides
Let dry completely and remove from board)
Weave tie in an over-under pattern through last round of the top edging
Tada! Your Lacy Summer Poncho is complete ? I hope you enjoyed crocheting this summer project. Please tag me @celticknotcrochet or use the #celticknotcrochet on Instagram – I would love to see your poncho!
Remember you can find a large-print instant downloadable PDF of this pattern by clicking here and purchasing it in my Etsy shop.
Find Celtic Knot Crochet on the internet: Blog Youtube Instagram Etsy Pinterest
Stay connected with Clover on Facebook | Twitter | Instagram | Pinterest | YouTube | Ravelry