Beacon Hill Pillow Cover Crochet Pattern
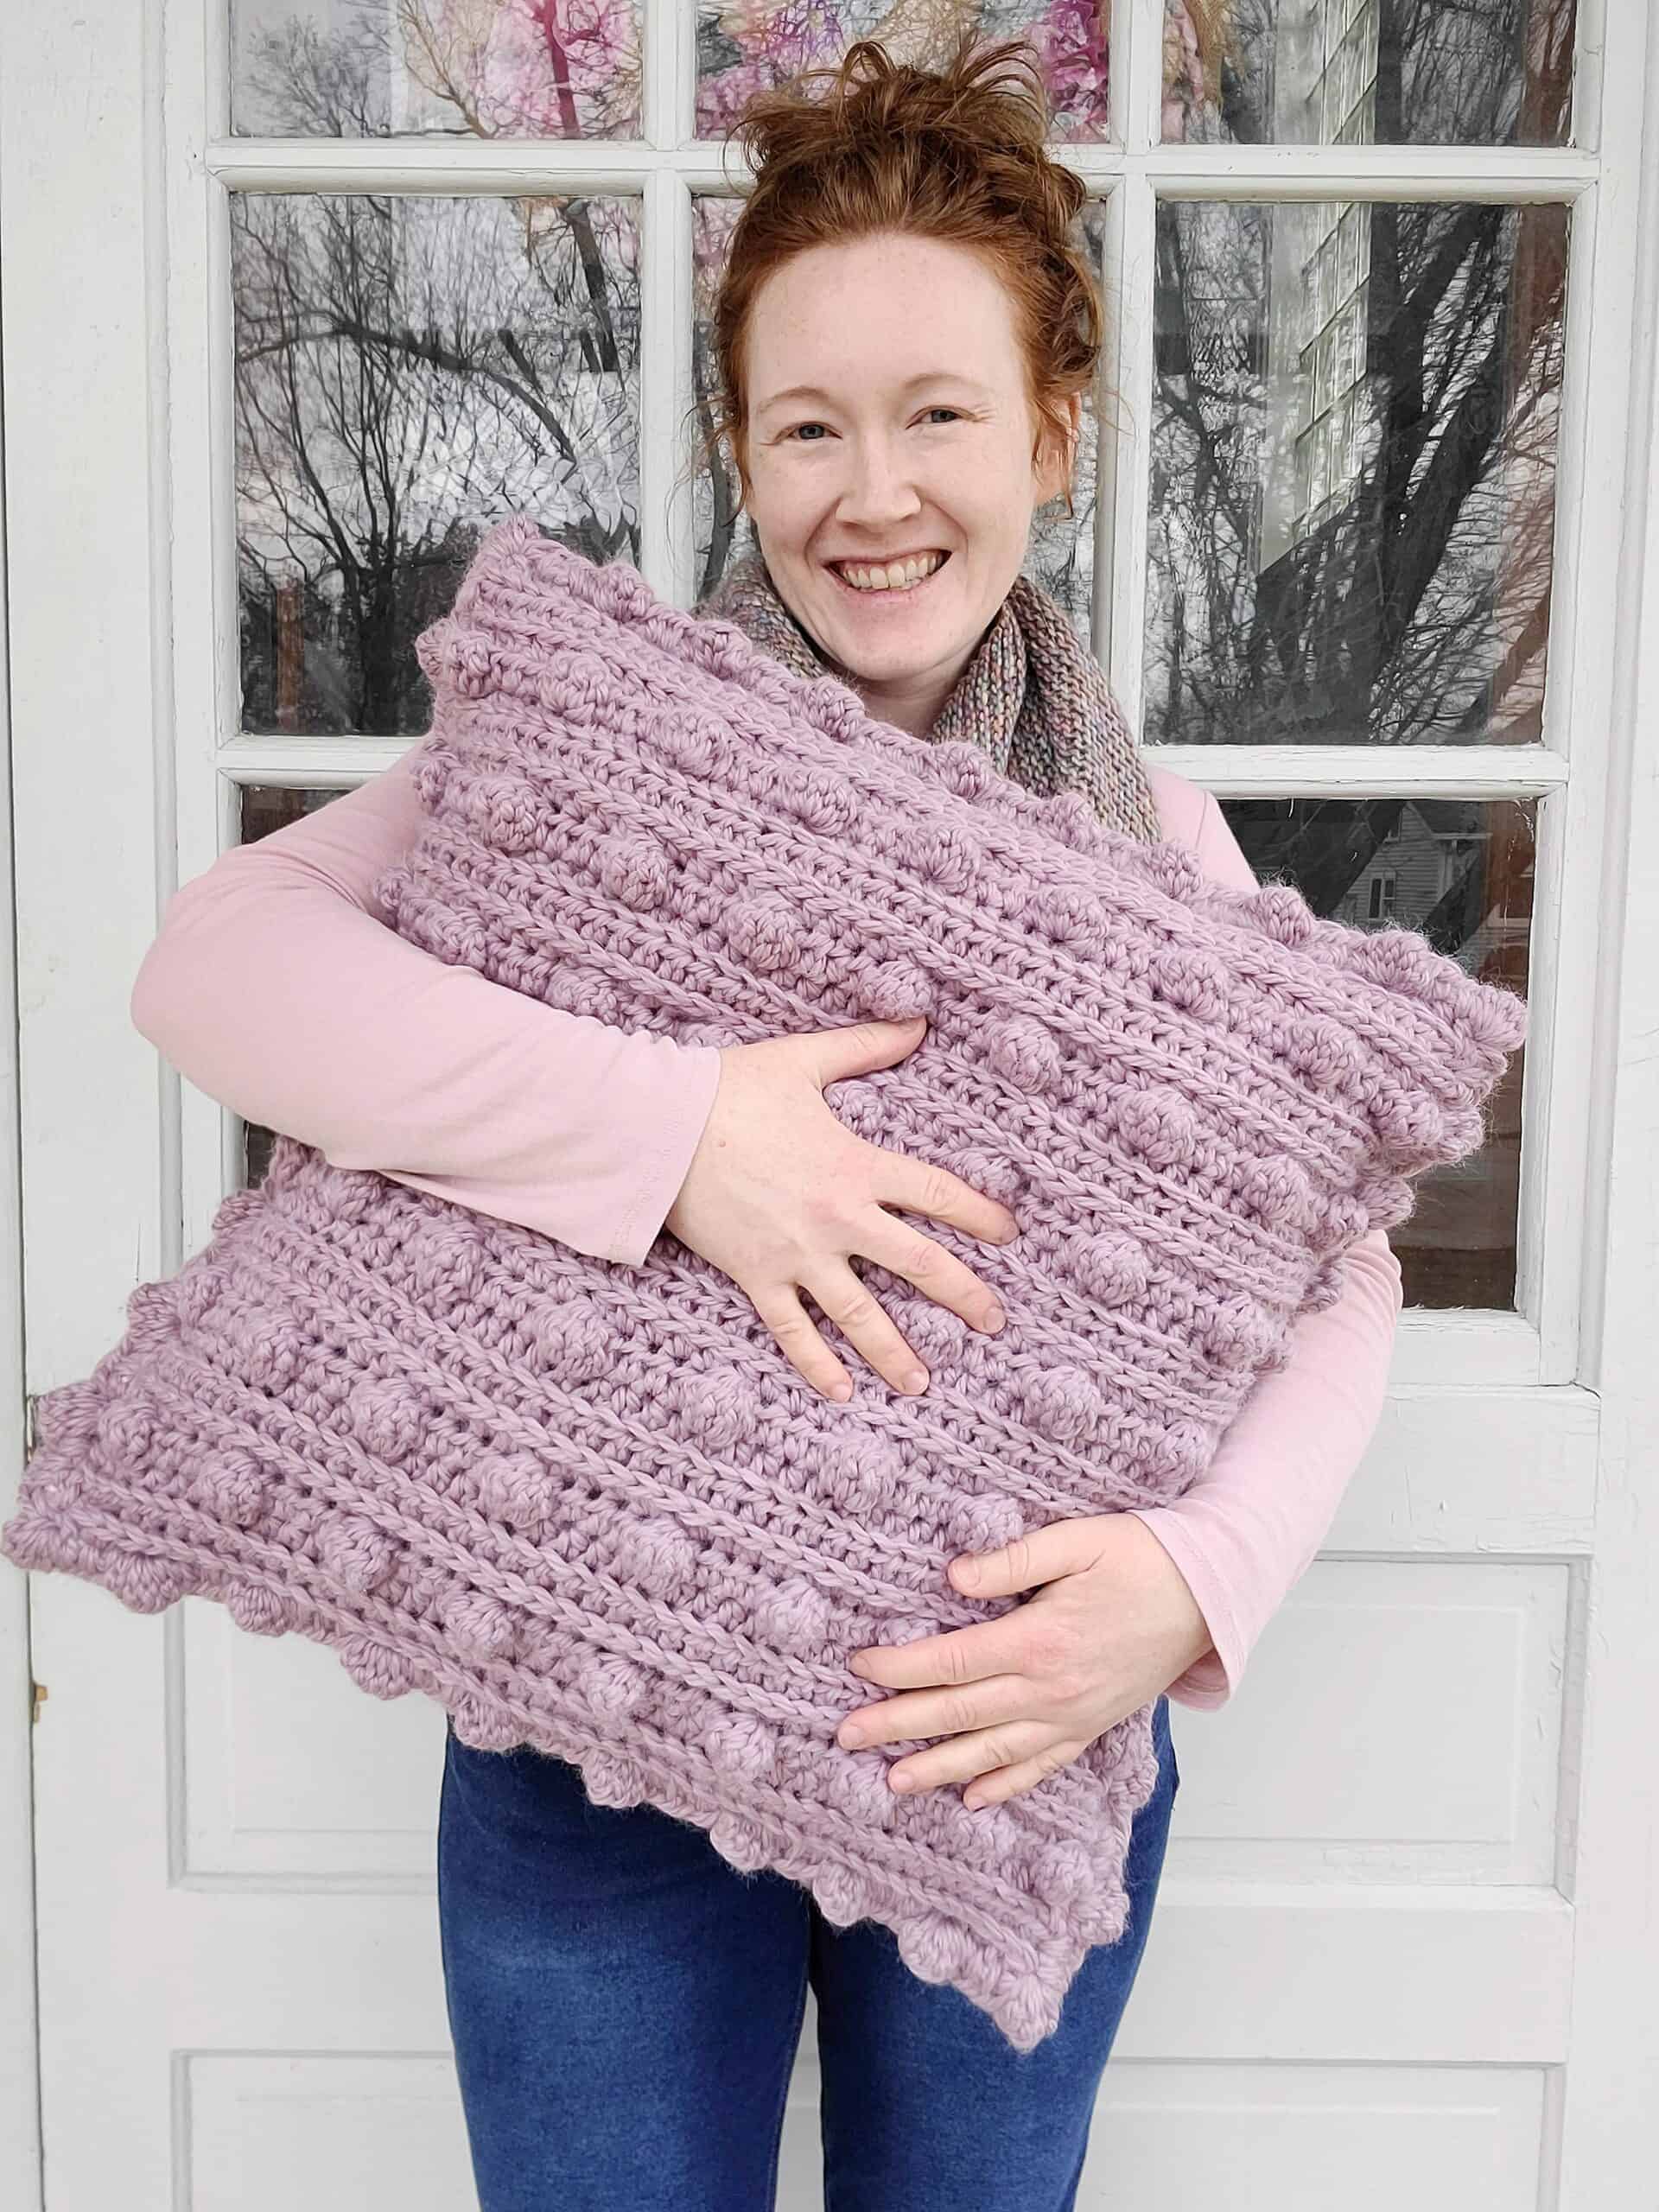
Who loves bobbles? I know I do so I regularly make things with squishy bobbles. They add amazing texture to projects and are so easy to do.
This fun pillow cover pattern comes in three sizes, 16, 18 and 20″, and works up quickly with a big hook and super bulky yarn.
This is the companion to a popular blanket pattern I released a few months ago. A lot of my testers mentioned wanting a matching pillow cover so I whipped one up.
I have somehow never made a crochet pillow cover in all my years of crocheting but this won’t be the last time. It looks so cute in the living room! I made one in two colors that matches my blanket but you can make yours in solid, stripes, patterned yarn, etc.
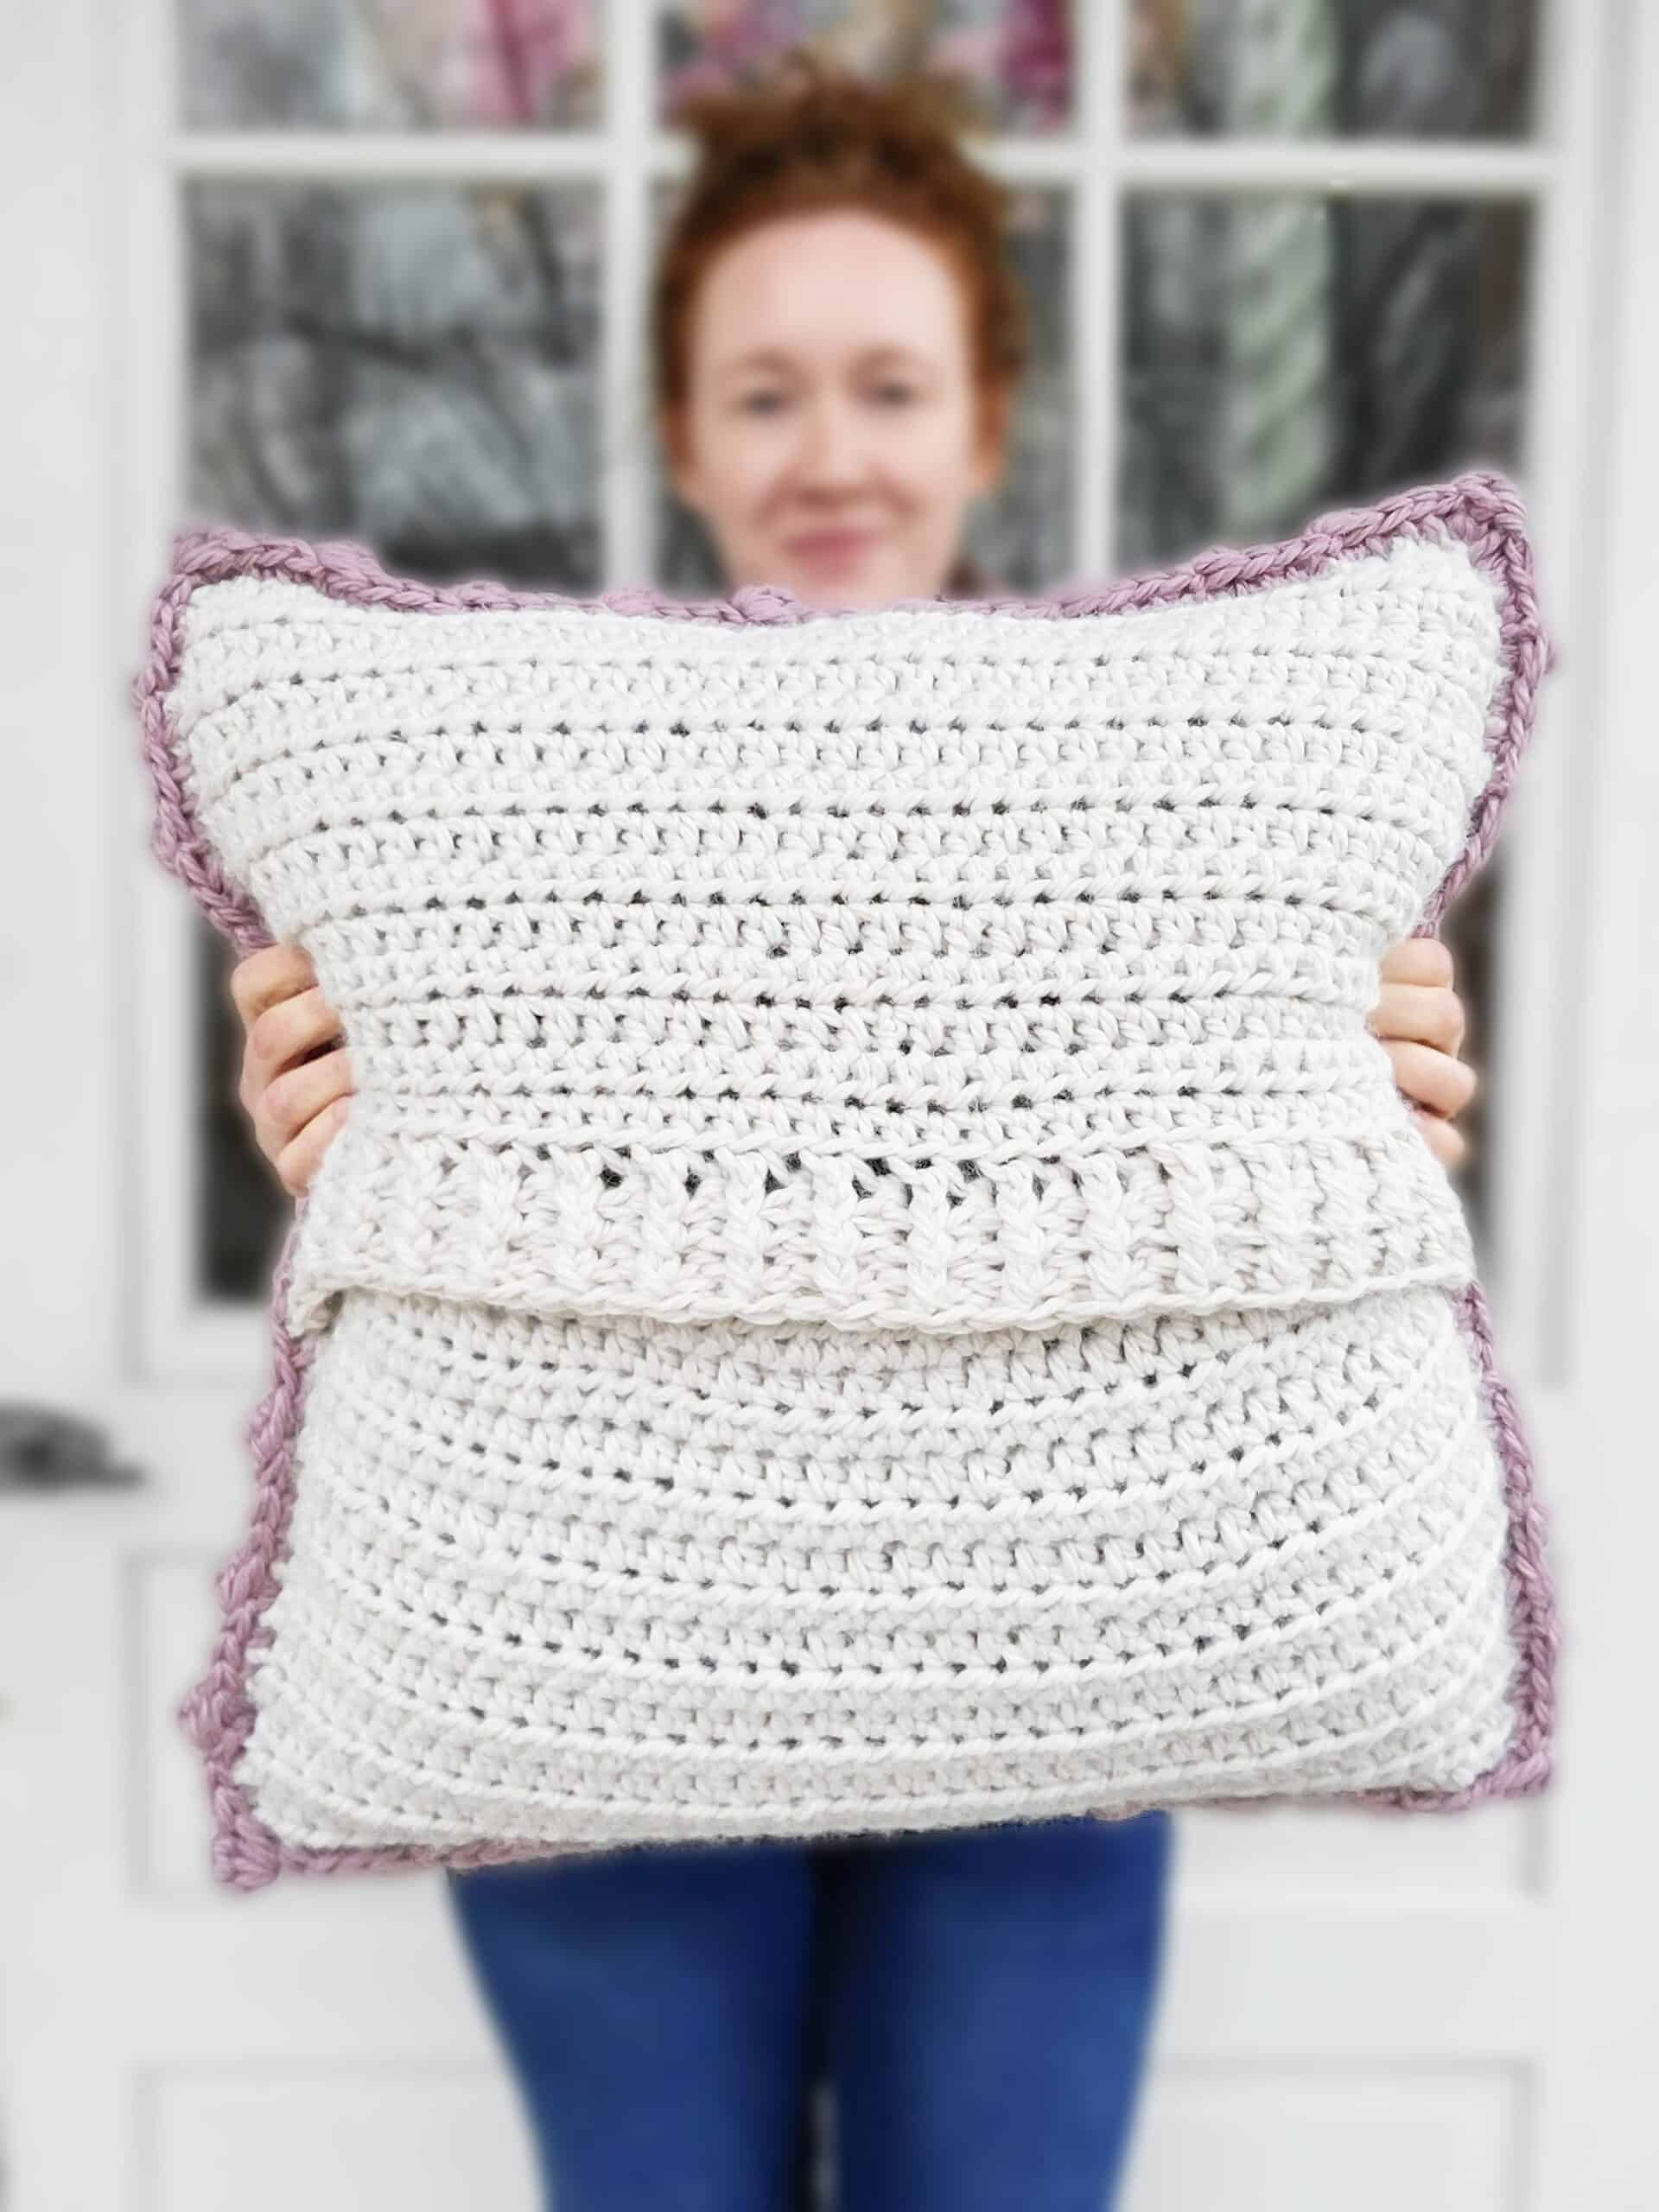
This is an easy beginner-friendly project that is made in three pieces and then seamed together. Border is added after seaming if desired.
You’ll need a 9 mm M/N hook, super bulky yarn and a tapestry needle.
If you’d like an ad-free version, you can find that on Etsy or Ravelry. Let’s get started!
Skill Level
Advanced Beginner (Easy)
Materials
-
Amour Crochet Hook M/N (9.0mm) – Art. No 1056/MN
- Super bulky weight (6) yarn
- 16×16″ – 340 yards
- 18×18″ – 425 yards
- 20×20″ – 520 yards
- Extra yarn for seaming
- Darning Needle Set – Art. No 3121
- Scissors
- Pillow insert in chosen size
Gauge
Front side (bobble pattern)
4” = 8.5-9 hdc stitches x 6.5 rows in any part of the pattern with a 9 mm M/N hook and super bulky yarn.
Back side
4” = 7.5 hdc stitches x 6 rows with a 9 mm M/N hook and super bulky yarn
Terms
- Blo – back loop only
- Bobble – see stitch instructions for how to make the bobble stitch
- Bphdc – back post half double crochet
- Ch – chain
- Flo – front loops of the stitch only
- Fphdc – front post half double crochet
- Hdc – half double crochet
- Join – join with a slip stitch
- RS – right side
- Sc – single crochet
- St(s) – Stitch(es)
- WS – wrong side
Notes
- *Asterisks mark a repeated stitch pattern*.
- Your stitch count is in parentheses at the end of relevant rounds.
- Your first st of each round is placed in the same st as the ch.
- Ch does not count as a stitch.
- The first and last stitches of every round will always be a hdc.
- Make sure that you turn as the instructions call for!
- Pattern written in multiple of 5+5.
- I recommend counting stitches, especially in the hdc rows to make sure you get the correct amount of stitches. Working in the back loops and third loop of hdc stitches tends to “hide” the last stitch of the round and makes it easy to miss.
Stitch Instructions
Bobble Stitch for Pillow Cover:
- Yarn over, insert hook through the stitch
- Yarn over and pull through (three loops on hook)
- Yarn over and pull through the first loop on the hook (3 loops on the hook)
- Yarn over and pull through the first two loops on the hook (2 loops remaining on the hook)
- Keep those two loops on the hook, yarn over, insert hook through the stitch, yarn over, pull through and repeat steps 3-4 (3 loops on the hook)
- Yarn over, insert hook through the stitch, yarn over, pull through and repeat steps 3-4 (4 loops on the hook)
- Yarn over, insert hook through the stitch, yarn over, pull through and repeat steps 3-4 (5 loops on the hook)
- Yarn over, pull through all five loops on the hook
Bobble Border Tutorial
The bobble border is optional and added after the entire pillow cover is finished and seamed together.
-
- With the wrong side facing you, make a bobble stitch through all layers of the pillow cover.
- After completing the bobble stitch, insert hook into the same stitch as the completed bobble, pull up a loop.
- Sl st to close the bobble.

Pattern
Front
Size, beginning chain and amount of repeats for front are written below:
| Size | Beginning Chain | Repeats |
| 16×16” | Ch36 | Rows 6-25 – Repeat 2-5 five times |
| 18×18” | Ch41 | Rows 6-29 – Repeat 2-5 six times |
| 20×20” | Ch46 | Rows 6-31 – Repeat 2-5 six times and rows 2-3 once |
Pattern written as 16” (18”, 20”).
Row 1 – With an M/N (9 mm) hook and super bulky yarn, ch 36 (41, 46), hdc in second ch from hook and across, ch1, turn. Stitch counts – 35 (40, 45).
Row 2 – (WS) Hdc, hdc in the third loop only to final st, hdc, ch1, turn.
Row 3 – (RS) Hdc, hdc in the blo to final st, hdc, ch1, turn.
Row 4 – Hdc x 2, *bobble, hdc x 4* to final 3 sts, bobble, hdc x 2, ch1, turn.
Row 5 – Hdc in each st, ch1, turn.
Rows 6-25 (29, 31) – Repeat rows 2-5 five (six, six) times.**
**Or until piece measures approximately ½” shorter than the height for the size you are making.**
Row 26 (30, 32) – Repeat row 2.
20×20” Only: Row 33 – Repeat row 3.
Piece should now measure about 16” (18”, 20”) with a little stretch.
At the end of the final row, tie off leaving a tail for weaving in.
Back Top
Size, beginning chain and amount of repeats for back top are written below:
| Size | Beginning Chain | Repeats |
| 16×10” | Ch32 | 15 rows of hdc and 1 sc row |
| 18×11” | Ch36 | 17 rows of hdc and 1 sc row |
| 20×12” | Ch39 | 18 rows of hdc and 1 sc row |
Pattern written as 16” (18”, 20”).
Row 1 – With an M/N (9 mm) hook and super bulky yarn, ch 32 (36, 39), hdc in second ch from hook and across, ch1, turn. Stitch counts – 31 (35, 38).
Row 2 – Hdc in every st across, ch1, turn.
Rows 3-15 (17, 18) – Repeat row 2.
**Or until piece measures approximately ¼” shorter than the height for the size you are making.**
Row 16 (18, 19) – Sc in every st across, tie off.
Piece should now measure about 10” (11”, 12”) with a little stretch.
At the end of the final row, tie off leaving a tail for weaving in.
Back Bottom
Size, beginning chain and amount of repeats for back bottom are written below:
| Size | Beginning Chain | Repeats |
| 16×10” | Ch33 | 13 rows of hdc and 4 ribbing rows |
| 18×11” | Ch37 | 14 rows of hdc and 4 ribbing rows |
| 20×12” | Ch39 | 15 rows of hdc and 4 ribbing rows |
Pattern written as 16” (18”, 20”).
Row 1 – With an M/N (9 mm) hook and super bulky yarn, ch 33 (37, 39), hdc in second ch from hook and across, ch1, turn. Stitch counts – 32 (36, 38).
Row 2 – Hdc in every st across, ch1, turn.
Rows 3-13 (14, 15) – Repeat row 2.
**Or until piece measures approximately 2.5” shorter than the height for the size you are making.**
Row 14 (15, 16) – Hdc, hdc in the flo to final st, hdc, ch1, turn.
Row 15 (16, 17) – Hdc, *fphdc, bphdc* to final st, hdc, ch1, turn.
Rows 16-17 (17-18, 18-19) – Repeat row 15 (16, 17).
Piece should now measure about 10” (11”, 12”) with a little stretch.
At the end of the final row, tie off leaving a tail for weaving in.
Seaming
Sew in all ends on the three pieces before seaming! Lay the front bobble piece down with the bobbles facing down and pin the back top piece on, then pin the back bottom piece on so they overlap and the ribbing on the back bottom piece is on top. Running stitch (or preferred seaming method) the three pieces together using the same color of yarn that you used for the pillow cover. Sew in your end.
If you are adding the bobble border, go to the border section below.
Border
**See border tutorial in stitch instructions above for a photo tutorial.**
With a 9 mm M/N hook and super bulky yarn, join new yarn in one corner of the pillow cover with the back side facing you (bobble side facing away), ch2.
Round 1 – Going through all layers of the pillow cover, *bobble, insert hook into same stitch as bobble, pull up a loop and slip stitch together to close the bobble, hdc x 3*. Repeat from * to * around entire pillow, spacing bobbles evenly with one in each corner.
Join to top of beginning ch2, tie off and sew in your end.
Now that you’ve finished your pillow cover, make sure to show it off on social media by tagging me using #beaconhillpillowcover and @craftseverywhere on Instagram or Facebook!
If you have any questions regarding the pattern, don’t hesitate to contact me at erin.oetker@gmail.com or through my messages on Etsy or Instagram.
Erin
Find CraftsEverywhere on social media! Instagram | Facebook | Ravelry | Etsy
Stay connected with Clover on Facebook | Twitter | Instagram | Pinterest | YouTube | Ravelry
[mc4wp_form id=”11289″]