Memorial Day Keychain with Beading Loom
Memorial Day is all about shining the light on our fallen soldiers and remembering their sacrifice. Our freedoms are directly intertwined with their strength and willingness to put their lives on the line for us, and because of that, I believe we should be forever grateful. To honor them, I decided to create a beading pattern that can be converted into a keychain, wreath pin, or brooch. As we pay our respects on this upcoming memorial day, I hope that you can reflect and appreciate the people that made the ultimate sacrifice.
Here’s what you’ll need to create the keychain:
- Our Hero Beading Pattern
- Clover’s Beading Loom – Art No. 9910
- Clover’s Beading Thread (Grey) – Art No. 9916
- Clover’s Spring Tape Measure – Art No. 9610
- Clover Thread Clipper “Kuroha” Art No.415
- Clover Double Needle Threader Art No.462/NV
- Beading Needles Art No.233
- Rectangle Ribbon Crimp, Jump Ring, Chain, and Split Ring
- Flat Nose and Needle Nose Pliers
- Toho Beads
- (Optional) Star Jewelry Embellishments
Beading Level: Advanced Beginner
Click here to download the free beading pattern!
Instructions:
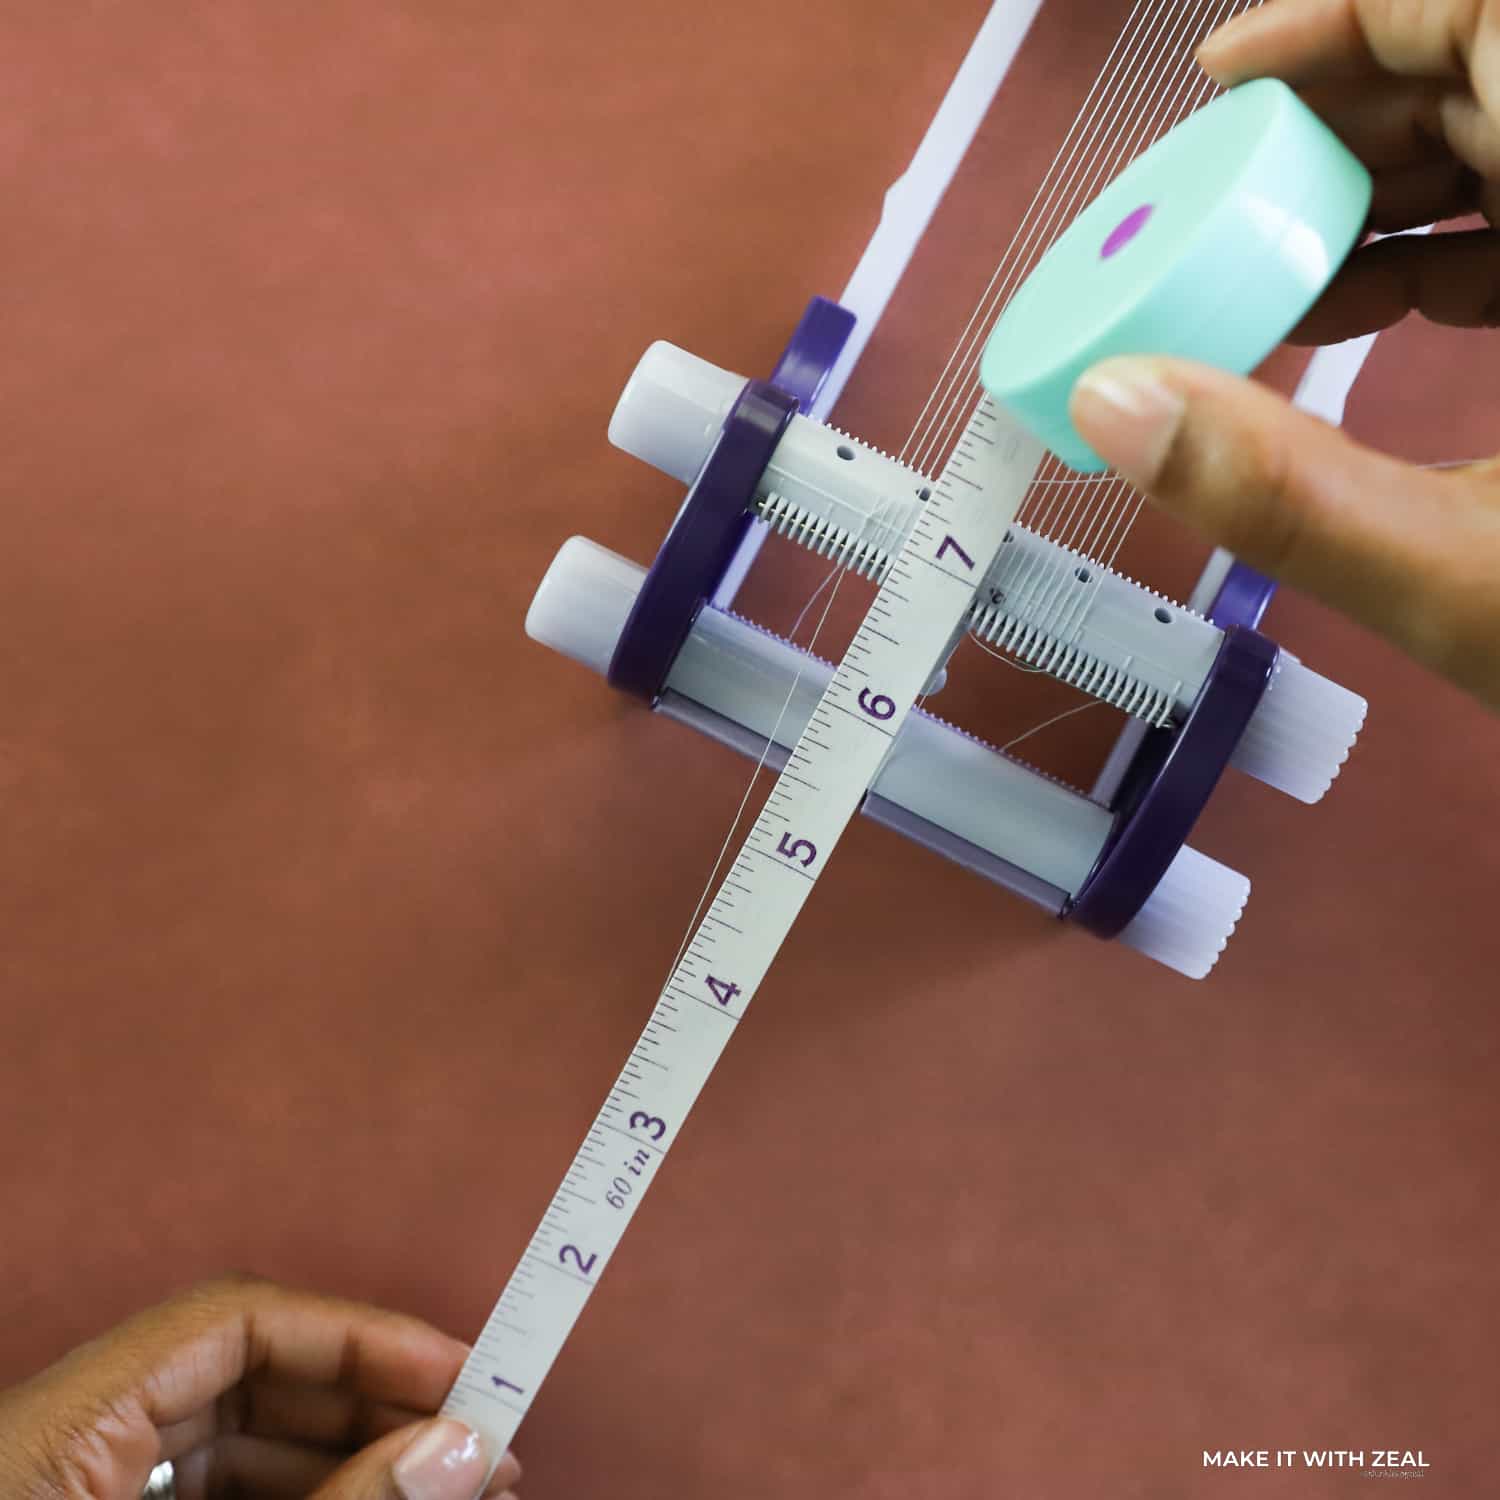
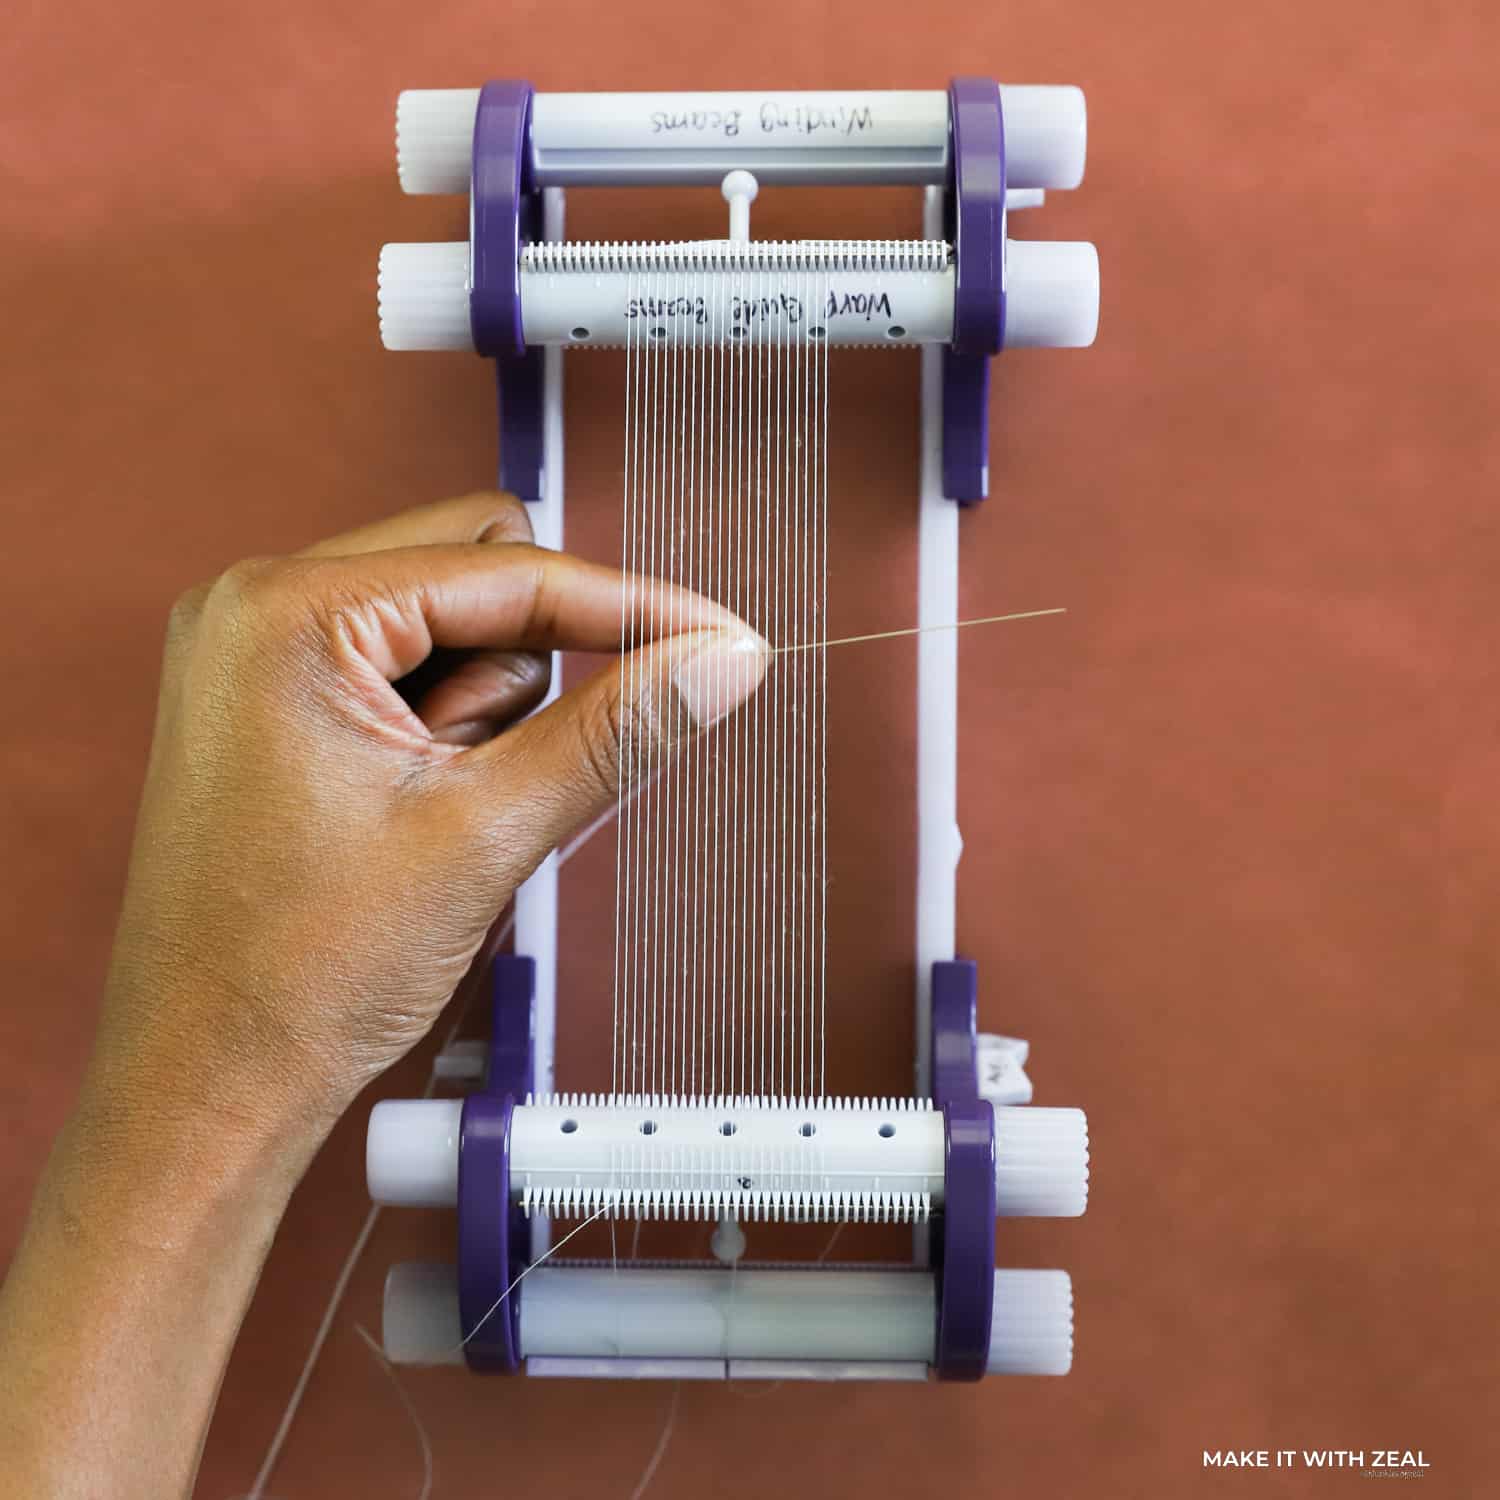
Step 1. Prep your beading loom by pushing the pegs into the center holes on both sides. Keep the loom in the original position. The final keychain will measure 1.37 inches in width and 1.97 inches in length.
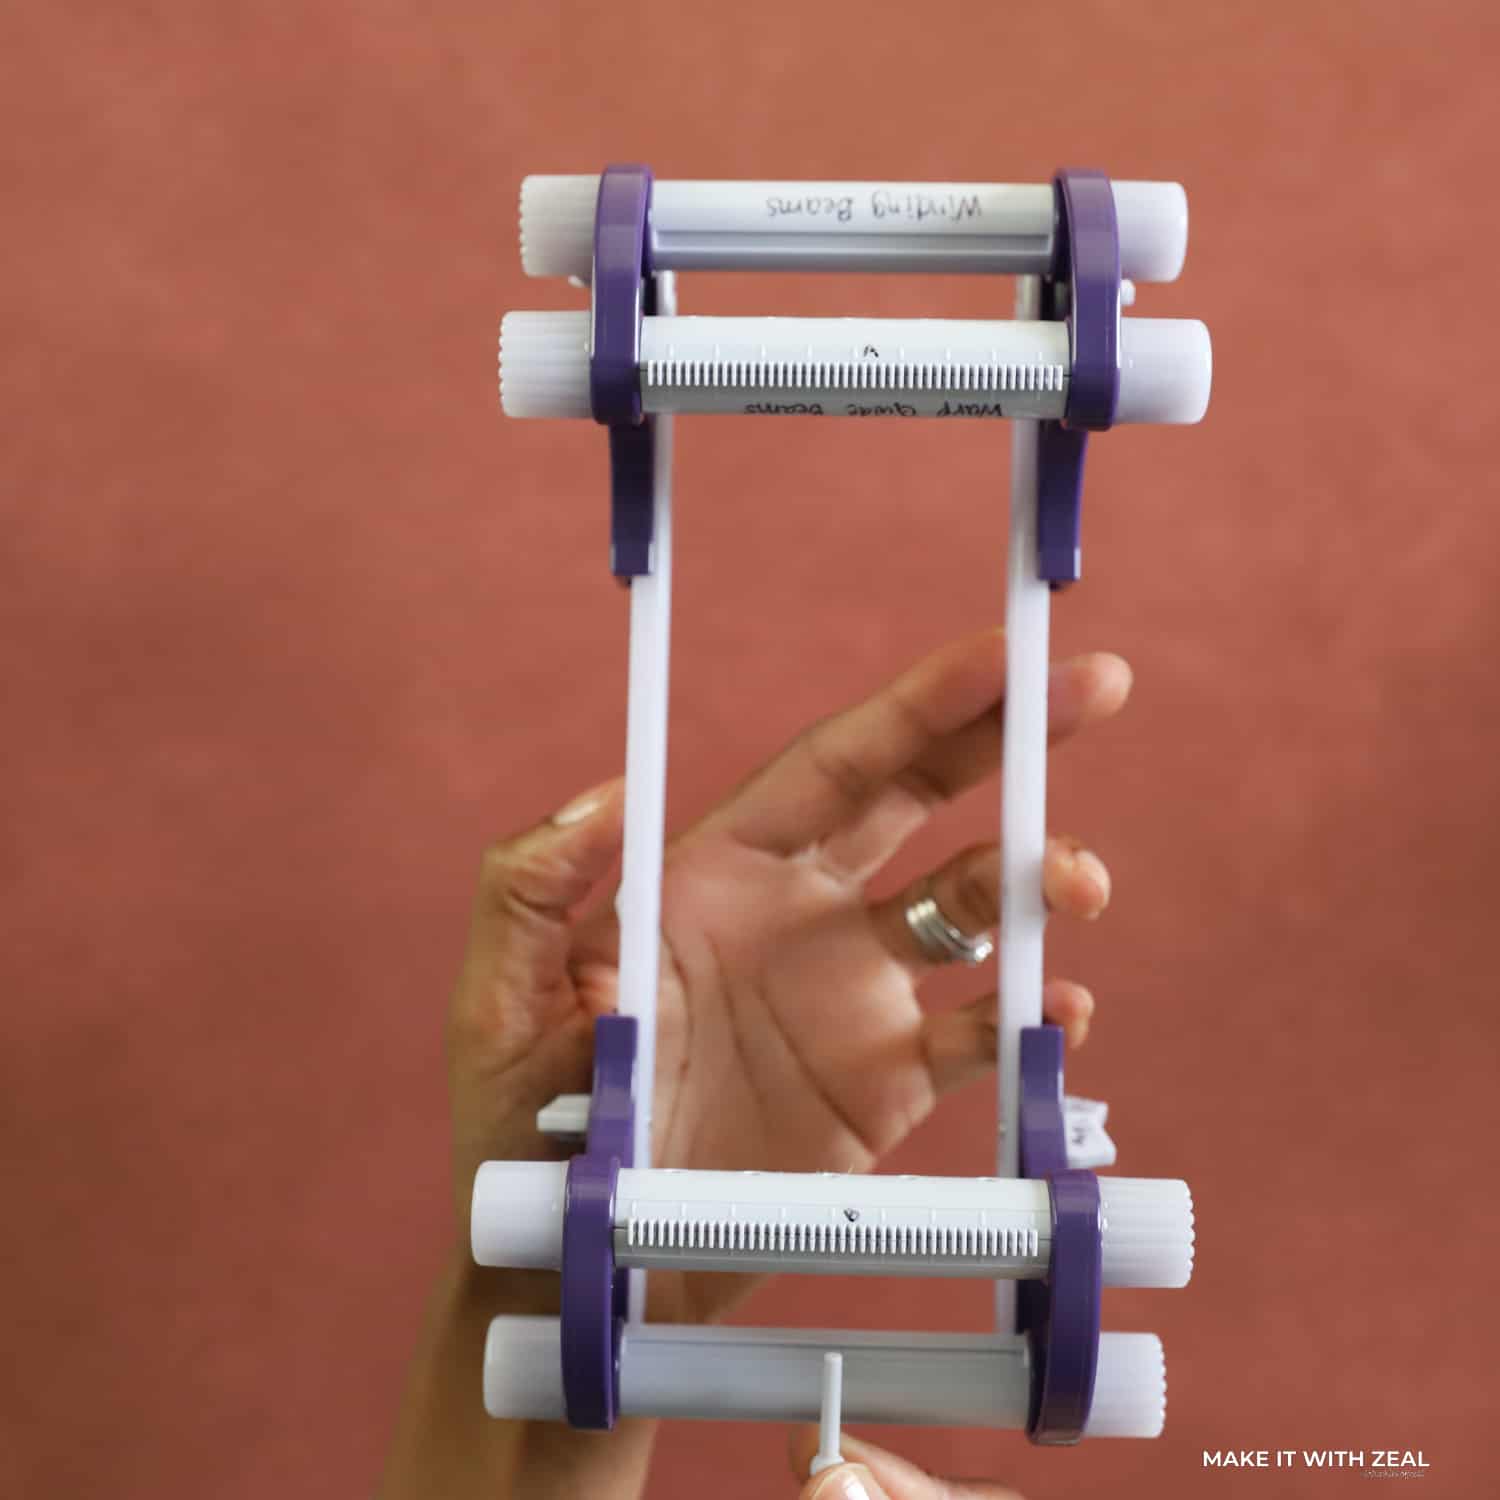
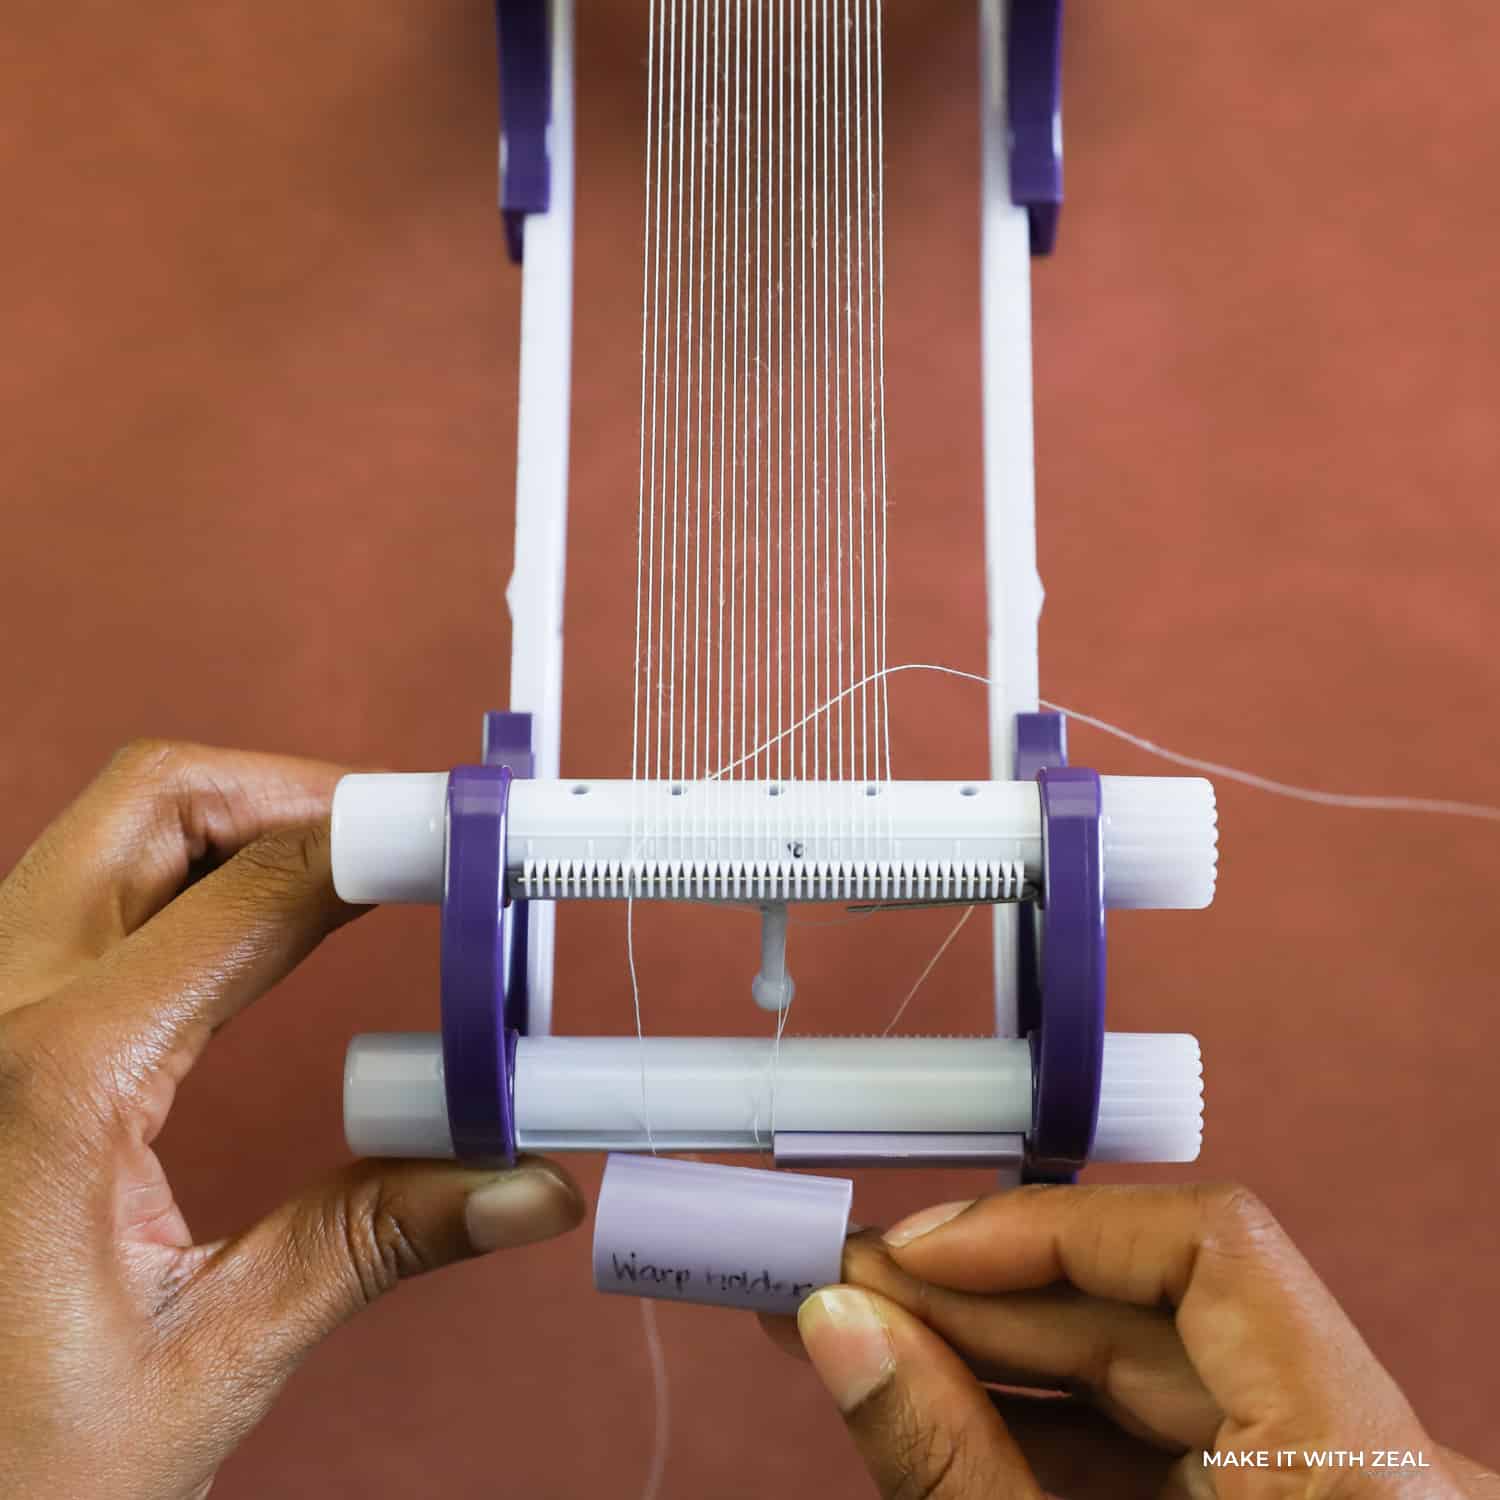
Step 2. Create a slip knot with beading thread, then secure it onto the winding beams with the warp holder.

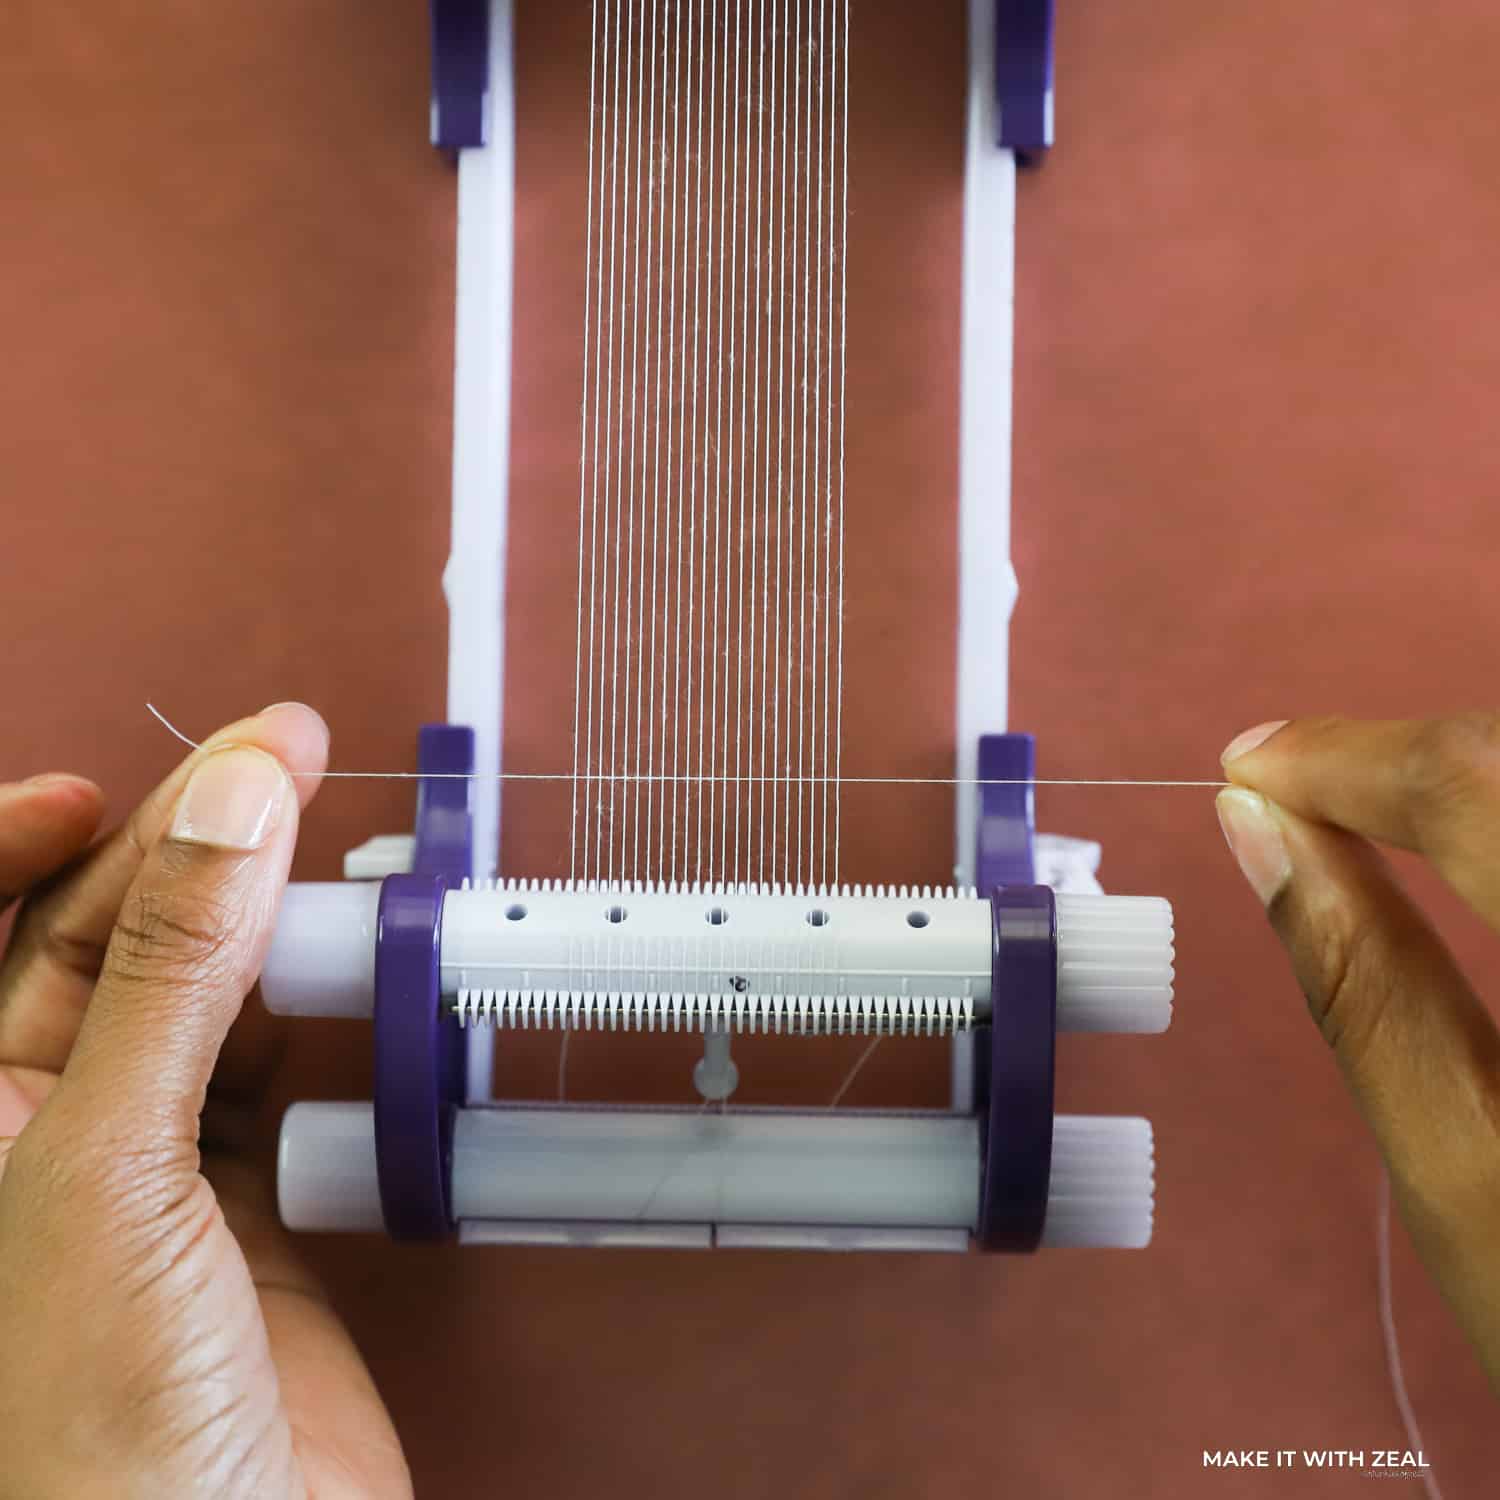
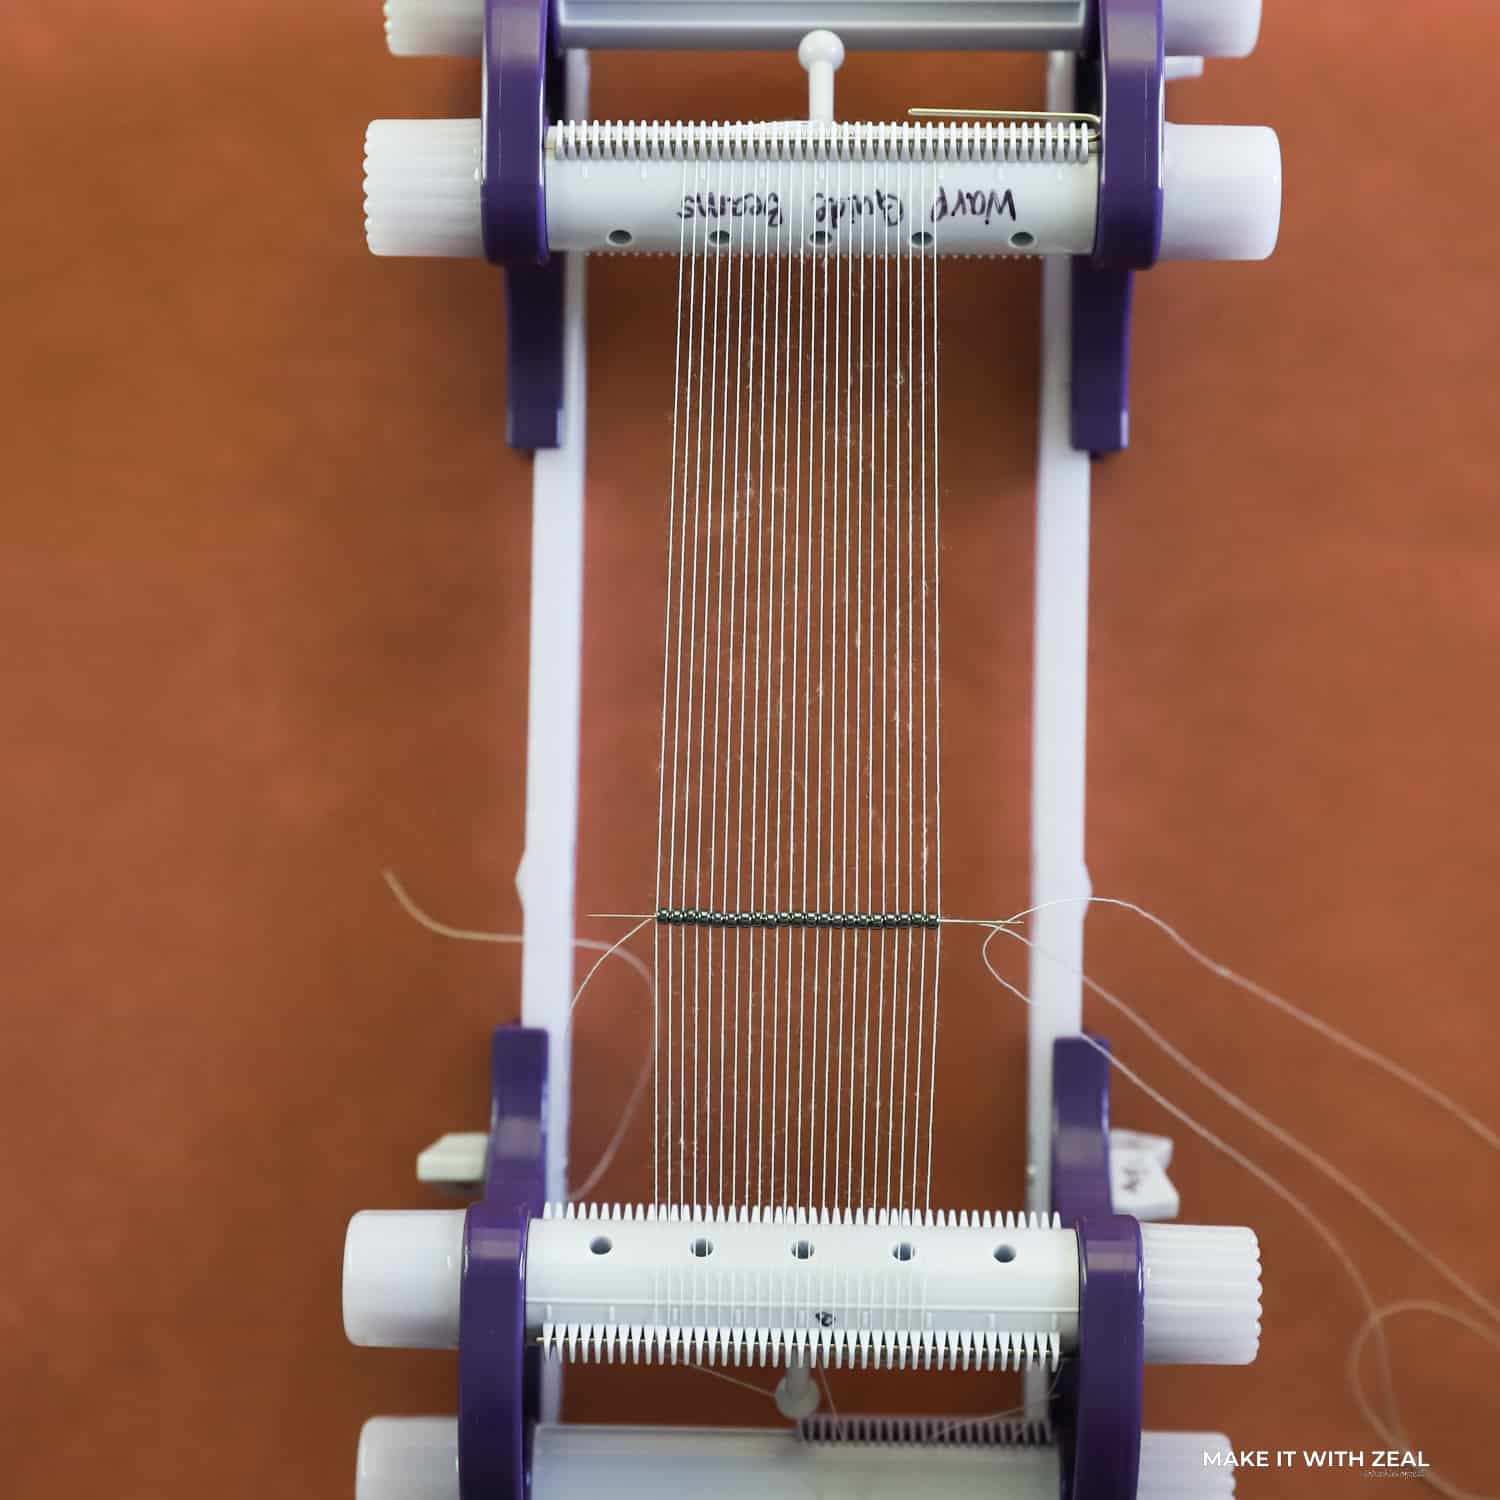
Step 3. Thread the loom with 21+1 warp threads. The additional thread is used to attach the needle, so please don’t forget to add it! Snip the thread using Clover’s Thread Clippers.
Tension Tip: Remember to wrap the thread once or twice around the peg each time to help with tension.
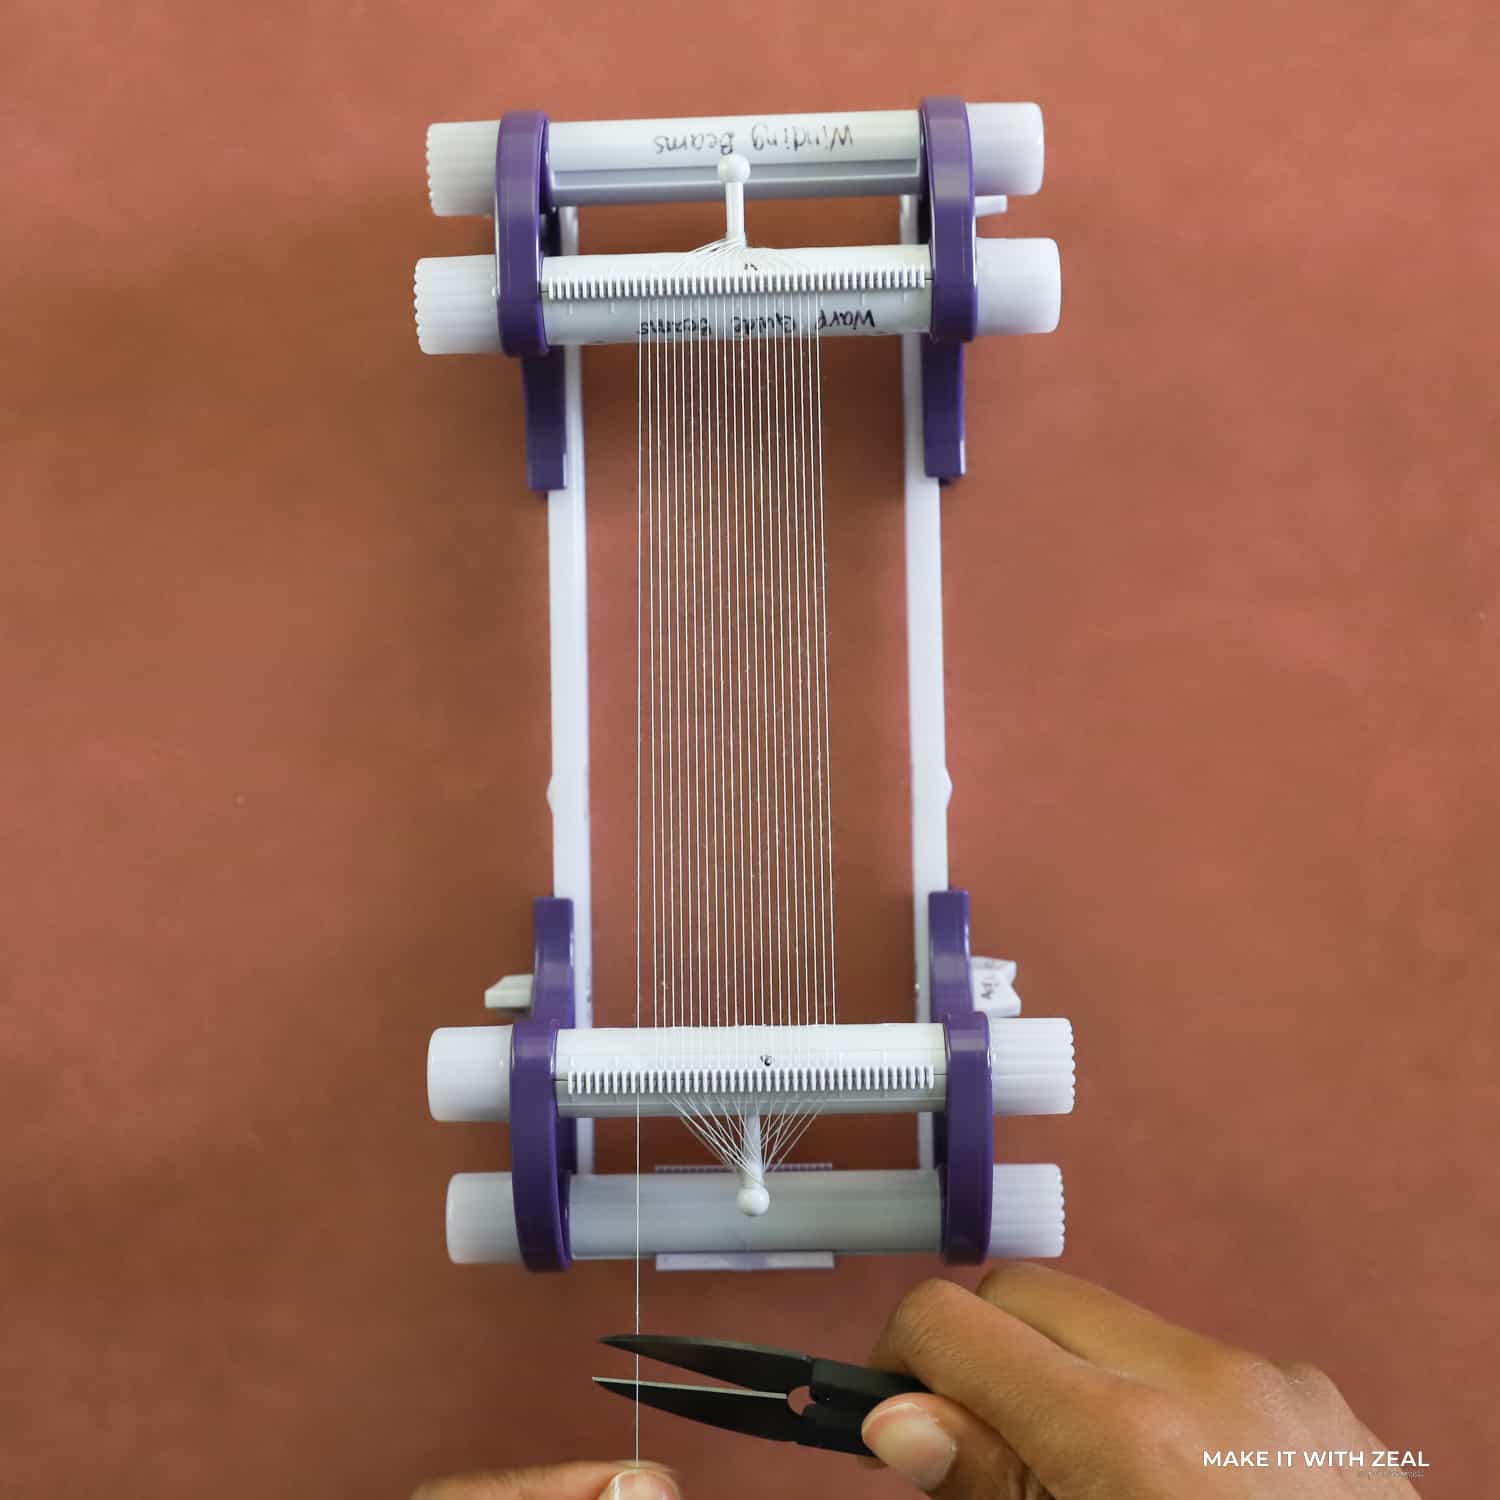
Step 4. Once you’re finished adding the warp threads, trim and attach the second warp holder to secure the thread in place.
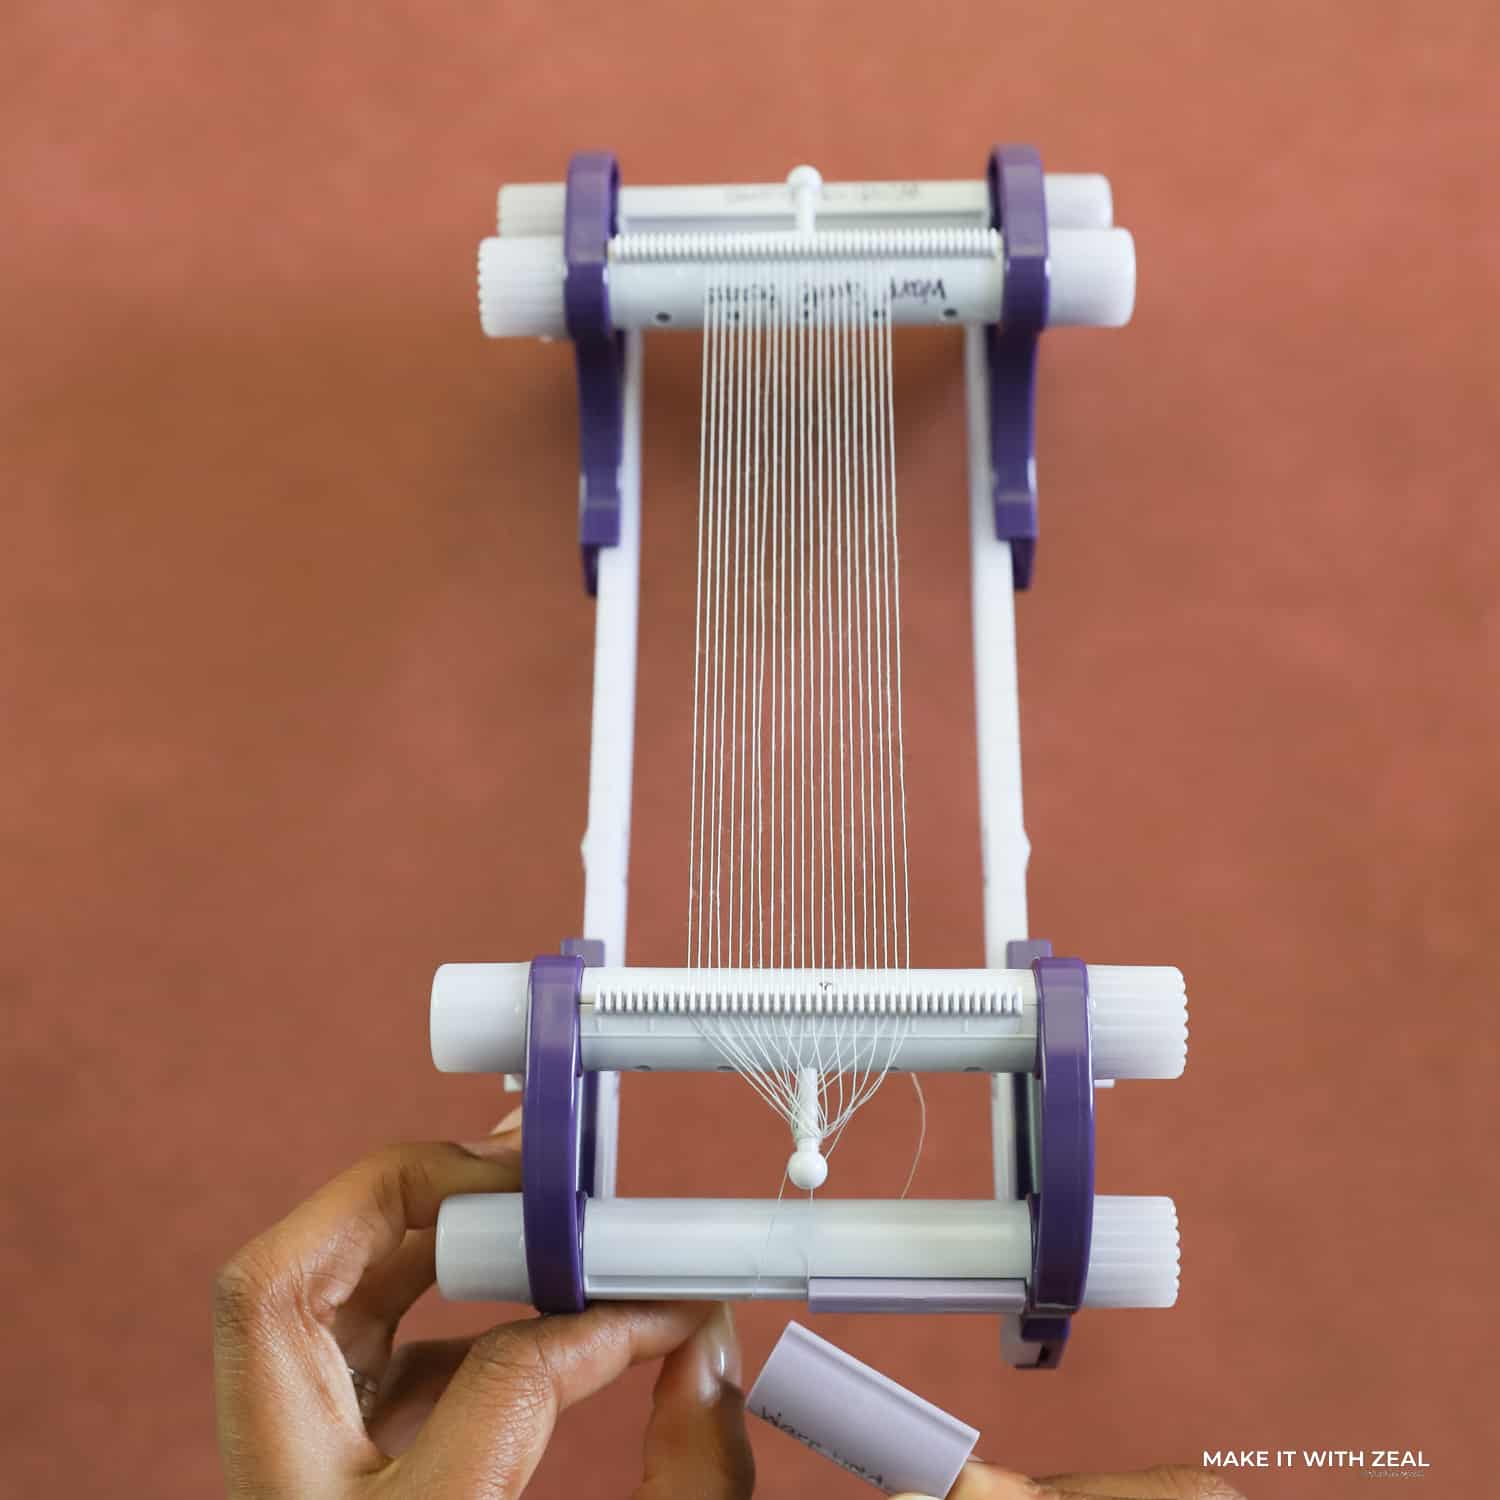
Step 5. Adjust the tension using the warp guide beams. The thread should have medium tightness to keep the beads stable. Refrain from overtightening the warp threads because breaks and puckering can occur.
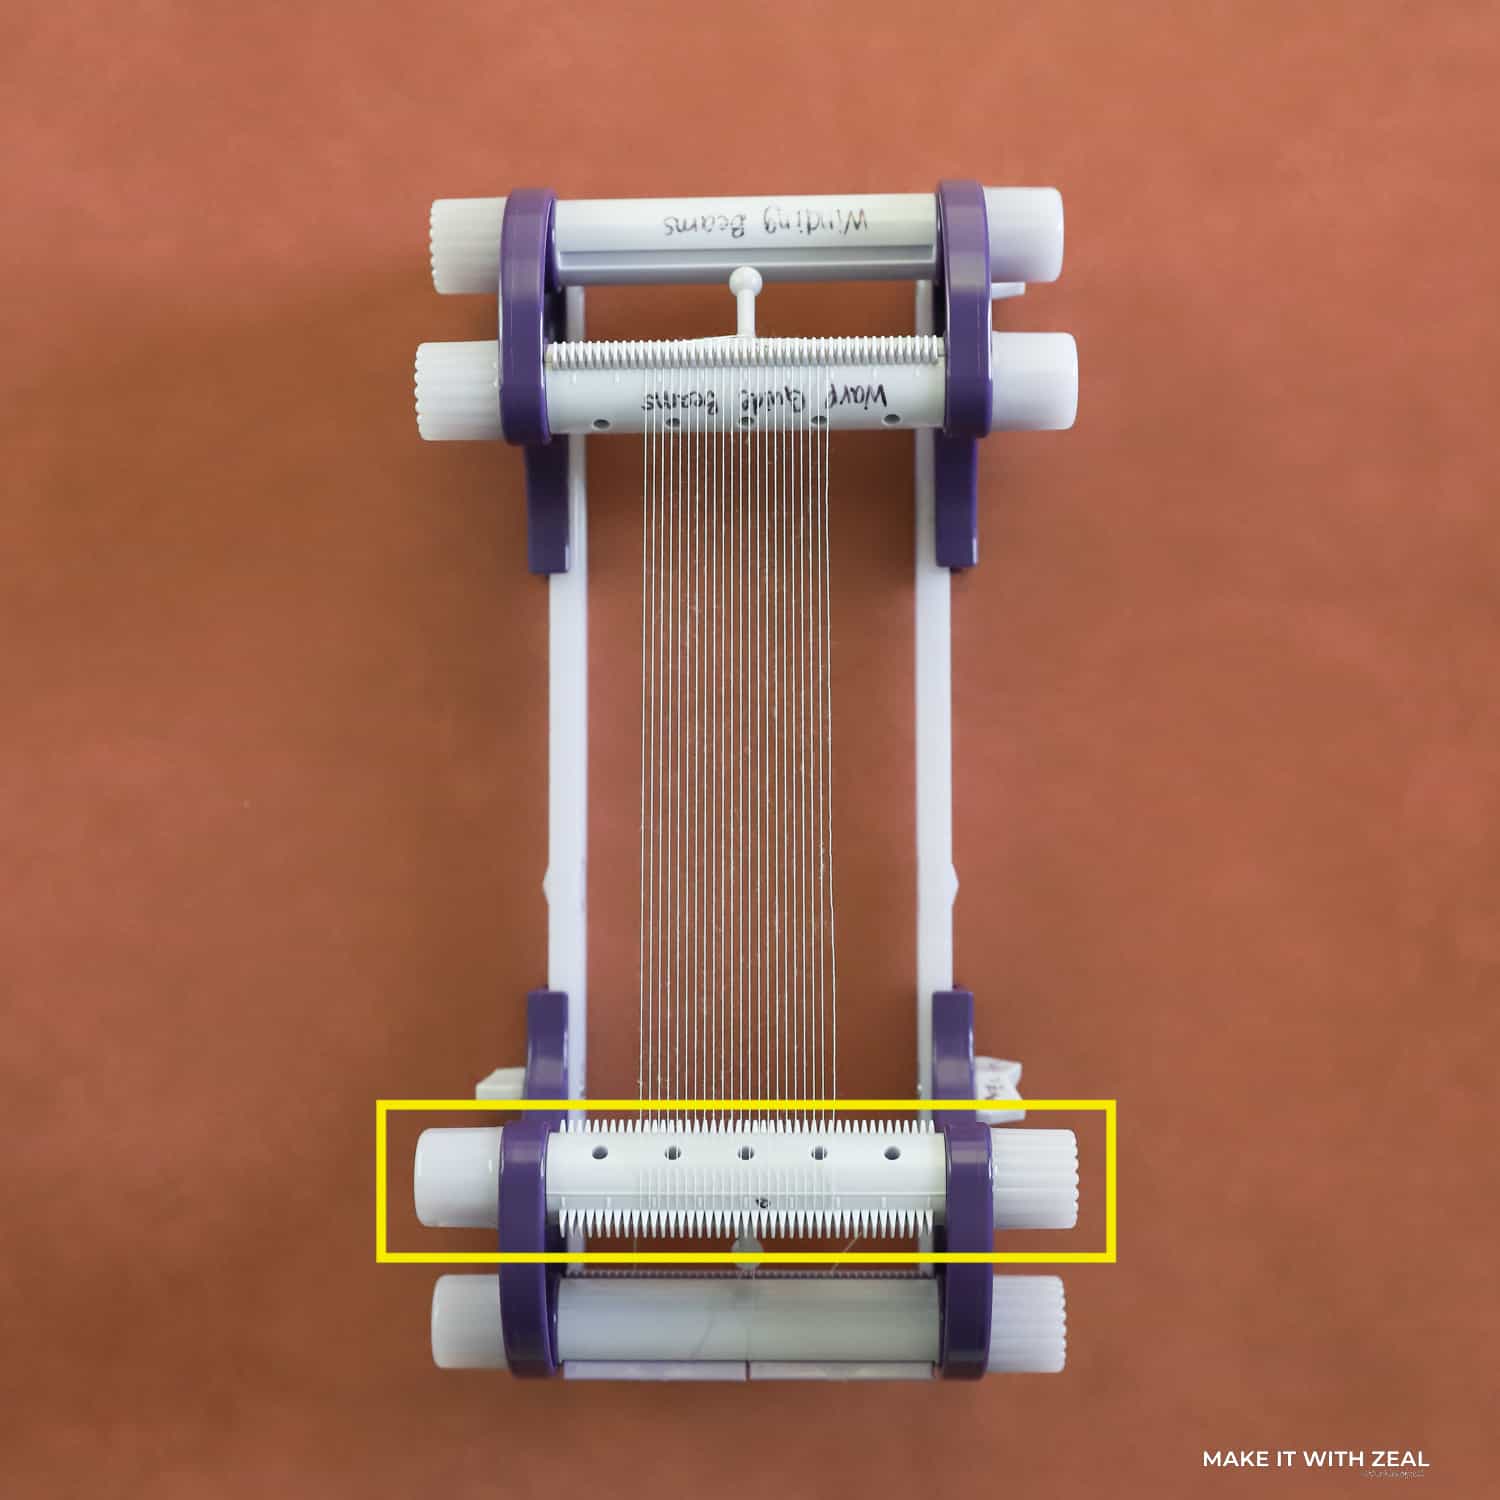
Step 6. Add the metal stoppers to prevent the warp threads from lifting.
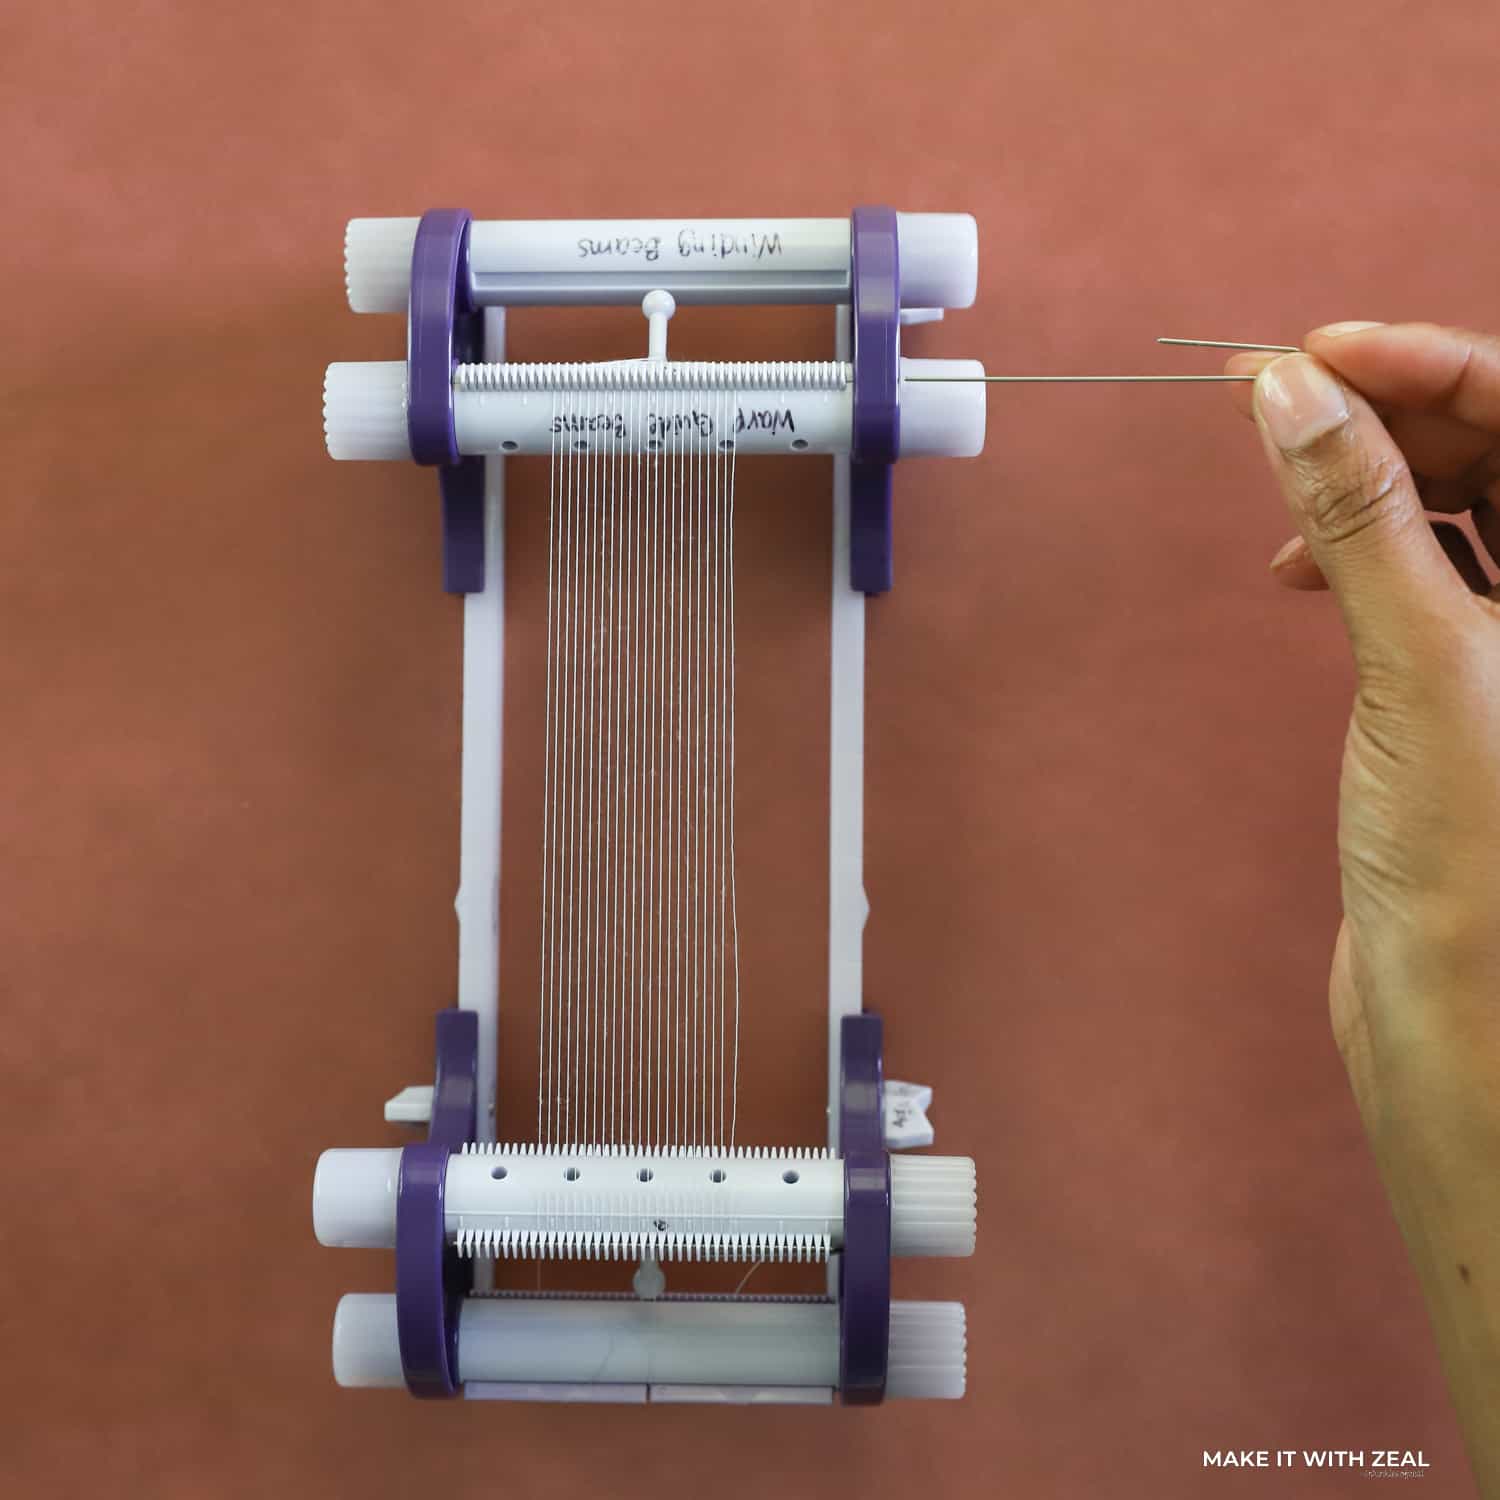
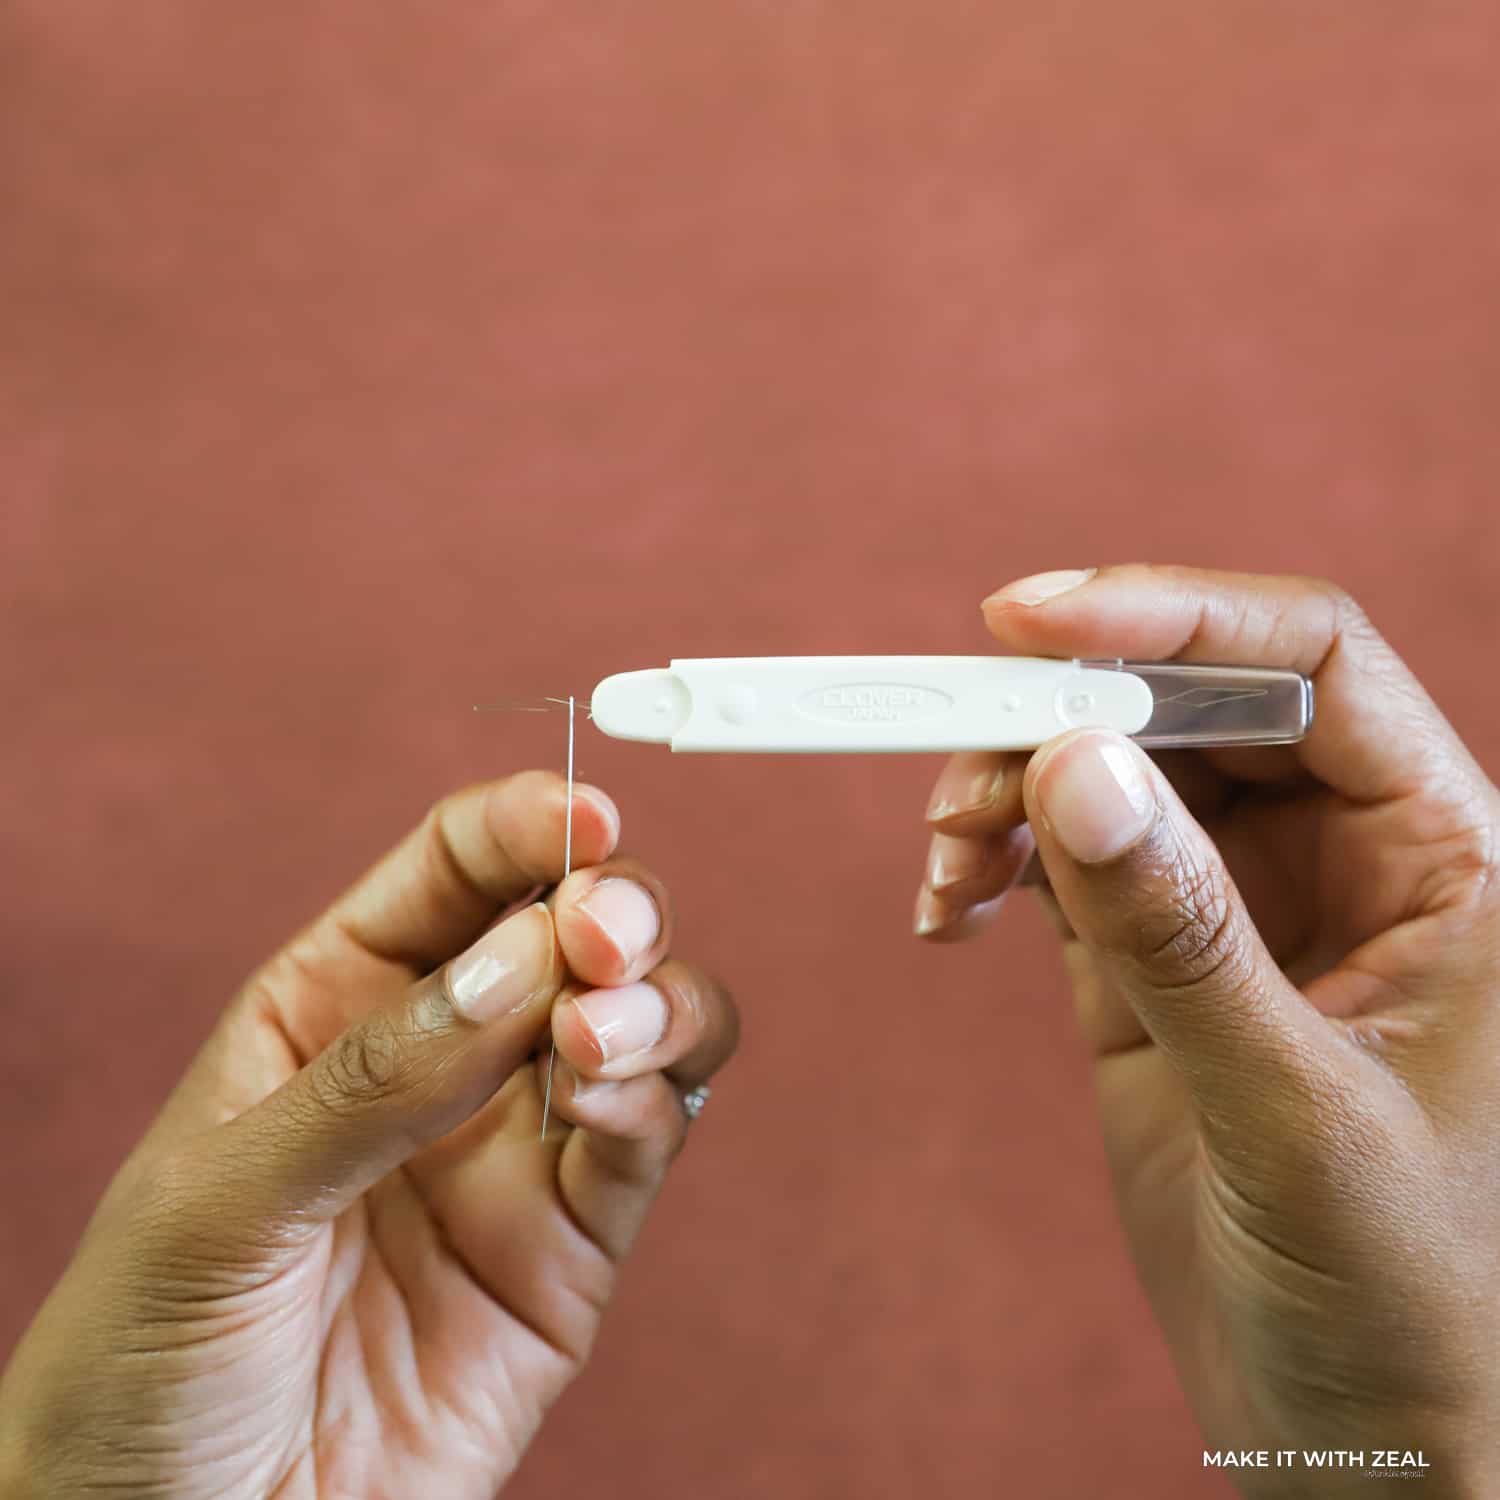
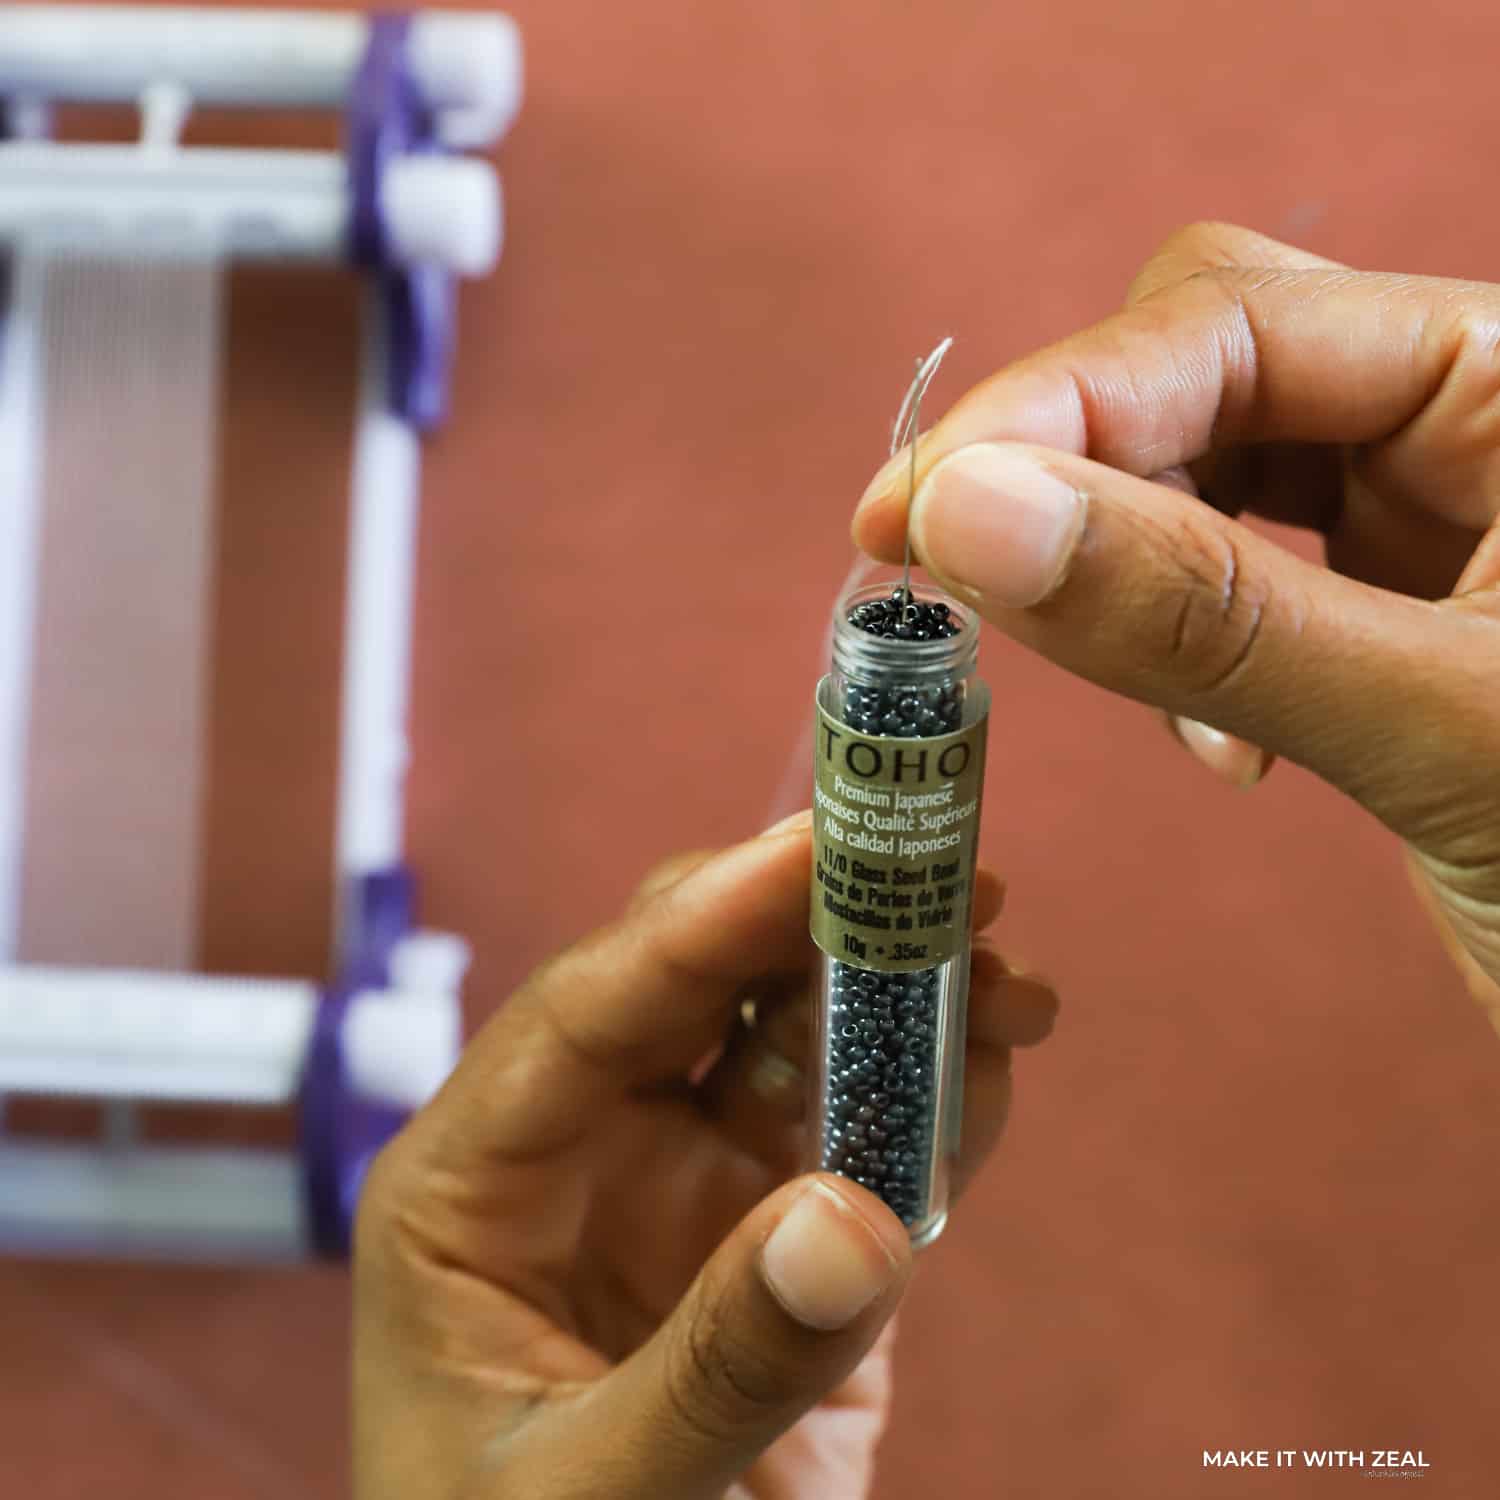
Step 7. Grab the center needle from Clover’s Beading Needle Set and thread it using Clover’s Double Needle Threader. This is the weft needle that will hold your beading thread.

Step 8. Slip the beading thread underneath the far left warp thread and tie a knot. This knot should be able to move up and down the warp threads so don’t make it too tight. Be sure to measure out a 6-inch tail to help during the finishing process.
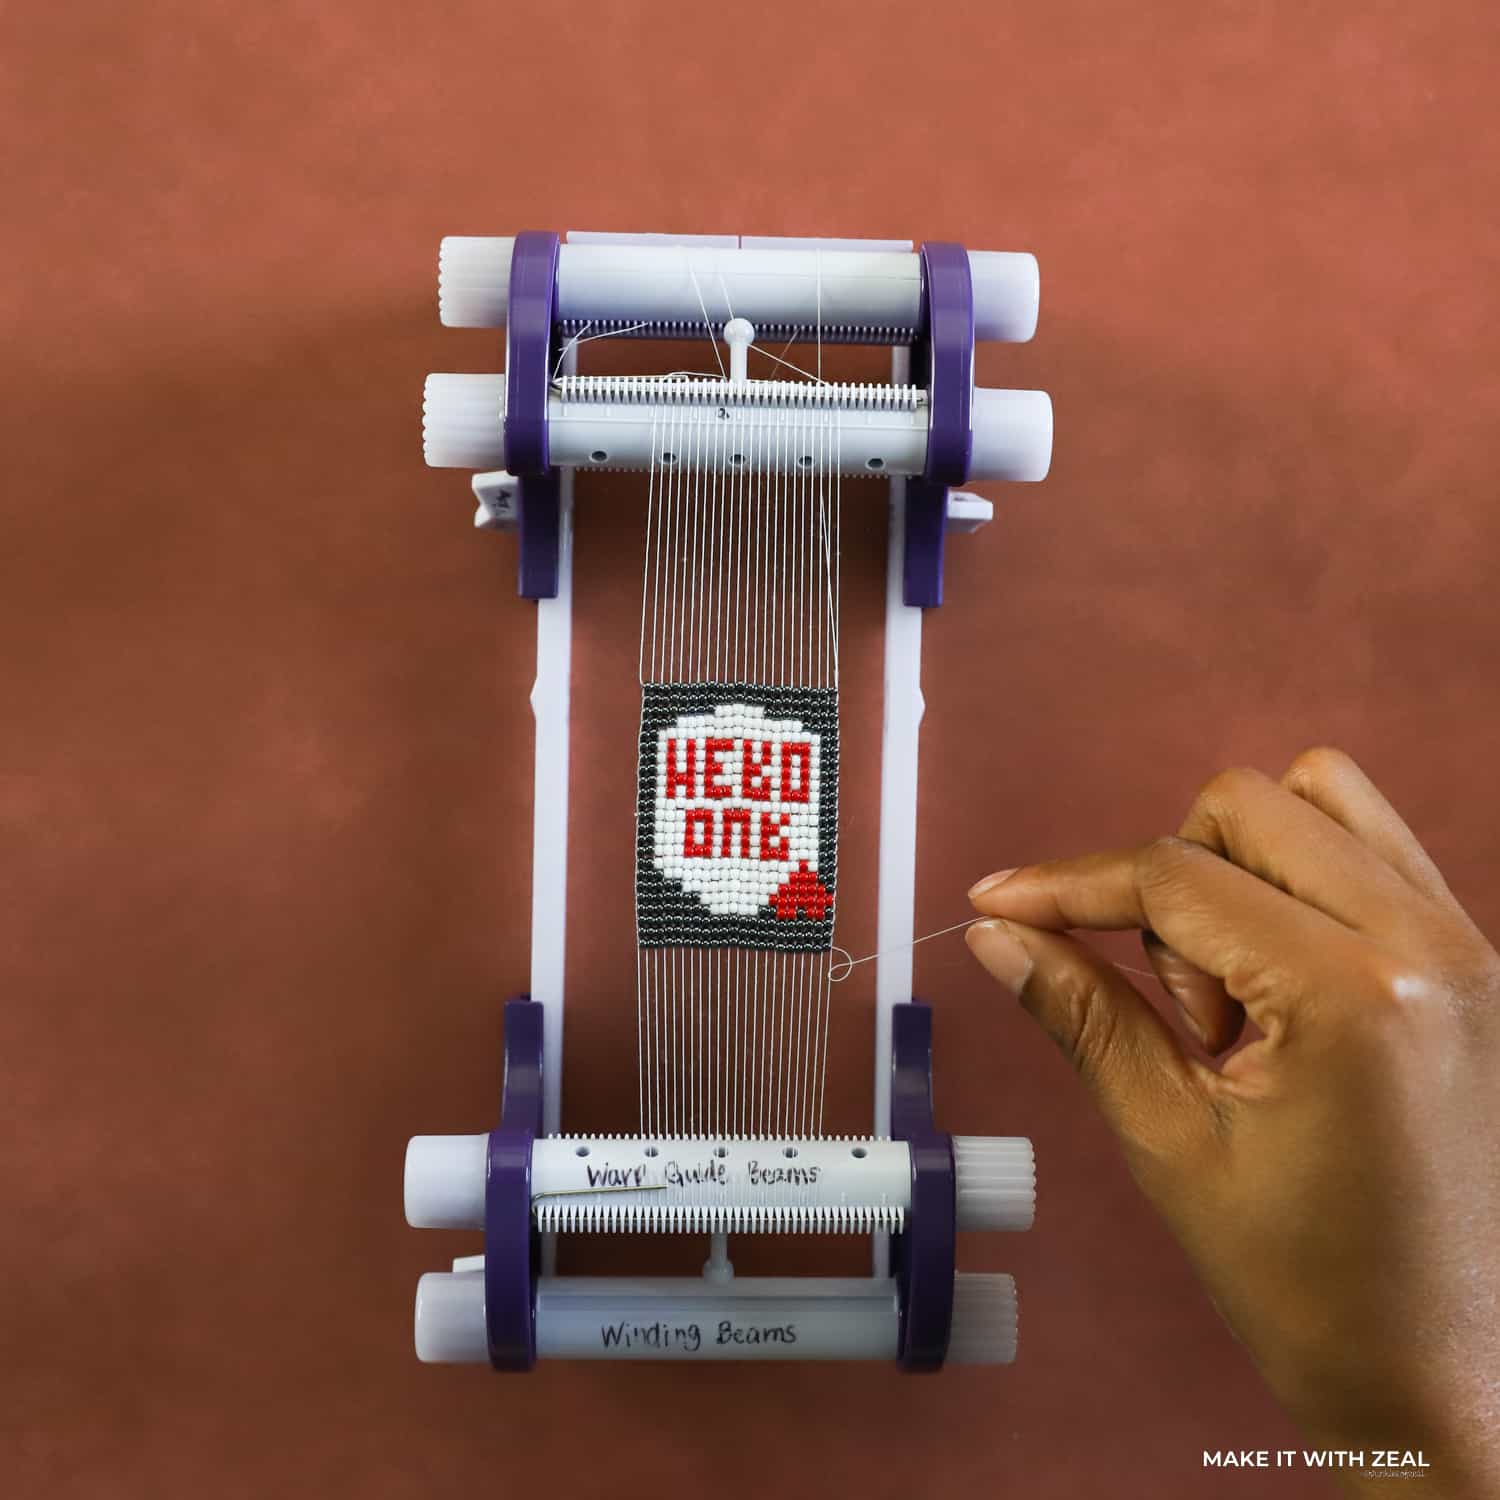
Step 9. Place your hand under the warp threads and begin by adding 21 beads to the (weft) beading needle. There are several ways to load the beads onto the needle, but I found that placing the needle into the bead bottle seems to be the easiest.
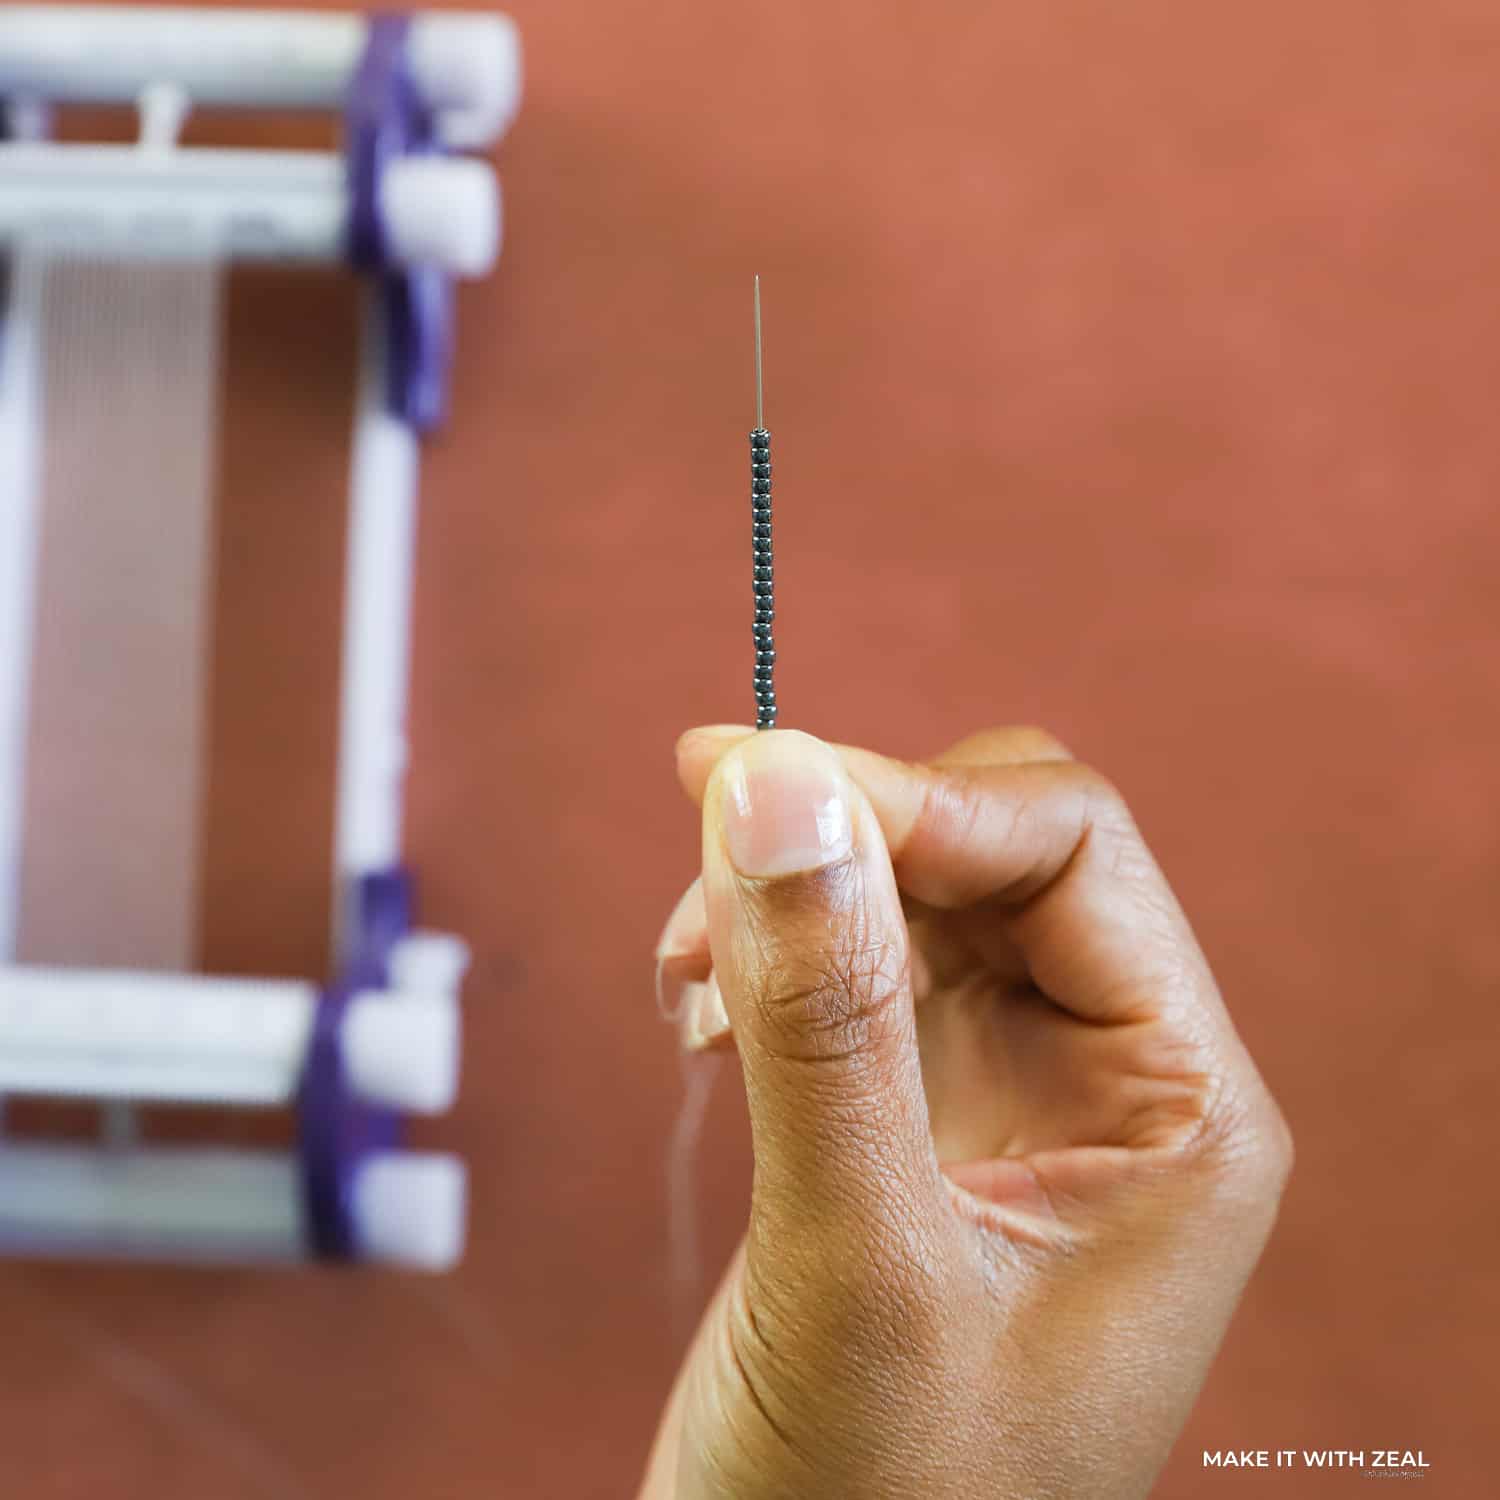
Step 10. Slide the beads down the beading thread, then line each bead up in between the warp threads. The first row will be difficult, but as you continue to add more beads the keychain will stabilize.
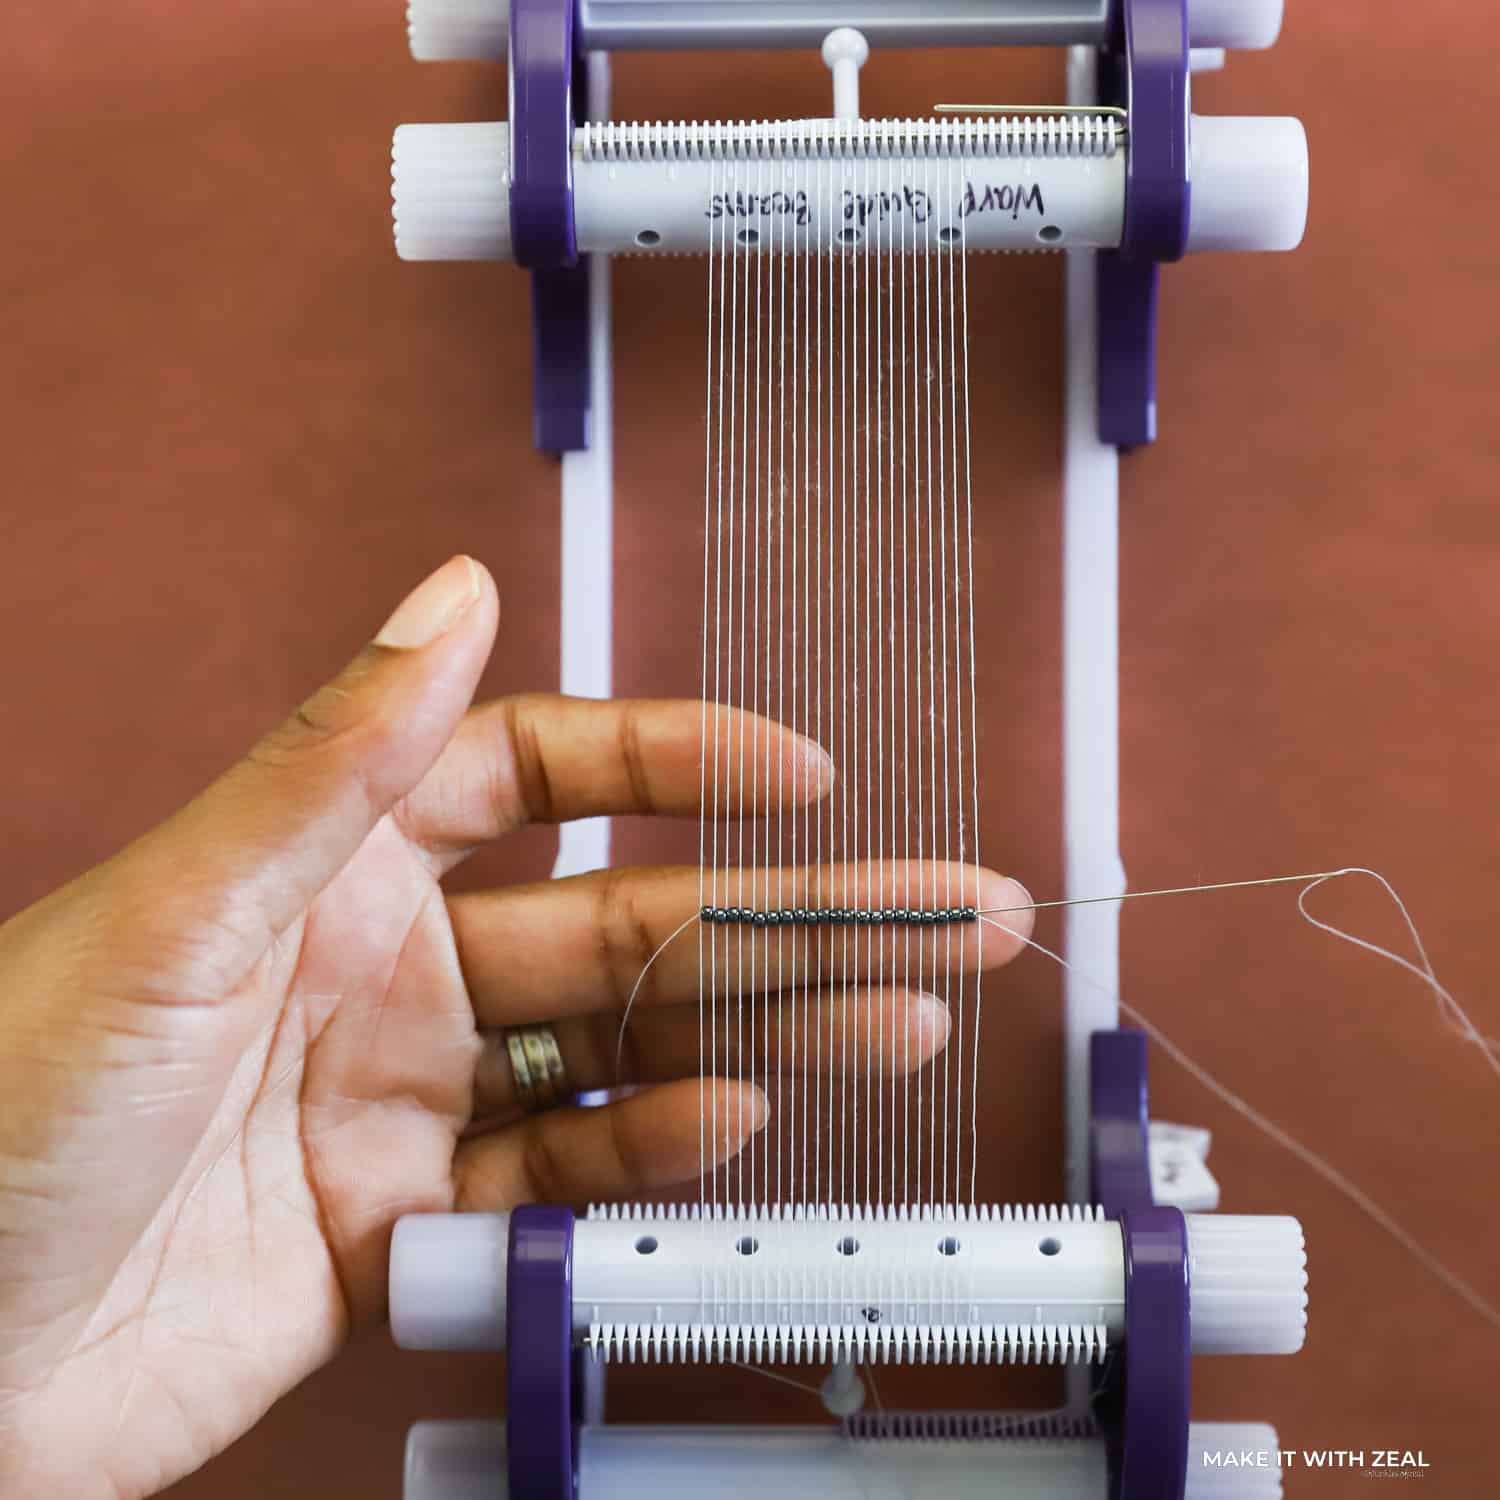
Step 11. Insert the needle into the beads making sure to go on top of the warp threads not under. Refer to the paper instructions to see the exact needle placement for this step. Always go slow during this part because it’s really easy to skip a bead.
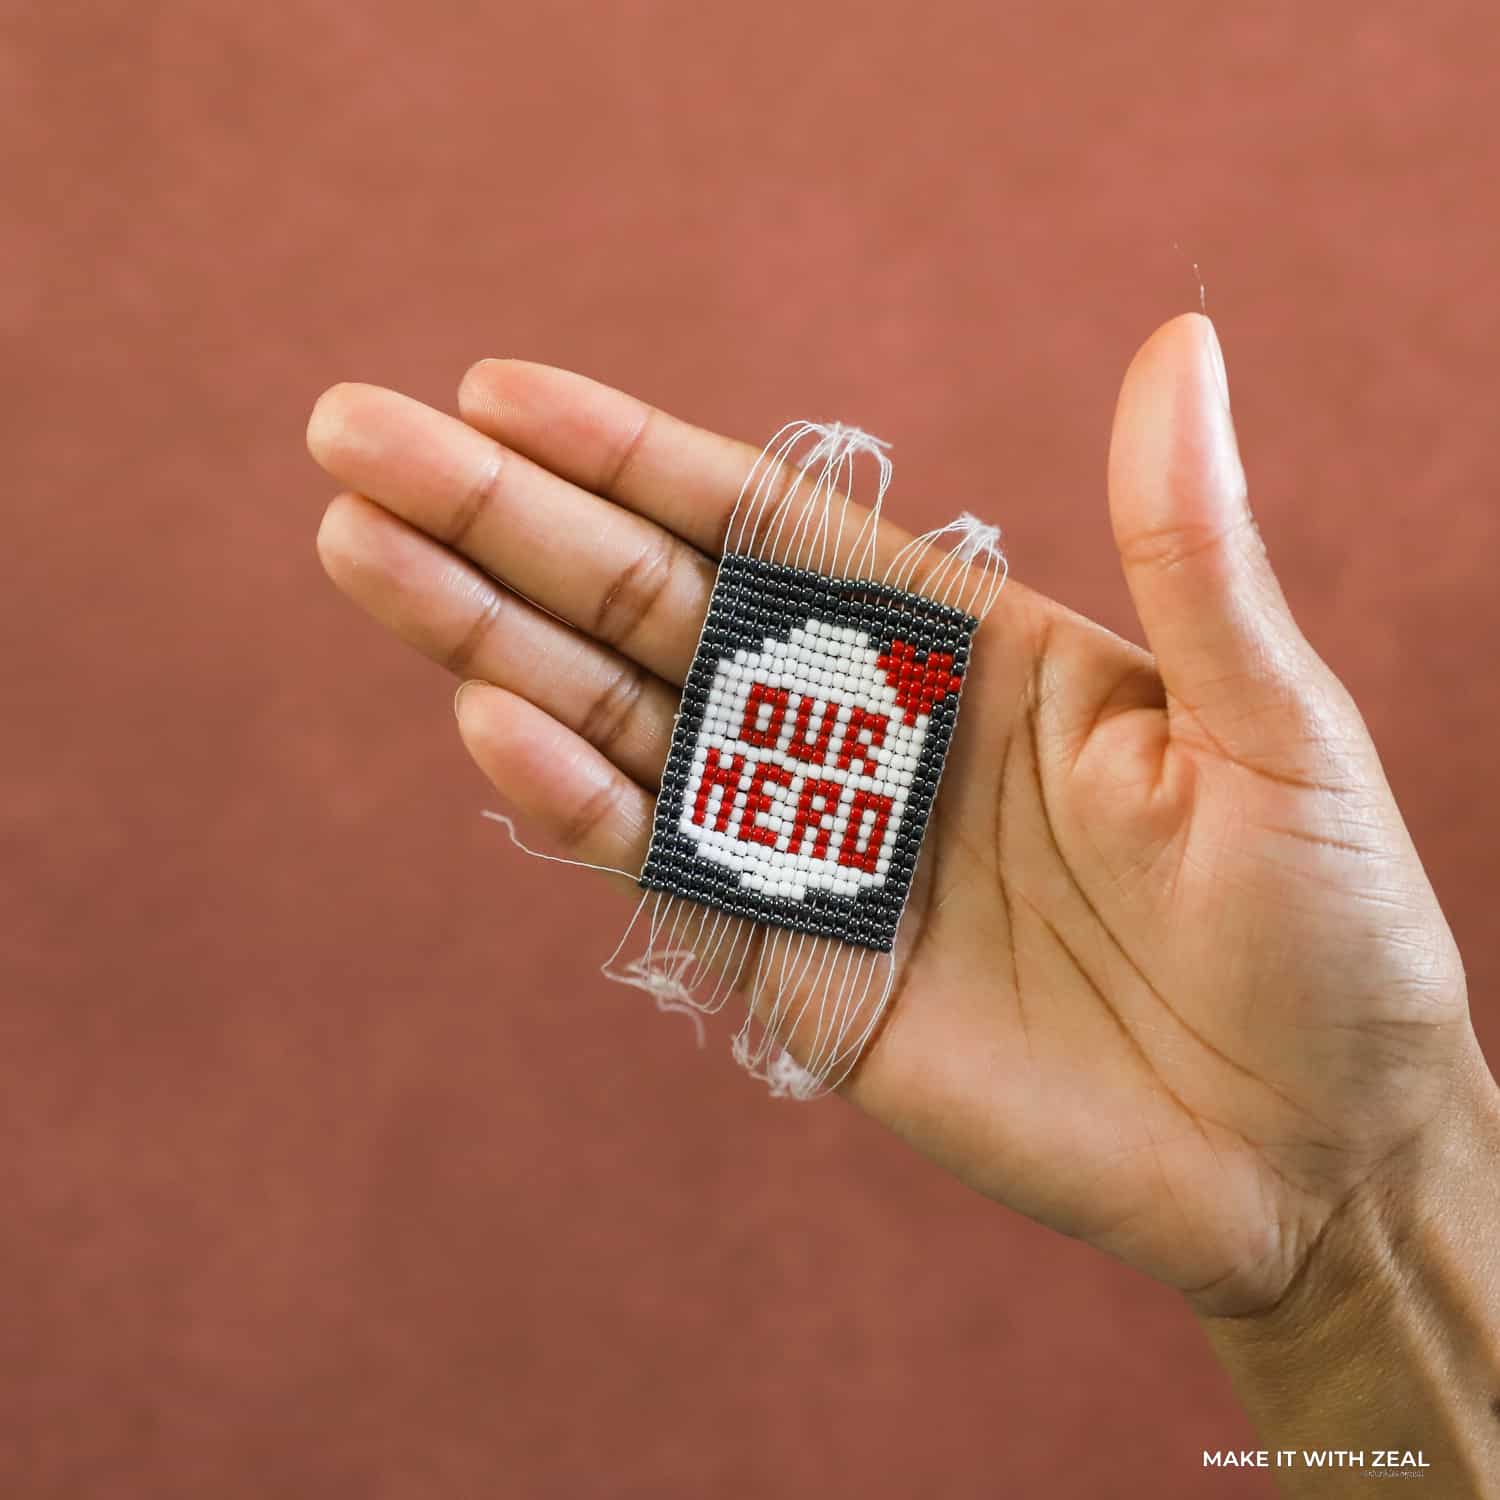
Step 12. Once you’ve completed the pattern, tie a secure knot on the last warp thread and trim.
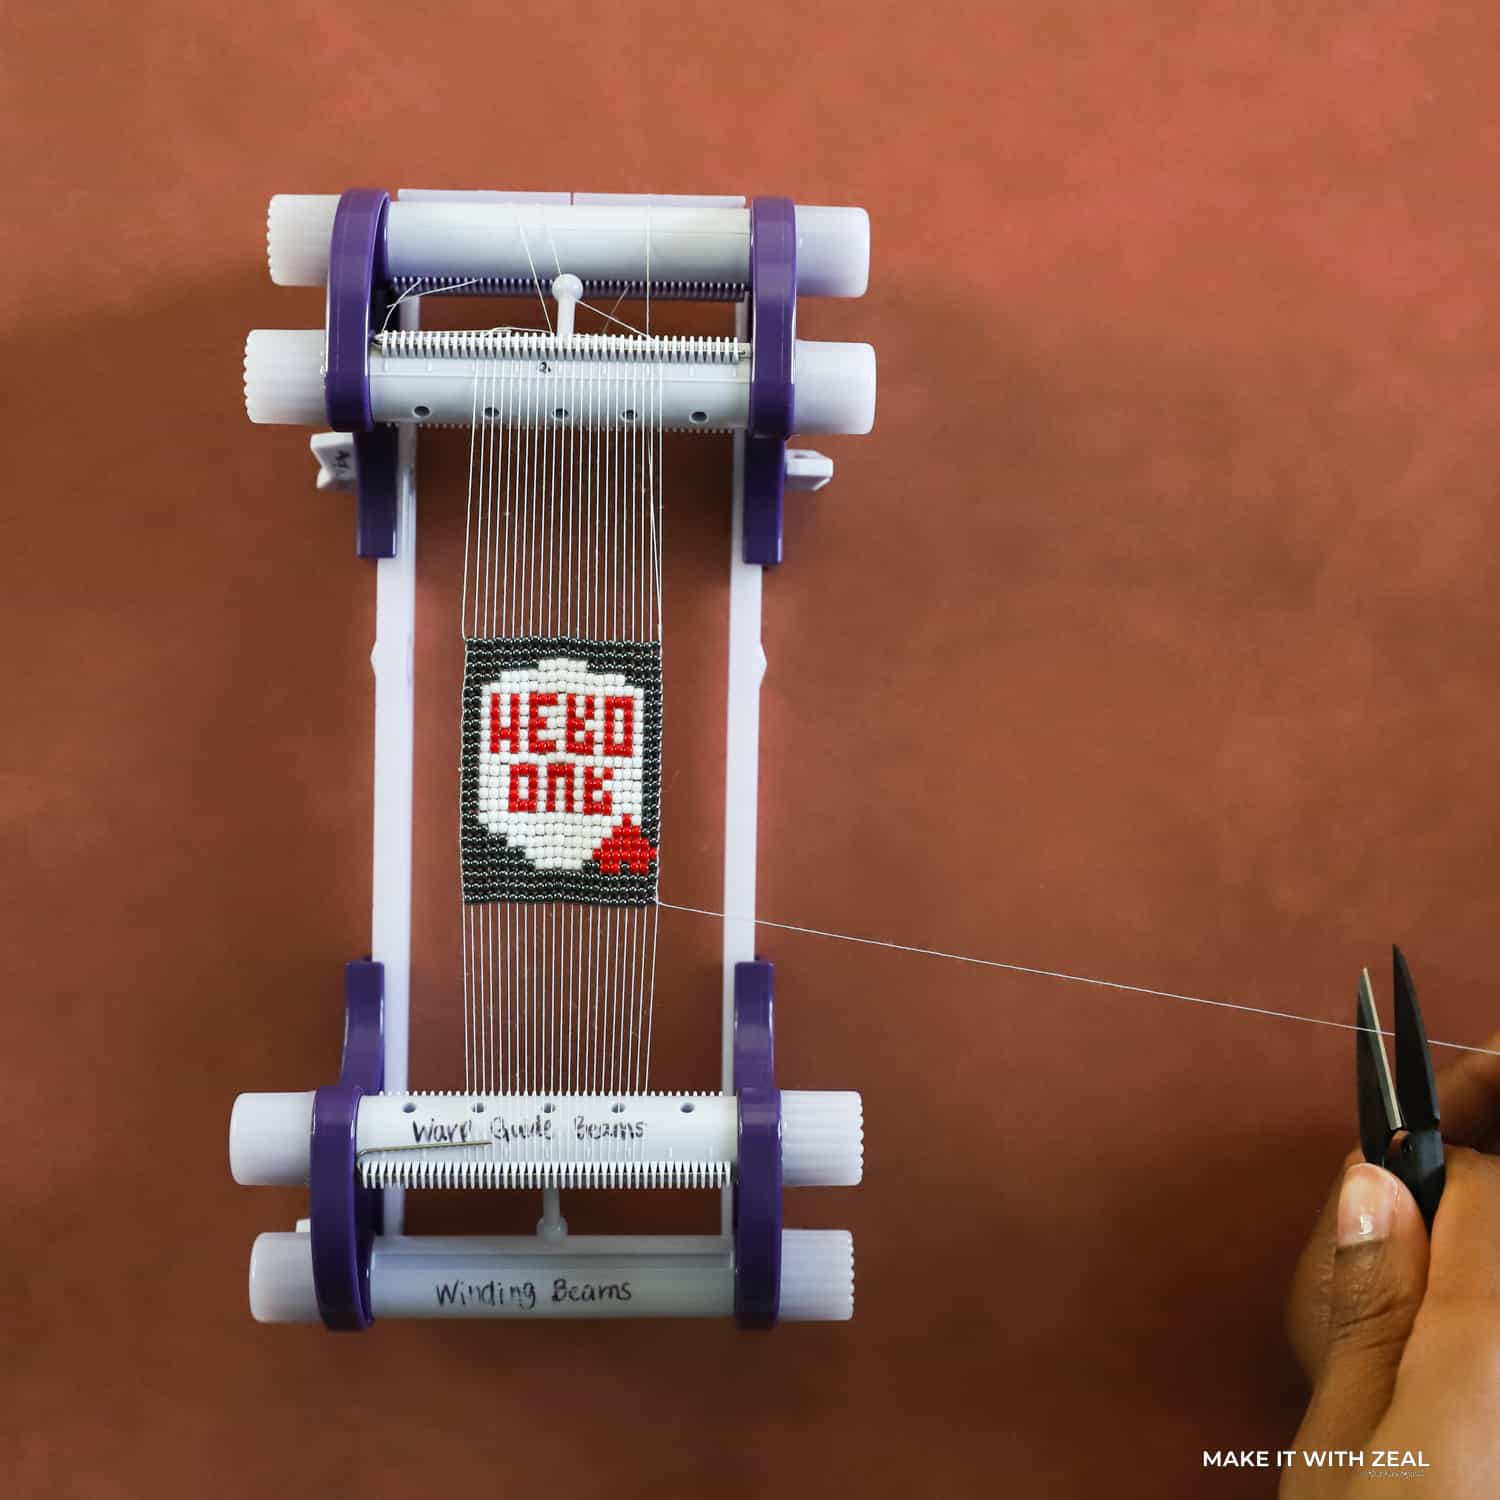
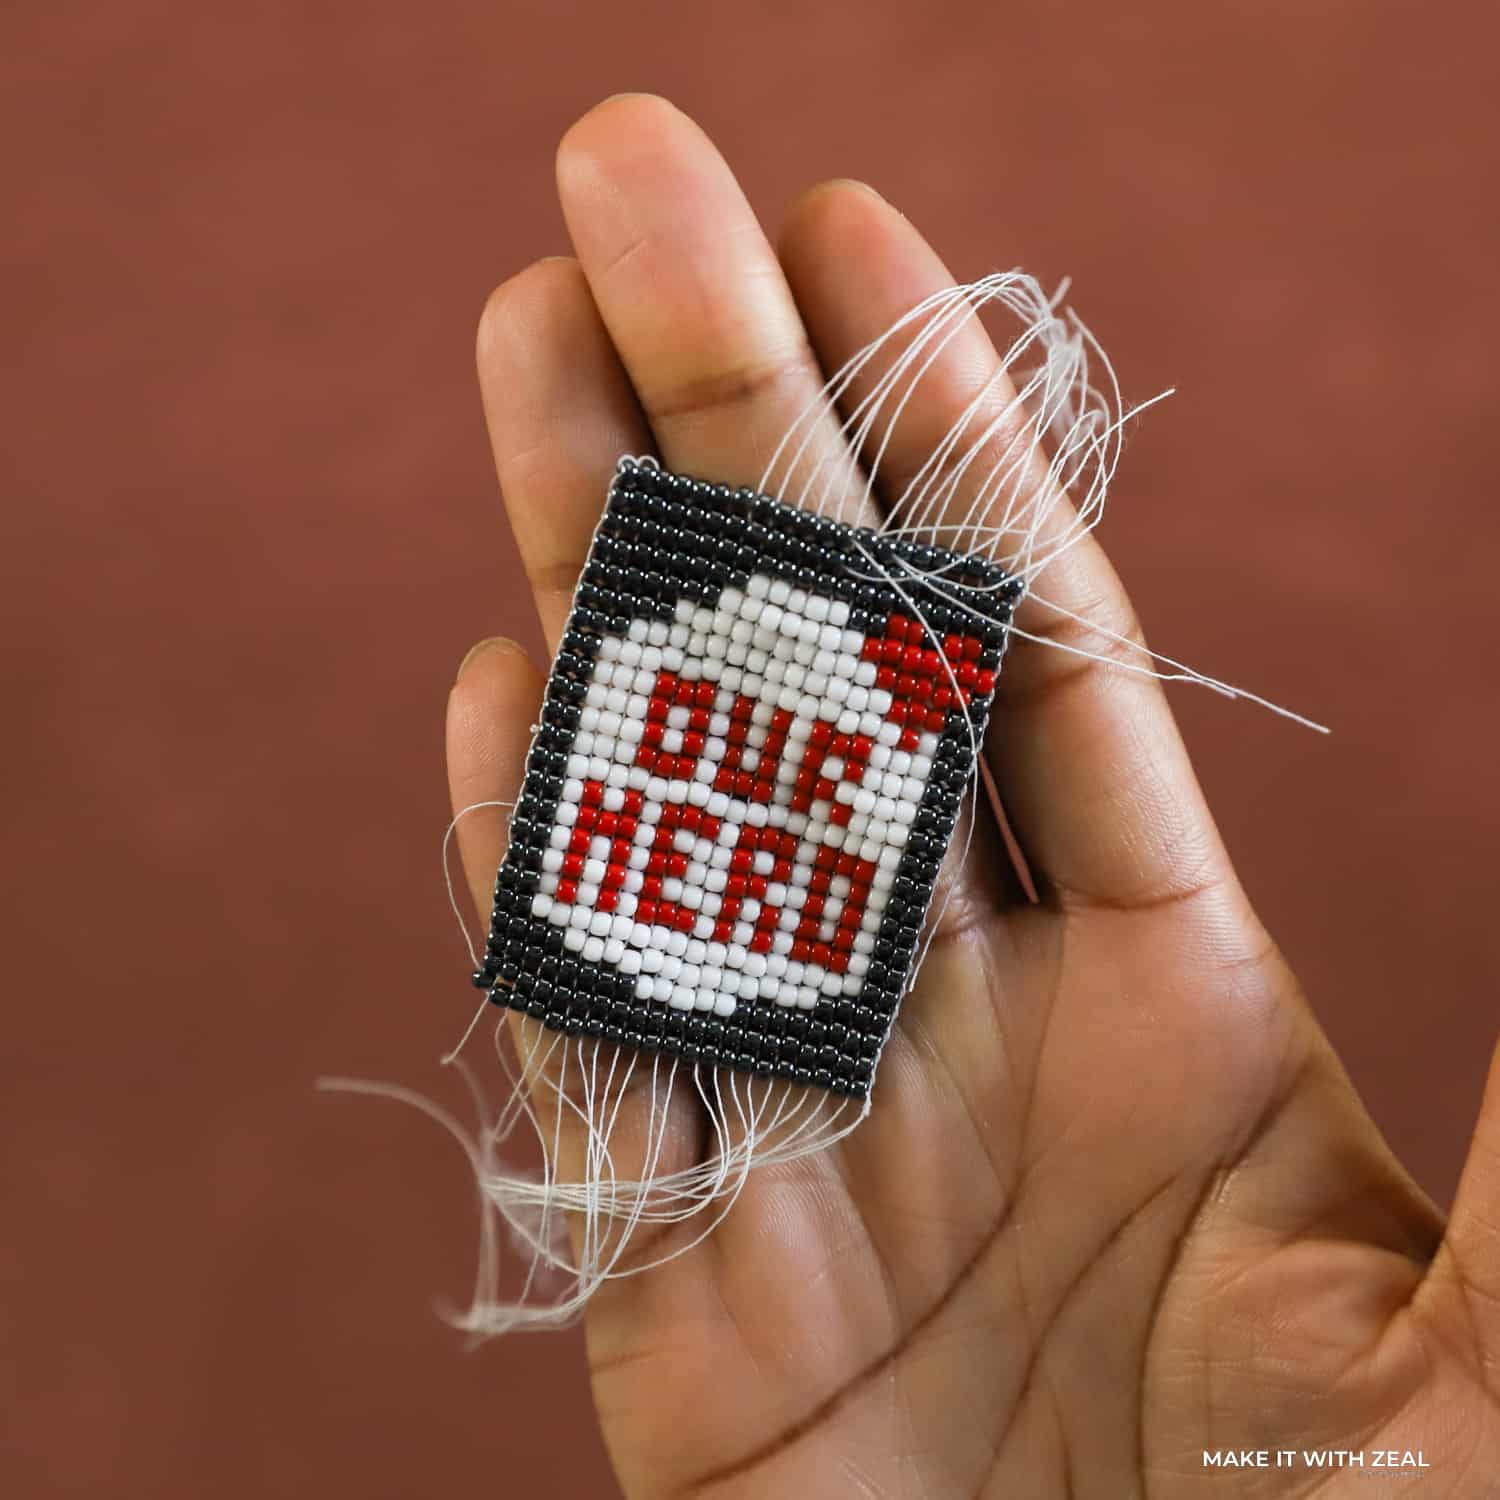
Step 13. Trim the warp threads off the loom and flip the design over. Doesn’t it look cool?
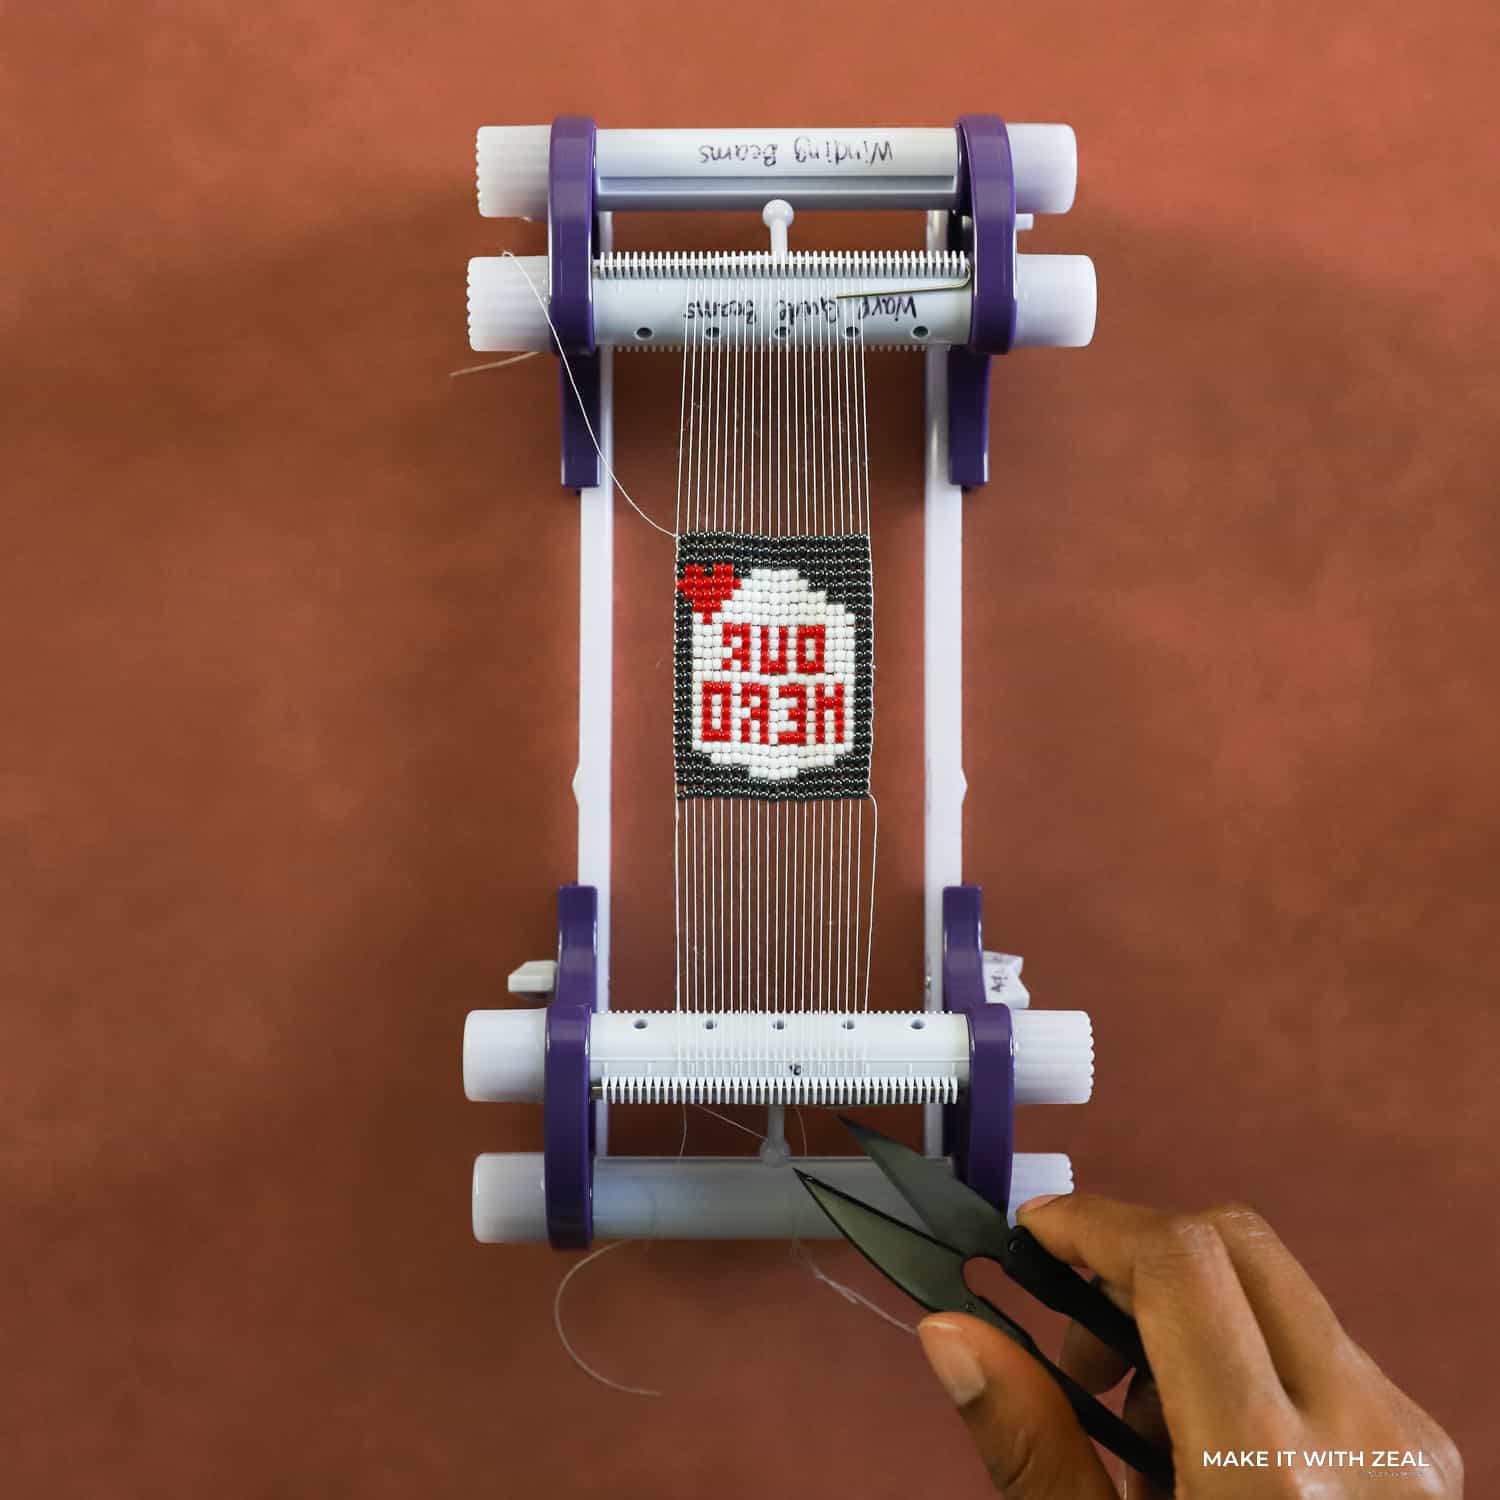
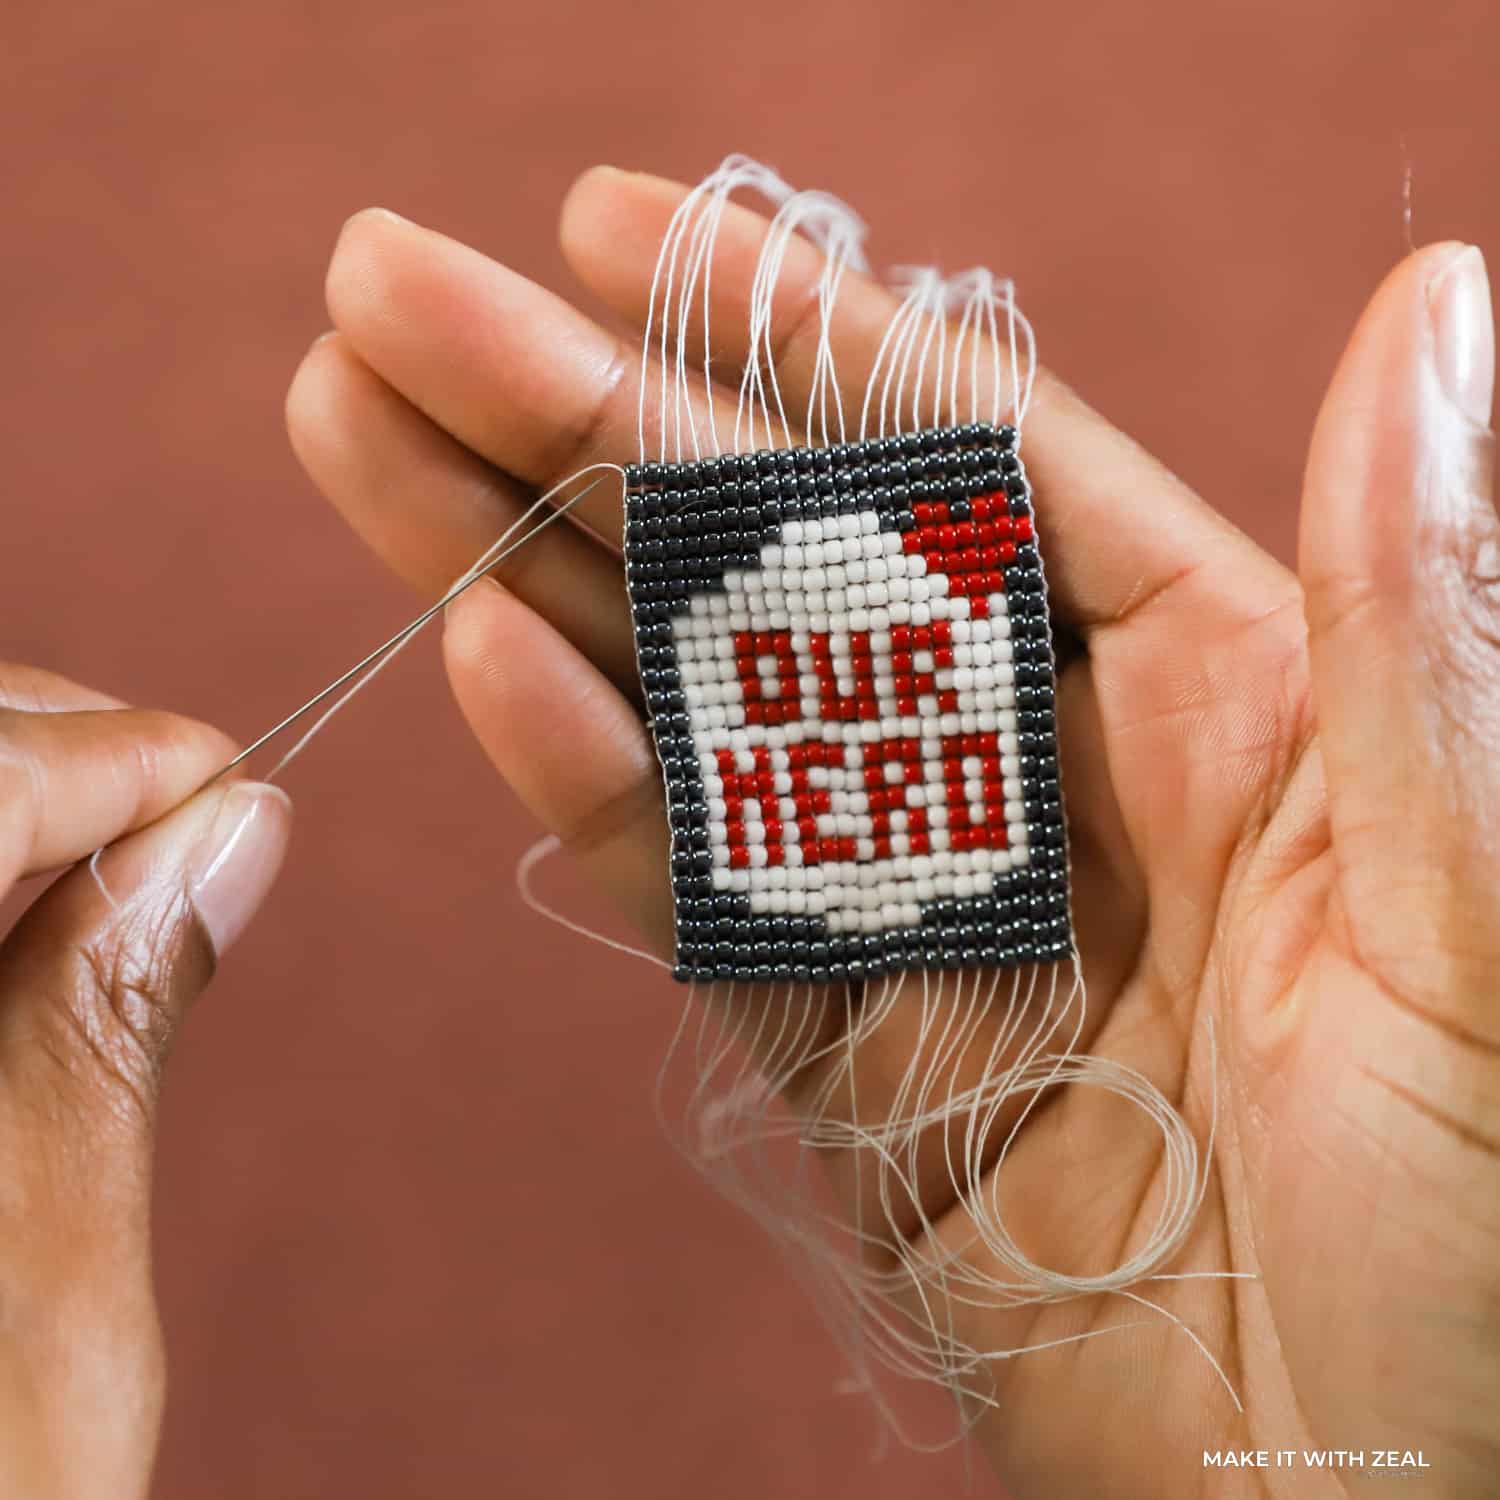
Step 14. Weave each warp threads back into the keychain.
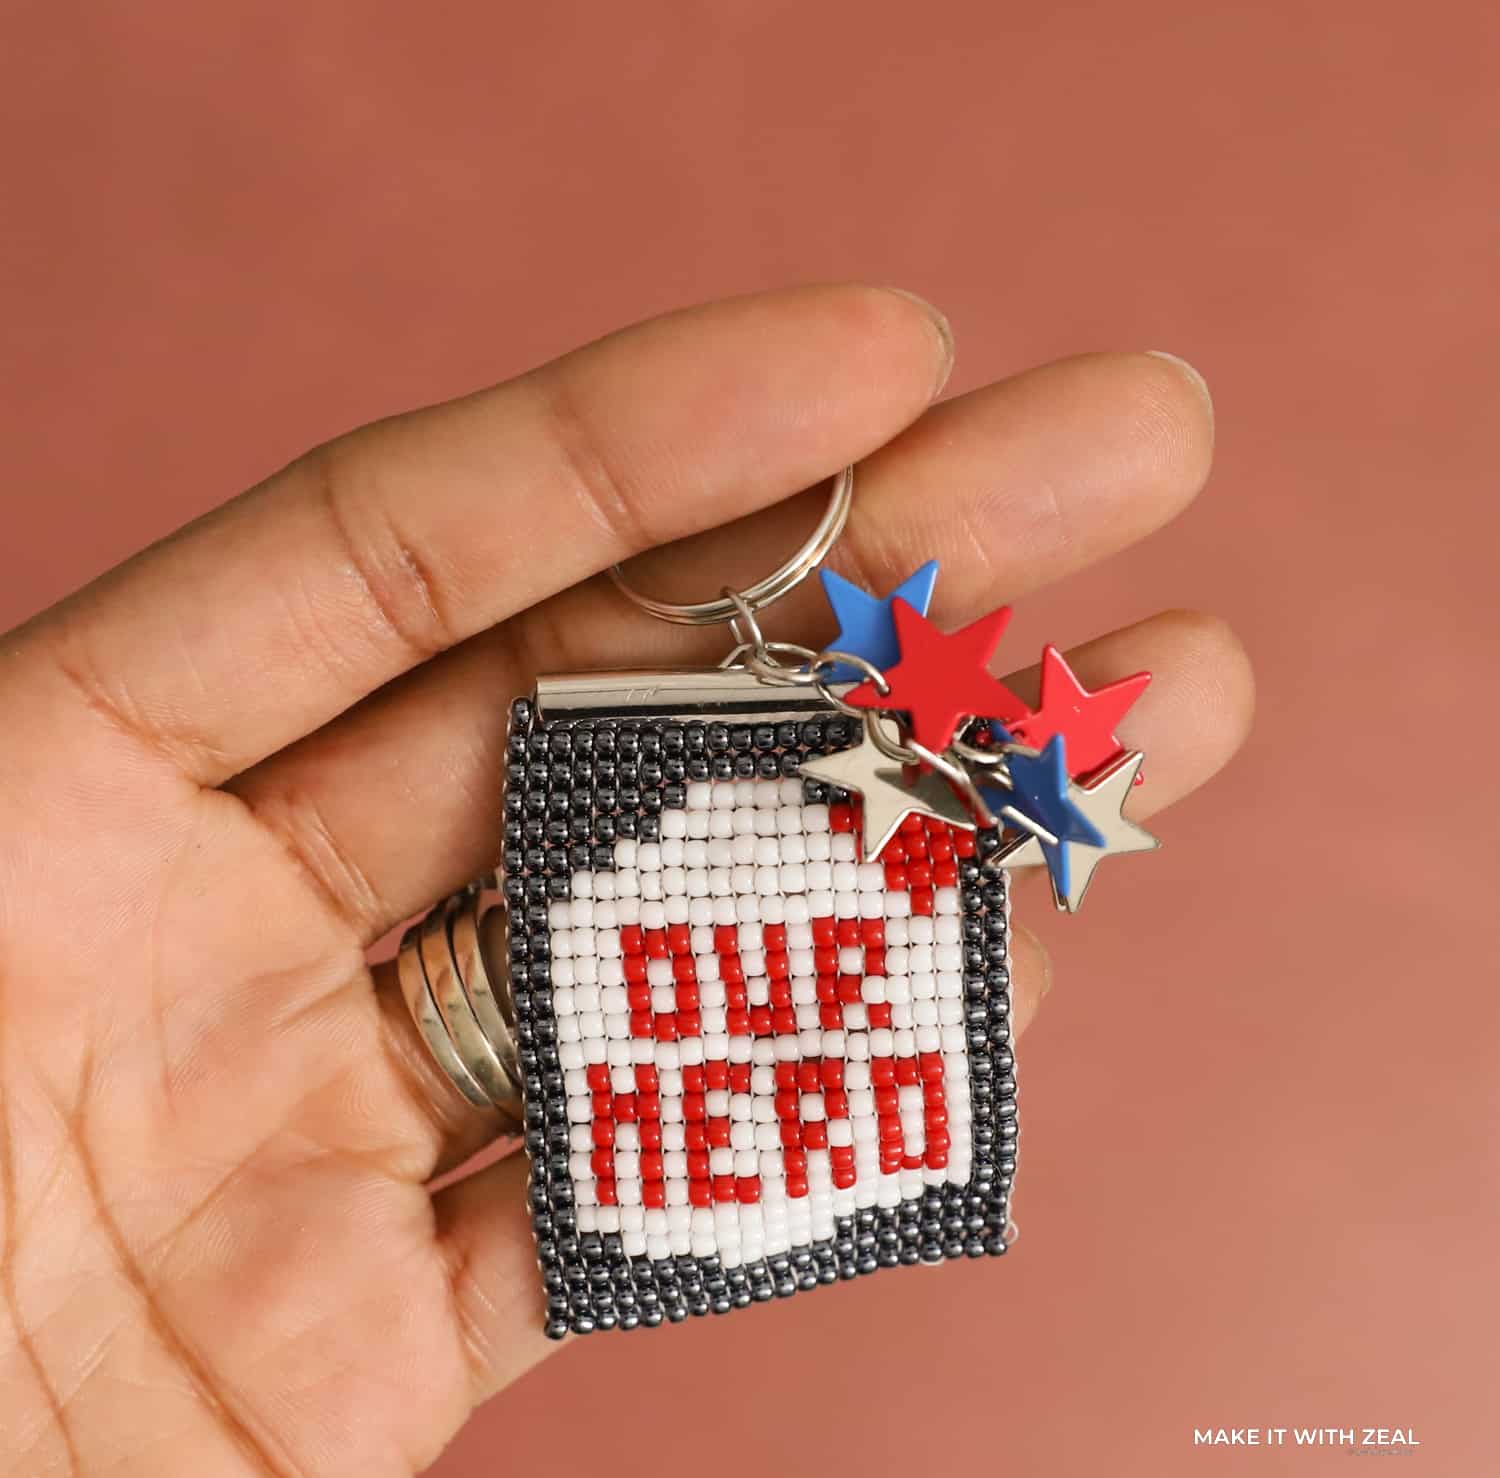
Step 15. For the final step, add a rectangle ribbon crimp using the flat and needle-nose pliers. Oh, and if you want to add a nice embellishment, stars work really well.

Beading on a loom is definitely one of those labor of love projects, but it’s totally worth it! I hope this “Our Hero” beading pattern will be of good use to you during this memorial day.
Enjoyed this beading blog? If so, click the links to check out my Ombre Bracelet and Cactus Keychain tutorials. If you’re looking for more in-depth information about Clover’s Beading Loom those blogs are pretty detailed!
Be sure to show me how you decided to use the pattern with the hashtag #makeitwithzeal and tag me @sprinklesofzeal on all social media.
Well, until next time, have a craftastic day!
-Danielle
Want to check out more of my blogs and tutorials? Here are my social links below!
Blog | Instagram | Facebook | Pinterest | YouTube
Stay connected with Clover on Facebook | Twitter | Instagram | Pinterest | YouTube | Ravelry