Cactus Keychain – Beading Loom Project
Hey Clover friends, Happy National Craft month to you! My name is Danielle and I’m a Designer and Craft Blogger over at Sprinklesofzeal
I’m back with a beading project that is centered around plant love! Since plants are totally the rave right now, I thought it would be cool to create a beaded cactus keychain with a pop of spring colors! If you’re completely new to beading on a loom, I would suggest starting with the Ombré Bracelet with Beading Loom tutorial. This blog not only helps with using your loom, but the included pattern is simple and easy to follow. Alright, are you ready to start beading? Let’s gather the supplies.
Beading Level: Beginner – Advanced Beginner
Here’s what you’ll need to create the Cactus keychain:

- The Beaded Cactus Pattern
- Clover’s Beading Loom – Art No. 9910
- Clover’s Beading Thread (Grey) – Art No. 9916
- Clover’s Spring Tape Measure – Art No. 9610
- Clover’s Bordeaux Ultimate Scissors 130 – Art No. 4940
- Rectangle Ribbon Crimp, Jump Ring, Chain, and Split Ring
- Beading Mat
- Jewelry Pliers
- Miyuki Beads ( DB-2032, DB-1490, DB-655, DB-659, DB-2036)
- Black Marker
![]()
Instructions:
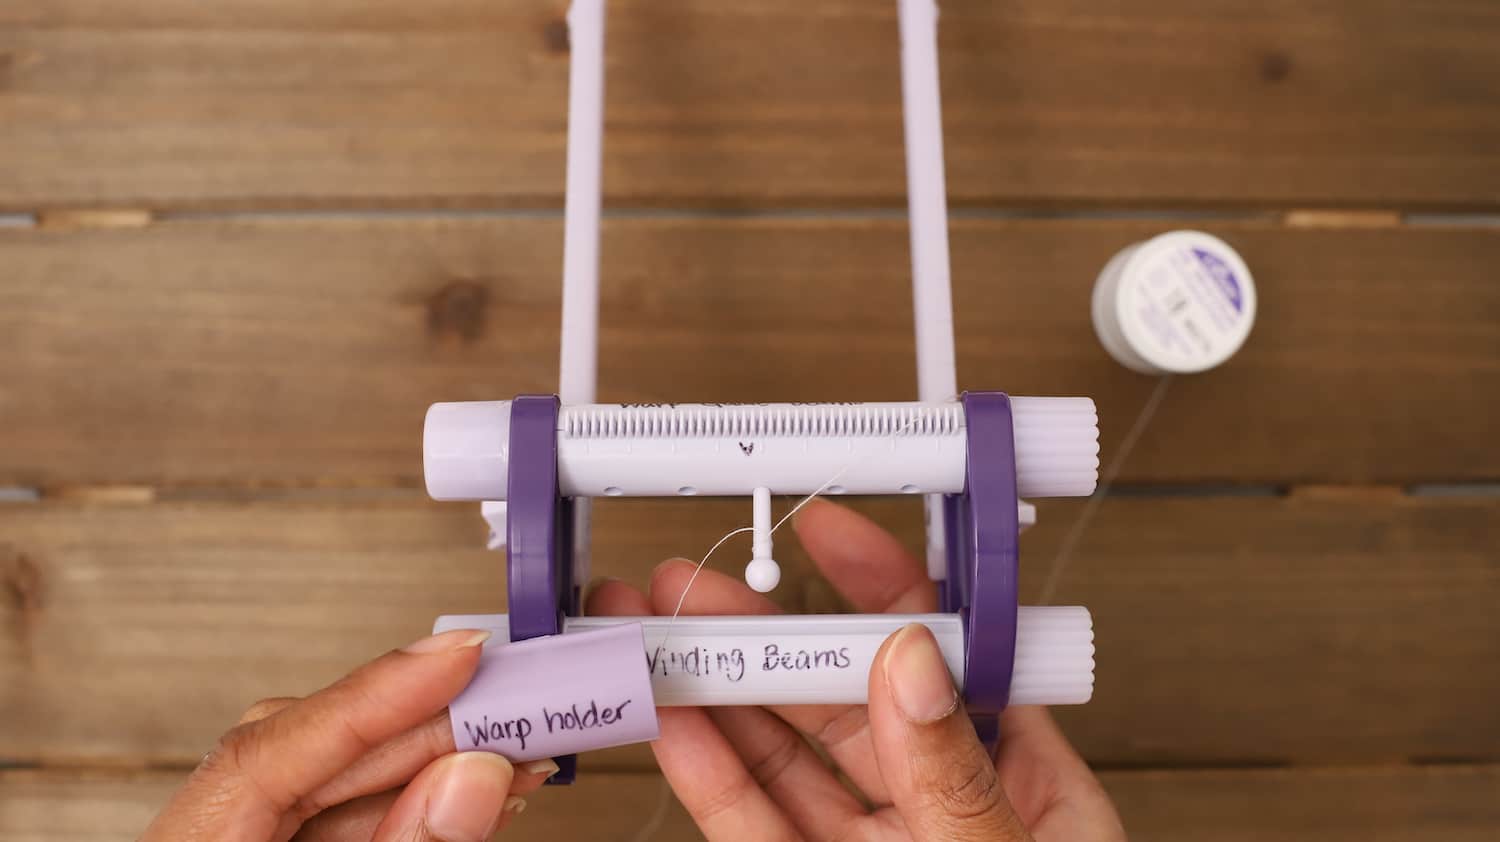
Step 1. Set up the Loom
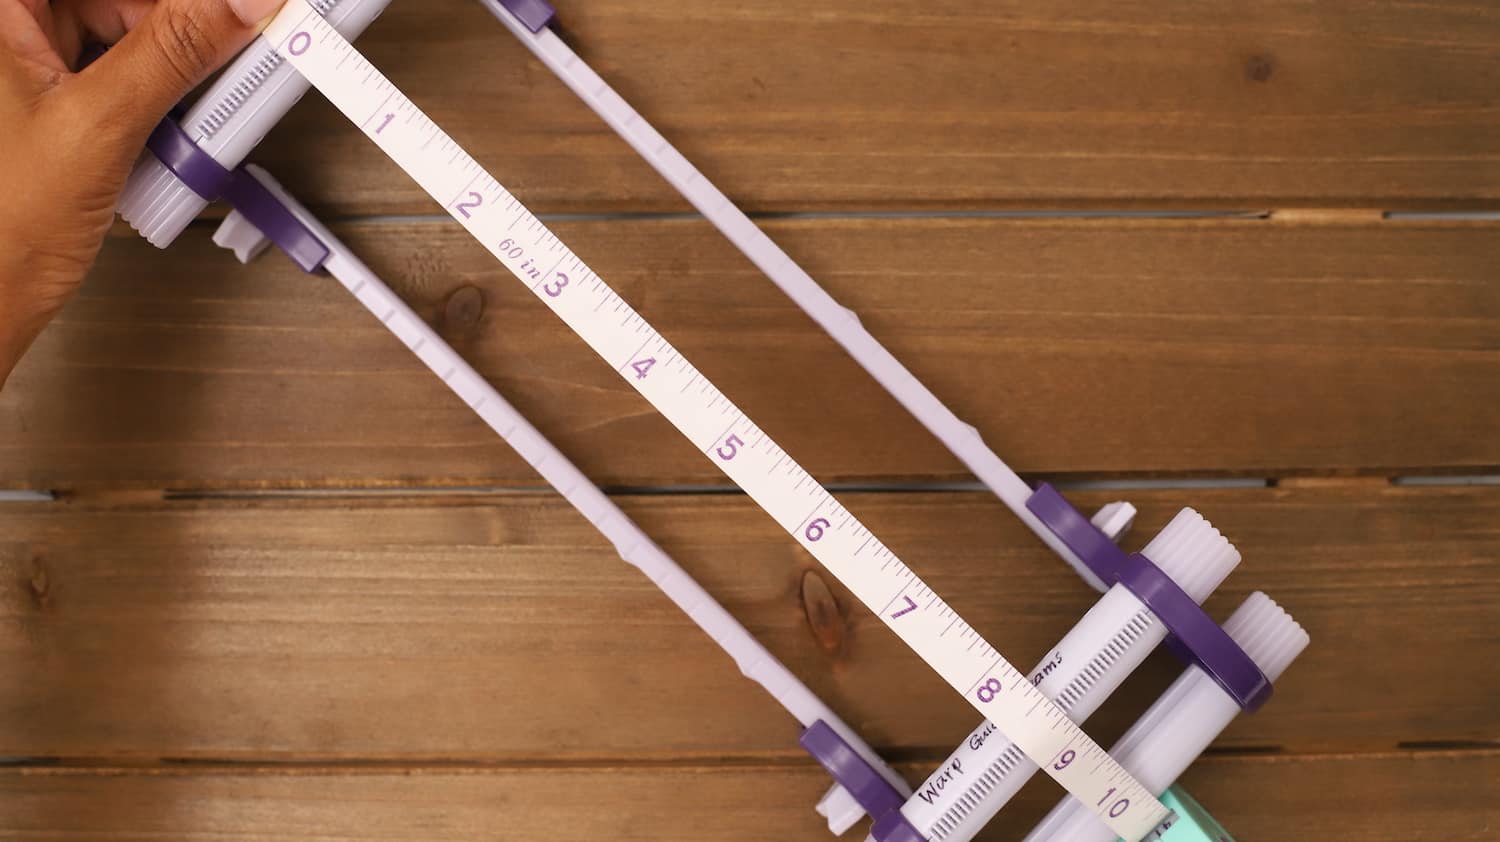
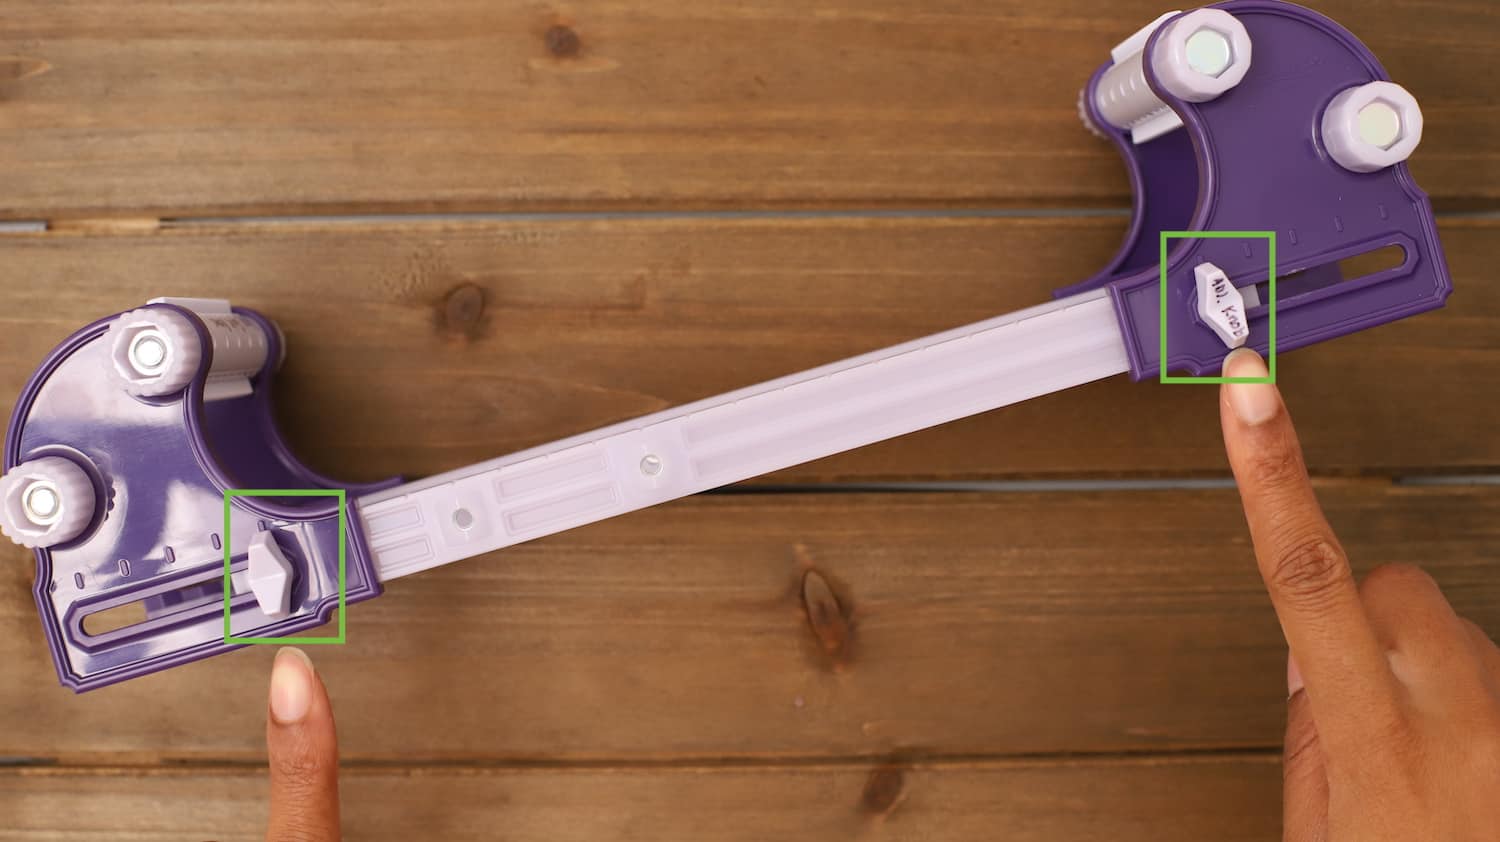
For this project, I would suggest using the largest loom setting at (8 3/8″) to ensure that you have enough thread during the finishing process. The beaded section, including the keychain should measure out to about (4 inches) in length when it’s complete. Here’s a photo that shows where the adjustment knobs should be for this project.
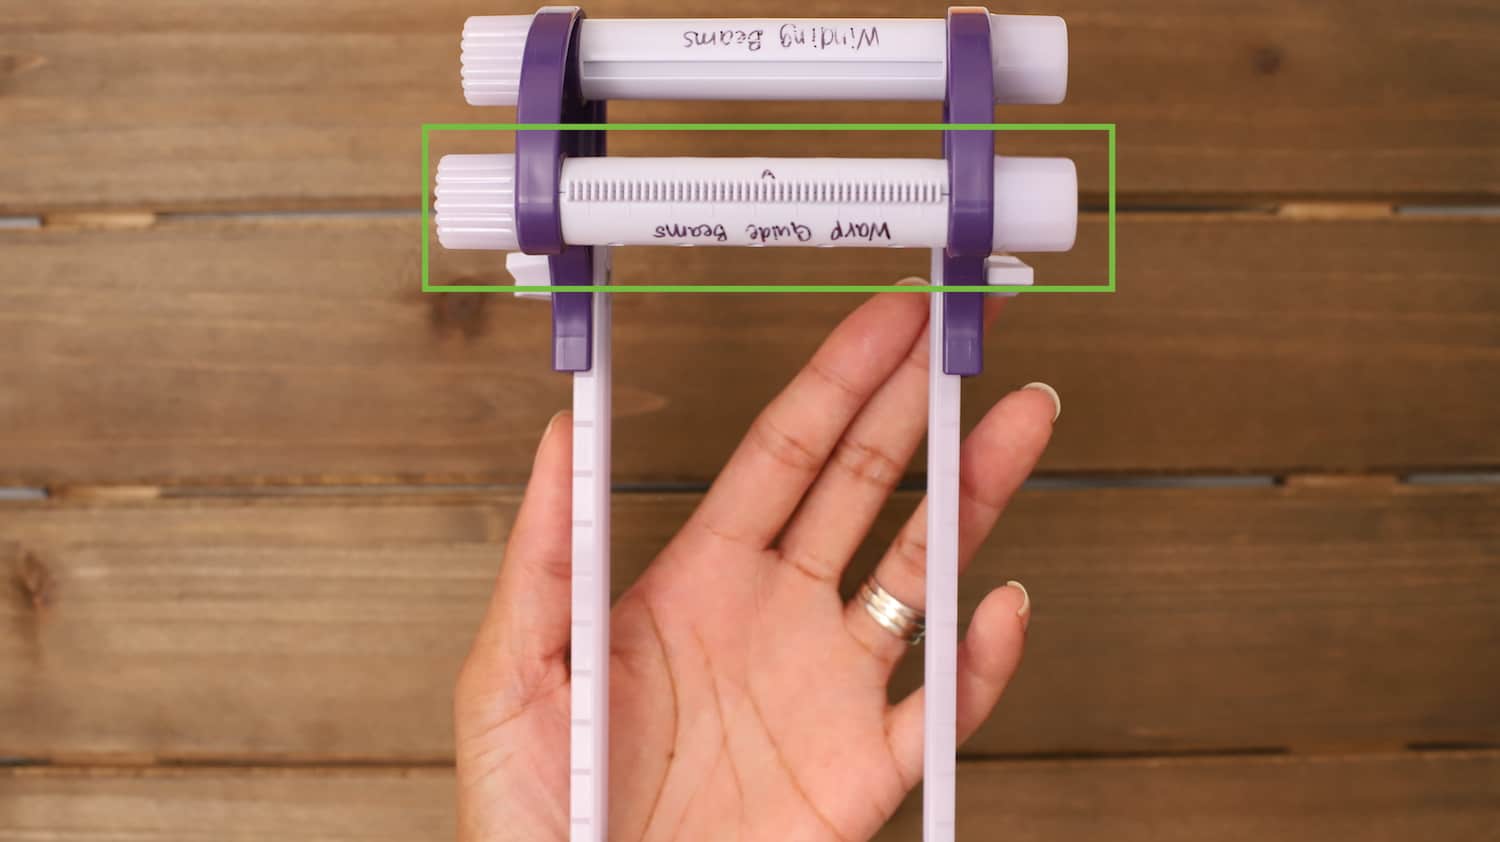
Since we will be using Miyuki Delica beads, it’s important to adjust the warp guide to the (A) Grooves and tighten.
Place the pegs into the center hole and then the initial setup is complete!

Step 2. Start Beading
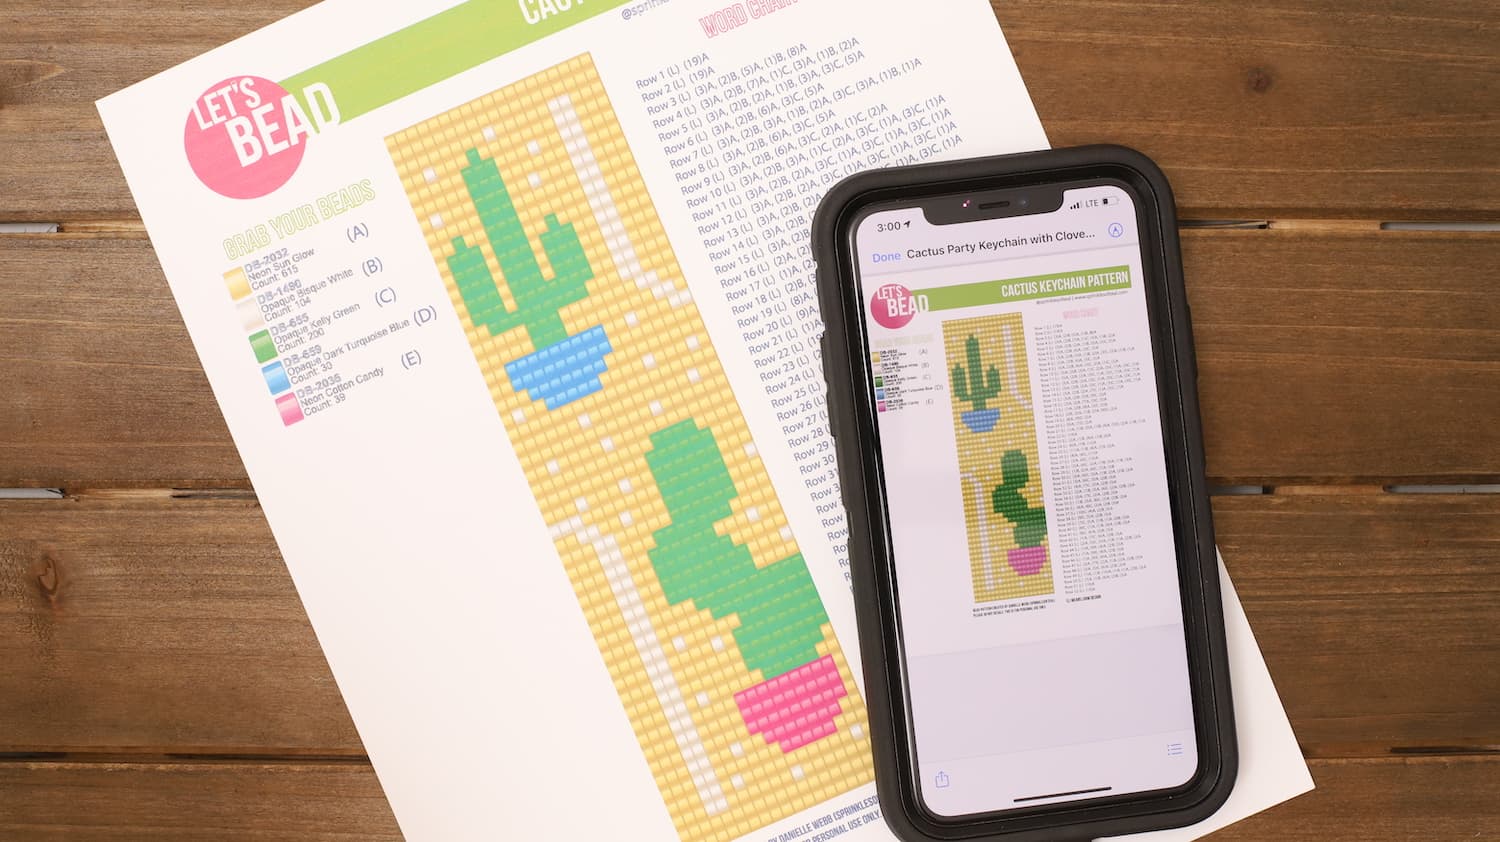
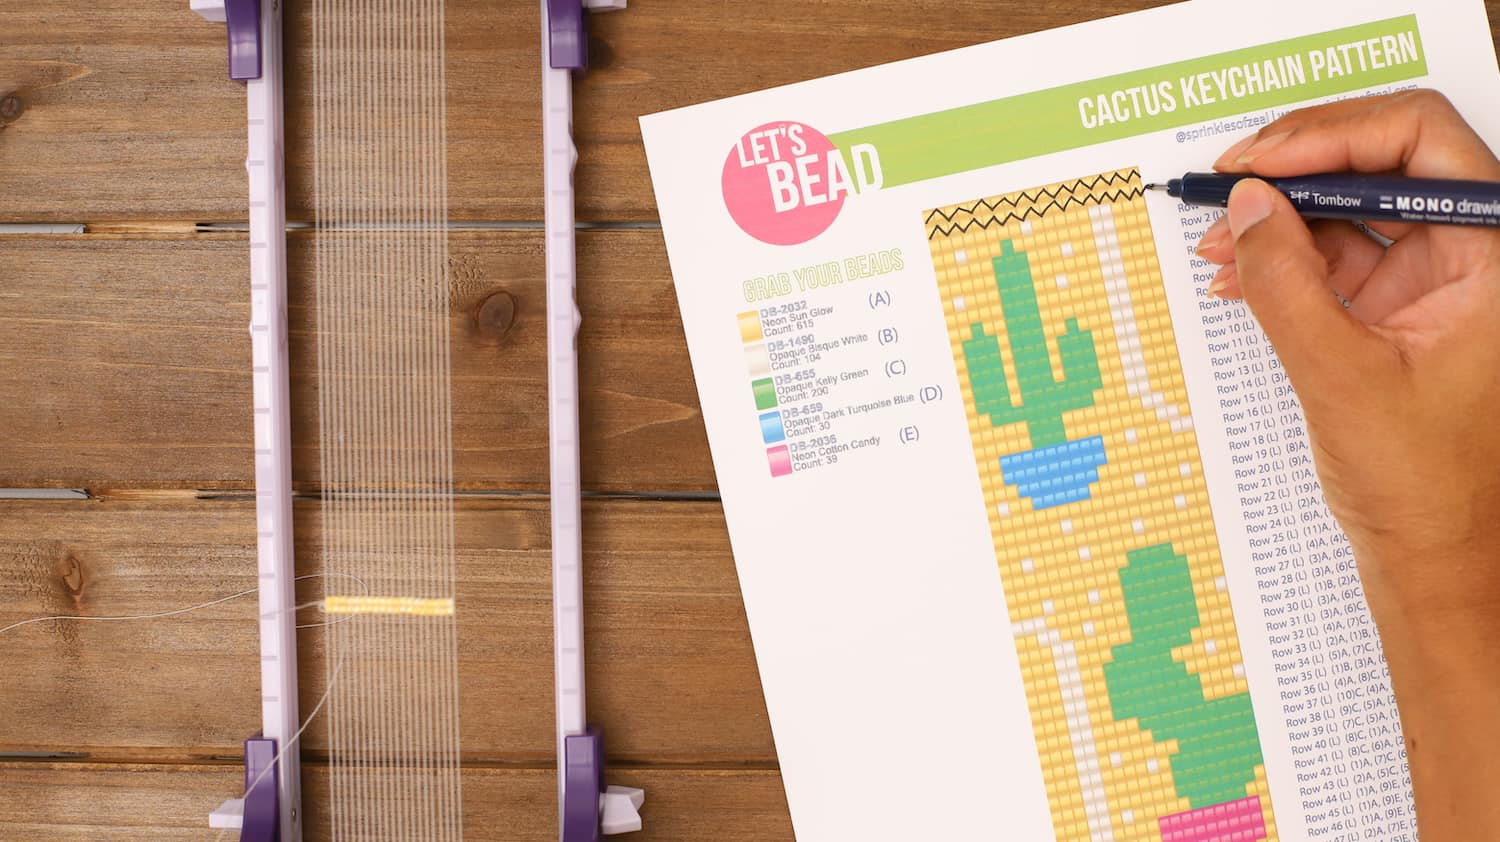
Download and print the pattern. You can always use your phone or laptop to view the design if you don’t own a printer.
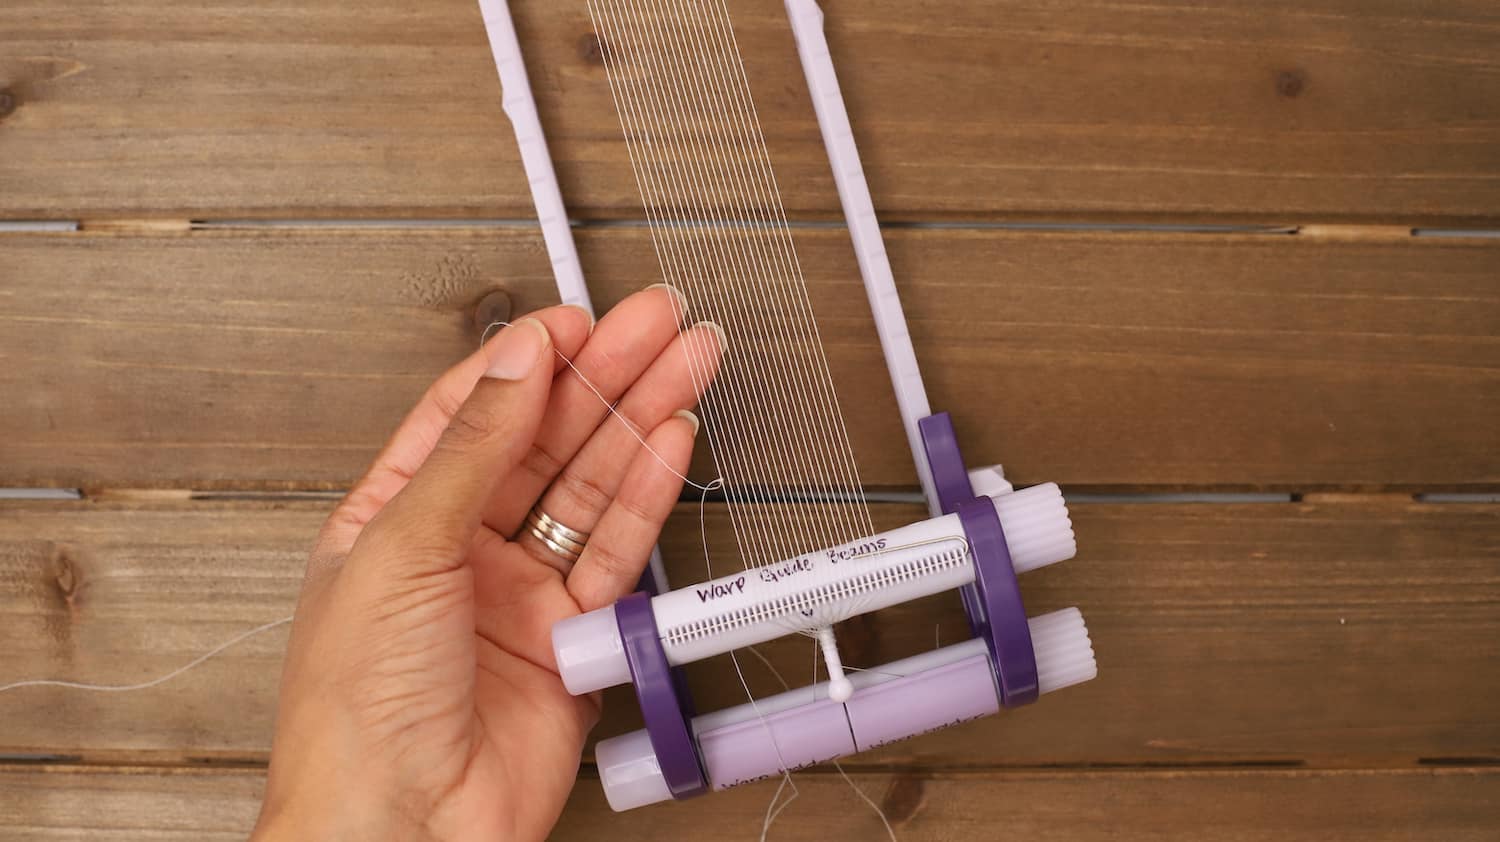
Create a slip knot with your clover beading thread and attach it to the peg. Clamp the warp holder onto the warp guide beam to secure the slip knot in place.
The pattern has 19 rows, which means you’ll need to add 20 warp threads to your loom.
Once you have the warp threads attached, trim the beading thread with the Bordeaux Ultimate Scissors 130, then adjust the tension if needed.
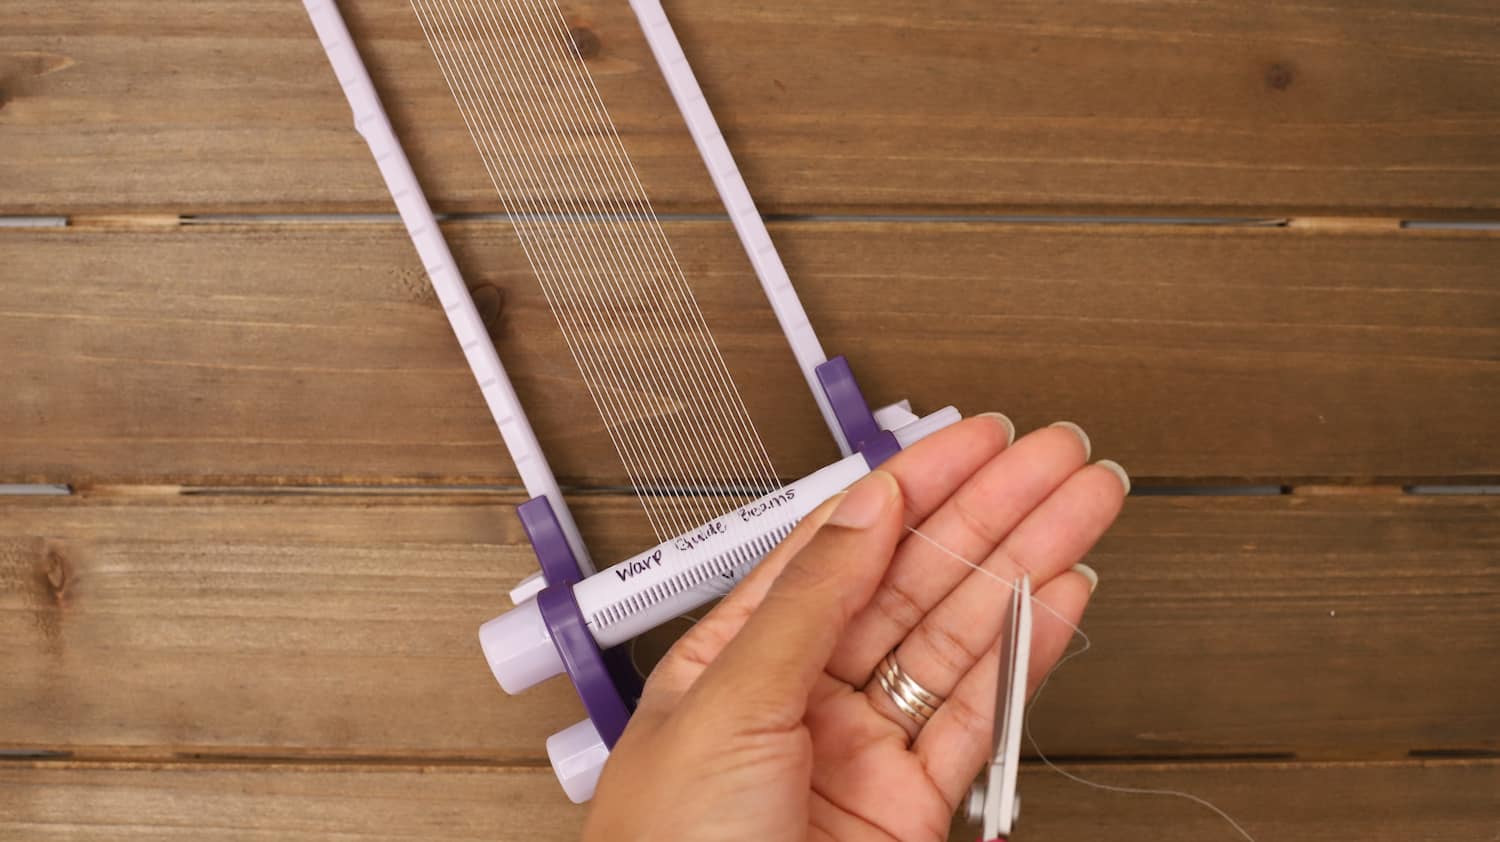
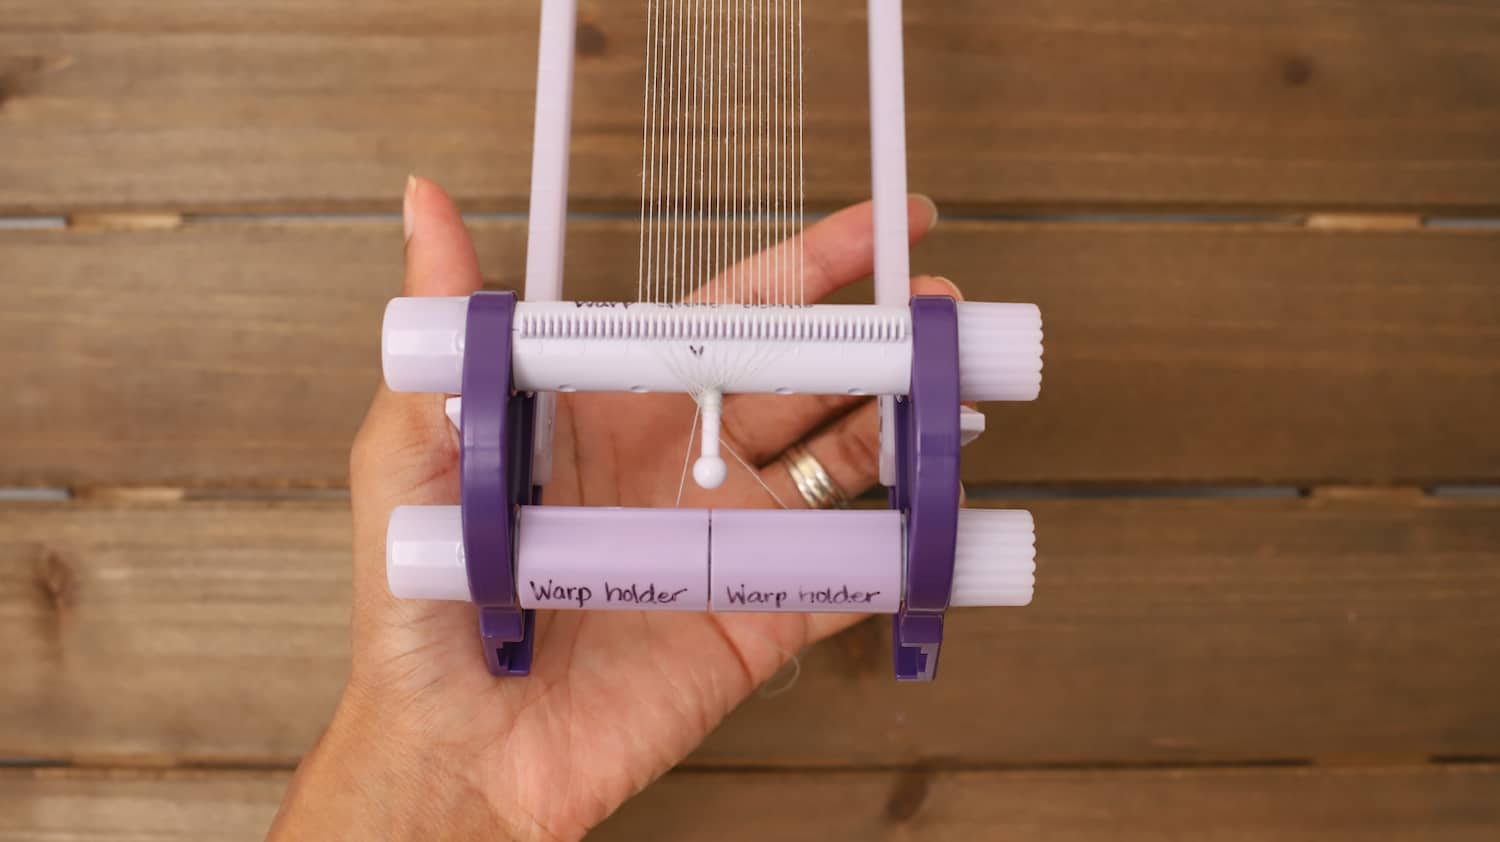
Since the number of warp threads is even, the warp holders will be on the same side.
Quick note: Make sure to wrap the beading thread around the peg at least twice as you wind the warp threads into each (A) Groove.
Add the metal stopper to prevent the threads from moving.
Now you’re going to thread the weft needle with the beading thread, then tie a knot onto the (left) last warp thread. Be sure to push the 6-inch tail underneath the warp guide beam to keep it from getting tangled.

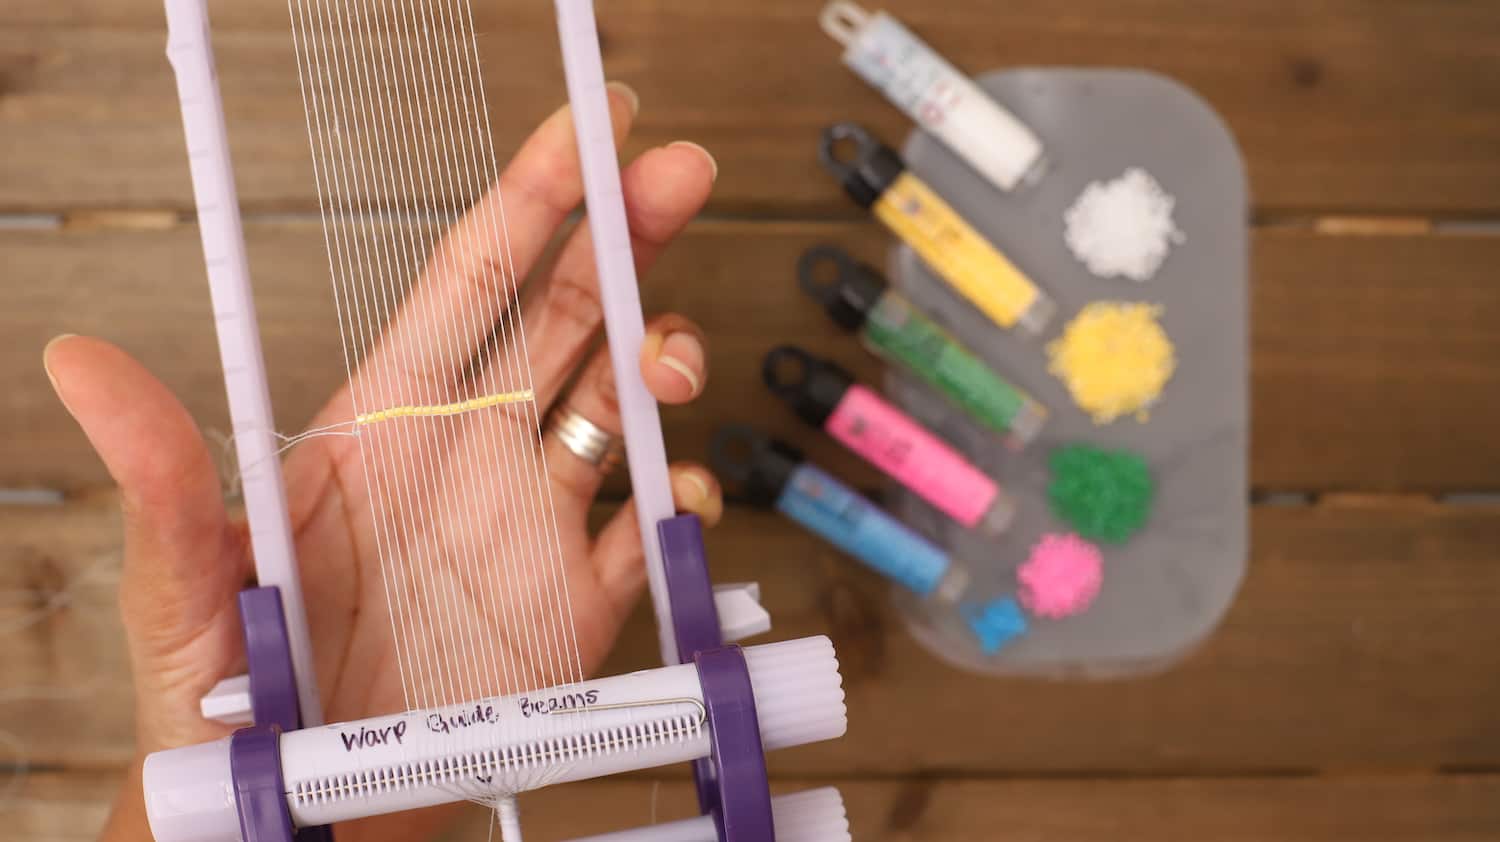
Load the Miyuki beads onto the beading mat and begin beading along with the pattern. Start by putting your weft (needle) thread underneath the warp threads then, pick up 19 Neon Sun Glow DB-2032 beads.

Line the beads up between each warp thread, then push the needle in backward to secure the beads. Make sure your needle is on the top of the warp threads when you weave it.
The first row is usually the most challenging. If you can’t get your needle through all 19 beads, then try threading 5 beads at a time until you reach the end.
I find it helpful to use a pen to cross out each row as you complete it. If you aren’t paying attention, you could skip a row and have to start the beading process over, so keep a pen near to avoid the headache.
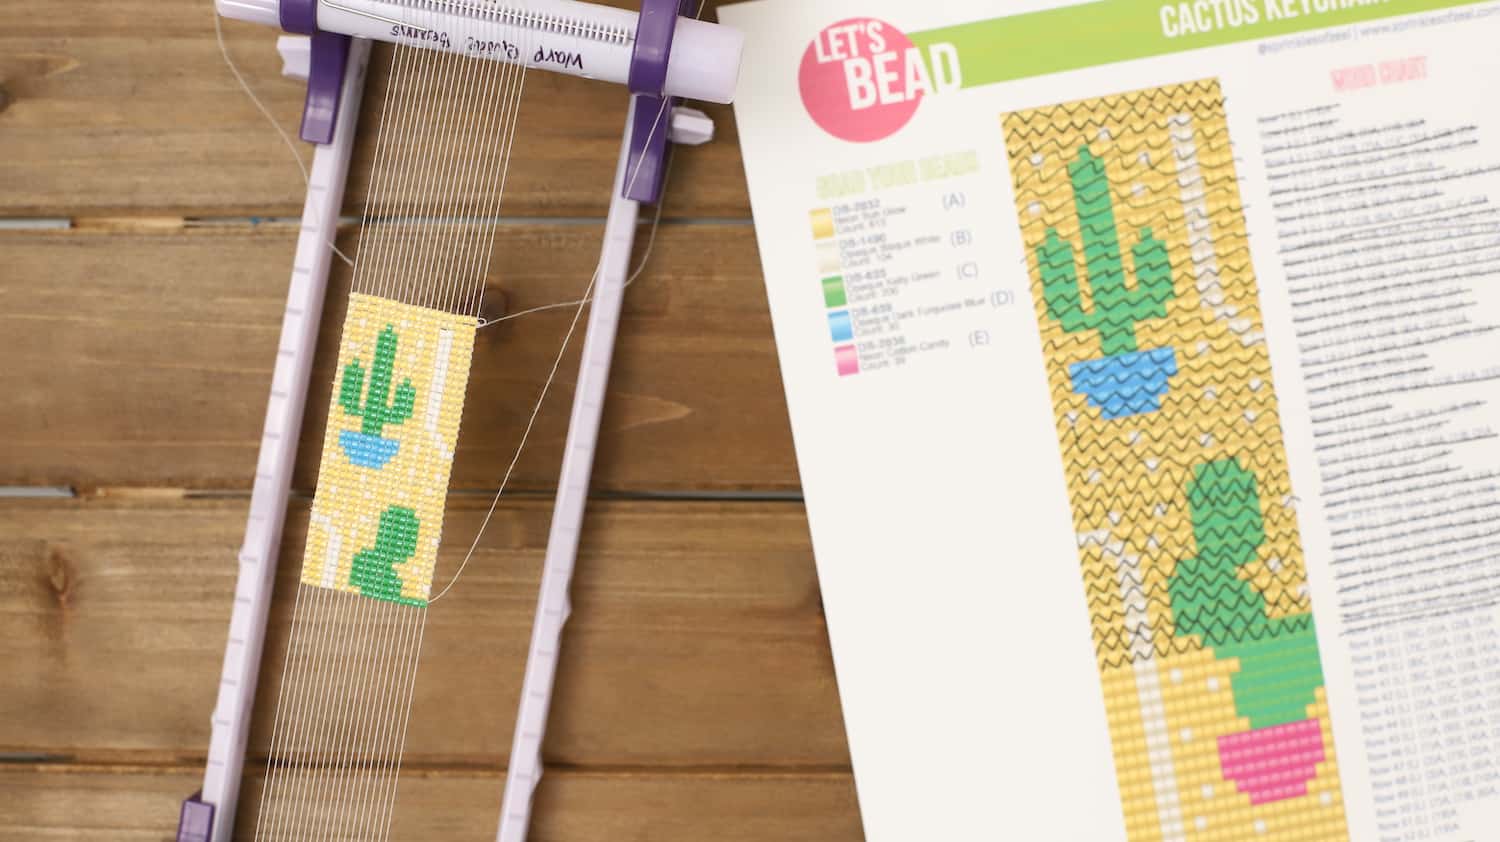
Check out how the keychain looks during the beading process. It’s very similar to the paper pattern!


Step 3. The Finishing Process
Before removing the beaded cactus from the loom, it’s best to tie a knot to secure the weft (needle) thread to the warp thread on the loom.
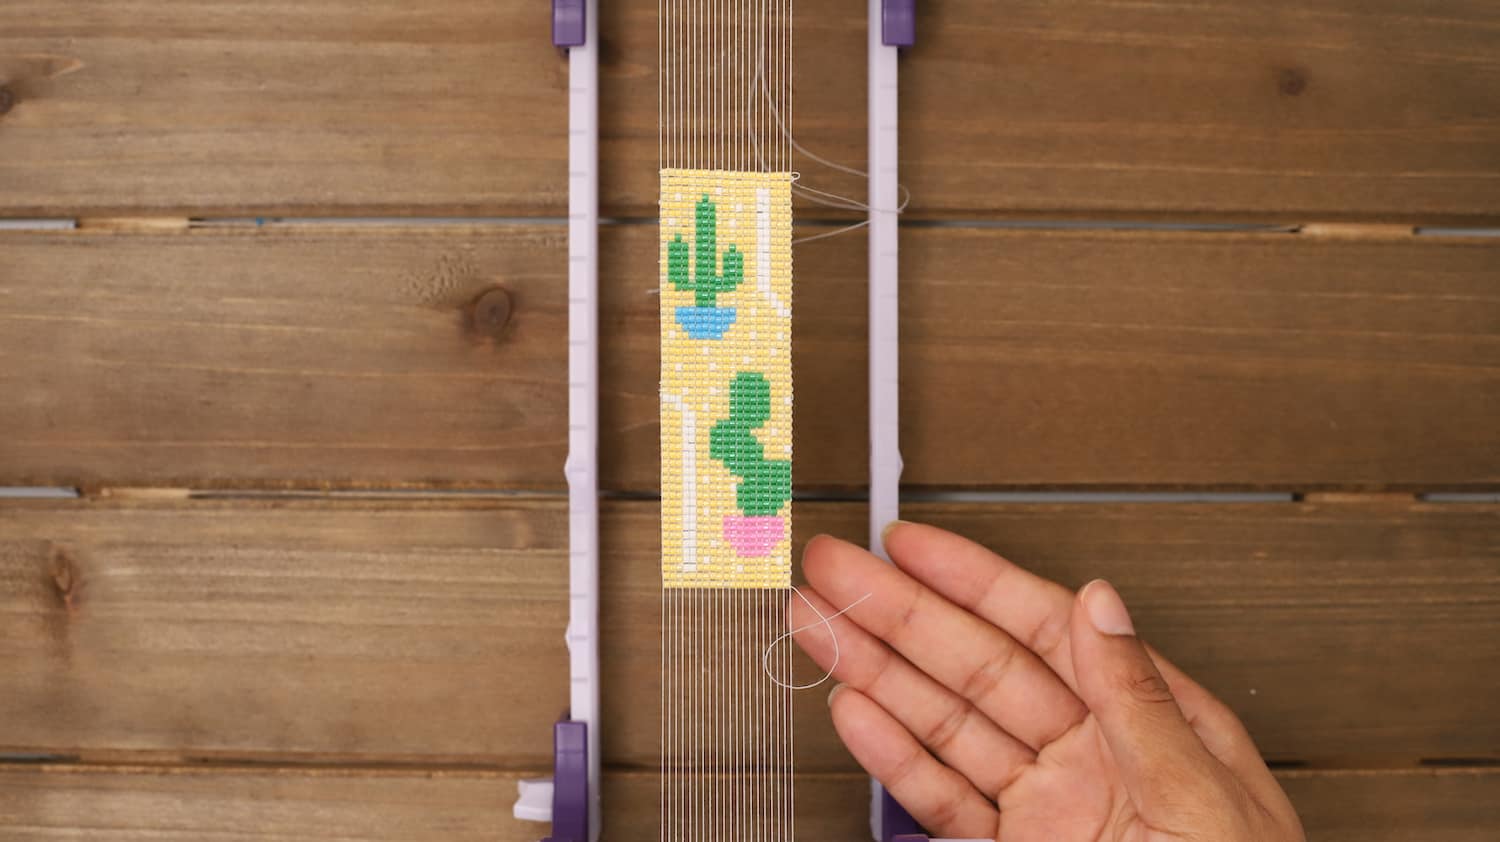

Take your working thread and weave up to the fourth row, going back and forth. Then,weave the warp thread halfway through the fifth row and cut the thread with the Bordeaux scissors. (draw pic..linework) This step is necessary to secure the beadwork and prevent the thread from showing on the ends.
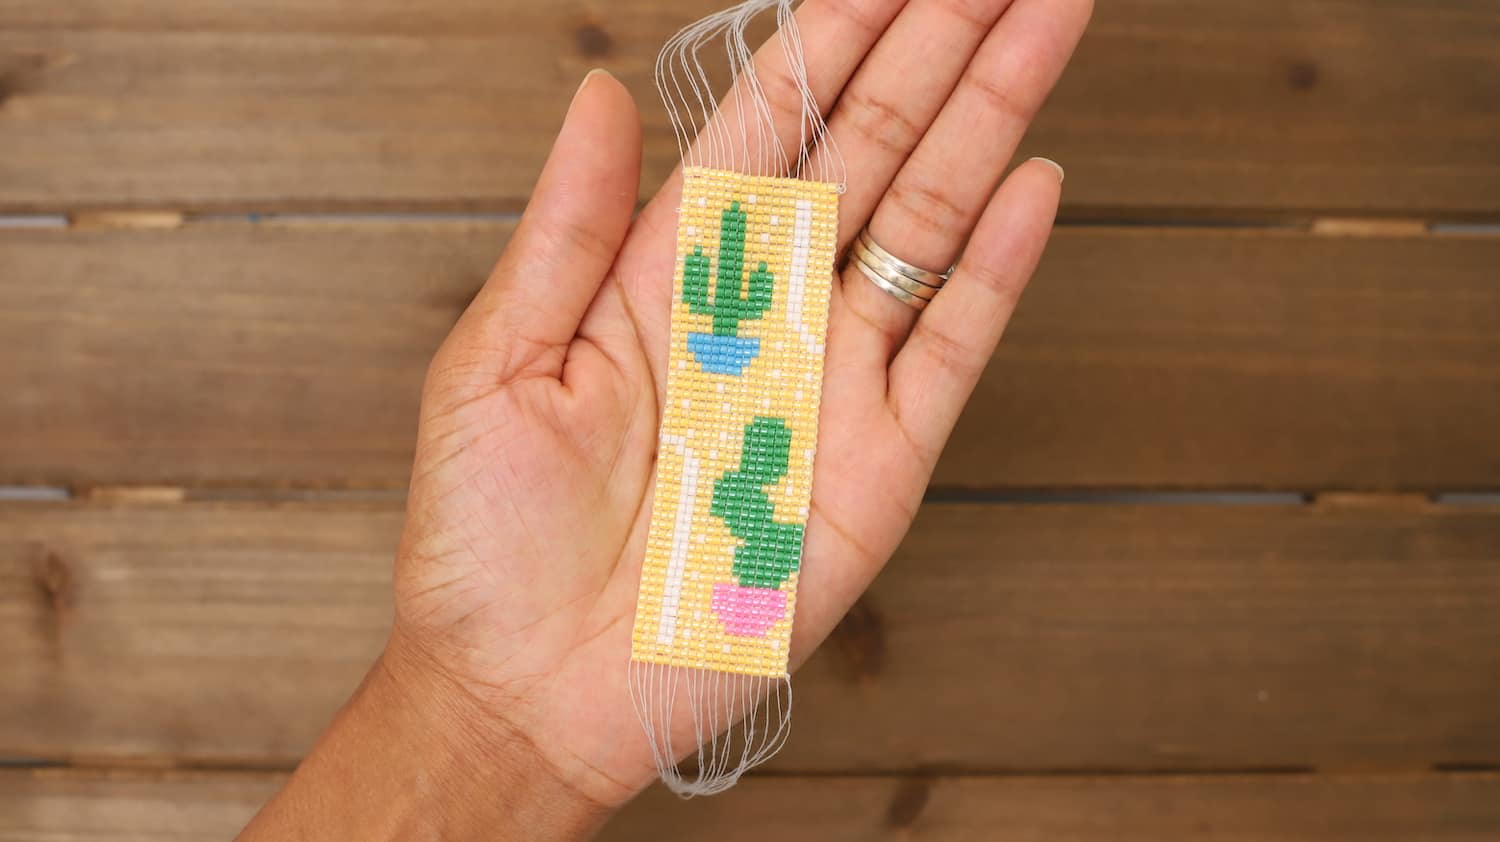
Step 4. Remove the design from the loom
Grab your Bordeaux scissors and cut the warp thread from the loom where the peg is located.

Tada! The beading process is complete!
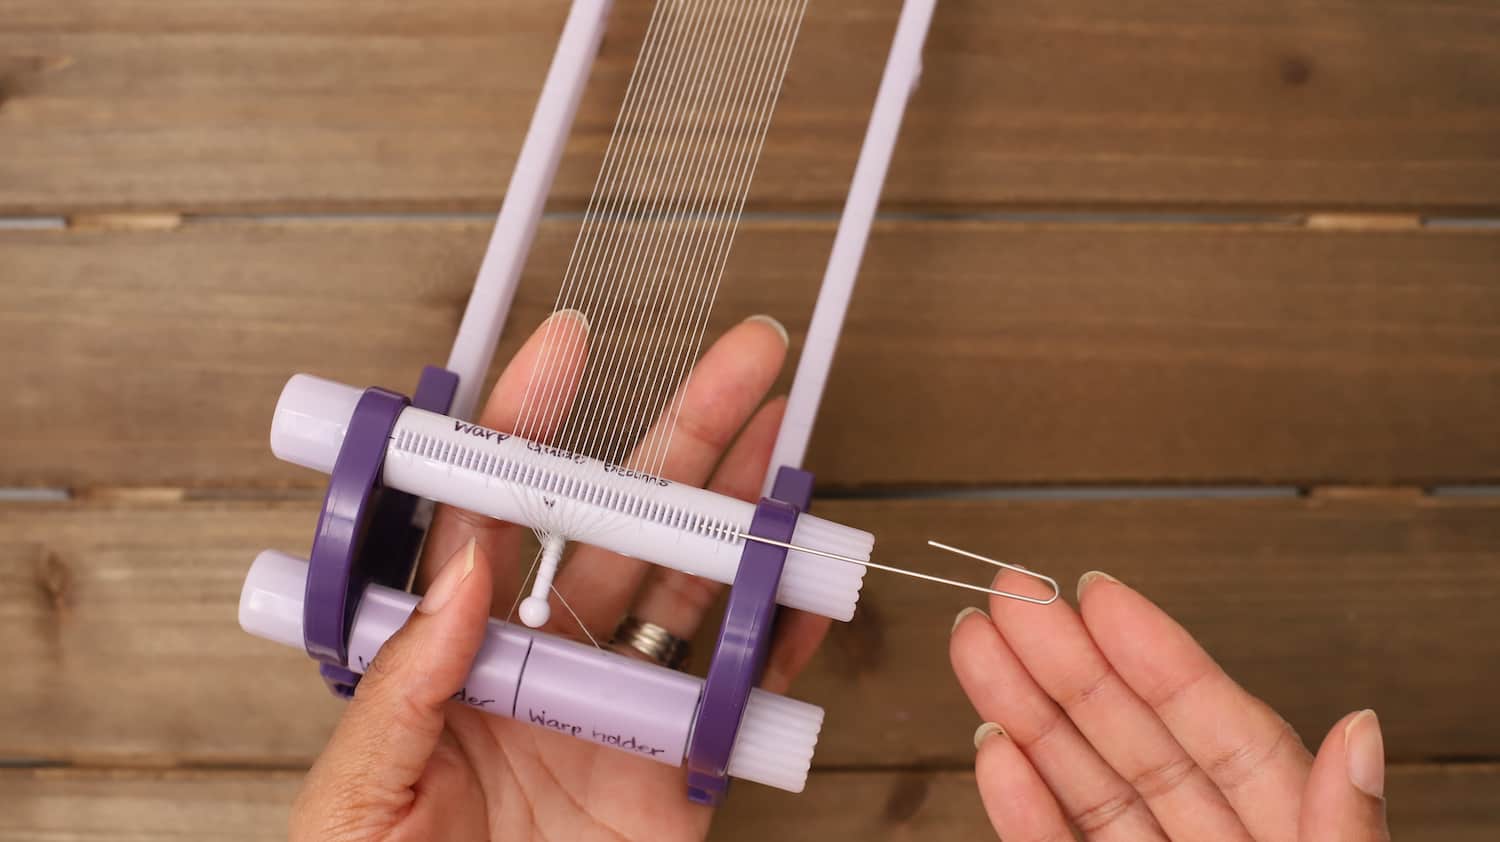
Take the clover threader and thread the loose warp threads back into the piece.
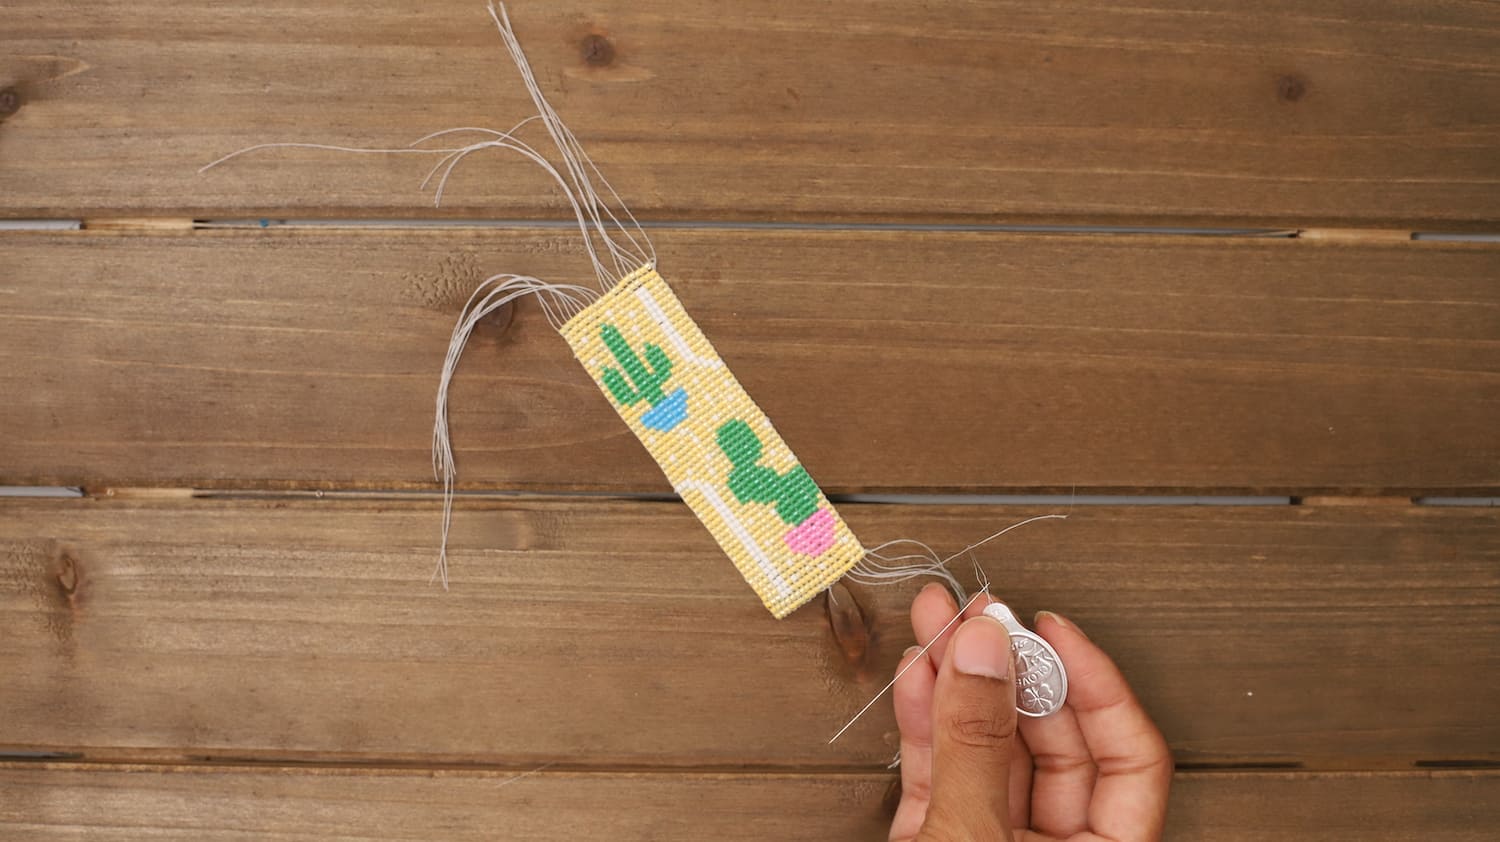
Each warp thread should go up 3 to 6 rows, weaving (one) bead in a back and both motion. See the close-up photos below.
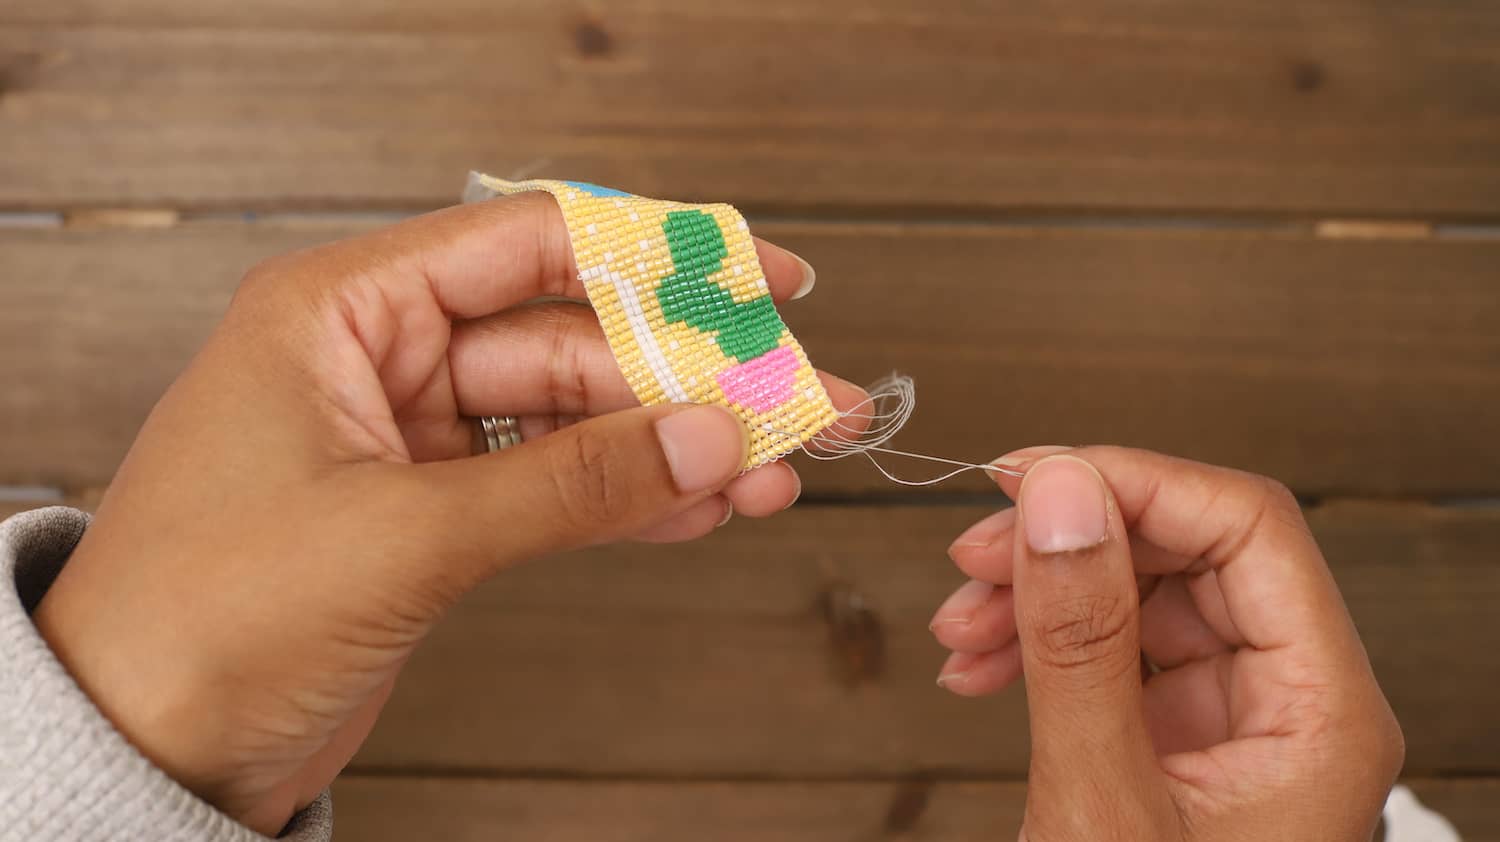
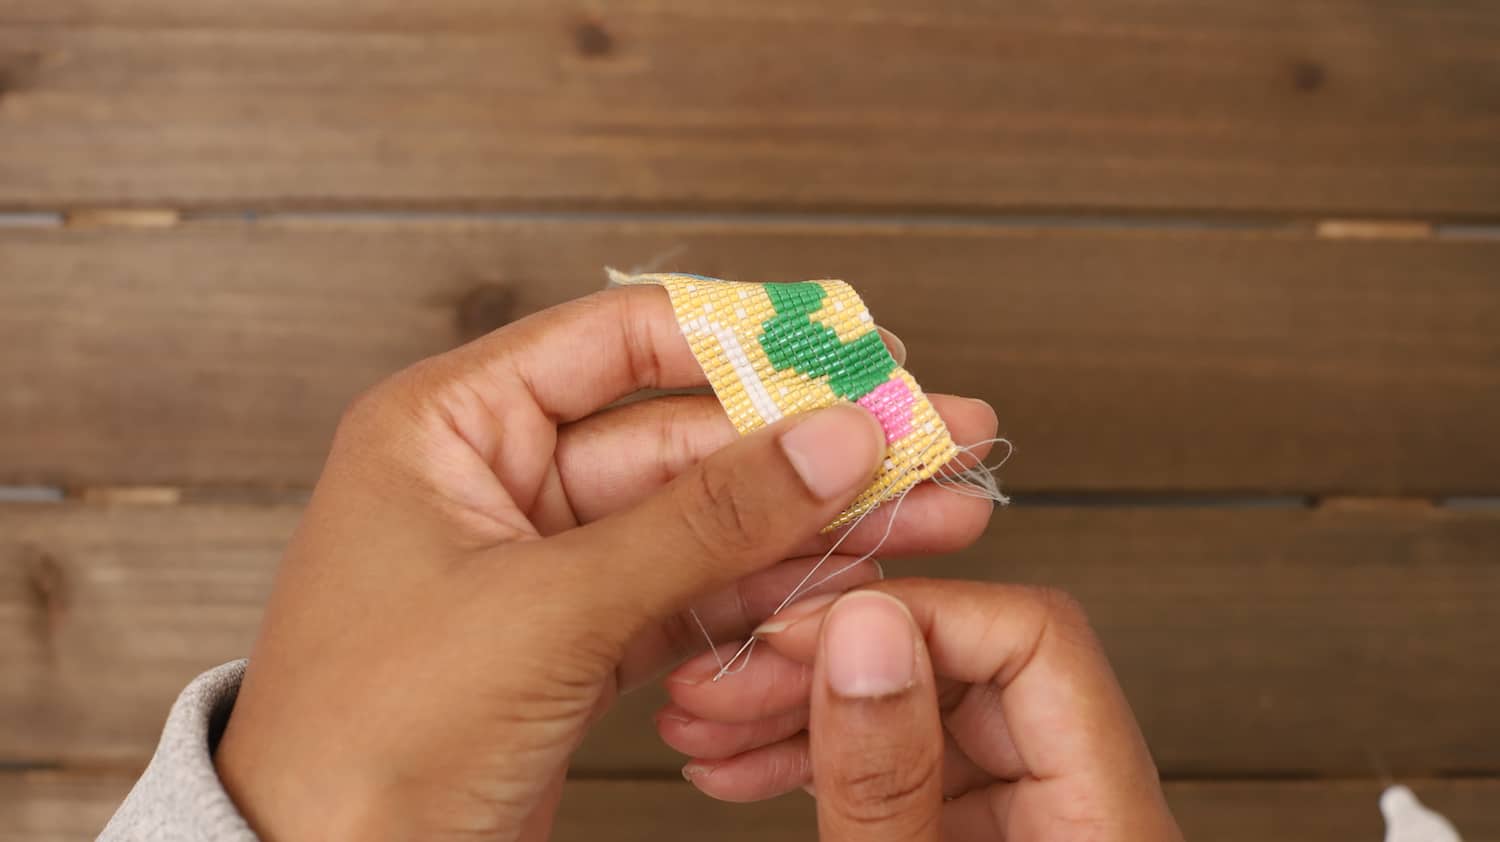
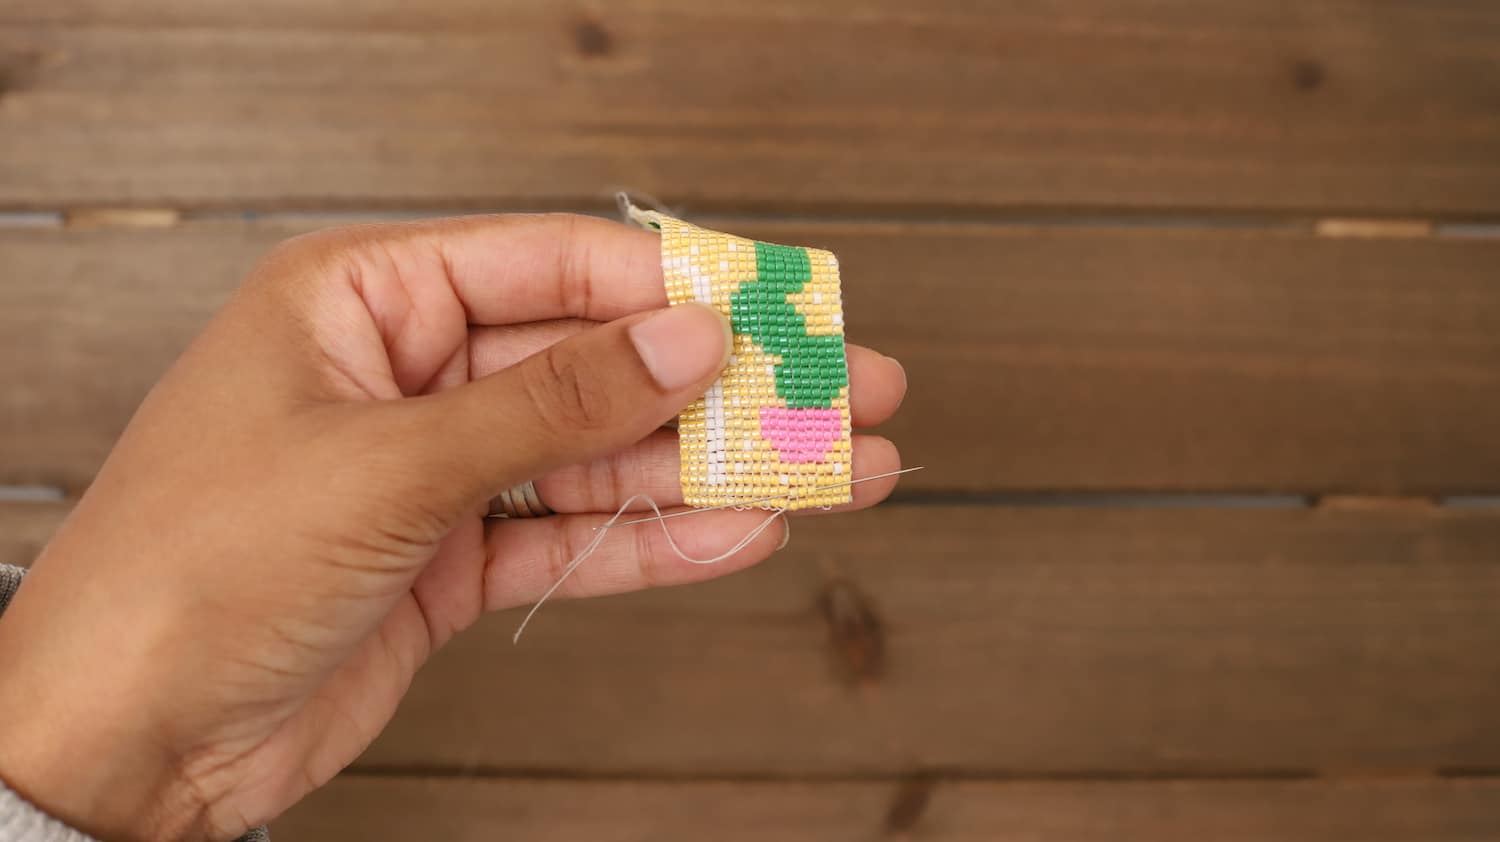
Each warp thread will be weaved in until they are all hidden. This does take some extra time, but it’s essential to keep your keychain stable.
Feel feel to weave the threads in a horizontal direction as well, and don’t forget to trim with the Bordeaux scissors.

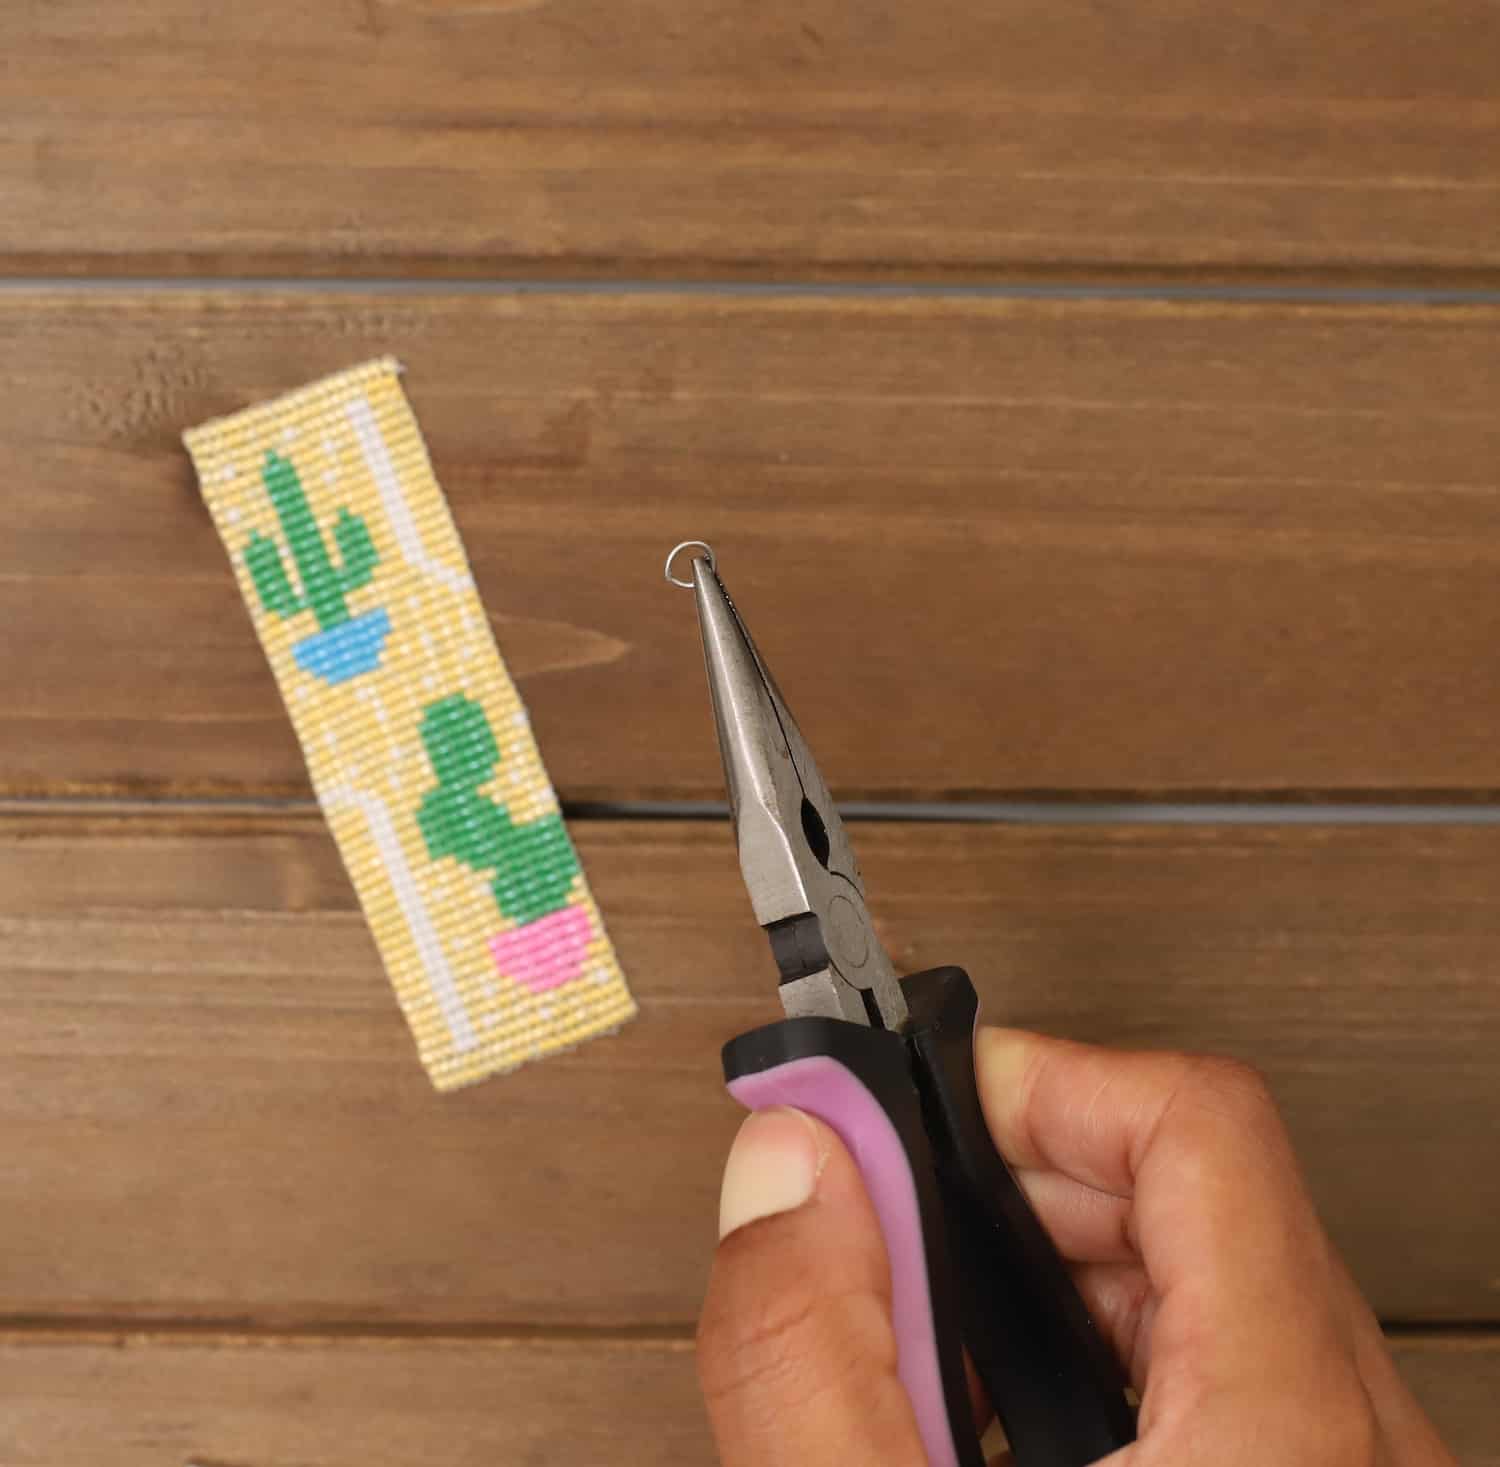
Step 5. Add the Keychain
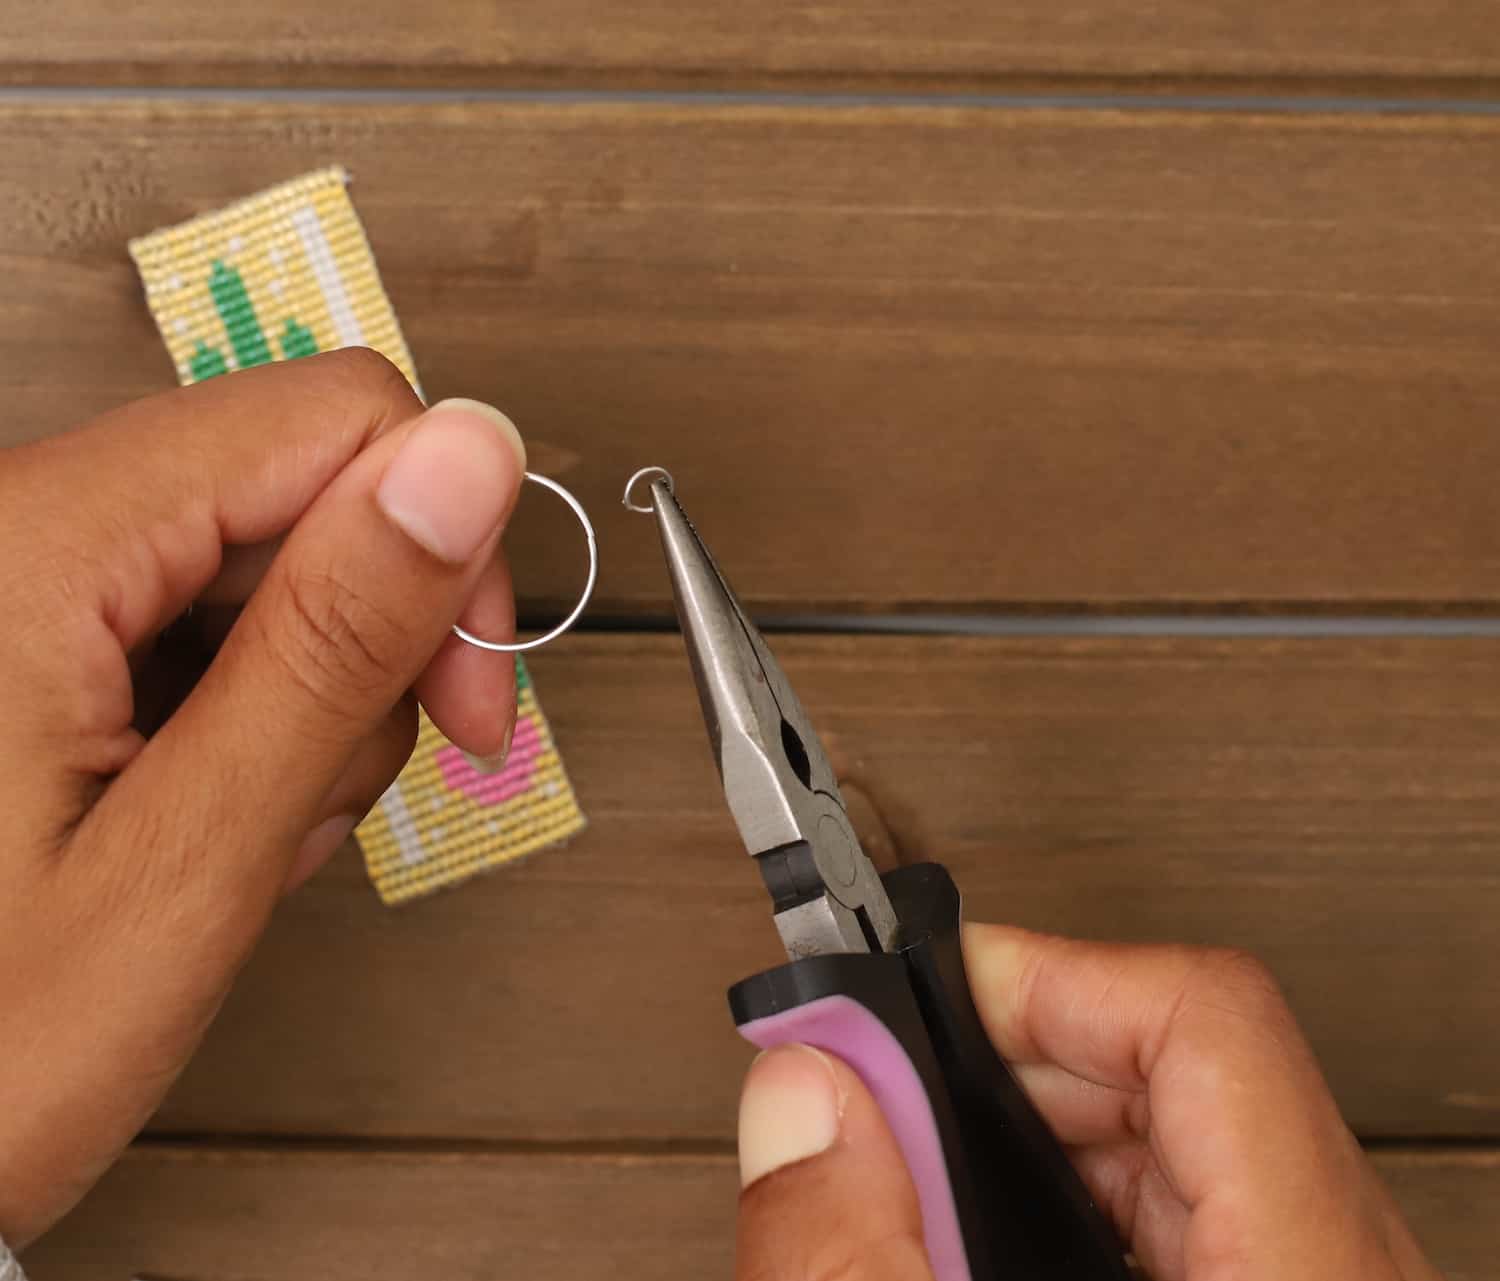
Use the jewelry plier to open the jump ring.
Attach the jump ring to the split ring. If you don’t want to buy a set of split rings, you can repurpose one from an older keychain.
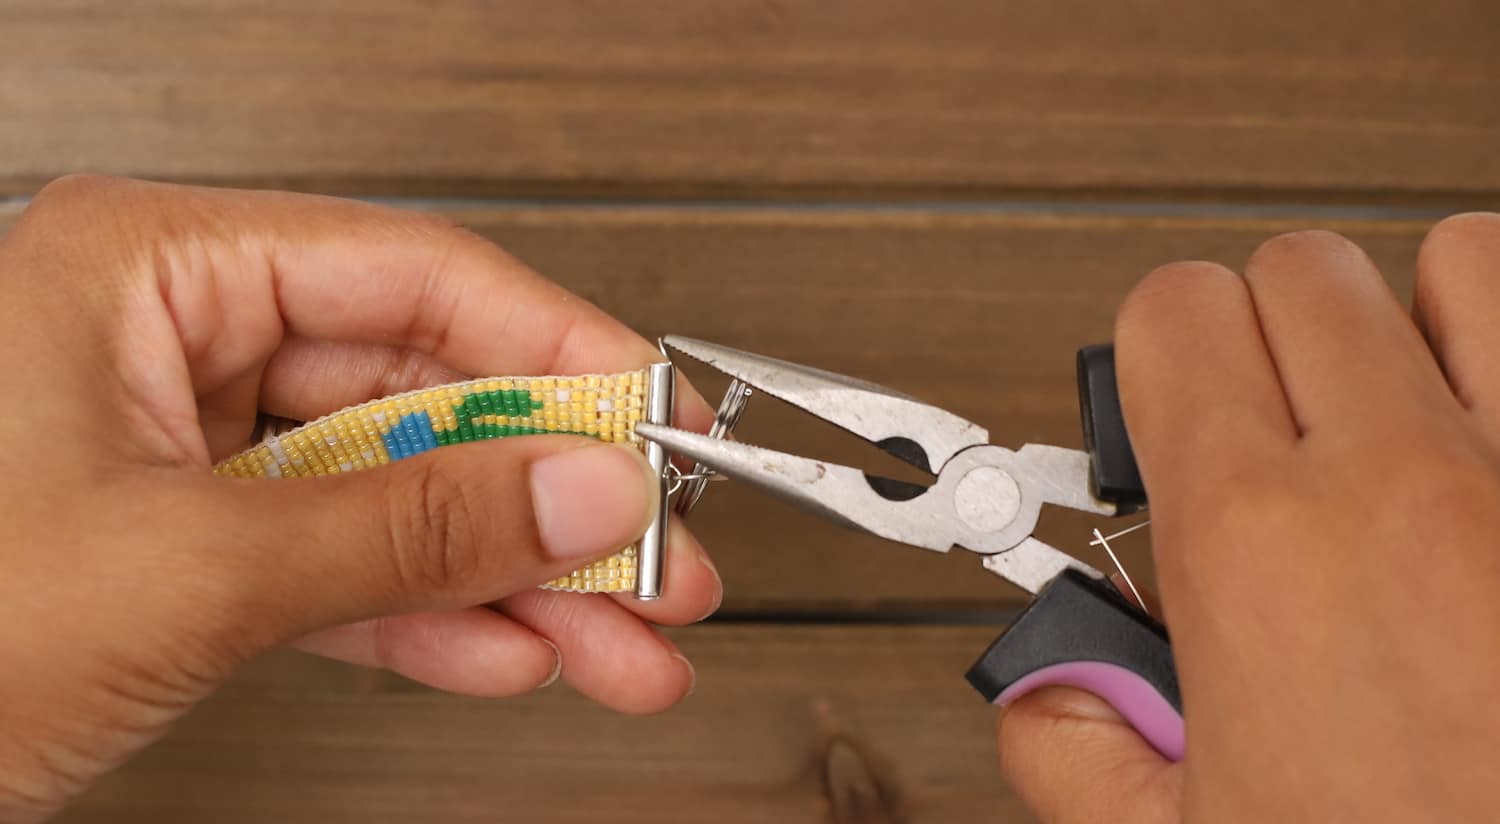
Use the same jump ring and attach it to the ribbon clamp.

Slide the ribbon clamp over the first or second row of beads, then use the jewelry plier to tighten the open side close.

Step 6. Celebrate!
You’ve just completed a beaded keychain with style!

Beading on the Clover Loom has been one of my personal highlights during national craft month. The lightweight and compact design is great for any road trip bag to craft on the go!
If you enjoyed this tutorial, be sure to show me your Cactus Keychain with the hashtag #makeitwithzeal and tag me @sprinklesofzeal on all social media. I can’t wait to see your creations!
Well, until next time, have a craftastic day!
-Danielle
Want to check out more of my blogs and tutorials? Here are my social links below!
Blog | Instagram | Facebook | Pinterest | YouTube
Stay connected with Clover on Facebook | Twitter | Instagram | Pinterest | YouTube | Ravelry
[mc4wp_form id=”11289″]