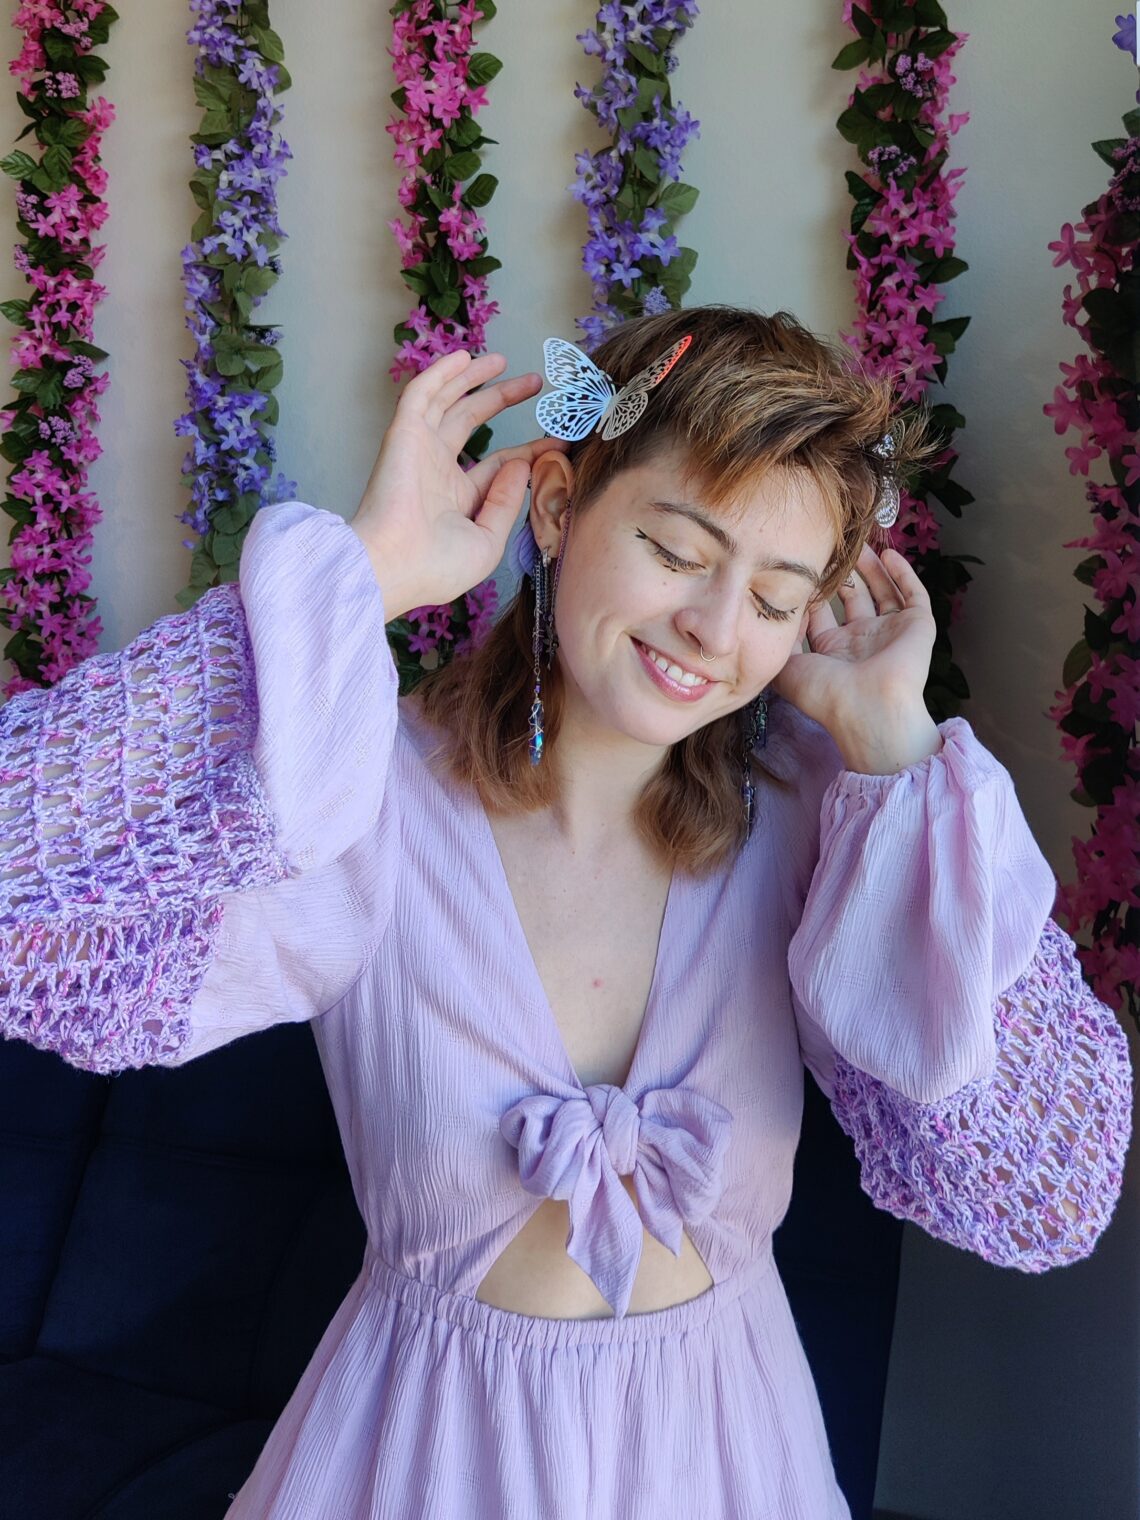
Spell-Stitched Sleeves #upcycled
INSPIRATION:
There’s something incredibly special about taking an old, forgotten piece and giving it a fresh lease on life through crochet. The magic of upcycling is whispering new stories into fabric that’s seen its fair share of adventures. What makes this project even more enchanting is the belief that we can infuse our creations with intention, just like practicing Reiki. With each stitch, we’re weaving a little bit of magic and personal energy into our work, making it a unique and heartfelt piece. I’m the Crochet Faerie, and I look forward to stitching spells together and seeing how we can breathe new life into old favorites through this tutorial!
MATERIALS:
- Clover Hook – 3.5mm US
- Yarn (Category 1 – Super Fine)
- Scissors
- Darning needle
- Measuring tape
- Embroidery needle
- Mid-sleeve top or dress
ABBREVIATIONS:
Right Side – RS
Yarn over – YO
Chain – Ch
Stitch – St
Slip Stitch – Sl St
Single Crochet – SC
Treble Crochet – Tr
V-Stitch (V-st): (Tr, Ch 1, Tr) all in same specified St
INSTRUCTIONS:
Read Chain Stitch Embroidery Instructions before starting your project
PROCESS:
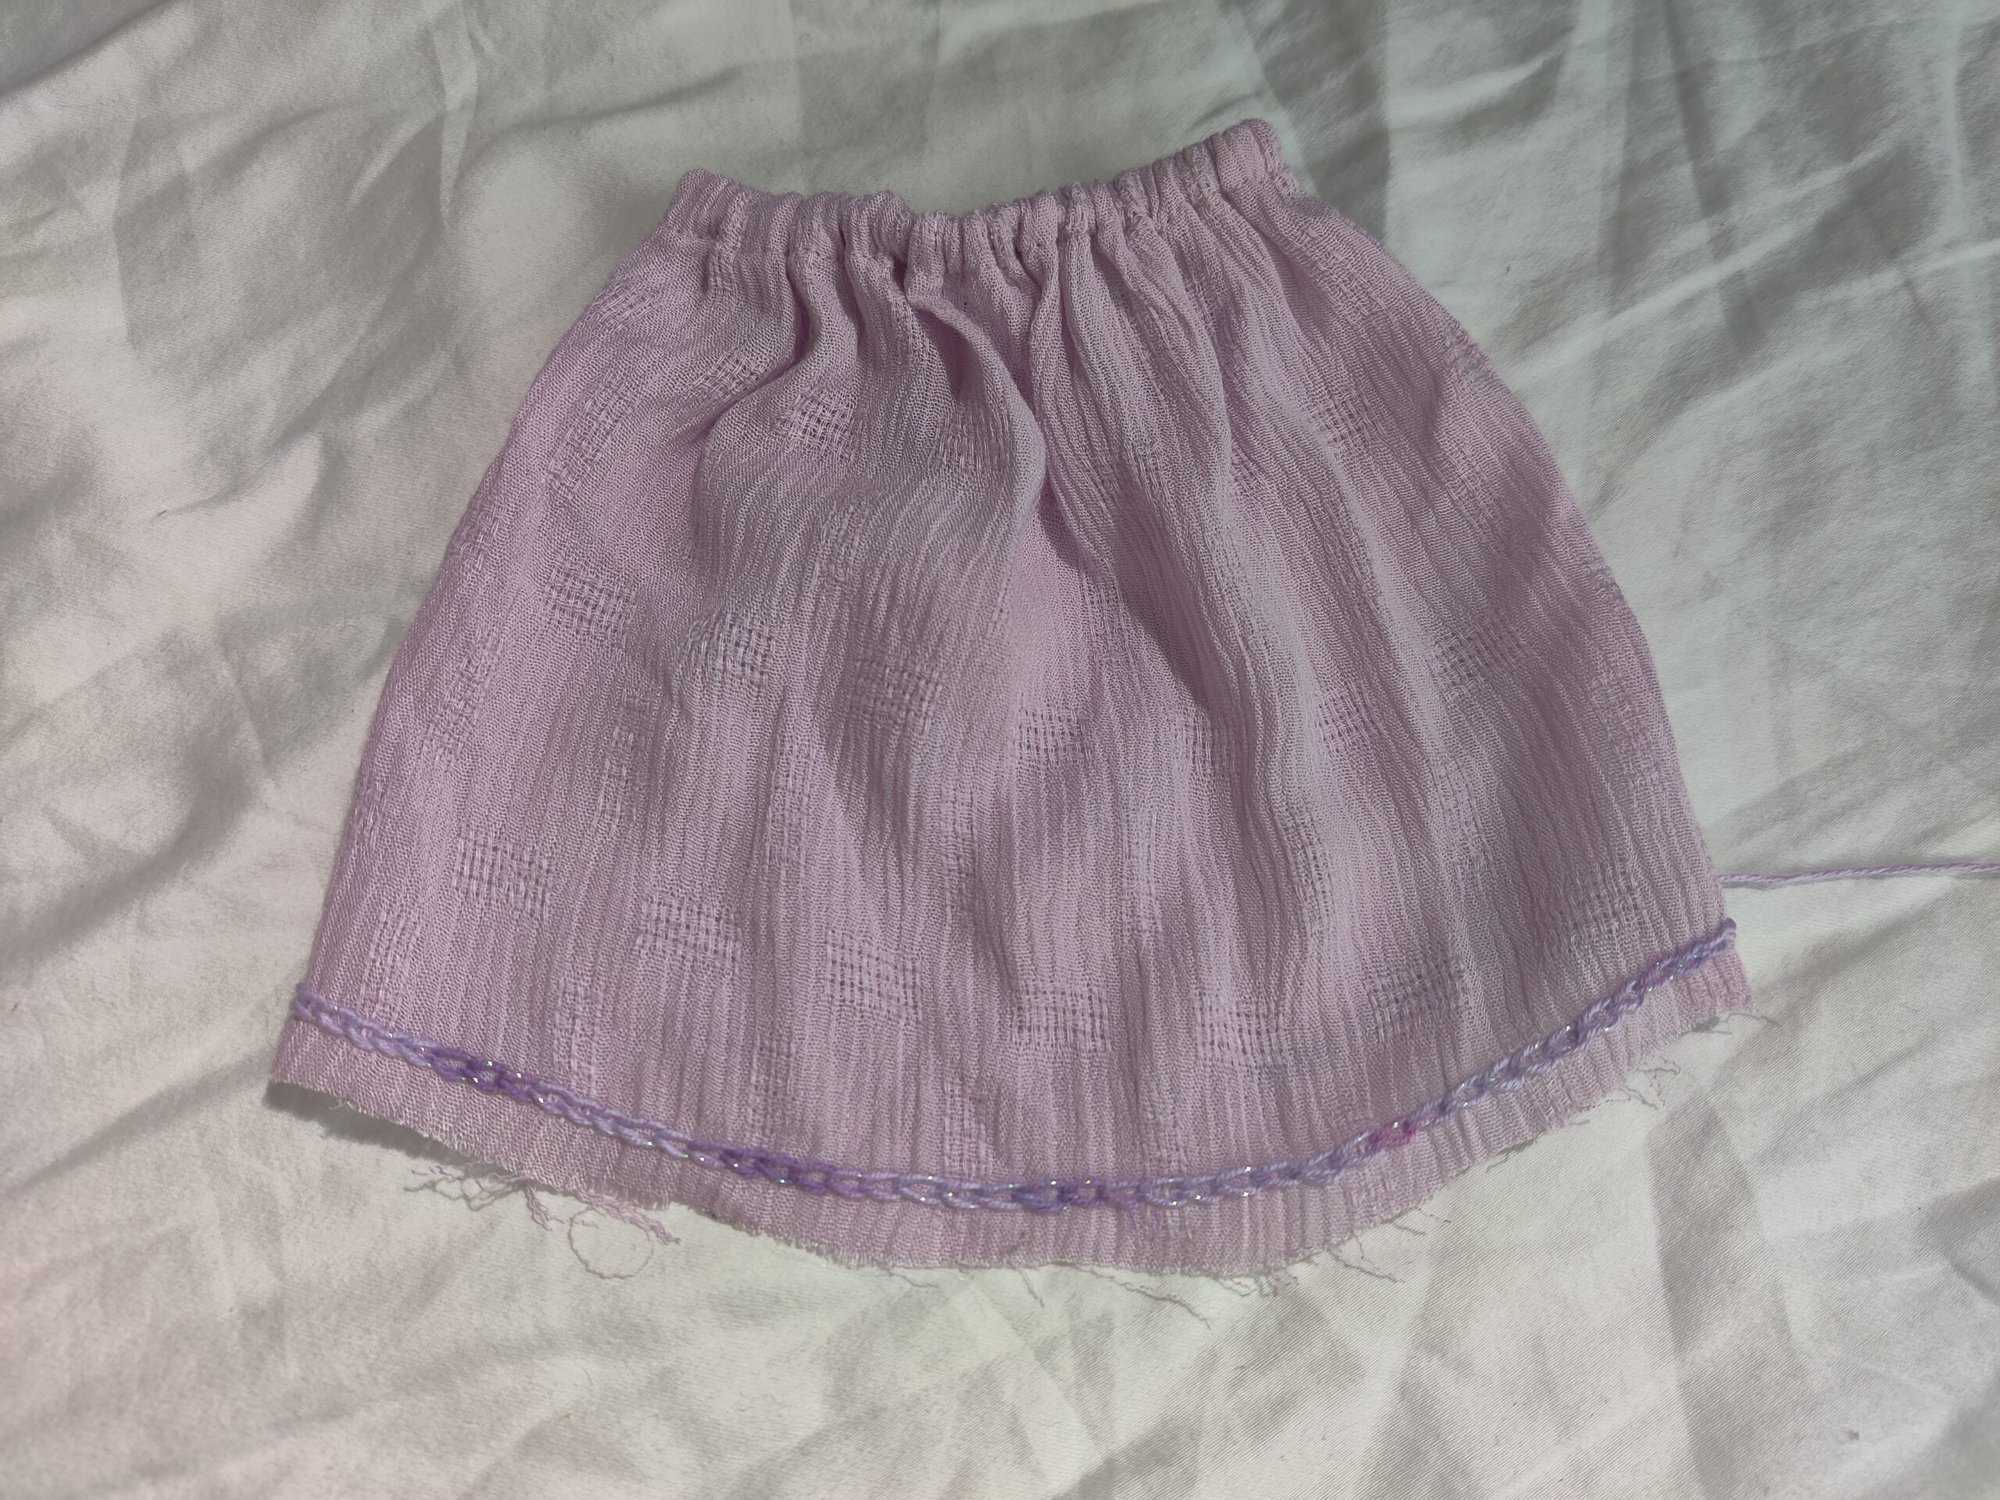
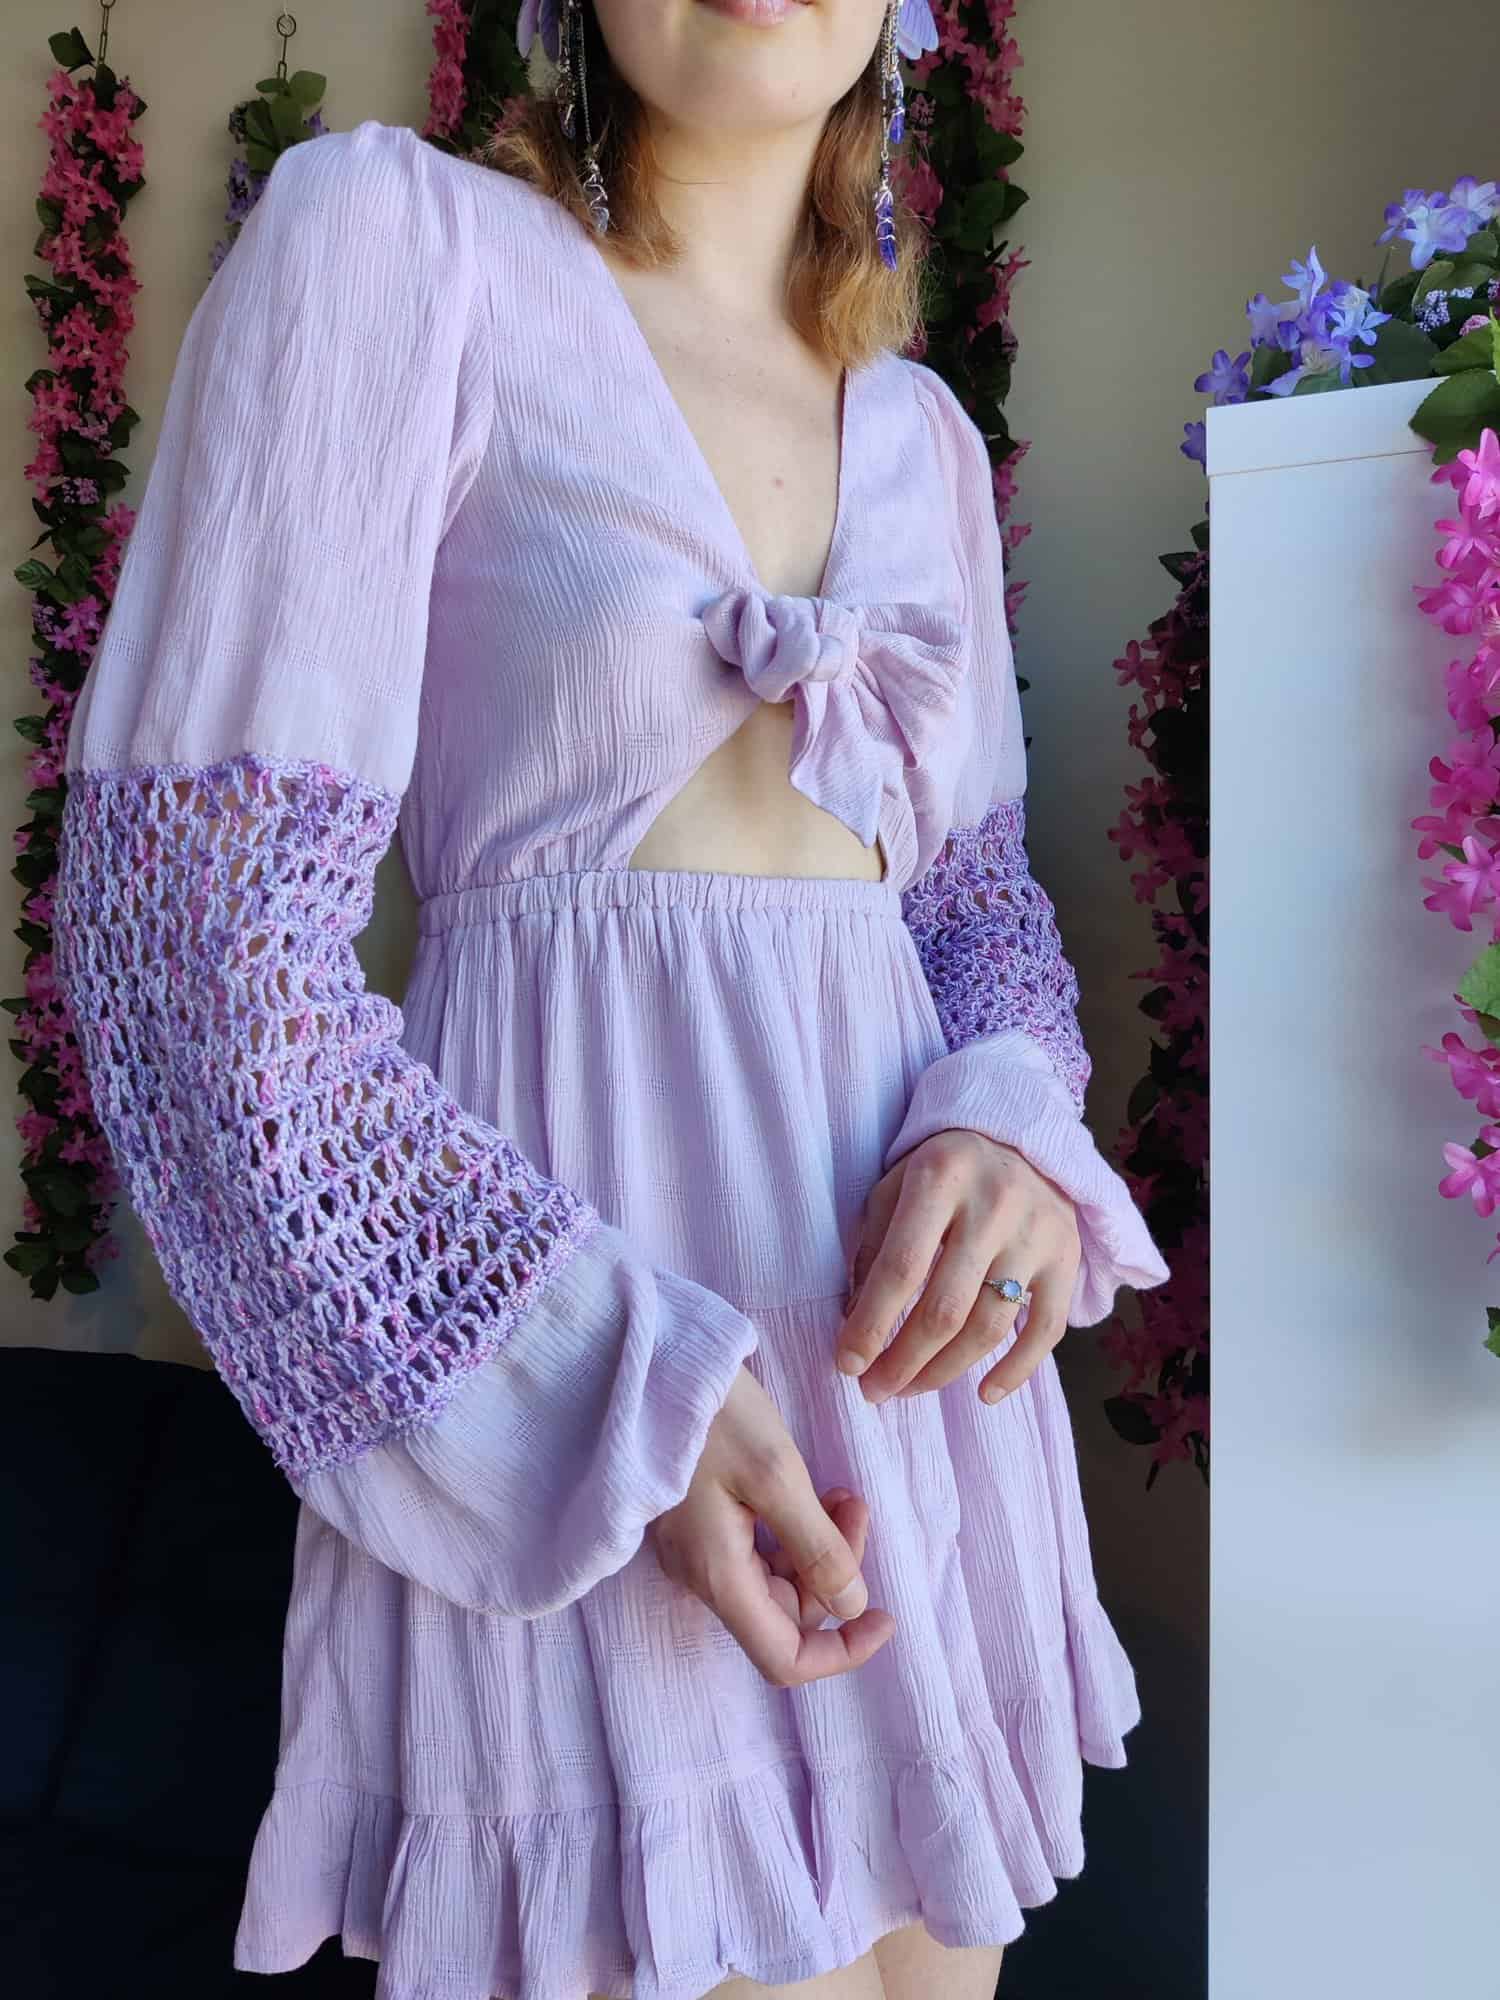
Cut first sleeve in half. Using an embroidery needle, chain stitch around the borders of both halves of the cut sleeve. Next, attach yarn to the bottom the sleeve still attached to the garment and crochet around, working into the embroidered chain stitches. Continue crocheting rows until you reach your desired sleeve length, then reattach the second half of the sleeve to the rest of the garment by sewing the embroidered chain stitches to your most recent crochet row. Repeat steps for the second sleeve <3
EMBROIDERY:
Start by cutting your sleeve in half. At this point, if you are concerned about the fabric fraying, you can opt to sew the hems of both halves of the cut sleeve.
Thread your embroidery needle with a long string of yarn. Bring the needle up through the back of the fabric (a quarter inch from the hem) of either sleeve half. From there, chain stitch around the entire sleeve border (each chain stitch MUST be wide enough to fit a 3.5mm hook through). Repeat this for the second half of the sleeve, making sure you make the same amount of chain stitches as you did for the first sleeve half. Set aside the detached sleeve cuff, and proceed to crochet the first Sleeve.

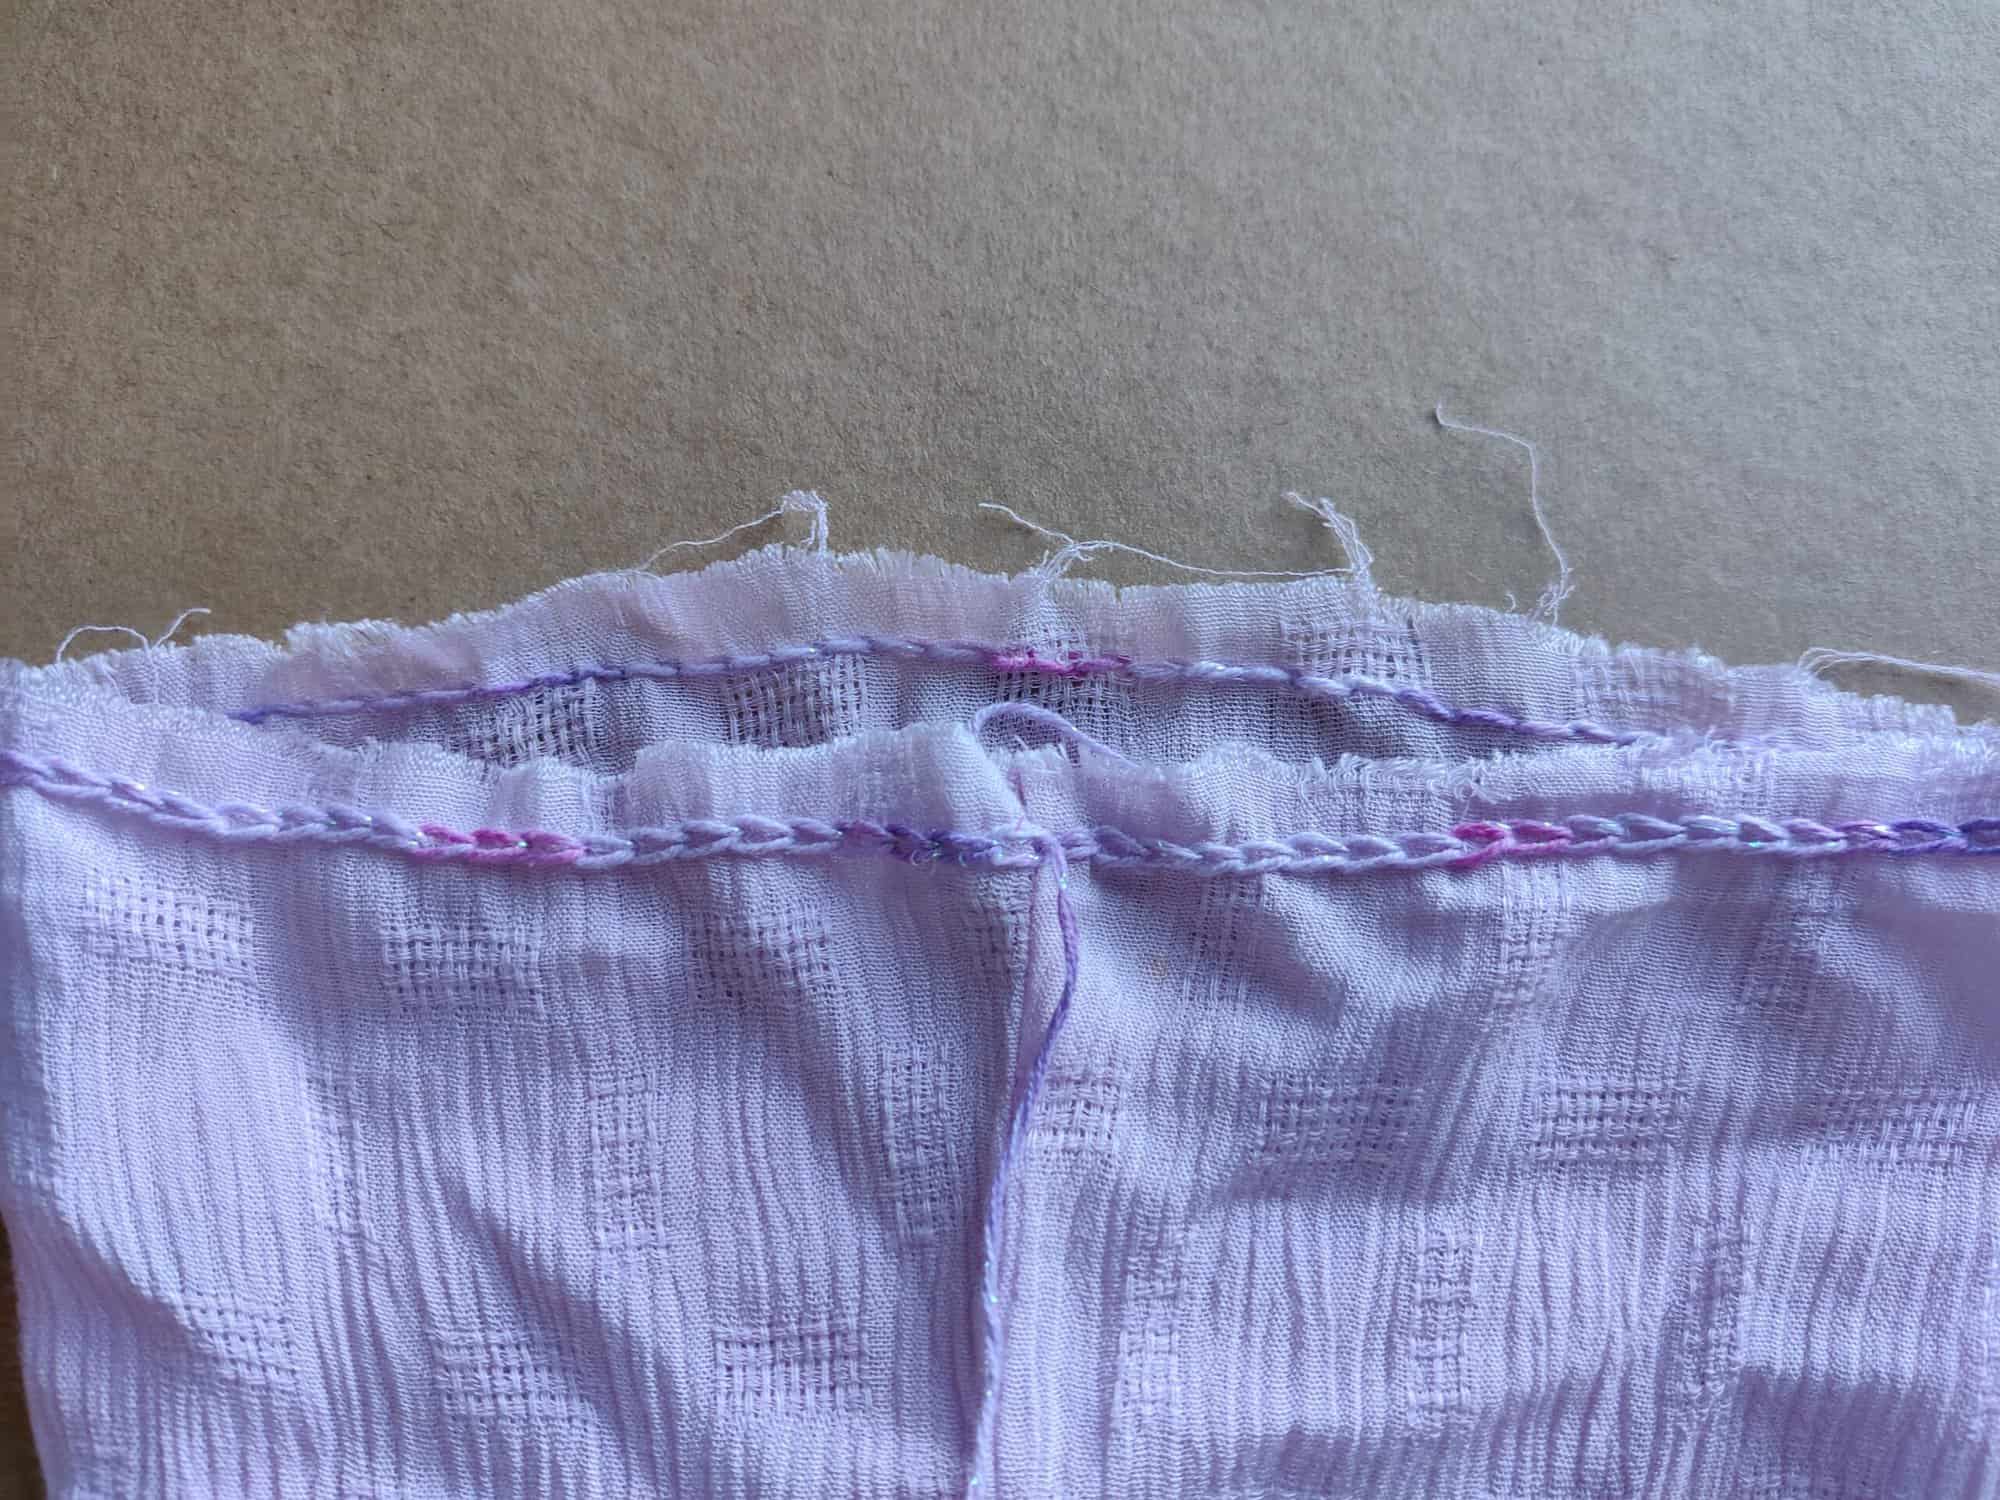
HINT: Make sure your stitches aren’t too tight so that your fabric isn’t creasing!
HOW TO CREATE THE SLEEVES:
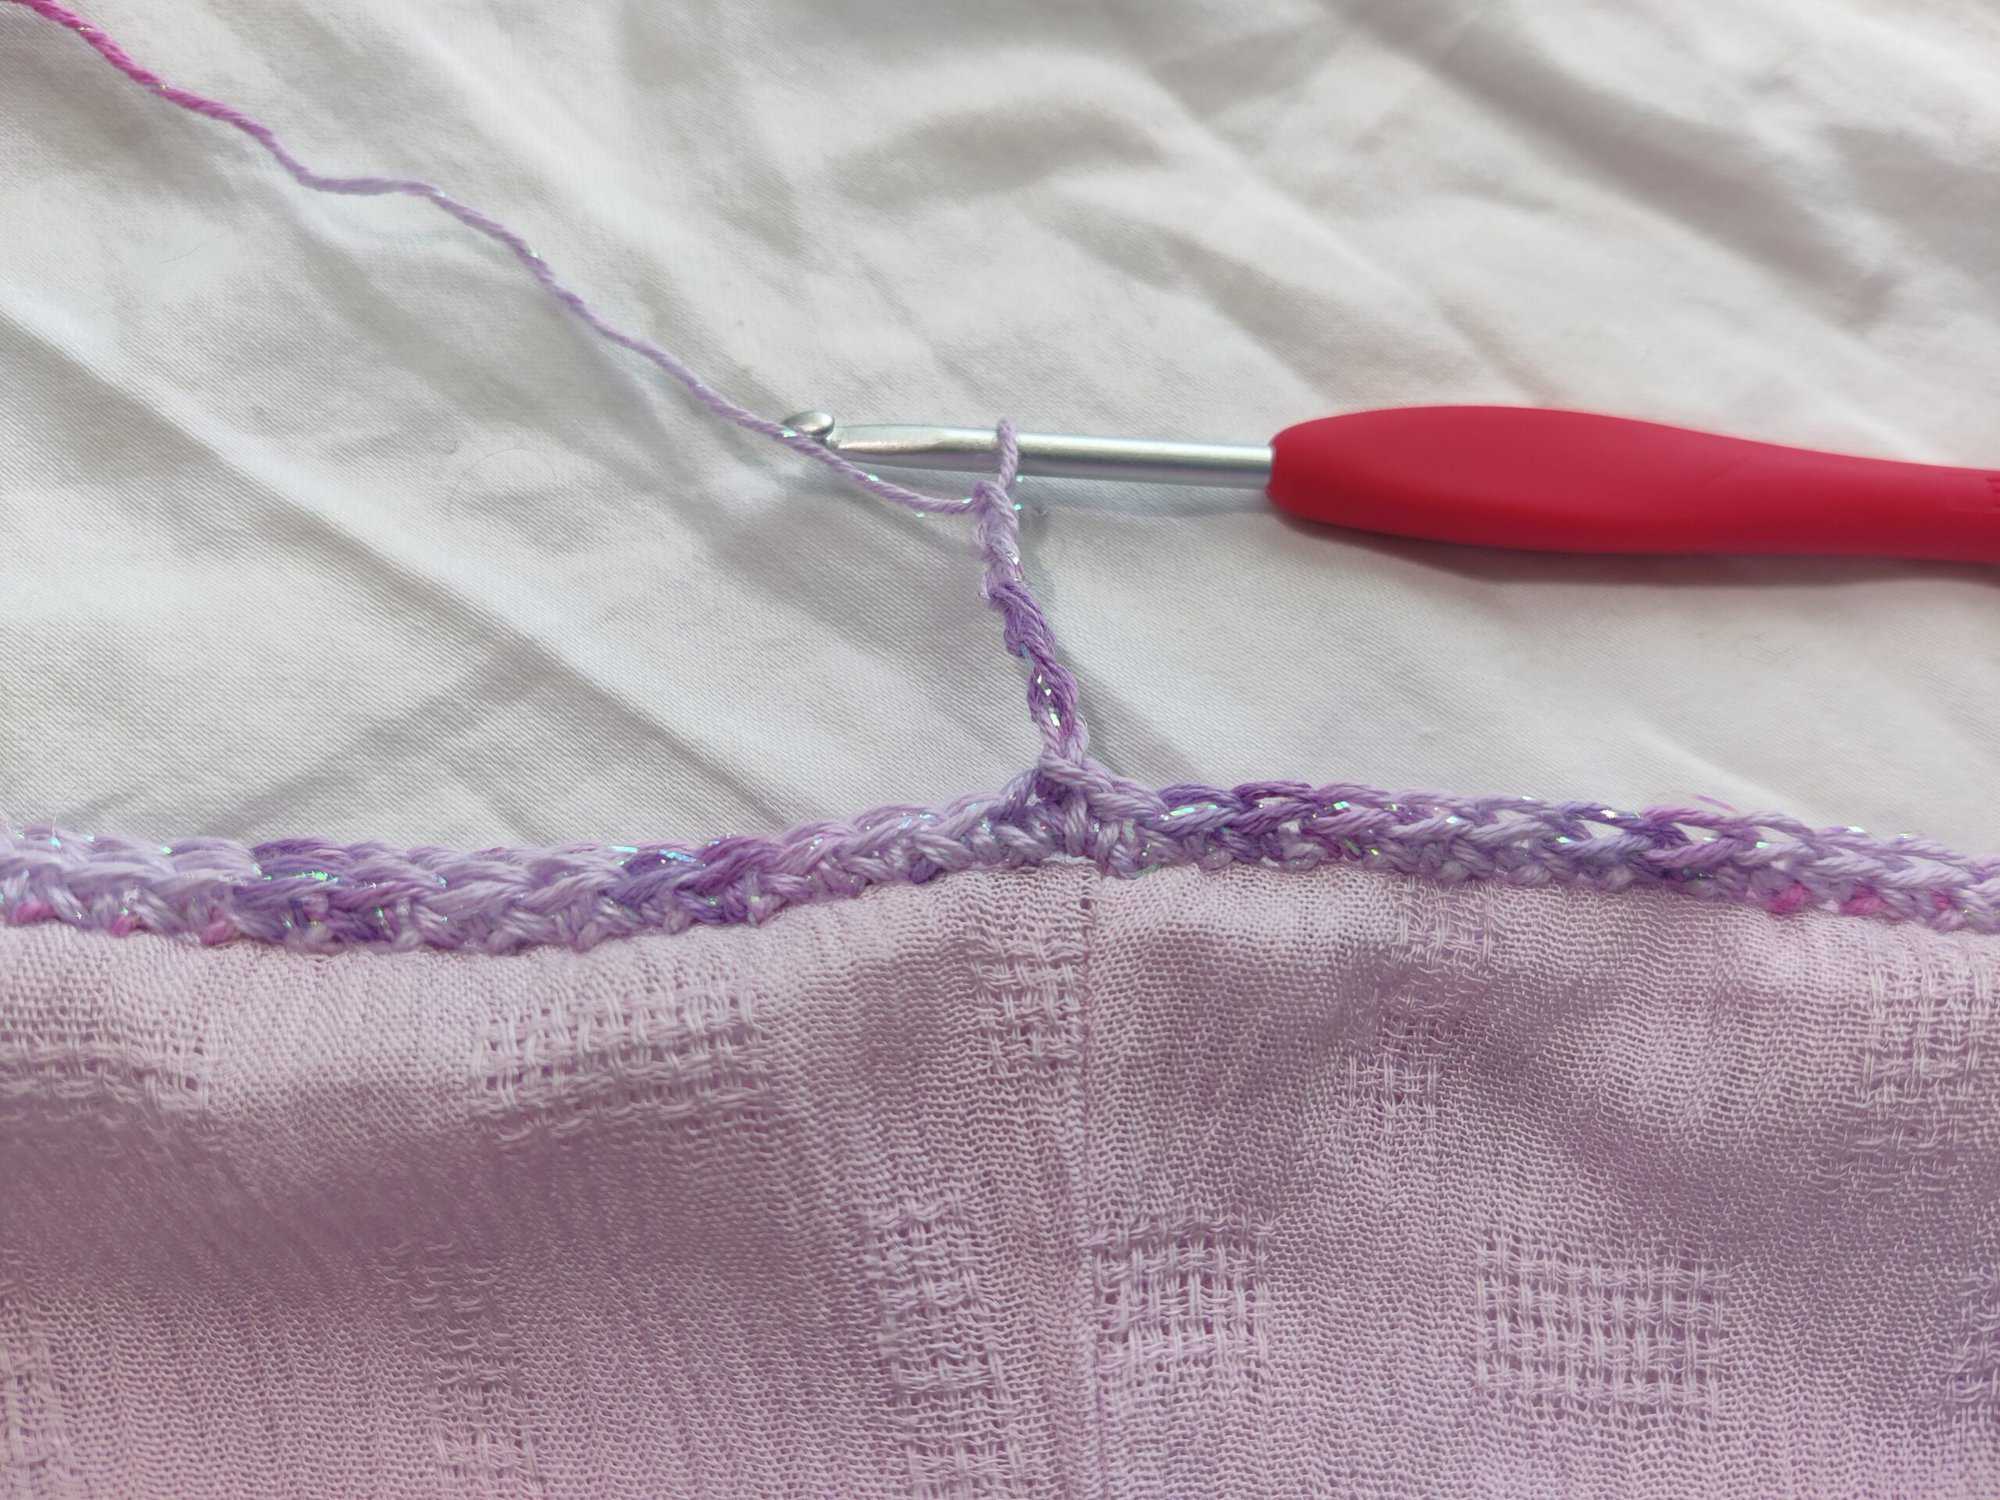
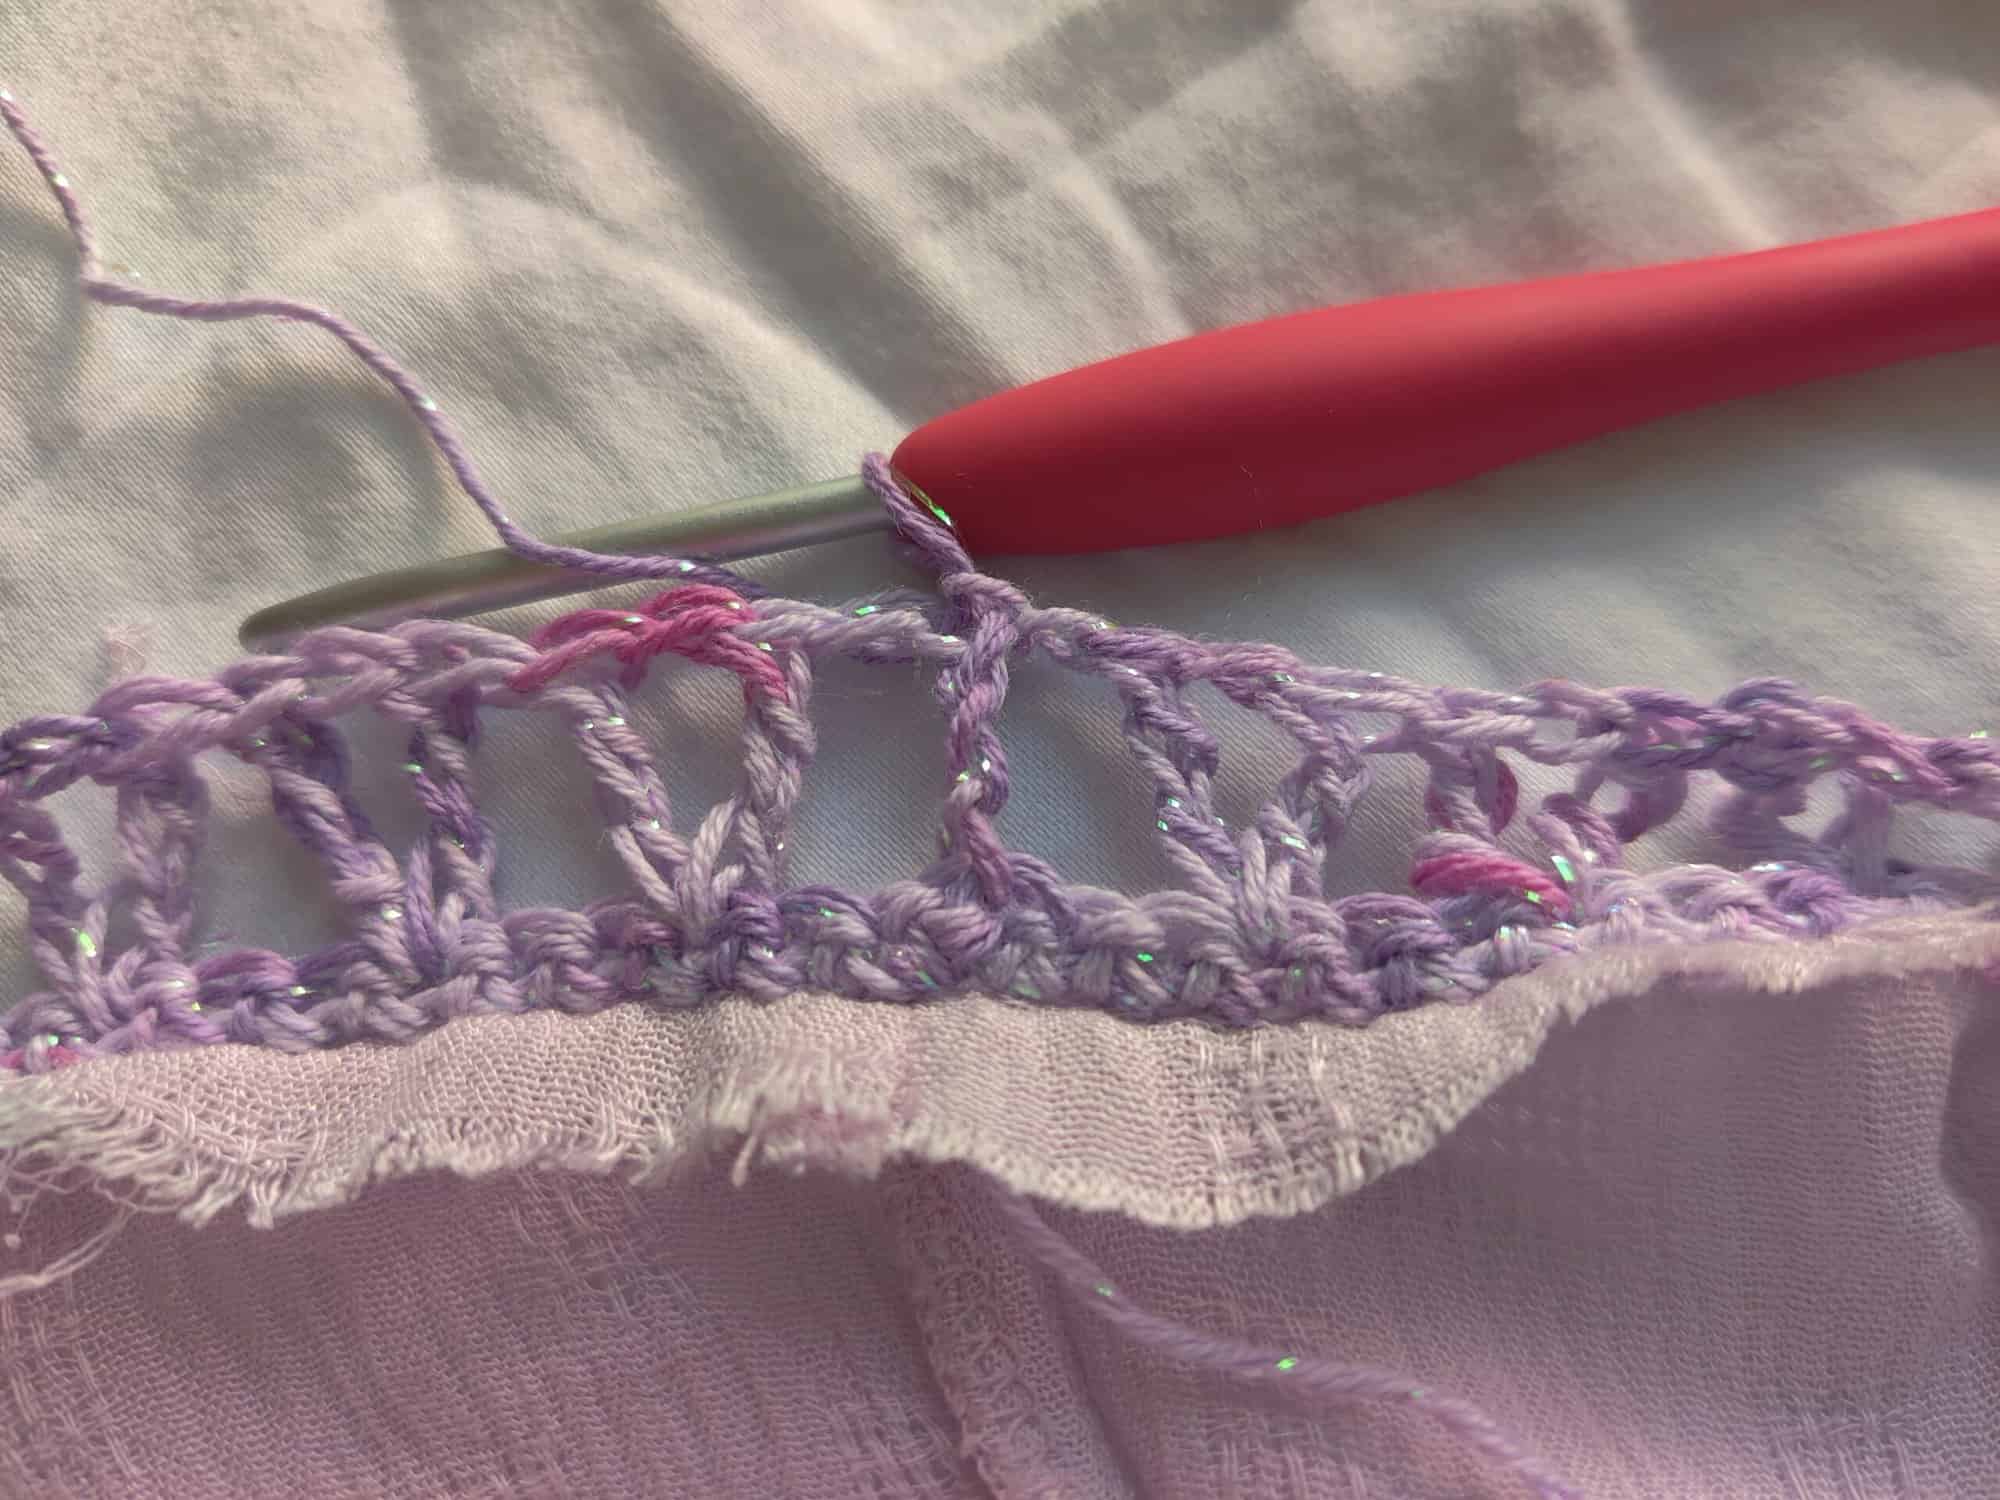
Row 1: Attach yarn into the closest embroidered chain stitch to the bottom seam of the sleeve. Working the RS (outside fabric of the sleeve facing you) Ch 1, SC into each embroidered chain stitch all the way around, Sl St into 1st SC from beginning of row, Ch 5 (counts as a Tr + Ch 1), turn work
(you will want to end with an EVEN amount of SC before the final Sl St. If you end with an odd number, increase at the end to make it even by placing 2 SC in the final embroidered chain stitch.
Row 2: Skip Sl St and next 2 SC, *V-St in next St, Skip next 2 SC** repeat from * to ** all the way around, Ch 1, Sl St into 4th Ch from beginning of row, Ch 5 (counts as a Tr + Ch 1), turn work
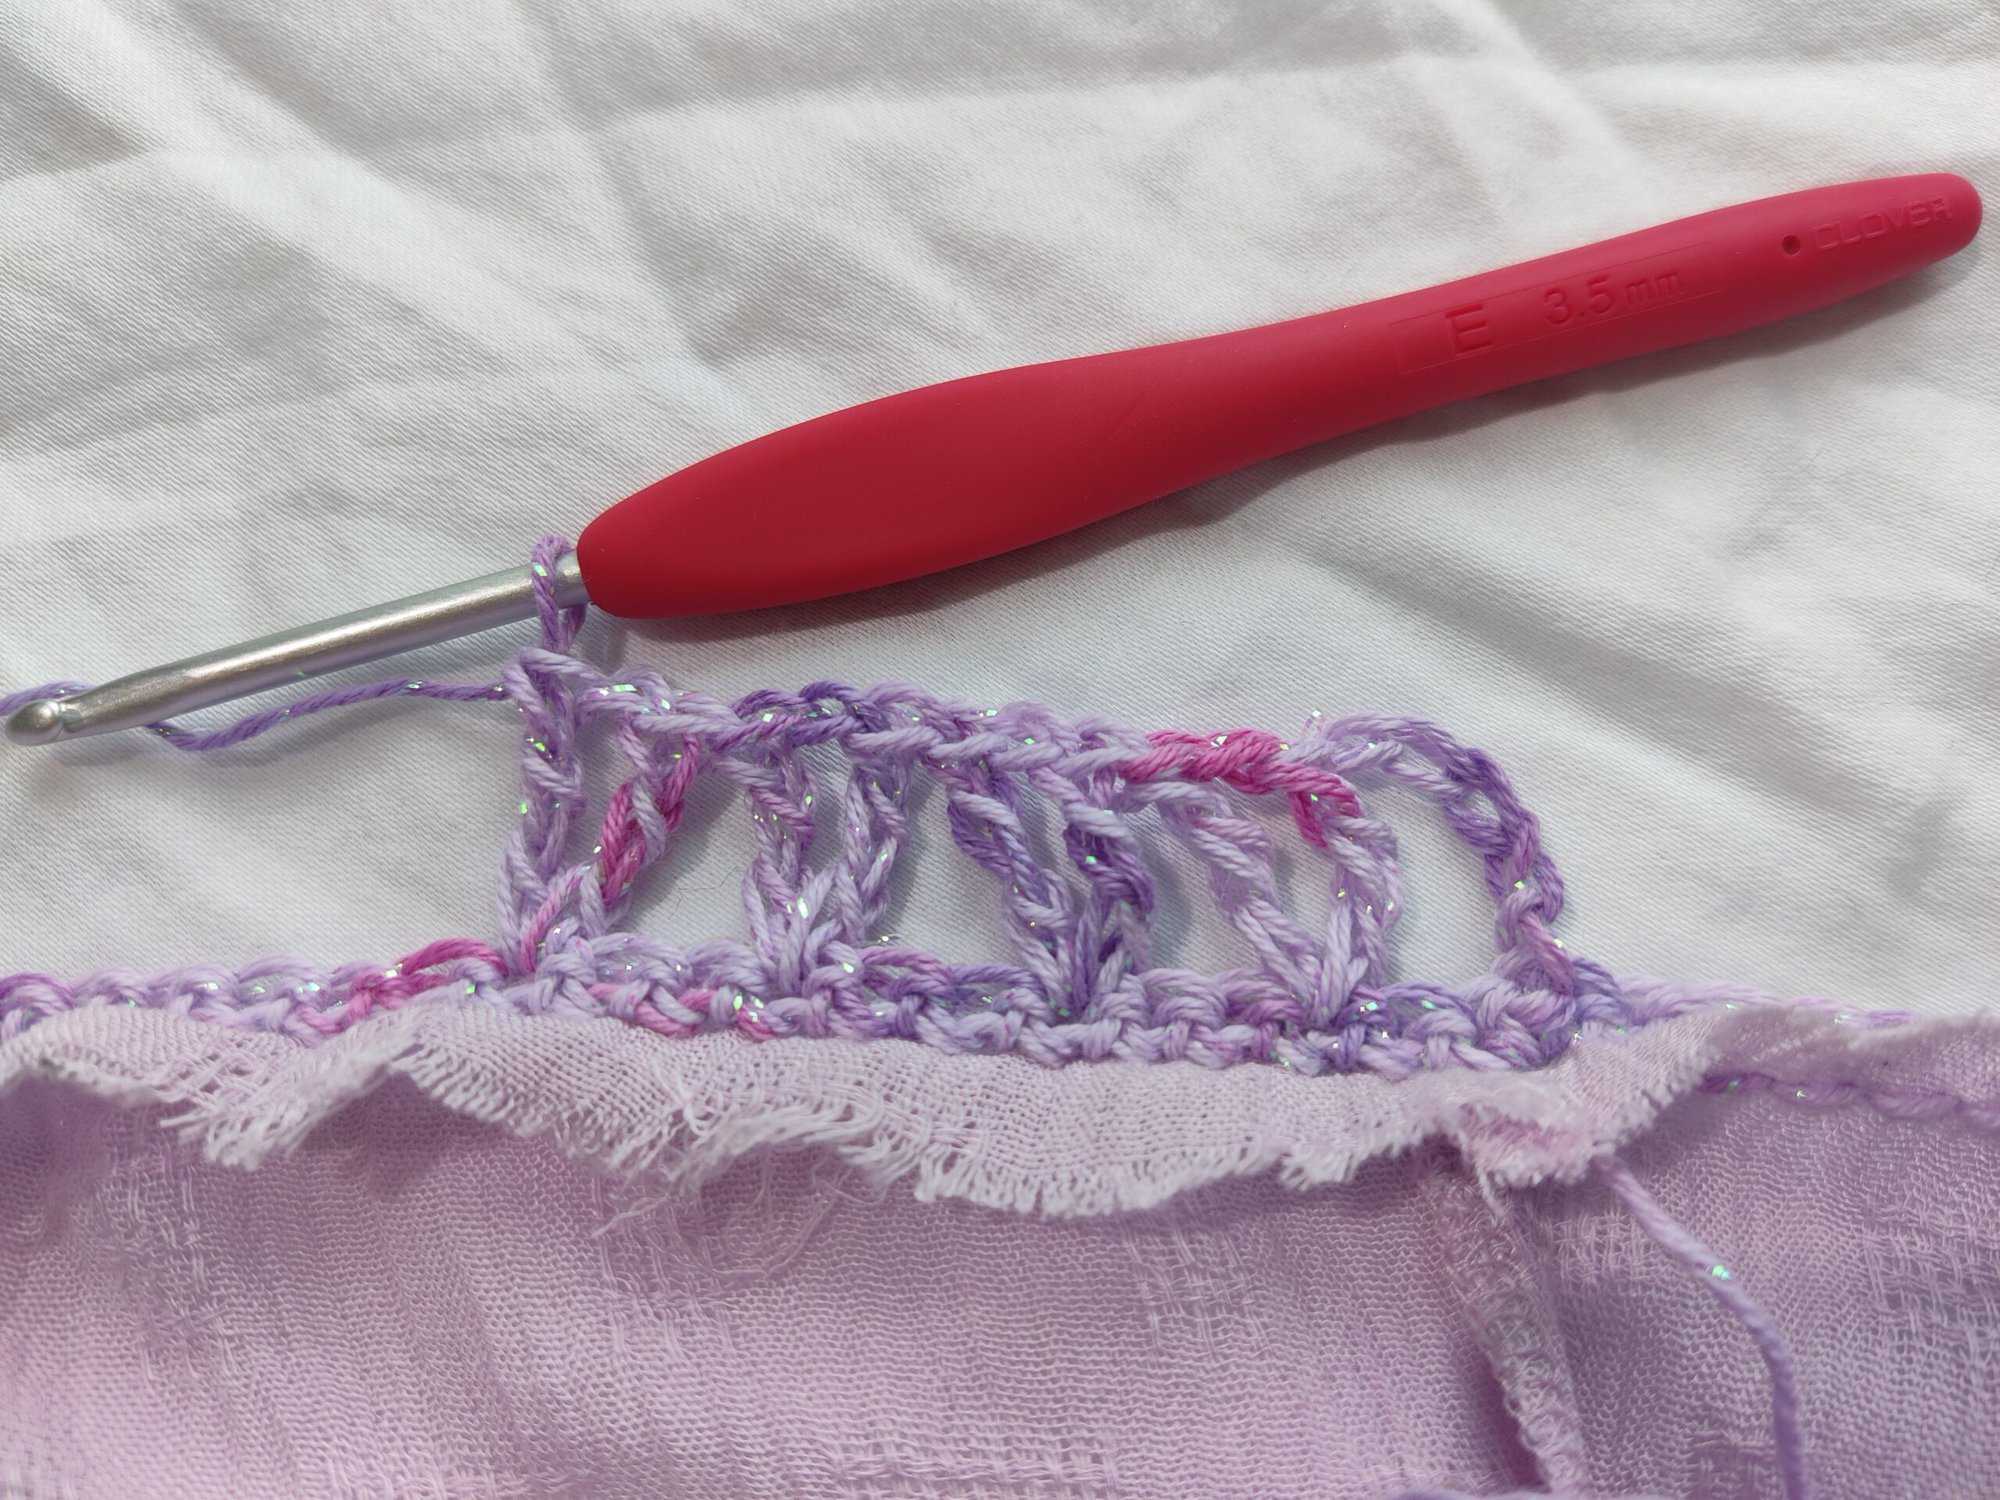
Row 3: *V-St in the Ch 1 space of the next V-St** repeat from * to ** all the way around, Ch 1, Sl St into 4th Ch from beginning of row, Ch 5 (counts as a Tr + Ch 1), turn work
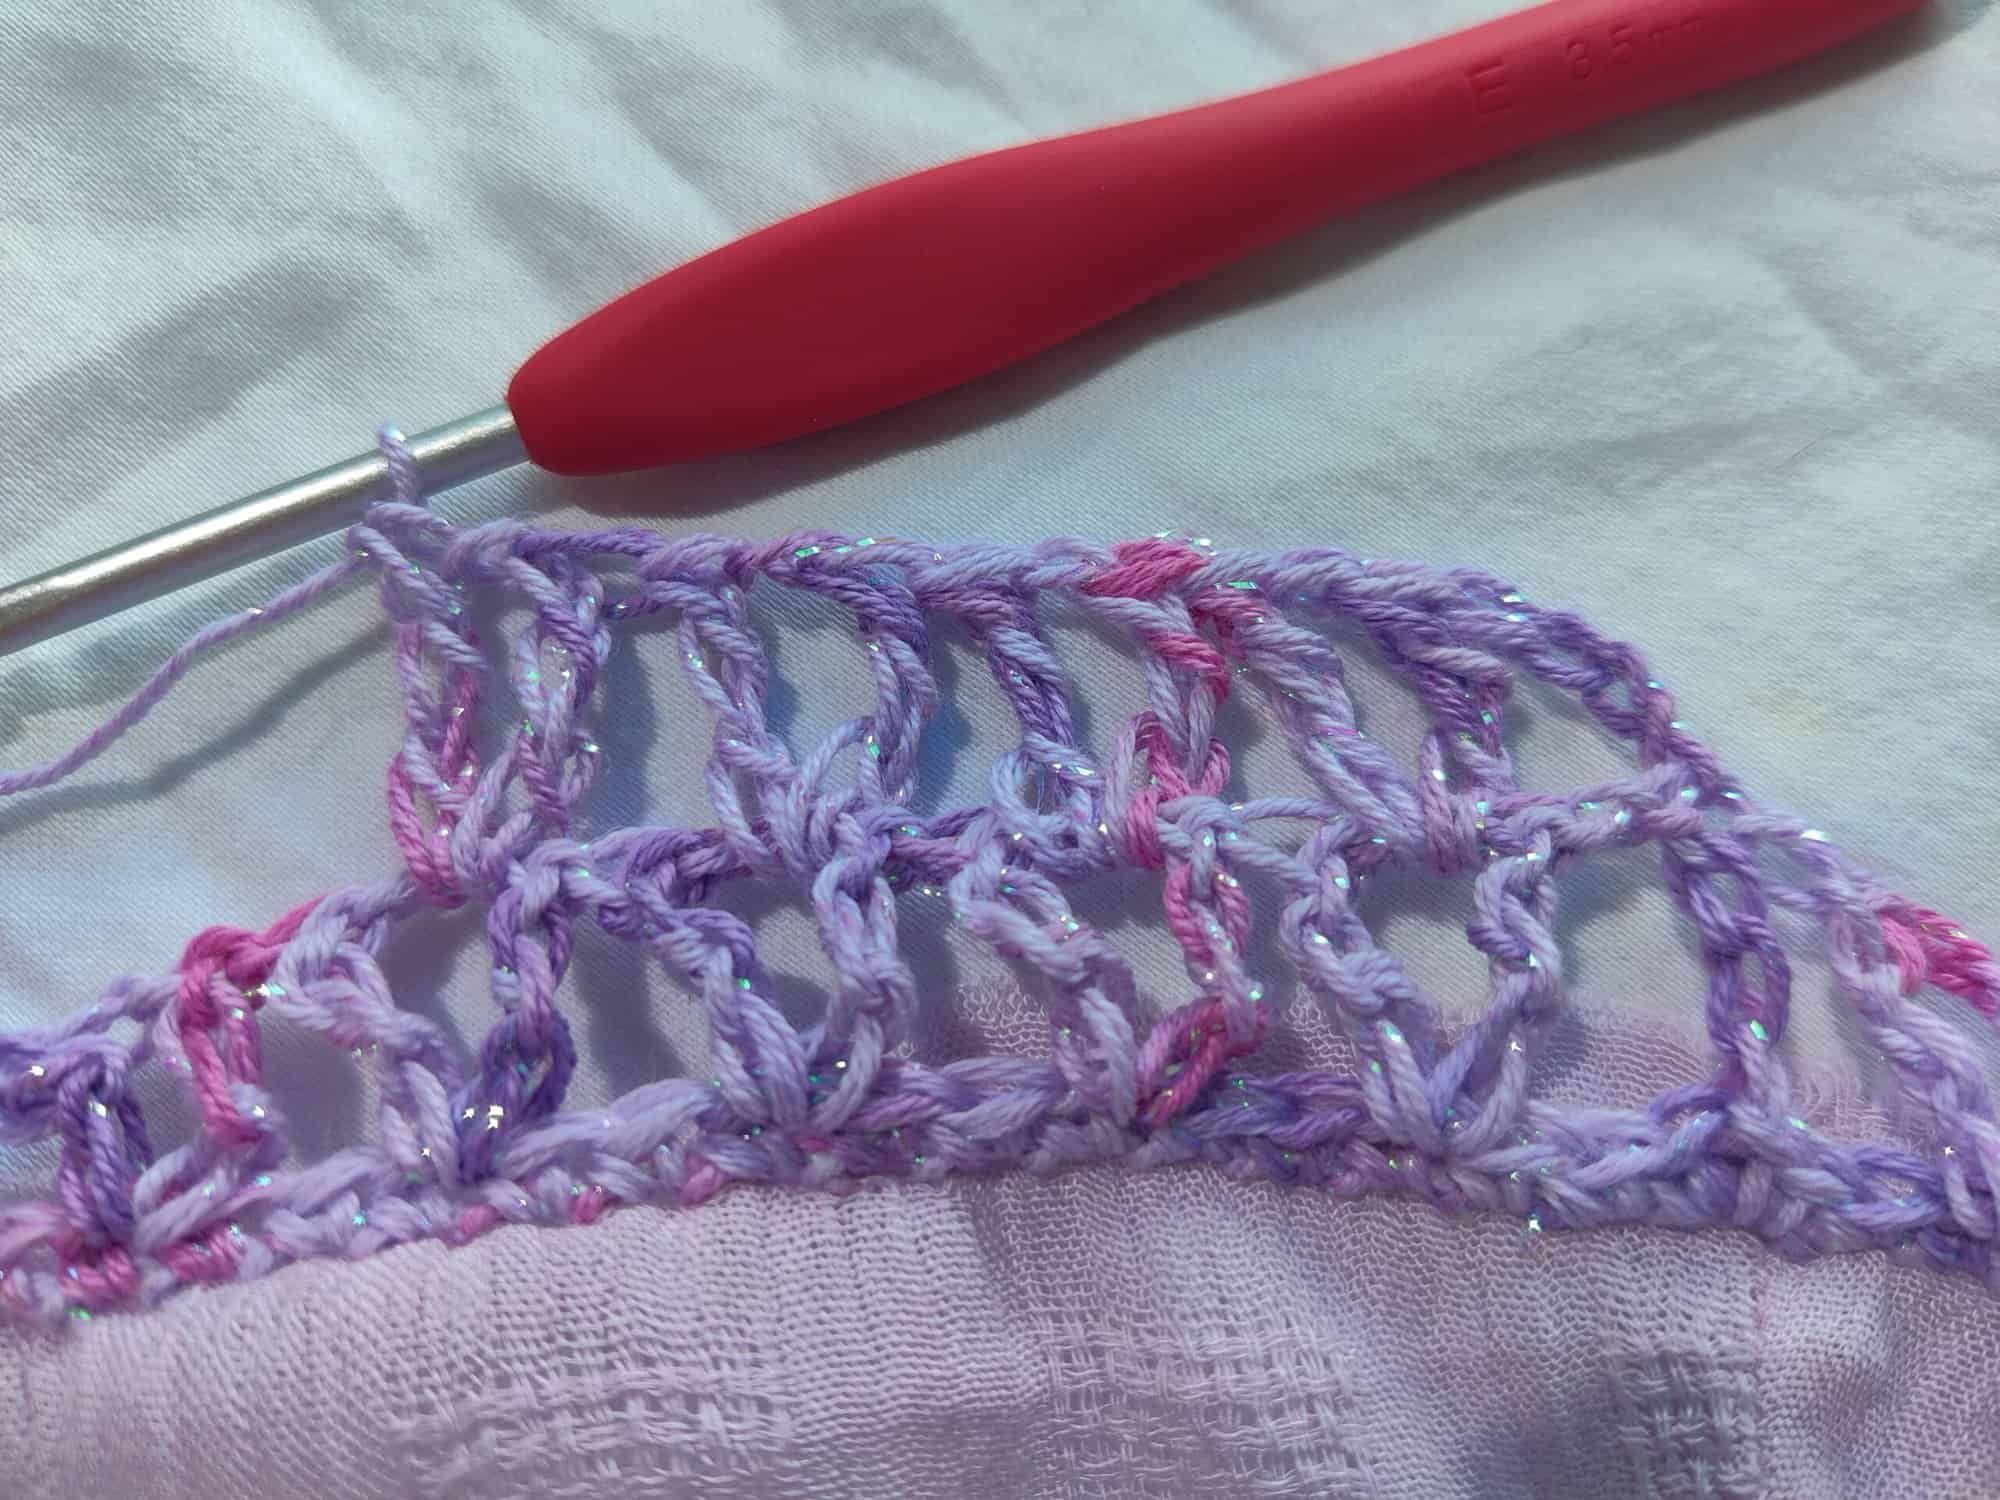
Repeat Row 3 until you’ve reached your desired sleeve length (don’t forget to take the length of the cuff into account)
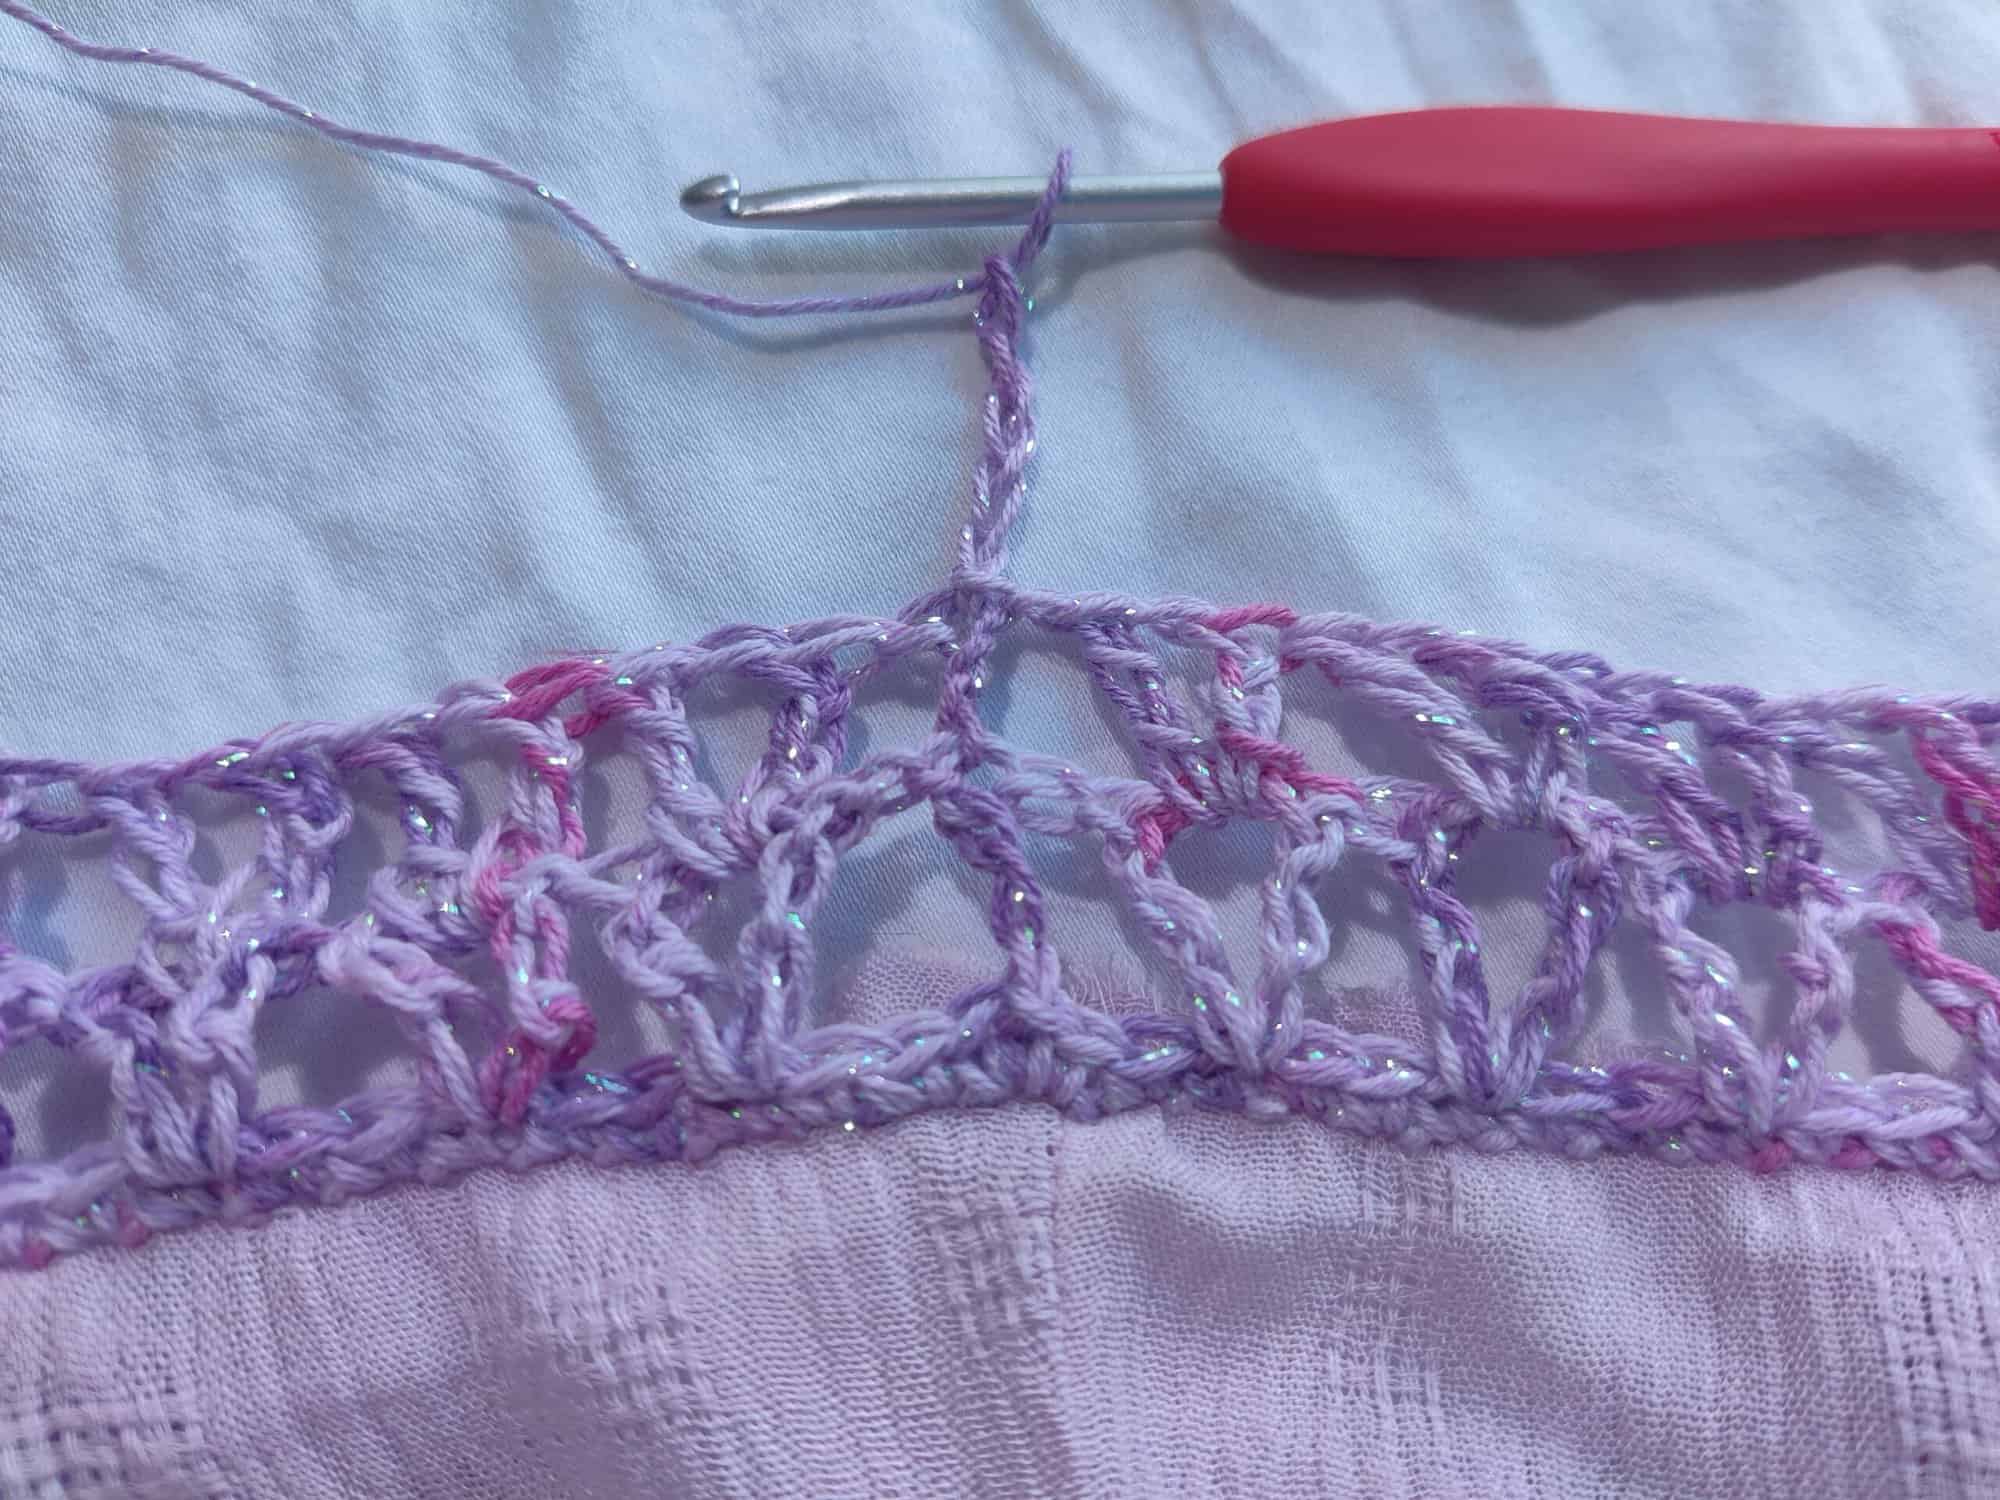
Add one final row of SC, then cut and fasten yarn, leaving a very long tail to sew with.
Proceed to finish the sleeve by reattaching the half that you cut off, sewing each SC of your most recent row into each embroidered chain stuff.

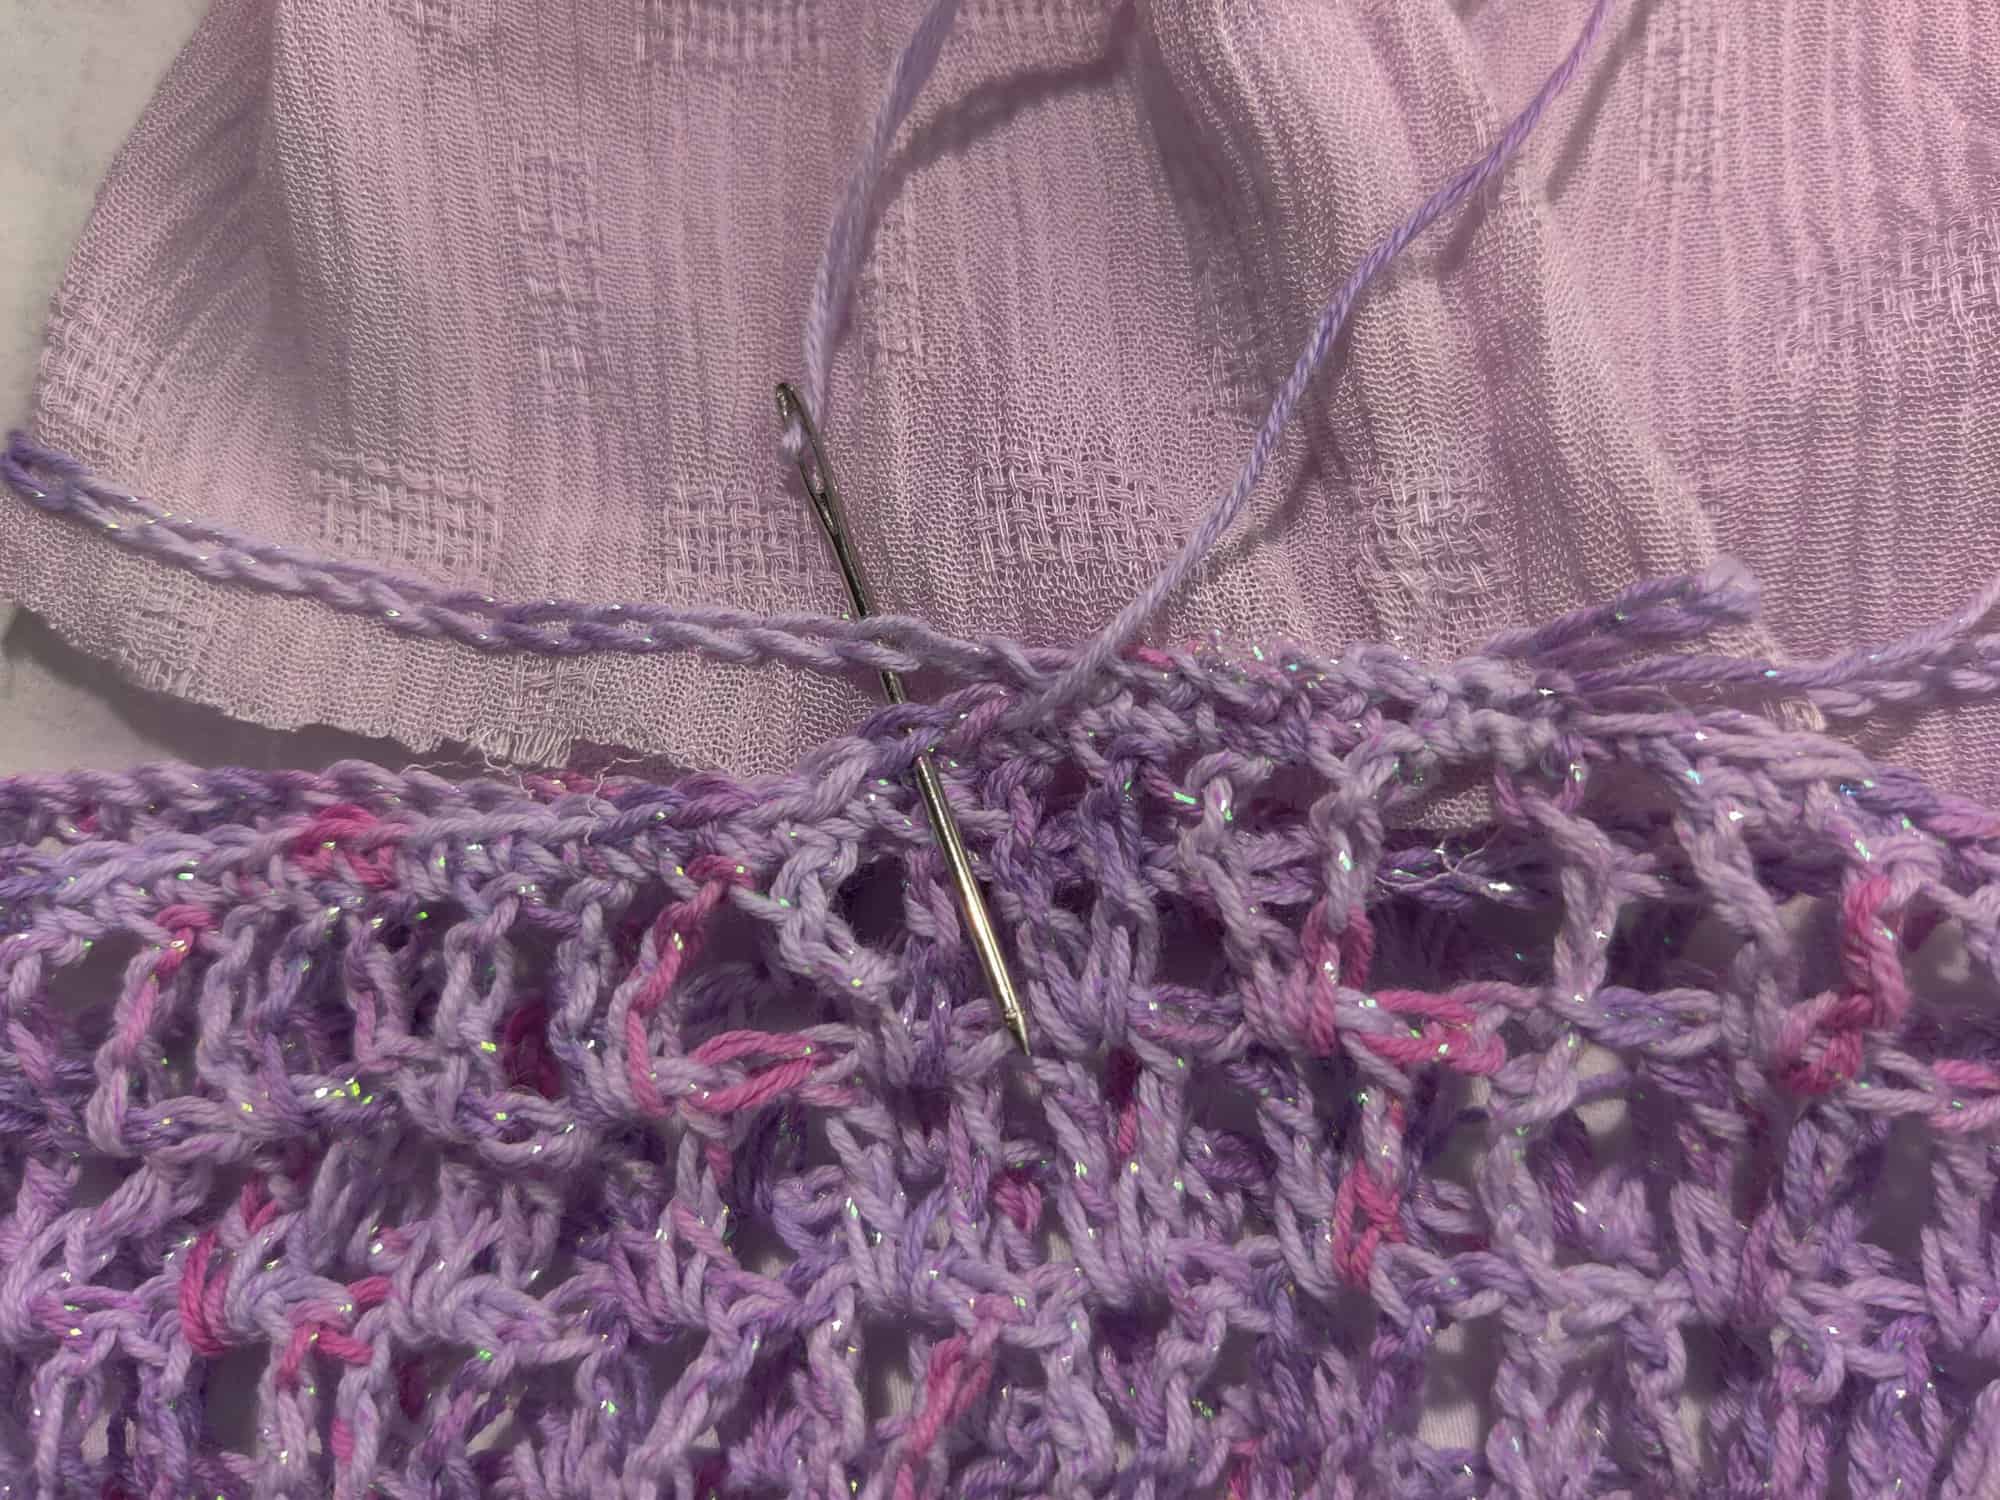
Repeat all above steps for the second sleeve, making sure to stitch the same amount of embroidered chains so that both sleeves are the same width. Afterwards, weave in all of your ends and your spell stitched sleeves are complete. <3
Thank You!
I hope you enjoyed making this little mashup as much as I did. If you would also like to explore my creative world and try out my pure crochet patterns, you can visit my website or instagram. I look forward to connecting with you lovely beings again next month for another whimsical tutorial. Until then, stay magical! <3