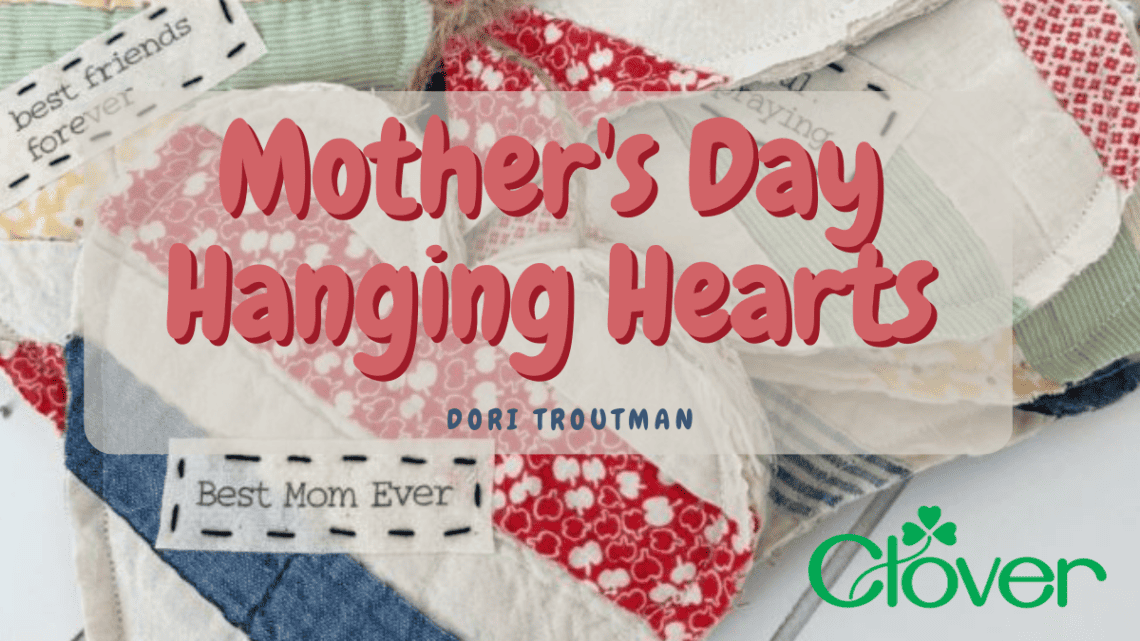
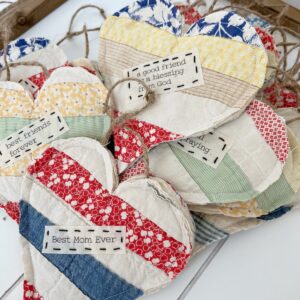
Mother’s Day Hanging Hearts- DIY
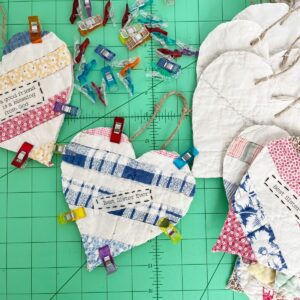
Hello friends! I’m one of those people who think that hearts are for every day… not just for Valentine’s Day! And today my project is all about gifting a precious hanging heart to the Mothers in your life for Mother’s Day! And if you don’t want to wait until Mother’s Day you can gift some for May Day. I plan to do both! These amazing little hearts are so perfectly adorable that I couldn’t stop making them. And if you’ve got an old, falling apart, stained and ruined quilt… this is the perfect project to repurpose it!
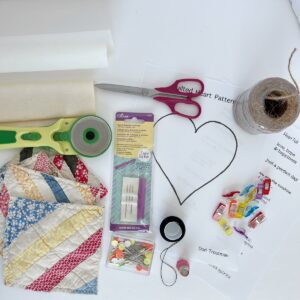
Necessary Supplies
- Vintage Quilt cut to 5.5 inch scraps (you will need two per hanging heart)
- Heart pattern – you can download PDF here
- 8.5 inches x 11 inches white or off white fabric
- Clover Wonder Fuse- Art No 4091
- Hanging Heart words – download at link below
- Clover Flower Head Pins- Art Q2505
- Clover Wonder Clips
- Scissors
- Clover Rotary Cutter- Art No 7500
- Clover Embroidery Needle No 3- Art No. 235
- Embroidery thread (I used Perl cotton #8 in black)
- Clover Protect and Grip Thimble Thimble- Art No 6026
- Twine
- Printable PDF patterns and words: Quilted Heart Pattern and Quilted Heart Words
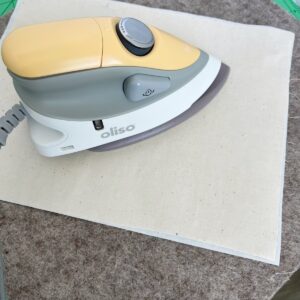
Step One: Cut white fabric piece and Wonder Fuse to 8.5 inches x 11 inches. Iron the Wonder Fuse to the back of the fabric.
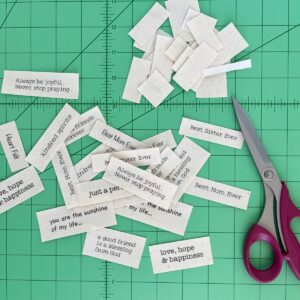
Step Two: Place the fabric with the Wonder Fuse on the back into your printer. Using the PDF download here: Quilted Heart Words, print directly onto the fabric, just as if you were printing a piece of paper. With the Wonder Fuse on the back, it should have no problem running through the printer. (You can choose to not put any words on the hearts, but honestly that is what makes them so special!)
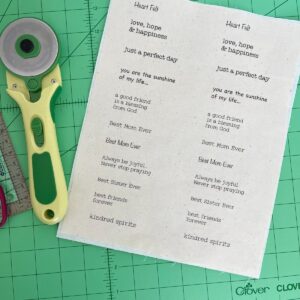
Step Three: Using a rotary cutter and scissors, cut out your words. Set aside for now.
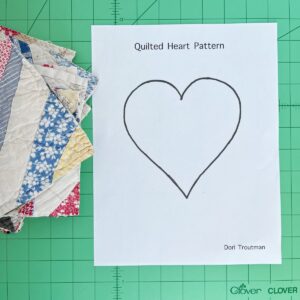
Step Four: Print the heart pattern here: Quilted Heart Pattern.
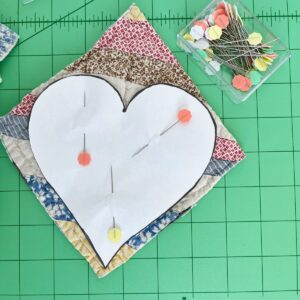
Step Five: Using sharp straight pins, pin your pattern to the 5.5″ x 5.5″ quilted scraps. (You will need two quilted scrap pieces for each heart.) Cut them out around the pattern. (Do this for as many hearts as you plan to make!)
Step Six: Take the cut heart that you intend to be the front and choose a word. Remove the Wonder Fuse backing from the word and iron to the front of the heart.

Step Seven: Use a Clover Embroidery No. 3 needle and some embroidery thread, sew a running stitch on the word patch. Optional: you could also sew this using your sewing machine, but I really like the look of the hand stitch.

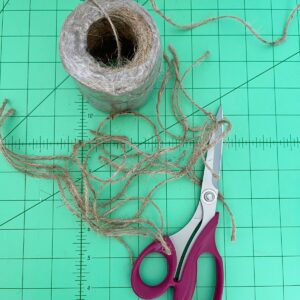
Step Eight: Cut twine 9 inches long. You will need one twine for each heart that you are making. I then tied two knots about an inch apart at the center of the twine. This is completely optional.
Step Nine: Place your twine on the inside of the heart back, right at the top of the heart. Use Wonder Clips to hold it in place. Sew a few stitches over each twine end, 1/4 inch from the edge of the heart.

Step Ten: Place your heart front (the one with the word) to the heart back, wrong sides together. Use Wonder Clips to hold them in place.
Step Eleven: Sew a 1/4 inch seam all the way around the heart.

Step Twelve: Press your hanging heart and trim any thread or old batting that might be sticking out the raw edges!

And your darling little Hanging Heart is complete! It is such a fun and fast project that I would recommend making plenty of them! You can gift them to all the favorite women in your life!
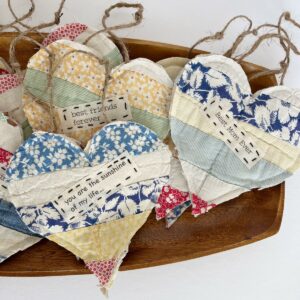
Happy Mother’s Day friends!
~ Dori ~