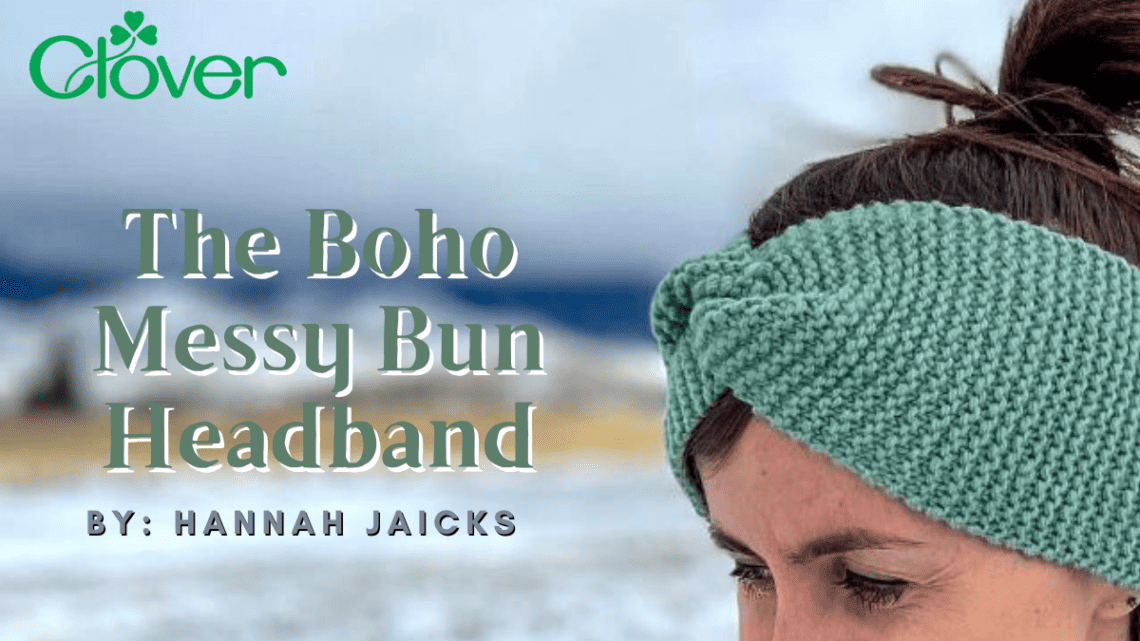
The Boho Messy Bun Headband- Beginner Knitting Pattern
Happy New Year fellow crafters! Hannah here, the knitwear designer, blogger, and maker behind Bears Den Essentials (@bearsdenessentials) with an exciting chance to kick off 2023 by learning a new skill set! I am happy to announce a brand new pattern AND an accompanying series of video tutorials that will provide new (and experienced) knitters with all that they need to create a beautifully messy bun headband. These twisted headbands are wildly popular, and I thought this pattern would be a fun alternative to the typical beginner patterns of a scarf or dishcloth (not that we can’t all use those, but I wanted to mix it up a bit for you!).
Knitted in garter stitch, I’ve put together a pattern that can be made for all head sizes, from newborn to adult large. It’s perfect as a first knitting project, and you can create beautiful headbands for yourself, as Mommy and Me sets, or for anyone in need of warm ears this cold winter season. Considering the polar vortex that hit us all pretty hard, I for one am happy that the temps are no longer -25 degrees Fahrenheit (yes, you read that correctly). This headband, made with 100% wool using Brown Sheep Nature Spun Worsted Yarn, kept me warm inside the house when we briefly lost power.
What’s most exciting is that once you learn how to knit this headband, you’ll have a strong foundation in how to cast on, how to knit in garter stitch, how to troubleshoot, and how to cast off and finish up your first project! Head to our YouTube channel’s playlist for this pattern (Bears Den Essentials: Beginners’ Knitting Series) to see our “how to” videos, released each week, to help you every step of the way. I once heard it said that mistakes in knitting are just more advanced techniques that you didn’t mean to do yet. I love this saying, and I can’t wait to show you how to get started knitting. Fair warning: once you start, you won’t be able to stop!
MATERIALS:
Yarn:
1 Skein* of Brown Sheep Nature Spun Yarn Worsted Weight Yarn
[245 Yards (227 meters) | 100 grams (3.5 oz) | Medium Weight (Category 4)]
Color Shown: Arctic Moss
*1 Skein is approx. enough for 1 large (Teen – Adult Large) and 1 small (Newborn – Child) headband
Beginner Tips: This yarn is worsted weight yarn, which is a medium weight yarn considered to be “category four.” Yarn weights range from 0 (finest and thinnest) to 7 (thickest and bulkiest). Yarn weight refers to the thickness of the yarn, not how much your yarn physically weighs when you place it on a scale. Worsted is a nice weight to start with as a new knitter because it is not too hefty or too fine to be able to build the necessary muscle memory, finger dexterity, and motor skills your hands will be developing as you master handling the needles and yarn motions.
I like to describe knitting as a symphony where your hands and fingers are the different instruments learning how to play in harmony with one another, and the composition you create is your finished knit! The process of knitting with all your digits and limbs moving together is just like the joy of having music being played by every instrument in an orchestra. Half the fun is the composition! Being able to create a finished piece is simply the happy byproduct of your fingers and hands practicing together to create beautiful art, much like a percussion section learns how to play in harmony with the strings section. When it comes to knitting, you are the composer!
When you check out the label on your yarn, you’ll often see an image like the one above with the weight category. This standardization is handy for determining the correct knitting needle (or crochet hook) size, getting the correct gauge, and creating your project according to pattern specifications. If you’re ever confused by the numbers and how they correspond to your pattern, the friendly staff at your Local Yarn Shop will be glad to walk you through it! I’ve never met another knitter who won’t stop to help explain meeting your gauge.
Knitting Needles:
–US Size No. 7 (4.50mm) Clover Takumi Bamboo Single Pointed Knitting Needles 9” – Art No 3011-07
Notions:
–Jumbo Darning Needle- Art No 339
–Clover Yarn Cutter Pendant- Art No. 3106
–Clover Knitting Needle Point Protectors – Art No. 333/S
GAUGE: Approx. 5 sts per inch* using 4.50mm/US 7 needles
*Beginner Tip: No need to worry too much about rows/inch for your gauge for this project since you will be gauging your final piece’s length by measurement, not row count. Most new knitters start off too tight or too loose on their first project (see our videos for tips on how to combat this habit!), so this is a chance to get a feel for how you knit on the needles and learn how to create even stitches.
SIZE INFORMATION:
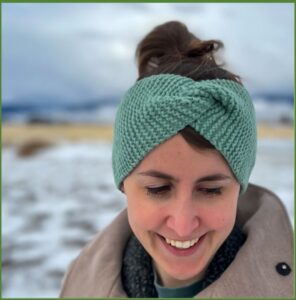
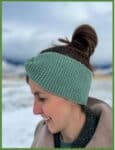
This pattern is designed to be worn with ~1-3” of negative ease in circumference. The yarn has a nice stretch to it, so you can make it looser or tighter according to preference. Model has a head size of 23” in circumference and is wearing a size Adult.
Size Guide & Finished Measurements:
| Approx. Head Size | Finished Headband Length
(Before seaming) |
Finished Headband
Width |
Approx.
Yardage Needed |
|
| Newborn
(0-3 Months) |
13-15”
(33-38 cm) |
12”
(30.5 cm) |
2.5”
(6.5 cm) |
42 yards (38 m) |
17g (.6 oz) |
| 3-12 Months | 15-17”
(38-43 cm) |
14”
(35.5 cm) |
2.5”
(6.5 cm) |
49 yards (45 m) |
20g (.7 oz) |
| Toddler
(1-3 Years) |
17-19”
(43-48.5 cm) |
16”
(40.5 cm) |
3”
(7.5 cm) |
67 yards (61 m) |
27g (1.0 oz) |
| Child
(3-12 years) |
19-20”
(48.5-51 cm) |
17.5”
(44.5 cm) |
3.5”
(9 cm) |
85 yards (78 m) | 34.5g (1.2 oz) |
| Teen/
Adult Small |
20-22.5”
(51-57 cm) |
18.5”
(47 cm) |
4”
(10 cm) |
102 yards (94 m) | 41.5g (1.5 oz) |
| Adult*
*Fits most adults |
22.5-23.5” (57-59.5 cm) | 20.5”
(52 cm) |
4”
(10 cm) |
113 yards (104 m) | 46g (1.6 oz) |
| Adult Large | 24”+
(61 cm +) |
21.5”
(54.5 cm) |
4”
(10 cm) |
119 yards (109 m) |
48 g (1.7 oz) |
Beginner Tip: If you’re unsure of how to estimate length based on the chart, a good rule of thumb for these headbands is to measure the circumference of the head (including ears) and then subtract 2-2.5” (5-6.5 cm). Knit to this length.
Adapting As You Go: Another way to determine when to cast off is to wrap the headband around your head with the edges overlapping one another ~.5”. If it feels comfortable, then you are ready to cast off. If it feels too tight, continue in garter stitch until it fits just right. If it feels too loose, then you can unknit a couple rows, which is undoing the stitch you just did by reversing your steps and working backwards. You want the headband to sit over your ears without sliding down over your face or feeling like you’ve got a headache coming on.
Sizing:
The sizes of the headband– Newborn, 3-12 months, toddler, child, teen/adult small, [adult], adult large – correspond sequentially to the numbers provided within the pattern.
Beginner Tips: Highlight all the numbers corresponding to the size you plan to knit for quick referencing. The number bolded inside the parenthesis “( )” corresponds to an adult size. The headband in the photos was knitted in the adult size on a model with an approx. head of 23” (58.5 cm).
ABBREVIATIONS AND STITCH GLOSSARY:
- Approx: Approximately
- CO: Cast on [Note: The beginning of the headband is cast on using the Long-Tail Cast On Method]
- K: Knit
- Garter Stitch created by knitting each stitch of every row
- St(s): Stitch(es)
- WS/ RS: Wrong side of the work / Right side of the work
- ” / cm(s): Inch(es) / Centimeter(s)
PATTERN:
CONSTRUCTION OVERVIEW:
This headband is knit flat and then the ends are seamed together to create the adorable twist in the middle. Since it’s made with 100% wool yarn, I recommend blocking it before wearing, and then moving forward hand wash it gently with your preferred wool wash.
CASTING ON:
With size US 7 (4.50 mm) single pointed needles and yarn, CO 13, 13, 15, 18, 20, [20], 20 sts.
BODY:
Row 1: K to end of row.
Repeat row 1 to continue in garter stitch pattern until piece measures 12” (30.5 cm), 14” (35.5 cm), 16” (40.5 cm), 17.5” (44.5 cm), 18.5” (47 cm), [20.5” (52 cm)], 21.5” (54.5 cm) from CO edge. Beginner’s Note: For troubleshooting common challenges, such as dropped stitches, knitting too tightly, or too loosely, check out this video on how to knit and troubleshoot.
Cast Off. Cut yarn leaving roughly 20” (51 cm), thread yarn through remaining st, pull tightly.
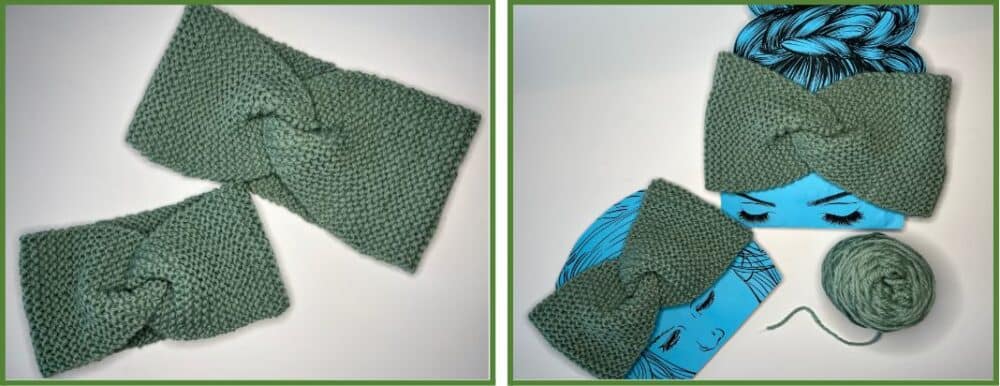
SEAMING THE TWIST:
Now that you’ve cast off, you will seam the two ends of the rectangle together to join the headband and create the beautiful twist in the front.
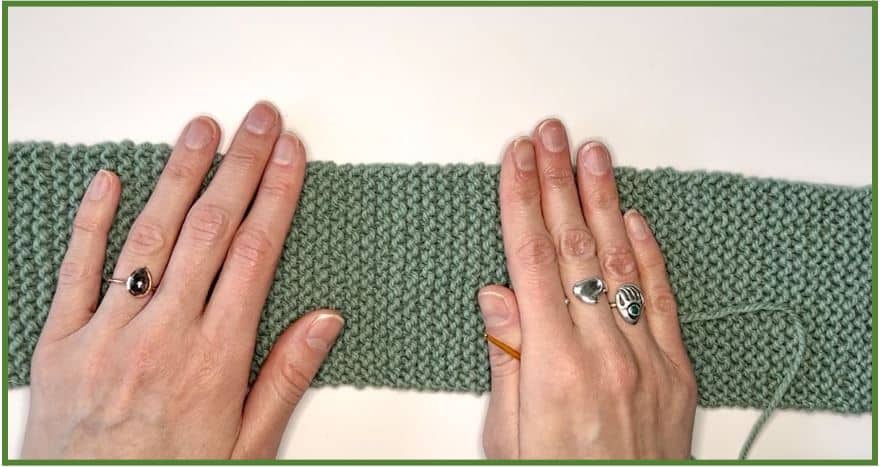
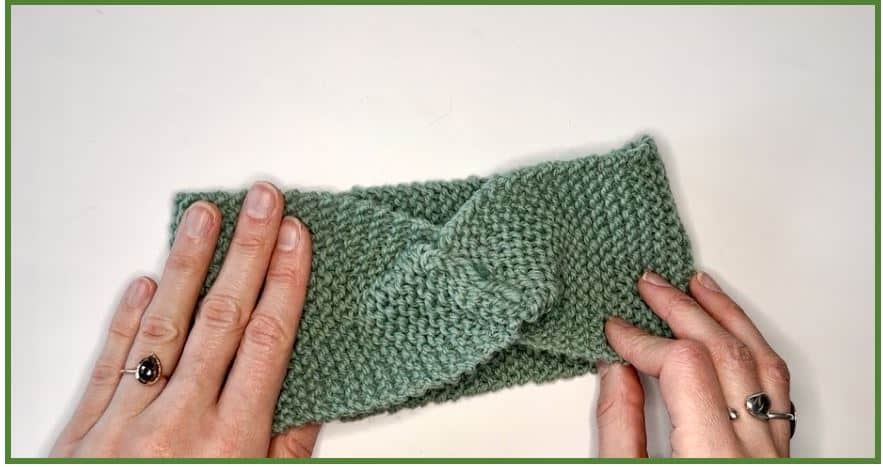
- Lay the piece flat horizontally as shown with the Right Side (RS) facing up.
Beginner Tips: Which side is the RS? Since it’s garter stitch, both sides are identical, so it doesn’t matter– just pick whichever side you think looks nicest and lay it facing up. When you progress to more advanced patterns involving purls and other stitches, this distinction will matter more. You will have the RS, which is the side that faces the world, and the Wrong Side (WS), which is the side facing inwards towards your body.
- Fold both ends together and move them close together towards one another in the middle.
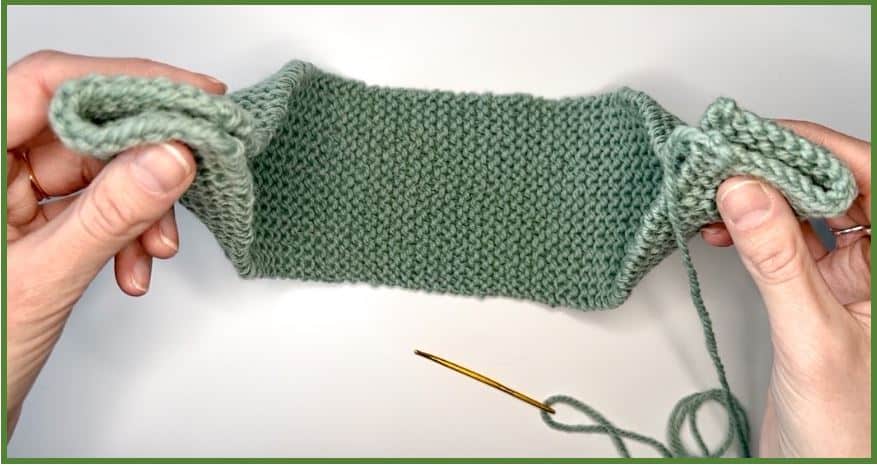
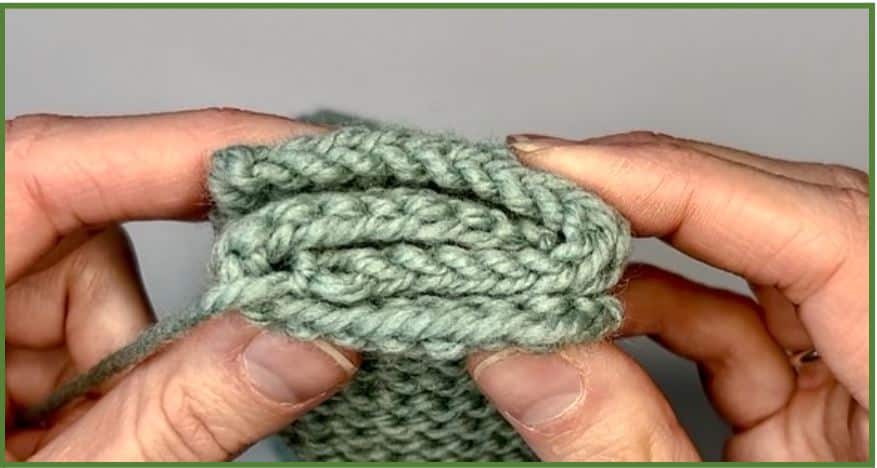
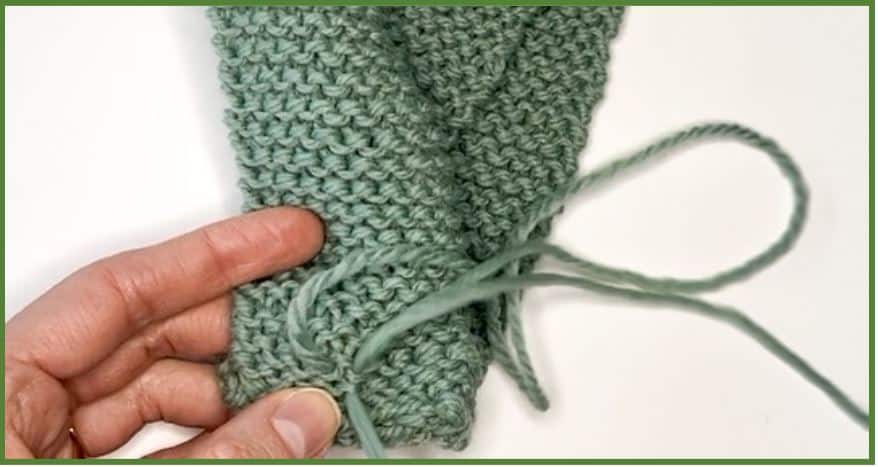
- Place both ends together so that they “hug” one another like a four-decker sandwich. Be sure to place them together so that all four edges of the hug are flush against one another at the sides and on top as shown.
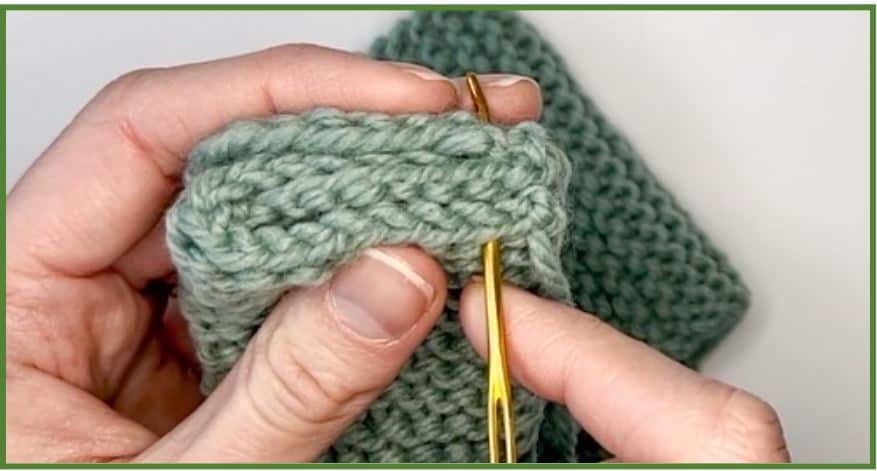
- Thread the tail end of the yarn through your darning needle, then thread the yarn through all the first stitches one row down (i.e., just below the cast on row/cast off row of each edge), and sew the sandwich together. Be careful to seam all four edges together with each pass of the needle. This will ensure that the twist is even. You can use your preferred seaming method– I like to use the backstitch method because it will create a nice secure stitch.
- When you reach the end, weave in your ends by pointing the needle away from you, inserting it up through the nearest stitch bump, and pulling your needle and yarn through (not too tightly or too loosely). Closely follow the path of the yarn by next rotating your needle and bringing it towards you– you are effectively creating a garter stitch on top of an existing garter stitch on the WS of your work. Next, go under the stitch bump adjacent to the original stitch bump you just went under, pulling your needle and yarn all the way through. Continue to follow the path of a single line of yarn (one row) using your needle and thread. Once the tail has been woven in for a few stitches, cut your yarn leaving enough of a tail that it won’t slip through to the RS.
- Your headband is finished but inside out. Turn your headband so the RS faces outwards.
FINISHING:
Block using your favorite wool wash (and LUKEWARM water) and enjoy!

I hope you had as much fun (re)learning how to knit and making this headband as much as I did designing it for you! For beginners, be sure to head to our YouTube Page (@bearsdenessentials) to get the full series of tutorials on how to knit this project, with tips and tricks for mastering your first project from start to finish! For questions about this pattern and extra tips, email us at bearsdenessentials@gmail.com.
Find Bears Den Essentials on Instagram | Pinterest | Etsy | Ravelry | Facebook | Youtube


DESIGNER AND PATTERN INFORMATION: All patterns, text, products, and photos are the property of Hannah Jaicks and Bears Den Essentials. Patterns and photographs cannot be distributed, copied in part or in whole, re-written, or re-sold without permission—electronically or physically. You may sell your finished products made using Bears Den Essentials patterns as long as you provide a direct link to this pattern in your listing and tag us on social media: @bearsdenessentials. For any other use, please contact us directly (Hannah: bearsdenessentials@gmail.com). Thank you for supporting artists by using and sharing our content ethically and legally.
Stay connected with Clover on Facebook | Twitter | Instagram | Pinterest | YouTube | Ravelry