Making A Quiet Busy Book {Part Two} – Sewing Tutorial
Hello Friends! I’m back with Part Two of the Quiet Book series! If you missed Part One you can find it here.
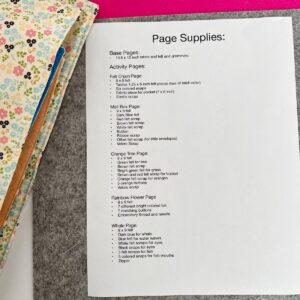
Lets start by talking about the activity pages you plan to do. I discovered that people have amazing, creative ideas for all kinds of activity pages and so many of them are shared on Pinterest. So, I really drew my ideas from there and didn’t go wild on thinking up my own! I limited my activity pages to five to get started. As soon as I narrowed it down to those five, then I sat down and wrote up a list of supplies for every page. That really helped me determine what I needed or what I could substitute out.
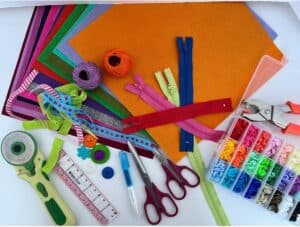
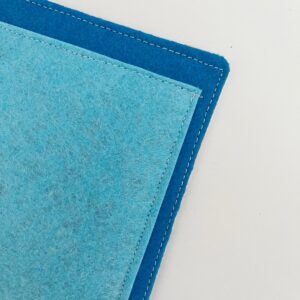
So lets talk tips and supplies. My first tip is that I highly recommend all the activity pages being made with felt. There are a few reasons for this. Felt is stiff so it creates a very solid page. And honestly, there are SO MANY gorgeous colors of felt now. I purchased this packet of felt on Amazon. The colors are vivid and beautiful and the felt size is what you need for this Quiet Book. The last reason I love felt so much for activity pages is that you don’t have any raw fabric edges that require a zig-zag stitch. You can simply sew a straight stitch to hold your felt in place.
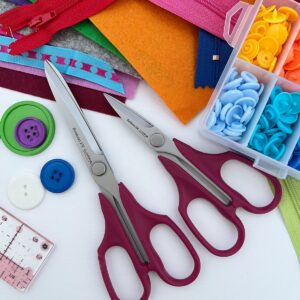
My second tip on supplies is scissors. I used my favorite scissors from Clover, the Bordeaux Ultimate scissors in two sizes. These are sharp and I cannot even describe the perfect cut they make, especially on the felt. It makes the job so much faster, easier, and a smoother finish. (Pictured below are the 170 and 130 sizes.)
I tend to have a lot of different craft supplies so other than the felt, I really didn’t need to purchase anything. Before you start spending a lot of money on supplies, dig through what you have and see what you can substitute as well!
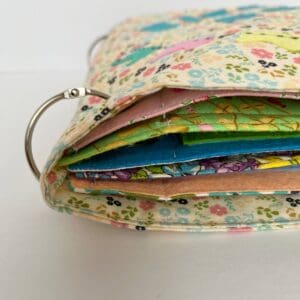
Okay, so now lets get started!! I made five Base Pages – this is what you will sew your activity pages to. These are simple and fast to make, and they really add stability to your book.
Supplies (for each base page):
- 10.5 inch wide x 12 inch tall felt
- 10.5 inch wide x 12 inch tall piece of fabric
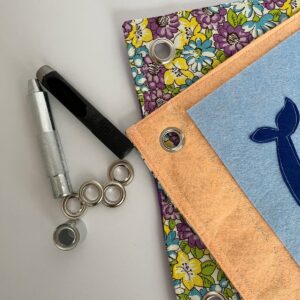
- 2 Grommets
- Grommet template (made with cardstock 1.5 inch wide by 10 inch long and holes cut at 1 inch and at 9 inch.)
Instructions:
Step One: Place felt and fabric right sides together. Sew 1/4 inch seam all the way around, leaving a 3 inch opening for turning.

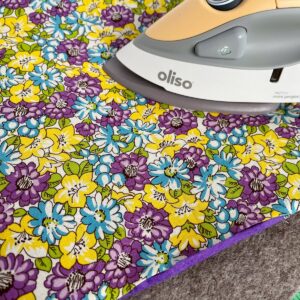
Step Two: Turn right sides out and iron all the edges flat, making sure all four edges are nice and crisp.
Step Three: Top Stitch 1/8 inch all the away around, closing the opening.
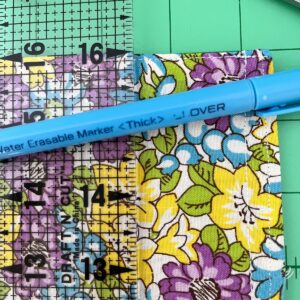
Step Four: Working on the left edge of your base page use your Clover Erasable Marker and mark two lines: one line at 1.5 inch from finished edge and another line 1/4 inch from the top stitch line. Sew both of those lines. (The purpose of this is that is creates a stable area where you will place the grommets of your page.)
Step Five: Using your Grommet template, lay it between the previously sewn lines. Mark the circles for grommet placement.

Step Six: Place your grommets. Repeat the above steps on as many base pages as you plan to have. (I chose five to start, I will add more later.)
Now!!! It’s time to start on the exciting part of the book – the activity pages! As I mentioned before, I simply chose five from a long list of ideas I had saved to my Pinterest Board! I will tell you this: looking at Quiet Book Pages on Pinterest is like a rabbit hole; once you get started you can’t quit. I seriously had to just choose five that I liked and ignore everything else!!! (Sometimes I think I’m the only crafter/maker/sewist that really doesn’t like Pinterest! Smile!)
Activity Pages
Note: After all five activity pages are complete I will show you how to attach them to the base page. Make your activity pages first and set them aside for now.
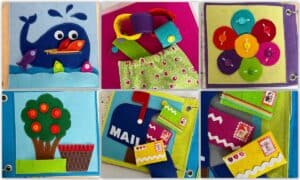
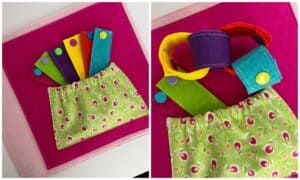
Chain Link Page:
I really recommend making this page because it is SO fast and SO easy!!! You can make your chain links any size you want; my finished links are 1.25 by 6 inches. I simply cut two pieces of felt for each link and sewed them together with a top stitch and then added colorful snaps to each one! (I have a plastic snap kit that I use ALL the time for so many craft projects.) You can make a very simple pocket with fabric and elastic to hold all the chain pieces.
Mailbox Page:
Okay, so this page looks complicated but I’m here to tell you that it is EASY!!!! I found this on a website with a free pattern printable. It even has the pattern for the little letters to go in the mailbox! You can find that pattern here. Honestly, I couldn’t believe how easy this page was!

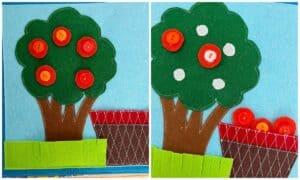
Orange (or apple) Tree Page:
This is a fun little page to make. It actually took me longer than I had planned because of sewing on all the buttons. But it did end up being super cute. I was kind of winging it the whole way; drew my own pattern, etc… Each round “orange” has velcro to attach it to the tree. You wouldn’t need to add the buttons if you didn’t want to. I thought I would like the way it looked, but in hindsight I think I would choose to leave off the buttons. Instead I would use two round pieces of felt per orange and sew them together so they are more stable. The basket was fun to make and the oranges can be removed from the tree and placed in the basket.
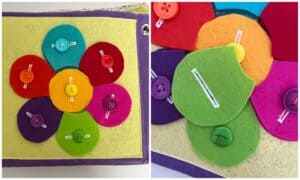
Rainbow Flower Page:
Okay so this page was super fun!!! My teenage grand-girl was with me on this day and we did this page together. We simply drew a large flower using circles, cut out two pieces of felt per color. I sewed a base flower with one of each of the colors. Then I used my button hole attachment and sewed a buttonhole in the second flower of each color. Hand sew on colorful buttons (use embroidery floss for the thread in sewing the buttons as that makes them where they literally can’t be pulled off). Then button on your colored petals! Super cute, super fast!
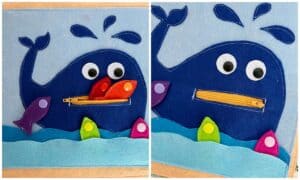
Whale and Fish Page:
I love this page!!! I hand drew the whale, the little fish, and the bubbles splashing above his head. Once I had everything cut out I added the little zipper mouth. This just made it so super cute! Sew on the whites of the eyes and then add the black snaps to the inside of his eyes. You could also use black felt if you don’t have the snaps. I made five little fish by cutting two felt pieces per fish and sewing them together. Once again the reason for that is simply stability. I added colored snaps for the fish mouths. That is totally unnecessary and only adds fun and dimension! Once everything is assemble you can sew it to your page. I added the waves at the bottom once the whale was sewn in place.
Sewing Activity Pages to Base Page:
Note: Before we sew our activity page to the base page I’m going to tell you a little bit about how I finished the back of each base page. I decided early on that I didn’t want activity pages sewn to both the front and the back of the base pages. Mainly because I wanted every activity page to be interchangeable (removed and added to the book at any time). Also I’ve seem Quiet Books where there is activity page on both front and back and they are so super bulky. SO, with that said I decided after the fact to add large 3 inch letters and numbers to the back each base page. I simply cut these out of fabric, added quilt batting in between and sewed them together, added velcro to the back so they can be moved around the book. However, this is absolutely an optional step. IF you decide to do this or to add some other small detail to the backs of your base pages, do it BEFORE sewing on your activity page.

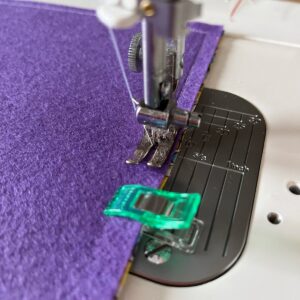
So the really great thing about your activity pages being out of felt is that when you sew them to your base page you do not have to worry one bit about raw edges that will fray. You don’t have to zig zag stitch (unless you wanted to of course). Lay your finished activity page on the prepared Base Page and simply sew right along the edge all the way around. Simple and stable!
You can add your pages to your book now so that you can get a feel for the finished product! The great thing about having them removable on the three ring binder is that you can later change them around into any order you want.

YAY!!! We have completed Part Two! I’ll see you back here in February and we will add some more pages and finish up out Quiet Busy Book! Please tag me on Insta @redfeedsack so I can see how you’re coming along on your book! If you have any questions, feel free to email me at redfeedsack@gmail.com!
~ Dori ~
Stay connected with Clover on Facebook | Twitter | Instagram | Pinterest | YouTube | Ravelry