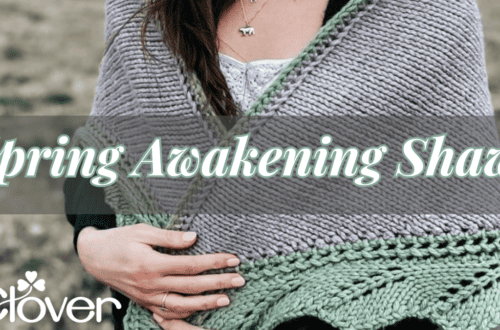
Cosmetic Zipper Pouch
Hello Friends! I hope wherever you are, you are enjoying some beautiful spring weather! I love it so much that I couldn’t resist digging in my fabric stash for some happy fabric to sew up into a great cosmetic pouch! I decided to share with you today because I have a feeling you’ll love this pouch as much as I do!
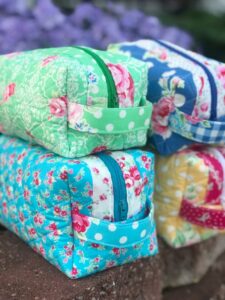
I have to admit that I intended to make a pattern for a box shape cosmetic zipper pouch and write the tutorial to share with you. However, there is a saying in the sewing world that goes something like this: “there is nothing new under the sun”… and as I was struggling to write the pattern I realized that I already owned the perfect pattern and there was absolutely no sense in trying to make it any better! So today, you will definitely want to purchase this pattern called The Holland Pouch by Kristina at Center Street Quilts. It’s under $10 and is the best, most well written and illustrated pattern.
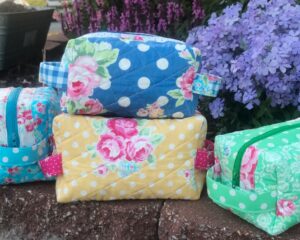
I love that this pattern comes in three sizes and I enjoyed making the small and medium sizes. I love both sizes but I was pleasantly surprised at what a great size the small one is. Someday I will make the large size but I can guess that it will hold a ton of supplies!
Click HERE to purchase the pattern and then lets get started by gathering supplies!

As always, I’m super thankful for my favorite Clover supplies for just about every project that I sew and they are always the first supplies I gather!
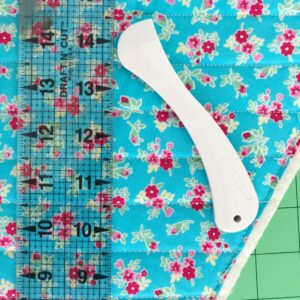
This cosmetic pouch is fully lined but the best thing is that you attach the outer fabric and lining fabric by quilting it on basically the very first step. I absolutely love a quilted pouch and the fact that you see the quilting lines on the inside of the bag as well as the outside, made it super fun. I used my Clover Hera Marker to mark my quilting lines. You could also use the Clover Water Erasable Marker but I love that the Hera Marker works so well and really holds the lines; no need for a pen marker.
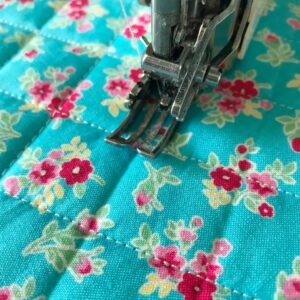
I marked and quilted my lines 1 inch apart on a 60 degree diagonal, creating great little diamond shapes. If you didn’t mark them on a diagonal, they would be darling one inch squares. You could also just do simple straight lines. No matter how you choose to quilt it though, it’ll be perfect!
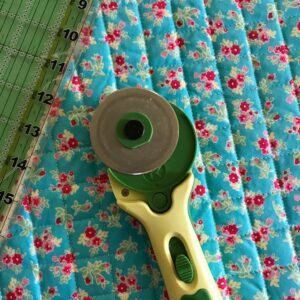
The pattern calls for fabric cut a little larger than necessary so that after you finish quilting it, you trim it to size. With the flex foam this is a fairly thick layer and the Clover Rotary Cutter just slices through the layers perfectly.
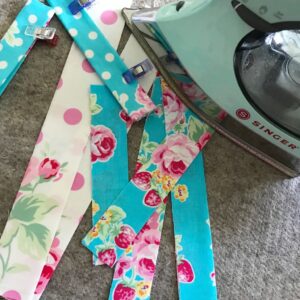
There are numerous little binding strips for this Cosmetic Pouch and I got them ironed nicely and used Clover Wonder Clips to hold in place the little handle pieces after I ironed them. I think the Clover Wonder Clips just might be my most used tool…. I always have them at the ready!
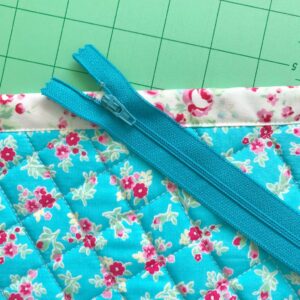
I think a lot of people, especially beginner sewists, steer away from projects with zippers. Well, this Cosmetic Pouch patter is the easiest for installing the zipper.
The pattern makes it very clear, plus there is a zipper binding that creates a perfectly finished edge, so adding the zipper is so easy.
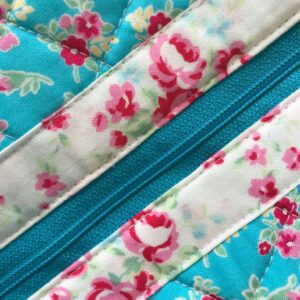
I love that this pouch has NO raw edges showing on the inside. See how beautiful the zipper and one of the seams looks from the inside? No unraveling threads!
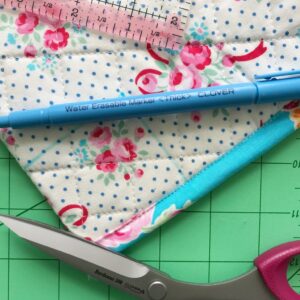
I love pouches with boxed corners! I used my Clover Water Soluble Marker to mark the cutting lines for the boxed corners. There is a pattern piece for the size of the corner that you cut out, but I found it simpler to just mark it. If you’ve never made anything with boxed corners before, then this is the perfect way to learn!
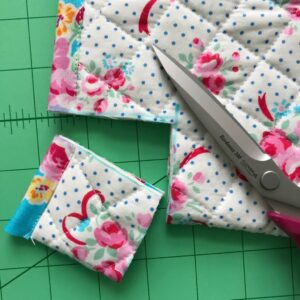
And of course there are NO better scissors than the Clover Bordeaux Ultimate Scissors size 200 for cutting out those thick corners. And I am not even kidding… these are my prized scissors! If you do not own them, you need to!

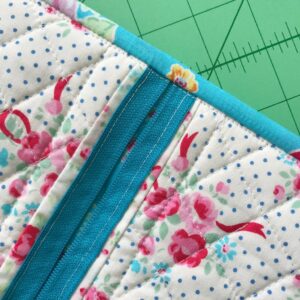
As I mentioned before, every seam has a binding that covers the raw edges. Which means you can wash this pouch over and over and it will stay together beautifully.
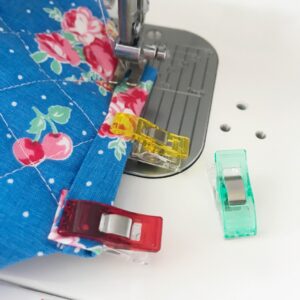
To sew the thickness of the pouch plus the binding can be a little tricky as the layers are thick. I found the best way to do this was to use Clover Wonder Clips to hold everything in place and sew very slowly over these thick seams and I had no problem at all.

I love the handles on these pouches as well. Everything about this pouch is just perfection.

This bag above is the small size and you can see how roomy it is! I’m so in love with this pouch!
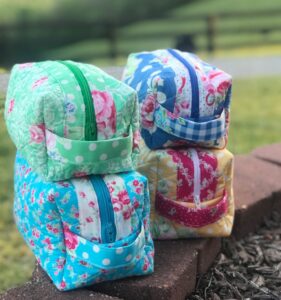
Our pasture grass here on our Tennessee farm is green, the cows are grazing and happy and I’m so thankful spring has arrived! Sewing these cheerful spring cosmetic pouches was the perfect thing and I think you need to make some too! Be sure to share with me on IG by tagging me @redfeedsack.
Thanks for following along and I’ll see you next month!
~ Dori ~