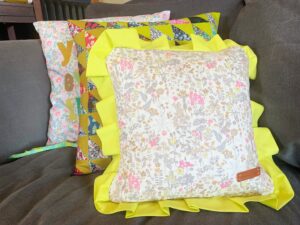
Spring Ruffle Cushion- Sewing Tutorial
![]()

![]()
I think ruffles are this years hot new look, I see them in all sorts of fashion as well as every home décor item under the sun, and that’s ok with me. I’ve been a lover of ruffles since I was little and so I decided to add some to my makes starting with a small pillow.

![]()
![]() What you will need for a 10×10 inch pillow cover:
What you will need for a 10×10 inch pillow cover:
Two fat quarters of fabric, one for the ruffle and one for the pillow front and back.
Fabric for lining if using a thinner fabric such as lawn.
![]()
![]() A cute leather tag with coordinating thread.
A cute leather tag with coordinating thread.
Tools such as iron, seam roller, scissors (my favorite small ones), Wonder Clips, rotary cutter, mat and cutting ruler.
![]() To start with we will need to make a bias ruffle, much like binding for a quilt only this time it will need to be extra wide. I went with a 4.5 width so that my finished ruffle would be two inches wide. If you already know how to make bias binding you can skip this part, but I find every time I make it I’m needing a little refresher on how to fold the fabric so hopefully this helps.
To start with we will need to make a bias ruffle, much like binding for a quilt only this time it will need to be extra wide. I went with a 4.5 width so that my finished ruffle would be two inches wide. If you already know how to make bias binding you can skip this part, but I find every time I make it I’m needing a little refresher on how to fold the fabric so hopefully this helps.
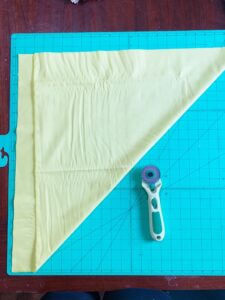
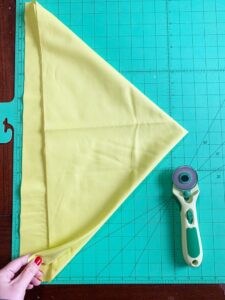

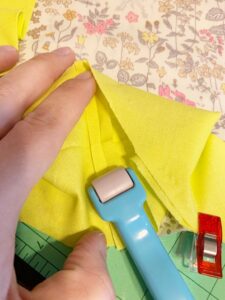
Folding your bottom right hand corner up to the top left corner, fold the top right corner to the bottom left, and last fold the top left corner to the bottom left. Use a ruler and rotary cutter to trim the folded edges on the right hand side of your fabric and then cut your strips according to your desired width. You will now have strips of bias cut fabric that will need to be sewn back together to make one long strip ready to iron, trim and fold in half length wise.


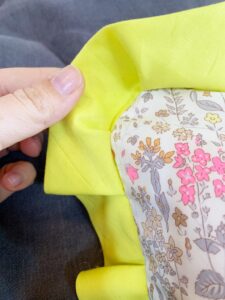
![]() For my pillow cover front and back I used the same fabric along with a basic white lining. Cut a 10.5 fabric square for the front and another if using lining. For the back panels cut a 10.5x 9.5 and another 10.5×5.5 for the smaller back piece. If using lining fabric sew along top edge with right sides facing, turn laying flat and using a seam roller to press seams to one side, top stitch with one or two rows for a finished edge. Repeat with second back panel.
For my pillow cover front and back I used the same fabric along with a basic white lining. Cut a 10.5 fabric square for the front and another if using lining. For the back panels cut a 10.5x 9.5 and another 10.5×5.5 for the smaller back piece. If using lining fabric sew along top edge with right sides facing, turn laying flat and using a seam roller to press seams to one side, top stitch with one or two rows for a finished edge. Repeat with second back panel.

Lay front fabric with right side facing up, with ruffle edge facing in and the raw edge lined up with the edge of the pillow clip in place every couple of inches, I made my ruffle tucks about a half inch and spaced them unevenly for a more organic look, as well as folding some up and some down. Ease the edge of the ruffle at the corners giving it a rounded shape and trim the excess square edge (this will be roughly a half inch eased in at each corner).


Once you have your ruffle around the whole pillow, overlap your ruffle ends by a quarter inch each, unfold and lay flat with right sides together, this might mean unclipping a couple inches on each side to give room to sew ends with ease. Sew using a 1/4 seam allowance, press seams flat using a seam roller and fold ruffle back into place, clipping so it’s ready to baste in place.

Use a basting stitch and a 1/4 inch seam allowance, baste ruffle in place around edge of pillow front. At this point I like to flip the ruffle out and see if I like how it looks in case I need to make any adjustments.
Lay pillow front facing right side up and place both of the back pieces facing right side down making sure the one you want as the outside flap goes down first. Use Wonder clips again to hold edges in place and sew a seam that is slightly more than 1/4th inch so that your stitches are sure to cover your basting ones. I also like to sew over the edges of the pillow backing a couple times to make sure those are sewn in really well.
Fold pillow case right side out and insert a 10×10 pillow form.


I’m itching to add more ruffles to my sewing projects starting with more pillows, but how fun would it be to add them to a quilt as well? Please tag us in your ruffle pillow makes so we can see your beautiful work as well.