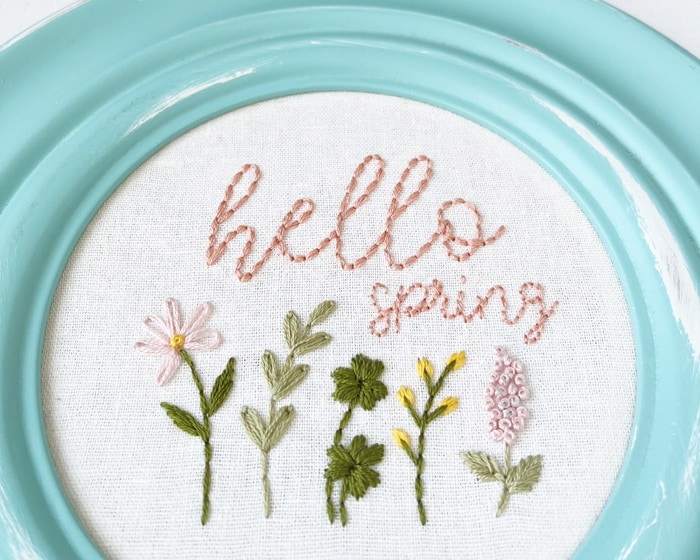
Hello Spring and hello embroidery stitches!
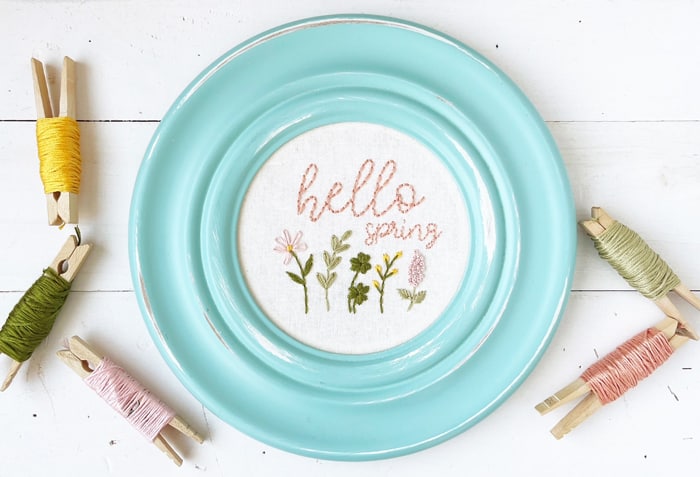
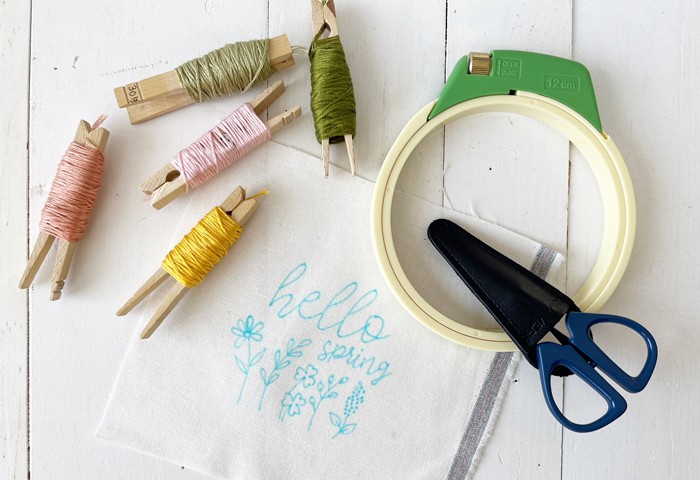
Hey again! Cheri from Tinkinstitches/tinkerellen here with some visual tutorials on embroidery stitches. I personally think absolutely anyone can learn these stitches! I’m giving you guys everything you’ll need to complete this pattern for some spring inspiration. Here’s what you need to make this design as you see it:
Pattern: hellospring
Quality cotton fabric 6″ square
Water soluble marker
5″ embroidery hoop
Scissors
Embroidery needle
DMC embroidery floss:
peach #748
yellow #725
light green #3013
dark green #580
light pink #3713
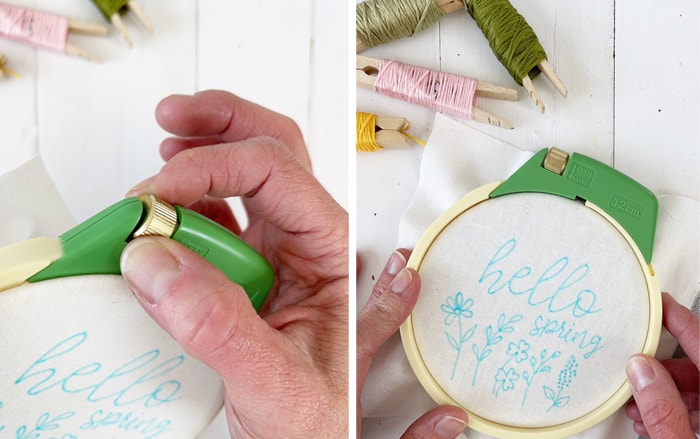
First, you’ll need to print your pattern. Trace your pattern onto the fabric using a small light table or the sunny window, quality cotton fabric and the Clover water soluble marker. Here I’m using the small embroidery hoop from Clovers line of embroidery tools, the patchwork mini scissors and some of their embroidery needles.
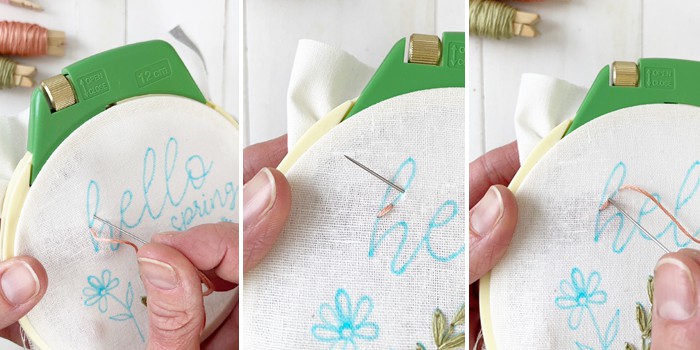
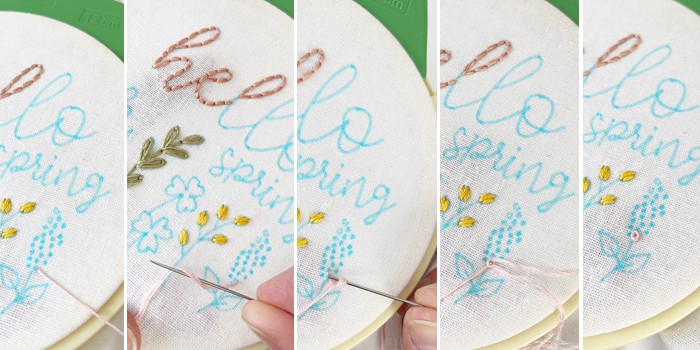
Now that you’re ready to go, let’s learn (or review) a few stitches together. Let’s start with the most basic stitch you should know for any embroidery design, the back stitch. This simple stitch helps you create lines, outlines, stems, writing, etc. It’s easy to learn and even easier to do. Just start at a point, create a small stitch in the direction you want to head, start another stitch a little further away from the first stitch and then finish your second stitch in the same exact hole as the first stitch ended. Keep going until you have finished your design. Here we’re using 6 strands to do the ‘hello’ part of the pattern. Use 3 strands to fill in your ‘spring’ section of this pattern. I’m using a DMC peach color, #758.
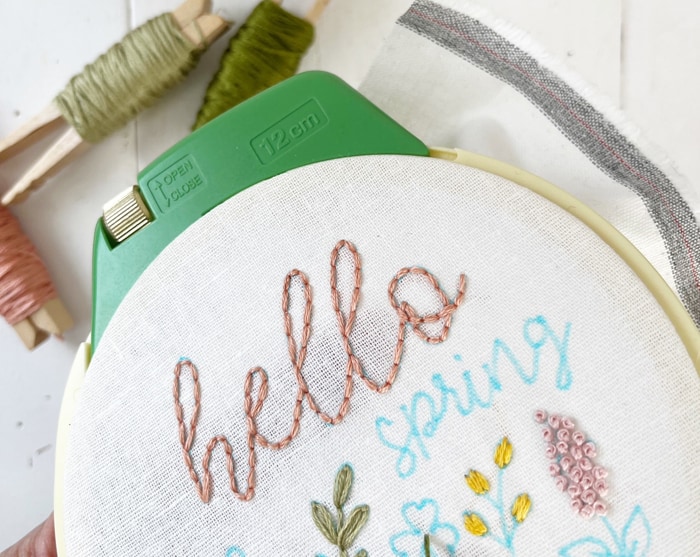
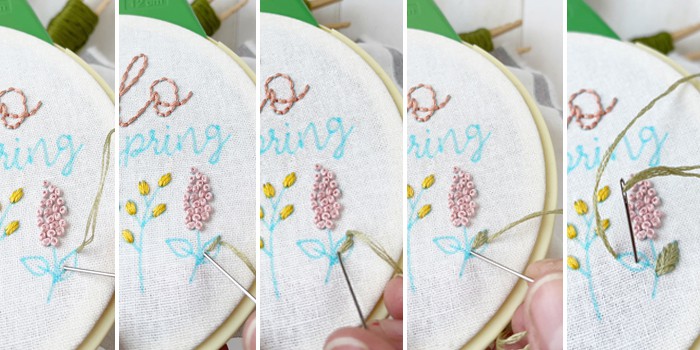
Great, now let’s move on to the satin stitch. You’ll use this for the clover leaves. When you’re filling sections like leaves or flower petals, I find the best way to do this is to create a few strands around the design before filling in the gaps. It helos create a more even fill and it helps keep you from sending strands in wrong directions. This particular one is straightforward with just three strands to create the initial shape, then going back in to fill in the empty space. Follow the edges of your leaves and end in the center. I used 4 strands of green DMC #580.
Now the satin stitch is similar to what I used for the yellow buds, it just takes about three stitches per bud. I’m using four strands of DMC yellow #725. Start with the middle stitch, then add shorter stitches, one on either side of the original stitch and you’re done!
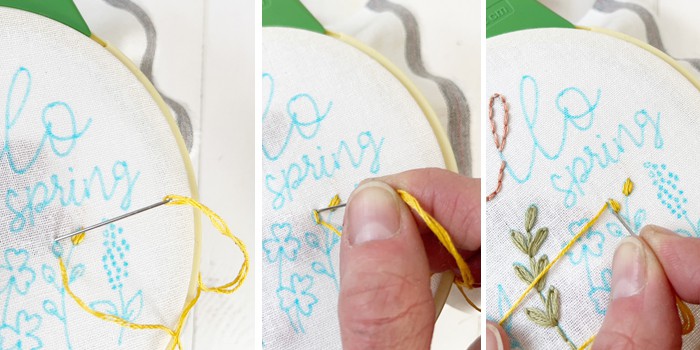
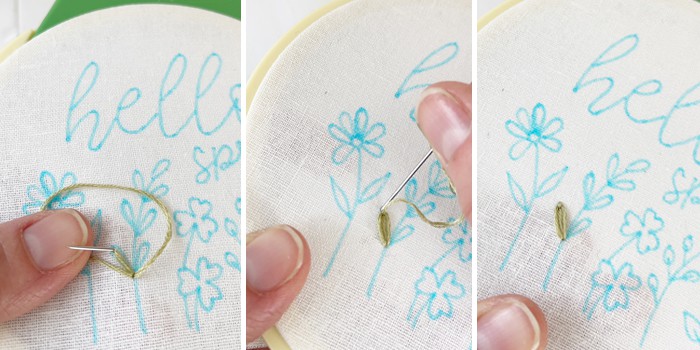
Now let’s do some leaves. Keep in mind that all your stems should be done using the back stitch method, and all of them use four strands of the color for that sprig. The leaf stitch is also called a fishbone stitch, in that you go back and forth from outer to center in a v-formation, emulating the bones of a fish. I don’t make up the rules, or the names. But that’s what it’s called. I start at the tip of my leaf, make a straight stitch down to about half way and pull through. Then start next to the tip and end just below the first stitch in the center. Now do this for the opposite side. Keep doing this back and forth v until you get to the end of your leaf where it meets the stem. I’m using four strands of green DMC #3013.
Okay, are you still with me? We have a few more to go. Let’s do the lazy daisy stitch. This one is so pretty to create petals or leaves with. Start at the center of your daisy petal, pull through then reinsert your needle back through the same hole, but don’t pull through yet. Make a loop with your thread and insert the needle at the edge of the petal (inside the loop) and pull through to create a loop tight to your fabric, now insert the needle on the edge of the petal again, but this time on the opposite side of the loop (outside the loop) to create a closing stitch to secure the loop. Thats you’re lazy daisy stitch! Now just complete the stitch for each petal and you’re done. This one uses four strands of DMC pink #3713.
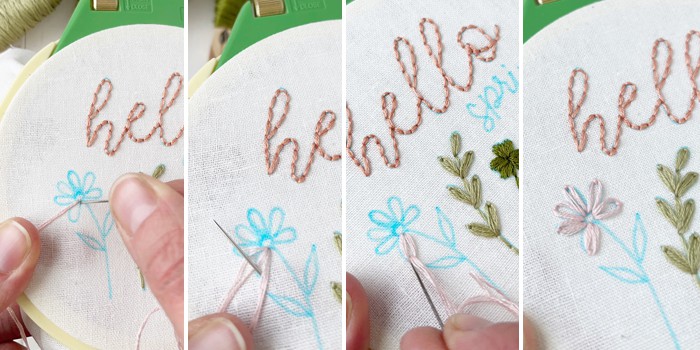
For a variation of this stitch, let’s do the filled lazy daisy stitch. Basically the same exact thing but you start by creating a straight stitch in side the petal or leaf and then doing the loop on the outside of that stitch. Like so. (Using four strands green DMC #3013.)

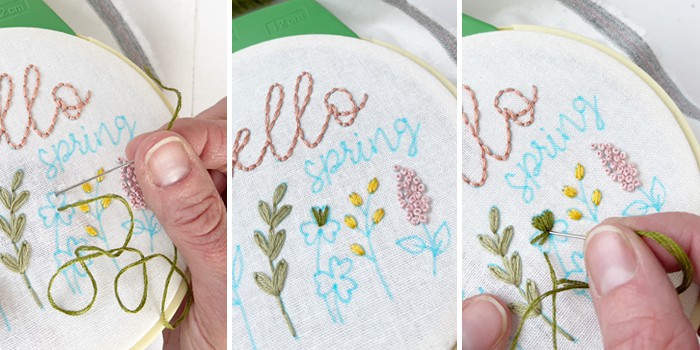
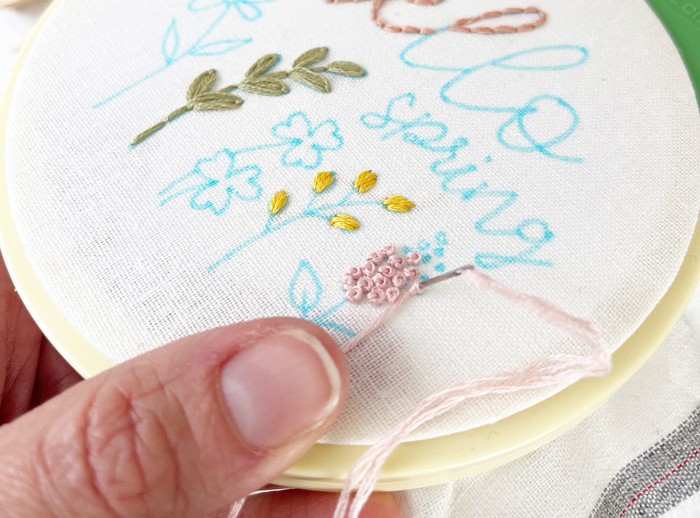
I’ve saved the ‘hardest’ for last. And I say that only because it looks difficult but everyone I’ve taught it to just wants to make a million more after they figure it out. The french knot. The most beautiful and fun stitch that you can impress your friends with. Enter your thread at the center of the knot. Pull through, then hold your thread tight with your left hand and use your right hand to wrap the needle around the thread. (I wrapped this one two times, wrapping once, twice or three times can vary the size of your final knot. Strand count will also affect the size. I’m using four strands of light pink #3713 again.) Put your needle back through the original hole, pulling the thread with your left hand slightly tight to get the knot tight again the fabric and hold your thumb over it. Pull your needle slowly through the back of your hoop until you’re all the way through and have a nice tidy knot on top of your fabric. Keep repeating this process depending on how much area you have to fill. I’ve made the pattern simple in that I have a dot for each spot you’ll need to add a french knot. This is a beautiful stitch and I’ve made complete designs out of just this one stitch. The final product is so full of depth and texture. It’s definitely one worth learning.
I think that’s it! We’ve learned every stitch to enable you to make this pattern! SO, will you?
I’m so honored to be able to teach you these techniques. I hope it all makes sense and the visual cues really help you grasp something that maybe was eluding you. It’s really a fun and useful skill to learn to work with thread and fabrics, to be able to use your knowledge and skill to create gifts, mend clothing, label your quilts, cozy up your home and even fix that jacket button you’ve been ignoring for years. It’s a wonderful thing to teach your children, to show people that we all have a creative spirit within ourselves. So go create, go play, go make the perfectly imperfect impression on the world. And as always, happy stitching, from my cheery little thread corner to yours.