Miniature Pom-Pom Party Hat Tutorial
The New Year is fastly approaching, which means it’s time to prep some party hats! This week, I will be sharing a step-by-step tutorial on pom-pom party hats. I designed a miniature template that will work for adults, children, and even pets. If you aren’t having a party to ring in the new year, that’s okay because the hat template can work for any celebratory occasion. Ready to make some party hats? Let’s gather the supplies!
Here’s what you’ll need to create the miniature pom-pom hats:
- Miniature Pom Pom Party Hat Template SVG/PDF
- Clover Pom-Pom Maker (Small) Art No. 3124
- Clover Cutting Mat Art No. 7520
- Clover Rotary Cutter 44mm Art No.7500
- Clover Bordeaux Shear Art No. 4940
- Clover Jumbo Darting Needles Art No. 340
- Foil Metallic Cardstock
- Metallic Curling Ribbon
- Pen
- 1/16″ Hole Punch
- Thin Beading Cord Elastic
- Scoring Wheel
- Small Nozzle Hot Glue Gun or Strong Permanent Adhesive
- (Optional) Cutting Machine
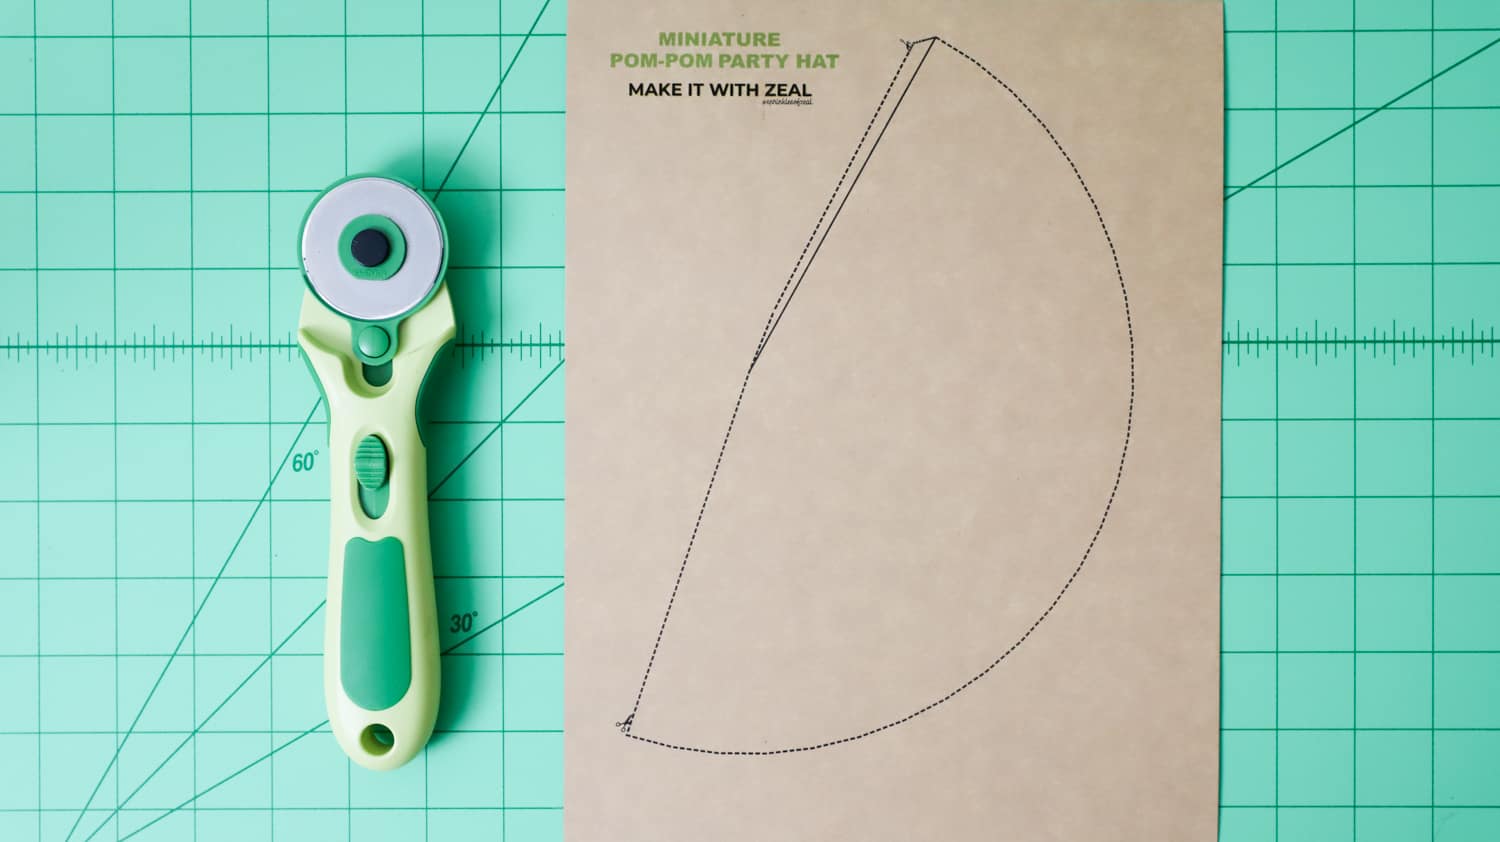
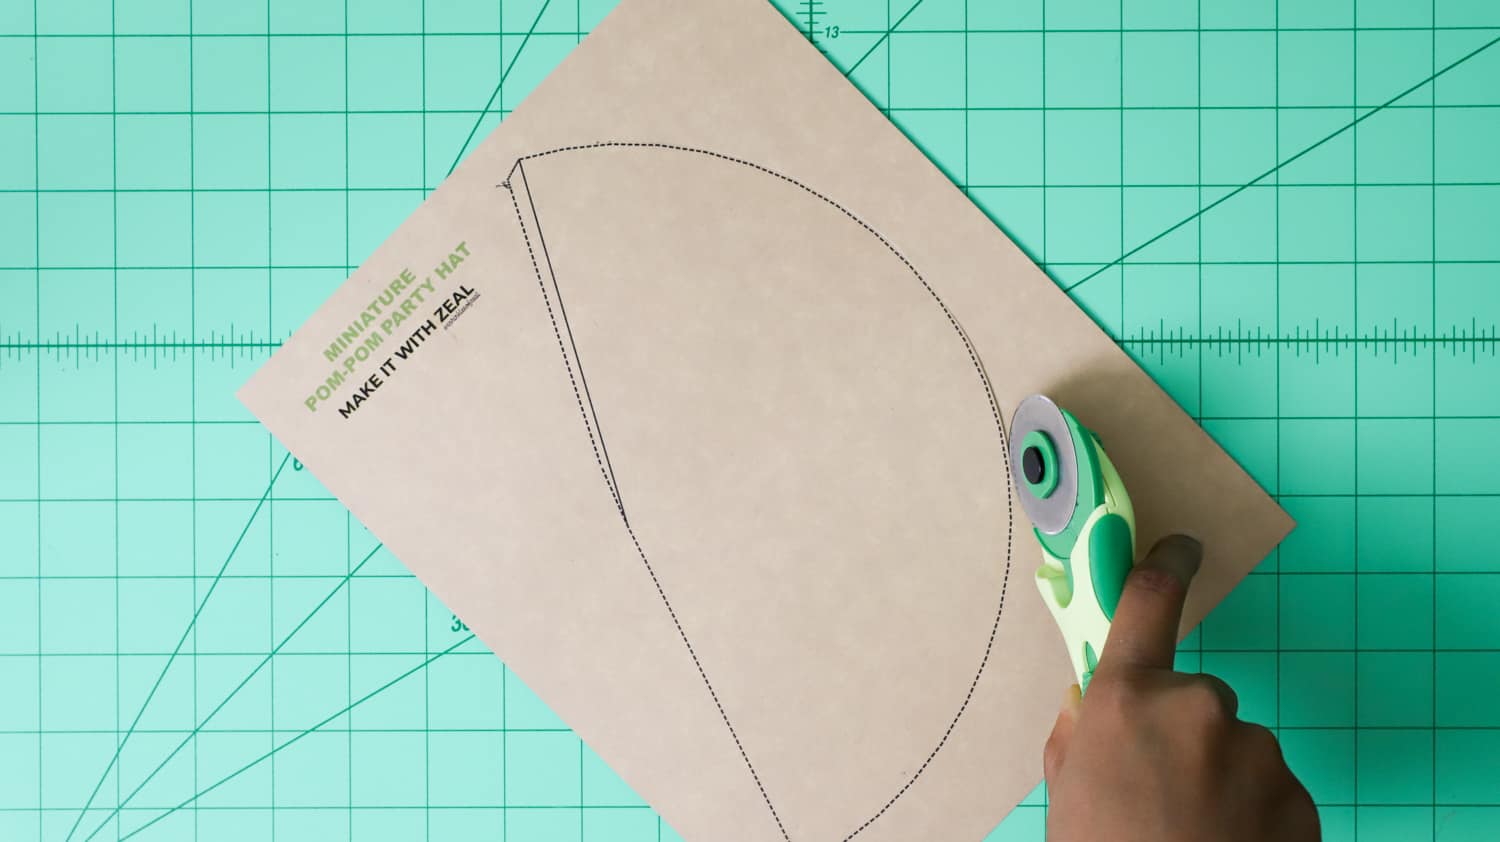
Step 1. Click to Download and print the template on the blank side of the foil metallic cardstock. If you own a cutting machine, use the included SVG file to surpass the manual cutting step.
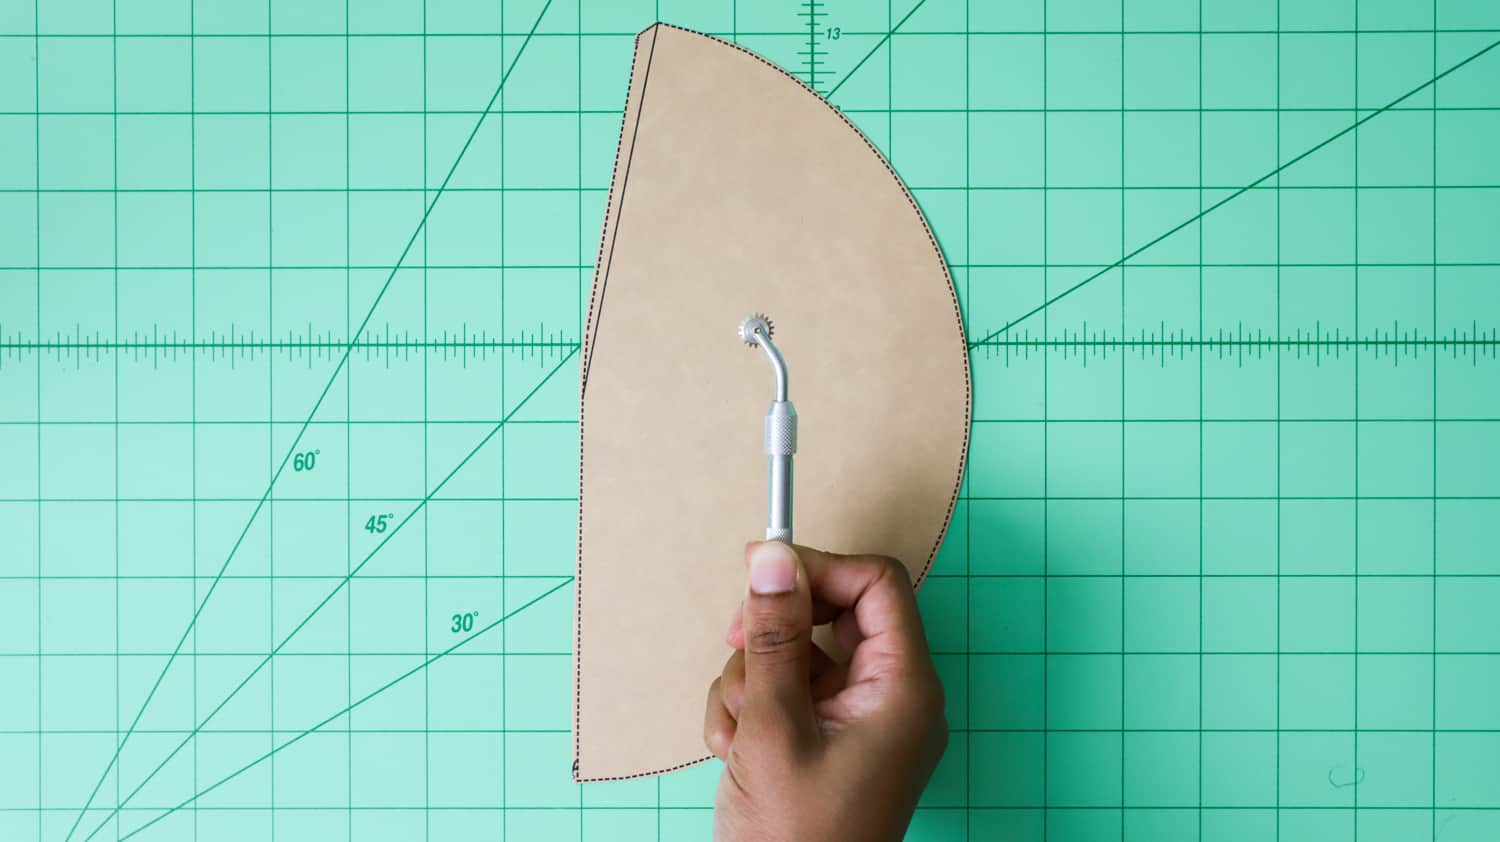
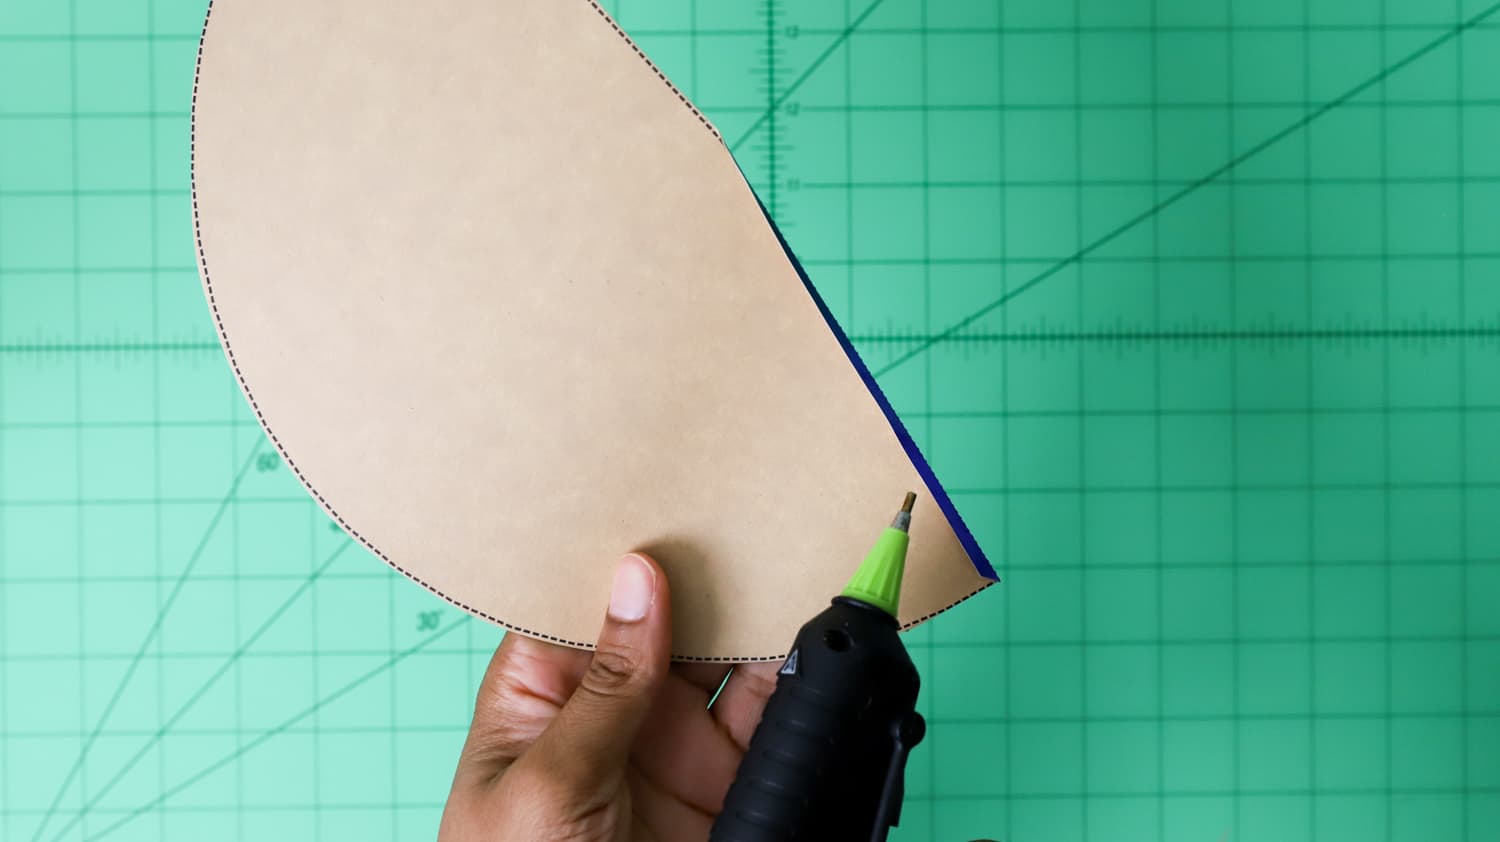
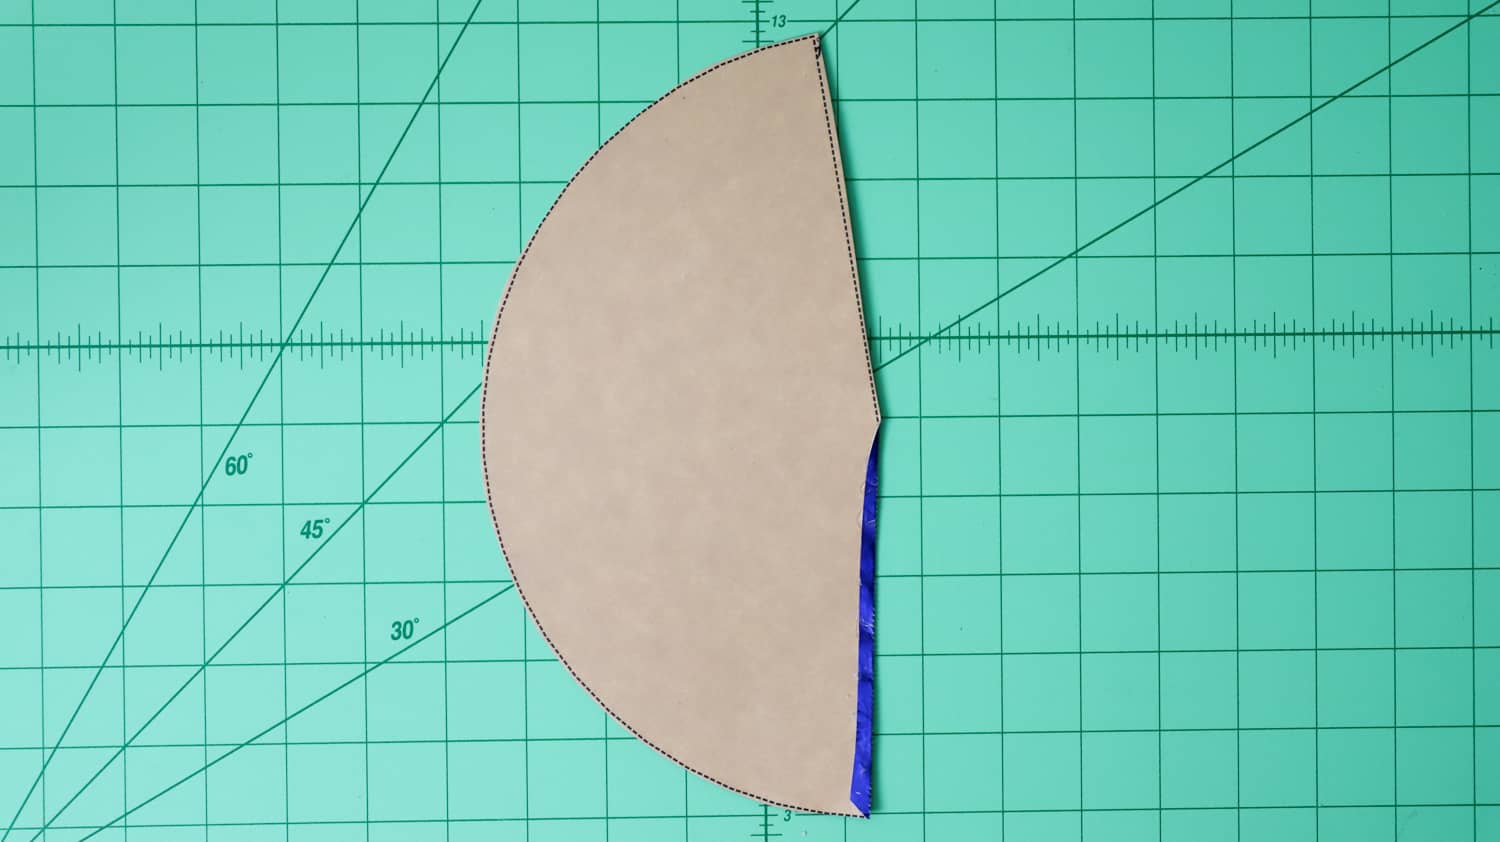
Step 2. Follow the dotted lines with Clover’s Rotary Cutter, then use a scoring wheel on the bold line to help with folding back the hat seam.
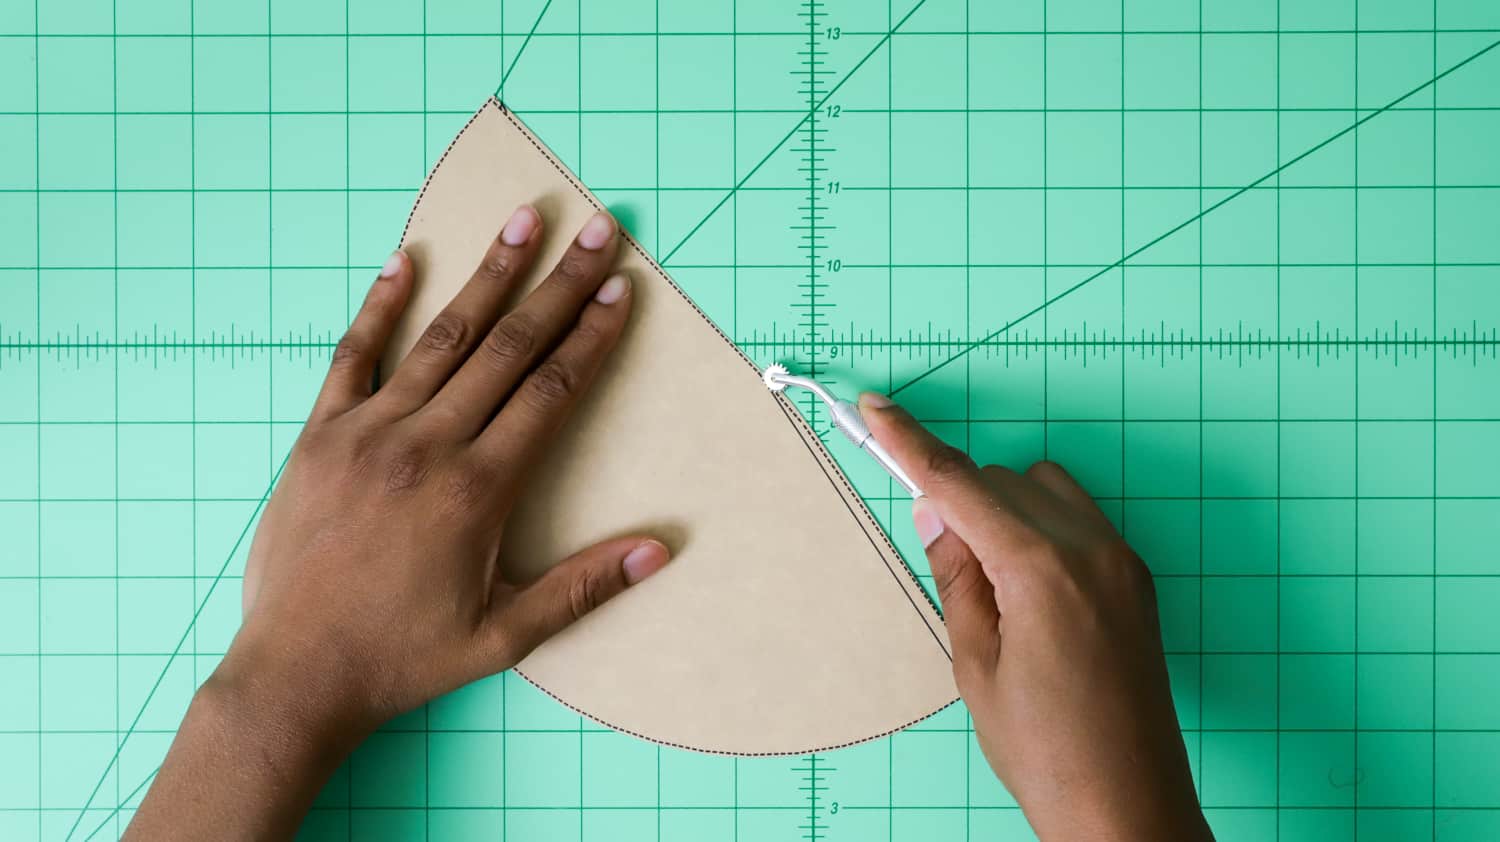

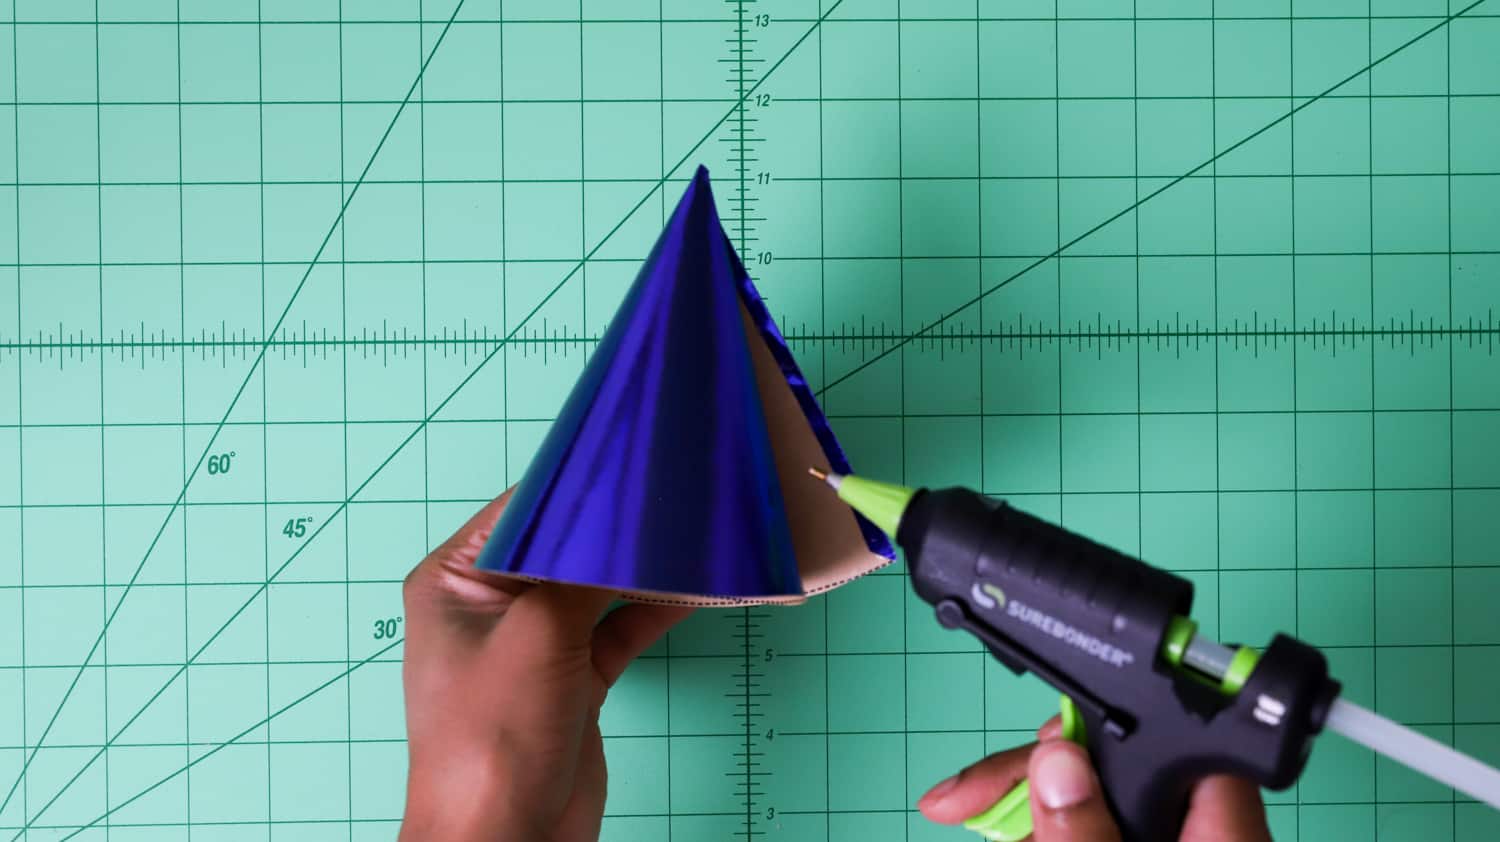
Step 3. Use a small- nozzled glue gun to add glue to the front and back of the scored flap. If you find that the drying time for hot glue is too fast, then I suggest using a strong permanent adhesive instead.
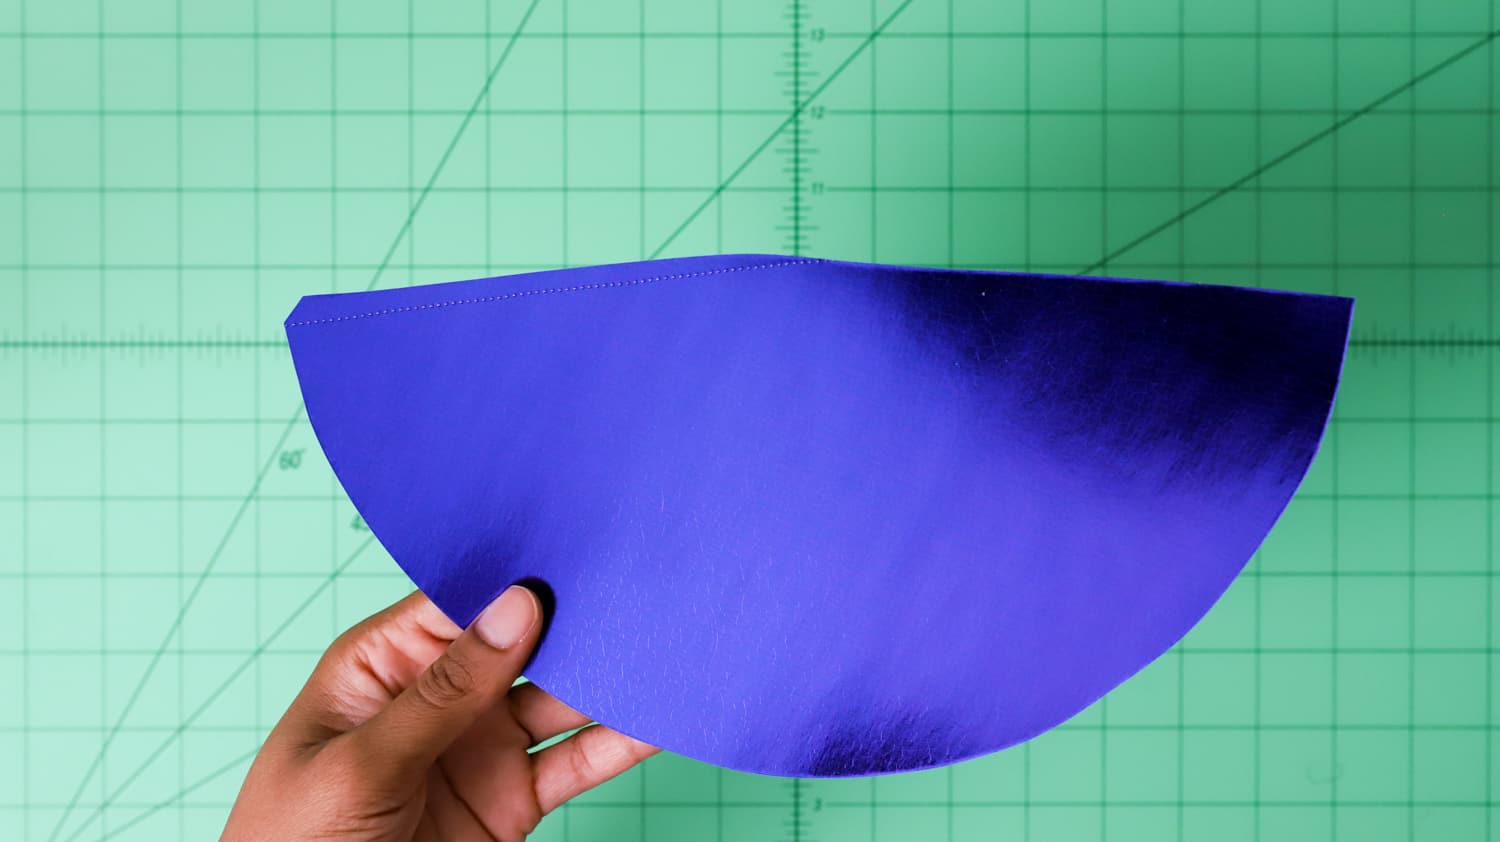
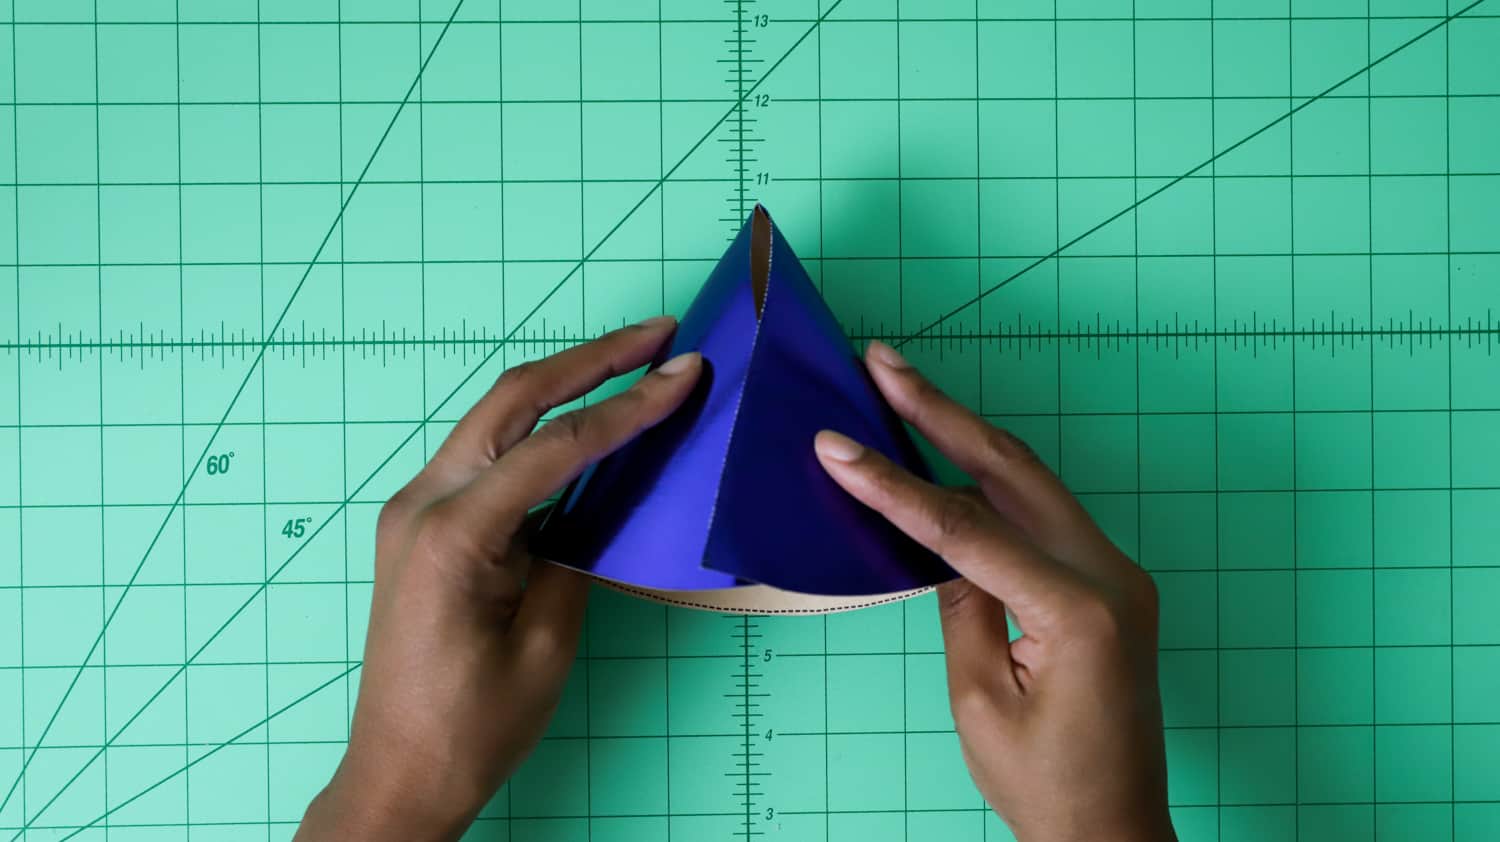
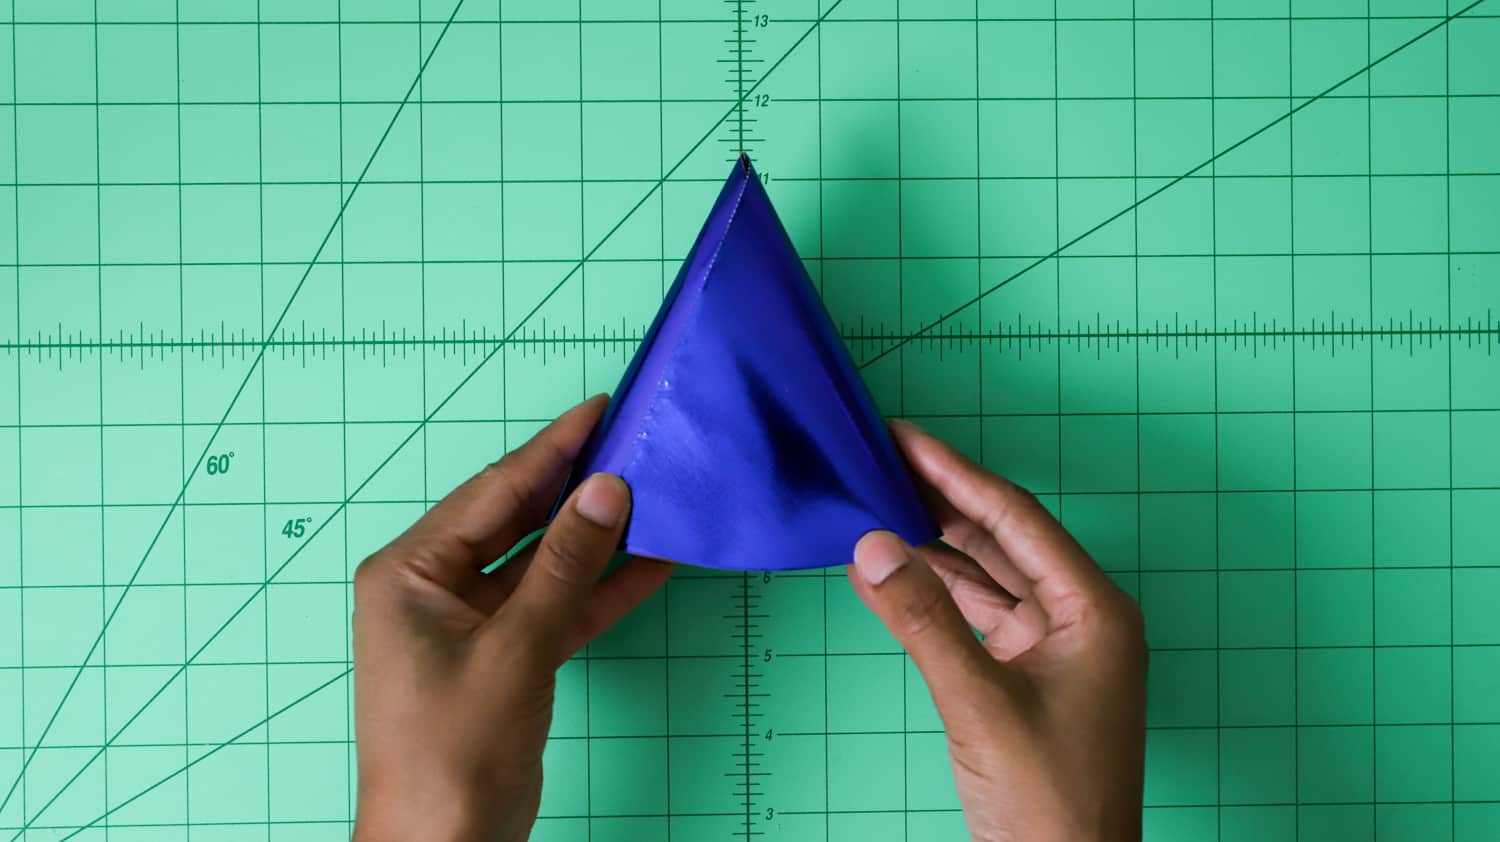
Step 4. Fold the party hat into a cone shape, then add glue to the inside flaps.
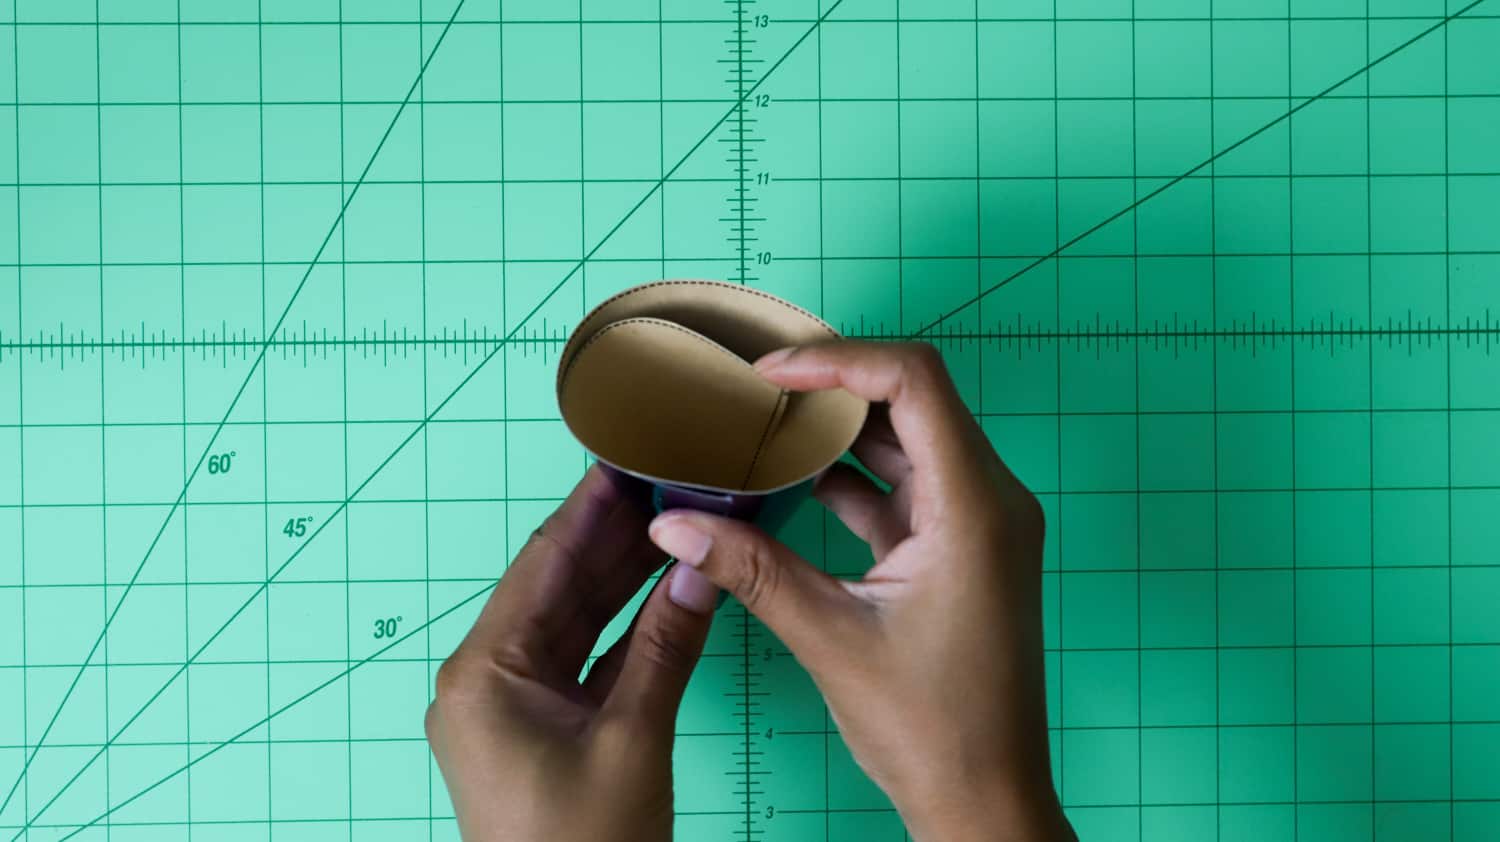
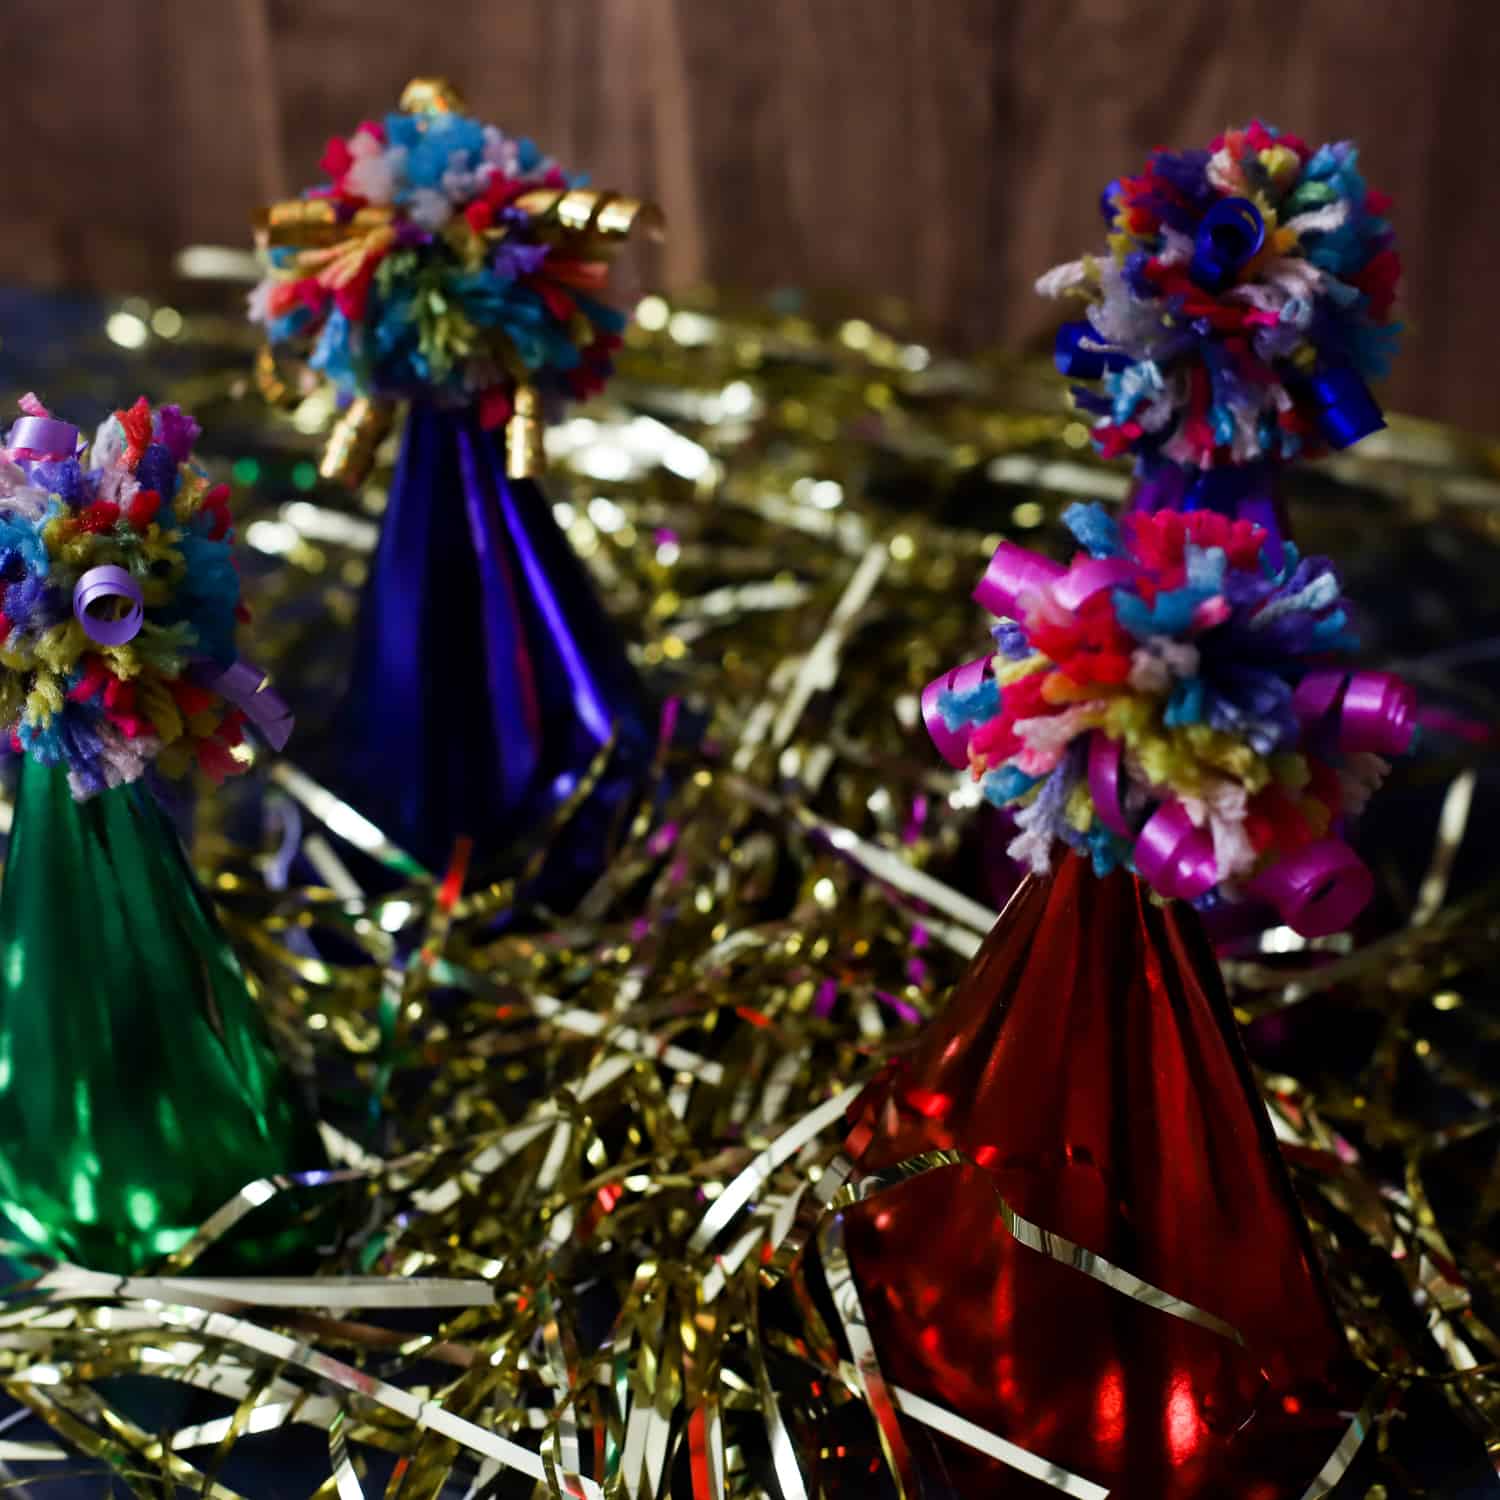
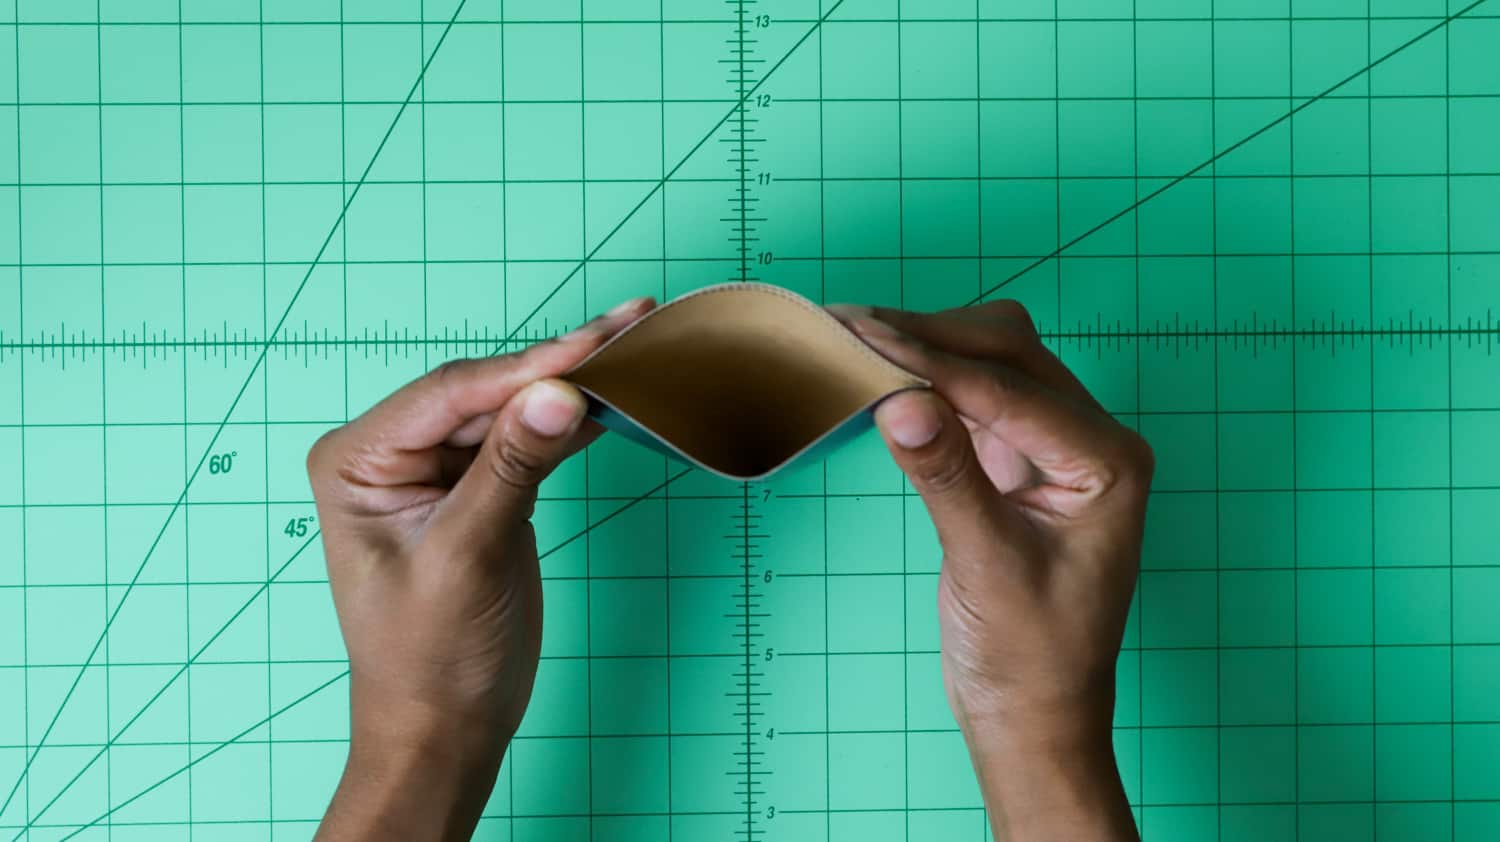
This hat template can make up to four different sizes, which means dolls and small pets can join in on the New Years’ Eve fun!

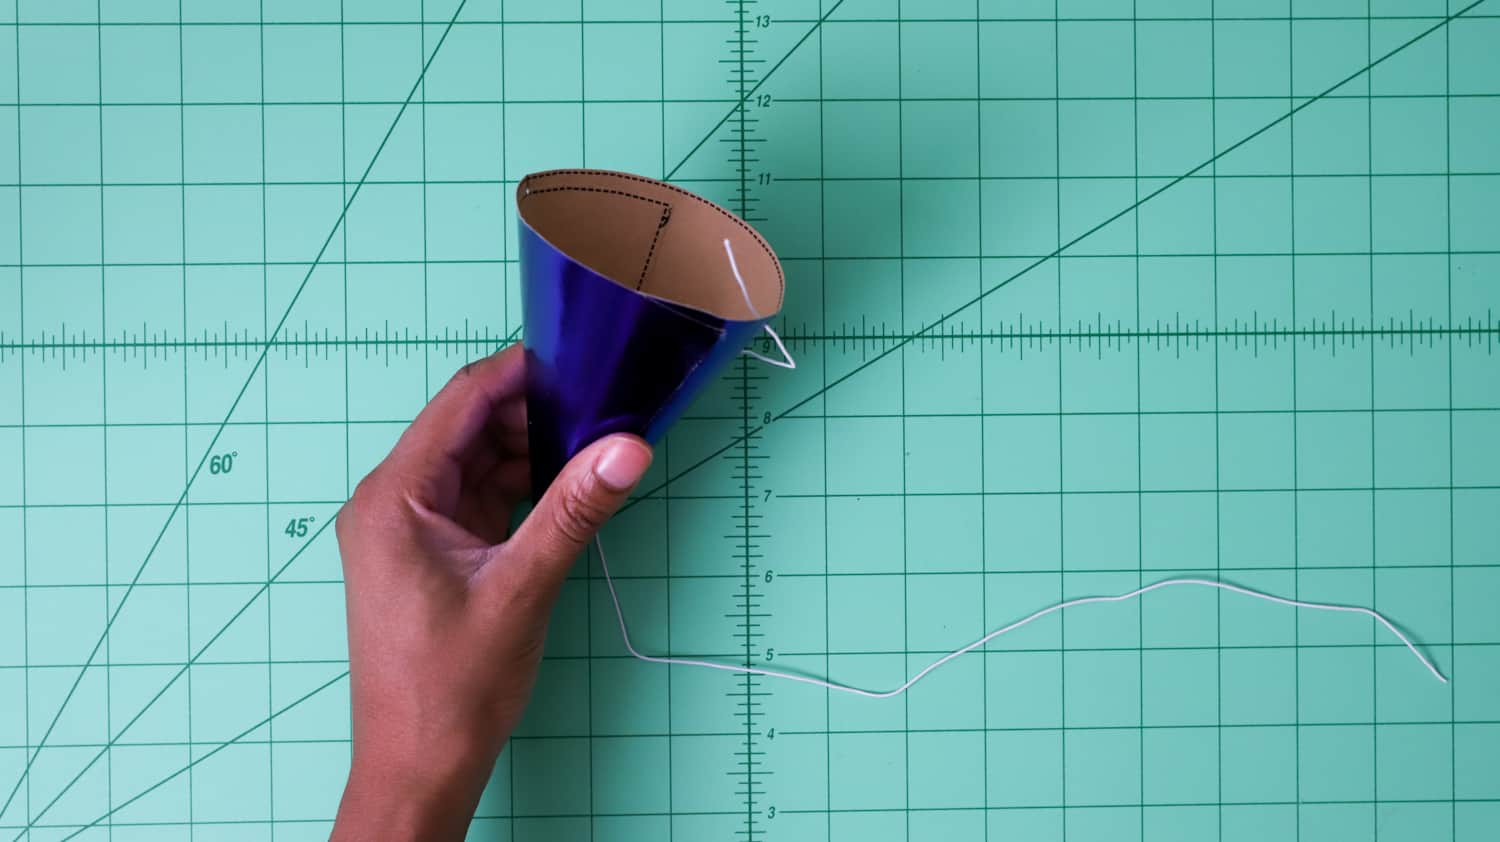
Step 5. After the glue has dried, gently squeeze the hat down like a mouth, then make two side marks with a pen. These marks will help us locate where to add the elastic cording.

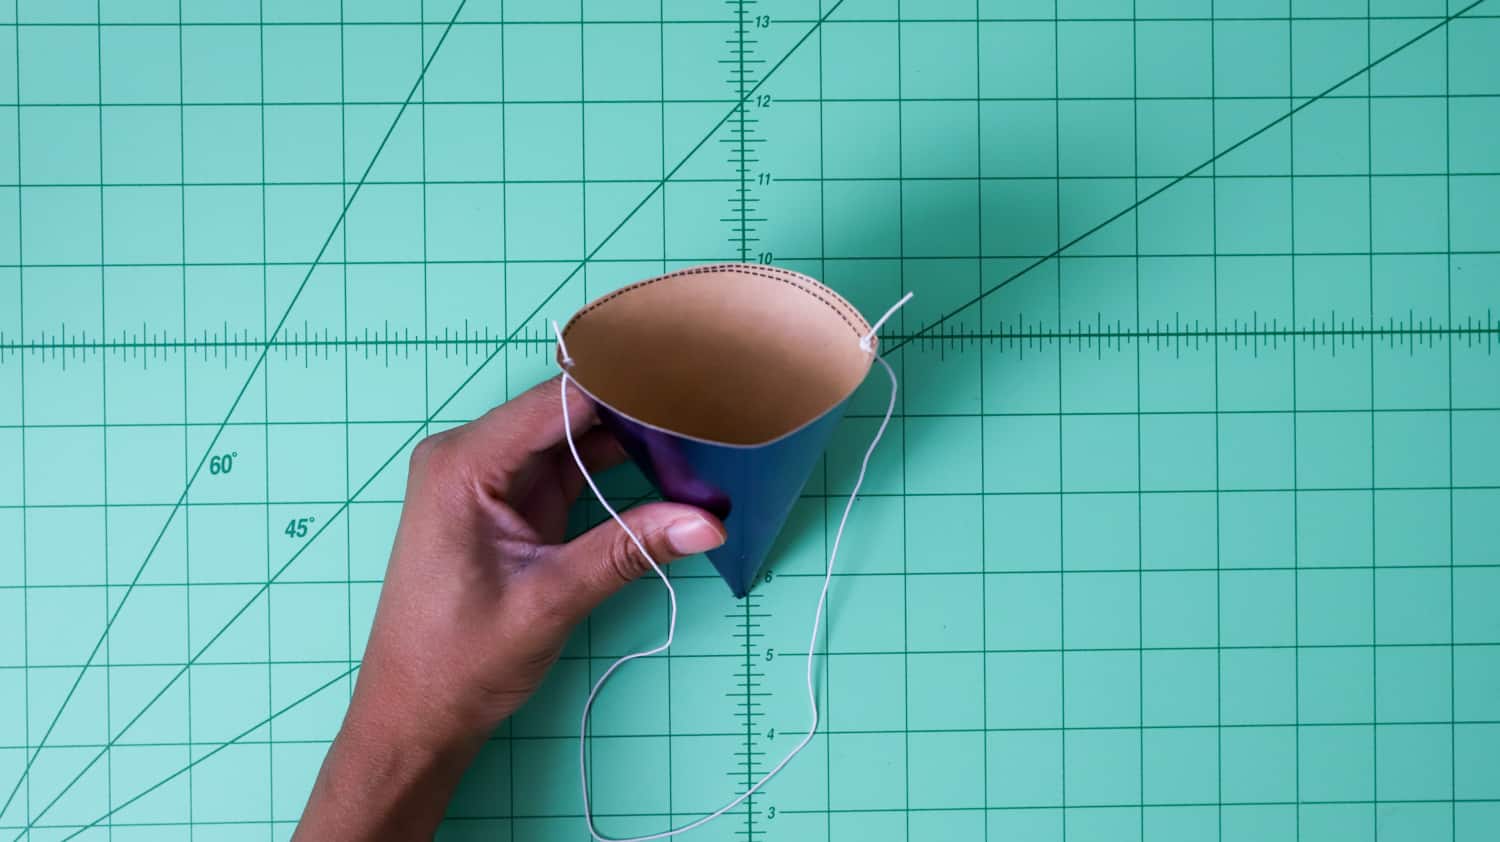
Step 6. Grab a 1/16″ inch hole punch, then create a hole above the side pen mark. The 1/16 ” inch hole is pretty small, but it keeps the elastic cording nice and snug.
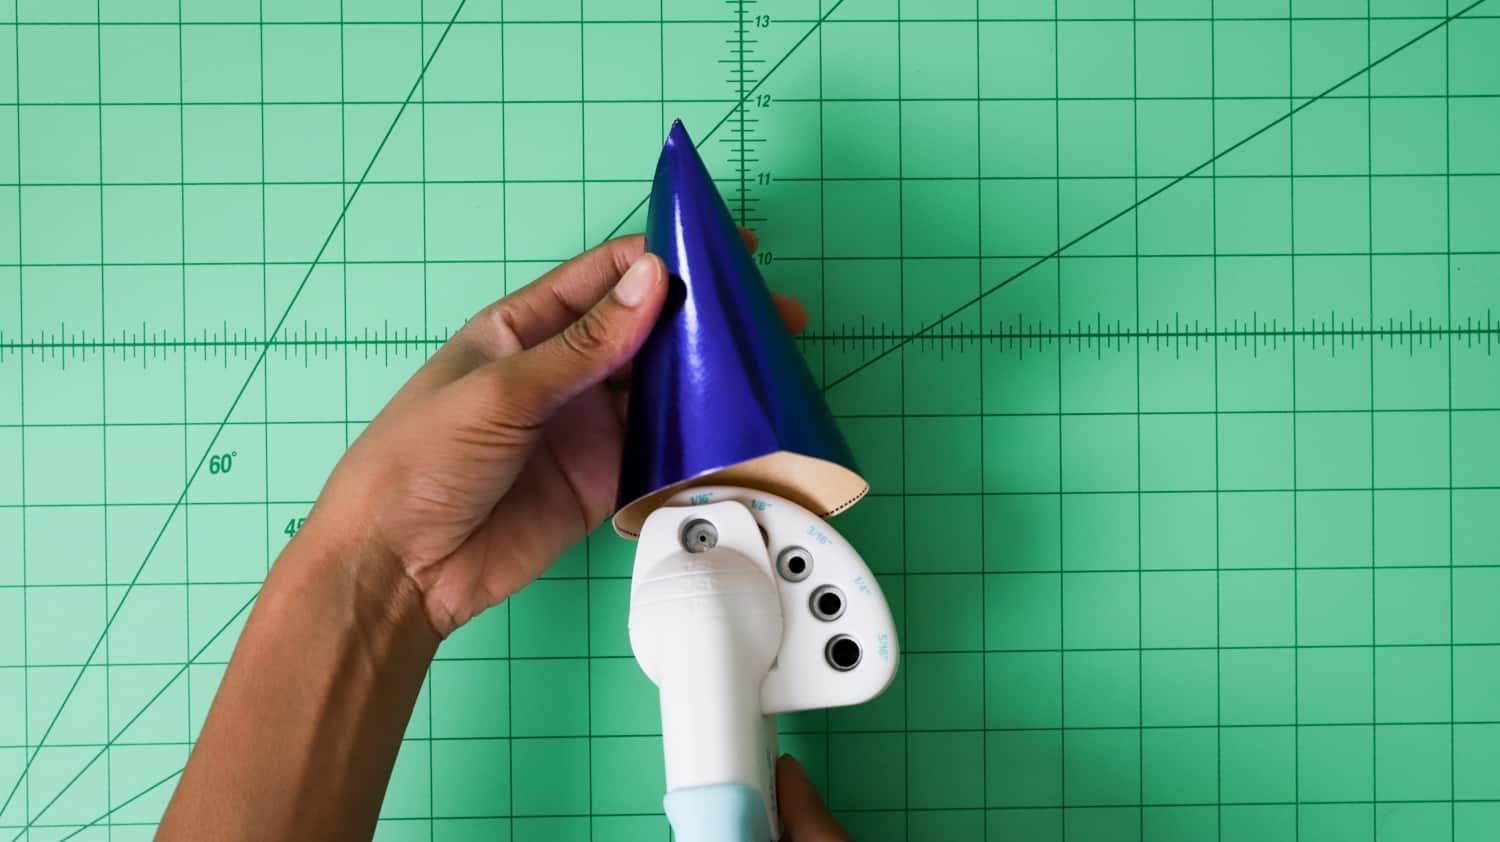

Slip the elastic cording into the hat, then create two knots to hold it in place.

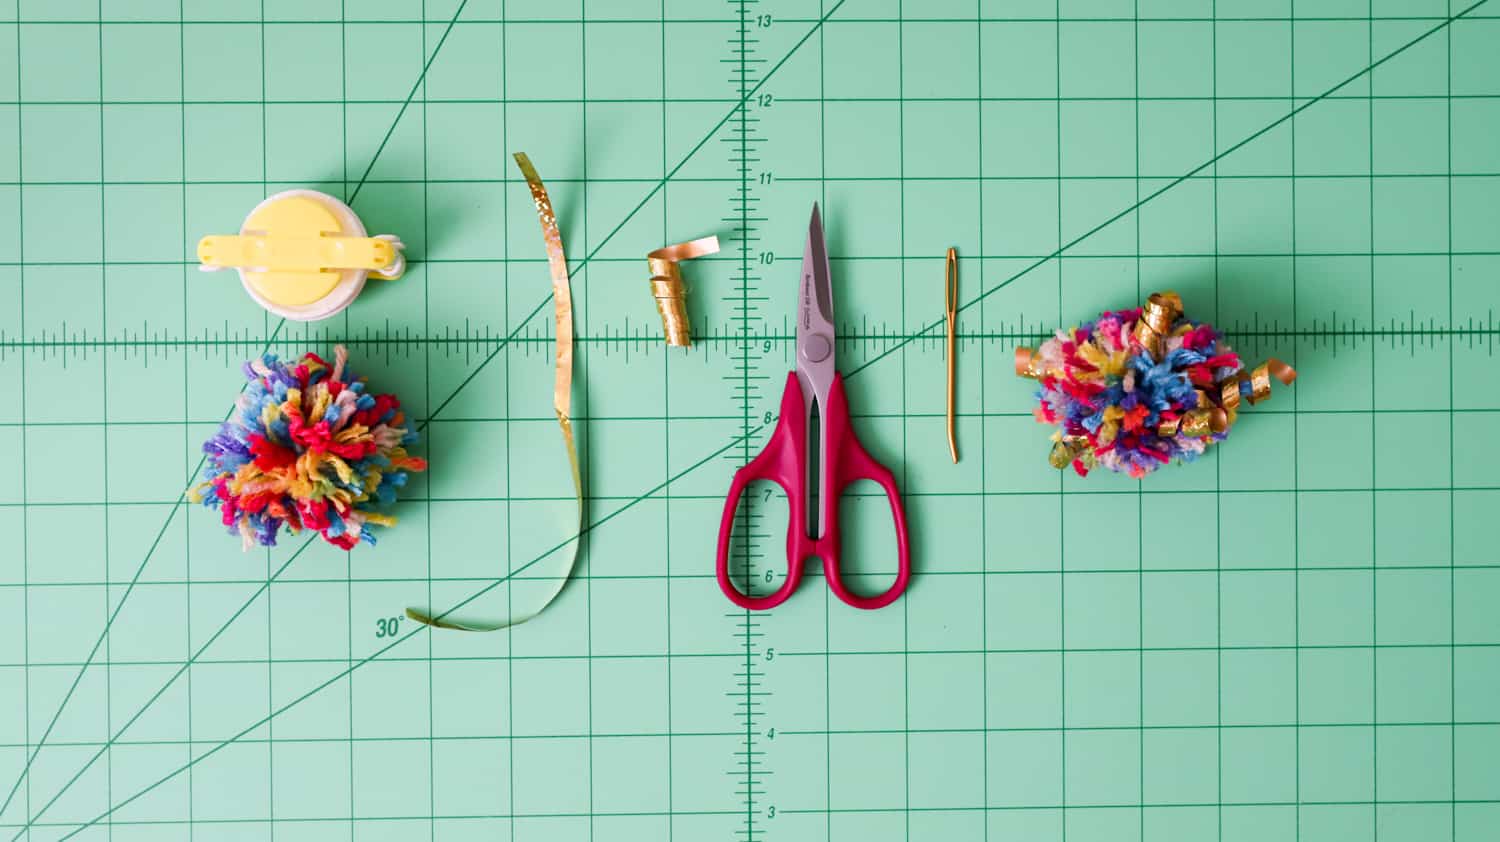
Step 7. Follow the pom-pom maker instructions, but add this fun twist! Curl about six to eight pieces of gift ribbon with Clover’s Bordeaux Scissors, then use a darning needle to insert the ribbon into the pom-pom.
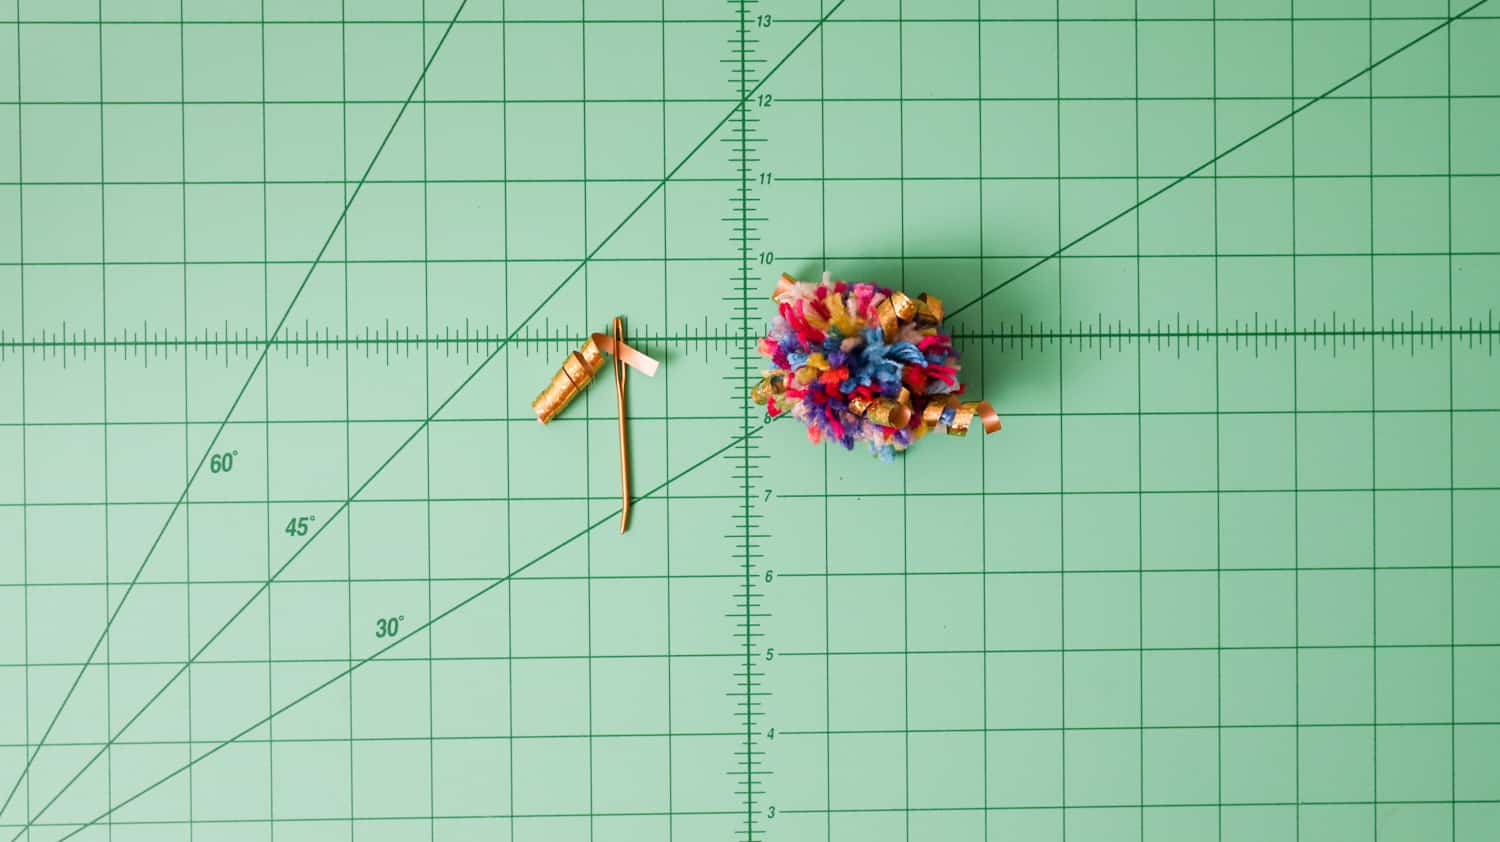
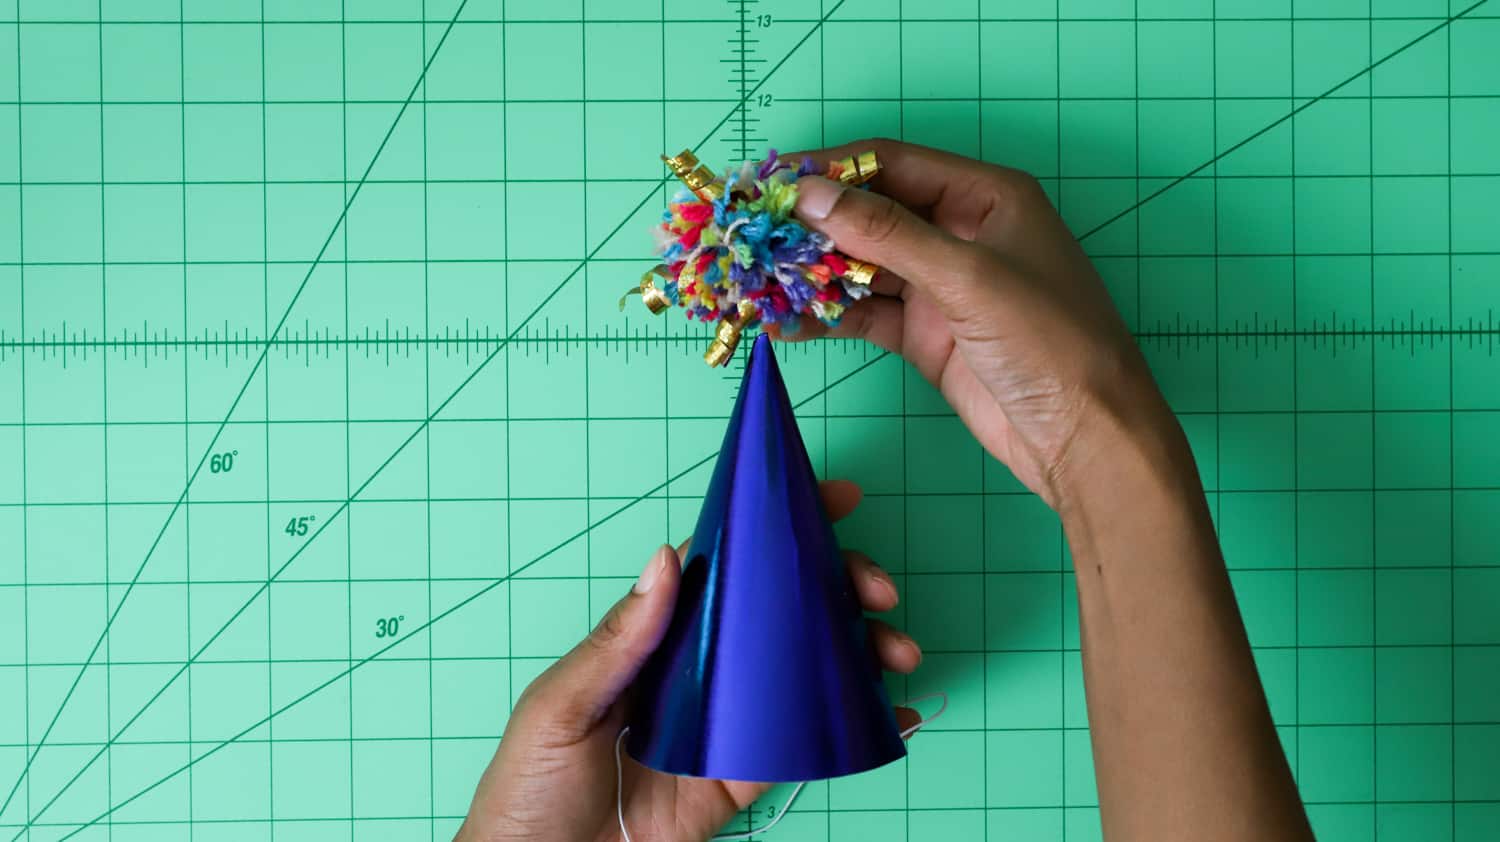
Step 8. After attaching the ribbon, hot glue each pom-pom to the top of the party hat. And That’s it!
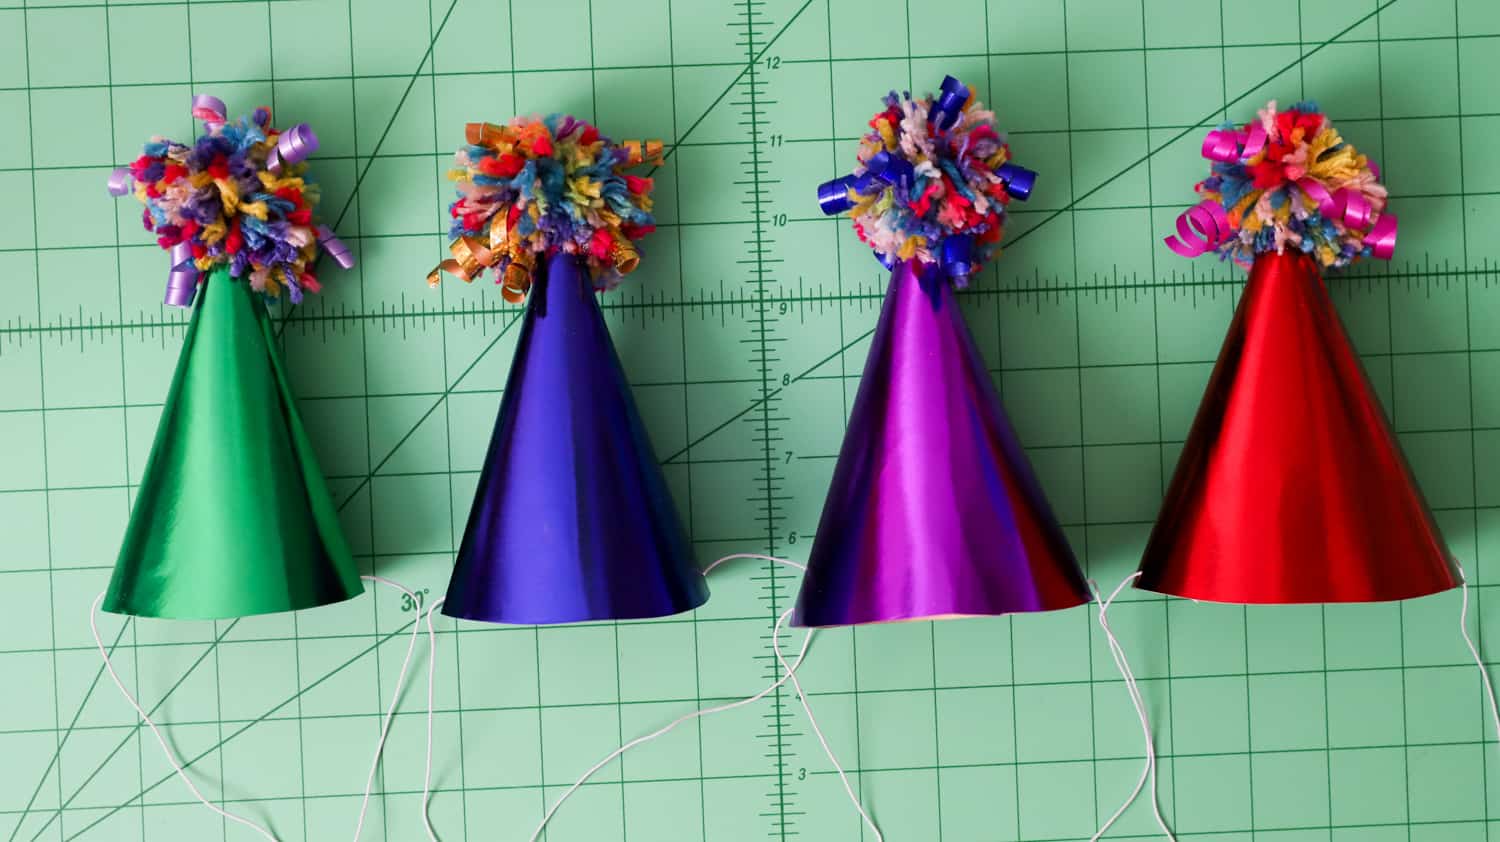
Yay! You’ve just completed your own Minature Pom Pom Party Hat! Doesn’t it feel great? If you enjoyed this tutorial, be sure to show me your party hats with the hashtag #makeitwithzeal and tag me @sprinklesofzeal on Instagram. I can’t wait to see what you all create!

Happy New Year!
-Danielle
Want to check out more of my blogs and tutorials? Here are my social links below!
Blog | Instagram | Facebook | Pinterest | YouTube
Stay connected with Clover on Facebook | Twitter | Instagram | Pinterest | YouTube | Ravelry