Christmas Gift Bag Sewing Tutorial
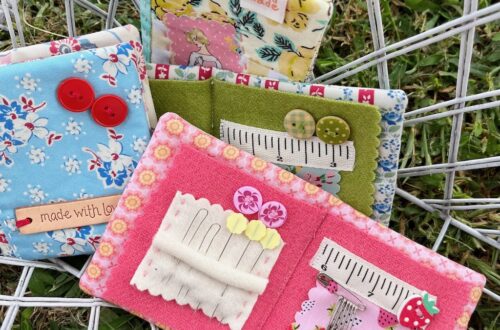
Hello Friends! Are you ready to do some super fun Christmas gift sewing? I’ve got such a great tutorial for you today on how to sew a very quick draw string bag that can be used as a gift bag for those perfect little treasures! The bag itself is a great gift!

These are so easy to sew that you can honestly make one in less than 30 minutes, especially if you make them in an assembly line! Even if you are a beginner sewist, you can make these bags!

NOTE: My favorite size is a small bag with a finished size of 5.5 inches wide by 6.5 inches tall. However, you can easily make your gift bag any size you want. I’ve put together a chart below that will help you in deciding which gift bag to make and has all your cutting dimensions. Beyond that, the instructions the same, regardless of the size of the bag!
|
Finished and Cutting Sizes for Drawstring Gift Bags |
|||||
|
Finished Gift Bag Size |
Outer Bag Cutting Sizes |
Lining Cutting Sizes |
Corner Square Box Cut-Outs |
Casing Cutting Sizes |
Drawstring Cord Length |
|
9” wide x 10.5” tall |
10” wide x 12” tall |
10” wide x 12” tall |
1.5” |
10” wide x 2” tall |
25 inches |
|
7” wide x 8” tall |
8” wide x 9.5” tall |
8” wide x 9.5” tall |
1” |
8” wide x 2” tall |
23 inches |
|
5.5” wide x 6.5” tall |
6” wide x 8” tall |
6” wide x 8” tall |
.75” |
6” wide x 2” tall |
20 inches |
Necessary Supplies
- 2) Fabric pieces for outer bag, cut to above specified size
- 2) Fabric pieces for bag lining, cut to above specified size
- 2) Fabric pieces for drawstring casing, cut to above specified size
- 2) Cotton cording or ribbon for drawstring cut to above specified lengths
- 2) Ribbon cut to 2″ long
- Wonder Clips
- Scissors
- Hot Ruler
- Water Erasable Marker
- Clip ‘n Glide Bodkin

Instructions
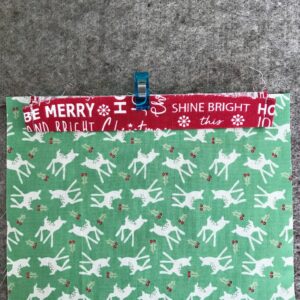
Step One: Using a rotary cutter and ruler, cut the fabric for outer bag and lining to the size specified for the bag you have chosen. (See chart above.) If your fabric has a directional design, make sure to cut it so that the design is going up and down. Cut the two casing fabric pieces to the specified size as well.
NOTE: I used holiday fabric on all my bags; however, feel free to use any favorite fabrics. This is a great gift bag anytime of the year with any fabric!

Step Two: In the two bottom corners of all four bag pieces use a ruler and Clover Water Erasable Marker to mark a box square, size specified in the chart above. Use sharp Clover scissors to cut along the marked lines and remove that square piece.

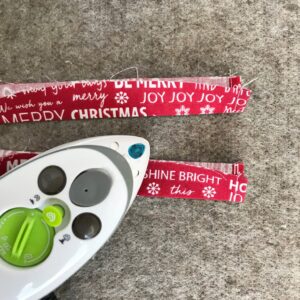
Step Three: Using a hot iron, press the two casing pieces nice and flat. Using a Clover Hot Ruler, fold over each short end 1/2 inch and press in place. Repeat this on all four short ends. (One of my most surprising Clover tools that I use all the time is the Hot Ruler. You can always count on precise folds at the exact measure you need.)

Step Four: Now, fold the raw edge to the pressed fold and iron again. You now have a clean 1/4 inch fold with no raw edges showing. Stitch the fold down on all four edges.

Step Five: Fold and press your casing in half along the long edge, wrong sides together.
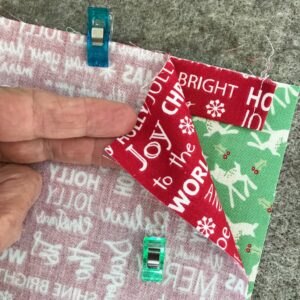
Step Six: Now you will attach your little ribbon tabs to the side of the bag. Fold each piece of ribbon in half and place raw edges approximately 2 inches from the cut out corner of one of the exterior pieces of fabric. Use a Clover Wonder Clip to hold in place. Repeat with the second ribbon, placing it approximately 1/2 inch above the other ribbon tab. Clip this ribbon in place as well. Sew 1/8 inch seam along the edge of the ribbons just to hold them in place.

Step Seven: Lay one bag exterior piece of fabric right side up. Center your casing piece along the top edge (there will be approximately 1/2 inch on each side for final seam allowance). Clip in place with one Wonder Clip in the center.
Step Eight: Lay one bag lining piece of fabric on top of the casing, wrong side facing up. Use the center clip to hold all three fabric layers together and place two more clips along each end of the casing that is sandwiched in between. Repeat with other bag exterior fabric, casing, and lining fabric.
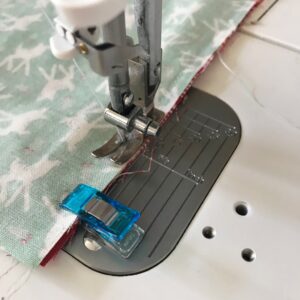
Step Nine: Sew 1/4 inch along that top edge. Repeat with other bag piece.
Step Ten: Iron seam open with the casing laying towards the lining and the seam towards the outer bag. Press carefully so that it lies nice and flat. Repeat with other piece.

Step Eleven: Place the pieces right sides together, matching center seams and making sure that both outer bag pieces and lining pieces are the same. Use Wonder Clips at those seams to make sure they stay in place. Clip all the sides together.

Step Twelve: Sew 1/4 inch seam all the way around the edges, being sure to leave a 3 inch opening at the bottom of the lining piece. (This is for turning your bag later.) Do not sew the cut out squares at the bottom of each side.

Step Thirteen: Now you will make your boxed corners. Do not be intimidated about this step. Making boxed corners is a very simple way to give any bag a “bottom” to stand on! Here’s how: Open the corners so that the side seams are lined up and matching. (Follow picture below.) Clip in place on the seam.

Step Fourteen: Sew 1/4 inch seam along the edge to close up the box. Repeat on all three other corners.

Step Fifteen: Push the fabric through the opening you left in the bottom of the lining. You should see all right sides of the fabric now.

Step Sixteen: Close the seam in the bottom of the lining by carefully pressing it and then sewing it closed with an 1/8 inch seam.

Step Seventeen: Push the lining into the outer bag and push all the boxed corners out. Press the bag.

Step Eighteen: Top stitch an 1/8 inch seam along the top of the bag (below the casing) all the way around. This gives it a nice finished look.

Step Nineteen: Attach one of the cords to the Clover Bodkin and pull it through the opening in the casing. Push it all the way through both sides and back out the opening on the other side. Repeat with the other cord, only this time go in the opposite side of the bag and all the way around. Tie a knot in the two ends on both sides of the bag.
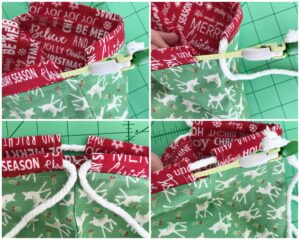
Step Twenty: If you’ve done it correctly it will look like the photo below.

Step Twenty-One: Pull your drawstring cords to make sure you’ve completed it correctly! It should easily pull tight, closing your gift bag.

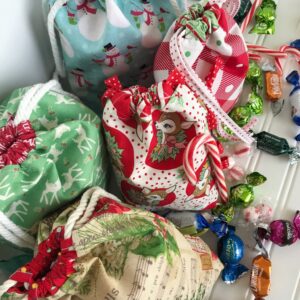
Now your bag is finished and ready to fill with all kinds of fun little goodies and gift to your favorite person! I like to treat my gift bag almost like a stocking and stuff it with fun little things! Or they work great for home-baked items or candy.

Happy Holiday Season and happy sewing! Be sure to tag me on Instagram @redfeedsack with your gift bags! Happy Holiday gifting!
~ Dori ~