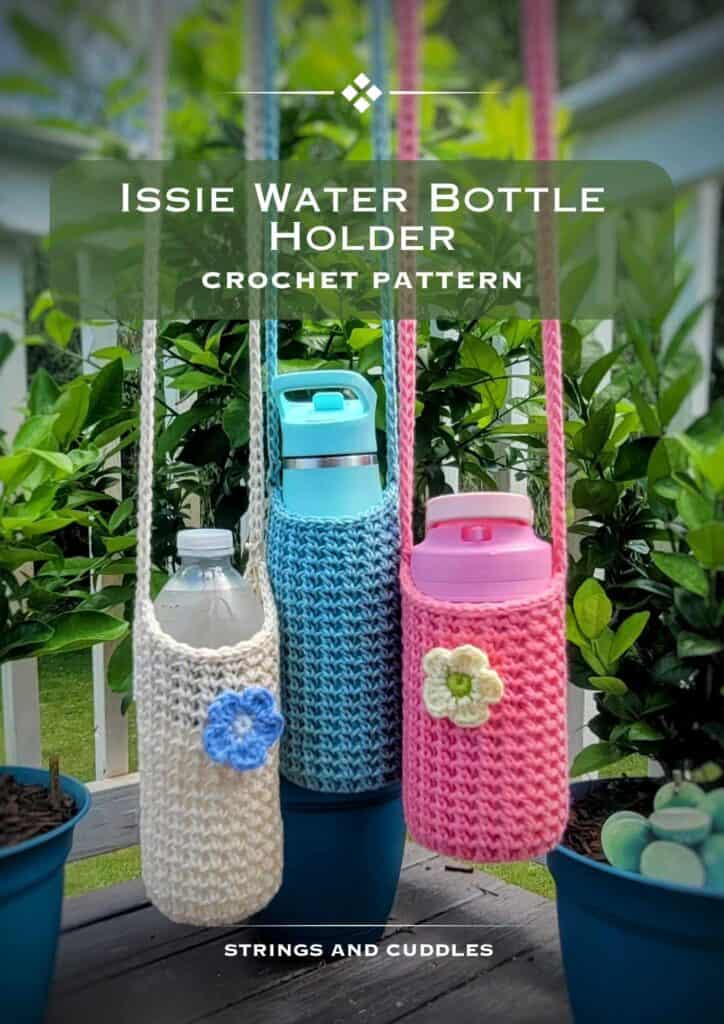
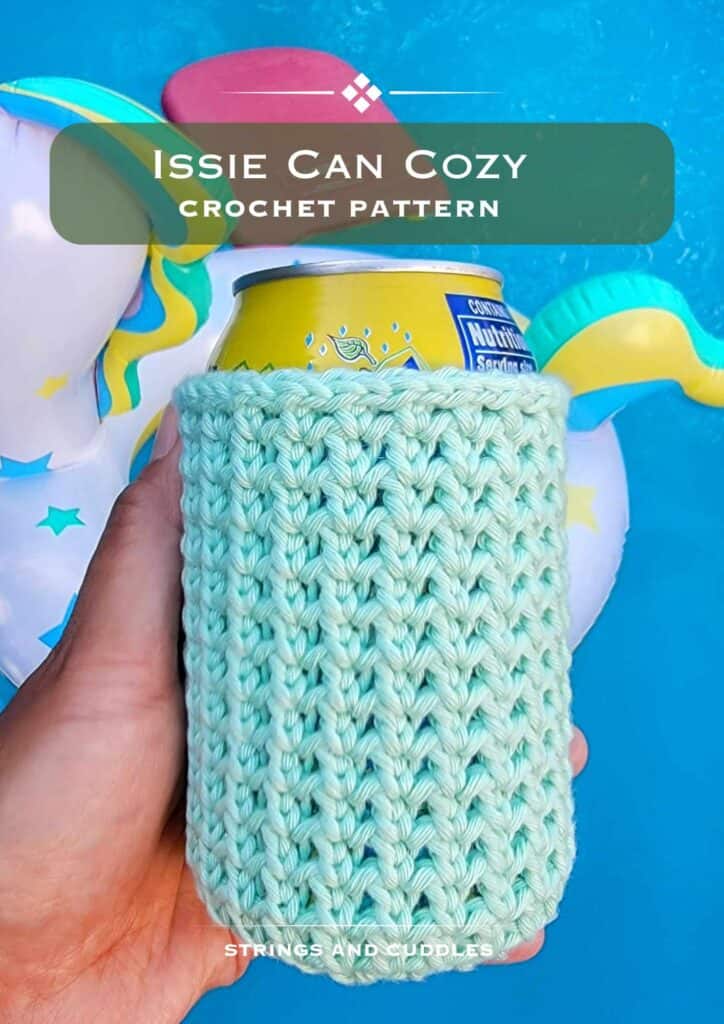
Issie Water Bottle Holder (+ Bonus Pattern!)
Time for a new crochet pattern!
Hi! My name is Elisa of Strings and Cuddles. Are you looking for a quick and easy crochet pattern to make? Lucky for you because you are in the right place! I am sharing one with you today!
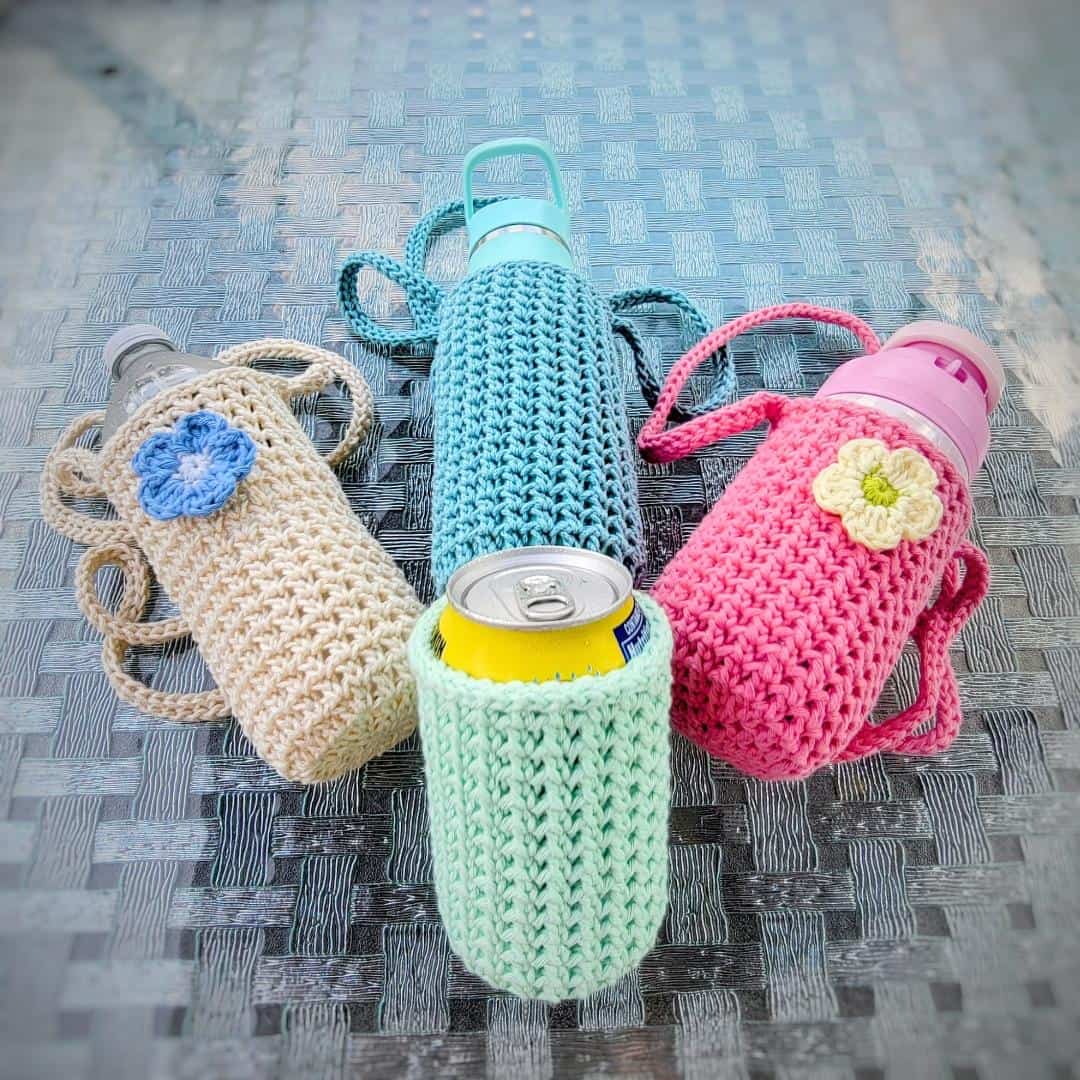
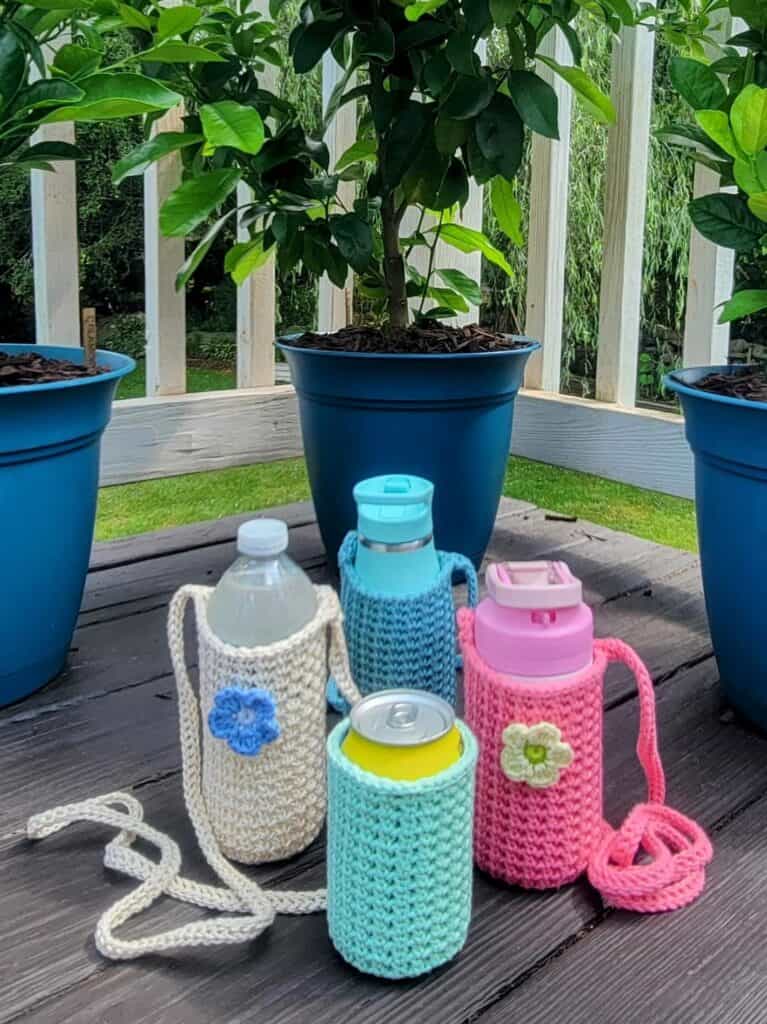
Summer season means you have to stay hydrated, especially in this ever-so-hot weather we have! With this in mind, I decided to design a simple yet pretty-looking water bottle holder. Most of us are always on the go so these water bottle holders come in handy.
The Issie Water Bottle Holder is easy enough for a beginner crocheter to make. All you need to learn for this pattern is the Extended Single Crochet which I used for the main pattern and the Foundation Single Crochet for the straps.
Without any more delay, let’s dive into the pattern!
ISSIE WATER BOTTLE HOLDER
– CROCHET PATTERN –
SKILL LEVEL: Beginner Friendly
MATERIALS
- Any Worsted Weight (4) Cotton Yarn
- Clover Amour Crochet Hook Size 4 mm (or size to obtain gauge)
- Clover Patchwork Scissors Mini
- Clover Quick Locking Stitch Marker
- Clover Chibi with Jumbo Darning Needle
- Tape Measure
GAUGE: Round 1 – 4 = 2.75 inches in diameter
FINISHED MEASUREMENT: Approximately 4 (diameter) x 4.5/5/6 (height) inches, excluding strap. The height is for a can cozy, a 14 and 16 oz water bottle, or bottled water
STITCHES AND ABBREVIATIONS | US Terminology
- Ch(s) – Chain(s)
- DC – Double Crochet
- ESC – Extended Single Crochet
- MR – Magic Ring
- Rep – Repeat
- FSC – Foundation Single Crochet
- SC – Single Crochet
- Sk – Skip
- Sl St(s) – Slip Stitch(es)
- Sp(s) – Space(s)
- St(s) – Stitch(es)
NOTES:
- Read the pattern carefully before starting.
- This pattern is worked from the bottom up, in rounds.
- ( ) work instructions within parentheses as many times as directed or work a group of stitches all in the same stitch or space.
- * * repeat instructions between asterisks as many times as directed or repeat at specified locations.
- I recommend using a stitch marker to mark the first stitch of each row so you will not miss it. Remember to move the stitch marker as you progress.
- Sizes may vary depending on your yarn choice and please note that this pattern is quite stretchy, too.
PATTERN INSTRUCTIONS
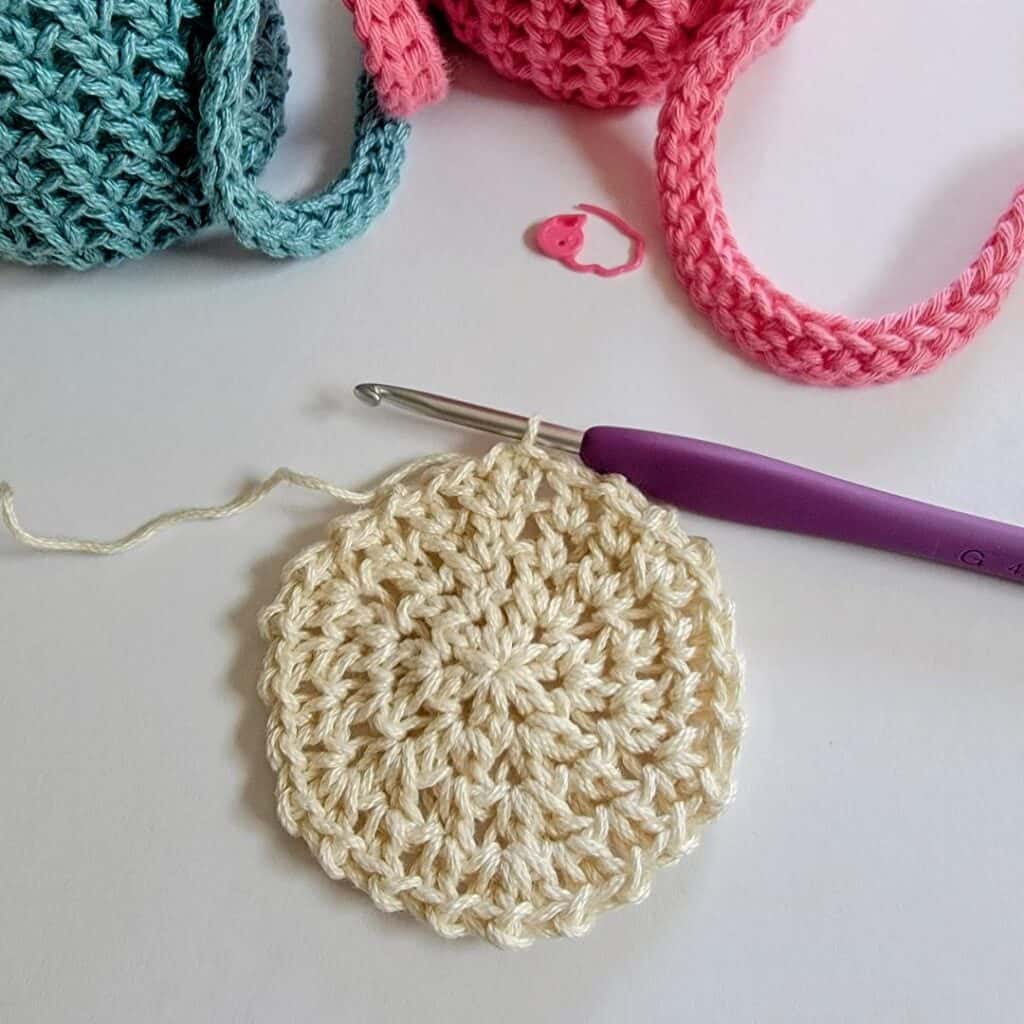
Start with a MR.
Round 1: Ch 1 (does not count as a st), (ESC, ch 1) 6 times into the ring. Sl st in the 1st st to close the round. Pull tight the yarn tail to close the ring. – 6 ESC, 6 ch-1-sp
Round 2: Do not ch 1 (throughout, unless otherwise stated), pull the loop to a height of an ESC. (ESC, ch 1) 2 times in the 1st st, sk ch-1-sp, *(ESC, ch 1) 2 times in the next st, sk ch-1-sp*; Rep from * to * around. Sl st in the 1st st to close the round. – 12 ESC, 12 ch-1-sp
Round 3: (ESC, ch 1) 2 times in the 1st st, sk ch-1-sp, (ESC, ch 1) in the next st, sk ch-1-sp, *(ESC, ch 1) 2 times in the next st, sk ch-1-sp, (ESC, ch 1) in the next st, sk ch-1-sp*; Rep from * to * around. Sl st in the 1st st to close the round. – 18 ESC, 18 ch-1-sp
Round 4: (ESC, ch 1) 2 times in the 1st st, sk ch-1-sp, (ESC, ch 1) in the 2 next sts, skipping ch-1-sps in between sts, *(ESC, ch 1) 2 times in the next st, sk ch-1-sp, (ESC, ch 1) in the 2 next sts, skipping ch-1-sps in between sts*; Rep from * to * around. Sl st in the 1st st to close the round. – 24 ESC, 24 ch-1-sp
Round 5: (ESC, ch 1) in the 1st st, sk ch-1-sp, *(ESC, ch 1) in the next st, sk ch-1-sp*; Rep from * to * around. Sl st in the 1st st to close the round. – 24 ESC, 24 ch-1-sp
Rep Round 5 until your piece measures approximately 5 (6) inches for a 14 (16) oz water bottle or bottled water. Once you’ve reached your desired measurement, finish it off by adding a sl st in every st and ch around. Sl st in the 1st st. – 48 sts.
Do not fasten off as we will continue with the handle.
Note: You can always modify the size of your water bottle holder.
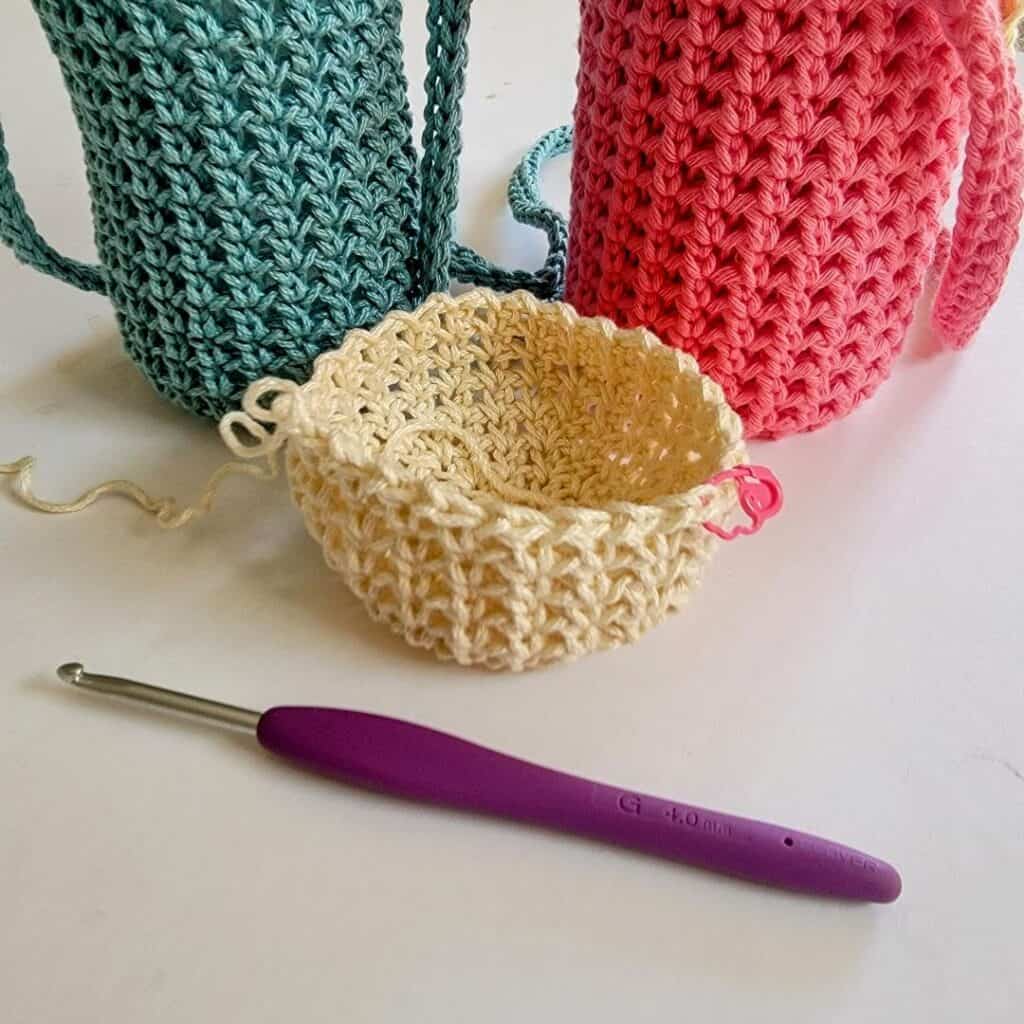
Bonus Pattern: Issie Can Cozy
Repeat Round 5 until your piece measures approximately 4.5 inches. Finish it off by adding a sl st in every st and ch around. Sl st in the 1st st. Fasten off and weave in all ends.
ADDING THE STRAP
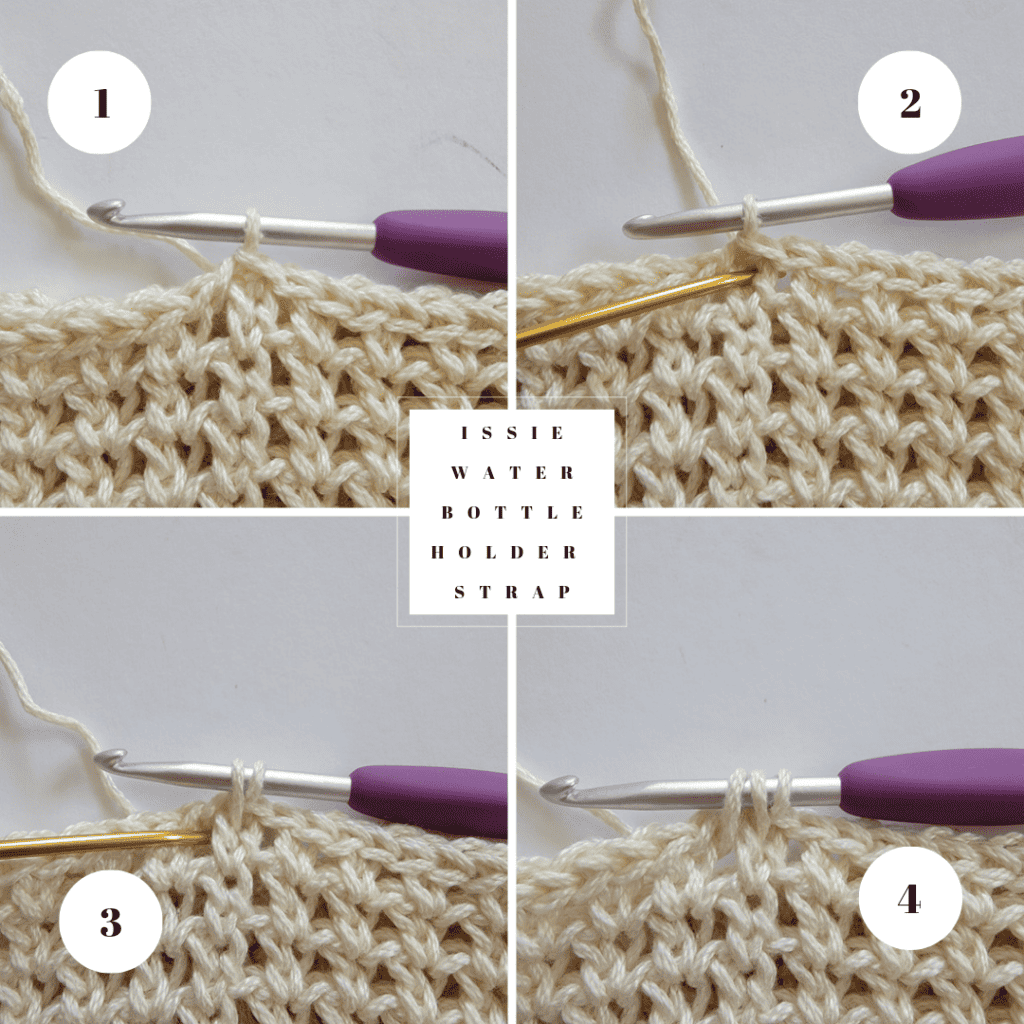
I am not a fan of sewing or seaming pieces together so as much as possible I try to avoid it or find an alternative way. For this pattern, I decided to use the FSC. First, we need to establish the first steps: (1) do not ch 1, (2) insert the hook where the needle is, (3) pull up a loop, insert the hook where the needle is, (4) and pull up another loop.
Next, (5) yarn over and pull through 2 loops, 2 loops remain on the hook, (6) yarn over again and pull through all loops, (7) insert the hook where the needle is, (8) pull up a loop.
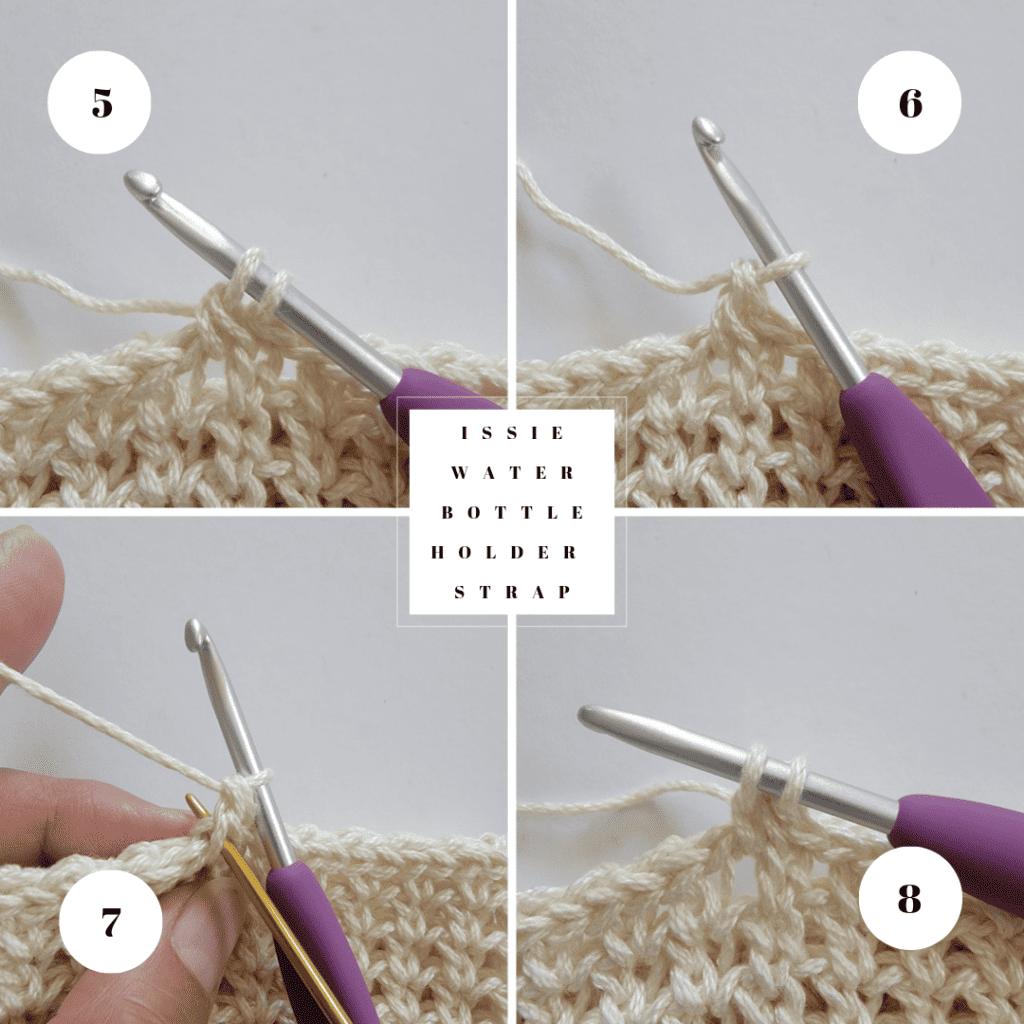
(9) yarn over and pull through 1 loop, (10) yarn over again and pull through 2 loops. From here, just rep steps 7 – 10 to make FSC. (11) Keep making FSC until your handle measures between 36 – 40 inches depending on your length preference. (12) Mark the placement where you are going to attach the other end of your handle, both sides of the handle should have an equal number of sts.

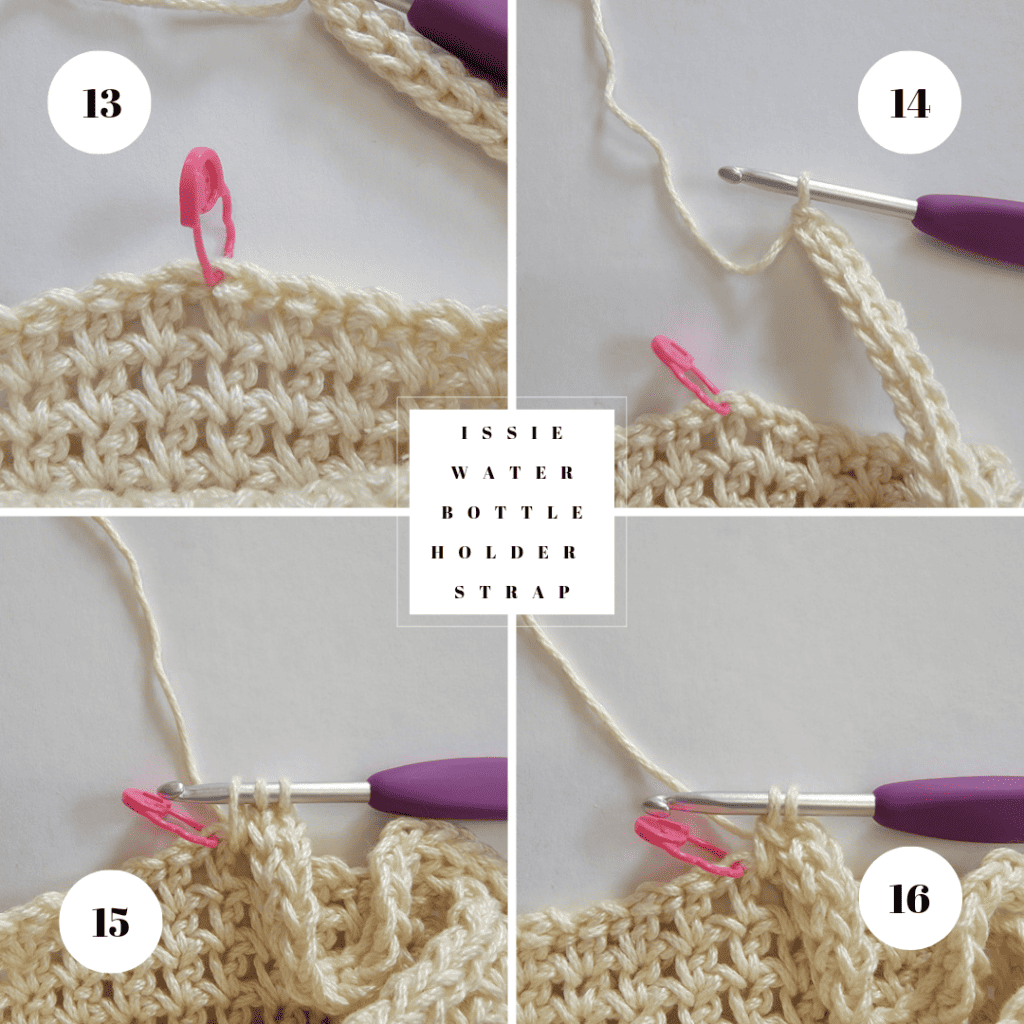
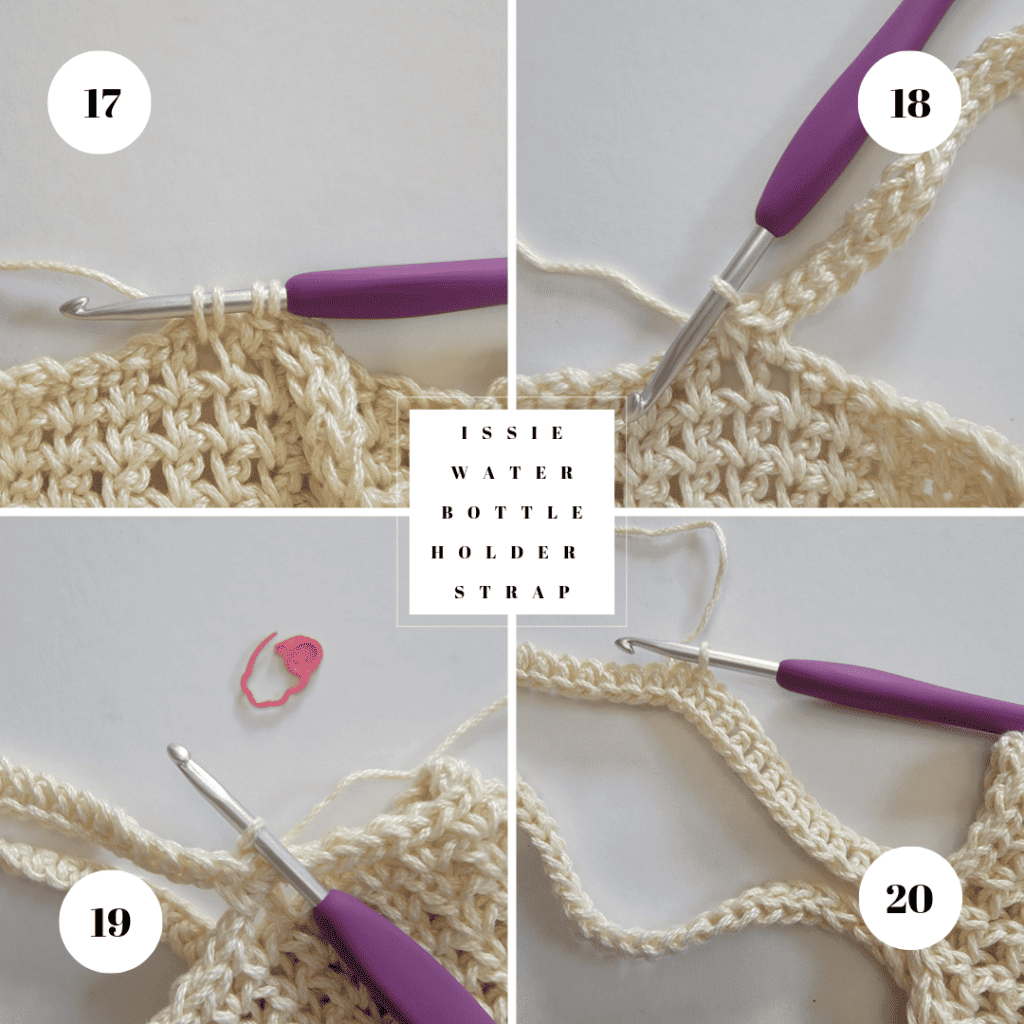
(13) Attach the handle from the inside (wrong side) of your piece and be very careful not to twist your handle, (14) rep steps 7 and 8, then insert the hook in the ch-1-sp on the right of the marked st. (15) pull up a loop, (16) pull through 2 loops, 2 loops remain on the hoop.
Now, (17) insert the hook in the marked st, pull up a loop, insert the hook in the ch-1-sp on the left of the marked st, 4 loops on the hook, (18) yarn over and pull through all loops on the hook. Lastly, (19) turn your handle, do not ch 1, (20) sl st in every st to the other end of the strap, sl st into the holder, and fasten off.
Weave in all ends and you are done!

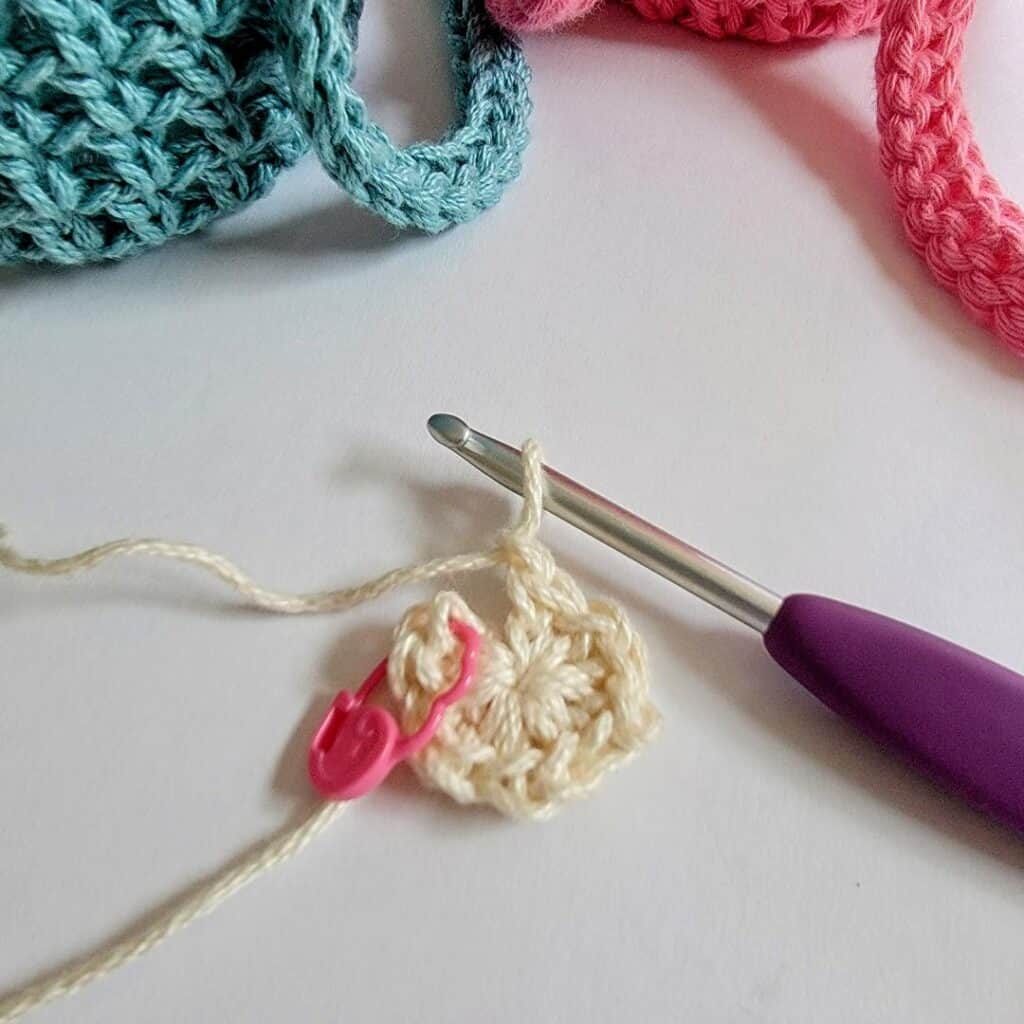
FLOWER PATTERN (Optional)
You may use 1 color or 2.
Start with a MR.
Round 1: Ch 1, make 10 SC into the ring. Sl st in the 1st st to close the round. Pull tight the yarn tail to close the ring.
Note: if you want to change color, fasten off round 1 and then attach the new color.
Round 2: Ch 2 (counts as 1 st), *3 DC in the next st, ch 2, sl st in the next st, ch 2*; Rep from * to * around. Sl st into the base of the very 1st ch 2. Fasten off and weave in the ends.
I hope that you like this pattern!
I would love to see your Issie Water Bottle Holder and your Issie Can Cozy versions. Please use these hashtags #stringsandcuddles, #stringsandcuddlesdesigns, #CapizLampshade, and Issie Can Cozy when sharing so I can see and share them, too!
Please don’t hesitate to reach out with questions regarding this pattern.
As always, stay safe and happy crocheting!
XOXO,
Elisa
Connect with me Instagram | Pinterest | Facebook | Blog | Ravelry