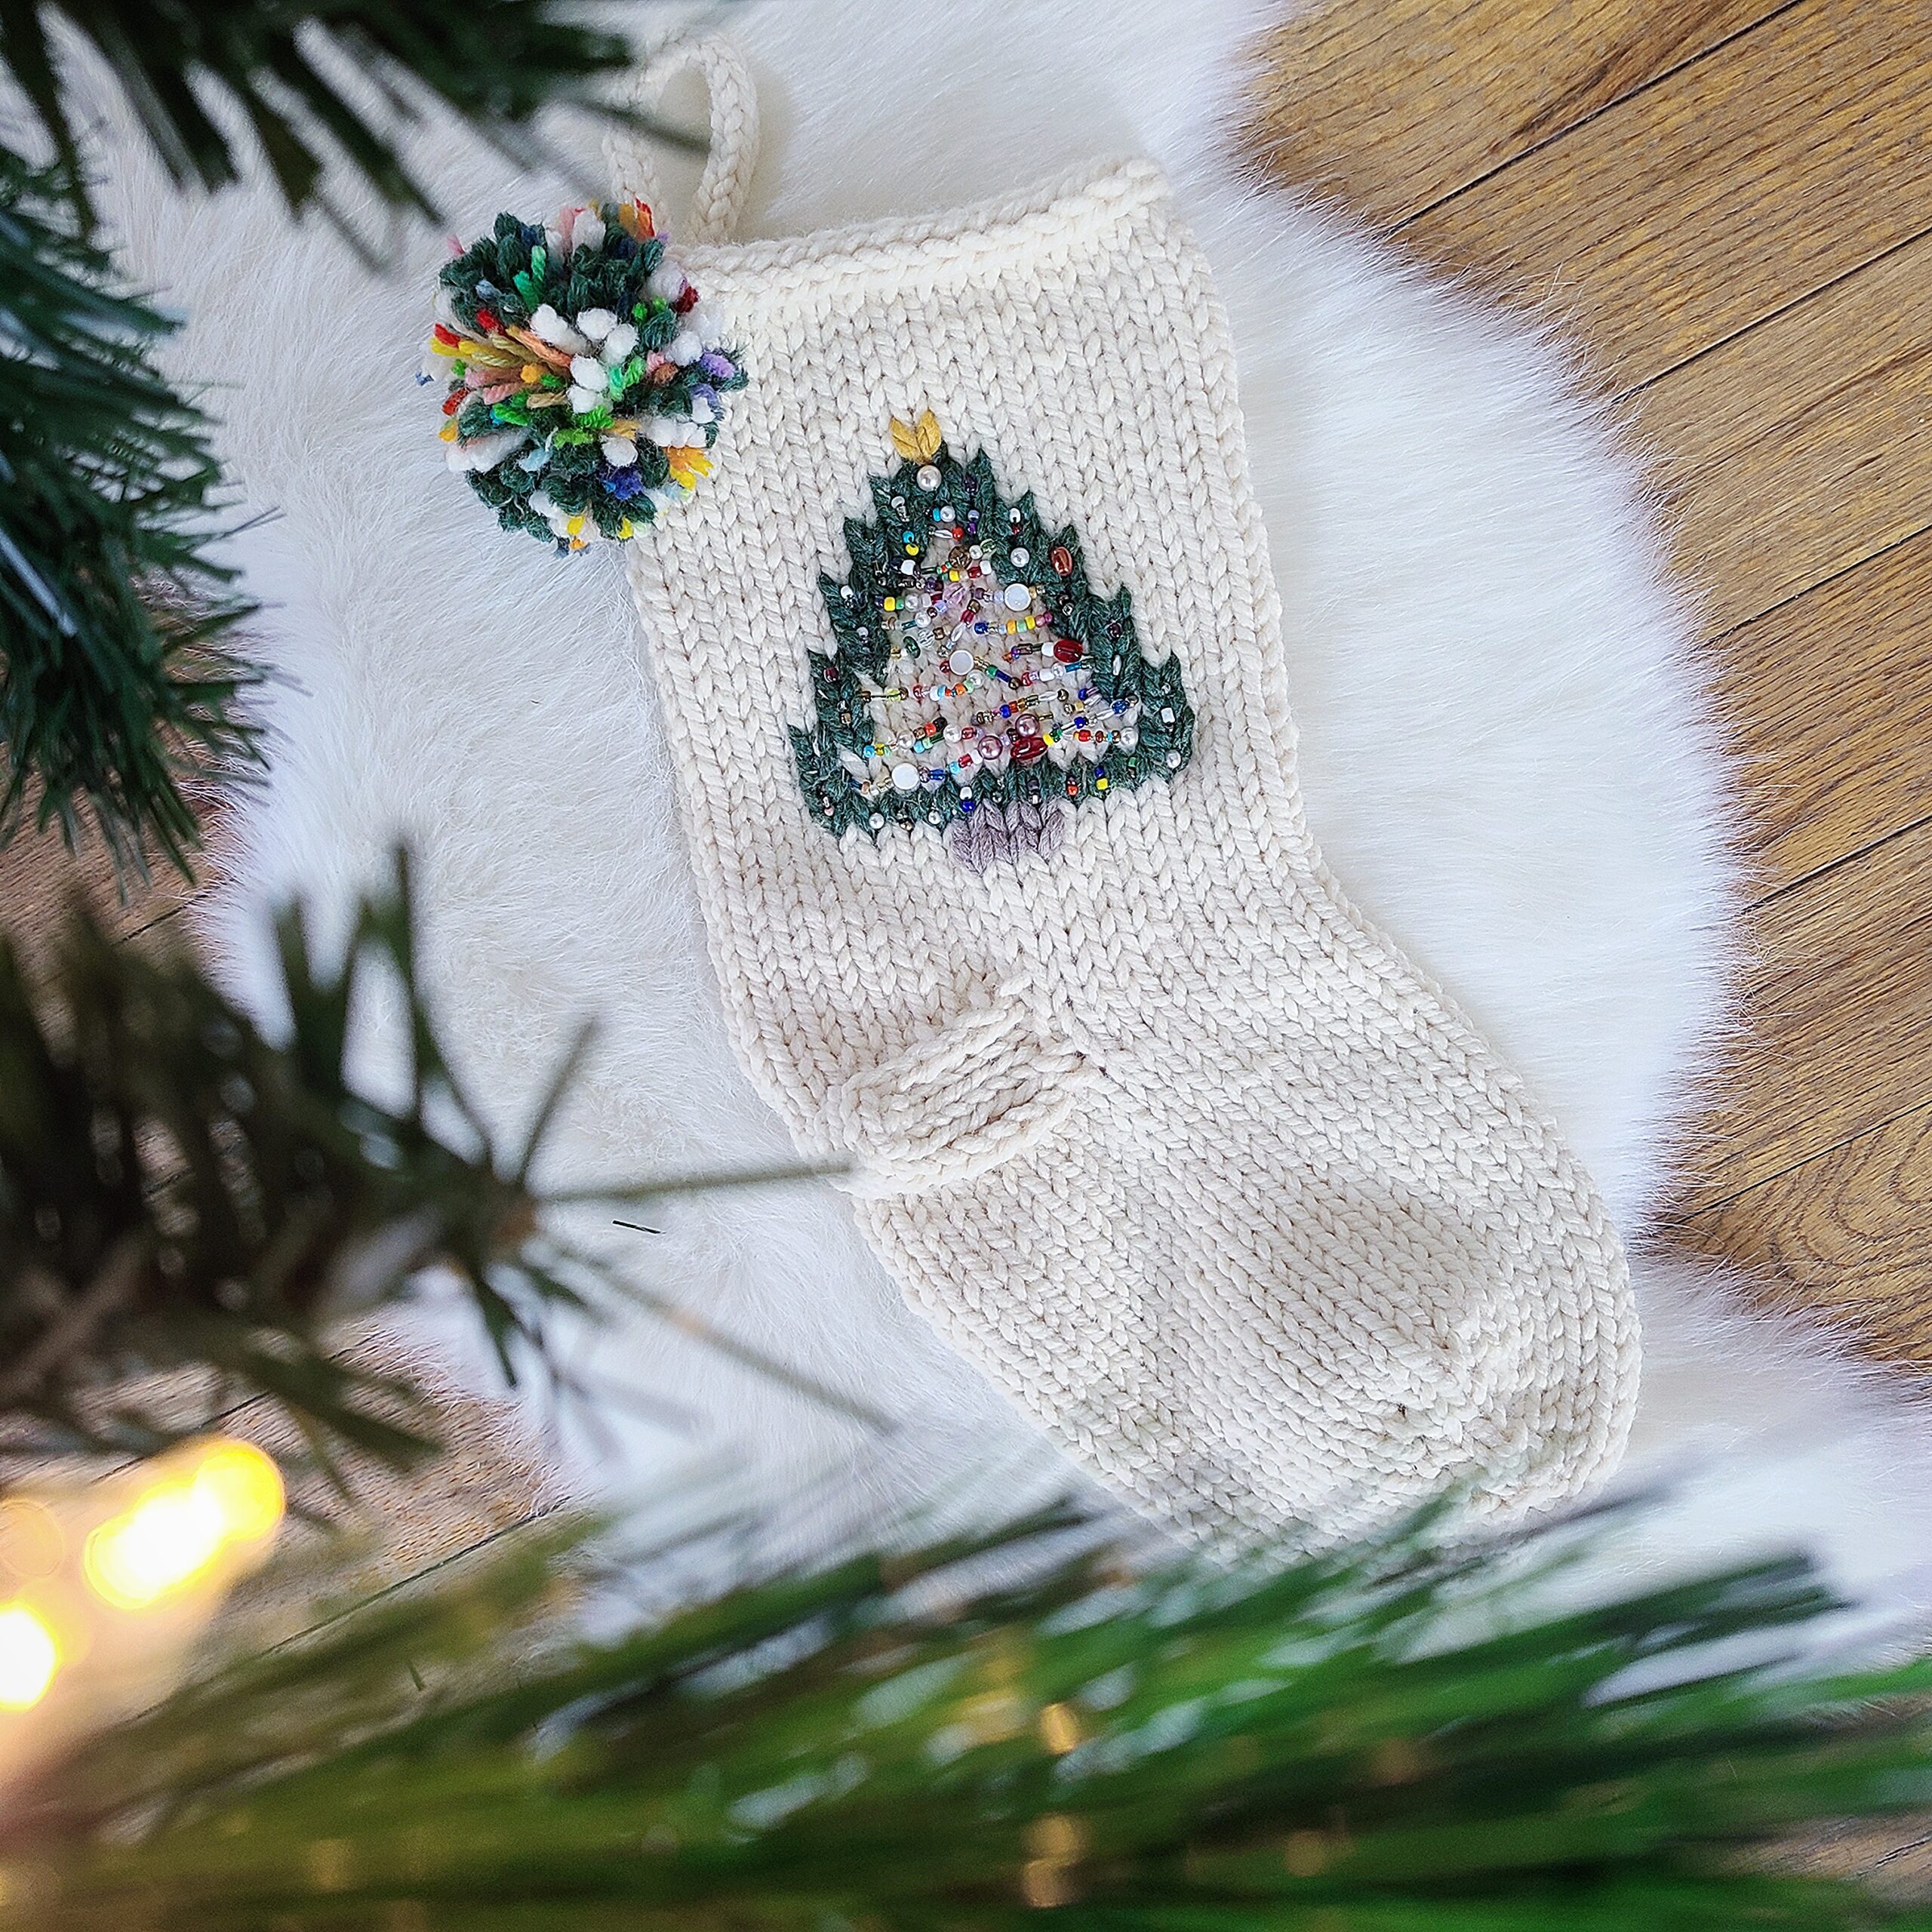
Into the Pines Christmas Stocking! *knitting pattern*
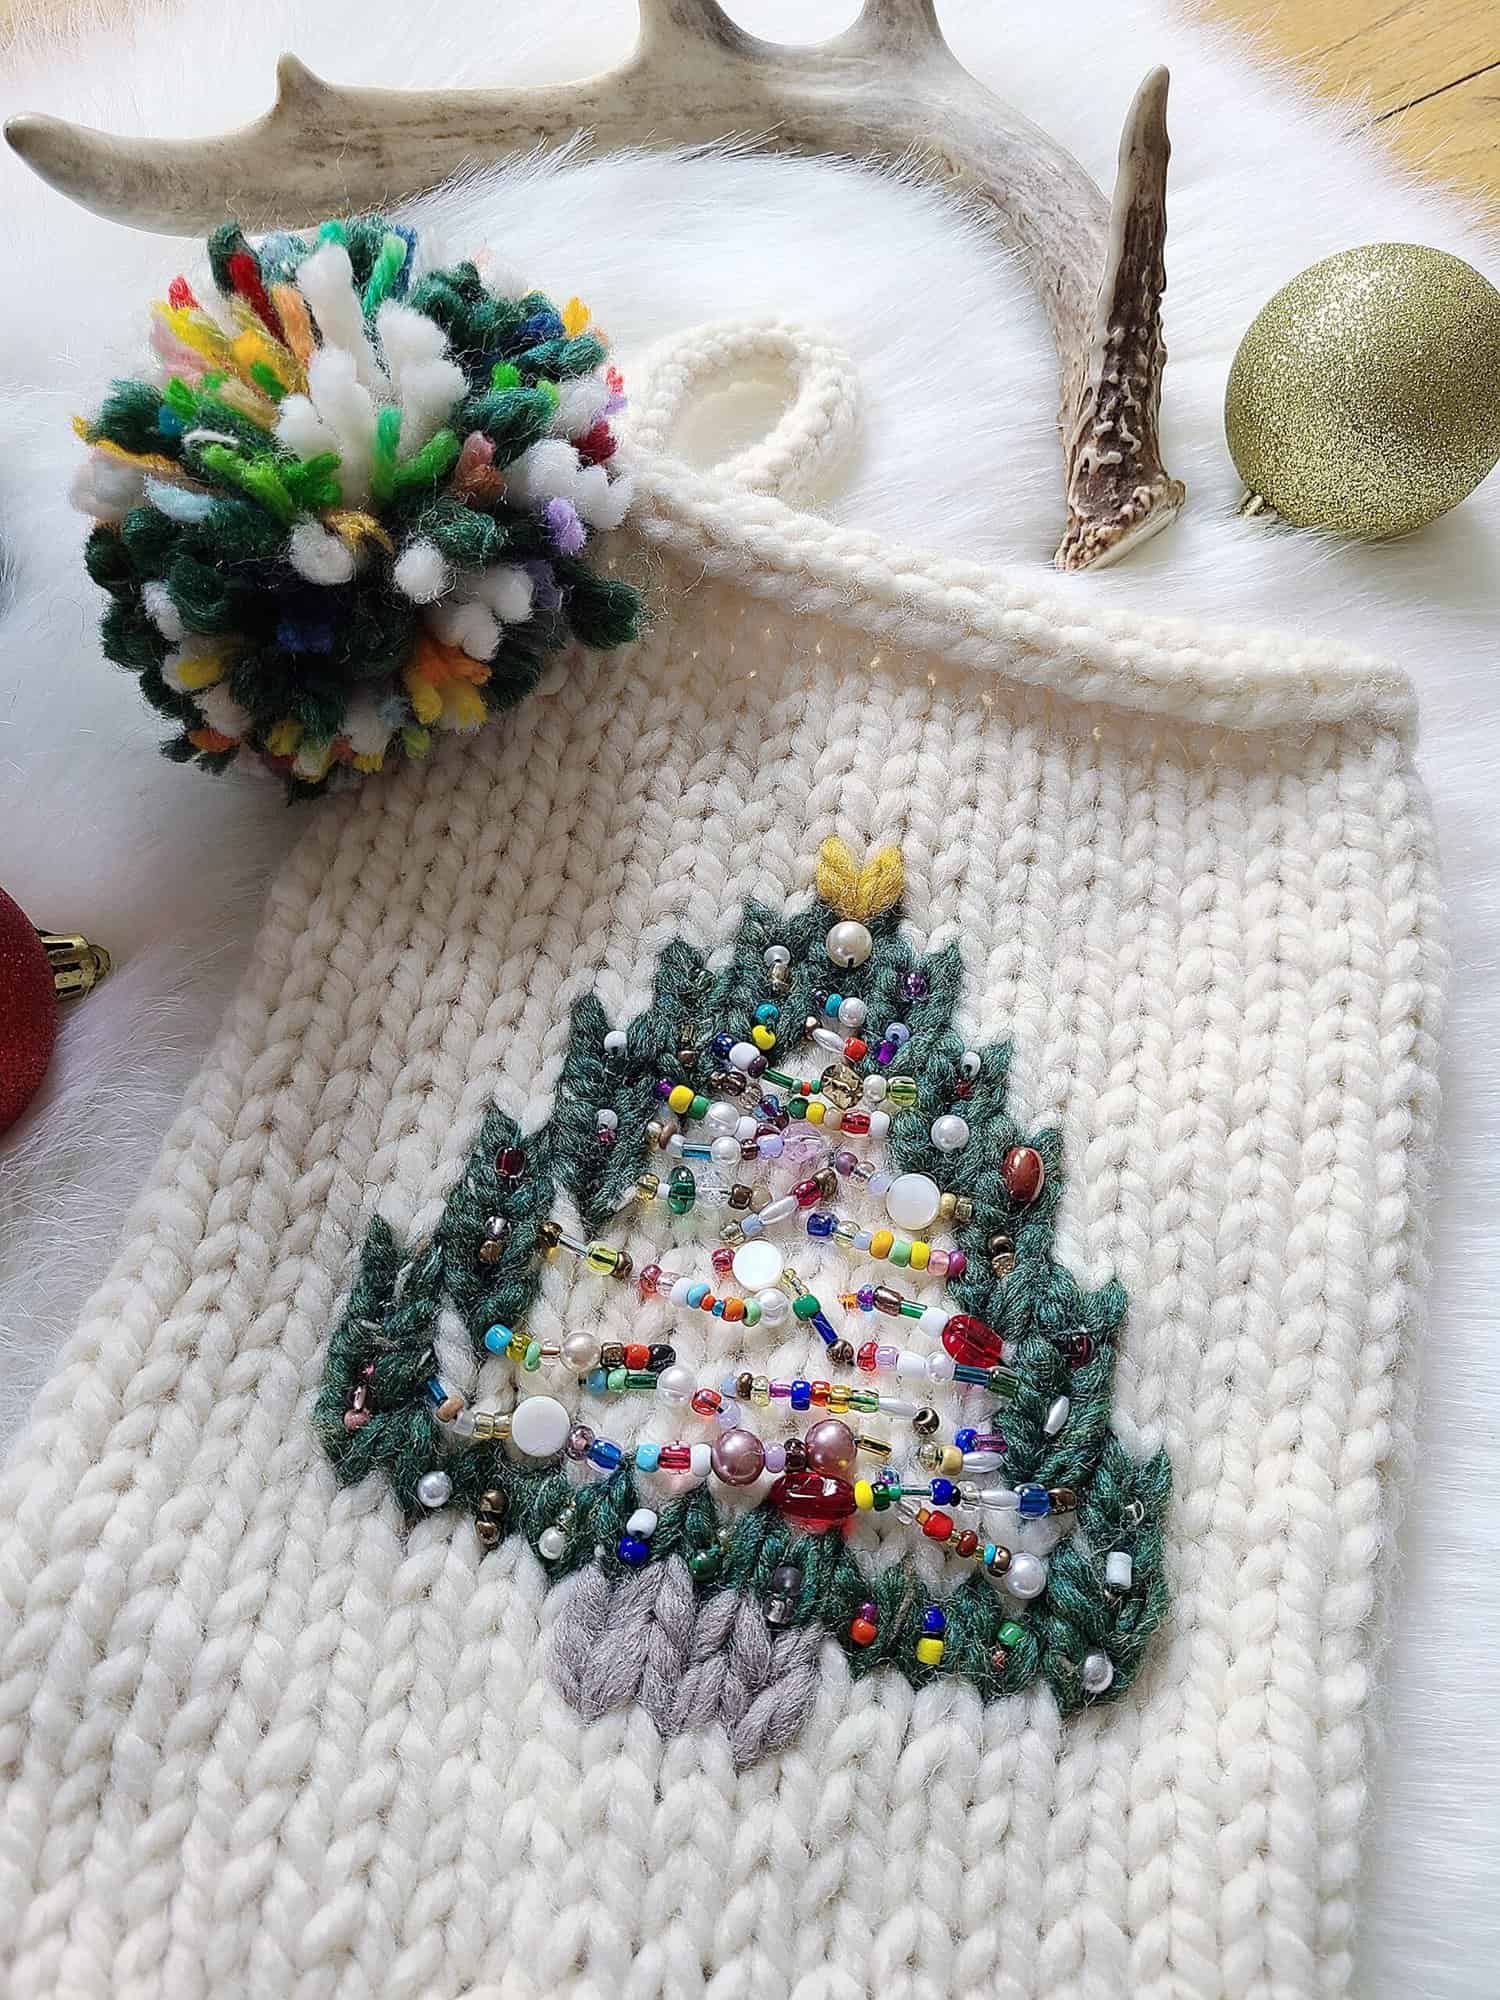
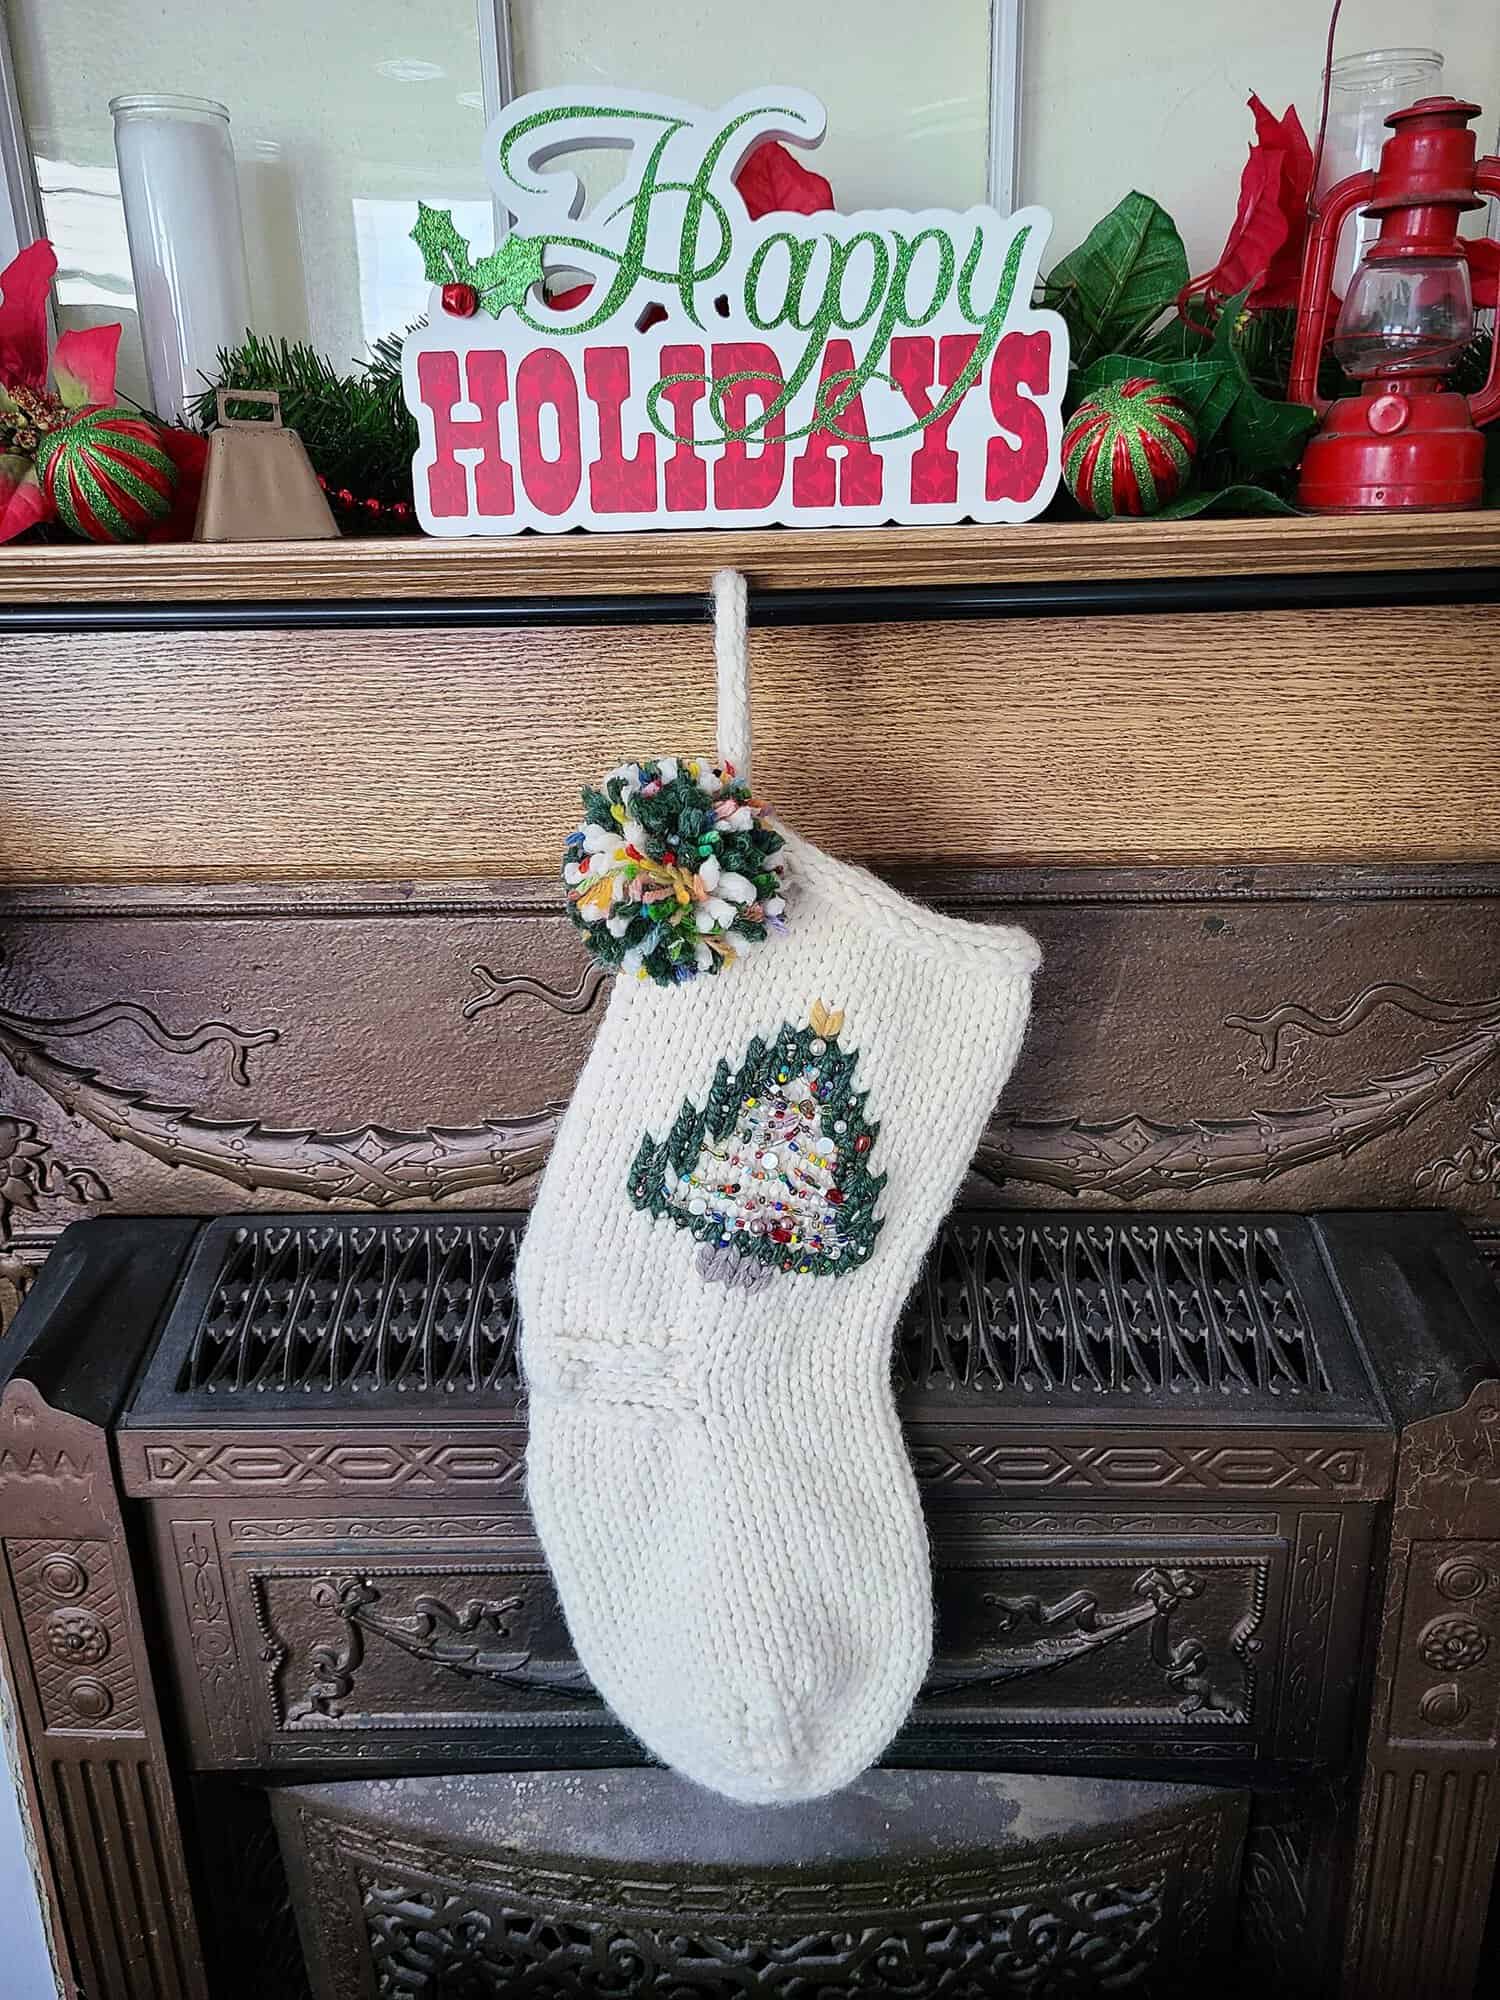
Hi there, Erin from CraftsEverywhere here! Today, I’m bringing you a tutorial for a new vintage-inspired Christmas stocking! I haven’t done a stocking pattern since last year at this time and it seemed like a good small project to get in the holiday spirit 🙂 This pattern combines a classic oversized stocking shape with a duplicate-stitch tree. The tree can then be decorated any way you’d like which is the most fun part about this project. I LOVE adding fun embellishments to my stockings. I used a mix of my personal hand-dyed yarn, plus colors from the stocking for the decorative pom-pom on this, and a variety of rainbow beads from my stash. You can also decorate the tree with mini poms, ornaments, bells, scrap yarn, or even a mini light strand! I have also added optional cuff instructions, in case you want to have room to add a name to your stockings.
MATERIALS:
- Clover Patchwork Scissors
- Clover Darning Needle
- 10 mm (US size 15) 16” circular needles and 3 x DPNs or magic loop method
- 6, 6.5 or 8 mm DPNs x 2 for the I cord hanger
- Stitch Markers (2)
- super bulky yarn:
- Main color – 140 yards
- Tree motif – 5 yards
- Tree trunk – 1 yard
- Tree star – 8”
- A piece of scrap yarn approx. 1-2 yards long for afterthought heel
- embellishments (ie. bells, beads, pom-poms, etc.)
ABBREVIATIONS:
- CO: cast on
- DPNs: double-pointed needles
- K: knit
- KFB: knit in the front and back of a stitch to increase by 1
- K2tog: knit two stitches together
- M1L: make 1 left
- M1R: make 1 right (M1R and M1L tutorial linked on M1R)
- MC: main color
- P: purl
- PM: place stitch marker
- SSK: slip 1 stitch knit-wise, slip 1 stitch knit-wise, insert left hand needle through the front of both slipped stitches and knit together
- st(s): stitch(es)
GAUGE:
- 2″ = 5 stitches x 7 rows on 10 mm needles in stockinette stitch
- Getting close to gauge is all that matters for this pattern!
NOTES:
- Skill Level: Intermediate
- An asterisk * marks a repeated stitch pattern.
- A double asterisk ** marks a note in the pattern.
- Your stitch count is in parentheses at the end of relevant rounds.
- You can also use the provisional cast on method for the beginning of the toe if you would prefer to kitchener stitch the toe together instead of seaming.
- There is a chart included for adding the tree motif in duplicate stitch after the stocking is completed.
- The stocking is shown without the optional cuff in this pattern but I have included instructions in case you want to add one.
- Tutorials:
PATTERN:
- Finished stocking measures 20” long by 8” wide.
- Co 20 sts using the long tail CO method with MC yarn, divided between two 10 mm (US 15) DPNs. Join to work in the round (20).
TOE INCREASE:
- Round 1: K all sts (20).
- Round 2: *K1, M1R, K until one st remains on the DPN, M1L, K1. Repeat from * for second DPN (24).
- Rounds 3-8: Repeat rnds 1-2 three more times (36).
- Switch to circular needles when there are too many sts on your DPNs, placing a marker after you have K all the sts on the first DPN and another marker after knitting the sts on the second DPN to mark the end of the round.
- Round 9: K all sts, remove the middle marker, leaving only the end of round marker (36).
STOCKING FOOT:
- Rounds 10-27: K all sts. Foot should measure approx. 8.75-9” from CO edge.
HEEL:
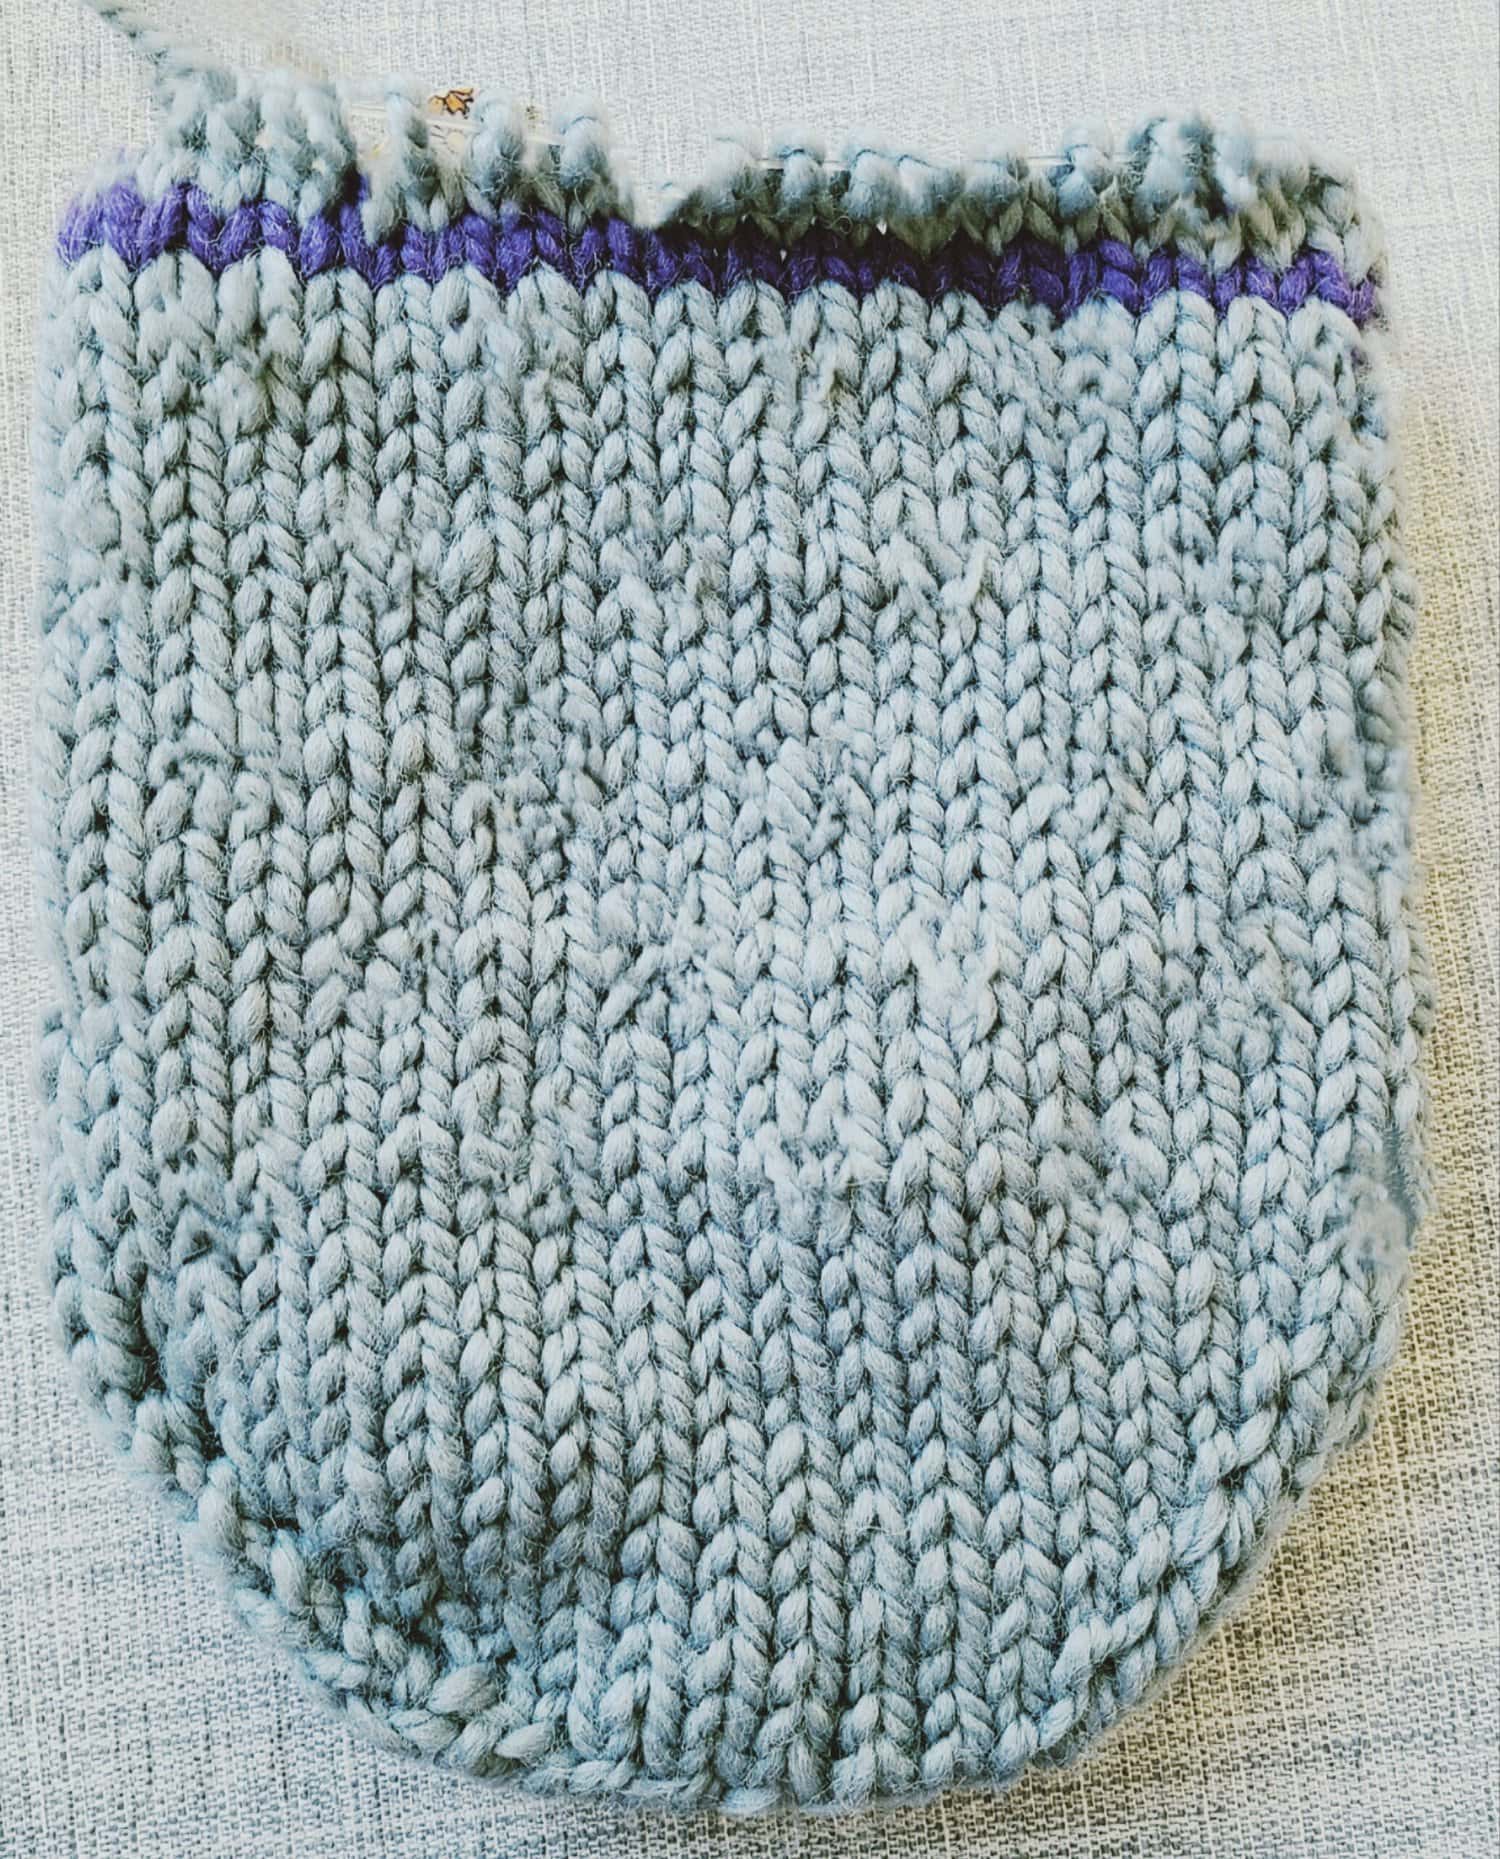
- Round 28: K18, cut yarn, leaving a tail for sewing later, **K18 with a long piece of scrap yarn to end of round.
- This will be your afterthought heel (in purple scrap yarn) after finishing the body of the stocking.
STOCKING BODY:
- Round 29: Drop scrap yarn. Join new MC yarn, K all sts (36).
- Round 30: K all sts.
- Rep rnd 30 until stocking measures approx. 10″ from the scrap yarn at the heel from rnd 28.
- I cord bind off.
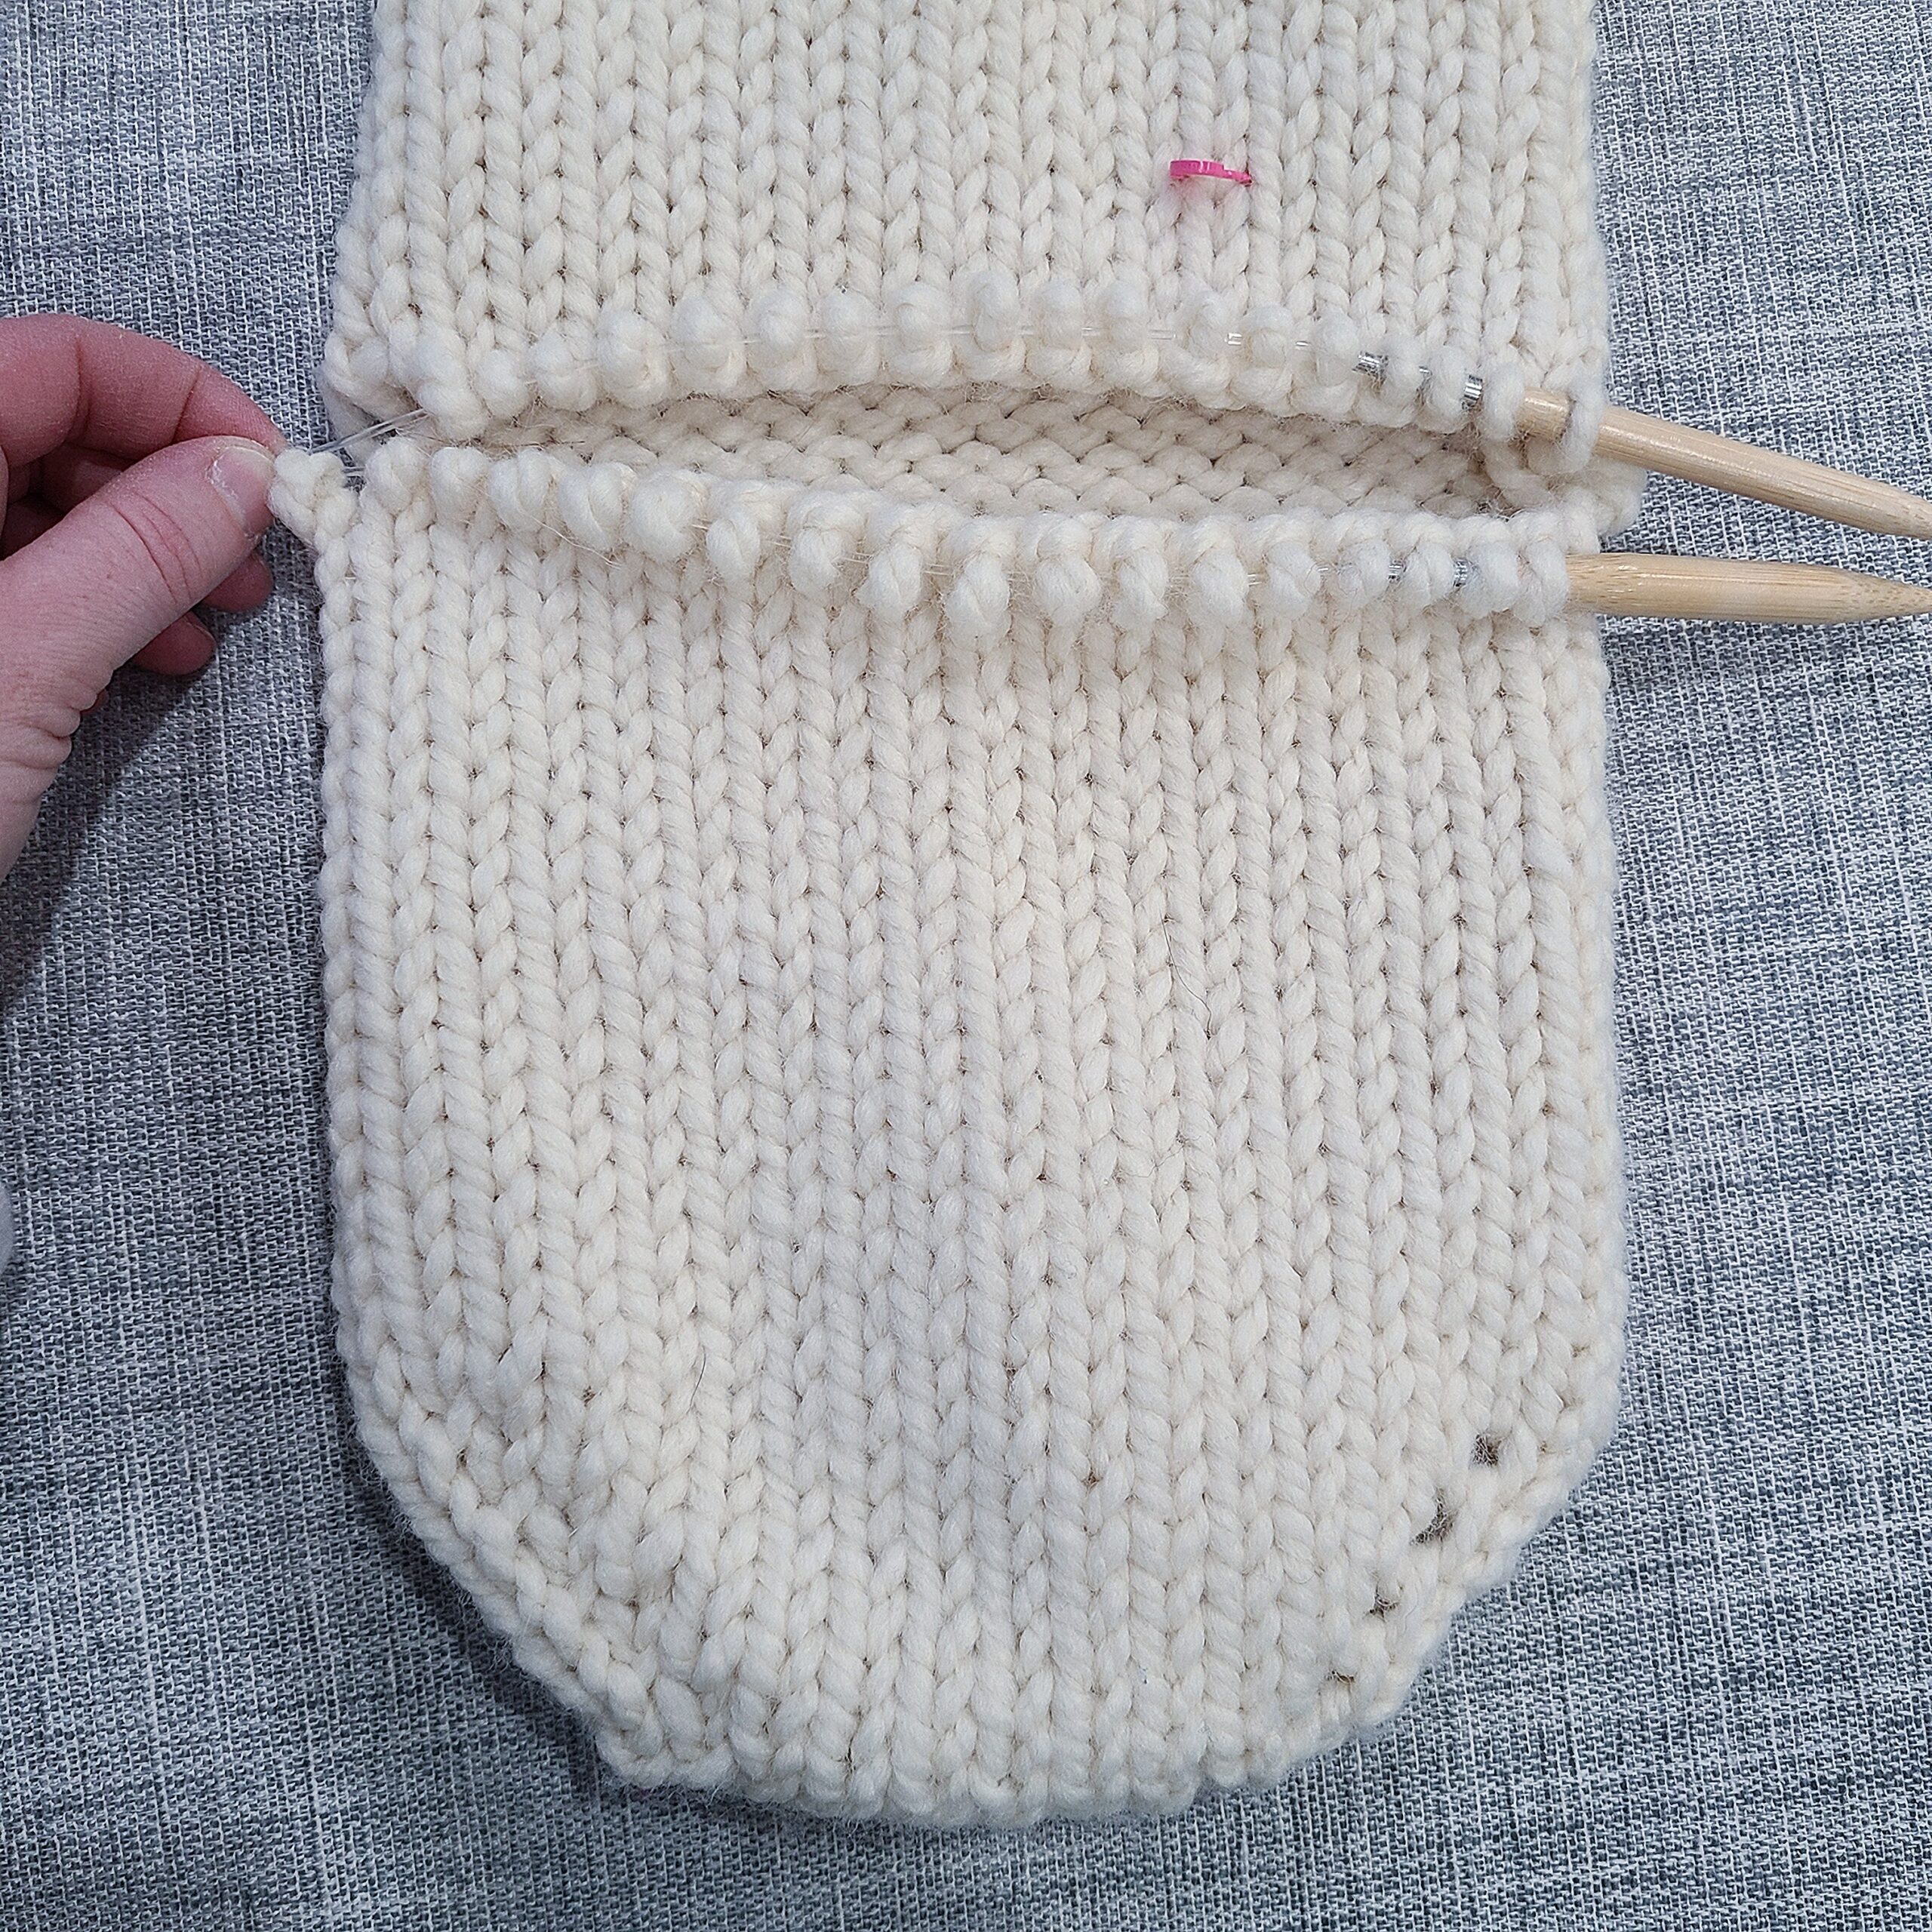
CUFF (OPTIONAL):
- Shown on a different style of stocking but you will follow the same instructions!
- Flip the stocking so that the top opening where you grafted the I cord bind off is facing you and pick up a stitch in each stitch of the bottom row of the I cord bind off, pm to work in the round (I picked up 40 sts, may vary slightly).
- Watch this video tutorial for picking up cuff stitches!
- Round 1: K all sts, add KFB in a few spots near the back to get to 40 sts (40).
- Round 2: K all sts.
- Rounds 3-13: Rep rnd 2 for 11 more times, or until cuff measures about 4″ from the bottom edge of the I cord bind off.
- I cord bind off or stretchy bind off of choice if using faux fur yarn
AFTERTHOUGHT HEEL:
- Pick up the sts on either side of the scrap yarn that you used to mark the heel on two 10 mm DPNs. You will have 18 sts on each DPN. Pick up 2 sts in the gaps on each side.
- Join new MC yarn, beginning in the bottom right stitch on the DPN closest to you.
- Round 1: K all sts (40).
- Round 2: On each DPN, *K1, SSK, K to final 3 sts, K2tog, K1* (18 per DPN, 36 total).
- Rounds 3-7: Rep rnd 2 for 5 more times until you have decreased to 16 sts, 8 per DPN.
- Round 8: K all sts (16).
- Graft together with kitchener stitch or bind off and seam together.
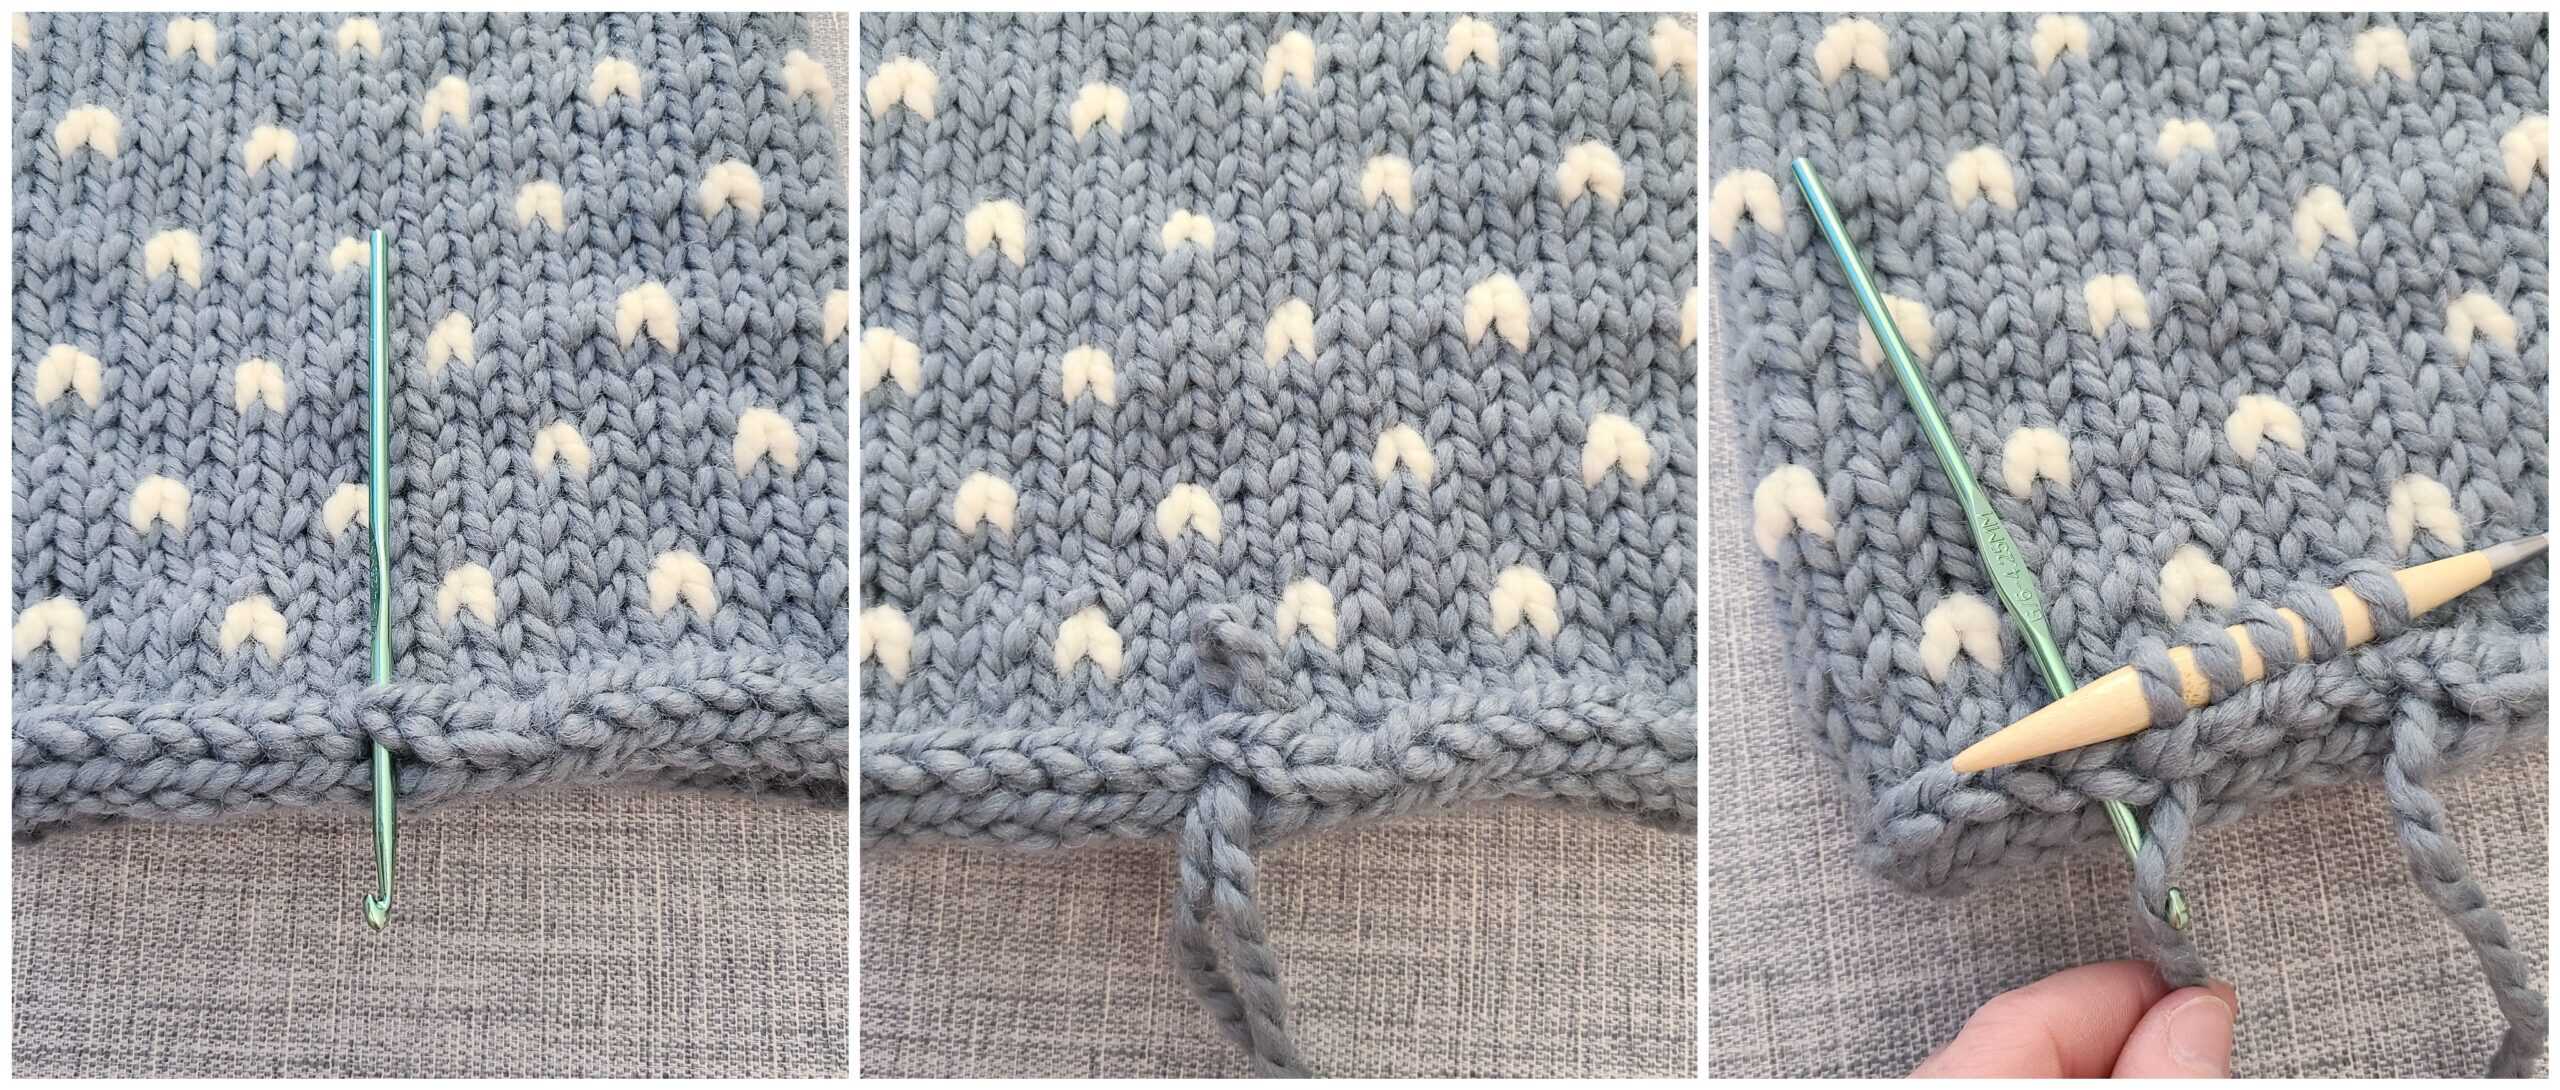
CHRISTMAS TREE MOTIF:
- Lay the stocking flat with the heel pointing the desired direction. This will determine which side it faces when it is hung.
- Mark a square area 11 sts wide by 18 sts tall in the center area of the upper part of the stocking body.
- Following the chart below, duplicate stitch the tree design onto the stocking.
- Sew in all ends after the design has been added.
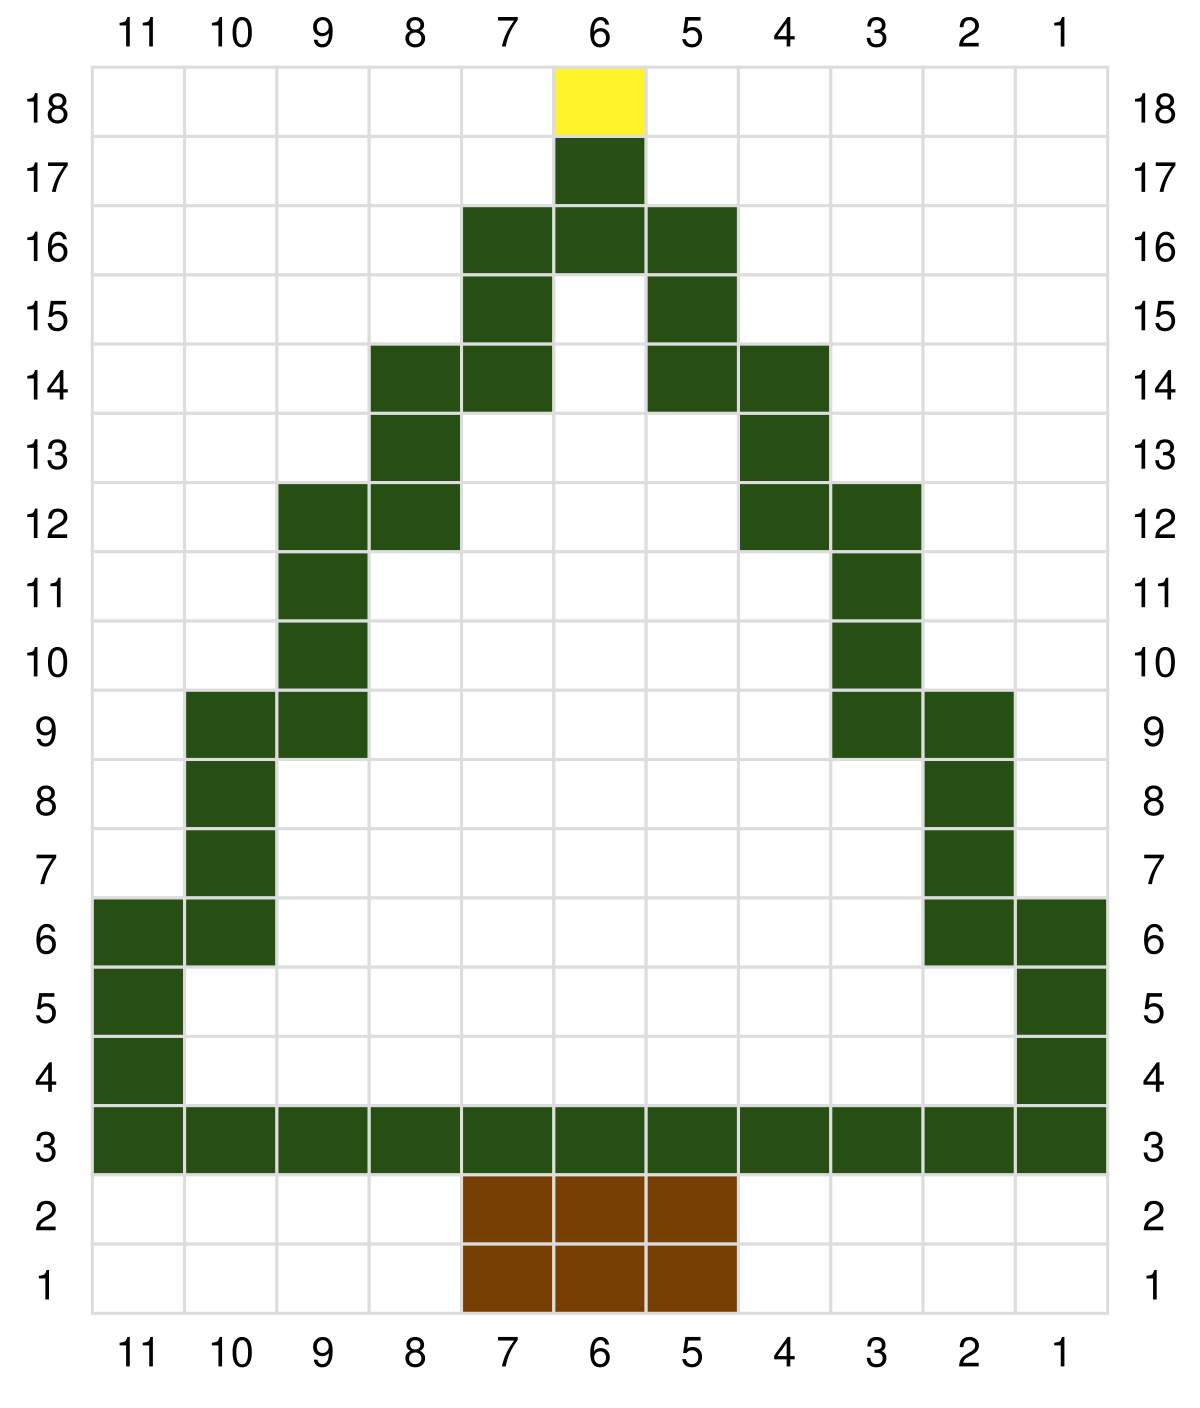
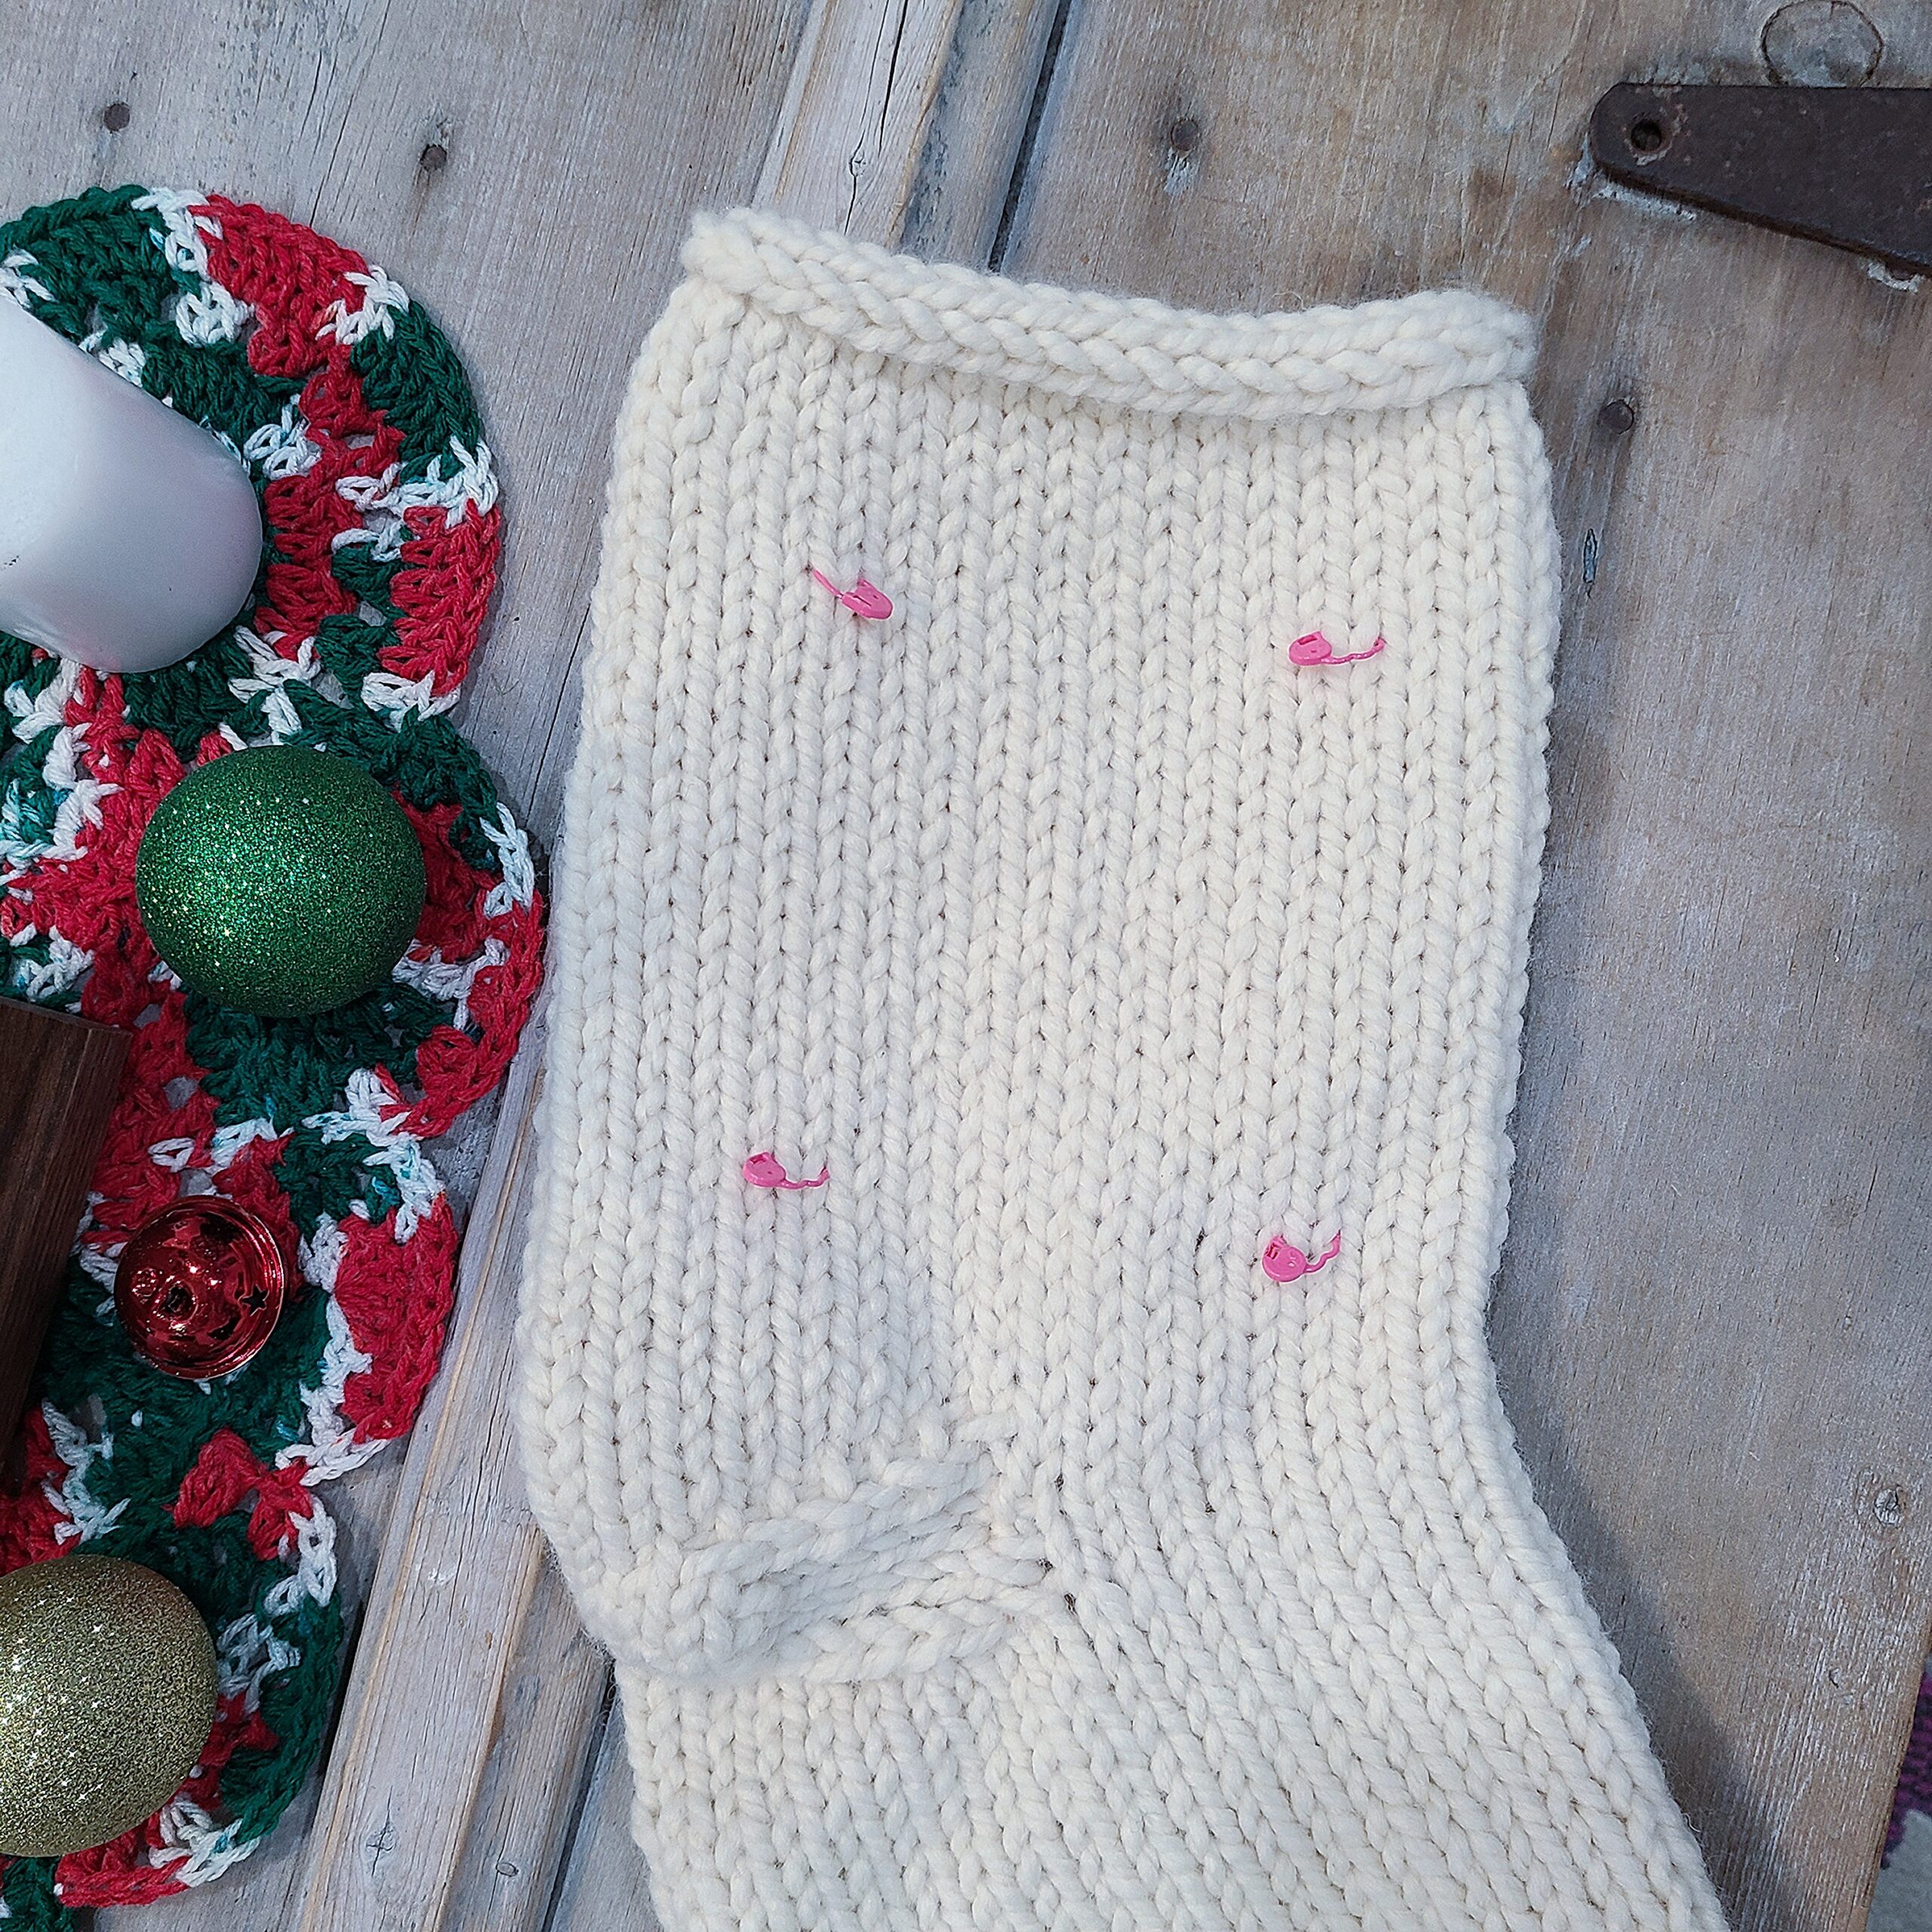
- Add embellishments. I added rainbow colored beads to my tree from my bead stash using green thread and a small needle.
- Other ideas for decorating the tree are small pom-poms, mini ornaments, bells or bright scrap yarn pieces!
HANGER:
- Knit an I cord on 6-7 mm DPNs that measures 7-8″, then sew to the inside back of the stocking.
FINISHING:
- Sew in all ends. Use the tails on either side of the heel to close any gaps as you sew them in. Mattress seam the toe if you did long tail CO or if you did a provisional CO, pick those sts up and graft together.
Now that you’ve finished your stocking, make sure to show it off on social media by tagging me using @craftseverywhere and #intothepinesstocking on Instagram or Facebook! If you have any questions regarding the pattern, don’t hesitate to contact me at erin.oetker@gmail.com or through my messages on my Etsy or Instagram.
If you want to keep up with me, Erin, on social media for other fun projects, follow me on social media: Instagram | Facebook | Ravelry | Etsy
If you want to keep up with all things Clover, follow us on: Facebook | Twitter | Instagram | Pinterest | YouTube | Ravelry