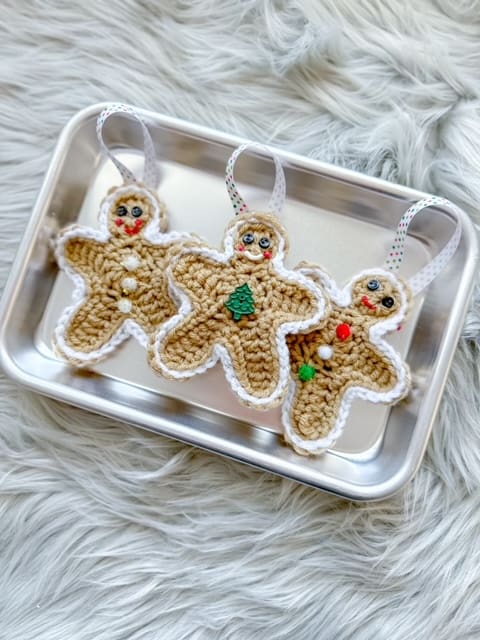
Gingerbreadperson Cookie!
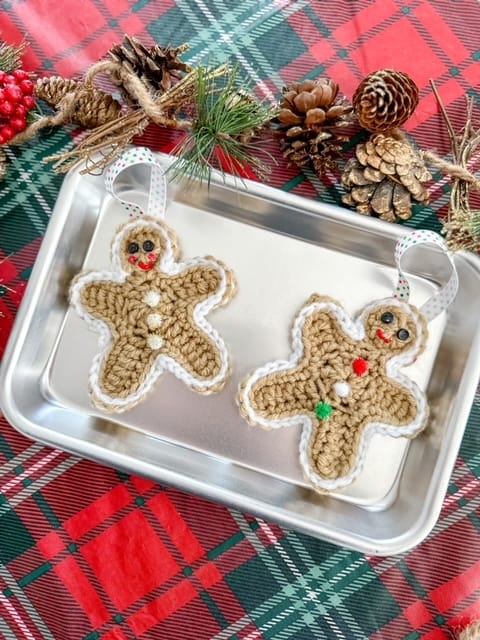
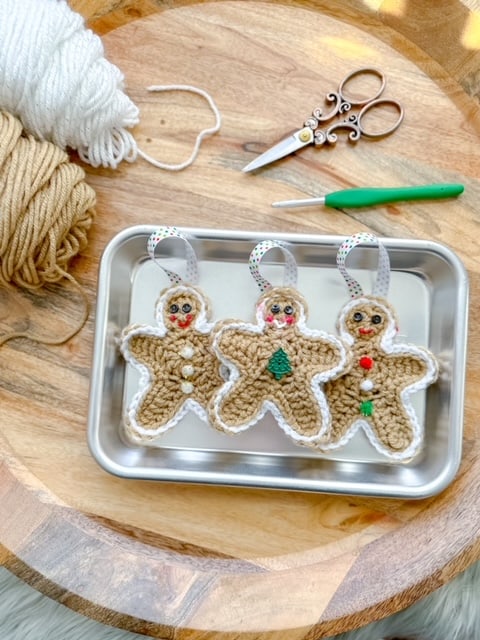
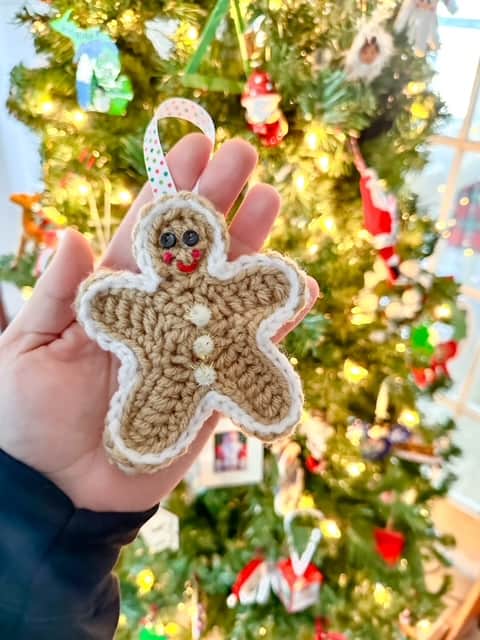
Can you believe it’s December 1st already?! Christmas will be here before we know it 😮 One of my favorite holiday memories is decorating Christmas cookies with my family. This crochet gingerbread person cookie would make an adorable ornament for friends or family, OR you can make a few without the handle and have them laying down in a cookie tray for decoration! You can sew on the eyes, mouth, and buttons with embroidery thread, or get creative with other craft supplies. I used mini buttons, pom-poms, and puffy paint!
MATERIALS:
- Clover Amour Crochet Hook (5.5mm)
- Clover Darning Needle Set
- medium weight yarn in colors of your choice
- Patchwork Scissors
- optional:
- ribbon
- embroidery floss
- other supplies for your gingerbread’s accessories
ABBREVIATIONS:
- ch: chain
- ss: slip stitch
- sc: single crochet
- dc: double crochet
NOTES:
- This is a no sew pattern! In order to make the gingerbread man sturdy, we are going to crochet 2 gingerbread pieces and slip stitch them together.
TUTORIAL:
1. Start with a magic circle with 10 dcs (or ch 2 and dc 10 in the second ch from the hook), and join.
2. Ch 6. Make a dc in the 3rd ch from the hook, and the next 3 chs (4 dcs total). Ss into the next open stitch on the original round. This creates our first arm.
3. We are going to skip a stitch, so ss into the next stitch. Ch 8. Make a dc in the 3rd ch from the hook, and the next 5 chs (6 dcs total). Ss into the next open stitch on the original round. This creates our first leg.
4. Do NOT skip a stitch here. Instead we will go straight into making the next leg. Ch 8. Make a dc in the 3rd ch from the hook, and the next 5 chs (6 dcs total). Ss into the next open stitch on the original round.
5. We are going to skip a stitch again, so ss into the next stitch, and then ch 6. Dc in the 3rd ch from the hook, and the next 3 chs (4 dcs total). Ss into the next stitch on the round. Fasten off.
6. We will make the head separately. Make a magic circle with 10 dcs, and join. Do not tie off.
7. Attach the head to the body with one sc. Next continue to sc in each stitch all around the body. When you get back up the other side, make sure the head is secure with another sc, and continue to sc around the head. When you get back to where you started, fasten off.
8. Next repeat steps 1-7 to make a second gingerbread piece. Stack the gingerbread on top of one another so that the stitches are aligned. Attach a new color (I’m using white) to both layers of the gingerbread. In the INSIDE loops of each layer only, you will slip stitch the 2 pieces together. Not only does this give a beautiful, sturdy, and cohesive look, but it also gives the gingerbread a nice icing effect. Continue to carefully slip stitch all the way around making sure not to skip any stitches. Tie off and weave in any loose ends.
9. I used hot glue to add a ribbon to create an ornament. I also used some tiny pom-poms, buttons, and a little puffy paint to create the face. You can get creative and add whatever fun little details you prefer!
And there you have it! Your very own gingerbread person cookie! 🙂 If you end up making some of your own, Clover and I would love to see it through tagging us on our social medias down below! <3
If you want to keep up with me, Molly, on social media for other fun projects, follow me on social media: Instagram
If you want to keep up with all things Clover, follow us on socials: Facebook | Twitter | Instagram | Pinterest | YouTube | Ravelry

