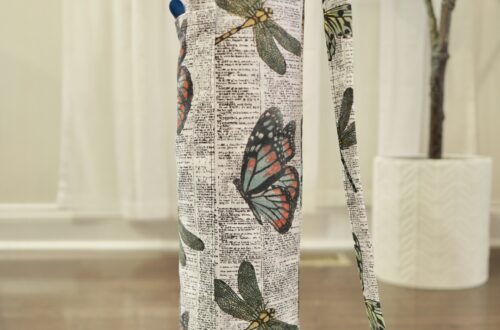
Sew a Drop Shoulder Cardigan from a Blanket!

Each culture has objects that become unanimous with it. Growing up, I was always surrounded by many items I believe would fall into the “Mexicana” category. Whether it was foods like my favorite empanadas or art like Talavera tiles, these things were ever-present. One such item that always seemed to be everywhere I turned was the humble Falsa Blanket. These blankets are traditional Mexican woven blankets that are often made of recycled cotton and acrylics. Like many Mexican families, we have a handful of these blankets laying around. With the weather turning colder every day, I thought it was time to turn one into a comfy warm cardigan so I can take a bit of culture wherever I go!
Let’s get started.
Supplies:
- Patchwork Scissors (mini)- Art. No 439
- Rotary Cutter (45mm) – Art. No 7500
- Cutting Mat (18″ x 24″) – Art. No 7521
- Pen Style Chaco Liner – Art. No 4710-4714
- Wonder Clips – Art. No 3185
- Universal Machine Needles – Art. No 9114
- 50 weight thread
- 1 or 2 Woven Falsa Blankets (may use any densely woven and soft fabrics, approximately 70”x50”)
Measure and Cut Panels:
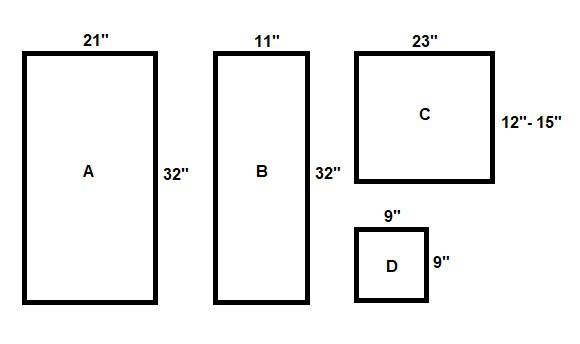
First, you will need to measure out and cut all your panel pieces. One traditional Falsa Blanket will make the sample size cardigan, which is a women’s size small. If you need to adjust your sizing up, you will likely need two blankets. For adjusting size, add 3” to panel A’s width, and 1 1/2″ to each panel of B and C’s width per size up. Measure and cut 1 panel of A, and 2 panels each of B, C, and D. The length of the sleeves and body are all adjustable according to taste.


Hem Front Panels:
Chose which side of the blanket fabric is your right side, and be careful to keep right sides consistent on every panel, as due to the woven nature there will be slight differences in the patterning on either side. Take both panels of B. With one panel, fold over the left side along the length 1/2” towards the wrong side of the fabric. Clip with Wonderclips and sew using a straight stitch and 1/4” seam allowance. Repeat this process on the second panel on its opposite side.


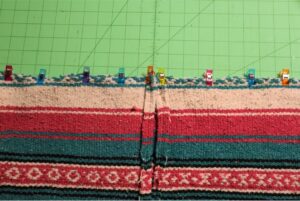
Join Fronts and Back:
With right sides together place both panels of B atop panel A with the hems slightly overlapping in the middle. Pin together with Wonderclips and seam using a straight stitch and 1/2” seam allowance.

Join Sleeves:
Open body panels. With right sides together place sleeves onto body panels with the midpoint of the sleeve width matching the mid-shoulder seam of body panels. Pin together with Wonderclips and seam using a straight stitch and 1/2” seam allowance.


Form and Add Pockets (optional):
This step may be done at any part of the process before stitching side seams. Fold over your designated top and bottom sides of panel D 1/2”, and stitch down using a straight stitch with 1/4” seam allowance. After, fold over remaining sides 1″ and stitch down using a straight stitch with 1/2” seam allowance. You may cut or keep the excess fabric on the back. Finally, pin pockets to each front panel in desired space and stitch down every side but top using a straight stitch and 1/4” seam allowance.


Seam Sides:
Open joined panels completely flat. Fold over cardigan along the shoulder seam line with right sides facing together. Pin sleeve and side seam edge with Wonderclips and seam together using a straight stitch and 1/2” seam allowance.

Finishing:
Leave all inside edges untrimmed, as trimming may lead to fraying and unraveling. Cut all thread tails. Turn cardi right side out. If sleeves are too long on, either roll sleeves up or hem sleeves to the desired length. Cardi is meant to be worn open with no fasteners.
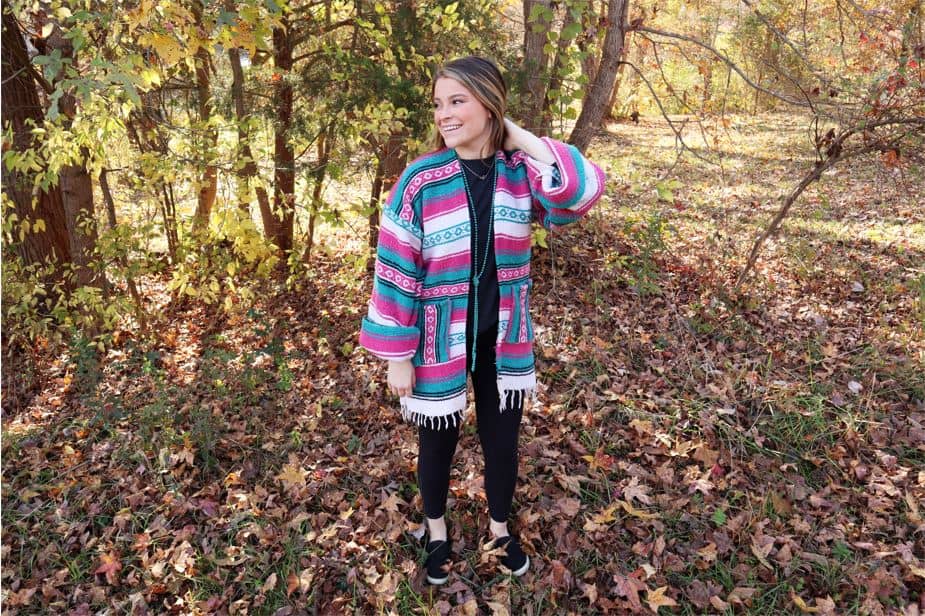
And just like that, we’ve completed our Falsa blanket cardi! I am so excited to see everyone else’s rendition of this look, and look at all the amazingly colorful stripe patterns! If you make your own, be sure to tag Clover and I so we can see!
Until next time, happy crafting!
Follow what Quayln is up to next on his Blog | Instagram | Facebook | Pinterest | YouTube | Ravelry
Stay connected with Clover on Facebook | Twitter | Instagram | Pinterest | YouTube | Ravelry