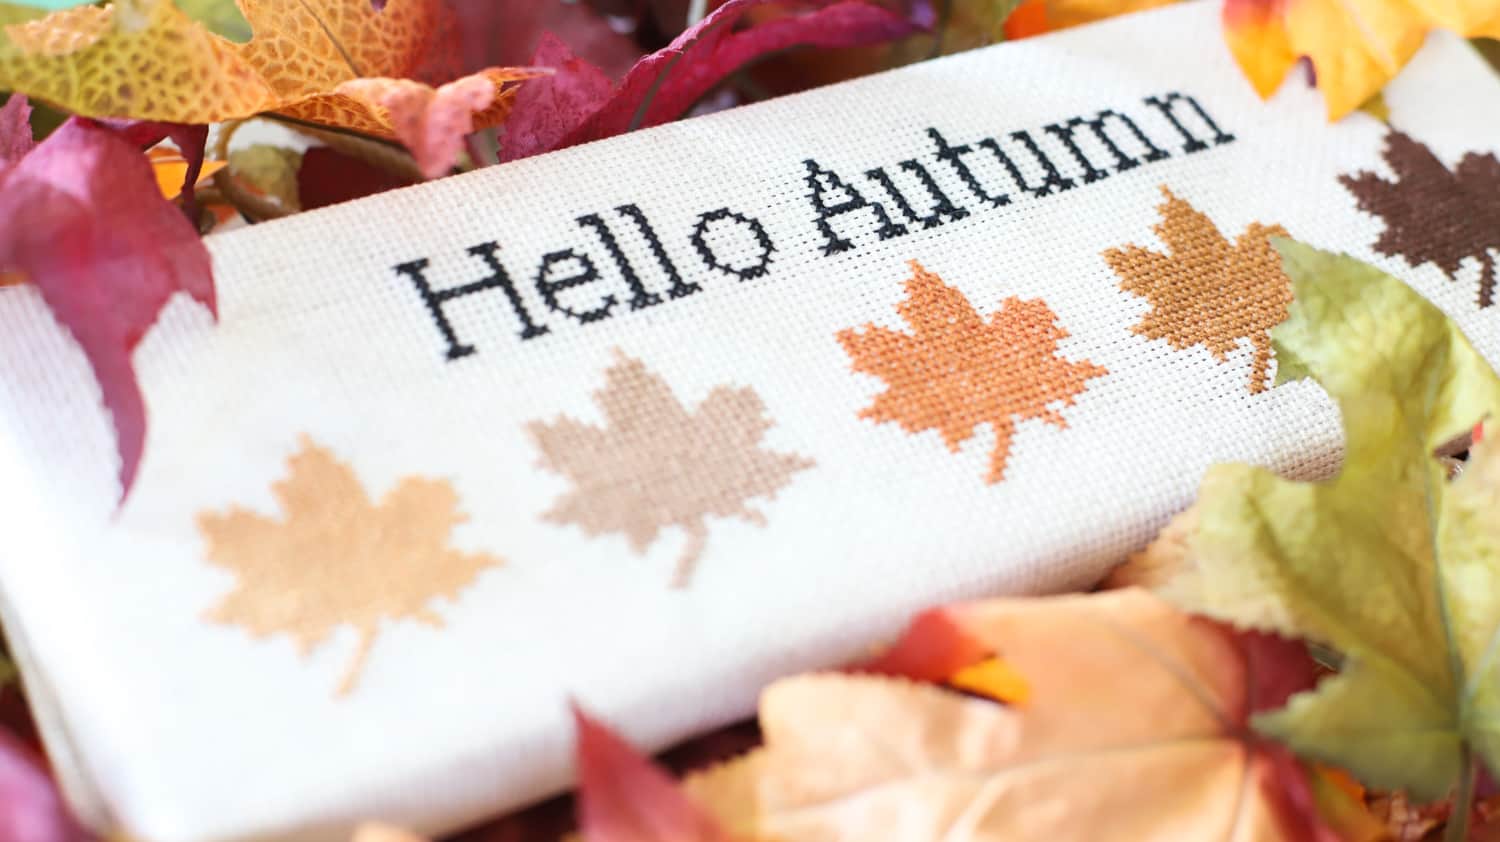
Autumn Leaves Canvas – Cross Stitch Pattern
Can you believe fall is right around the corner?!
Hey Clover Family, it’s Danielle from sprinklesofzeal, and I’m back with a cross-stitch blog that’s all about the fall. This tutorial is great for beginners that want to become comfortable with stitching text and color changes. If you love fall foliage, then you’re going to enjoy stitching this peaceful pattern. Alright, let’s gather our supplies.
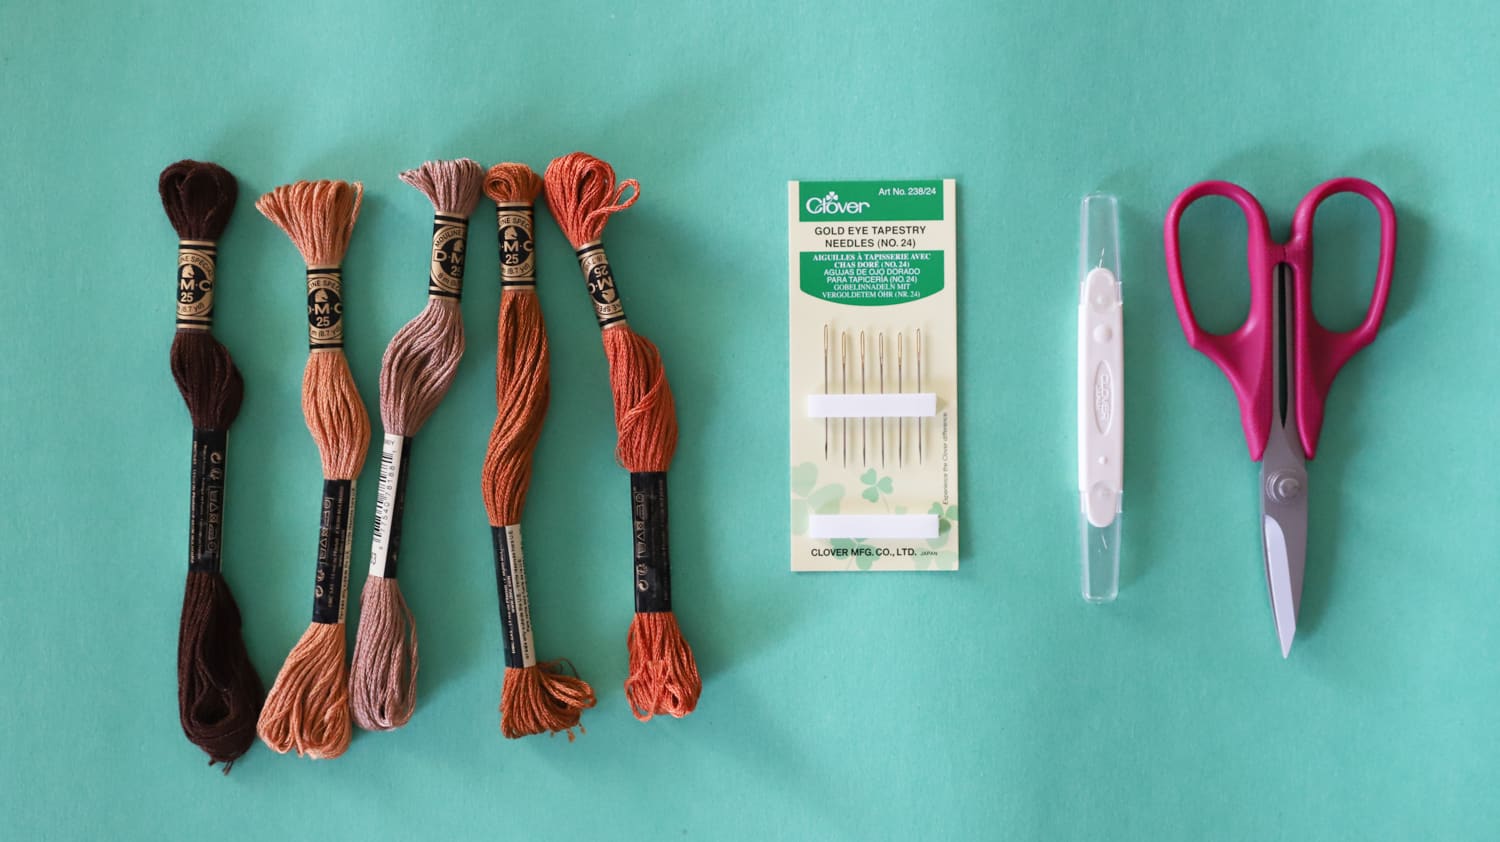
Supplies:
- DMC Embroidery Floss 938, 434,301, 436, 3863
- Ruler
- Clover Gold Eye Tapestry Needle (No.24) Art No. 238/24
- Clover Bordeaux 130 Shears Art No.4940
- Clover Air Erasable Marker (Thick) Art No. 5031
- Clover Double Needle Threader Art No.462/NV
- 15 in x 18 in 14 Count Aida Cloth (Oatmeal)
- 11 in x 11 in Plastic Snap Frame
- 4 in x 12 in Canvas
- Staple Gun with 3/8″ staples
- (2) Backdrop Clamps

Step 1. Download the pattern.
Step 2. Attach the Aida Cloth to the plastic snap frame.
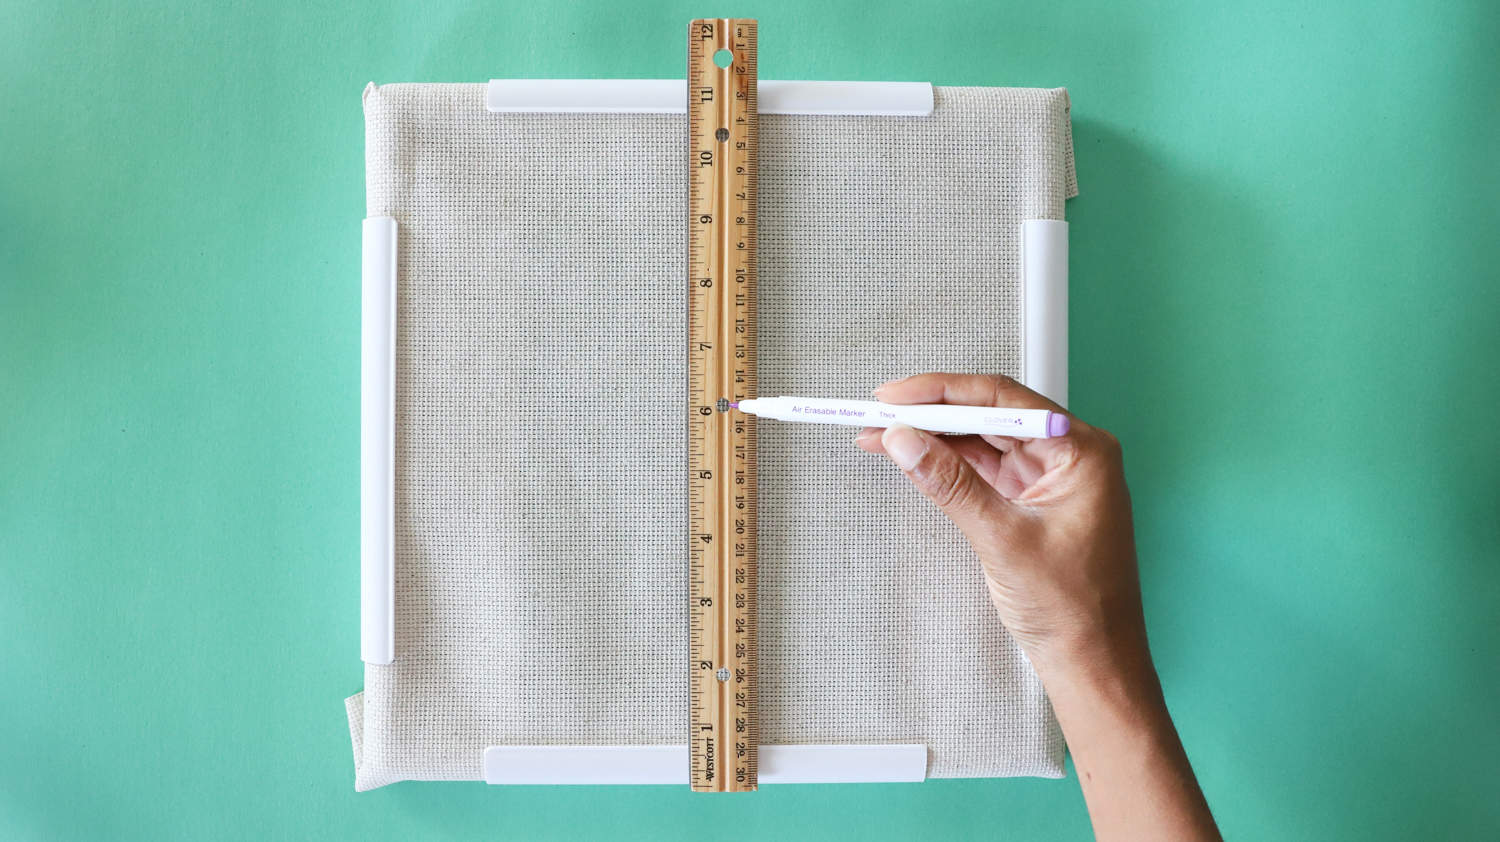
Step 3. Mark the center of the canvas.
Use a ruler and Clover’s Air Erasable Marker to make a dot in the center.
Step 4. Thread the Needles
I would advise threading all 6 needles with 2 pieces of thread before you begin stitching.
The pattern comes with a thread sorter, so you can attach the needles to the paper for safekeeping.

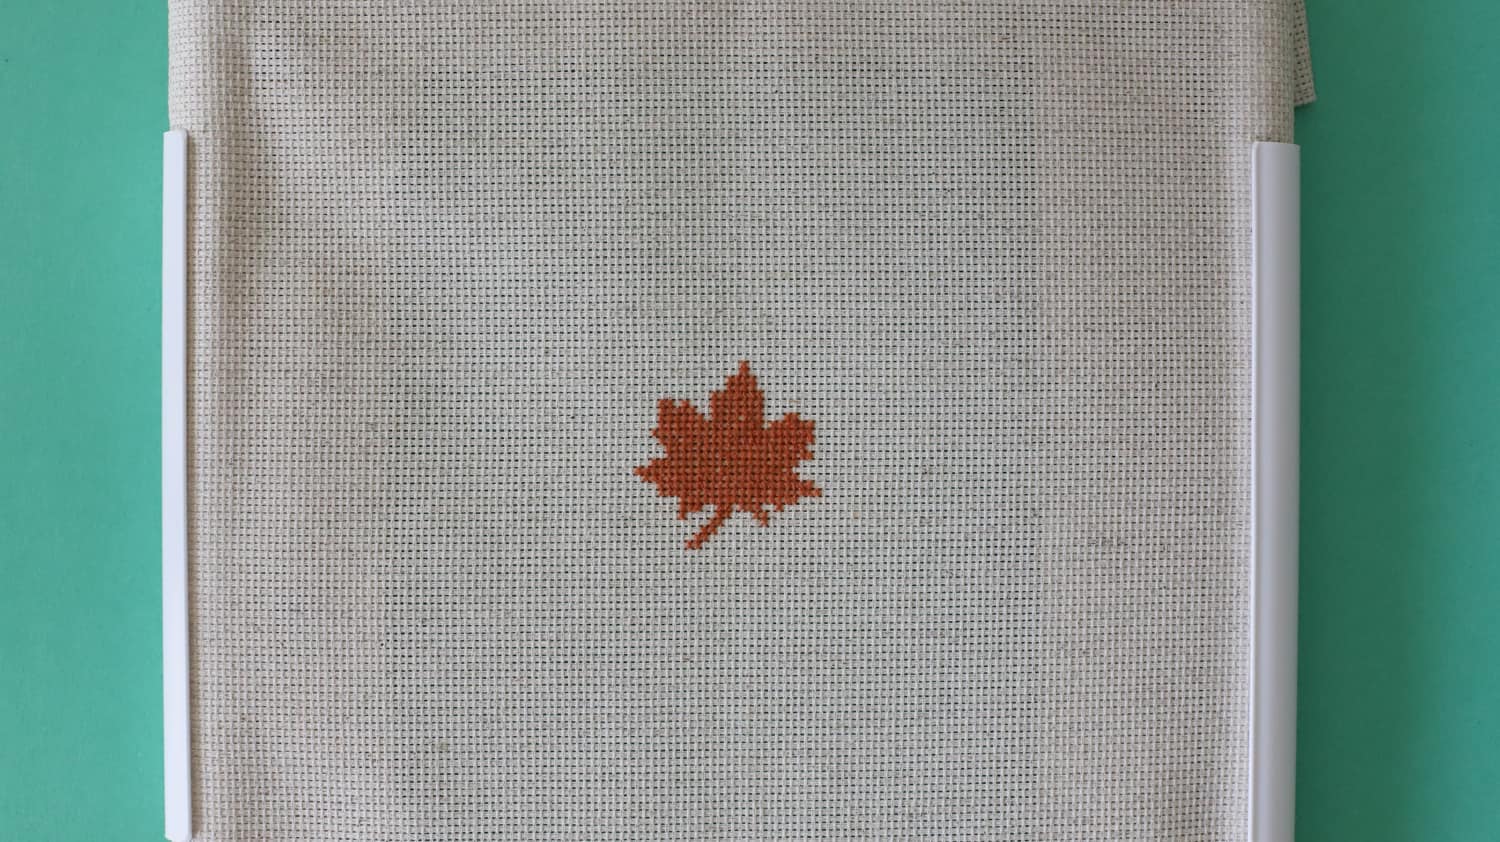
Step 5. Begin Cross Stitching
Start stitching over the marked dot. If you’re new to cross-stitching, check out the Newborn Cross Stitch Plaque blog. You will find a diagram that is helpful for beginners.
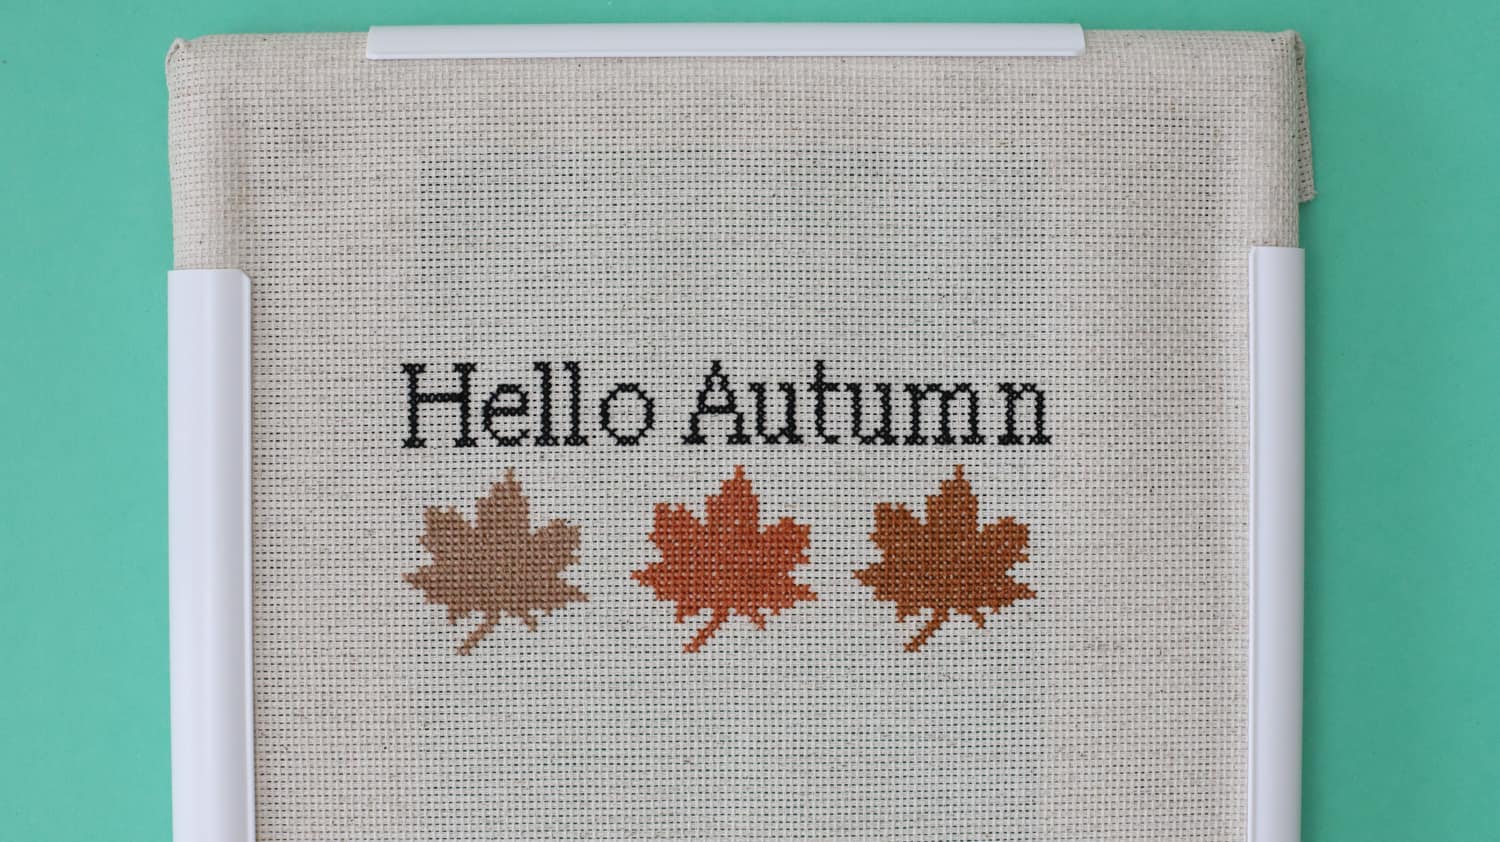
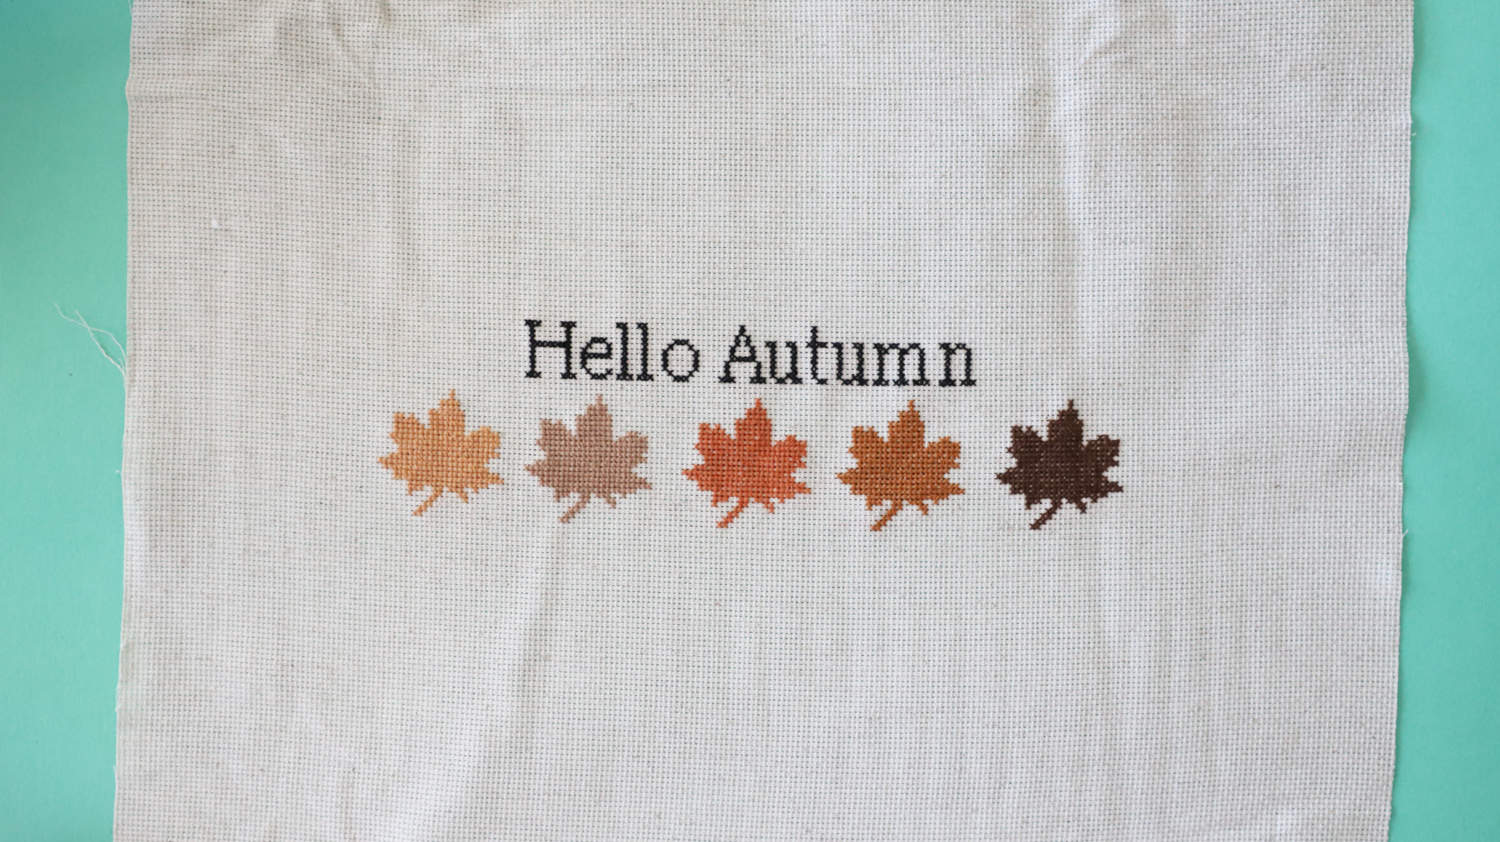
After completing the text and center leaves, adjust the snap frame to finish the leaves on the end.


Step 6. Attach the Aida Cloth to Canvas
Place a heavy book on your finished piece to decrease the wrinkles.
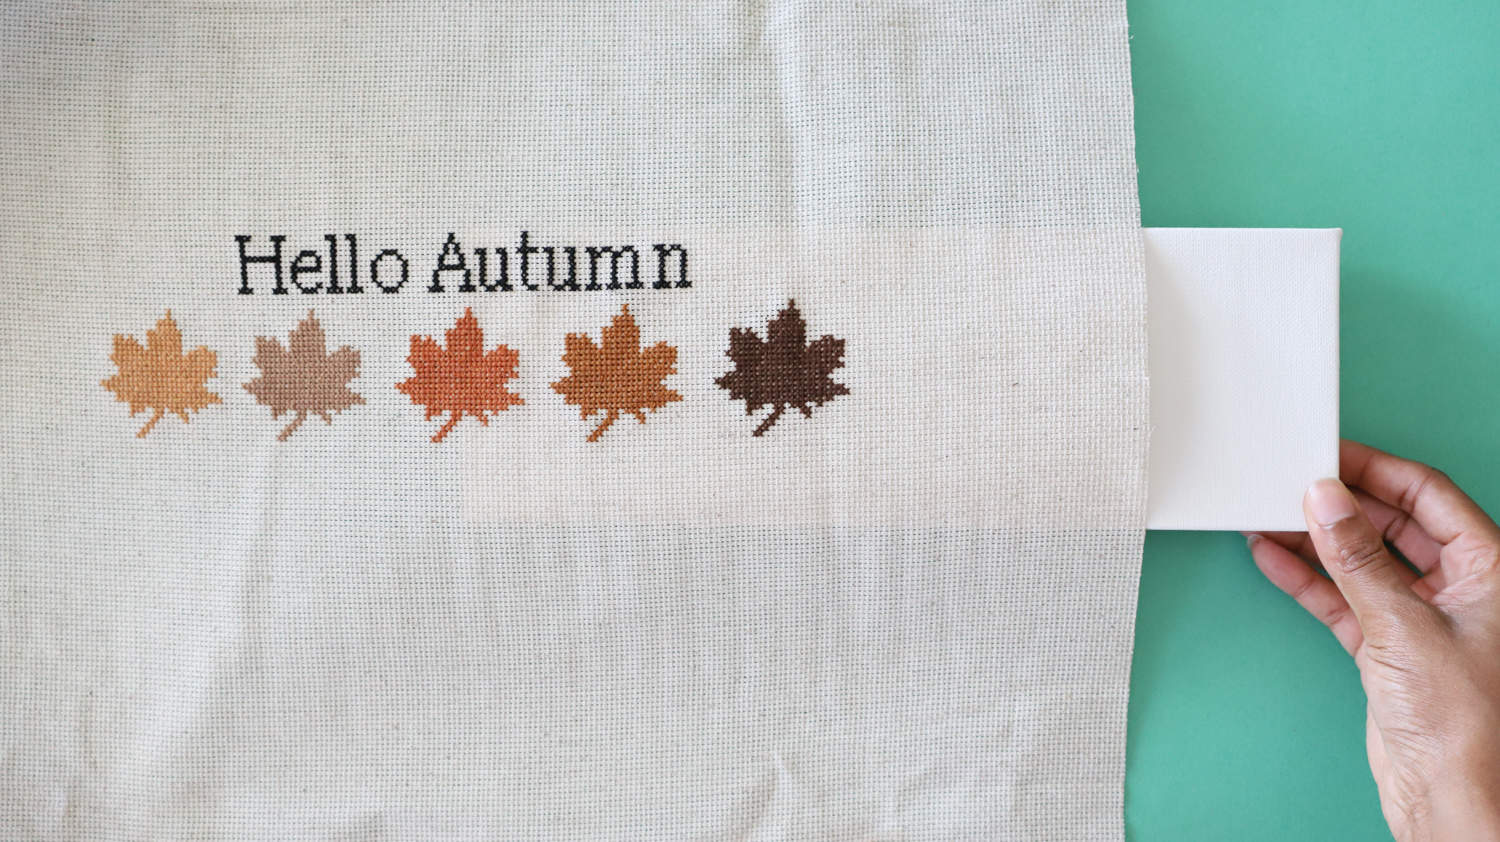

Center the Aida cloth on the canvas, then clamp the sides down to prevent shifting.
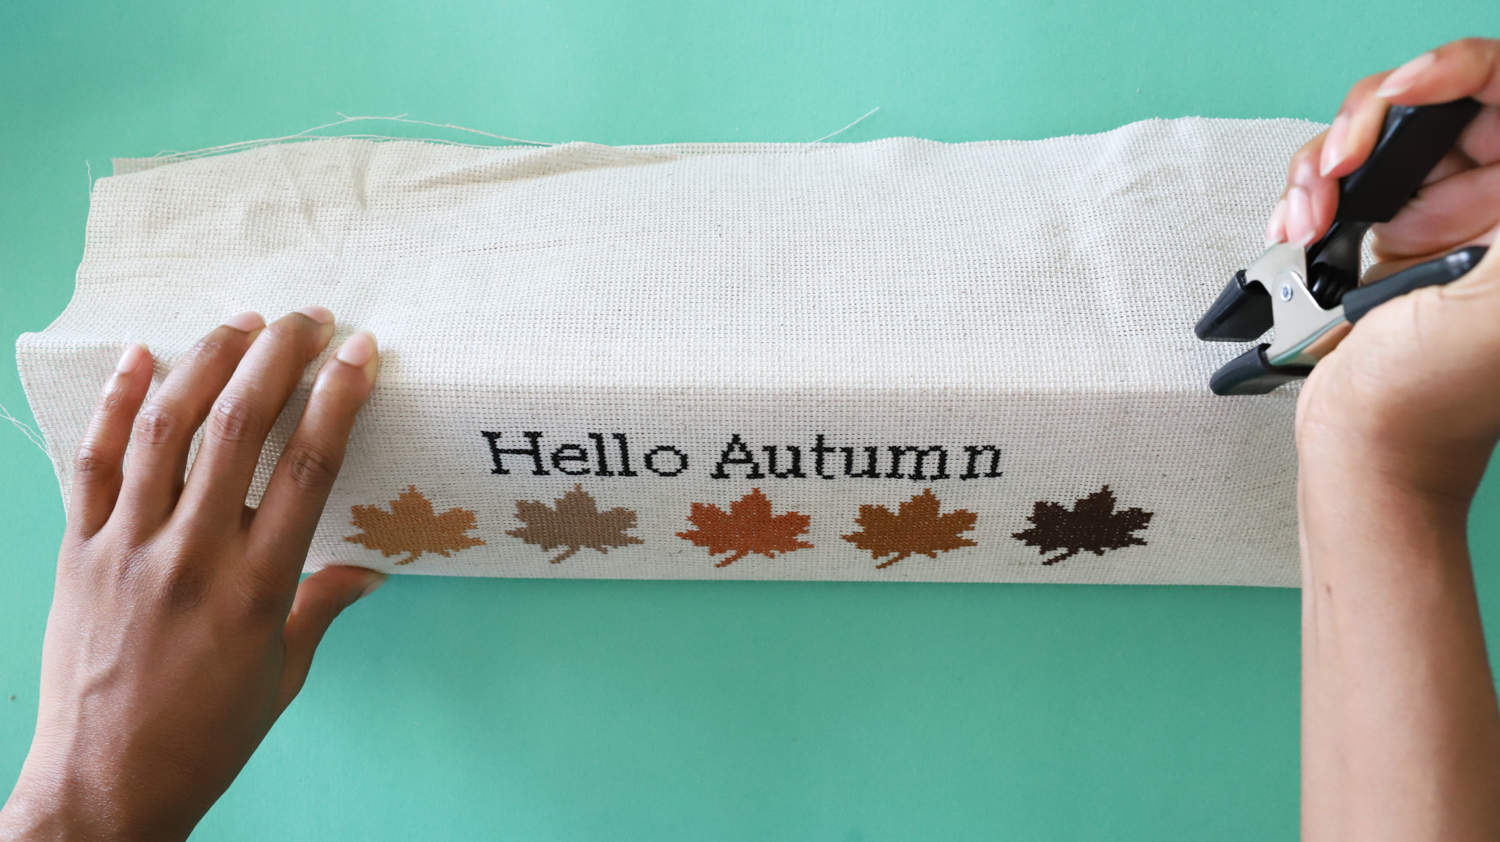
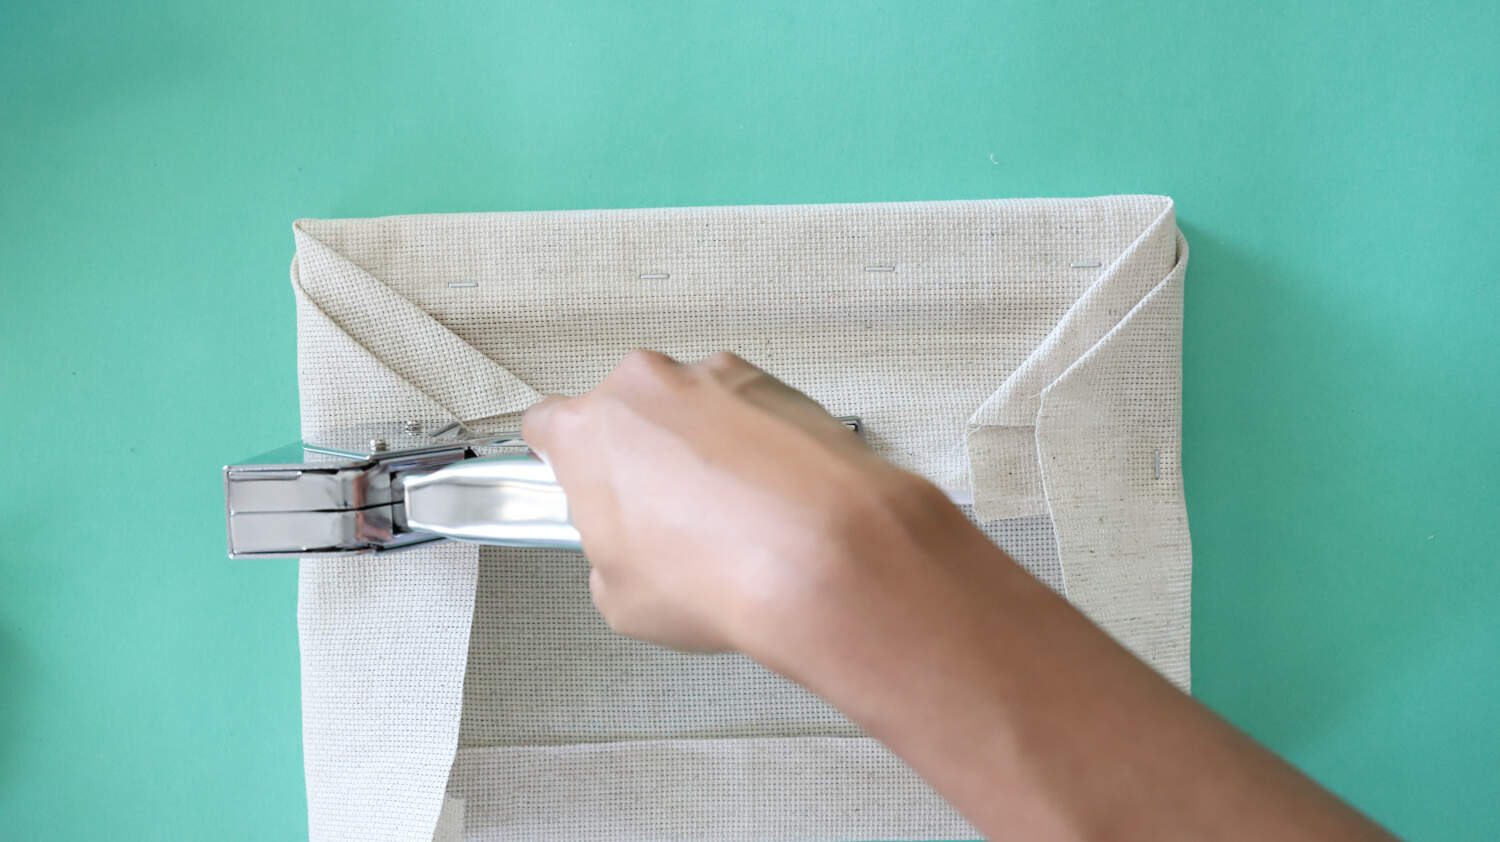
Load the staple gun with 3/8″ staples.

Place the staples low on the back of the canvas to ensure that you don’t come in contact with the other canvas staples.
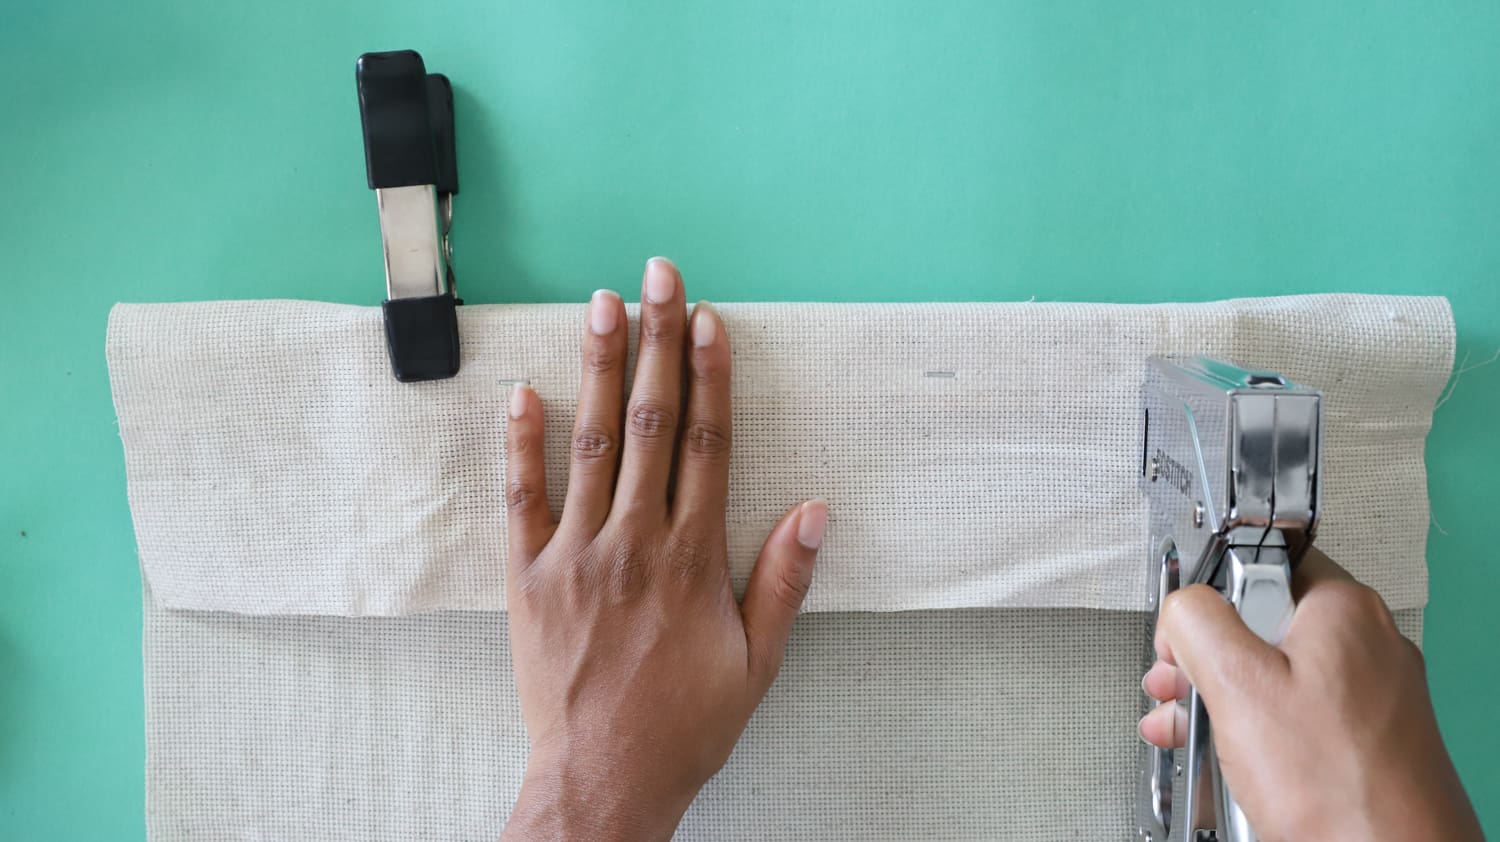
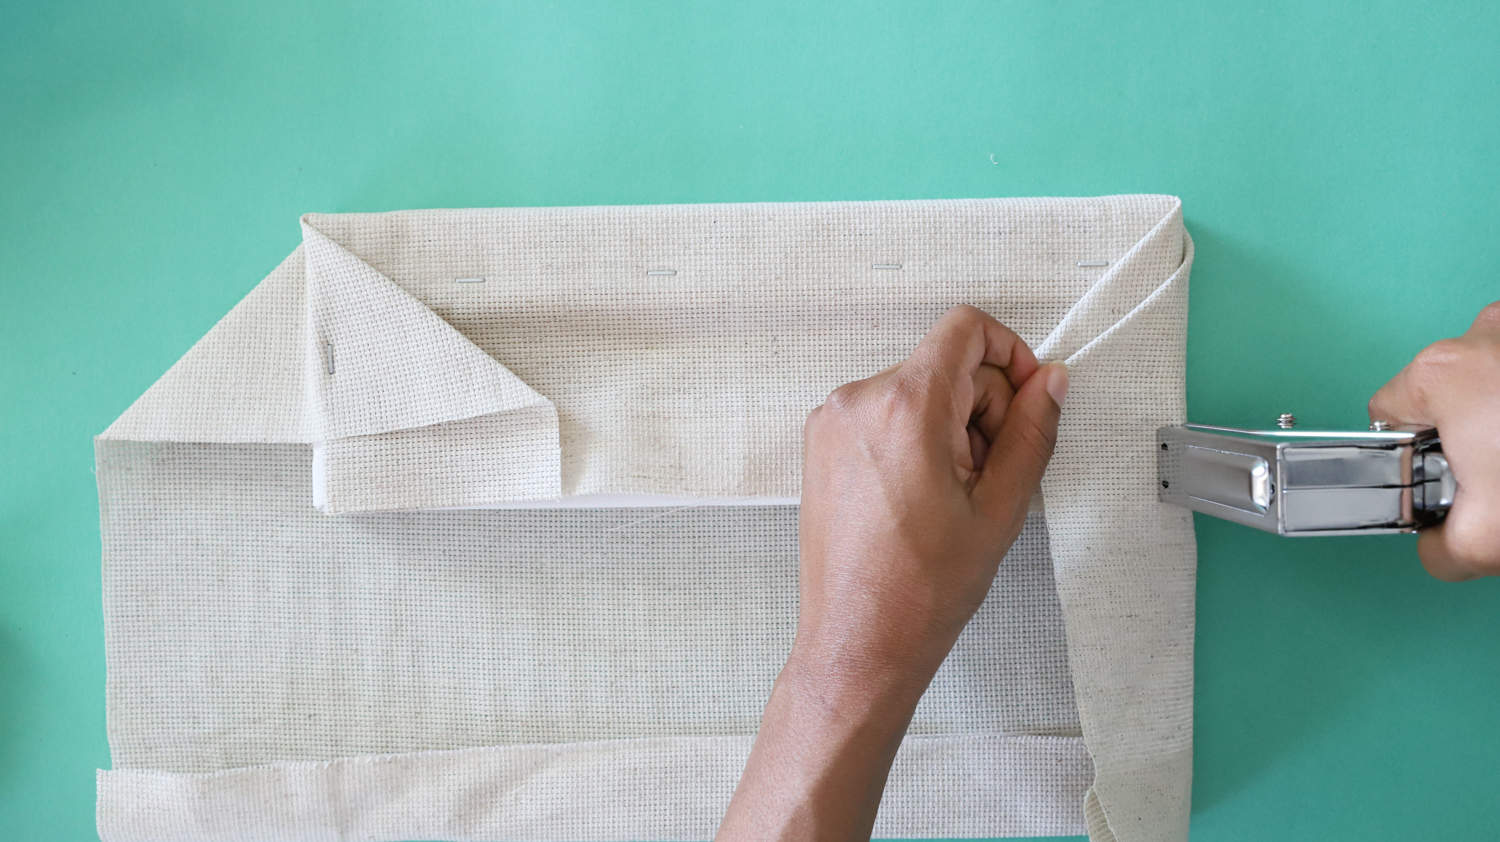
Fold the sides downward like a present, then staple.

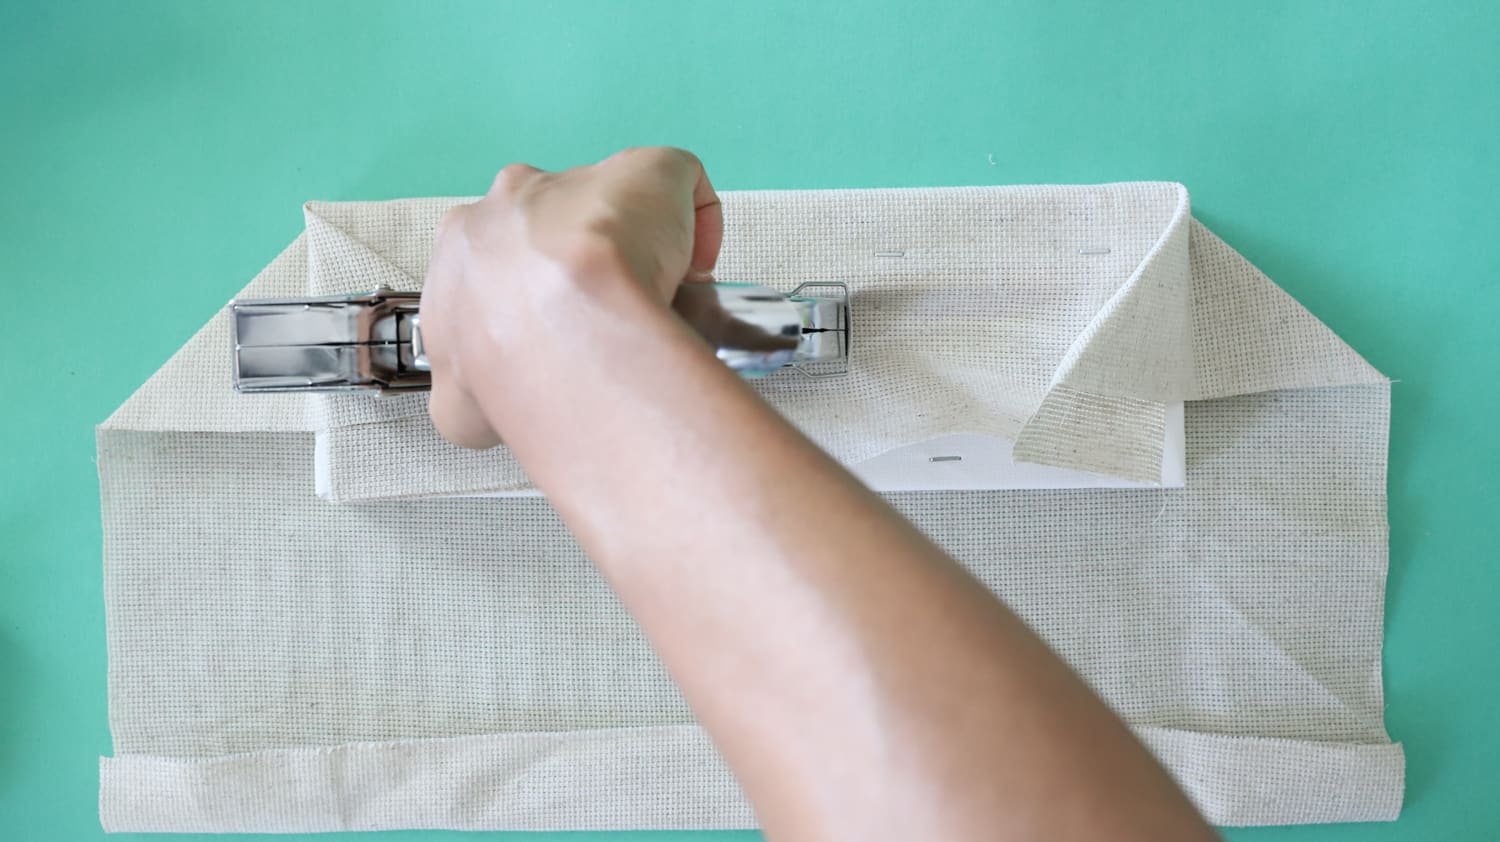
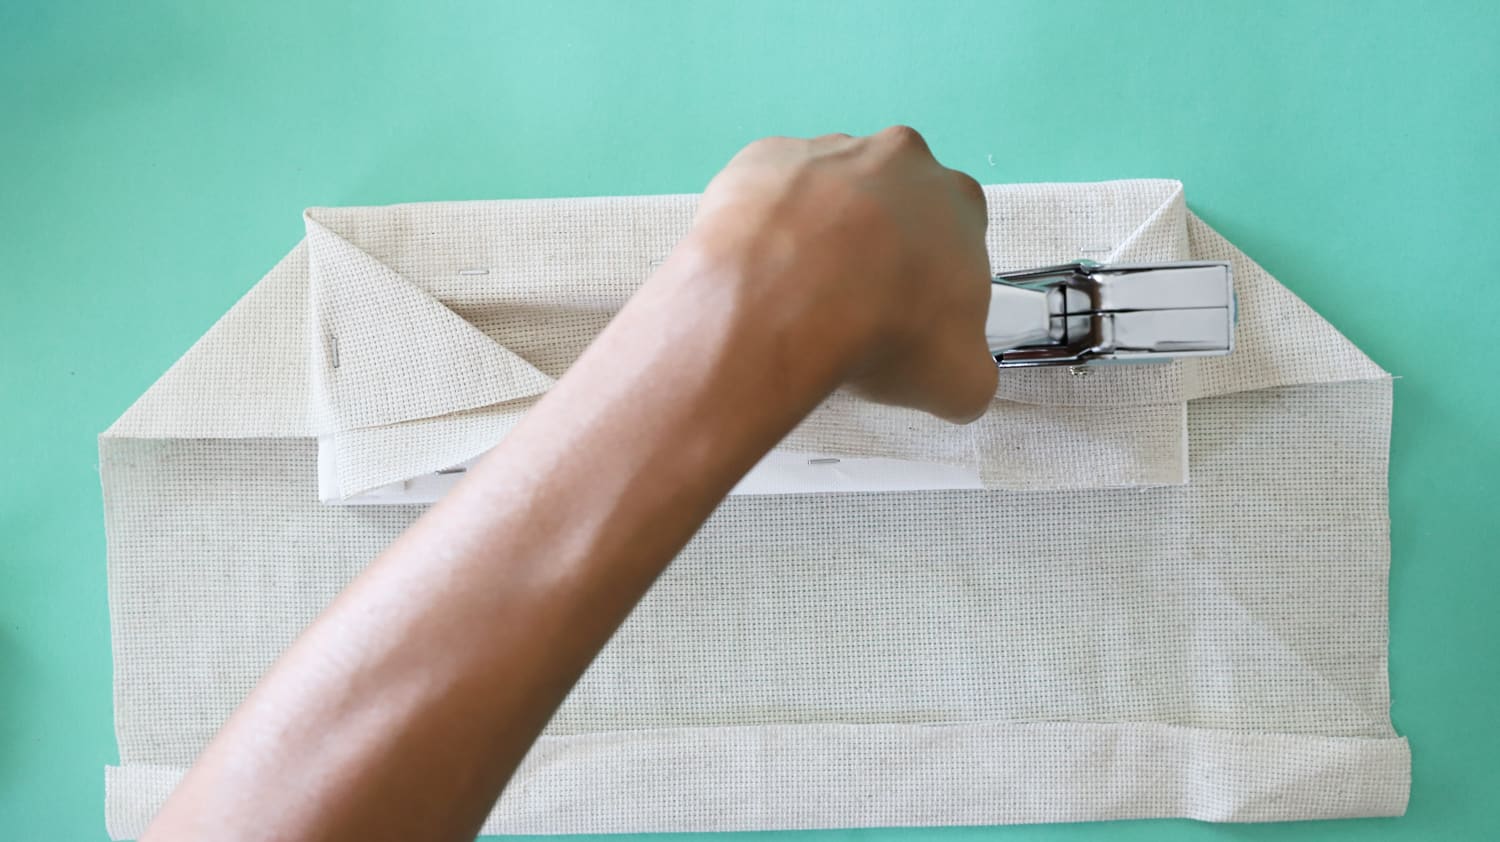
Staple the other folded sides as shown below.
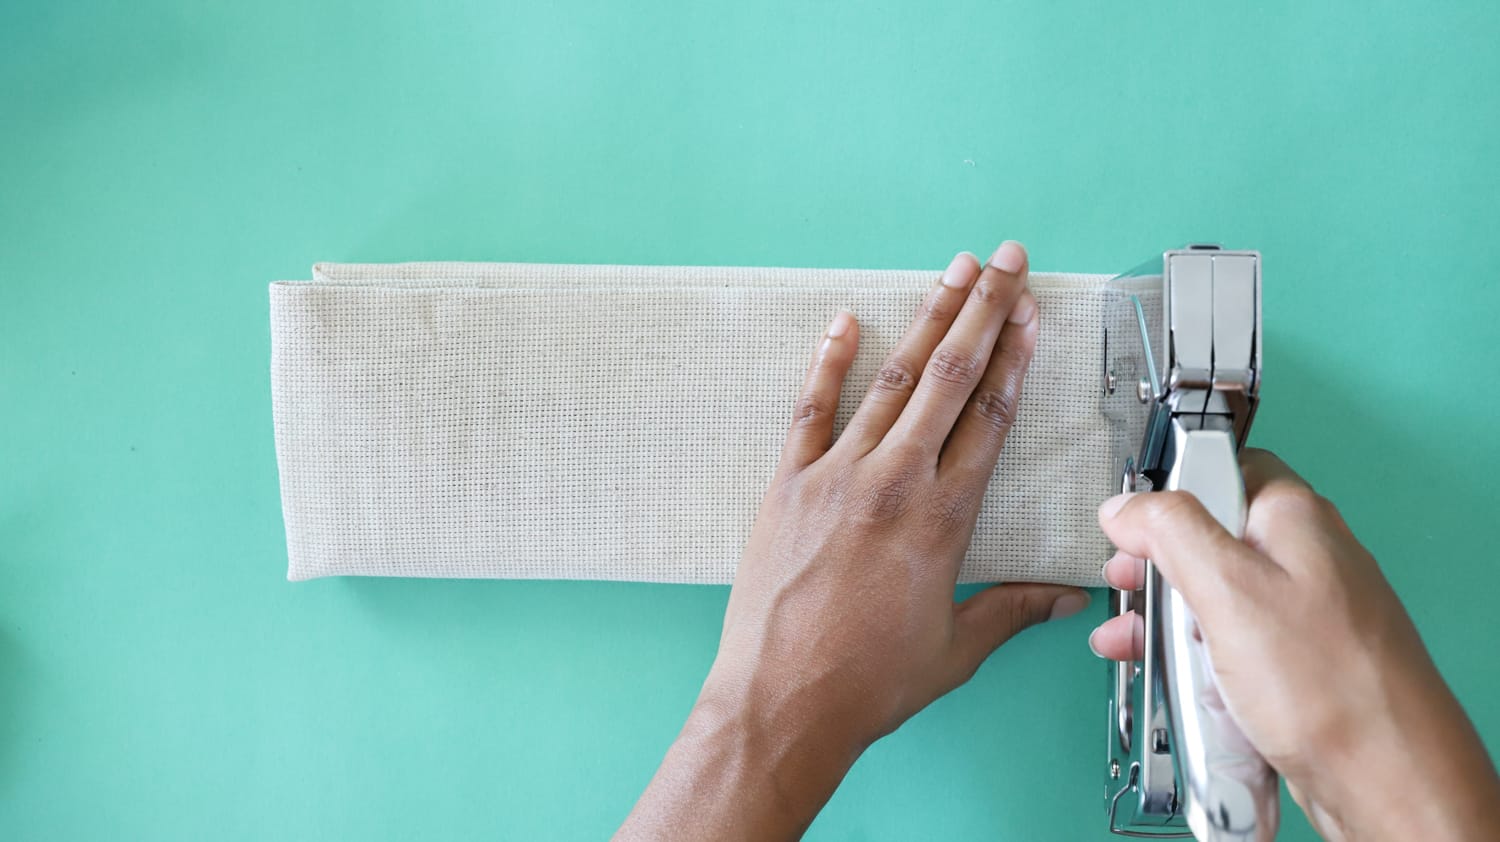
I decided to fold the Aida cloth instead of cutting the excess, but you can trim the cloth if you prefer.
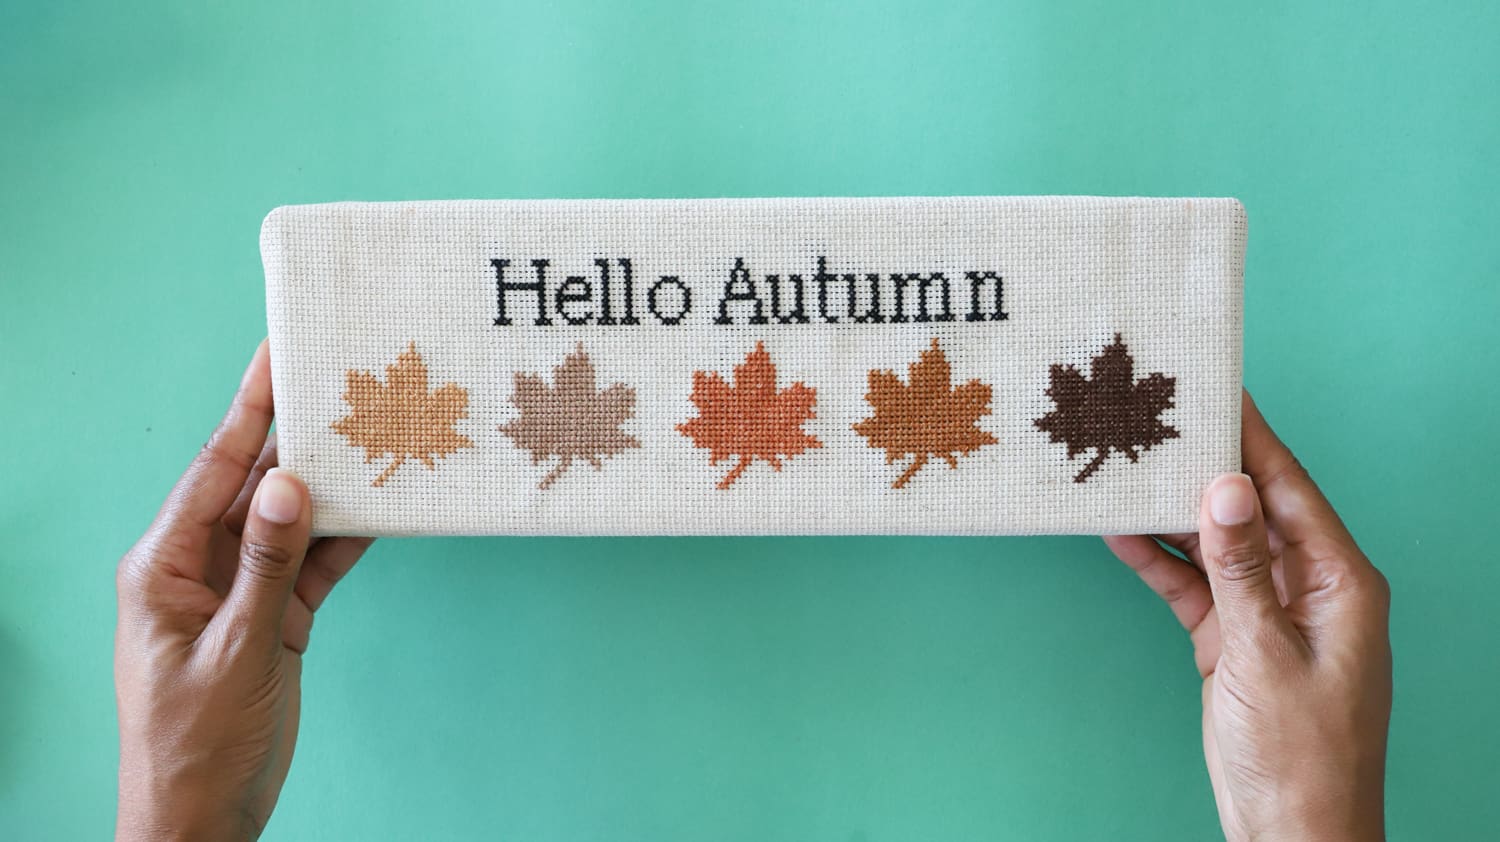
Here’s the finished cross stitch piece attached to canvas!
I hope you enjoyed this cross-stitch tutorial! It’s a wonderful and simple piece that will last a lifetime. Make sure to share this blog with your loved ones and friends.

Well, until next time, have a craftastic day!
-Danielle
Want to check out more of my blogs and tutorials? Here are my social links below!
Blog | Instagram | Facebook | Pinterest | YouTube
Stay connected with Clover on Facebook | Twitter | Instagram | Pinterest | YouTube | Ravelry
[mc4wp_form id=”11289″]