An Eternal Summer of Embroidery
Hello again! It’s Cheri from Tinkinstitches etsy designs and Tinkerellen Instagram land. I want to chat about my favorite thing: embroidery. There’s something I love about how well embroidery and summer go together. As soon as warm weather rolls around I pack a few pouches with projects I can bring along to the beach, swim lessons, park dates and even just to sit in the front yard on a quilt and chat with the neighbors. Embroidery is so versatile and portable because you need very little to start. Basically, a hoop, small scissors, quality fabric, embroidery floss and needles. And most of that fits comfortably in a small pouch. When Clover asked me to design a pattern specific to summer I saw this quote and paired it with my favorite garden flower, the cosmo. I also tried a little version of thread painting which looks stunning but is surprisingly simple to do. I’m going to outline a few stitches for you to get started and if you’re interested, you can purchase the Eternal Summer embroidery pattern here.

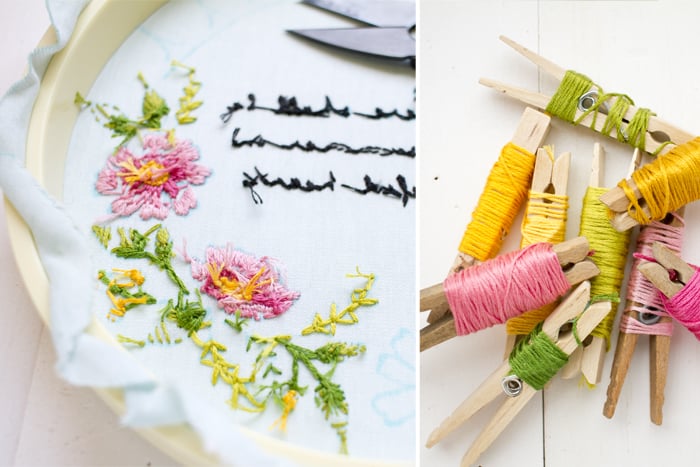
First let’s review a few basics. I find a few of the Clover tools to be absolutely perfect for a project like this. First you have your Water Erasable Marker, the 7″ Embroidery Hoop which holds your fabric so tight and the Thread Clippers. I personally use a needleminder with my projects to keep track of my needle in between thread changes. (I do sell a variety of needleminders in my Etsy shop but you can sometimes find them in your local quilt shop.) I’m stitching on a tight weave poplin fabric here but I usually prefer to use a linen or quality cotton fabric. If you’re questioning your fabric choice, just put it in a small hoop and sew a few stitches to see if you like it.

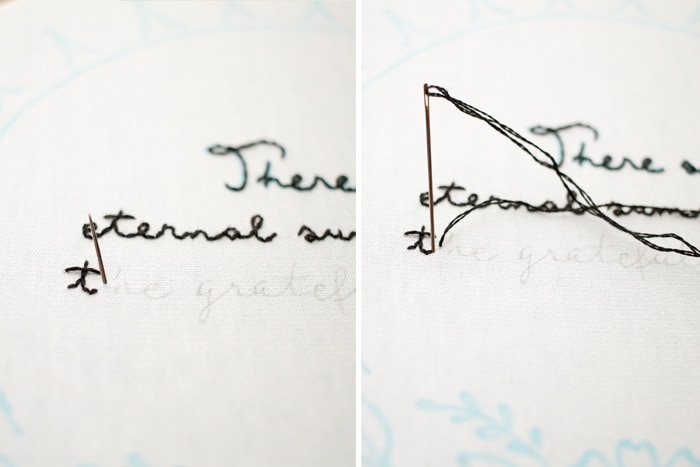
Moving on to how to make the seamless hand writing you see in this design. The key is simple, use a low amount of floss strands (floss comes in 6 strands and can be separated easily, here I’m using 2 strands) and make very small spaces between your stitches. In other words, baby steps with baby floss. Look how cute and tiny that stitch gap is!
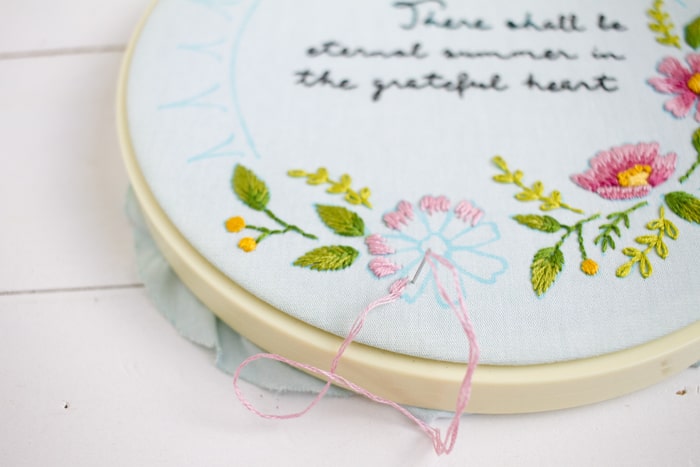
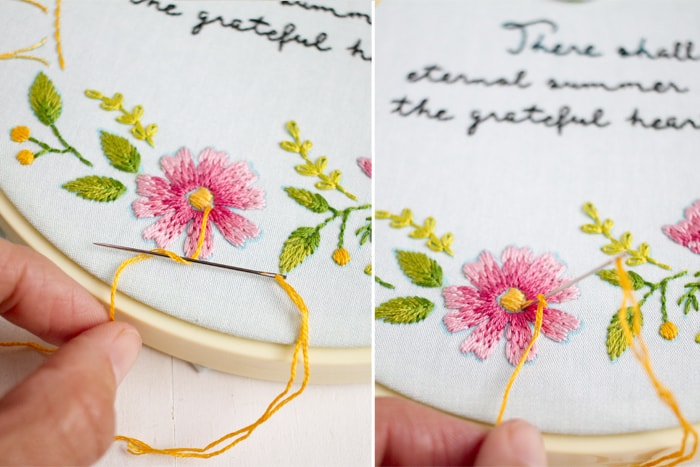
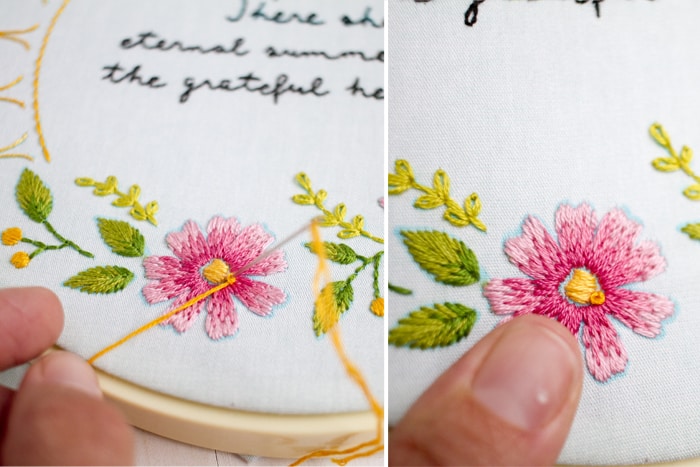
Moving on to our flowers. The gradient makes them look beautiful albeit a bit more daunting than they actually are. This gradient fill is made using a simple straight stitch satin fill but in different sections. I started with the outside of each petal and worked my way inside. Light floss all the way to the darker floss, giving it a more dimensional look.
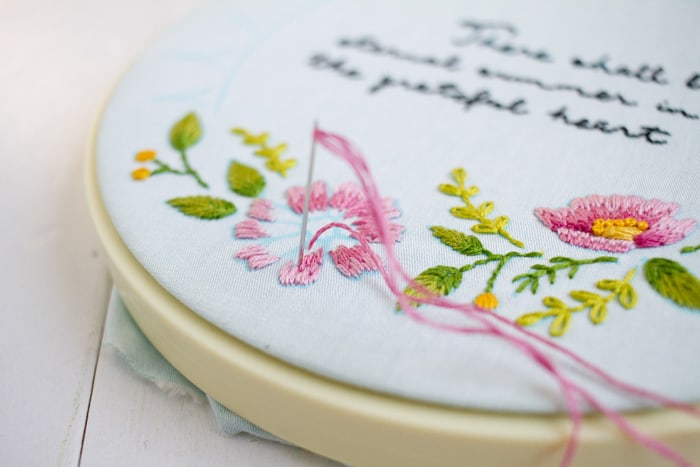
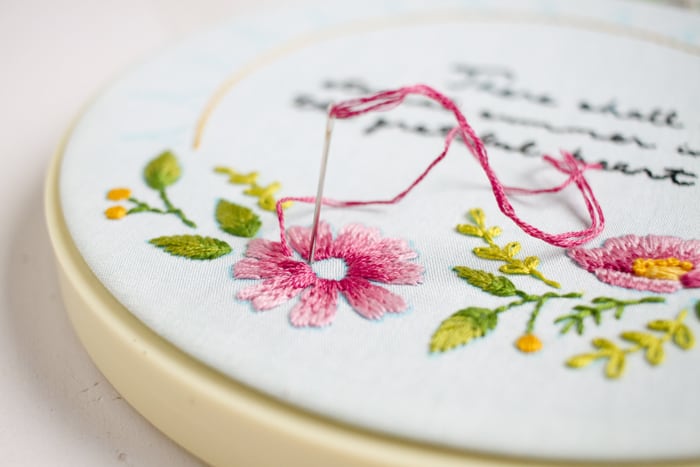
So follow those three steps (1: light, 2: medium, 3: dark) and you’ll have beautiful petals in no time! Next up is working on those flower centers. The absolute center is filled in with a satin stitch but the outer edges are embellished with a french knot. It’s not as hard as you think, or as French. Ha. First you bring your needle through from the back in the spot you want the knot. Then you wrap the thread around the needle like the picture. Classic french knots have you wrap three times, I prefer a smaller more delicate knot so a lot of times I only wrap it once. Now that you have it wrapped, hold the floss tight with your other hand, bring the tip of the needle back to the same spot or very close to where you started and poke the needle through to the back, keeping a hold on your floss as you slowly pull the needle through all the way. Once this is done you have your french knot! Congrats! Now go make 8,762 more. Just kidding, just stitch enough to create a ring around the center of your flowers. Done!
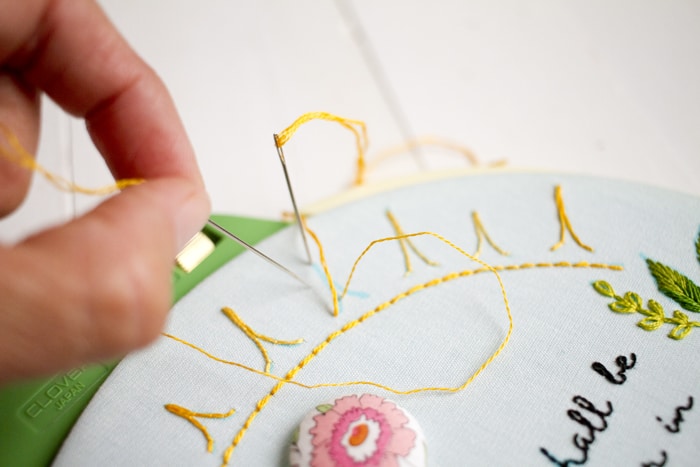
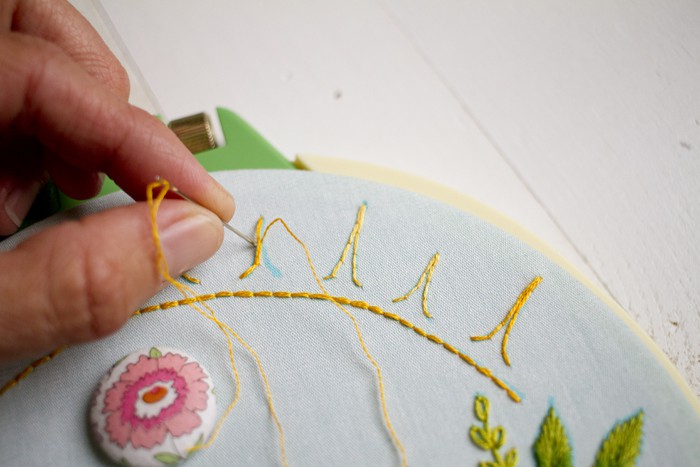
Now to perhaps the most scary stitch, the couching stitch. This one is a little more difficult because you’re operating two needles and threads at a time. But no worries, just take your time and you’ll be fine. Bring the sun ray thread through as one straight stitch from bottom to the top point. But how do I get that lovely curve? Well, bring your other needle through at the curved points and secure your main thread down on the opposite side but still close to the original location. this is basically tying a rope around your sun ray thread to keep it where you want it. It’s that simple! If only life could be couched. Ha ha.
That was really the hardest stitch in this pattern. Wasn’t that fun? Honestly these basic and eye catching stitches can be used for so many different designs. I hope this will give you more confidence to give some of these stitches a chance. And you can always use something to keep your hands busy in those zoom meetings or instead of dishes and emails. Even the back is beautiful, whether you choose to weave your threads in or knot the ends, everyone has a preferred style.
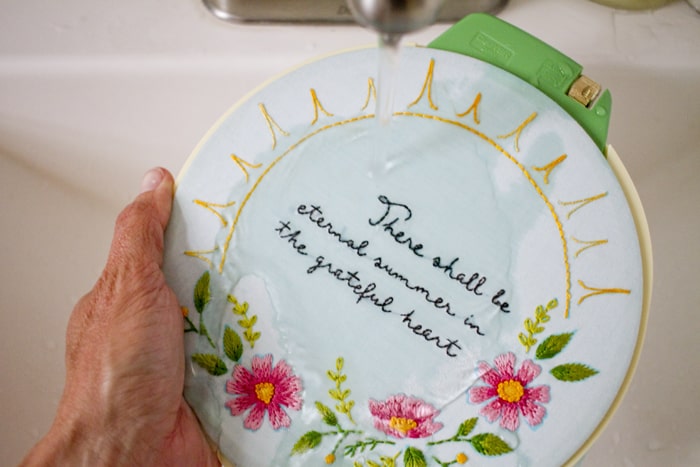
Another quick thing to note is how easy it is to remove your design once you’re finished with it. I just run my whole hoop under cold running water and voila! Set it out to dry and you’ve got a beautiful embroidery to impress, well, yourself. Happy stitching friends.