Natale Stocking – Knit Pattern
Hello Makers! It’s Elise again, the maker and designer behind Frosia Knits. Christmas is just around the corner, and it’s time to decorate for the most magical time of year! My latest pattern, the Natale Stocking, is the perfect addition to your holiday traditional decor.
The Natale Stocking is knit flat from the toe up and then the two sides are joined together in the end. It is a fun knit that might teach you a new technique or two and makes a perfect gift for yourself, your pet, or a loved one.

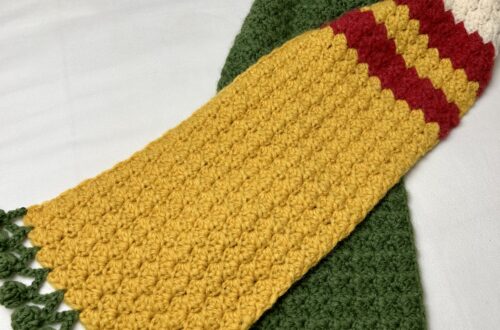
The Natale Stocking pattern was inspired by the Christmas atmosphere I experienced while living in Italy. It all felt so joyous and magical passing by the chestnut vendors and walking through the streets below canopies of twinkling lights. Italy at Christmas time is a must see. Growing up, Christmas was always a big deal in my family and it always revolved around family and spending time with loved ones. My Grandma and Mother filled the house with vintage style Christmas decor every year, so I chose some vintage colors to create my stocking and keep the tradition going. I hope this brings some of that Italian Christmas festivity and joy to you!
Method:
Knitting
Skill Level:
Advanced Beginner
Materials
- 1 skein of Lion Brand Hue + Me Bulky yarn (80% Acrylic, 20% Wool). Each skein is 137 yds (125m). You will need about 68 yds (62 m).
- 1 skein of Lion Brand Wool-Ease Thick & Quick Super Bulky yarn (80% Acrylic, 20% Wool). Each skein is 106 yds (97m). You will need about 30 yds (28m). You can easily substitute any bulky and super bulky yarn, just make sure to check your gauge.
- Takumi Knitting Needles US 10.5 (6.5 mm) – Art. No 3012/10.5
- Tapestry Needle Set (Bent Tip) – Art. No 3121
- Mini Patchwork Scissors – Art. No 493/CW
- Spring Tape Measure – Art. No 806
Finished Size (laid flat with cuff folded over)
- Height = 12“
- Circumference = 10″
Gauge
10 sts + 14.5 rows = 4” in stockinette
Abbreviations
- CO cast on
- k knit
- p purl
- m1L make one left
- m1R make one right
- pso pass stitch over – pass second to last stitch over your last stitch
- wyib with yarn in back – bring yarn to back of work if not already there
- k2tog knit two stitches together
- ssk slip slip knit
- hb horizontal braid stitch
- st(s) stitch(es)
- BO bind off
Horizontal Braid Stitch Explanation
- Knit through the back loop of the 2nd st (do not pull sts off of left needle)
- Knit into the front loop of the 1st st on left needle
- Pull those two sts you just worked off of left needle
- Pass one st from right needle back to left needle
Important: On the last stitch you create in the horizontal braid stitch, do not pass the last stitch from your right needle back to the left needle.
Pay careful attention to the instructions in the pattern for the first and last stitches of the horizontal braid rows. They are not all the same on purpose.
Check out my instructional videos for the horizontal braid stitch and the m1L and m1R increase stitches on IGTV here
Notes
This pattern is knit flat from the toe up and the two sides are joined together in the end. It can be worked with any two increasing weights of yarn (ie dk and worsted, worsted and bulky, etc). Just make sure to select the appropriate needle size for the yarn you are working with.
For example if you used DK & worsted weight yarn instead with size 8 needles the stocking would be about 9″ in height and 6″ in circumference.

Natale Stocking Pattern – Side 1:
Long Tail CO 8 sts with smaller weight yarn
Row 1: p to end of row
Row 2: k1, m1L, knit to last st, m1R, k1 (2 sts increased)
Repeat row 1 & row 2 three more times (16 sts)
Row 9: p to end of row
Row 10: CO 1, *hb repeat from * to last st, m1R, pso, k1 (17 sts)
Row 11: k1, *p1, k1 repeat from * to end of row
Row 12: *k1, p1 repeat from * to last st, wyib m1R, k1 (18 sts)
Row 13: *p1, k1 repeat from * to end of row
Row 14: CO1, *hb repeat from * to last st, m1R, pso, k1 (19 sts)
Row 15: p to end of row
Row 16: k1, k2tog, k to last st, m1R, k1 (19 sts)
Repeat row 15 & 16 two more times
Row 21: p to end of row
Row 22: *hb repeat from * to last st, k1, pso (18 sts)
Row 23: *k1, p1 repeat from * to end of row
Row 24: k2tog, *p1, k1 repeat from * to end of row (17 sts)
Row 25: *k1, p1 repeat from * to end of row
Row 26: *hb repeat from * to last st, k1, pso (16 sts)
Row 27: p to end of row
Row 28: k to end of row
Repeat row 27 & 28 two more times
Row 33: p to end of row
Row 34: CO1, *hb repeat from * to last st, k1, pso
Row 35: *k1, p1 repeat from * to end of row
Row 36: *p1, k1 repeat from * to end of row
Row 37: *k1, p1 repeat from * to end of row
Row 38: CO1, *hb repeat from * to last st, k1, pso
Row 39: p to end of row
Row 40: k to end of row
Repeat row 39 & 40 two more times
Row 45: p to end of row
Row 46: k to end of row, CO 36
Row 47: BO 36, p to end of row
Break the yarn and change to larger yarn weight
Row 48: k to end of row
Row 49: *k1, p1 repeat from * to end of row
Repeat Row 49 eleven more times
BO in pattern

Natale Stocking Pattern – Side 2:
Long Tail CO 8 sts with smaller weight yarn
Row 1: p to end of row
Row 2: k1, m1L, knit to last st, m1R, k1 (2 sts increased)
Repeat row 1 & row 2 three more times (16 sts)
Row 9: p to end of row
Row 10: CO 1, *hb repeat from * to end of row (17 sts)
Row 11: k1, *p1, k1 repeat from * to last st
Row 12: k1, m1L, *p1, k1 repeat from * to end of row (18 sts)
Row 13: *k1, p1, repeat from * to end of row
Row 14: CO 1, *hb repeat from * to end of row (19 sts)
Row 15: p to end of row
Row 16: k1, m1L, k to last 3 sts, ssk, k1 (19 sts)
Repeat row 15 & 16 two more times
Row 21: p to end of row
Row 22: *hb repeat from * to last st, k1, pso (18 sts)
Row 23: *k1, p1 repeat from * to end of row
Row 24: p1, *k1, p1 repeat from * to last 3 sts, ssk, p1 (17 sts)
Row 25: p1, *k1, p1 repeat from * to end of row
Row 26: *hb repeat from * to last st, k1, pso (16 sts)
Row 27: p to end of row
Row 28: k to end of row
Repeat row 27 & 28 two more times
Row 33: p to end of row
Row 34: CO1, *hb repeat from * to last st, k1, pso
Row 35: *k1, p1 repeat from * to end of row
Repeat Row 35 two more times
Row 38: CO1, *hb repeat from * to last st, k1, pso
Row 39: p to end of row
Row 40: k to end of row
Repeat row 39 & 40 three more times
Row 47: p to end of row
Break the yarn and change to larger yarn weight
Row 48: k to end of row
Row 49: *k1, p1 repeat from * to end of row
Repeat 49 eleven more times
BO in pattern

Finishing the Stocking
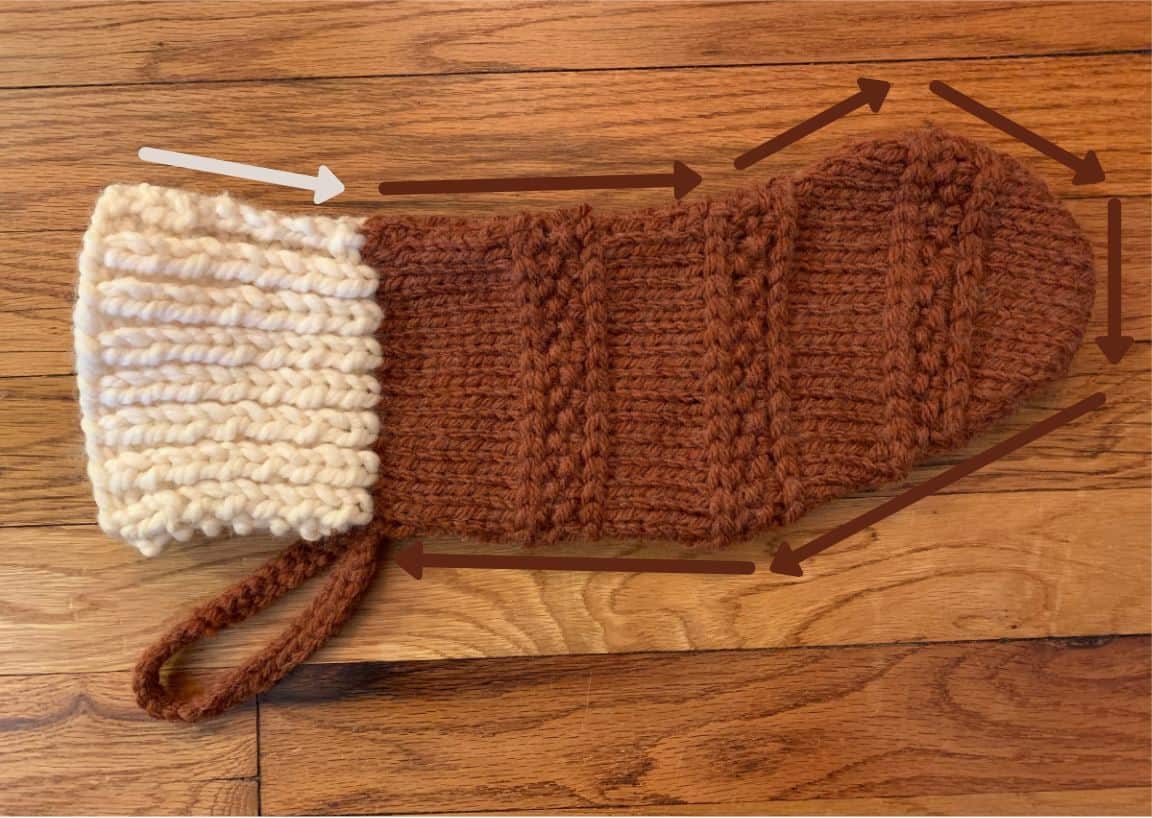
Match up the two sides and seam around the stocking as shown below. We will be flipping the cuff down so make sure to seam on the side that will not be seen. (do not seam the side of the cuff where the loop is)
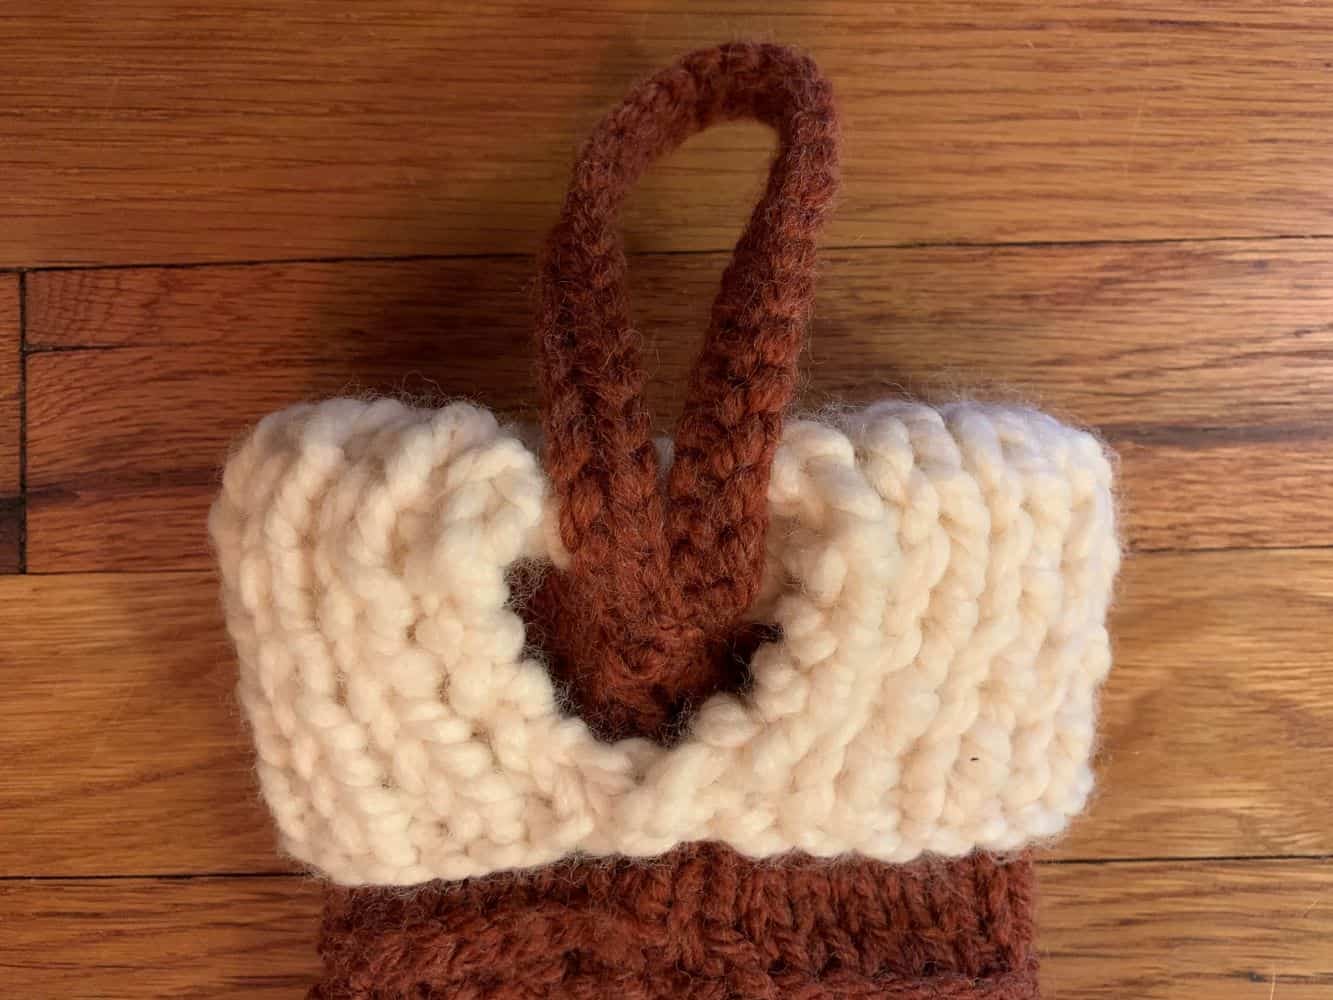
Tack the end of the loop together. Fold down the ribbed cuff and tack together the bottom corners of the cuff underneath the loop as seen in the photo below. Weave in all ends.
This pattern is free but you may also purchase the inexpensive PDF file in my Etsy shop for easy printing and reading. If you’d like a printable version of the pattern, you can find that here.
Don’t forget to follow Frosia Knits on social media for more updates and to share your finished projects tagging @FrosiaKnits and with the hashtag #NataleStocking!
*****
All photos and instructions in this pattern are the property of Frosia Knits. Do not publish or share this pattern as your own. You can sell the items you make from this pattern by crediting Elise Ljiko from Frosia Knits, linking to my Etsy site, and using your own photos.
Find Frosia Knits on Instagram | Pinterest | Etsy | Ravelry | Facebook

Stay connected with Clover on Facebook | Twitter | Instagram | Pinterest | YouTube | Ravelry
[mc4wp_form id=”11289″]