Florence Wall Hanging – Tunisian Crochet Pattern
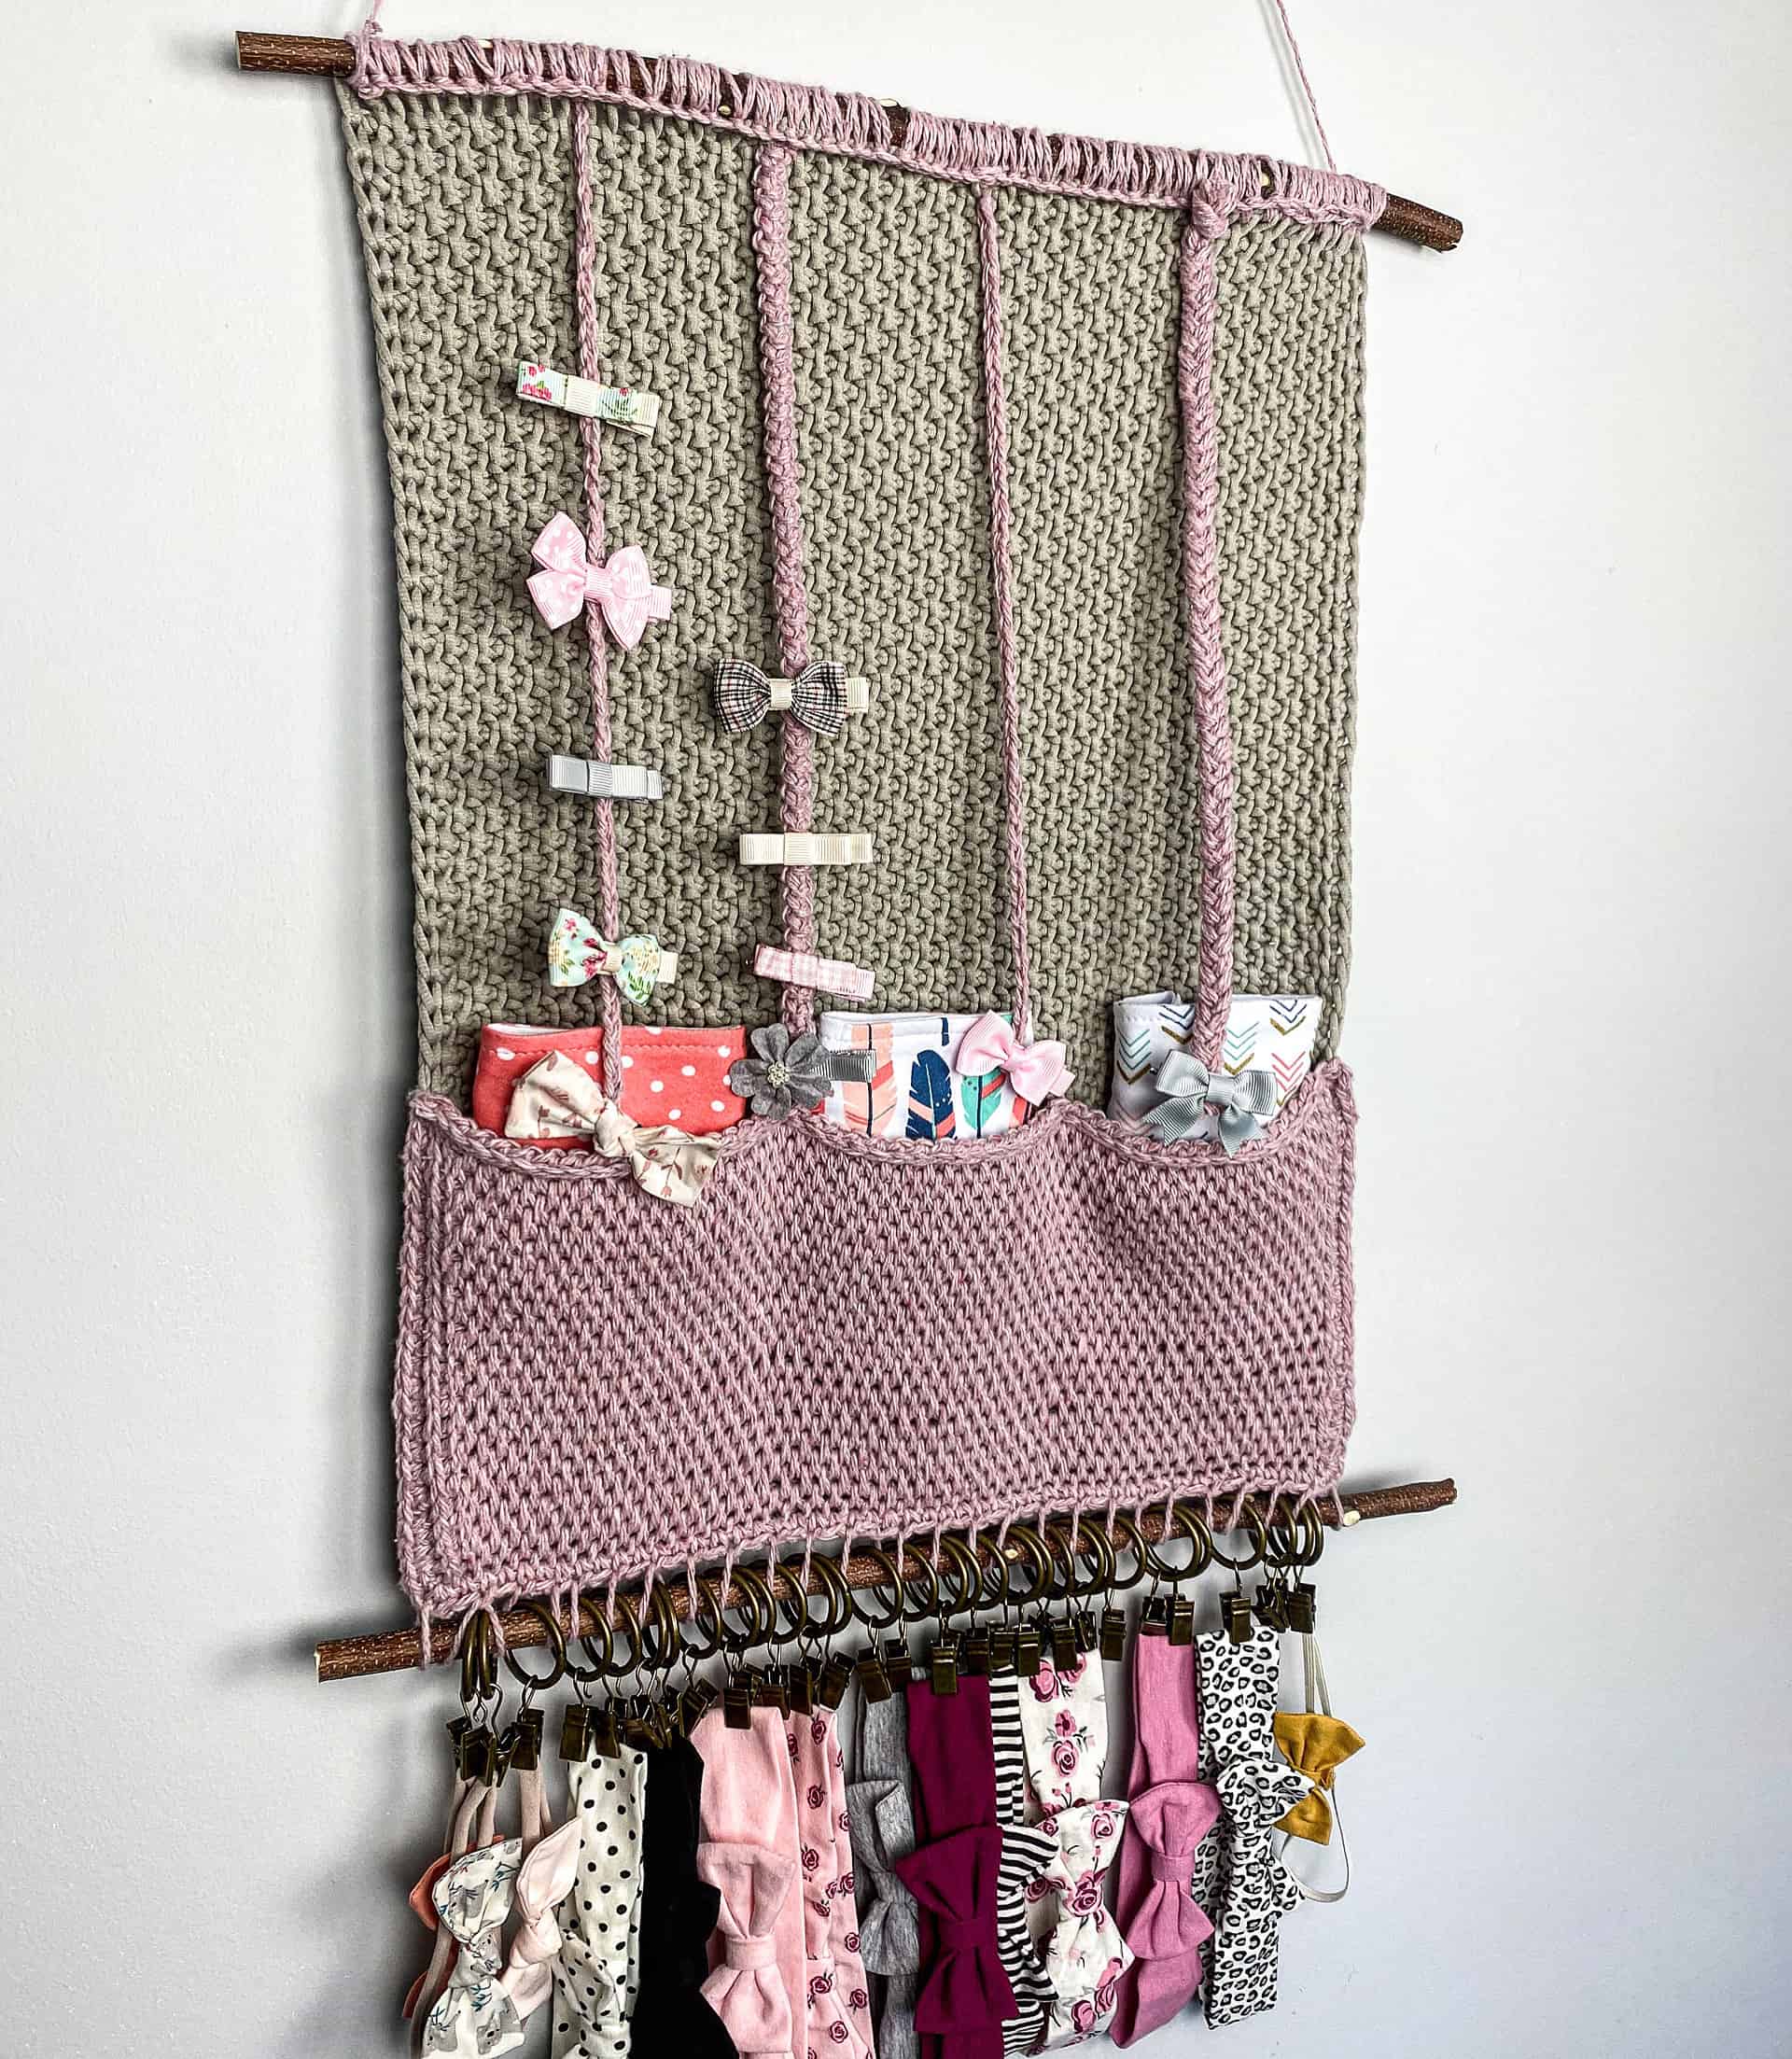
This fun and functional wall hanging can be so versatile – use it for the nursery room to store all the bibs and bows/headbands. Use it for your craft room to keep your hooks, needles and notions organized. It is pretty easy to make and assemble and the possibilities are endless!
Materials:
- Interchangeable Tunisian Crochet Hook, Size J/6.0 mm (Art. No 3696)
- Interchangeable Cord 29″ (Art. No 3647)
- Interchangeable Cord Stopper (Art. No 3651)
- All components can also be found in the Takumi Interchangeable Tunisian Set (Art. No 3684)
- Darning Needle Set (Art. No 339)
- Mini Patchwork Scissors (Art. No 493/CW)
- Locking Stitch Markers (Art. No 353)
- 250-350 yards of worsted weight (Category 4 or 5) yarn such as Bernat Maker Home Dec or Lion Brand Yarn Re-tweed (used for the pockets for this particular wall hanging) or any similar yarn weight
- 2 dowels or rods or sticks (18”)
- Rings with clips – optional – for nursery organizer for the headbands
Difficulty Level:
Beginner
Finished Size:
18” x 22” (main part); 18” x 7” (pockets)
You can customize the size of your wall hanging by adding or subtracting sts from the main part and the pockets (main part needs to have an odd number of sts and pockets part can have any number of sts – just has to be the same amount as in the main part)
Abbreviations:
- ch: chain
- sl st: slip stitch
- sp: space
- sk: skip
- sc: single crochet
- tss: Tunisian simple stitch
- st: stitch
- sts: stitches
- tfs: Tunisian full stitch
- tks: Tunisian knit stitch
- tps: Tunisian purl stitch
Gauge:
14 sts x 12 rows of 4” x 4 ” of tss
Notes:
- This pattern is written in American Standard Terms.
- Last stitch (selvage) is always worked into 2 vertical bars at the very end of the work, as shown in instructional videos.
- For you convenience I recorded 3 videos describing each stitch used in this design.
Instructions:

Main Part (Honeycomb Stitch)
Foundation Row 1: ch 61, pick up 60 loops, ch 1, make return pass. (61)
Video for Foundation Row:
Video for Honeycomb Stitch:
Row 2: *tss, tps* across until last 2 sts, tss 1, work last selvage st, ch 1, make return pass. (61)
Row 3: *tps, tss* across until last 2 sts, tps 1, work last selvage st, ch 1, make return pass. (61)
Row 4-66: repeat rows 2-3.
Row 67: sl st in each vertical bar across row.
Pockets
Video for Tunisian Stitch #25:
Make sure to work these tfs sts loosely so it curls less.
Foundation Row 1: ch 61, pick up 60 loops, ch 1, make return pass. (61)
Row 2: tks 1, tfs in 58 spaces, sk 1 sp, tks 1, work last selvage st, ch 1, make return pass. (61)
Row 3: tks 1, sk 1 sp, tfs in 58 spaces, tks 1, work last selvage st, ch 1, make return pass. (61)
Row 4-18: repeat rows 2-3.
Row 19: sl st in each vertical bar across row.
Wall Hanging Assembly
Right sides facing, lay the pockets right side facing up, on the right side of the fabric. Starting from the right side of the top part of the pockets, sc the two layers together down the sides, sc 2 in the corner, sc along the bottom part of both pieces, sc 2 in the second corner, sc up the left side of these pieces. If you prefer, you can sew the sides instead of sc.
Count 20 sts from the left side of the pocket fabric, place a stitch marker, count 20 more, place another marker. To create pockets – sew from the marker down to the bottom of the piece. You can also create just 2 pockets – then you will need to count 30 sts from the left side of the pocket fabric to the middle of it and sew that way.
Attaching the dowels
Place the dowel in the middle of the top part of the wall hanging – make sure it’s well centered (especially if you are using a “rough” stick) since the sts won’t move around. Insert your hook into the first st, yarn over and wrap it around the dowel, sc this way across. Weave in all the ends.
Here is a good video on that by Teresa of DeBrosse:
To attach the dowel with rings – use the needle. Insert the needle in the first st, wrap around the dowel, place 1-2 rings on the dowel (depending how many you would like to have total), insert the needle into the next st, and keep going this way till the very end of the piece. Weave in all the ends.

Clip Holders (Optional)
Make as many holders as you would like.
Style 1: Chain the length from the top of the piece till the pockets, tie it to the top.
Style 2: Cut 12 strands of yarn and braid them until the braid reached the pockets, secure both ends and tie to the top dowel.
Style 3: Crochet a basic cord, my favorite cord is this one:
Ch 2, insert your hook into the back loop of the second ch from the hook, sc, rotate your work and insert the hook going from top to bottom into the vertical bar on the back, yo, pull up a loop, yo and pull up a loop again, now rate your work and you will see two horizontal bars, insert your hook through both of them, pull up a loop, yo, pull through both loops. Keep working this way till the length reaches the pockets of the wall hanging. Tie this holder to the top dowel.
Basic crochet cord:
Share all your finished work with the hashtag #FlorenceWallHanging, I would love to see them! Thank you for crocheting with me!
**NOTE** If you choose to sell items made from this pattern, please credit my shop (AnyutaDesigns, IG: @anyutadesigns) for the pattern. Please do not rewrite, reprint or share/sell this pattern in any way. This is only for personal use WITH the exception of selling items made from it. Thank you very much!
If you have any questions, send them to anyutadesigns@gmail.com
Find Anyuta Designs on her Blog | Instagram | Twitter | Facebook | Pinterest | Etsy | Ravelry
Stay connected with Clover on Facebook | Twitter | Instagram | Pinterest | YouTube | Ravelry
[mc4wp_form id=”11289″]