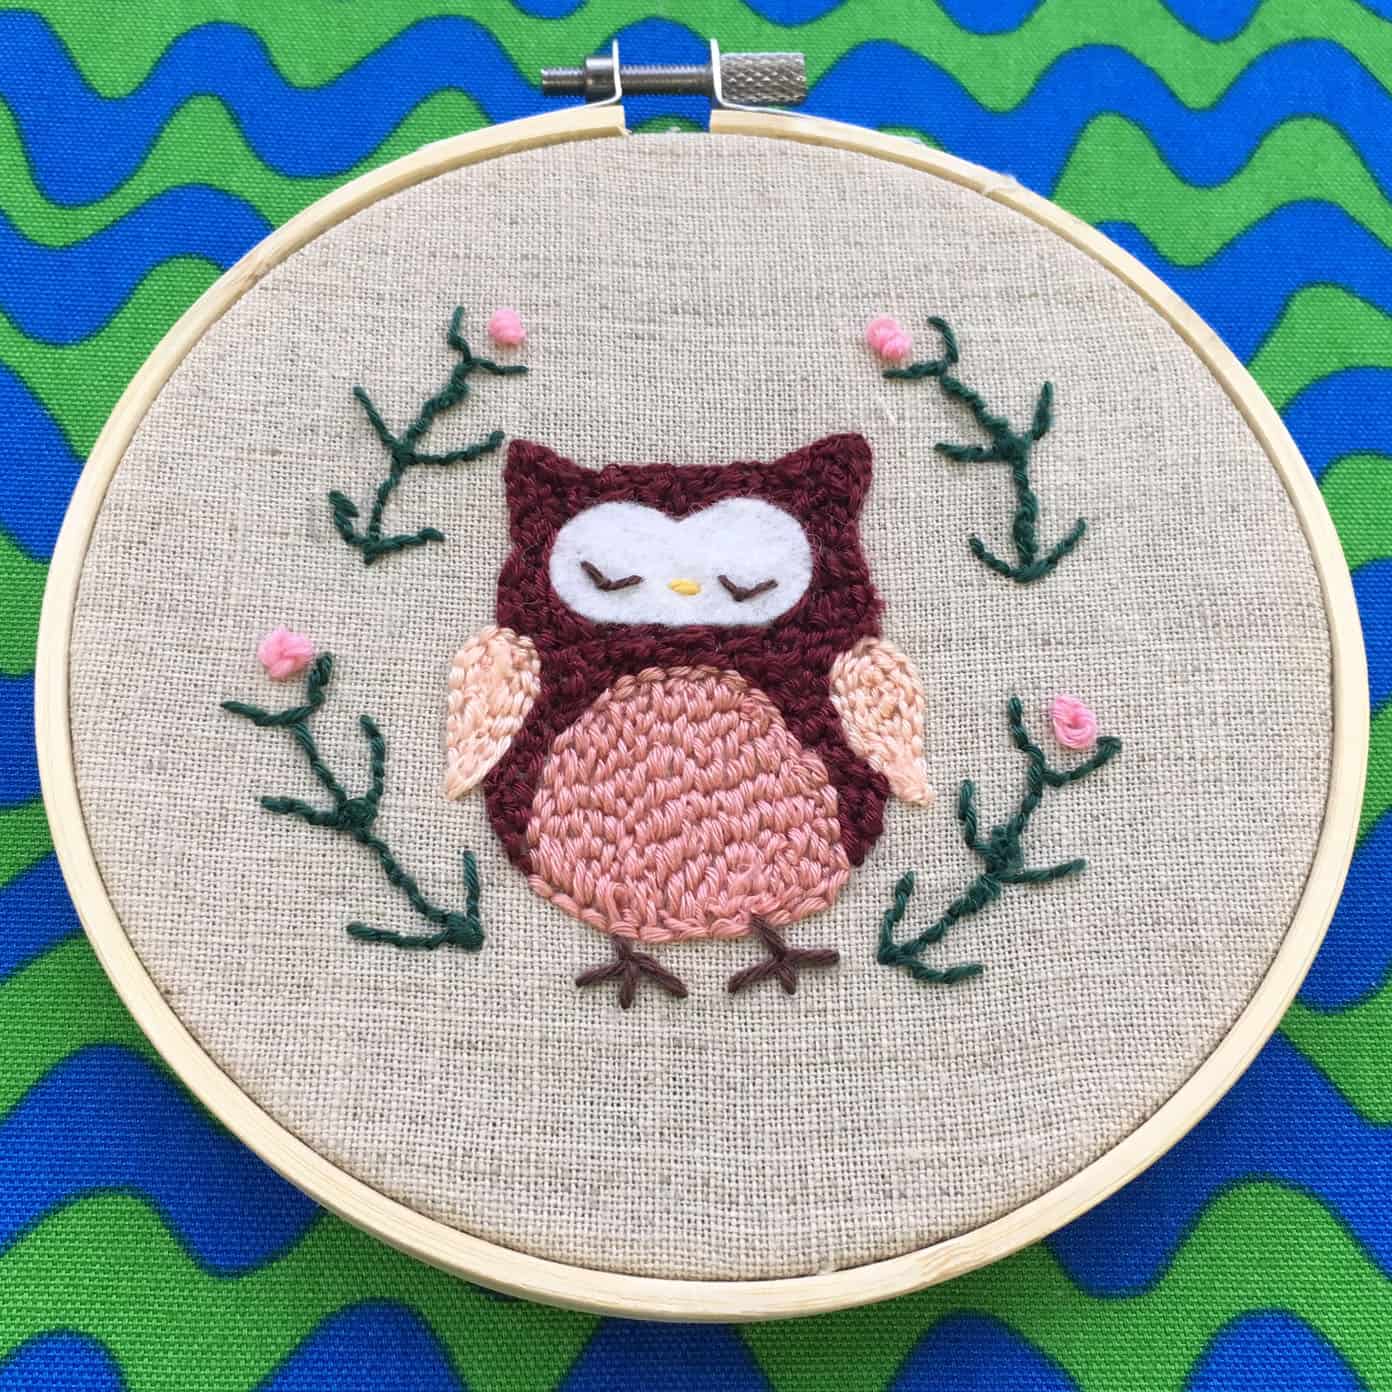
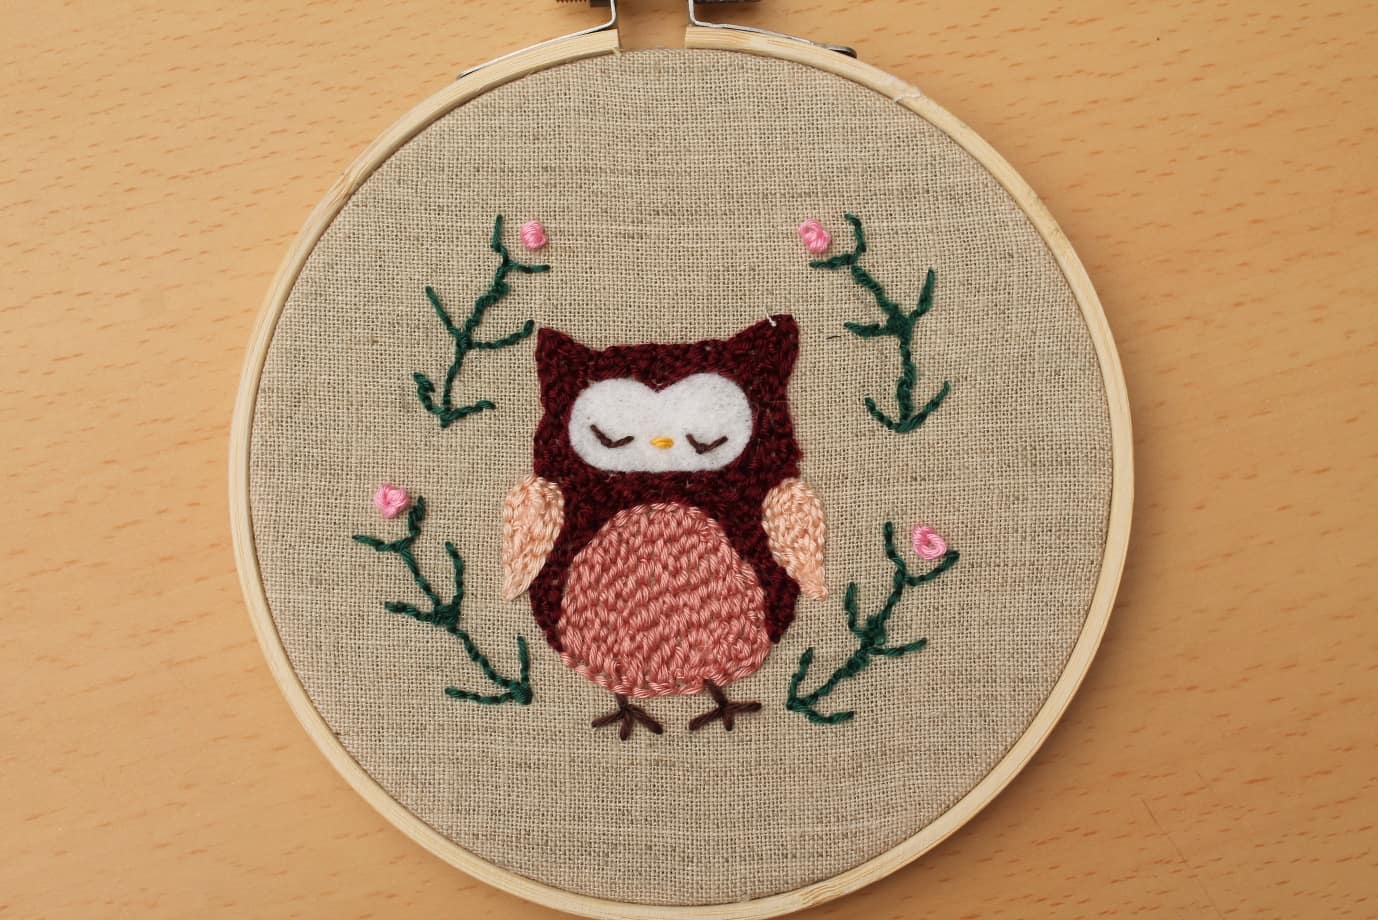
Punch Embroidered Owl
Hand embroidery with a punch needle is a fiber art technique that involves looping yarn, floss or ribbon in the format of a pattern through fabric.
The Embroidery Stitching Tool and its accessories enable us to apply our desired fiber to any selected fabric easily and precisely. Here’s a project that puts that technique to practice.
Gather these supplies…
Tools
• Embroidery Stitching Tool (Art No. 8800)
• Embroidery Stitching Tool Needle Refill (6 Ply Needle)(Art No. 8803)
• Clover Embroidery Hoop (4 3/4″ / 12 cm) (Art No. 8813)
• Gold Eye Chenille Needle (No. 18) (Art No. 234/18)
• Tracing Paper Clover Chacopy (Art No. 434)
• Mini Patchwork Scissors (Art. No 493/CW)
Materials
• 6″ x 6″ (15cm x 15cm) Oxford Cotton fabric
• 6-ply embroidery thread in peach, soft pink, salmon pink, burgundy red, green, yellow, dark brown
• A small amount of white felt
• Fabric glue
• 5″ (13 cm) wooden embroidery hoop
• String
Here’s How:
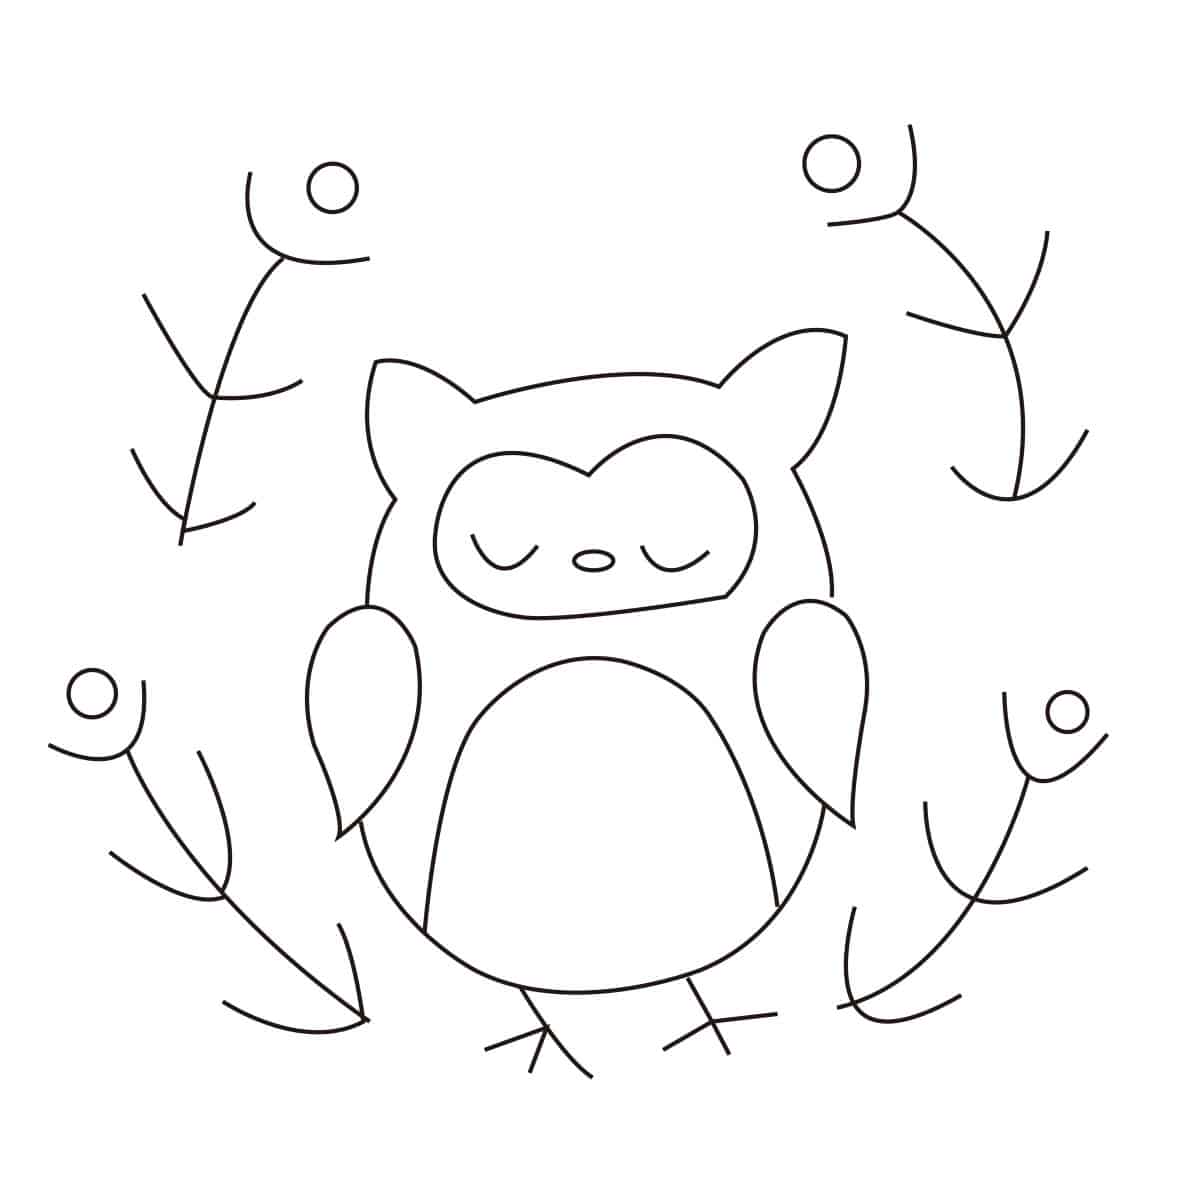
1. Transfer the motif onto the fabric, using Chacopy.
2. Place the fabric in hoop. For the best result, use Clover Embroidery Hoop which grips the fabric firmly.
3. Using the Embroidery Stitching Tool, adjust the needle length to position 1 and start stitching. Work the outline of the body motif first and fill in the body from outer edge towards center, referring to photo for colors.
When you finish one color, leave a fairly long end, thread end through chenille needle and fill in any gaps with hand stitching if needed.
Work all the body parts, leaving out the face.
4. Work the details. Cut out white felt fabric to the template and place it on the owl. Embroider eyes and beak, piercing through both fabric and felt layers.
5. Using chenille needle and green thread, embroider leaves with straight stitches. Work French knots with soft pink.
6. Lightly coat the loops on the wrong side of work with fabric glue. Allow it to dry.
7. Release the work from hoop and place it in the wooden hoop which works as a frame. Trim the excess fabric, leaving about 1/2″ (1 cm) outside of the hoop. Fold back the fabric edge and glue it to the hoop.
8. Attach the string.
Stay connected with Clover on Facebook | Twitter | Instagram | Pinterest | YouTube | Ravelry
[mc4wp_form id=”11289″]