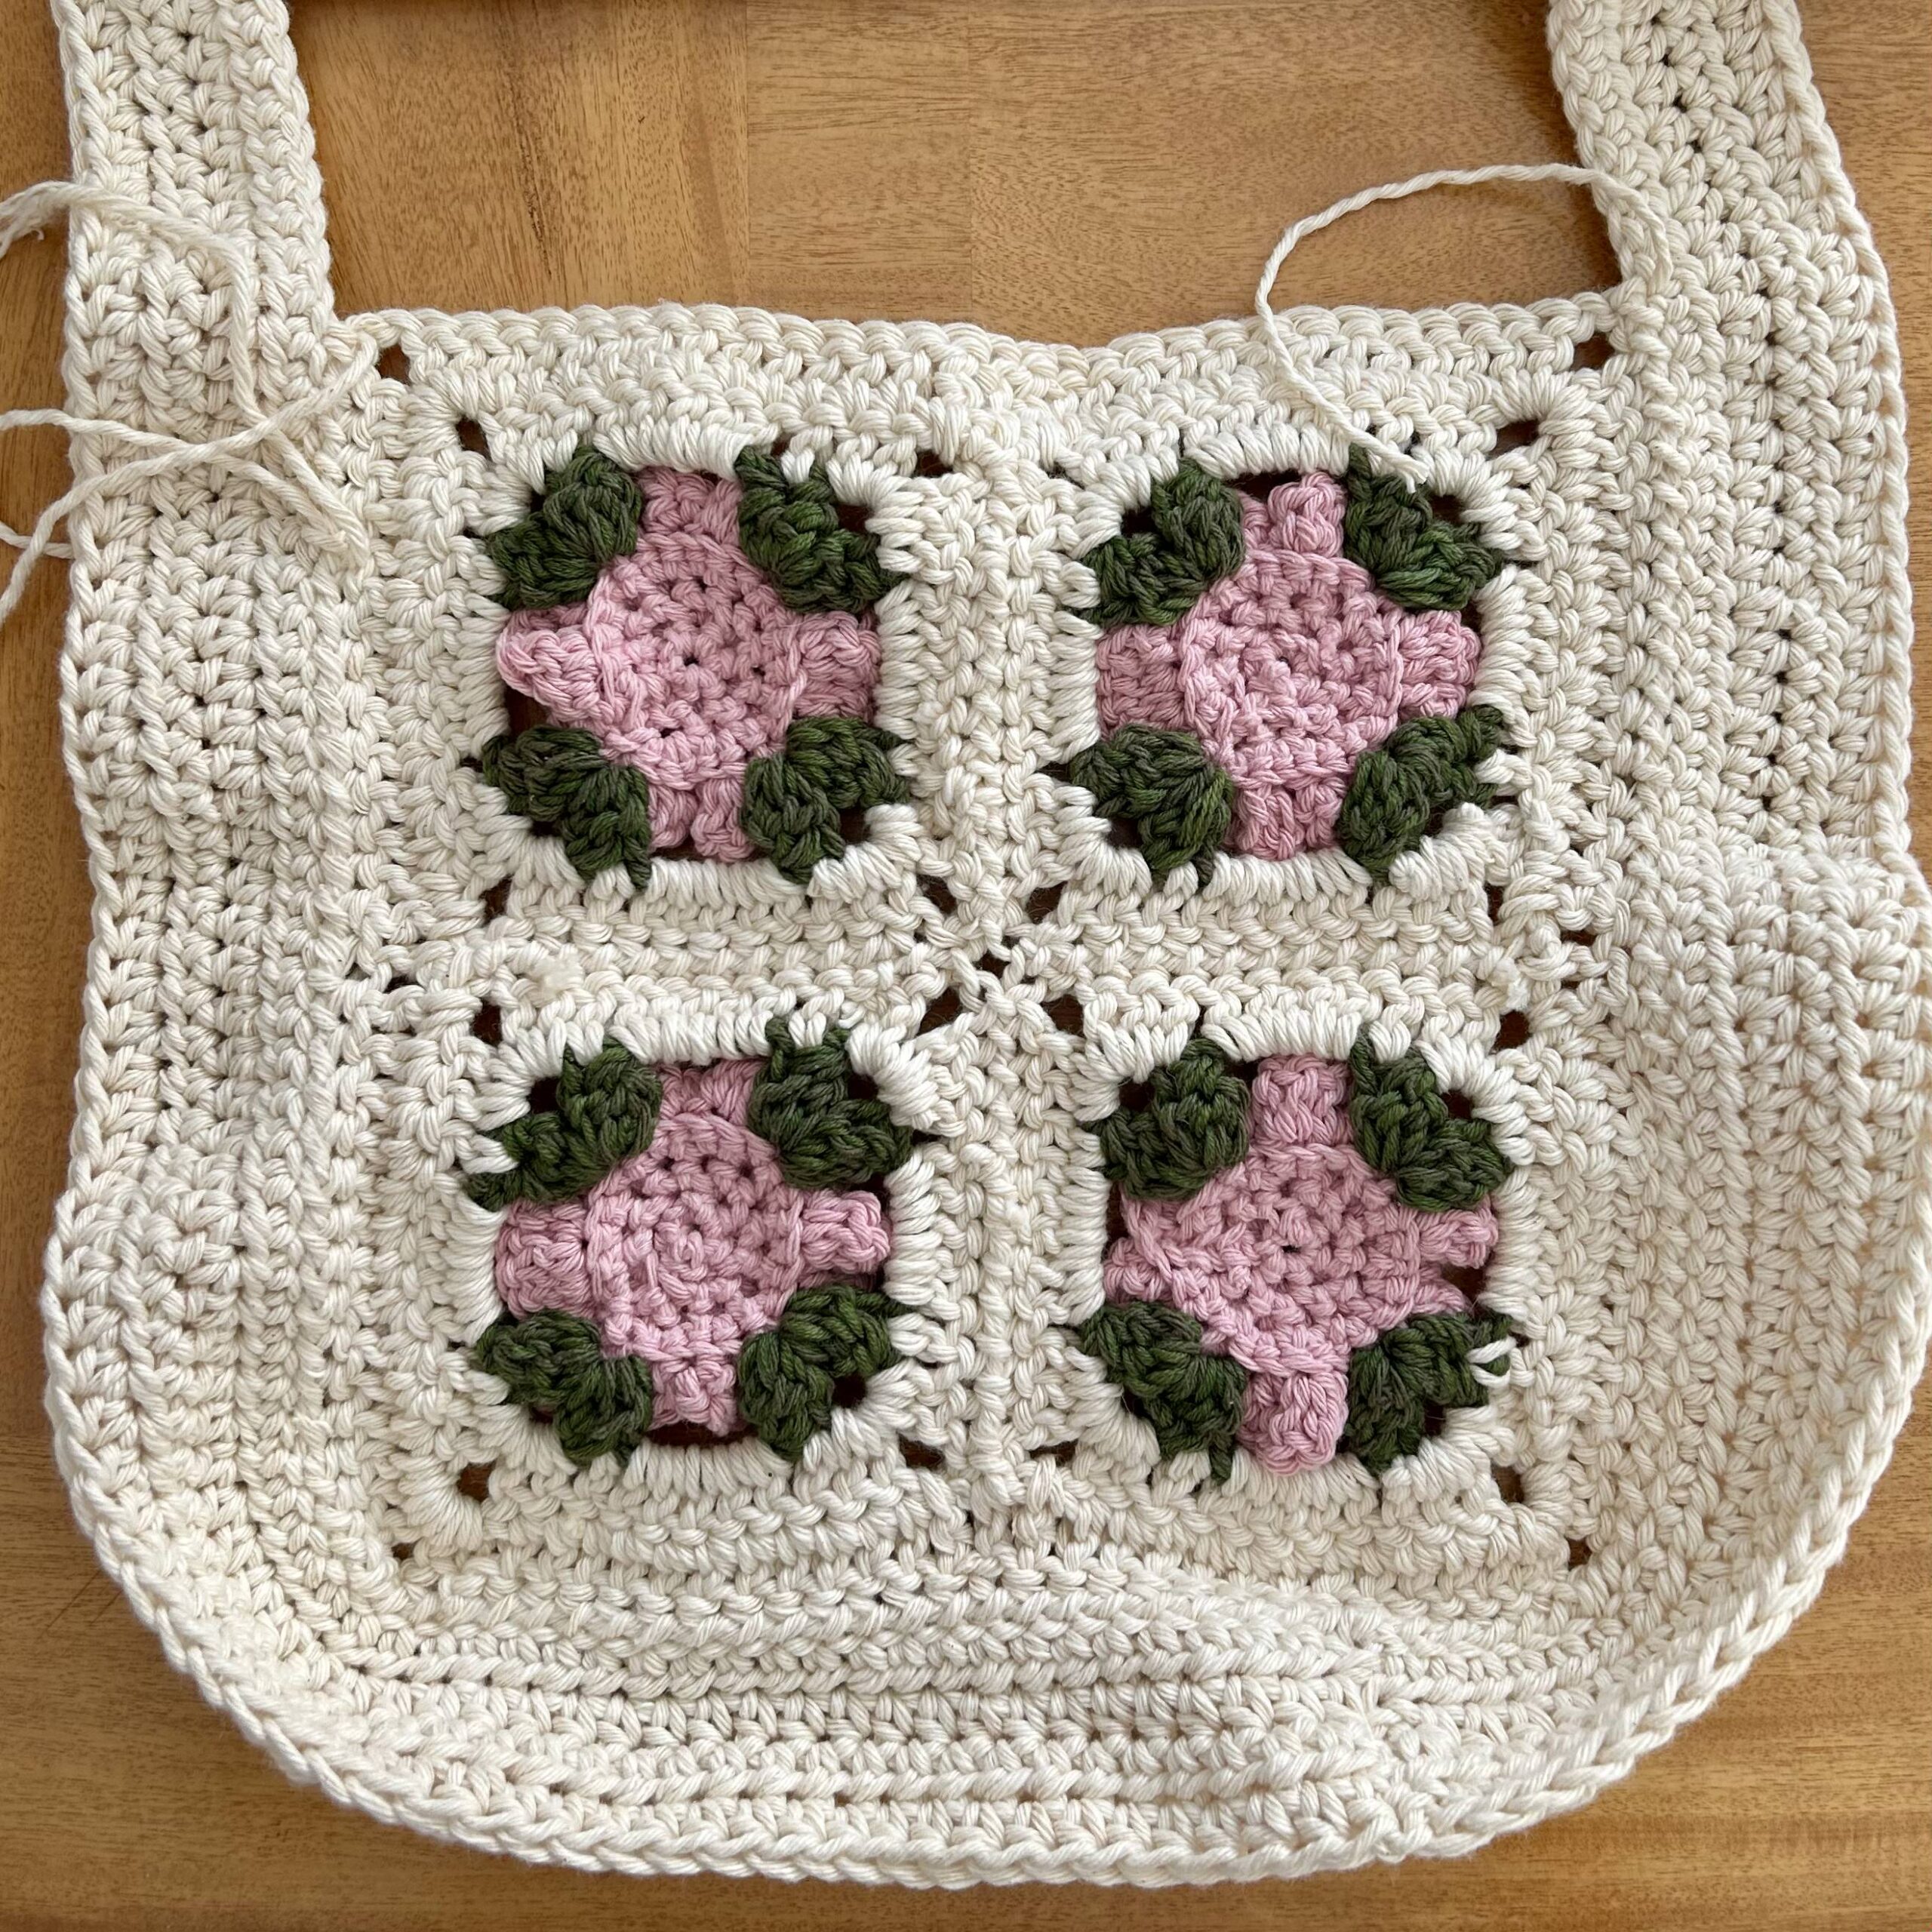
Rose Petals Crochet Tote Bag
Indulge in the elegance of crochet with our latest pattern: the Rose Shoulder Bag. Learn to crochet delicate petals and create a charming accessory that captures the timeless beauty of a blooming garden. This tote bag is perfect for packing travel essentials, coffee shop studying, or going to the park with a book and your crochet materials 🙂 Here’s what you’ll need to get started with one of your own:
MATERIALS:
- 5.5mm Clover Amour Crochet Hook
- Patchwork Scissors
- yarn needle
- chunky yarn
- colors: cream, green, & pink
PATTERN:
ROSE SQUARE (make 4):
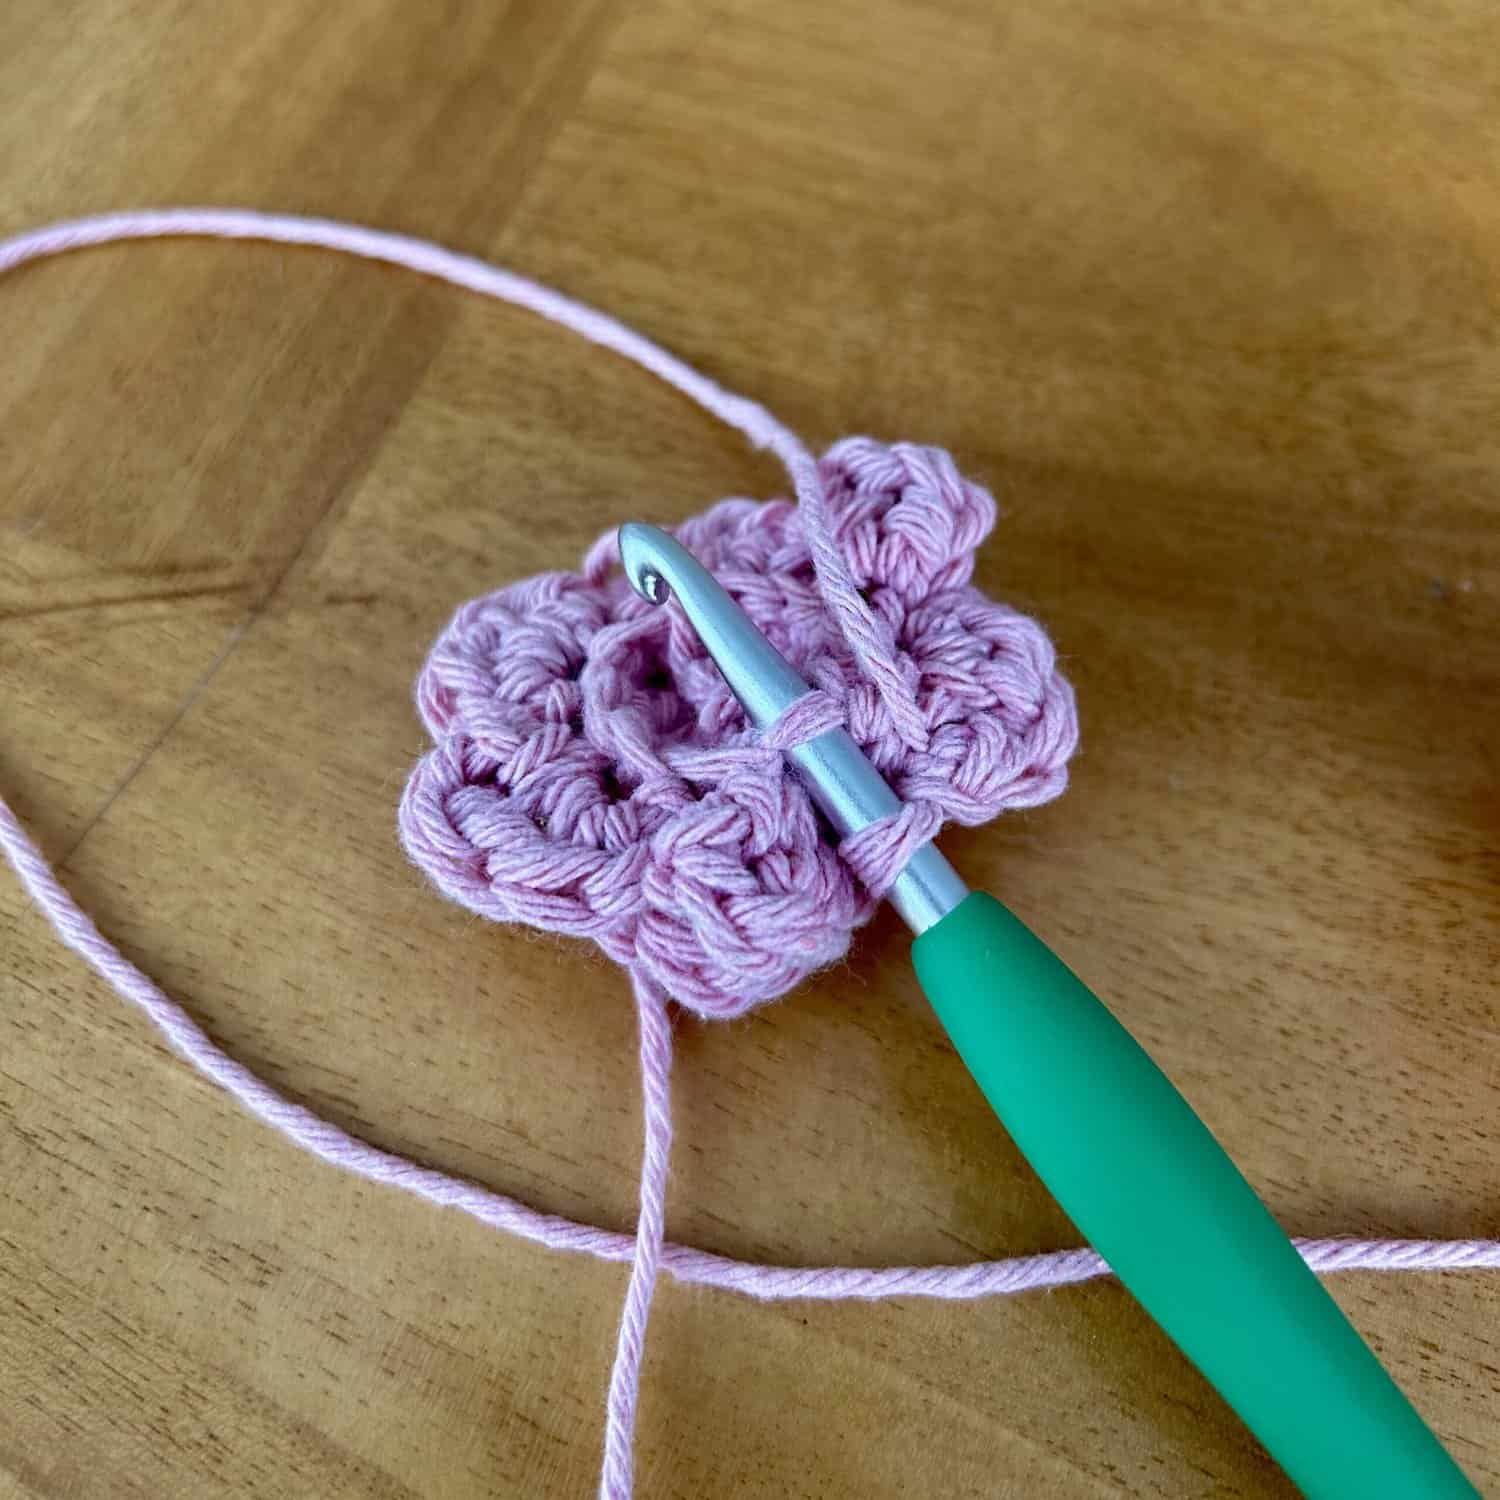
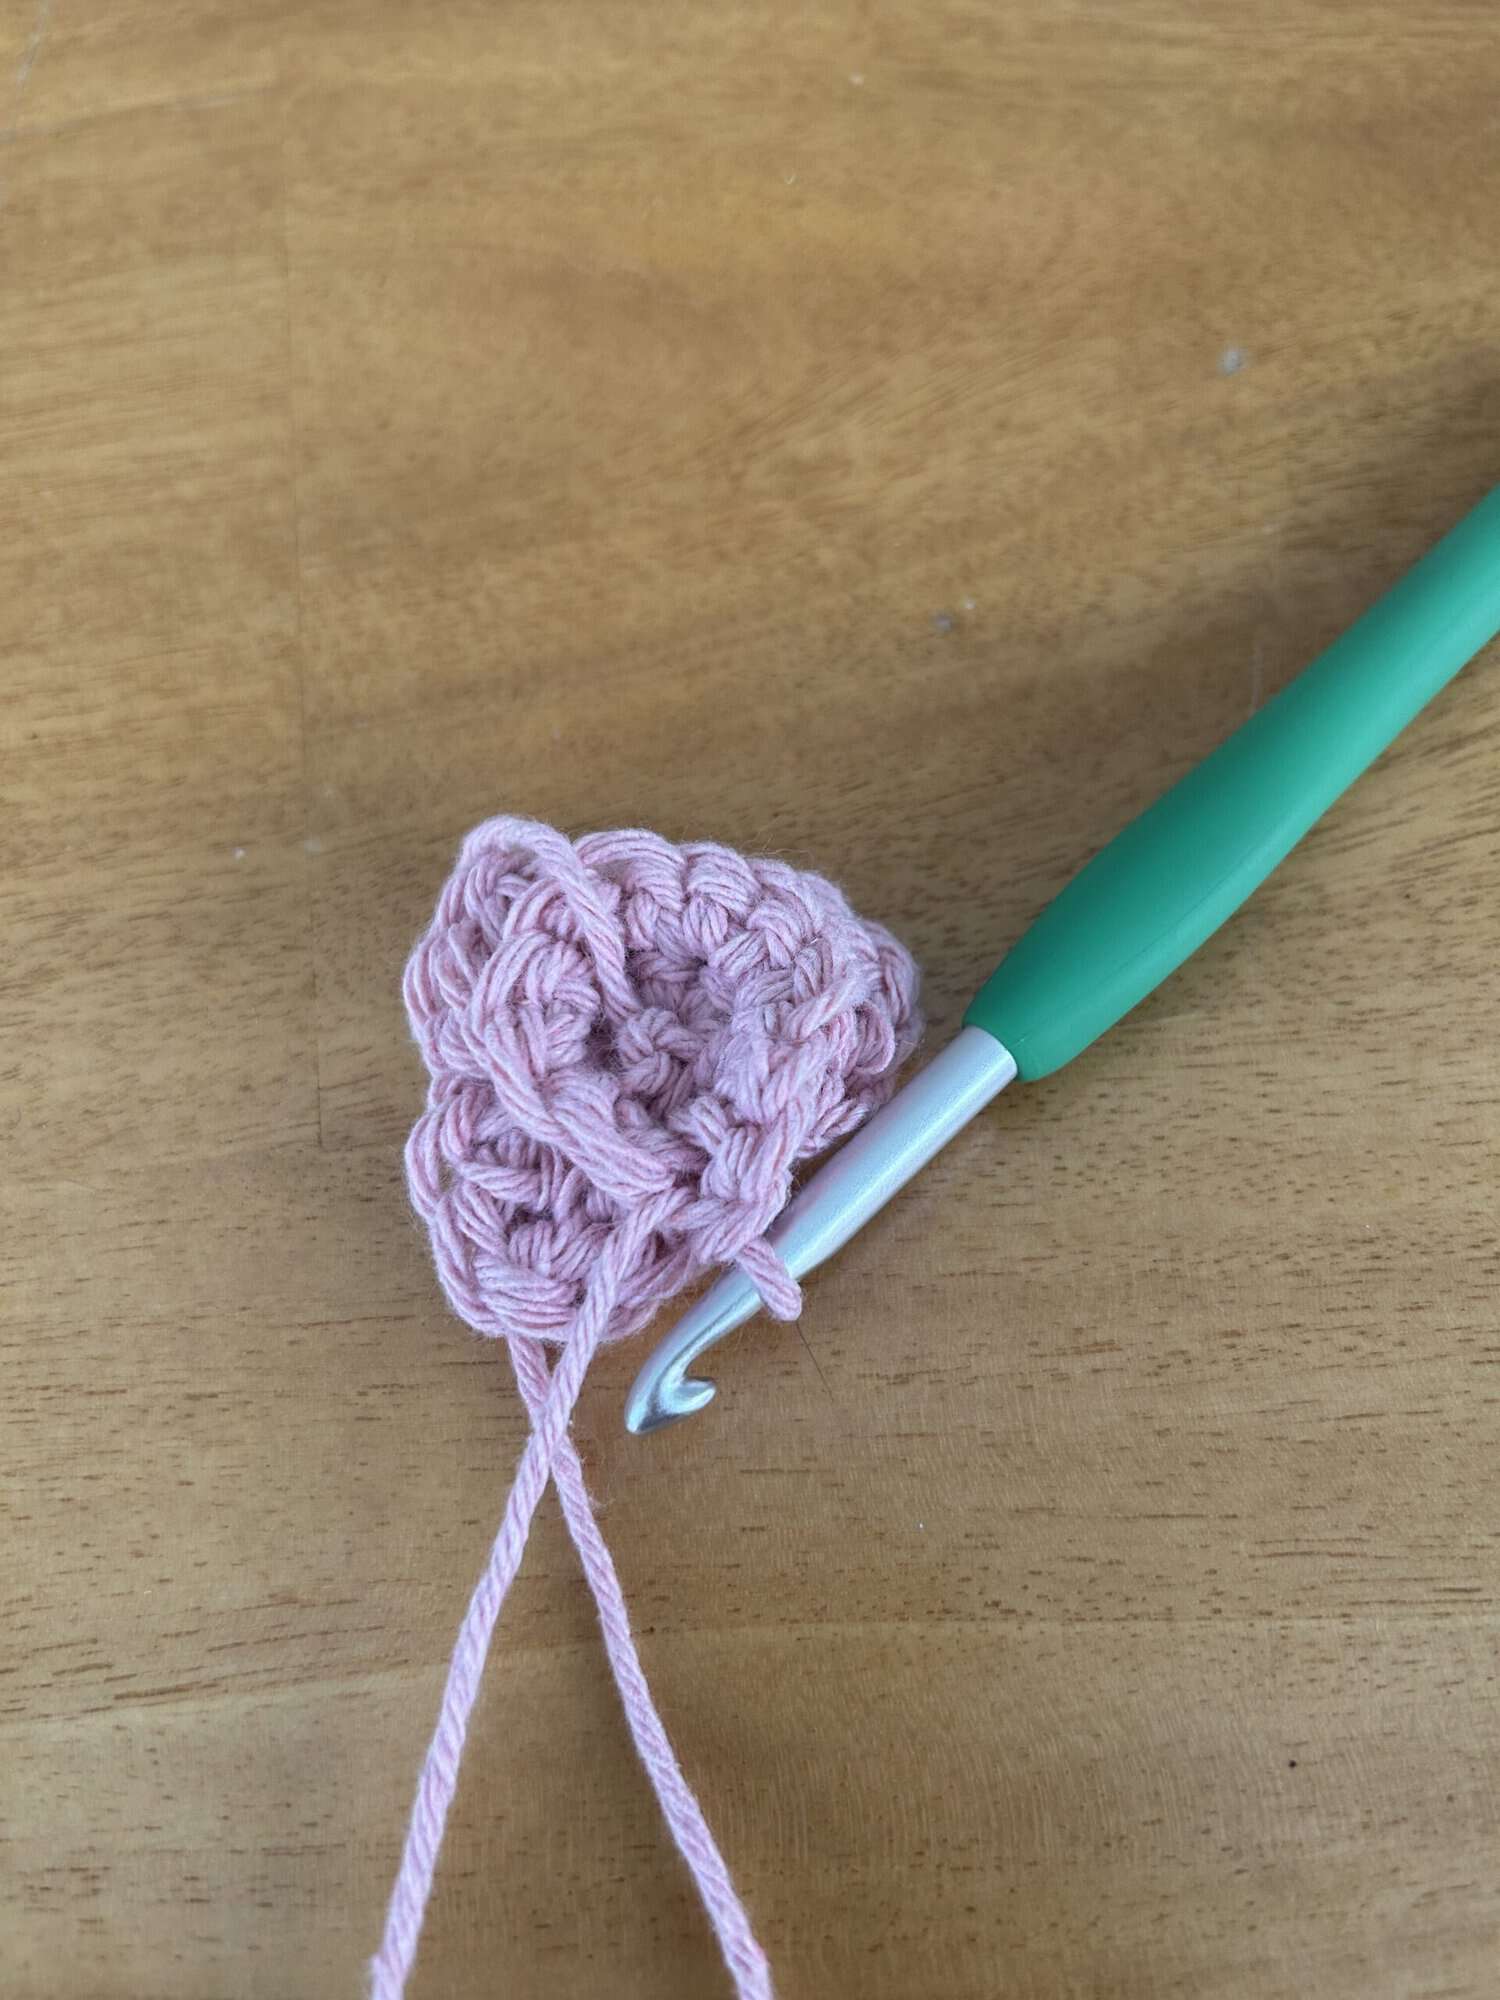
- With pink, make a magic circle and ch 1
- Round 1: 6 sc inside the magic circle. Sl st into the FRONT LOOP of the first sc. (6 sc)
- Round 2: Working in the FRONT LOOPS ONLY. *(sc, hdc, dc) in the first st, (hdc, sc, sl st) in the next st*, repeat from * two more times. (3 petals)
- Round 3: Working in the BACK LOOPS OF ROW 1 ONLY. 2 sc in each st around. Sl st into the FRONT LOOP of the first st. (12 sc)

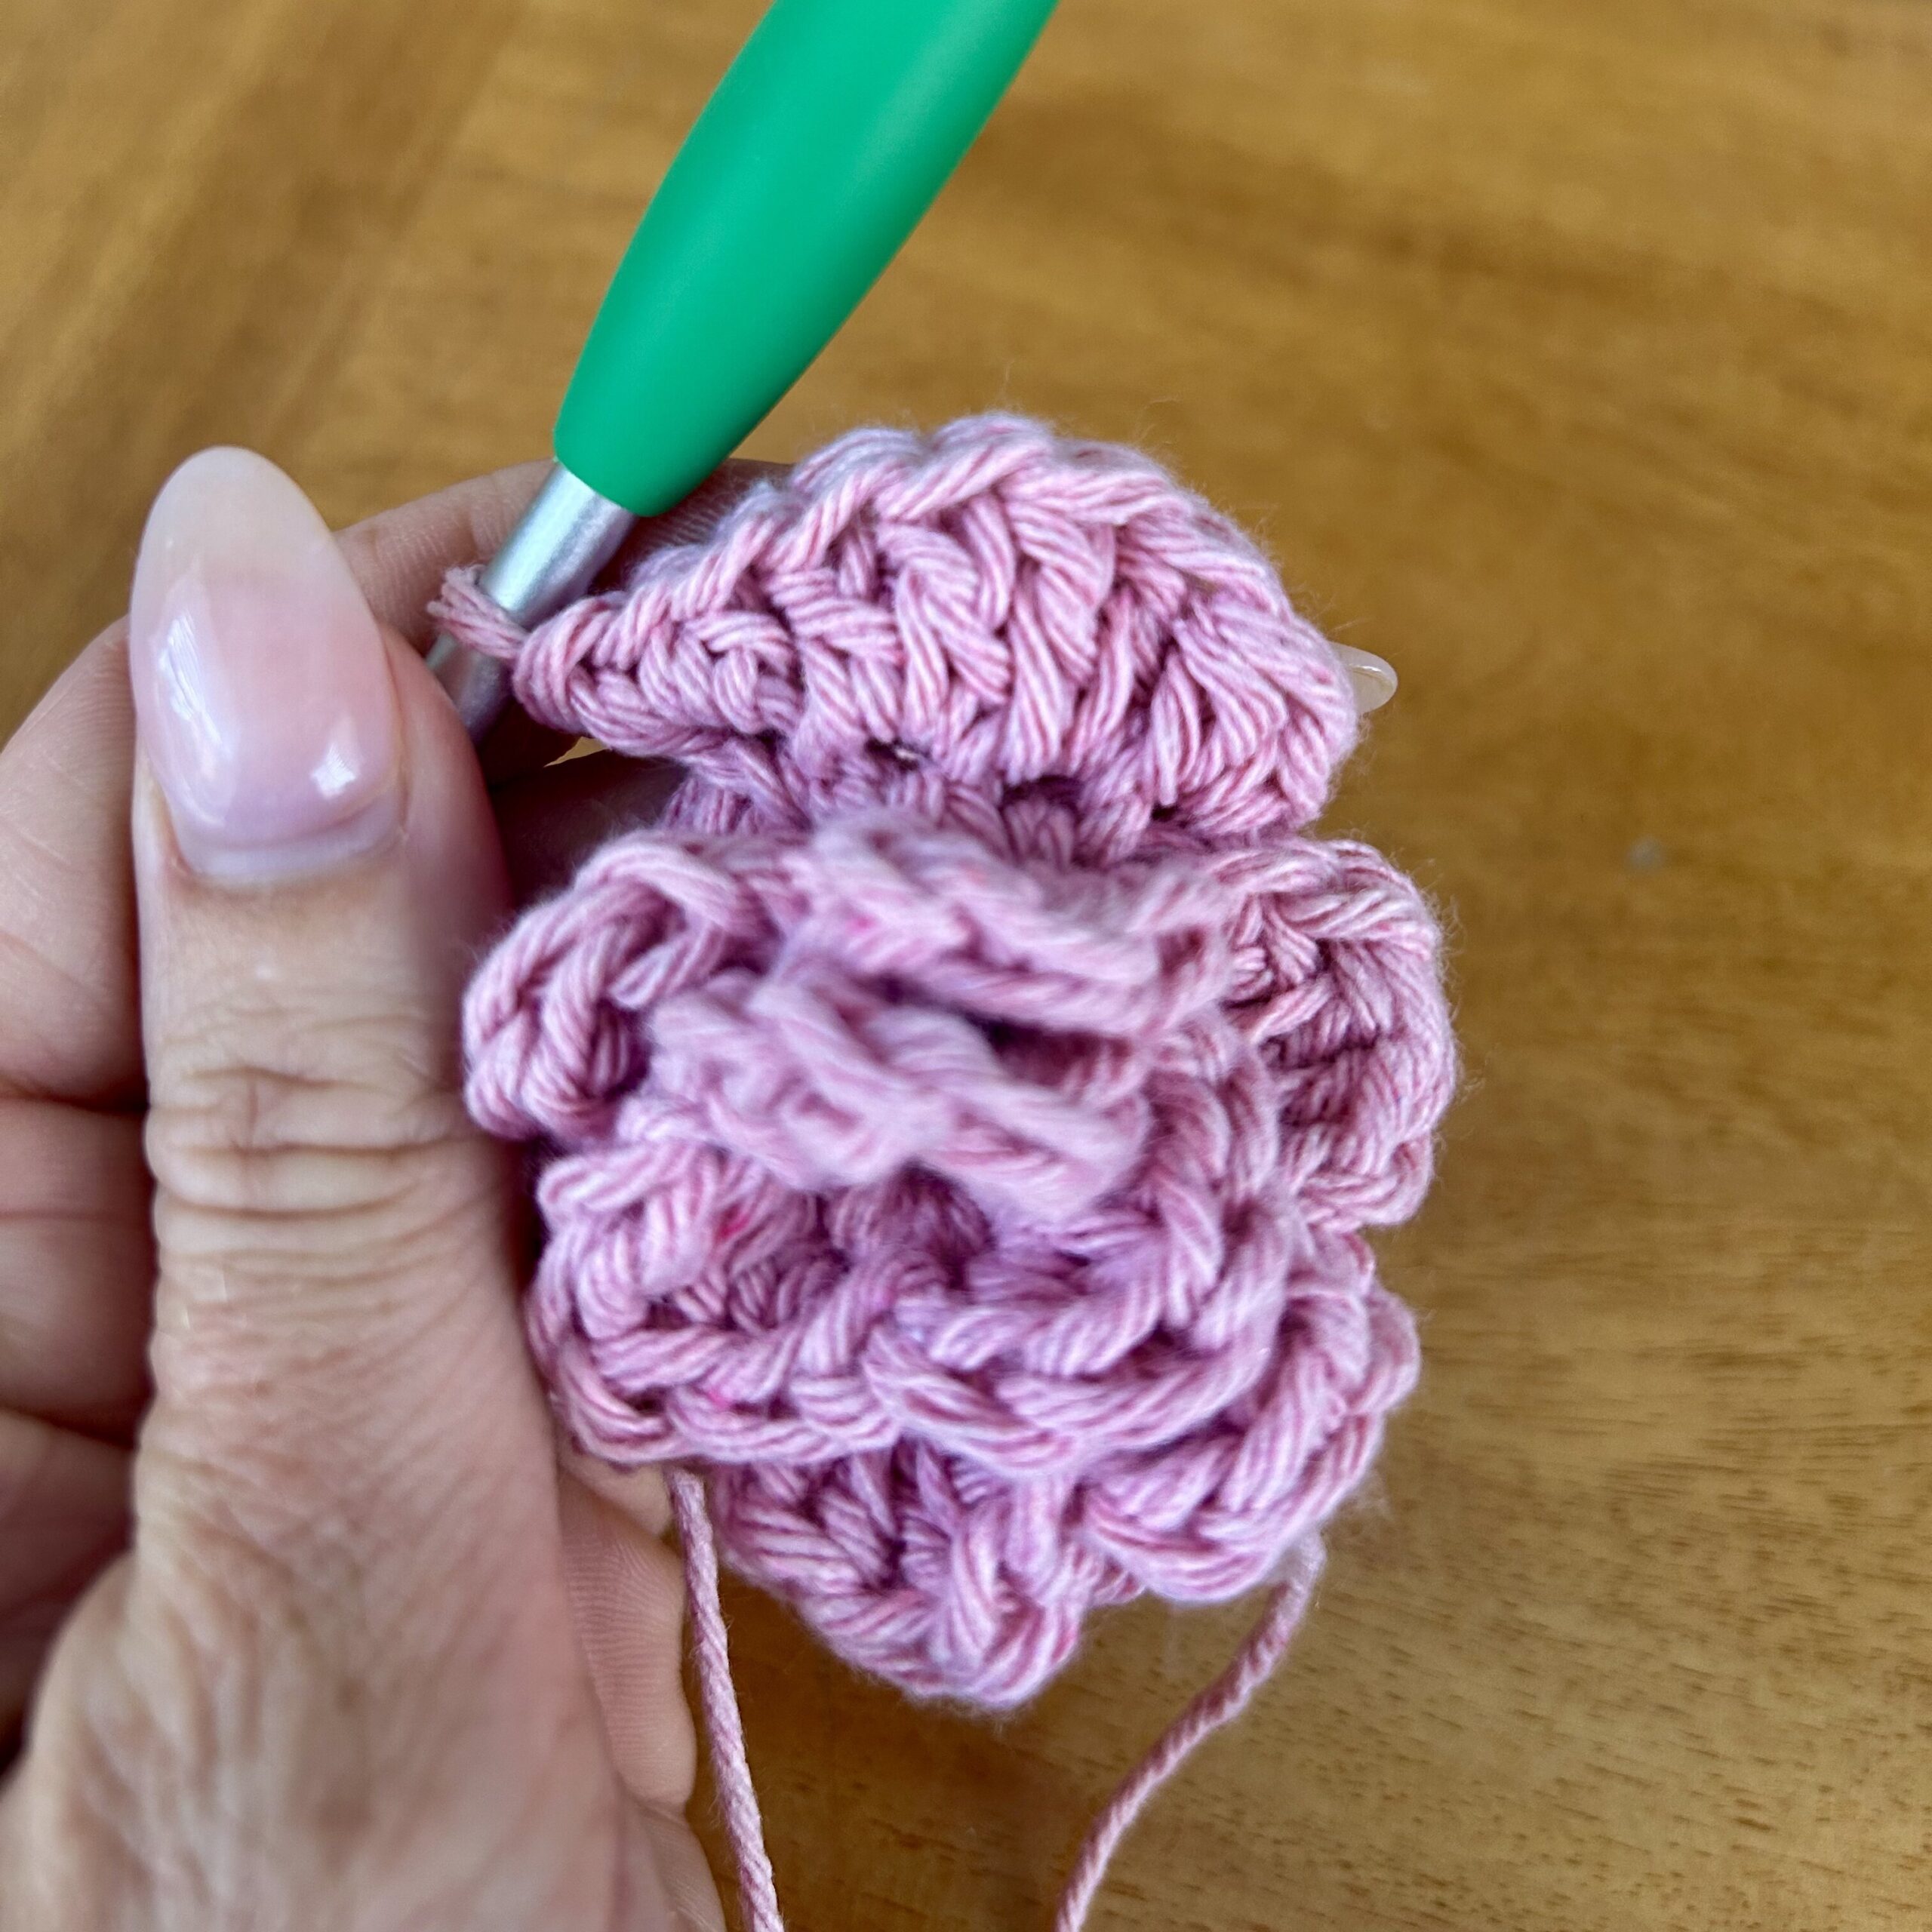
- Round 4: Working in the FRONT LOOPS ONLY. *(sc, hdc, dc) in the first st, (hdc, sl st) in the next st*, repeat from * five more times. (6 petals)
- Round 5: Working in BACK LOOPS OF ROW 3 ONLY. 2 sc in each st around. Sl st into the FRONT LOOP of the first st. (24 sc)
-
- Round 6: Working in the FRONT LOOPS ONLY. *(sc, hdc) in the first st, 2 dc in the next st, 2 dc in the next st, (hdc, sc, sl st) in the next st*, repeat from * five more times. (6 petals) Finish off and weave in ends.
- With green, working in BACK LOOPS ONLY OF ROW 5, attach yarn to any st.
- Round 7: Ch 2 (count as beginning of cluster st), beg cl in same st, ch 3, dc cl in the same st, ch 5, sk 5, *(dc cl, ch 3, dc cl) in the next st, ch 5, sk 5*, repeat from * 2 more times, ending with a sl st in the top of the beg cl. Finish off and weave in ends.
- With cream, attach yarn to any ch 3 sp.
- Round 8: Ch 3 (count as dc), (dc, ch 3, 2 dc) in the ch 3 sp, 1 dc in the next st, 5 dc in the ch 5 sp, 1 dc in the next st, *(2 dc, ch 3, 2 dc) in the ch 3 sp, 1 dc in the next st, 5 dc in the ch 5 sp, 1 dc in the next st*, repeat from * two more times, ending with a slip st in the first dc. Finish off and weave in ends.
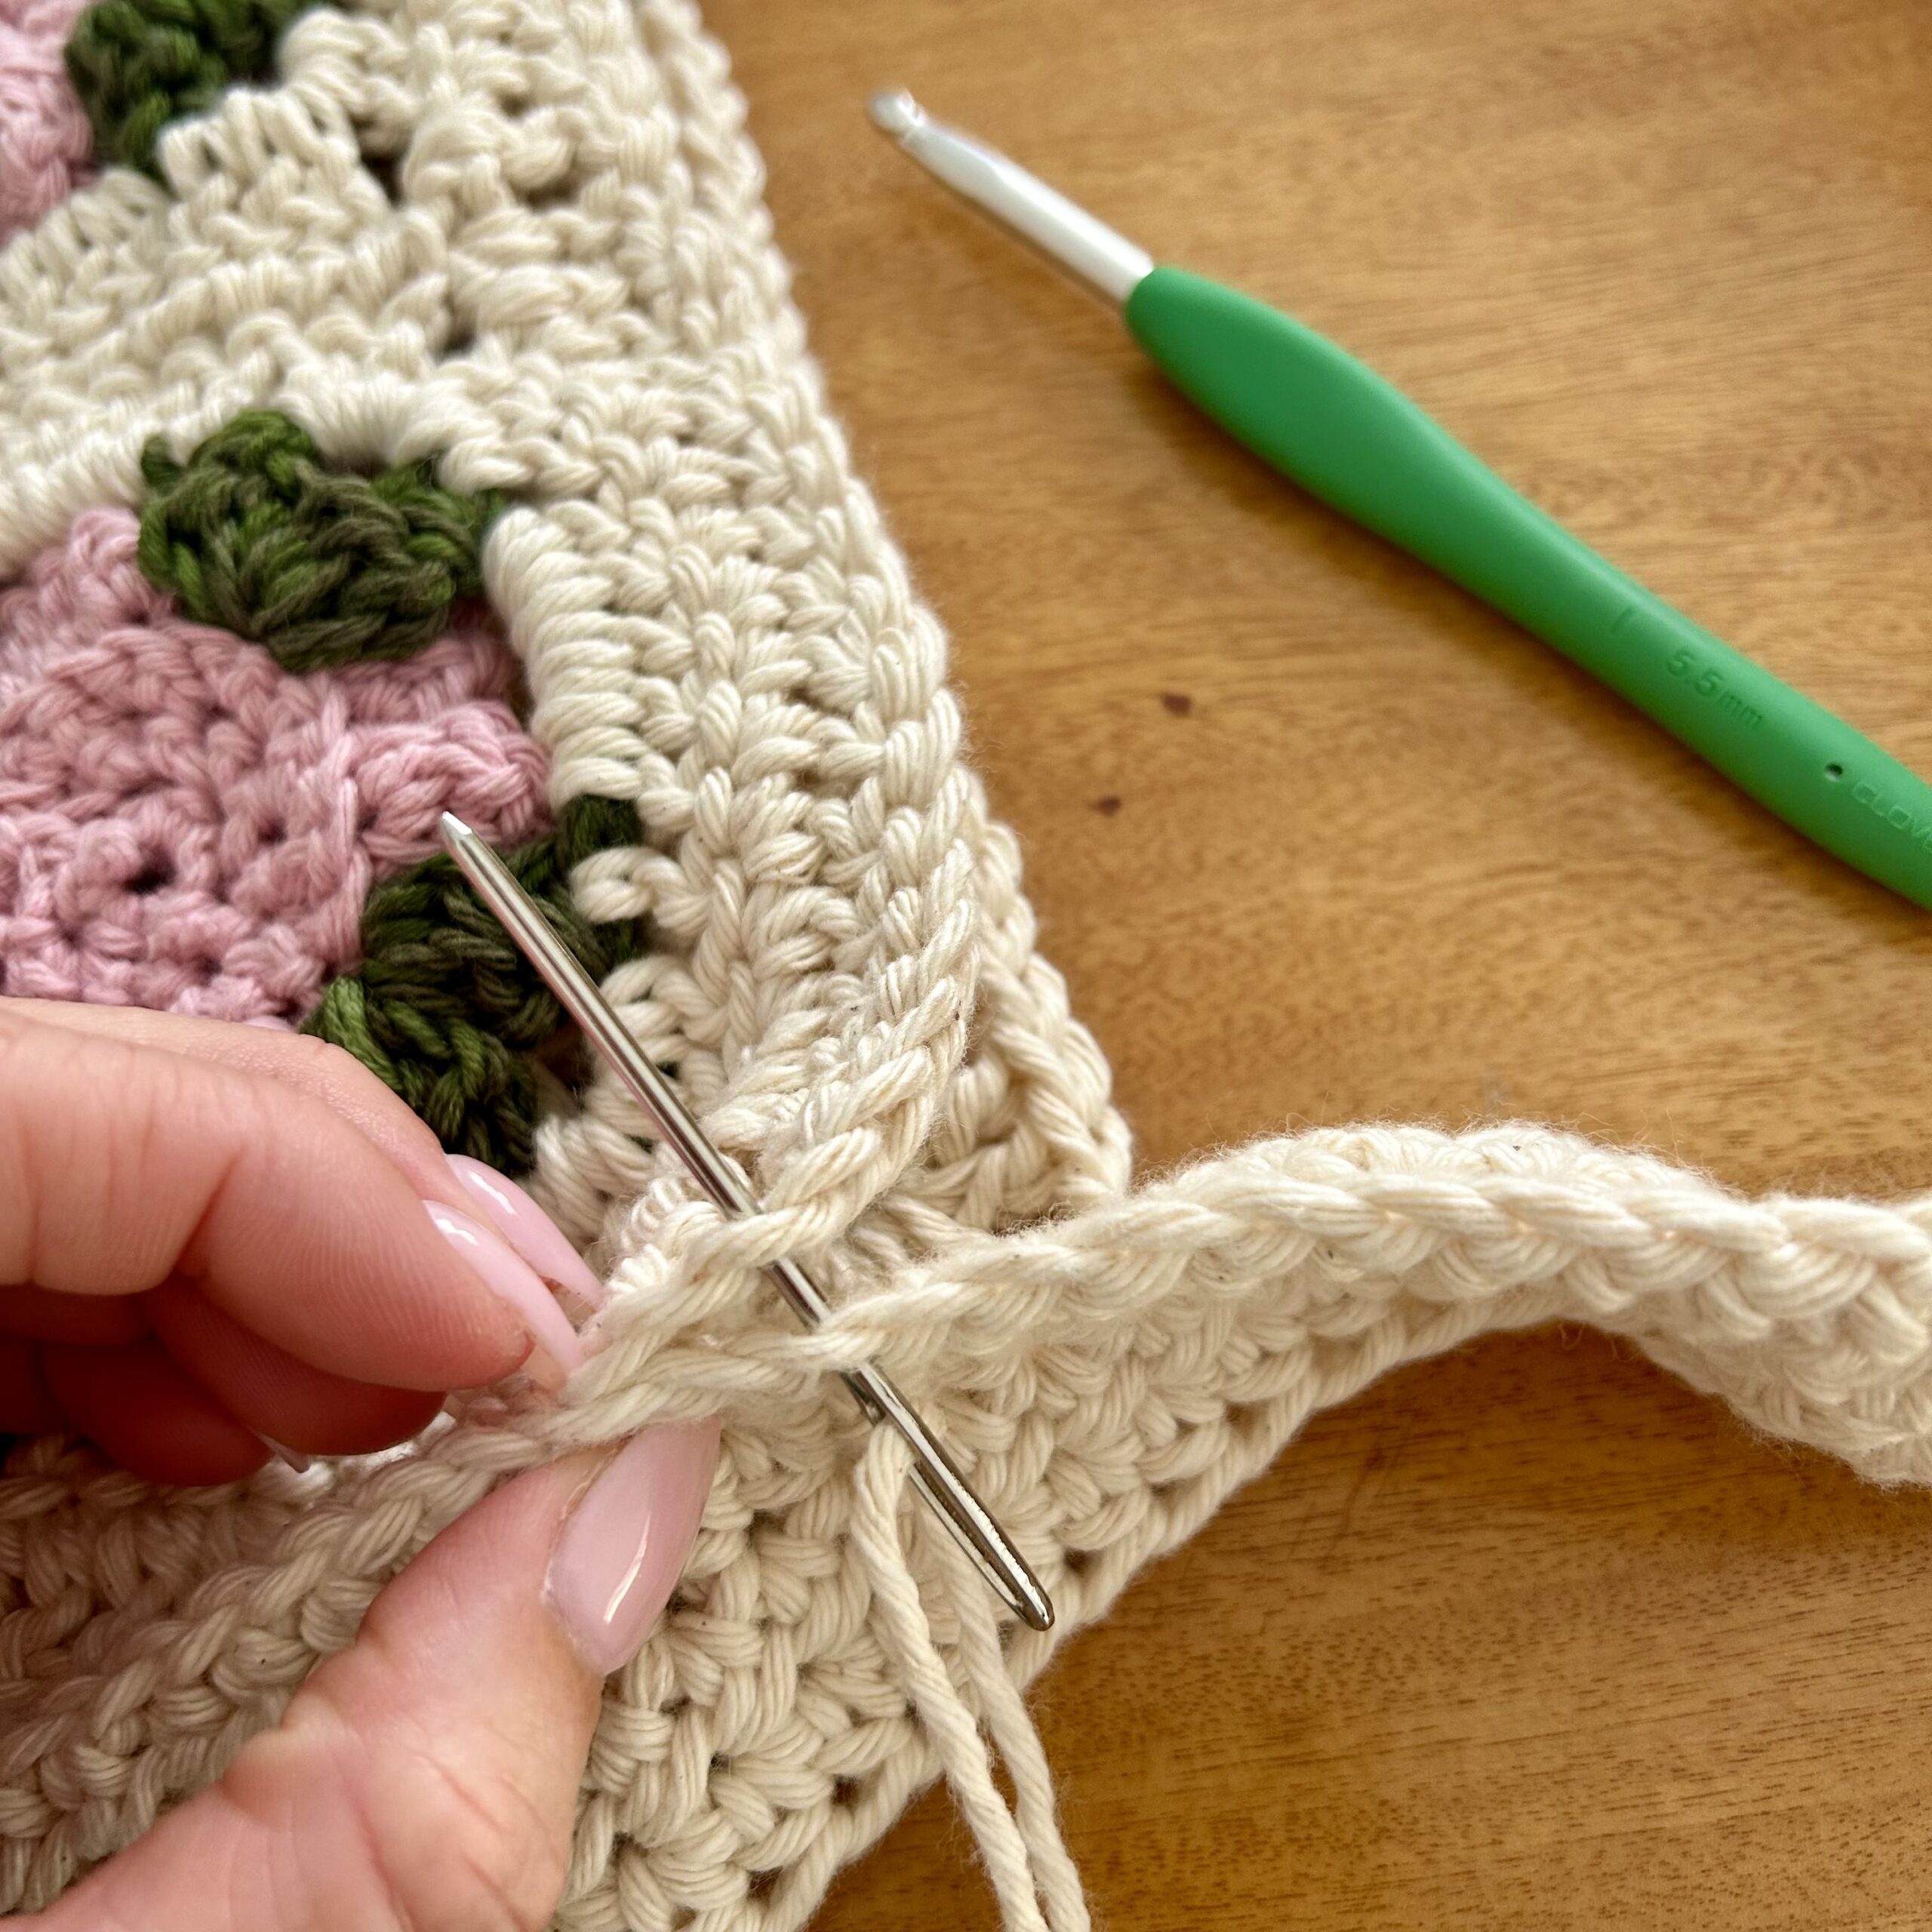
- Now whip stitch all four squares together to make one large square. Once you have your four squares all together, move on to the border.
- Attach cream yarn in any ch 3 corner sp.
- Round 1: Ch 2, (count as a double crochet), (1 dc, ch 3, 2 dc) all in same sp, *1 dc in each of the next 11 dc, 1 tr in the ch 3 sp from the square below, 1 dc in the sp between the squares, 1 tr in the next ch 3 sp from the square below, 1 dc in each of the next 11 dc, (2 dc, ch 3, 2 dc) in the ch 3 sp*, repeat from * 2 more times. 1 dc in each of the next 11 dc, 1 tr in the ch 3 sp from the square below, 1 dc in the sp between the squares, 1 tr in the next ch 3 sp from the square below, 1 dc in each of the next 11 dc, join with a sl st to the top of the beginning ch 2. Finish off and weave in ends.
LARGE GRANNY SQUARE – for back of bag (make 1):
- With cream, ch 5 and join with a sl st to the first ch to form a ring.
- Round 1: Ch 3 (count as 1st dc). In the loop work 2 dc, ch 2, 3 dc, ch 2, 3 dc, ch 2, 3 dc, ch 2, sl st to the top of the beginning ch 3.
- Round 2: Sl st into the next 2 dc and into the ch 2 sp, ch 3, (2 dc, ch 2, 3 dc) in same sp (corner made), *ch 1, (3 dc, ch 2, 3 dc) in next ch 2 sp*, repeat from * two more times. Ch 1, join with a sl st to the top of the beginning ch 3.
- Round 3: Sl st into the next 2 dc and into the corner sp, ch 3, (2 dc, ch 2, 3 dc) in same sp, *ch 1, 3 dc in the next ch 1 sp, ch 1, (3 dc, ch 2, 3 dc) in next corner sp*, repeat from * two more times, ch 1, 3 dc in the next ch 1 sp, ch 1, join with a sl st to the top of the beginning ch 3.
- You are going to continue in this same fashion by slip stitching to the corner sp, working (3 dc, ch 2, 3 dc) in each corner, work 3 dc in each ch 1 sp, and work a ch 1 between. Continue making rounds until your square is the same size as the front (four rose squares together). Finish off and weave in ends.
STRAP:
- With cream, ch 202.
- Row 1: 1 hdc in the third ch from the hook and in each ch across. Ch 2, turn.
- Row 2-4: 1 hdc in each st across. Ch 2, turn.
- Fold piece in half and join the ends together by whip stitch, making one large ring.
BAG ASSEMBLY:
Place your front and back squares right sides together. Take your strap and line it up around of the pieces and whip stitch it to three sides of the pieces, then repeat on the other side.
And that’s it! Once you’re done making one of your own, don’t forget to post on socials and tag Clover @cloverusa! Be sure to check out Clover’s other blog posts for more inspiration for new projects <3
If you want to keep up with me, Julie, on social media for other fun projects, follow me on social media: Instagram
If you want to keep up with all things Clover, follow us on: Facebook | Twitter | Instagram | Pinterest | YouTube | Ravelry