Something Knitted, Something Blue Wedding Shawl- Knitting Pattern
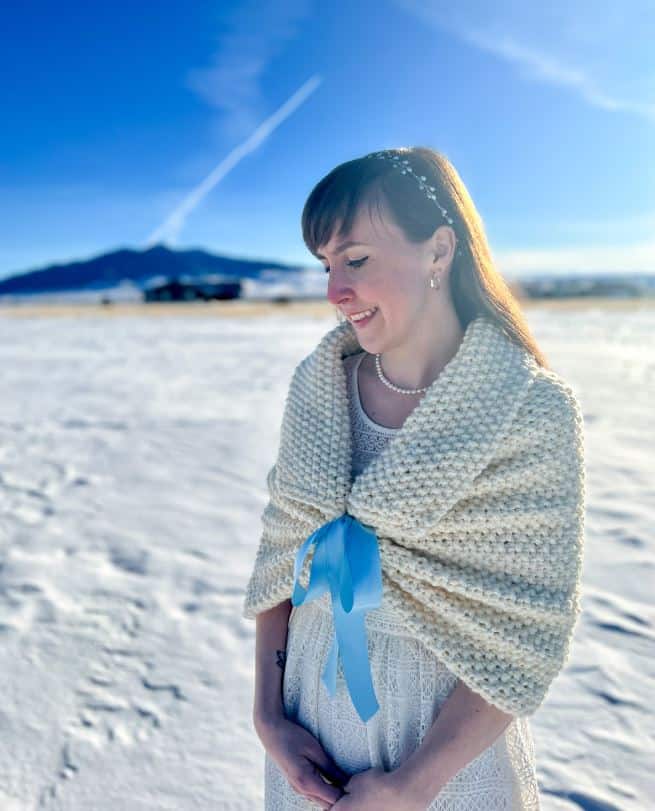
Greetings fellow crafters! Hannah here, the knitwear designer, blogger, and maker behind Bears Den Essentials (@bearsdenessentials) with some exciting updates on my end. I am happy to announce a brand new pattern that I will actually be wearing to my wedding in just under a week! I live in Montana, where it can snow up to twelve months out of the year, so having a February wedding where I’ll be outside meant figuring out some cute but functional layering options.
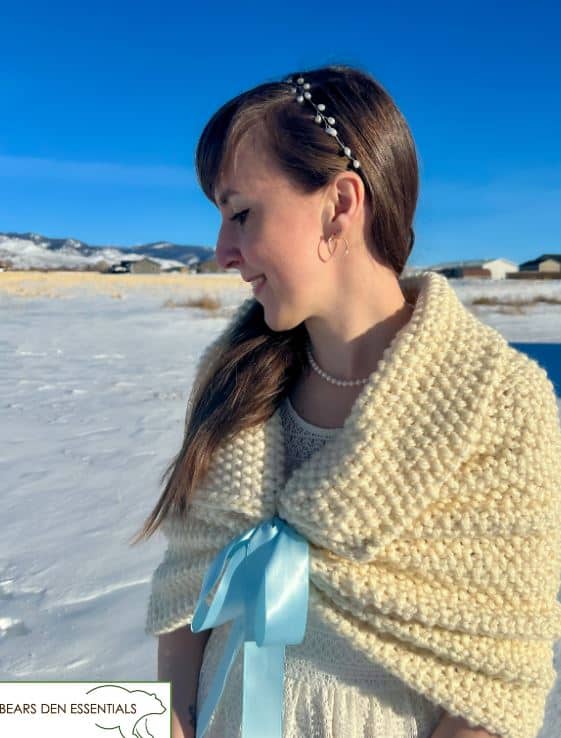
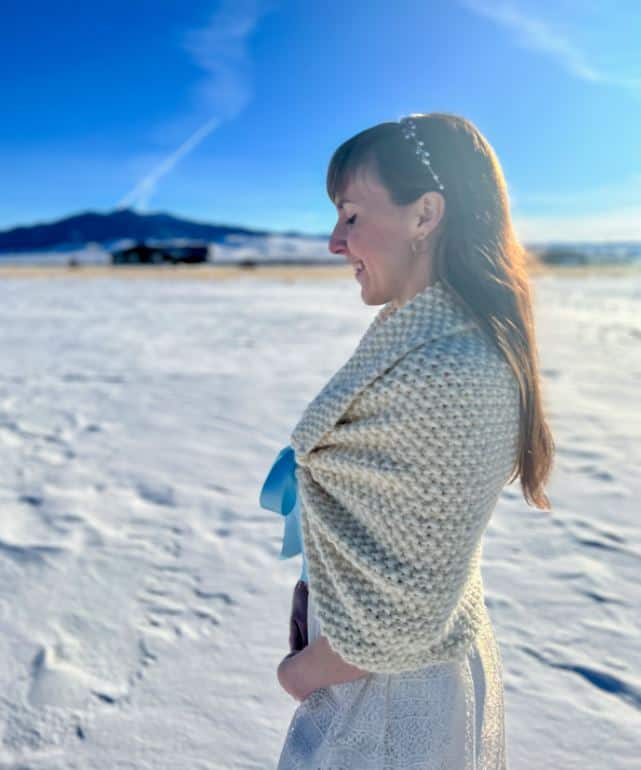
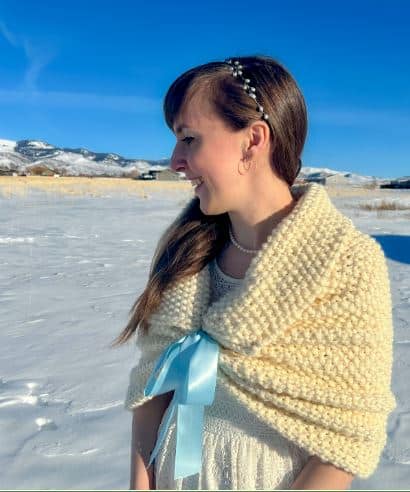
I’ve known since I was a little girl that I wanted to have some element of what I wear on my wedding day to be handmade, so I started brainstorming this wedding wrap idea as soon as we set a date. Knitted in seed stitch, which is made by alternating knit stitches and purl stitches within a row and between rows, I’ve put together a chunky knitting pattern that keeps you warm– the key is allowing for about ~2-5” of negative ease so the wrap stays snug around your shoulders as you wear it in. It’s perfect as a beginner’s knitting project because it’s knitted flat and gives you good practice with knit and purl stitches.
The “Something Knitted” part is complemented by a “Something Blue” piece, which in this pattern is a 1.5” thick satin ribbon that I ordered online from Joann’s. The flat knit comes together by threading the blue satin ribbon through both edges of the knit, cinching the edges, and tying it all together with a bow. I walk you through the steps for this towards the end of the pattern, and you’ll find it creates a cute but very warm finished wrap that you can wear outside. I’m so excited to share this pattern with you, and I hope you enjoy wearing this special knit on your special day as well!
Difficulty Level: Advanced Beginner
Skills Required/Techniques Used: 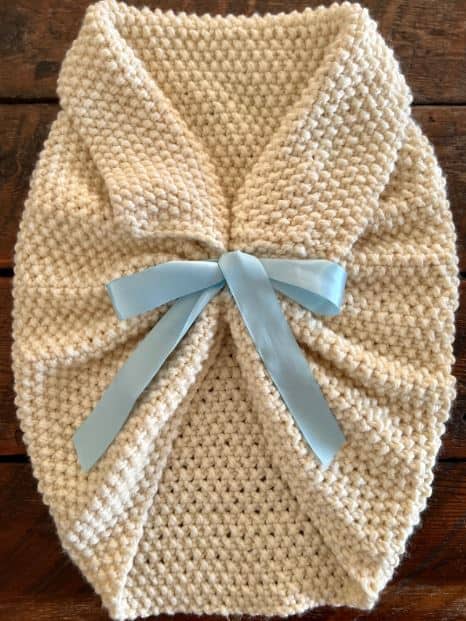
-Knit & Purl
-Casting On/Casting Off
-Working Flat
MATERIALS
Yarn: Lion Brand Wool Ease Thick And Quick Yarn [106 Yards (97 meters) | 170 grams (6 oz) | Super Bulky Weight (Category 6)]
-
- Wrap requires 3-4 Skeins (see size chart below)
- Main Color (MC)
- Wrap requires 3-4 Skeins (see size chart below)
- RECOMMENDED COLORS:
- MC –“Fisherman”
Knitting Needles:
–Takumi 24″ Circular Bamboo Knitting Needles size US 13 (9.00mm)- Art No.. 3016/24-13
Notions:
–Offray 1.5” X 21’ Satin Ribbon in Light Blue
–Jumbo Darning Needle- Art No. 339
–Clover Yarn Cutter Pendant- Art No. 3106
–Clover Knitting Needle Point Protectors- Art No. 333/S
GAUGE: Approx 9 sts X 12 rows = 4” x 4” using 9.00mm/US 13 needles
SIZE INFORMATION:
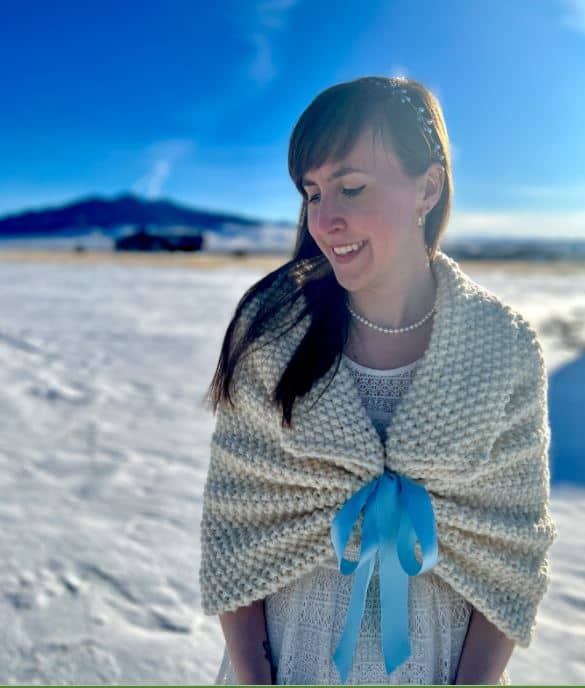
This pattern is designed to be worn with ~2.5-5.5” of negative ease in circumference. The yarn has a nice stretch to it and the weight will cause it to stretch over time, so I recommend sizing down if you are in between sizes or unsure of which size to make. The wrap should fit snugly but not uncomfortably– You don’t want it sliding down on you on your big day! The model has a chest overarm measurement of 40” in circumference and is wearing a size Adult Medium.
Size Guide & Finished Measurements:
**To get your chest overarm measurement: Measure the total circumference of your body, passing over your arms and bust point and mid-back, with your arms straight down at your side; keep the tape parallel to the floor.
| Chest Overarm Measurement* | Finished Shawl Length Across
(Before adding ribbon) |
Finished Shawl Length Top-To-Bottom
(Before adding Ribbon) |
Approx.
Yardage Needed |
|
| Adult Extra-Small | 35.5”-37”
(90-94 cm) |
32”
(81.5 cm) |
28”
(71 cm) |
284 yards (260 m) | 455g (16 oz)
(3 Skeins) |
| Adult Small | 37.5”-39”
(95-99 cm) |
34”
(86.5 cm) |
28”
(71 cm) |
301 yards (276 m) | 483g (17 oz)
(3 Skeins) |
| Adult Medium | 39.5”-41.5”
(100.5-105.5 cm) |
36”
(91.5 cm) |
28”
(71 cm) |
318 yards (291 m) | 510g (18 oz)
(3-4 Skeins) |
| Adult Large | 42”-43.5”
(106.5-110.5 cm) |
38”
(96.5 cm) |
28”
(71 cm) |
335 yards (307 m) | 538g (19 oz)
(4 Skeins) |
| Adult XL | 44”-45.5”
(112-115.5 cm) |
40”
(101.5 cm) |
28”
(71 cm) |
353 yards (323 m) | 566g (20 oz)
(4 Skeins) |
| Adult XXL | 46”-47”
(117-119.5 cm) |
42”
(106.5 cm) |
28”
(71 cm) |
370 yards (339 m) | 593g (21 oz)
(4 Skeins) |
Sizing:
The sizes of the wrap– Adult XS, Adult Small, [Adult Medium], Adult Large, Adult XL, Adult XXL – correspond sequentially to the numbers provided within the pattern.
ABBREVIATIONS AND STITCH GLOSSARY:
- Approx: Approximately
- CO: Cast on [Note: The beginning of the shawl is cast on using the Long-Tail Cast On Method]
- COFF: Cast off
- K: Knit
- P: Purl
- Seed Stitch created by alternating knit stitches and purl stitches within a row and between rows
- St(s): Stitch(es)
- WS/ RS: Wrong side of the work / Right side of the work
- ” / cm(s): Inch(es) / Centimeter(s)
PATTERN:
CONSTRUCTION OVERVIEW:
This shawl is knit flat and then the ends are sewn together and cinched at the front with the ribbon to create the adorable bow in the center.
CASTING ON:
With size US 13 (9.00 mm) 24” circular needles and MC yarn, CO 63, 63, [63], 63, 63, 63 sts.
BODY:
Rows 1-4: K to end of row.
Row 5: K1, *P1, K1, repeat from * to end-of-row.
Repeat row 5 to continue in the seed stitch pattern until piece measures 31” (78.5 cm), 33” (84 cm), [35” (89 cm)], 37” (94 cm), 39” (99 cm), 41 (104 cm) from CO edge. Beginner’s Note: For troubleshooting common challenges, such as dropped stitches, knitting too tightly, or too loosely, check out this video on how to knit and troubleshoot.
FINISHING:
Rows 1-4: K to end of row.
Cast Off. Cut yarn leaving roughly 10” (25.5 cm), thread yarn through remaining st, pull tightly. Weave in your ends.
CONSTRUCTING THE WRAP:
Now that you’ve cast off, you will seam the two ends of the rectangle together to join the wrap and create the beautiful cinch and bow in the front.
- Cut ribbon to 48” (123 cm); angle the ends when you cut the edges to help prevent fraying.
- Lay the piece flat horizontally with the Right Side (RS) facing up.
- Fold both ends together towards one another in the middle.
- Starting 6” (15 cm) from the top of the right end, weave ribbon downwards into the edge using the running stitch method.
- When you reach the bottom of the right end, weave ribbon into the bottom of the left end.
- Weave ribbon upwards into the edge using the running stitch method until you reach 6” from the top of the left end.
- Cinch the ribbon tightly and create a bow at the front.
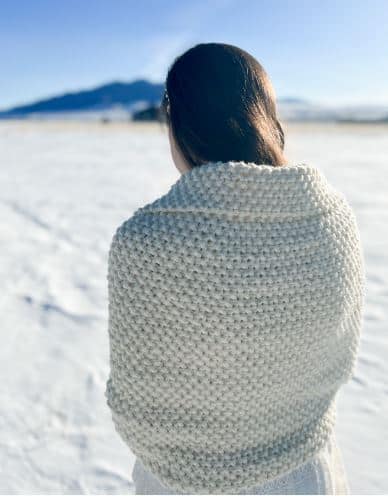
- Fold the top edge over to create a 6” (15 cm) collar.
I hope you had as much fun making this wrap as much as I did designing it for you! I am so happy to share something from my special day with all of you.
For beginners, be sure to head to our YouTube Page (@bearsdenessentials) to get the full series of knitting tutorials we offer! For questions about this pattern and extra tips, email us at bearsdenessentials@gmail.com.
Find Bears Den Essentials on Instagram | Pinterest | Etsy | Ravelry | Facebook | Youtube

DESIGNER AND PATTERN INFORMATION: All patterns, text, products, and photos are the property of Hannah Jaicks and Bears Den Essentials. Patterns and photographs cannot be distributed, copied in part or in whole, re-written, or re-sold without permission—electronically or physically. You may sell your finished products made using Bears Den Essentials patterns as long as you provide a direct link to this pattern in your listing and tag us on social media: @bearsdenessentials. For any other use, please contact us directly (Hannah: bearsdenessentials@gmail.com). Thank you for supporting artists by using and sharing our content ethically and legally.
Stay connected with Clover on Facebook | Twitter | Instagram | Pinterest | YouTube | Ravelry