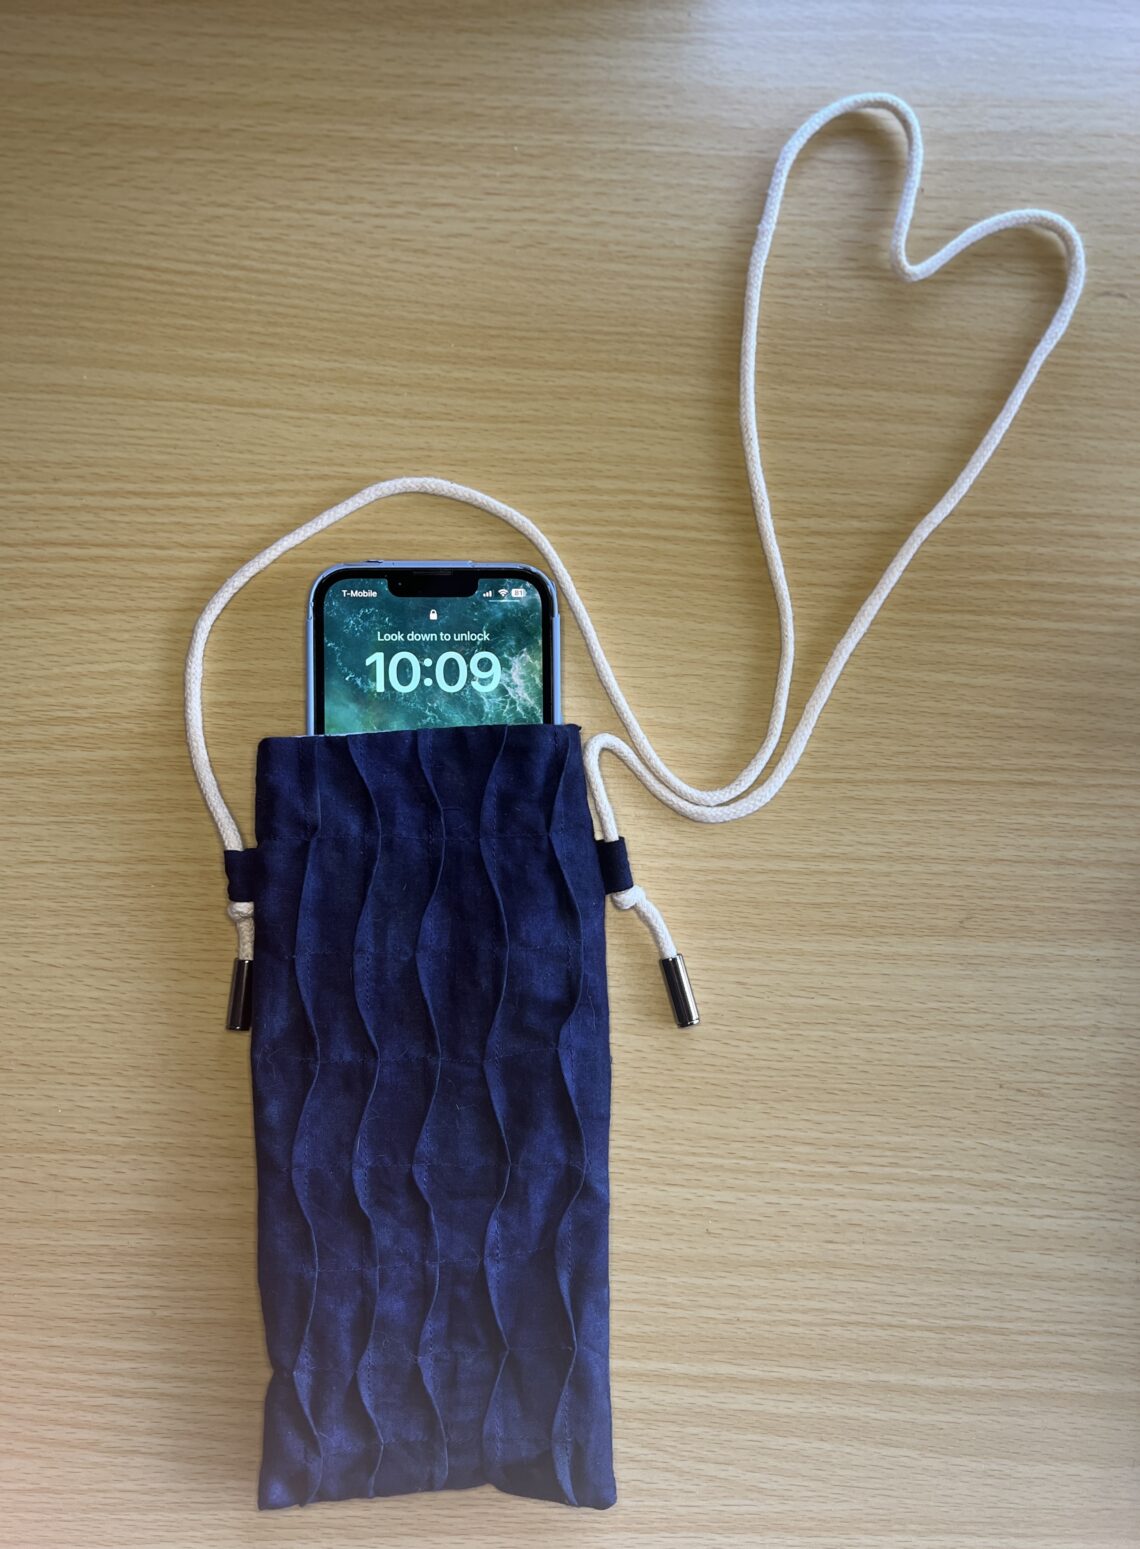
DIY Phone Bag!
Happy 2024! As is common with the start of a new year, I like to set some goals for myself to foster greater intentionality and mindfulness. Some of these goals include growing my pattern-making skills, spending more time with loved ones, and moving my body more. One way to get the ball rolling with my goals is to create a phone bag pattern so that I could have a small bag to take with me while I’m outdoors, whether it be to run a short errand, take a stroll, or play with my pets. So if you share similar goals, let’s make one together 🙂 Follow the pattern below then scroll down to the rest of my tutorial!
MATERIALS:
- Chacopel
- Point 2 Point Turner
- Patchwork Scissors
- ¼ yard main fabric
- ¼ yard lining fabric
- matching thread
- needle
- loop turner
- 48” of 4mm cording
- magnetic snap button
- optional:
- 2 cord ends
TUTORIAL:
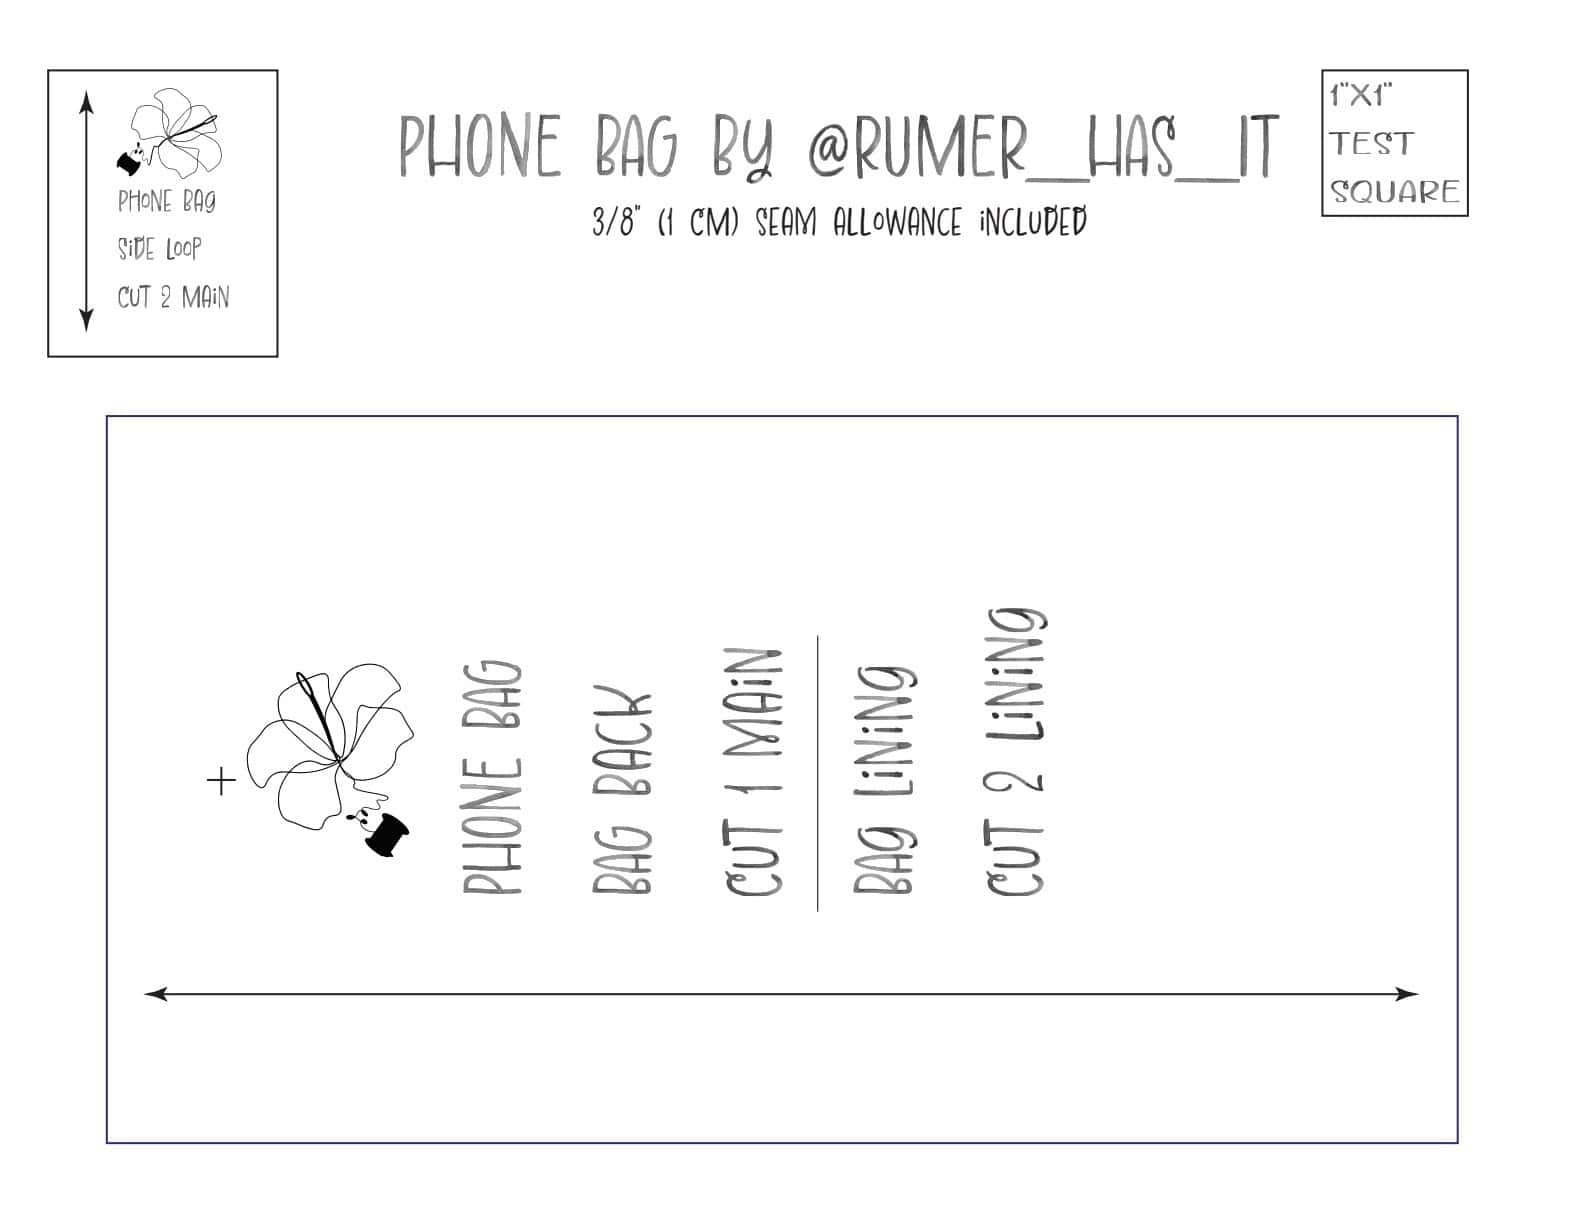
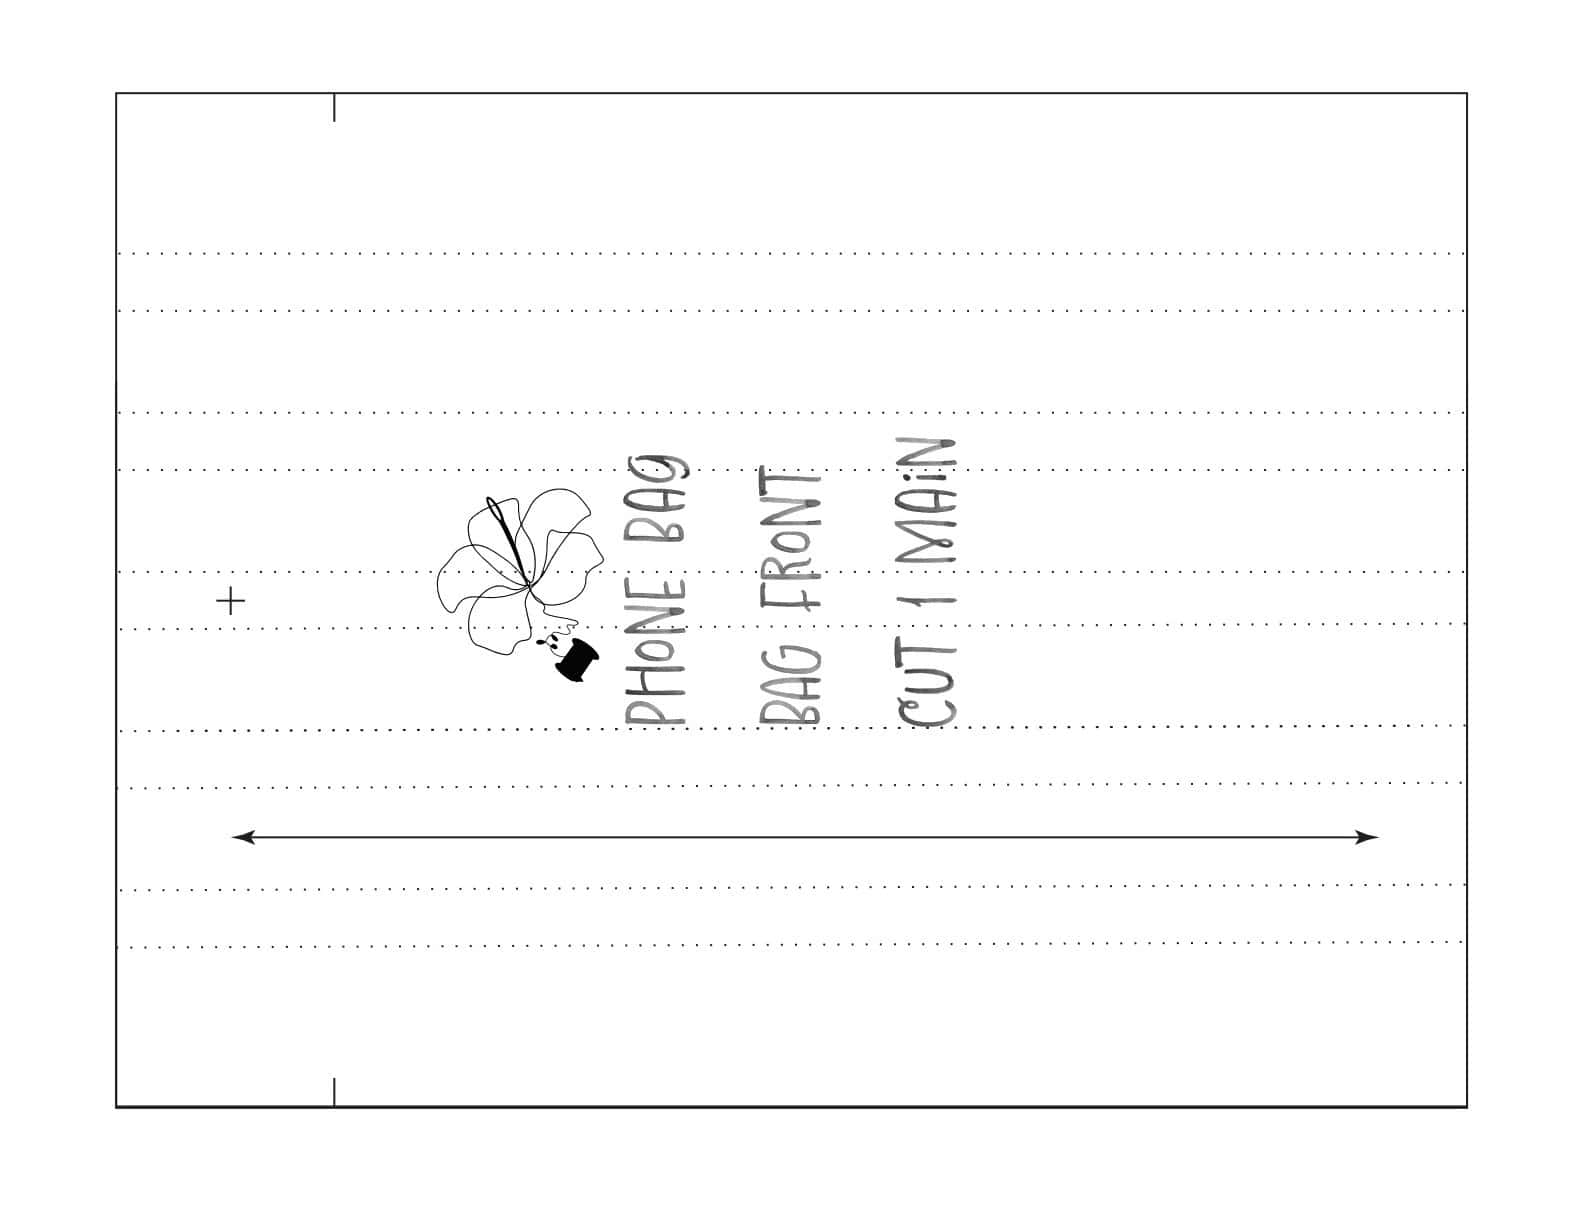
1. Cut out your pattern pieces as described on the pattern.
2. Use the Chacopel or other marking tool to mark the notches/dashed lines on the pattern.

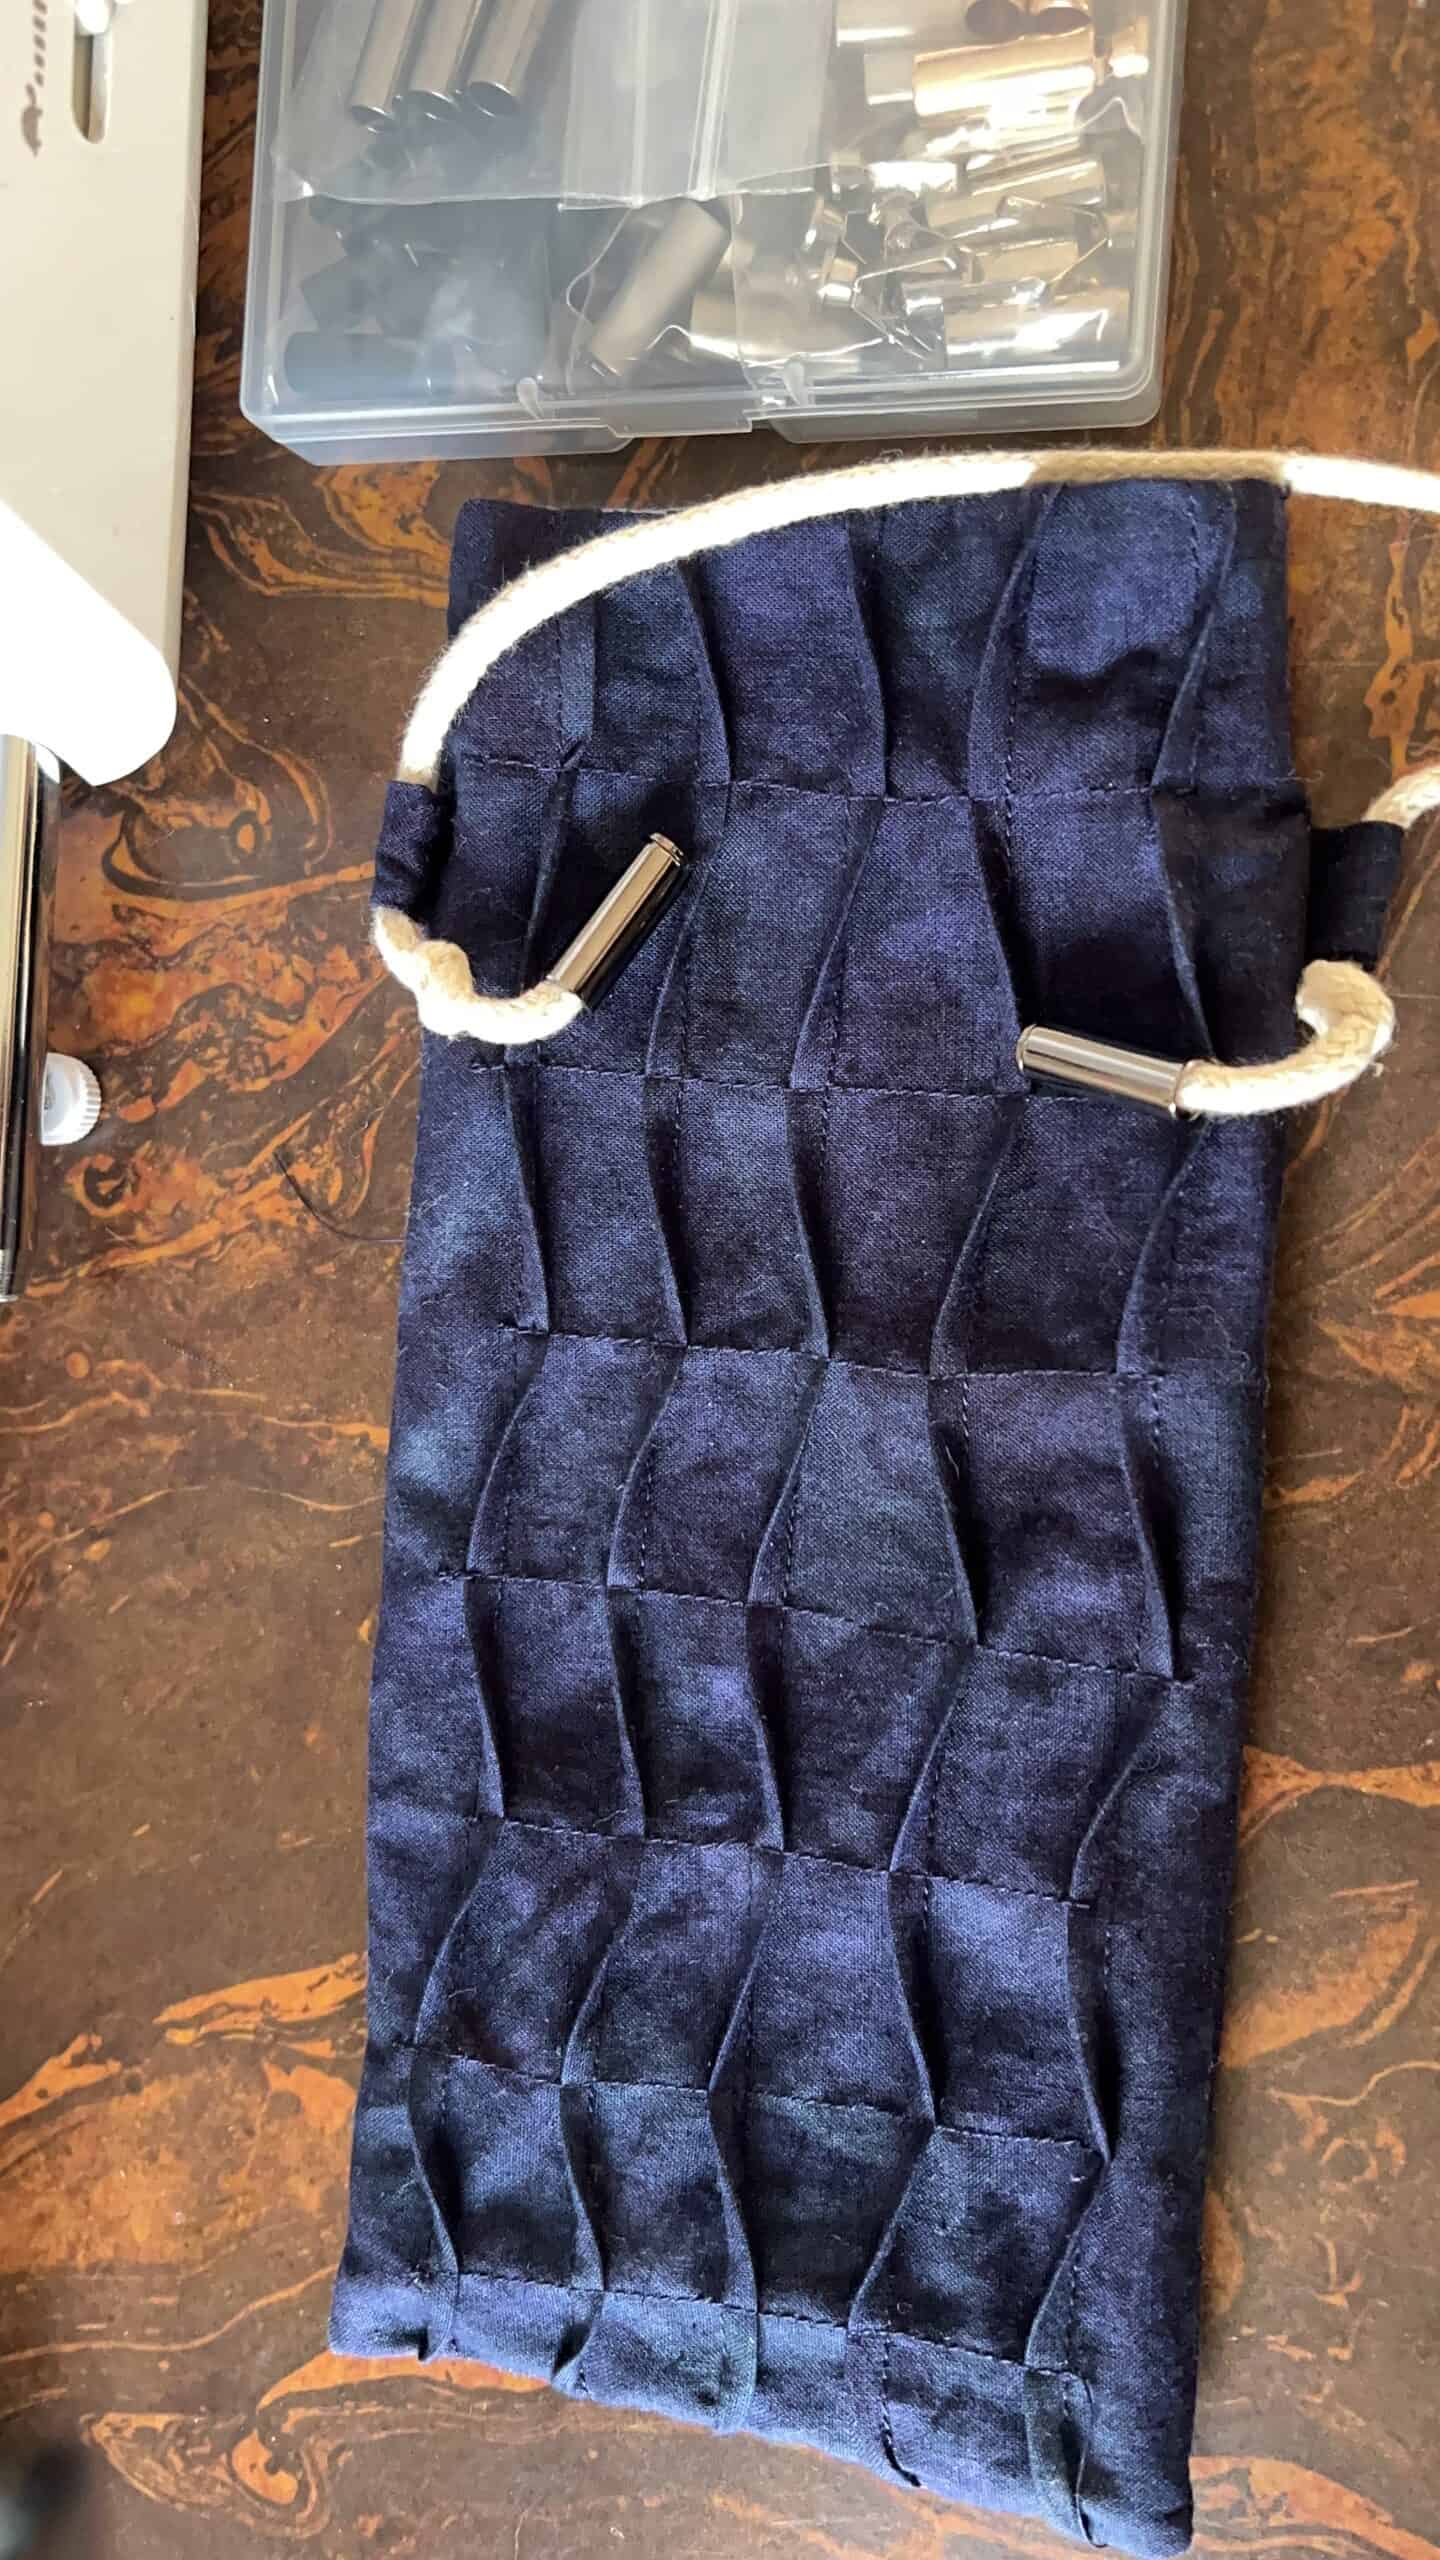
3. To sew the tucks on the bag front, line up the markings with wrong sides together, this will create a fabric fold or tuck. Sew down using a ¼” seam allowance. Repeat for the remaining tucks. There are 5 in total.
4. To create a wavy texture, sew a straight line of stitching perpendicular to the tucks. You can space them out however you want. I chose to stitch mine about an inch apart from each other. As you are sewing the straight line of stitches, play around with the direction the tuck is facing. I kept 2 tucks facing in one direction and 3 facing the other. As you continue sewing additional lines of straight stitches, move the tuck to face the opposite direction.
5. Fold the side loop piece in half with right sides together, along the long edge. Sew using a 1cm seam allowance. Repeat with the remaining side loop piece.
6. Use a loop turner to turn both side loop pieces right side out.
7. Fold the side loop piece in half and baste in place at the notches on the bag front piece. The raw edges of the side loop piece should be on the same side as the raw edge of the bag front piece. Make note of how wide your cording is and make sure the opening of the side loop can accommodate its width, while still being relatively snug.
8. Place the bag front and bag back right sides together and sew along the sides and bottom edges. Make sure the opening at the top remains unsewn. Trim the corners and grade the seam allowance down. This piece will now be referenced as the “main bag body”.
9. Place the lining pieces right sides together. Sew along the sides and bottom edges and be sure to leave about a 2” gap in the center of one of the sides. This gap will be used to turn the bag right side out. Trim the corners and grade the seam allowance down, ensuring there is enough seam allowance at the gap to sew it closed comfortably.

10. Place your lining and the main bag body right sides together (one will slip into the other). Sew along the top edge using a 1cm seam allowance.
11. Turn the bag right side out using the gap in the lining. Carefully push out the corners using a point turner.

12. Sew the gap in the lining closed. You can use a machine to do this, or hand stitch it closed for a more invisible finish.
13. Edgestitch the side seam from the bag opening to the top of the side loops to keep the lining in place.
14. Insert the cording through the side loops and secure the ends with a knot.
-
- Optional: Place a cord end on the raw edge of the cording for a cleaner finish.
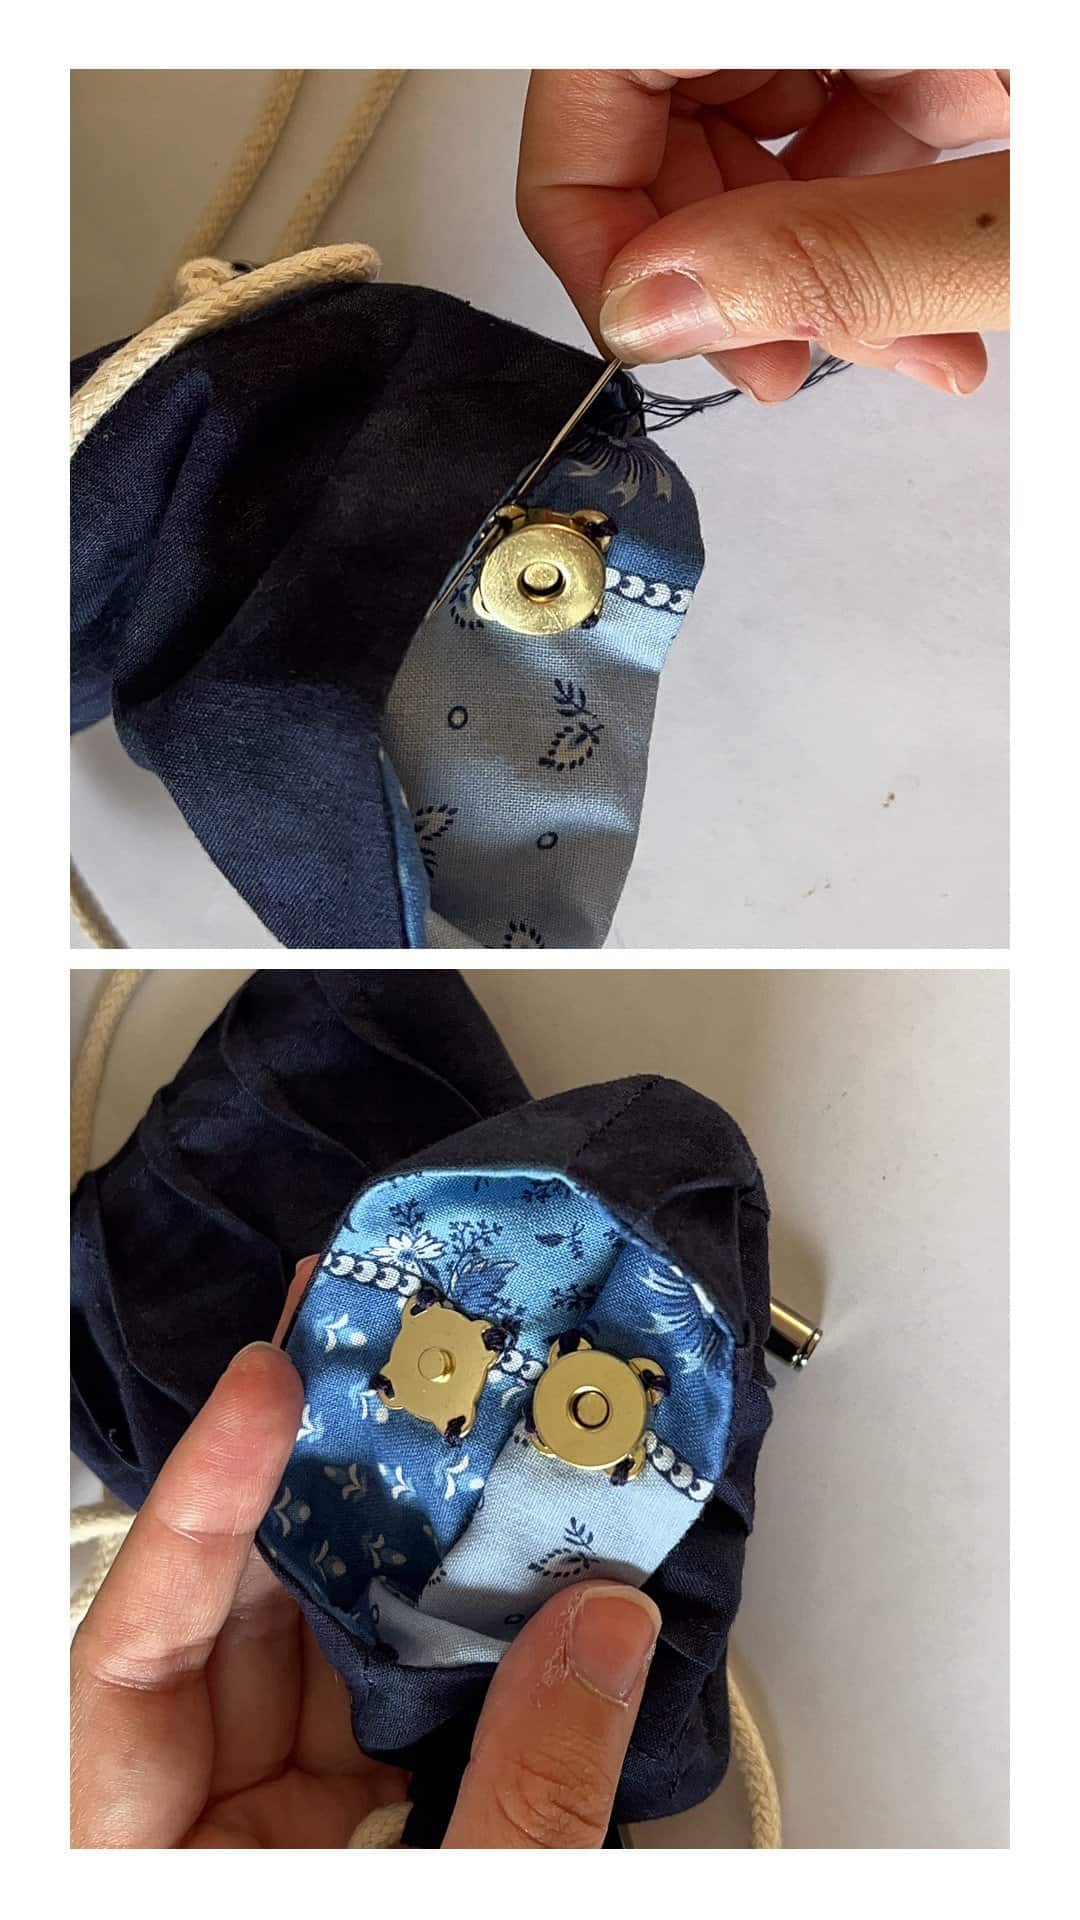
15. To ensure your bag contents are secure, attach a magnetic snap button as indicated on the pattern, using a needle and thread. It should be centered along the bag opening and 1cm from the top edge.
Now it’s all done! You have a cute and compact bag to fit your phone into for on-the-go adventures. Tag me on IG @rumer_has_it if you make one too. I’d love to see it! 🙂
If you want to keep up with me, Rumer, on social media for other fun projects, follow me on social media: Instagram
If you want to keep up with all things Clover, follow us on: Facebook | Twitter | Instagram | Pinterest | YouTube | Ravelry