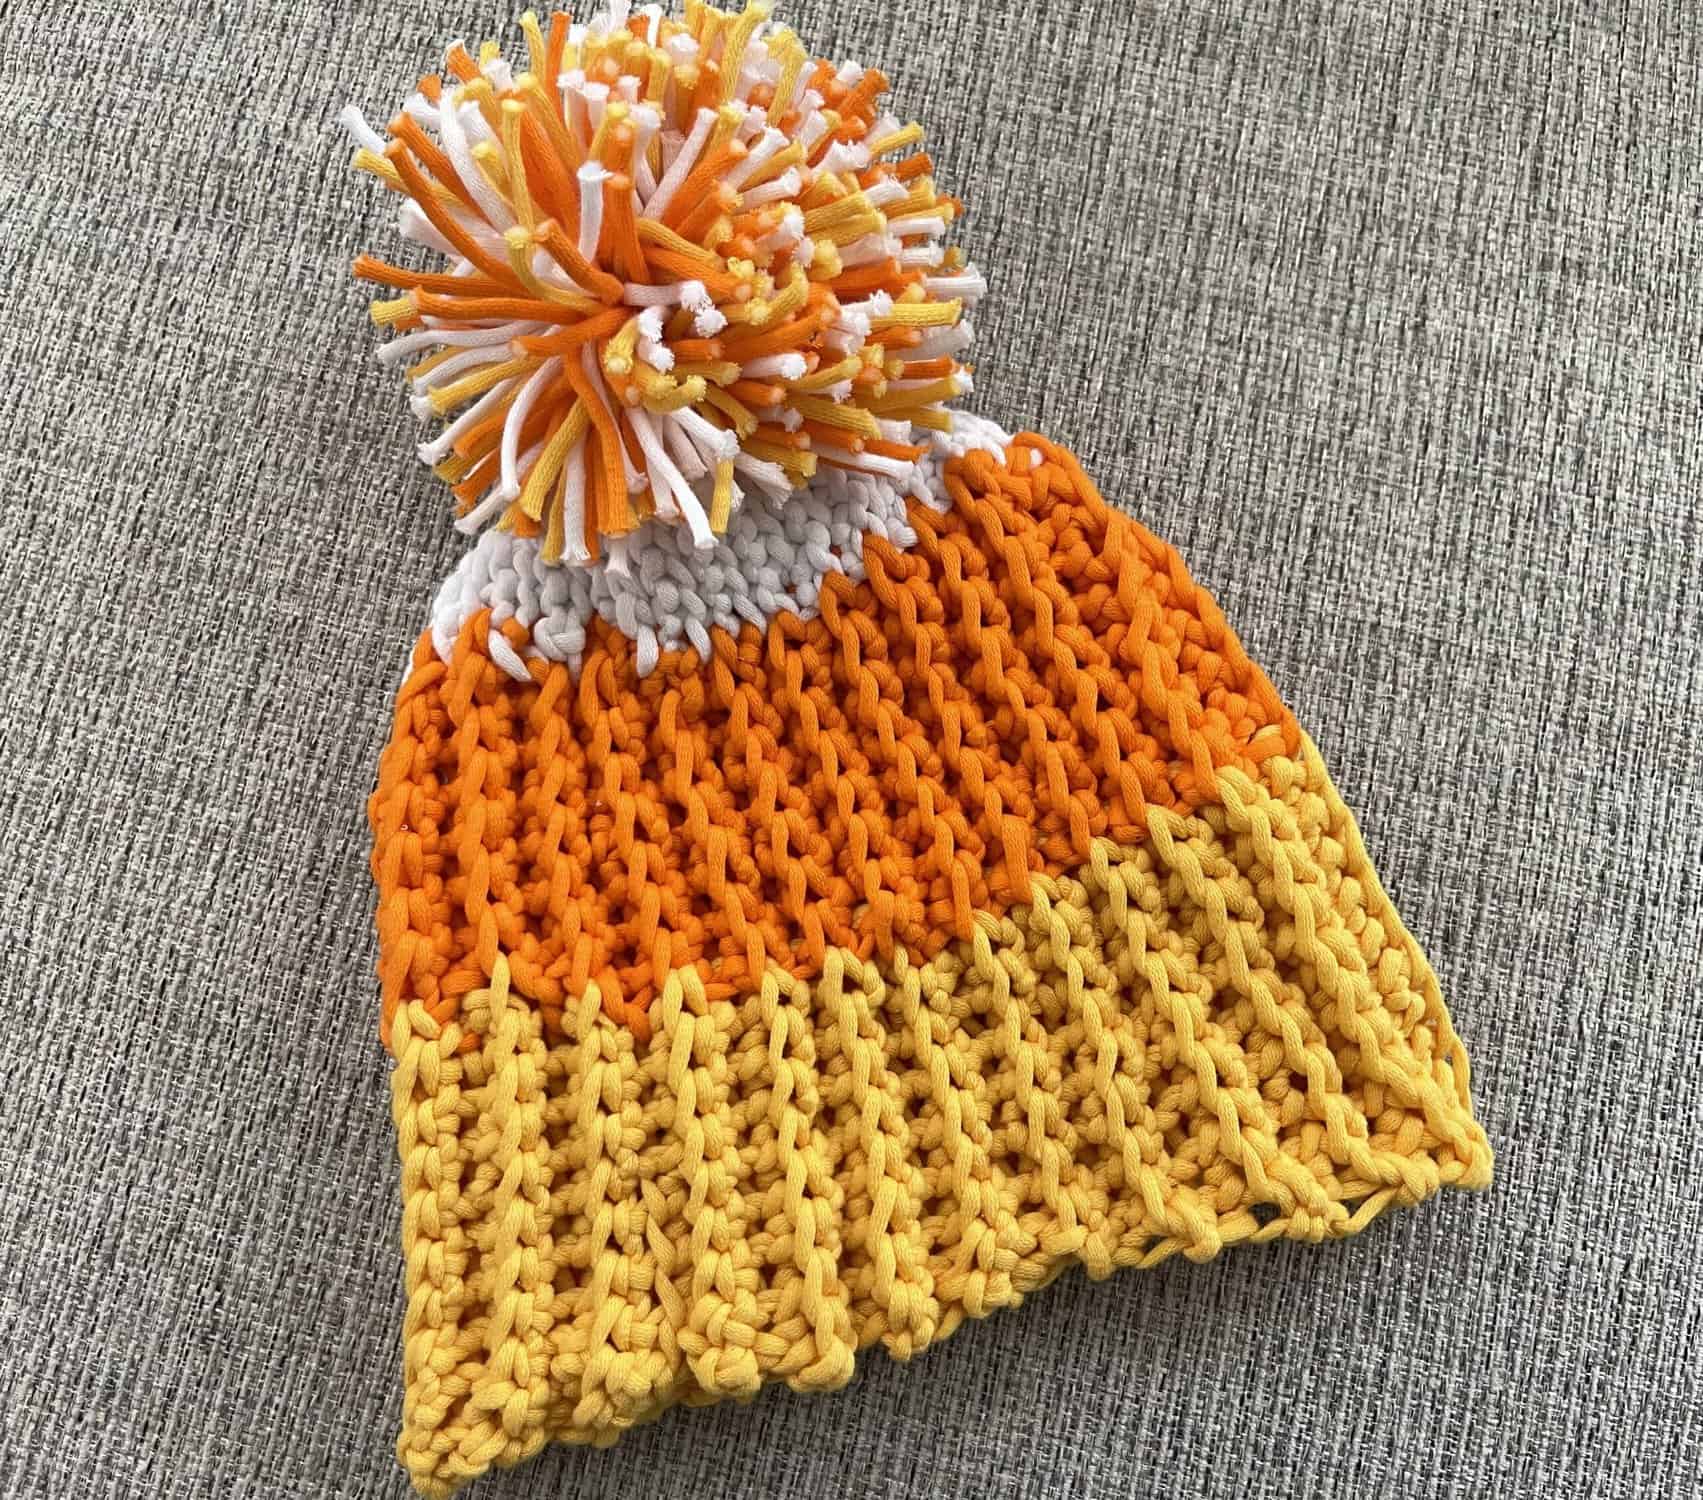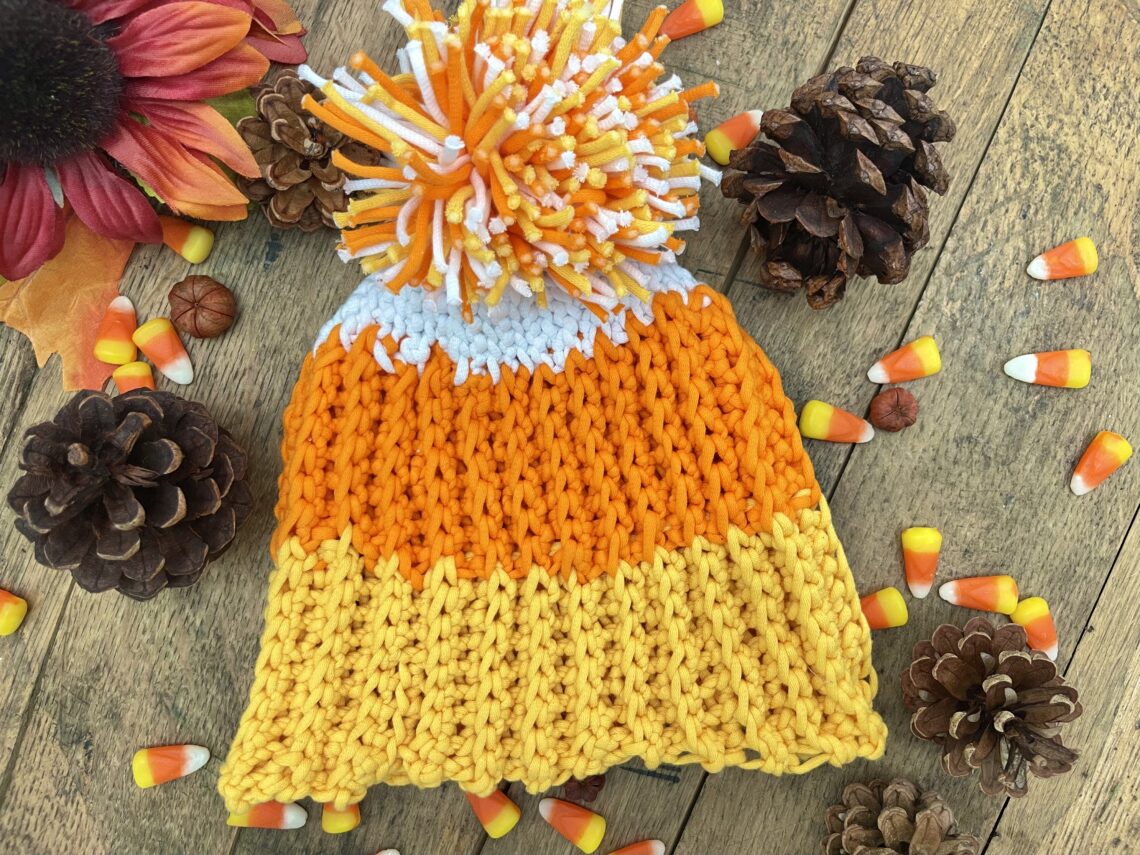
Candy Corn Pom-Pom Beanie
Hi all, it’s Duana from @duanastudio (@duana_m_chandler on IG)! I’m excited to share this new blog post on this cute candy corn beanie that I made for my daughter 🙂 If you have a passion for both crochet and the sweetest and most yummy season of the year, you’re in for a treat (literally and figuratively)!
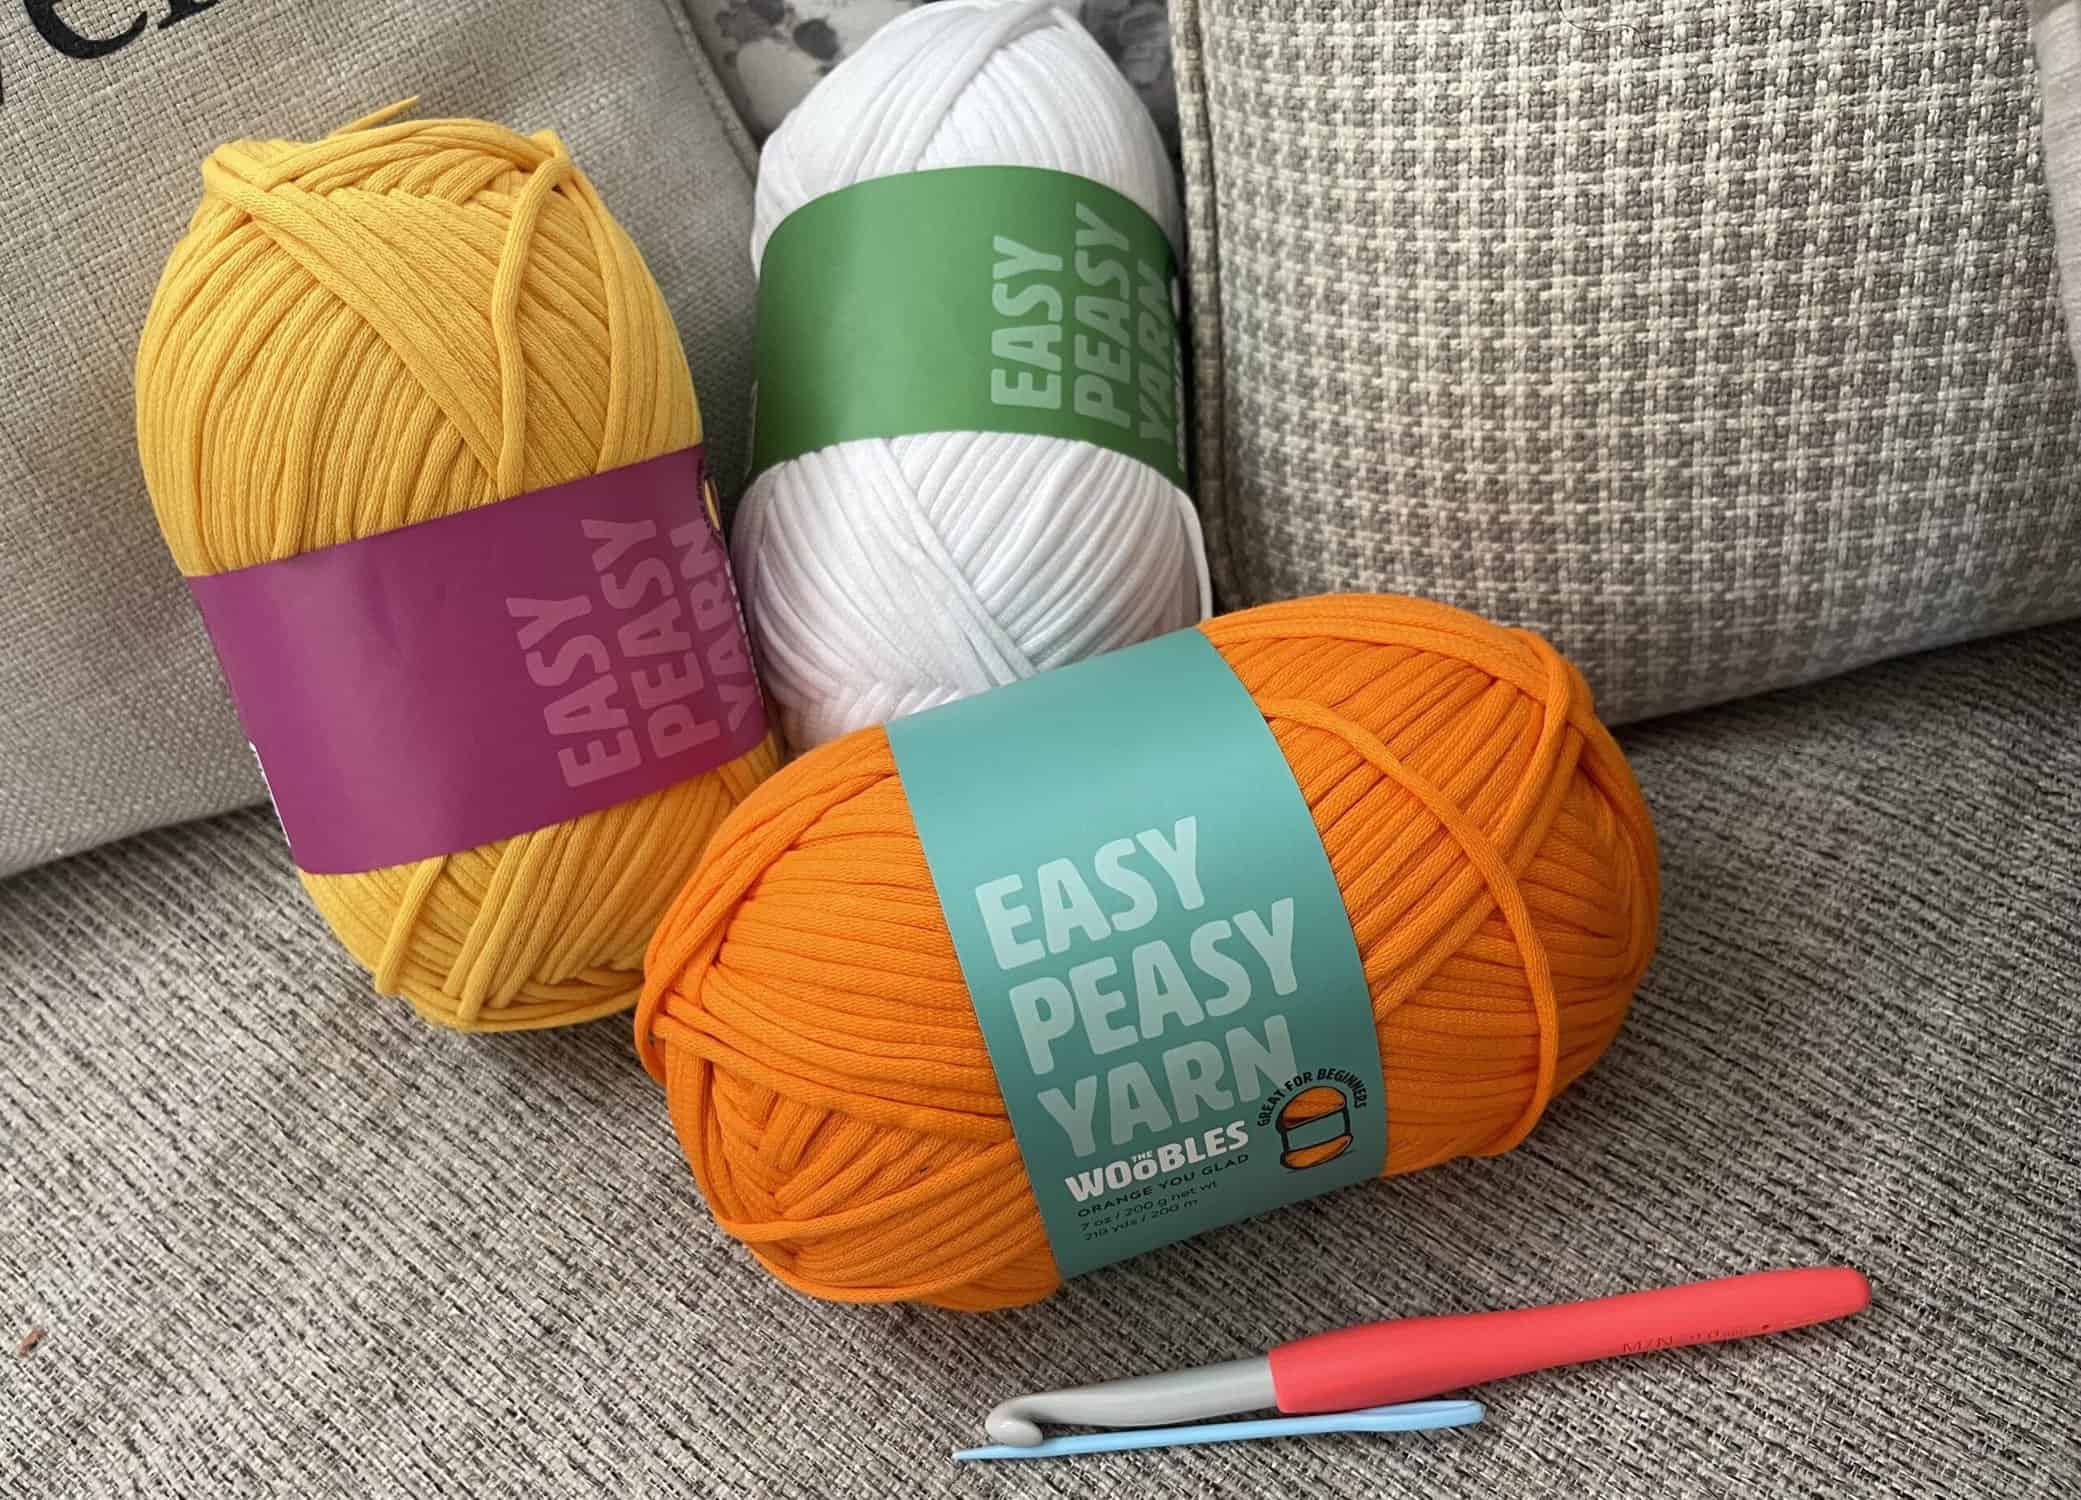
In this blog post, I wanted to share a candy corn beanie pattern I found by Sierra’s Crafty Creations that would guide you through the creation of a delightful and seasonally-appropriate accessory: a Candy Corn Beanie Hat. I made a few modifications for my own beanie, but her pattern was pretty straight forward and great for beginners. This was the first time I have used Woobles yarn. I decided to use it since it’s great for beginners and I will admit, this was probably one of the best yarns I have used. So grab your crochet hook, a few skeins of yarn in bright orange, sunny yellow, and white, and let’s get started!
MATERIALS:
- The Woobles Easy Peasy Yarn (Orange, Yellow, and White)
- Amour Crochet Hook M/N (9.0 mm)
- Yarn Needle
- Patchwork Scissors
ABBREVIATIONS:
- ch – chain
- sl st – slip stitch
- blo – back loop only
INSTRUCTIONS:
BEANIE:
Using white yarn, make a chain of 11. Attach the orange yarn and make a chain of 11. Attach the yellow yarn and make a chain of 13.
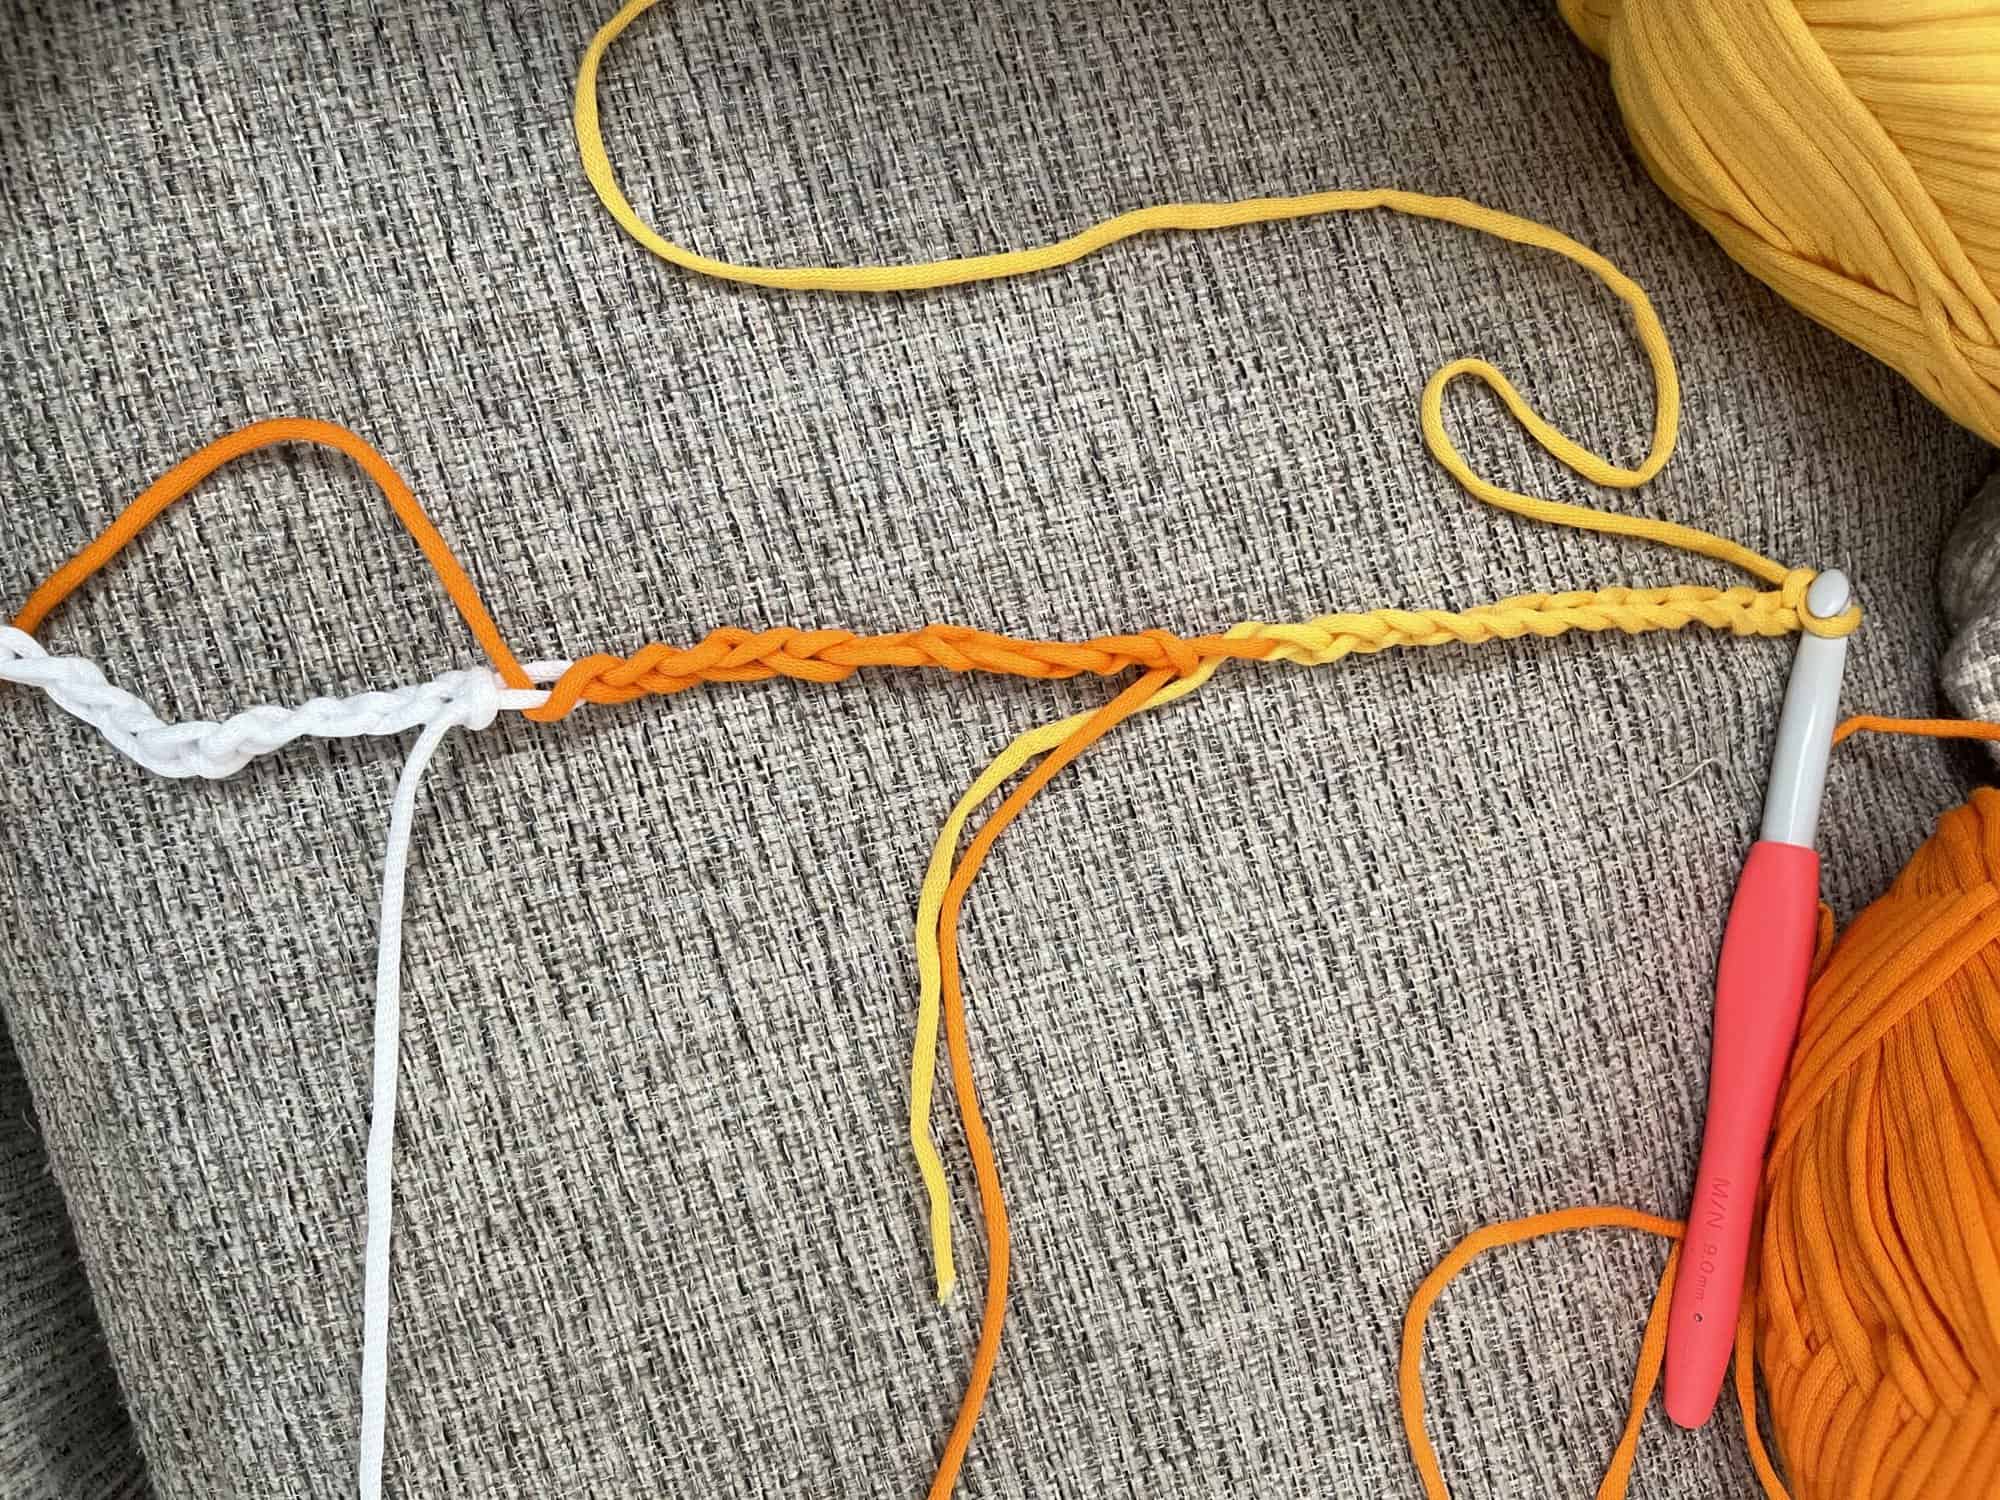
Row 1: SC in second ch from hook. SC in the next 11 chs. Bring yellow yarn in front of your work. Insert hook into last yellow st, grab orange yarn and pull that through your yellow ch and the loop on your hook.
Using your orange yarn, sc in the next 12 chs. Bring orange yarn in front of your work. Insert hook into last orange st, grab white yarn and pull that through your orange ch and the loop on your hook.
Using white yarn, sl st in the next 12 sts. Ch 1, then turn.
Row 2: sl st in blo of the next 12 sts. Color change in last st. Sc blo in next 12 sts. Color change in last st. Sc blo in each st across. Ch 1, then turn.
Row 3: Sc in blo of the next 12 sts. Color change in last st. Sc blo in next 12 sts. Color change in last st. Sl st blo in each st across. Ch 1, then turn.
Repeat Rows 2-3 until you reach Row 46. In the original, it’s 52 rows, but I wanted to make this for my daughter, so I made it a little smaller. Also, due to the slip stitches on the white, it will appear more narrow and that’s the whole point because that’s going to be the top.
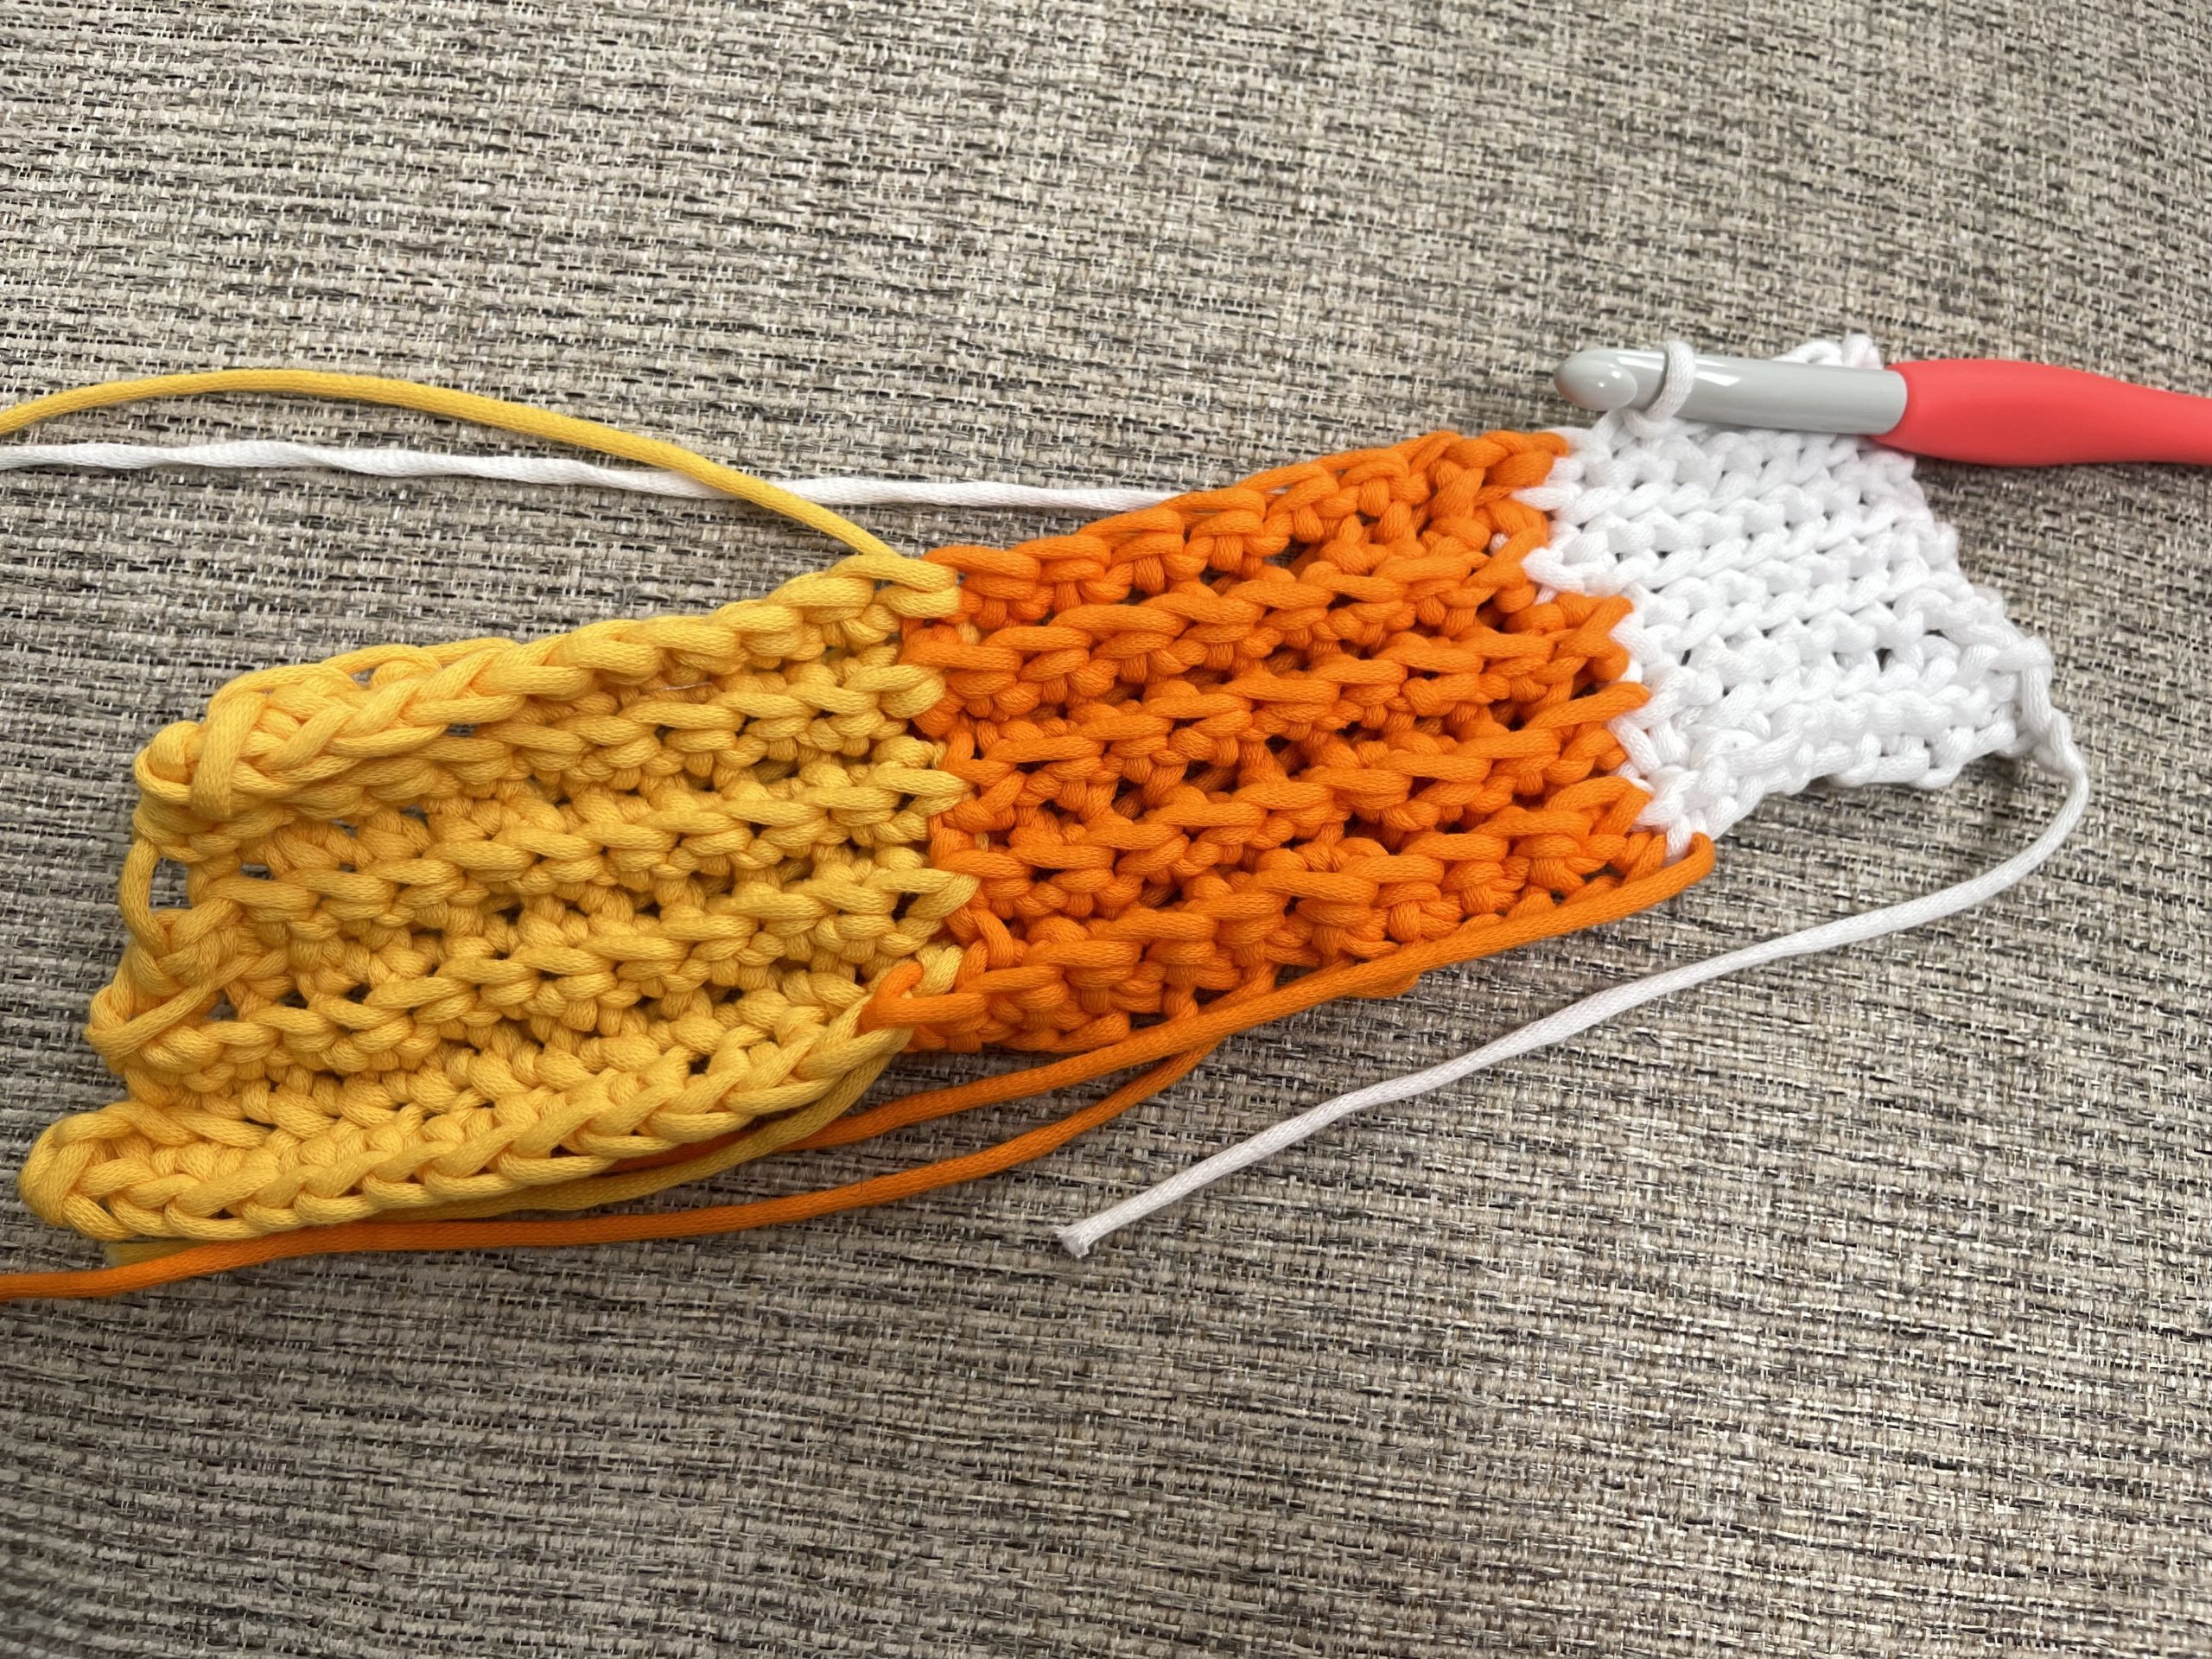
Tie off each color leaving a tail of 6 inches. Fold your rectangle in half so your two short ends are lined up.
Start at either end (with the white or yellow yarn). Thread your yarn tail through your yarn needle. Whip stitch both ends together, stitch for stitch, until you reach your orange section. Pull your white or yellow yarn off your needle, and thread the orange.
Whip stitch your orange section. Pull your orange yarn off your needle, and thread your last color. Whip stitch it together. Tie off and weave in any loose ends.
To close the top, take your white yarn and cut a 12 inch piece of yarn. Using your yarn, thread through your needle. Tie a double knot at the opposite end of the yarn. Weave this through the top stitches of your white section. Skipping a row, going in through the next. All the way around the top. Cinch close the opening.

POM POM:
To create the pom pom for the top of the beanie, use all three skeins. Hold the end of the yarn between your fingers. Then, start wrapping the yarn around your four fingers (excluding your thumb) multiple times. The more times you wrap it, the fuller your pom-pom will be.
Carefully slide the wrapped yarn off your fingers, keeping it in a loop shape. Take the pre-cut length of yarn and slide it through the loop, tying it in a tight knot. This will secure the loops in the middle.
With the knot secure, you should have a loop of yarn with two loose ends. Then use your Patchwork Scissors to cut through the loops on both sides of the knot. Be careful not to cut the knot itself!
After cutting the loops, you’ll have a rough pom-pom shape. Hold the pom-pom by the long ends of the tied yarn and give it a good shake. The yarn will naturally fluff out.
Use your scissors to trim any uneven or overly long yarn strands to create a round and even shape for your pom-pom. Be cautious not to cut the two long ends of yarn used to tie the knot, as these will be used to attach the pom-pom to your project!
You can use the two long ends of yarn to attach the pom-pom to various craft projects or clothing items. Simply thread these ends through a needle and then through your project where you want the pom-pom to be, tying knots on the inside of your project to secure it.
And that’s it! Enjoy your new beanie that’s PERFECT for this colder fall weather. Happy crocheting! 🙂
P.S. If you like candy corn, try not to eat the beanie….Happy Halloween!