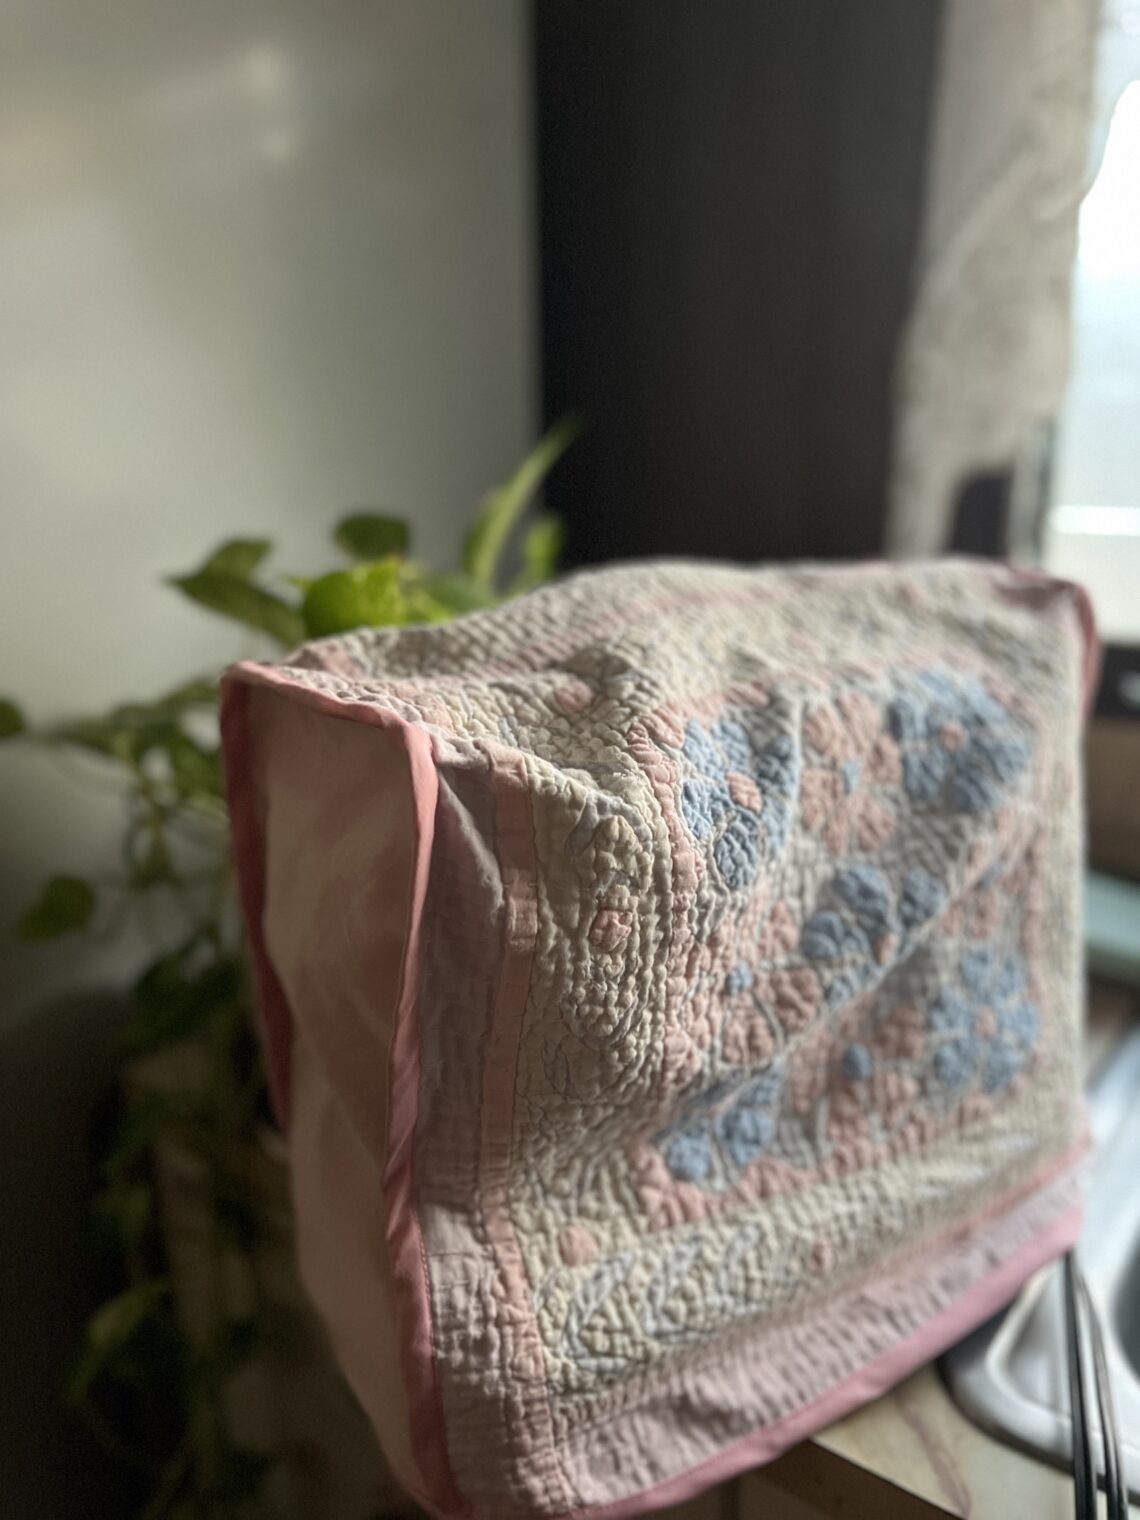
Sewing Machine Cover!
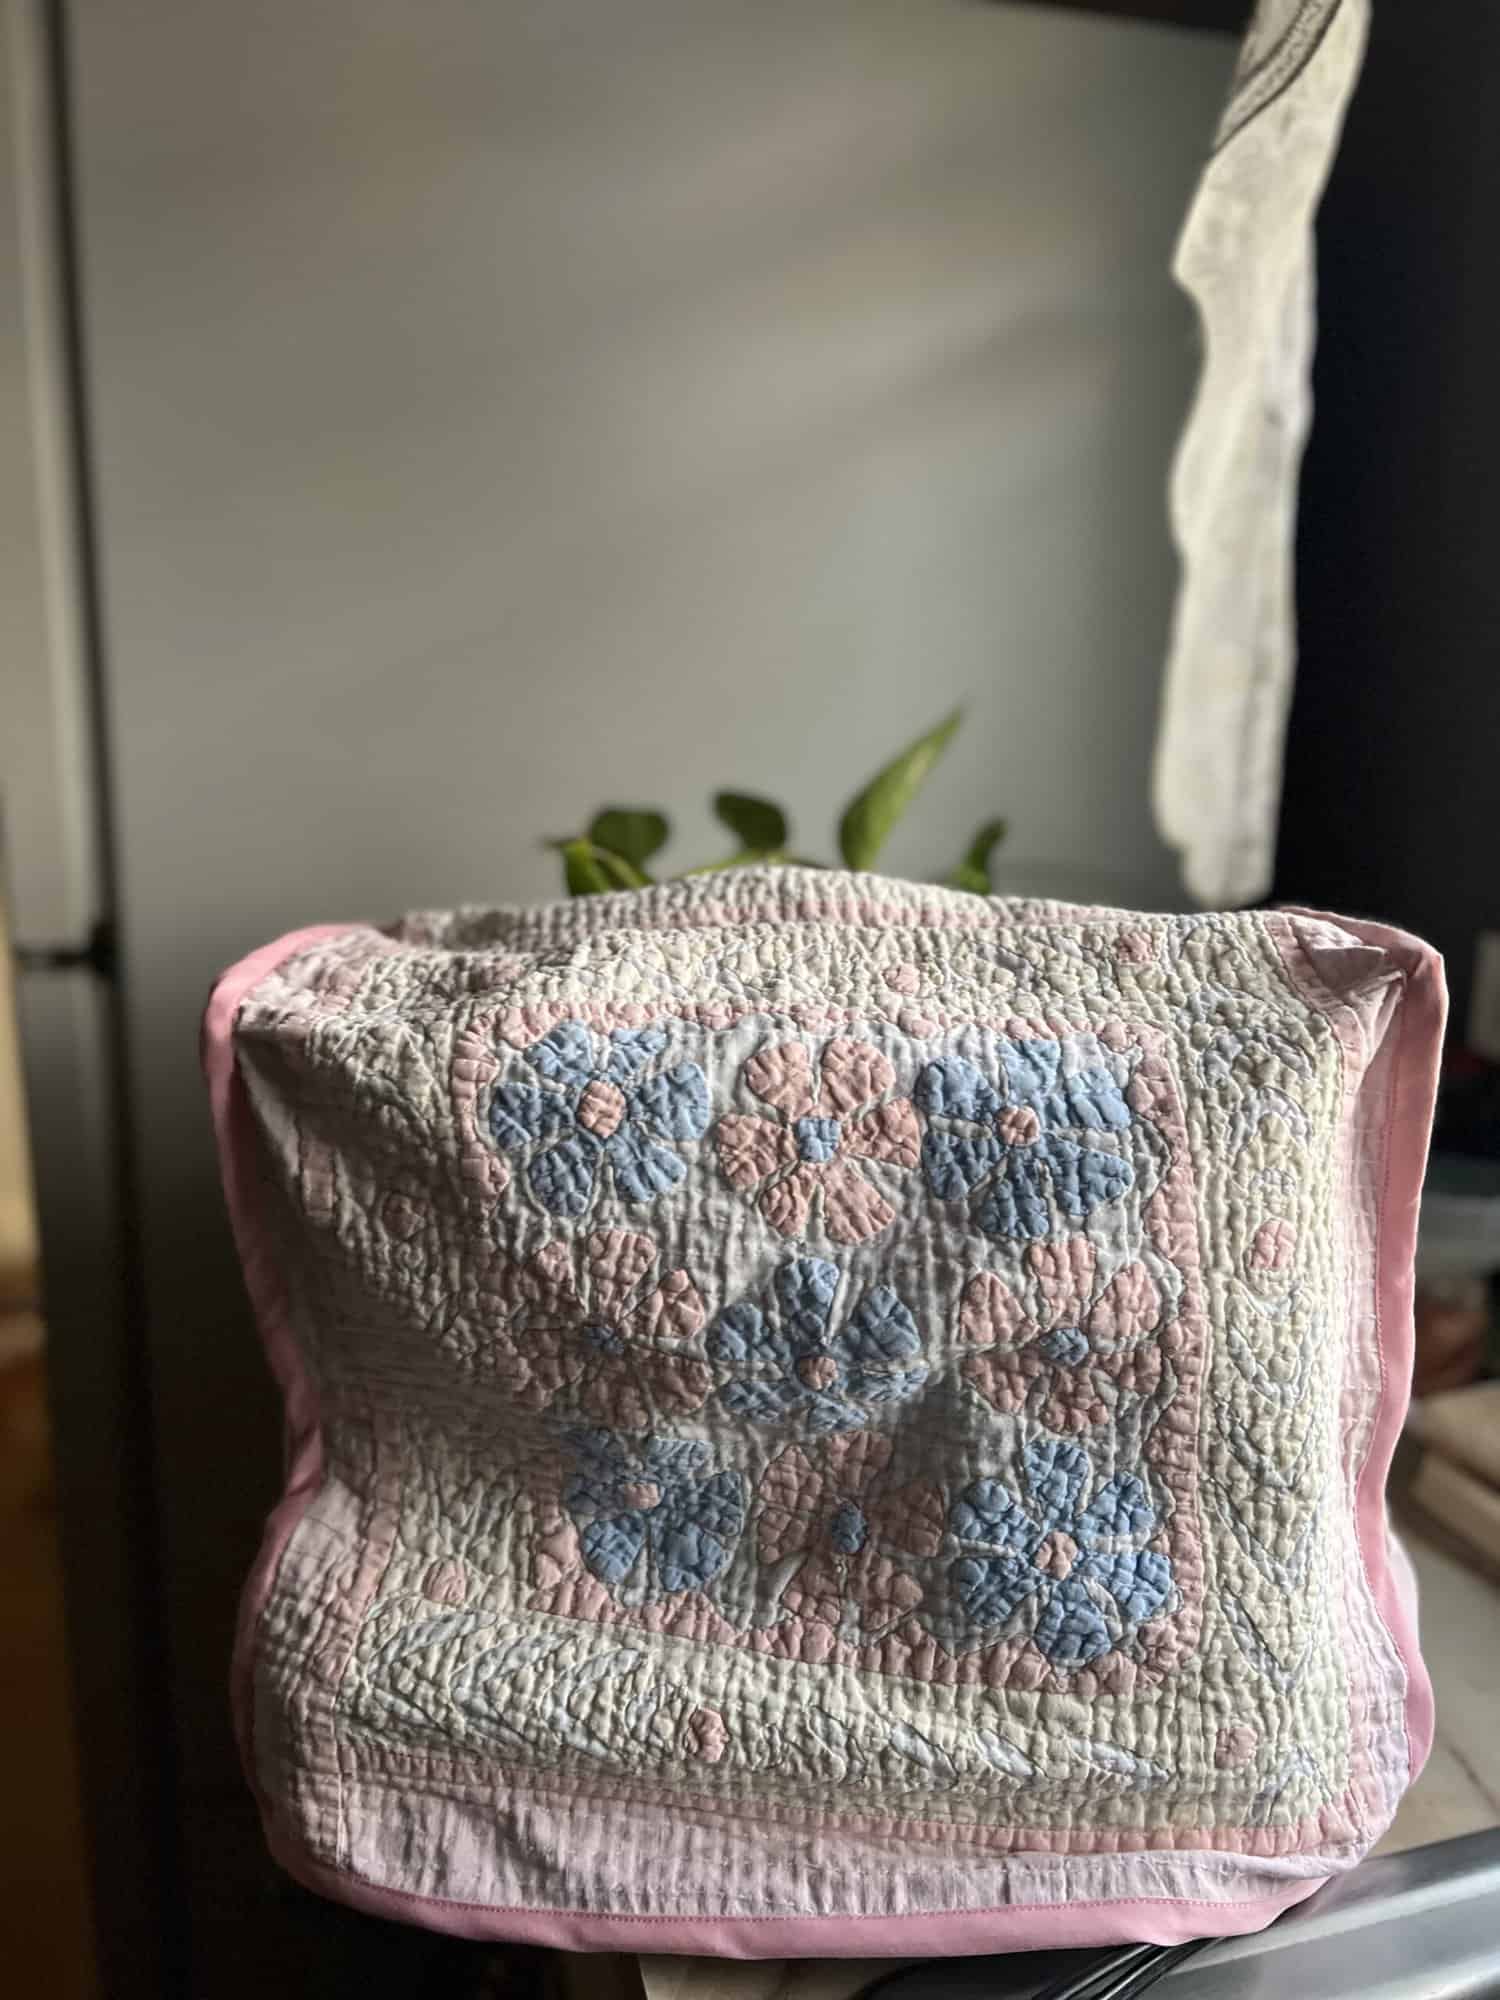
Happy National Sewing Month! It’s Rumer (@rumer_has_it on IG) back with a sewing machine cover project. The sewing machine I use is probably over 15 years old (give or take a few years), and the manufacturer’s cover is breaking at one of the seams a little…. I figured it’s finally time to replace it with a self-made version, so why not make it look cute and colorful while I’m at it? 🙂 I found the perfect hand-quilted squares to upcycle into this cover for my sewing machine, so let’s get started with this project!
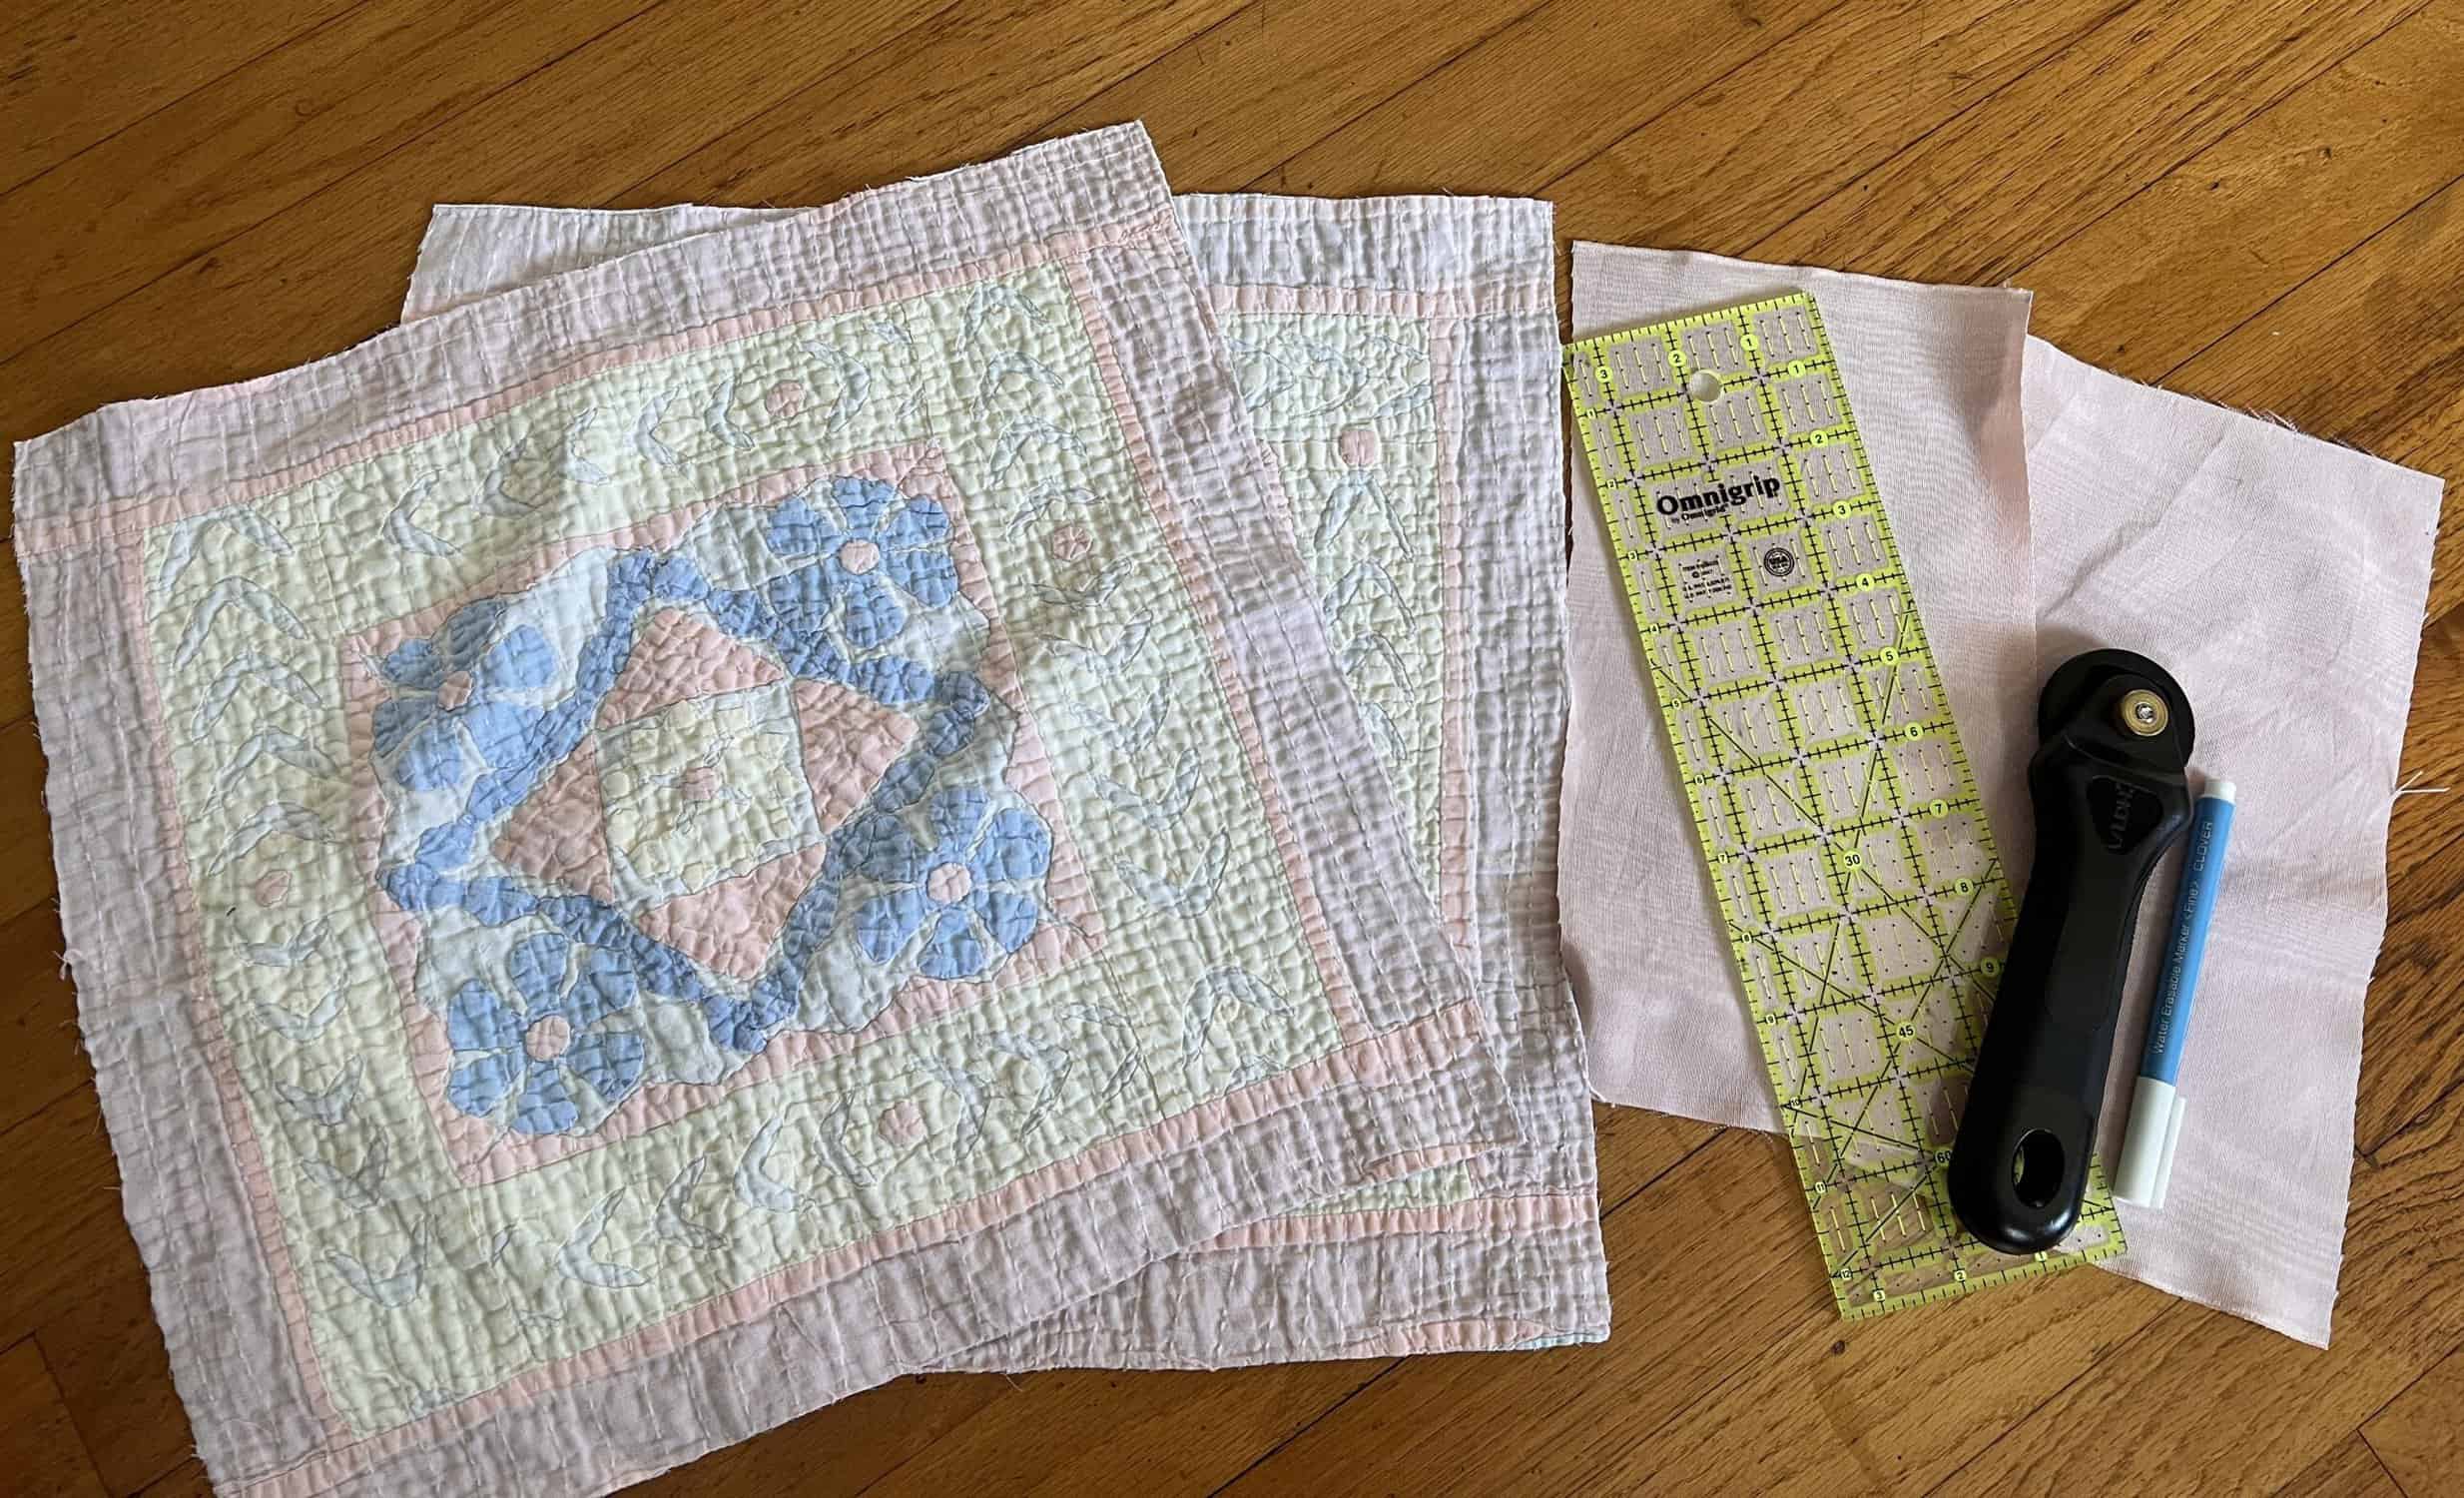
MATERIALS:
- 2 15×15” quilt square
- 2 12×6” coordinating fabric scraps
- Matching thread
- Clover Hand Sewing Needles
- Clover Wonder Clips
- Sewing pins
- Bias binding
- Scissors/Rotary blade
- Clover Water Erasable Marker (Fine)
- Ruler
INSTRUCTIONS:
- Fold the raw edge of the top of the quilt square 1 cm toward the wrong side and then fold again by another 2 cm. Secure the seam with an invisible stitch using a needle and matching thread. Repeat on the other quilt square.
- Connect the two quilt squares together using an invisible stitch.
- Pin a 12×6” piece of fabric to the right side of the quilt square, carefully easing it in. Don’t be afraid to use plenty of clips to secure everything in place. This will serve as a side panel (and will be referenced as such going forward). Sew in place using a 1cm seam allowance. Make sure to pivot as best you can along the corners. Repeat on the other side. Then grade the seam allowance and trim the excess fabric around the corners.
- Add bias binding around the side panel. Sew along the pre-folded guide. Then fold the bias binding over to the right side of the quilt square and sew along the edge. Repeat on the other side.
- Trim off the excess bias binding protruding at the bottom.
- Pin bias binding along the bottom edge of the side panels and quilt squares on the wrong side. Sew along the pre-folded guide. Then fold the bias binding over to the right side and sew along the edge.
Aaaand there you have it! A simple project that also looks like a piece of art in itself. If you make a sewing machine cover with this simple method, feel free to tag me on IG @rumer_has_it so I can see it too!