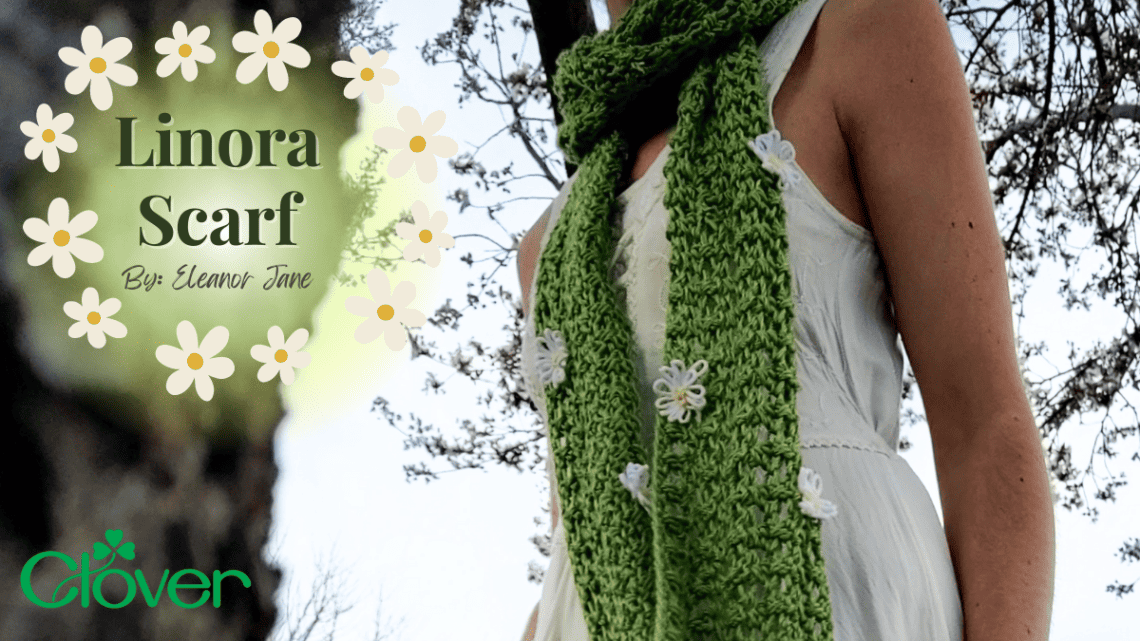
Linora Scarf- Crochet Pattern
Happy March lovely fae! <3 It is I, The Crochet Faerie, jumping for joy at the coming change of season! Today, I am excited to share a special project with you: a Spring-inspired scarf that holds a special place in my heart. This design is a tribute to my love for fantasy, flowers, and childhood memories, all woven together in delicate lace-like stitches that recall the intricate foliage of enchanted forests.
I used the Hana-Ami Flower Loom to create the sweet little daisies adoring this piece, which symbolize innocence and purity, embodying the meaning behind this design.Crocheting this scarf was a delightful journey down memory lane, and I’ve kept it simple and beginner-friendly so that everyone can create something magical and tap into their inner child.
Below are the instructions for you to fashion your own Linora Scarf. If you would like a version of the pattern with photo guidelines, or would like to check out my other patterns, visit my shop:
I truly hope you have as much fun creating this as I did designing it! Seeing you magical being express yourselves through my designs fills my heart in the most lovely sort of way. Thank you for accepting and spreading the love I put into my work.<3
Materials:
Yarn, hook, scissors, darning needle
Hana-Ami Flower Loom- Art No. 3146
Yarn A (for the scarf): Weight 4 – I use Caron Simply Soft in Pistachio
Yarn B (for the flower petals ): Weight 4 – I use Lily Sugar’n Cream in White
Yarn C (for the flower centers): Weight 4 – I use Lily Sugar’n Cream in Yellow
Hook: 8mm US
Gauge: 8DC x 2 rows = 4” wide x 2” tall
Size: Made to measure
Abbreviations:
Chain – Ch
Stitch – St
Single Crochet – SC
Double Crochet – DC
Right Side – RS
Yarn over – YO
Instructions:
TURN WORK after each row
Ch 2 at the beginning of a row counts as a DC
Process: This project is started by chaining an amount equal to the desired length of your scarf, and then working in vertical rows to add width. Lastly, loom flowers are made and sewn onto the RS of the scarf.
Scarf:
*Turn work after each row*
Using yarn A, Ch a multiple of 4 + 1, equal to the length you want for your scarf
Row 1: SC in the 2nd ch from hook and across, Ch 2 (counts as a DC)
Row 2: DC in the next St (2 DC total including the Ch 2), *skip next St, DC in next St, DC in previously skipped stitch (creating an X)* repeat from * to ** until you reach the last 2 Sts, DC in final 2 Sts
Repeat Row 2 until you have reached your desired scarf width, making sure you end with an UNEVEN amount of total crossed DC rows (I crocheted 9 rows total to reach my desired width, NOT including the SC row)
Final Row: SC in each St across, cut and fasten off yarn, weave in any ends <3 Proceed to “Applying Flowers”
Applying Flowers:
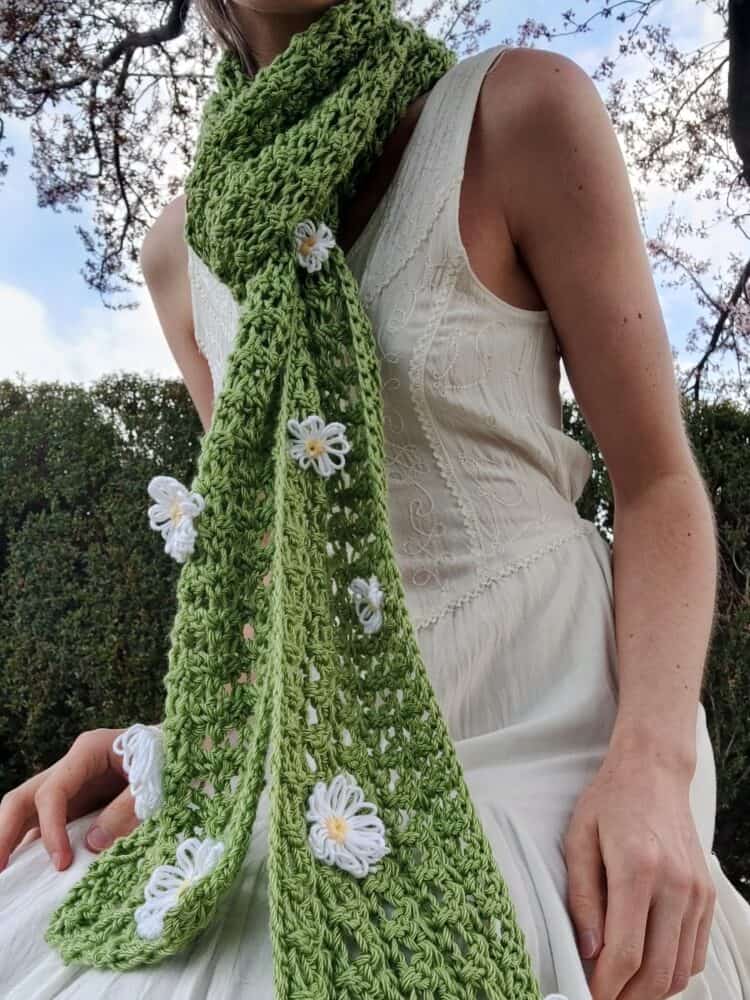
Using yarn B for the petals and yarn C for the flower’s center, follow the instructions of your Hana-Ami Flower Loom (I’ve included a guide below) to create 2 large circle flowers, 4 medium circle flowers, and 6 small circle flowers
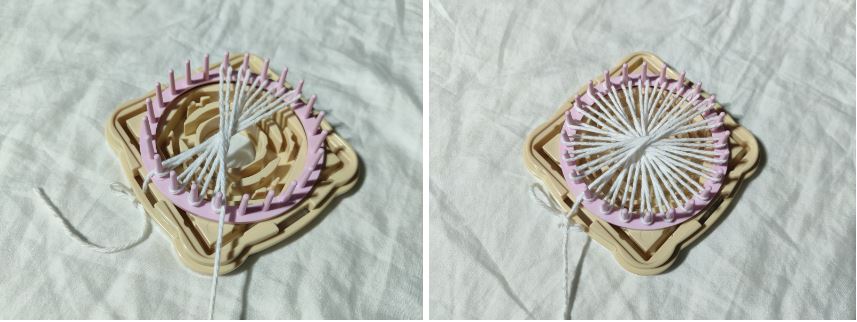
Step 1: Attach loom to base and wind yarn B all the way around pegs in a criss-cross fashion, tying it off once you’ve worked full circle
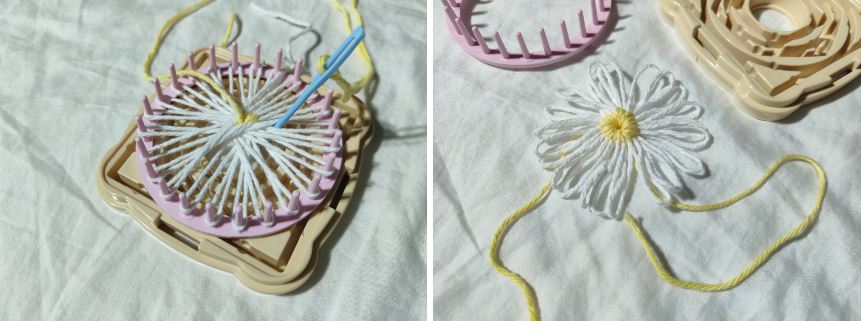
Step 2: Using yarn C, weave from the center, down through each petal. Once finished, remove flower from loom, tie and secure ends <3
Use the tail threads of the flowers to securely knot them into your project, facing RS up, weaving in loose ends after 🙂 I arrange my flowers as picture below <3
I really hope this pattern was easy to follow along, but if you need instructional photographs, you can find a more detailed, step by step, beginner friendly version of this pattern (and all of my other designs) in my shop TheCrochetFaerie.com
Until our next artistic adventure – Love, Eleanor Jane <3
Stay connected with Clover on Facebook | Twitter | Instagram | Pinterest | YouTube | Ravelry