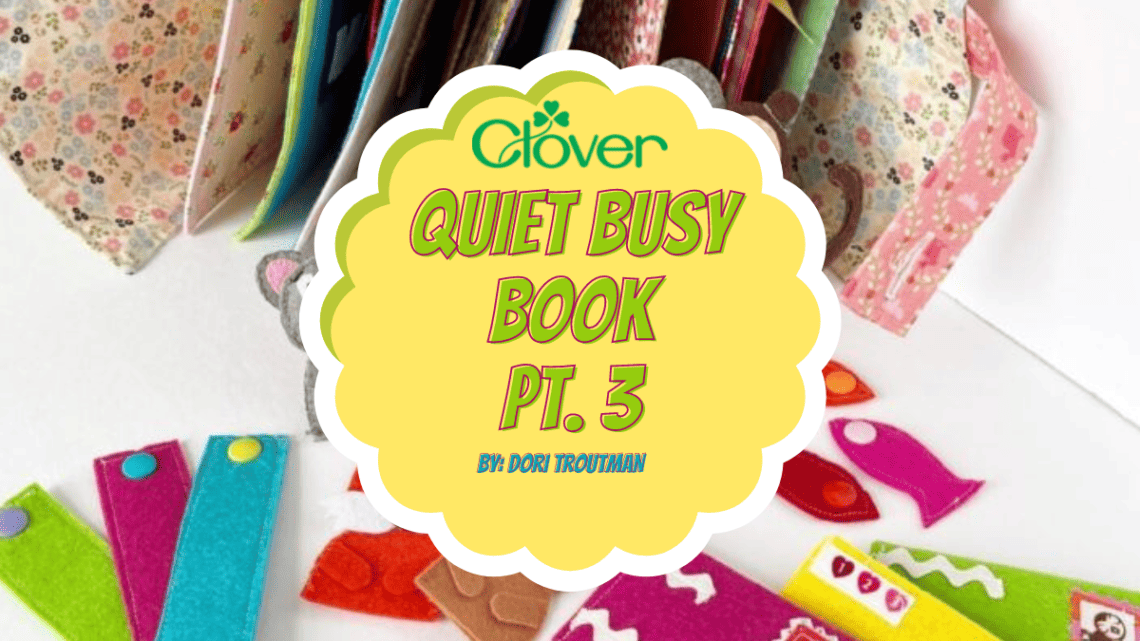
Making A Quiet Book {Part Three} – Sewing Tutorial
Hello Friends!! Today is the final post on my Quiet Book series! It is finished and I couldn’t be happier with it!
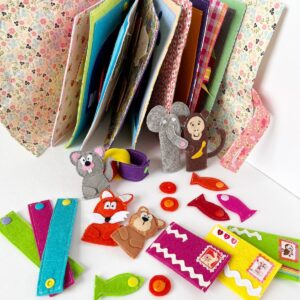
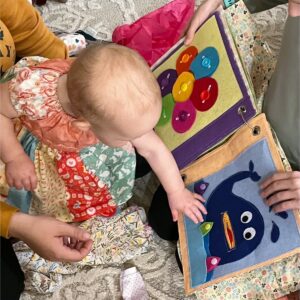
Activity Pages
I followed the same guideline as I did last month (review that post here).
Once again I used Pinterest to help me with ideas. I do have some ideas in my head for things I’d like to try when my grand-baby is a little older and I can make new pages to add to her little book. But for now, I loved just copying some of the great ones out there (and there are A LOT)!
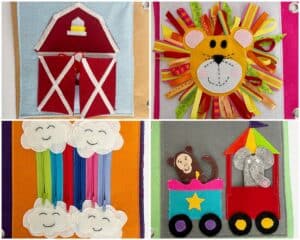
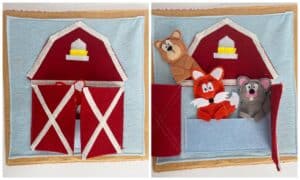
Barn Page:
This page is all over Pinterest but unfortunately, the printable pattern is no longer available. So I had to kind of wing it and draw one of my own. It went together really fast. However… I added little finger puppet animals and let me tell you what friends… that was SLOW going!!! I did all hand embroidery on them, and I’m not very fast at it and the pieces were super tiny! With that said, I think they are absolutely adorable and I would do them all over again (although maybe I’d make barn animals instead!).
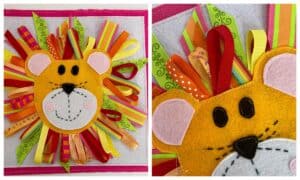
Lion Face Page:
Okay, so let me tell you what… this page was SO MUCH FUN!!! It was super simple… drew the lion’s face and attached the facial details. I laid the face on the middle of my 9-inch felt page and traced around it. Then I dug through all my ribbon scraps and started sewing them to the traced line. I didn’t pay any attention to anything except staying inside the line. It was super fast and so cute. Then I laid the lion face on top and top-stitched it around. This page is not an interactive page… but I do think all the ribbons make it fun.
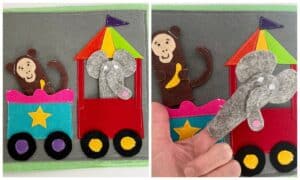
Train Page:
I found a printable here that made this page super easy. It was simply cutting the felt and sewing it on! I then also made the little hand puppets but chose to do them all with machine sewing. I do think hand embroidery would look a lot better, however! But these little puppets are absolutely so cute. Look at the adorable monkey holding his banana!
Rainbow Zipper Page:
I chose this page because I love the look of the rainbow zippers. However, once opened there really isn’t room to put anything inside. If I made it again, I would recommend sewing all the zippers together and THEN attaching them on the two outer edges… then every zipper would open to a big “room”! You could fill it with all kinds of cute colored things! I’m actually considering re-doing it, that’s how much I want it to be different!

Once all your pages are finished, attach the activity page to the base page just like in Post Two.
Also install the grommets on the edge of each base page. Now you can add them to your book!!
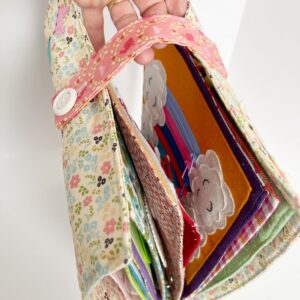
Book Closure
In the Part One of this quiet book (read that here) we made the outer cover and the little strap closure attached with a button on the front. At that time we left the end of that strap unfinished. Today is when we finish it! With all the pages in your book, loop that strap to the back and determine how tight you want it attached. I chose to have it fairly loose so that it would be used like a handle for carrying. Here’s how:
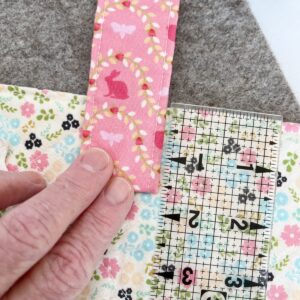
Step One: Once you have determined how tight you want it, overlap it on the back of the book about two inches and using your sharp Clover scissors, (these are my favorite!) cut off the remaining fabric at that point.
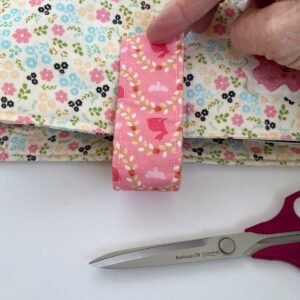
Step Two: Hold the strap exactly where you will sew it and using a Clover erasable marker, mark the lines on each side of the strap.
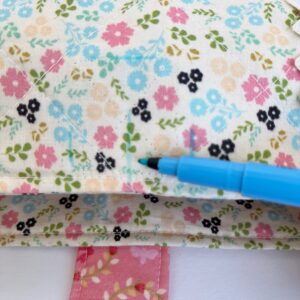
Step Three: Remove the strap from the book (by unbuttoning it) and fold over that unfinished edge about a 1/2 inch. Iron this fold with your iron to hold it in place.

Step Four: Lay the edge of the strap between the marked lines, extending it 1.5 inches. Carefully pin in place; the Clover flower head pins are super sharp and worked great to hold this in place.
Step Five: Sew around the end of the strap, creating a box. Then sew two diagonal lines inside that box creating an X. I actually double sew this so that it is really secure.
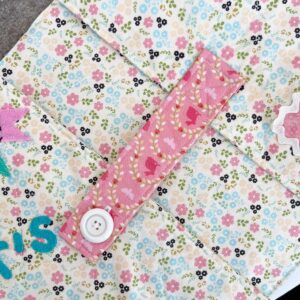
I can hardly believe it but our Quiet Book is finished!!!! I really hope that you will use these blog posts and your favorite Clover tools to make a Quiet Book for the little someone special in your life. I gifted mine to my little grand-girl for her first birthday and oh my goodness does she love it!
Thank you for following along, my sewing friends! I’ll see you next month with an all-new project! Happy Sewing!
~ Dori ~
Stay connected with Clover on Facebook | Twitter | Instagram | Pinterest | YouTube | Ravelry