Christmas Stocking- Knitting Pattern

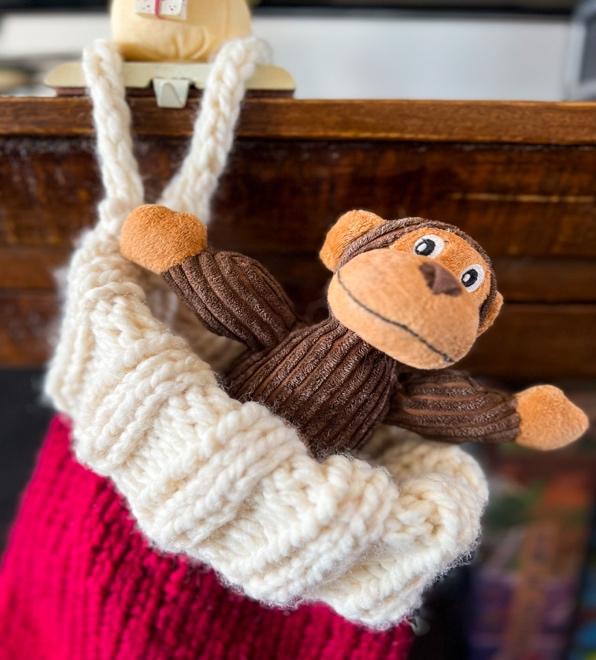
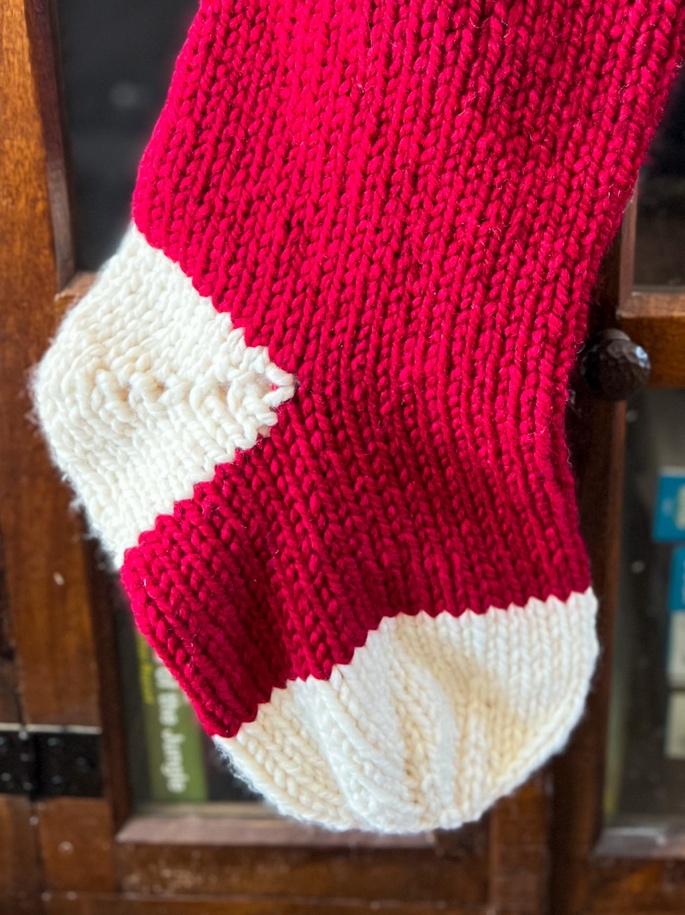
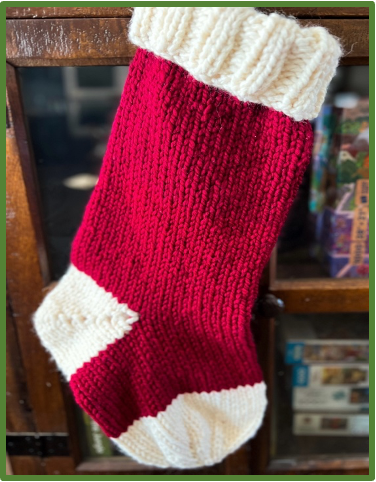
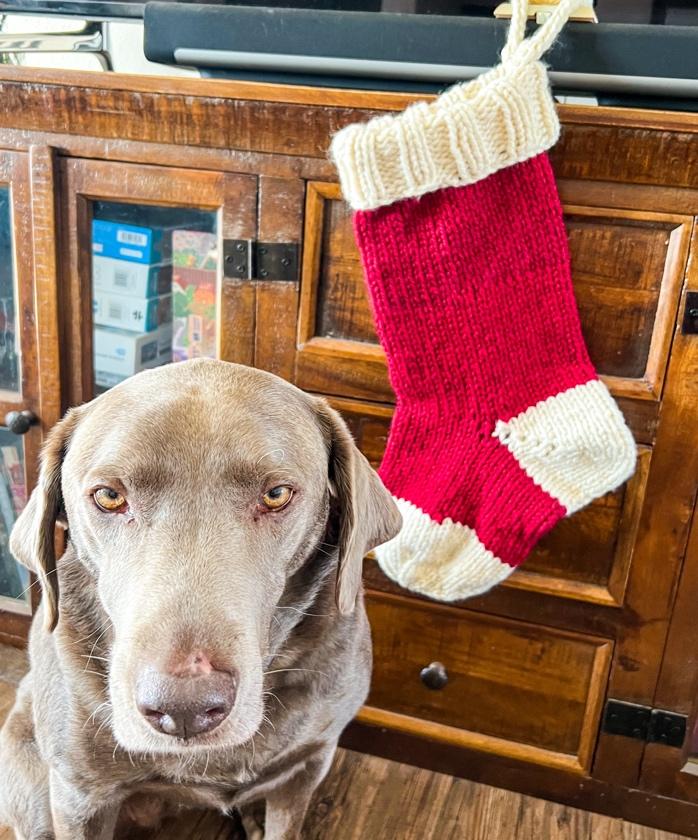
Hi Makers! Hannah here from @bearsdenessentials. We are excited to bring you a festive pattern perfect for knitting up this holiday season. It’s dog-tested, and kid approved! The Bears Den Essentials Christmas Stocking pattern uses Lion Brand Wool-Ease Thick and Quick yarn in two colors, Cranberry and Fisherman, and it celebrates the beautiful colors of the Christmas season. Knit from the cuff to the toe in the round, the heel of the stocking is constructed using the Wrap + Turn Short Rows method. An I-cord is used to create a hook for hanging the stocking on your mantle.
This Christmas Stocking pattern produces a large stocking with a folded-over cuff and contrasting heel and toe colors to hang amidst your tree and trimmings. It’s perfect for filling up stocking stuffers for kids of all ages. You can personalize it by adding an initial or Christmas tree in duplicate stitch on the leg of the stocking or keep it simple and classic.

Difficulty Level: Advanced Beginner

MATERIALS
Yarn: Lion Brand Wool-Ease Thick And Quick Yarn [106 Yards (97 meters) | 170 grams (6 oz) | Super Bulky Weight (Category 6)]
- Stocking requires 2 skeins (1 in each color):
- Main Color (MC), Contrast Color 1 (CC1)
- RECOMMENDED COLORS:
- MC – “Cranberry”, CC1 – “Fisherman”
Yarn Yardage:
| Approx. Amount Needed | |
| MC Color –Cranberry | 106 Yards (97 meters) | 170 grams (6 oz) |
| CC1 Color –Fisherman | 106 Yards (97 meters) | 170 grams (6 oz) |
Knitting Needles:
-US Size 13 (9.00mm) Clover Takumi Bamboo Circular Knitting Needles 16” (41cm)- Art. No 3016-16-13
-US Size 13 (9.00mm) Clover Takumi Bamboo Double-Pointed Knitting Needles 7” (18cm)- Art. No 3015-13
Notions:
-Clover Jumbo Stitch Ring Markers – Art. No 354– 1 unique stitch marker for marking the end-of-the-round
-Clover Jumbo Darning Needle- Art. No 340 (to weave in loose ends)
-Clover Knitting Needle Point Protectors – Art. No. 3005 (recommended but not required – helps prevent stitches from slipping off the needles)
-Flexible Stitch Holder
SIZE INFORMATION:
Gauge:
Approx. 10 sts/13.5 rounds = 4 inches square in pattern stitch (after blocking) using 9.0mm/US 13 needles
Finished Measurements:
Finished Width of Cuff Folded Over: ~9” (23 cm)
Finished Length from Top of Cuff Folded Over to Start of Heel: ~13.5” (34.5 cm)
Finished Length from Center of Heel to Center of Toe: ~10” (25.5 cm)
ABBREVIATIONS AND STITCH GLOSSARY:
• Approx: Approximately
• CO: Cast on
• Dpns: Double-pointed needles
• K: Knit
• M(s): Stitch marker(s)
• Pm: Place marker (place down one stitch marker)
• P: Purl
• Rnd(s): Round(s)
• Sm: Slip the stitch marker over
• Stockinette Stitch created by knitting each stitch of every round
• St(s): Stitch(es)
• Wrp-t: Wrap and turn
• WS/ RS: Wrong side of the work / Right side of the work
• “ / cm(s): Inch(es) / Centimeter(s)
• 2×2 Rib(bing): Knit 2, Purl 2
PATTERN:
CONSTRUCTION OVERVIEW:
This stocking is worked in the round from the top, starting with a 2×2 ribbing to create a folded-over cuff. The body of the stocking is then worked before changing colors to work the heel using the Wrap + Turn Short Rows method. The foot and toe are worked in stockinette stitch with an 8-corner toe decrease. The final touch is an i-cord, which is knit for ~8” to ensure your stocking can hang securely on the mantle. Since it’s made with 80% wool yarn, I recommend blocking it before hanging up and then moving forward hand wash it gently with your preferred wool wash.
CUFF RIBBING:
With size US 13 (9.00 mm) circular needles and CC1 yarn, CO 40 sts. Place stitch marker, then join in the round. Be careful not to twist the yarn.
Round 1: K2, p2 around to end-of-round marker, sm.
Continue working in ribbing (k2, p2) until work measures 5” (13 cm) from CO edge.
STOCKING BODY:
Change from CC1 to MC.
Round 1: Knit around to end-of-round marker, sm.
Continue to knit around to the end-of-round marker until the piece measures ~16” (41cm) from CO edge.
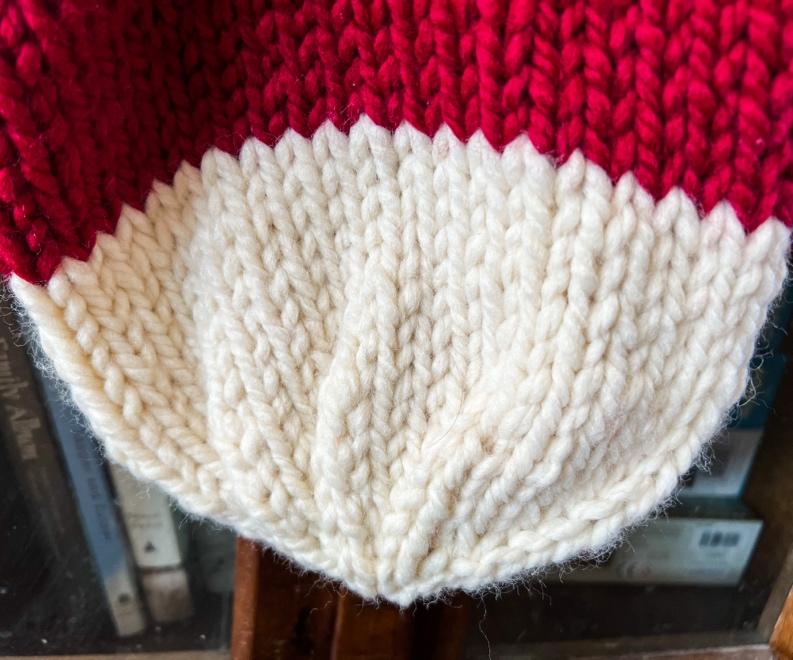
HEEL: The heel is worked using the Wrap + Turn Short Rows** method over half of your stocking’s stitches.
|
**WRAP + TURN SHORT ROWS METHOD HOW TO To wrap and turn on a knit row: Keep the yarn in back, slip the next stitch purlwise from the left needle to the right needle, bring the yarn forward as if to purl, slip the stitch from the right needle back to the left needle, bring the yarn to the back of the work as if to knit, and turn the work so the purl side is facing you, ready to purl. |
Change from MC to CC1. The heel is worked using short rows over half of your stocking’s stitches. Before you start the heel, put your 20 heel sts on one needle and transfer the remaining 20 sts to a flexible stitch holder.
Round 1: K to 1 st before the end of the heel, wrp-t.
Round 2: P to 1 st before the end of the heel, wrp-t.
Round 3: K to 2 sts before the end of the heel, wrp-t.
Round 4: P to 2 sts before the end of the heel, wrp-t.
Work as established, working one less stitch at each end, until you have 6 heel stitches left in the center and 7 stitches on both sides (14 rows total).
Once you’ve completed this first section, you’ll notice gaps in the knitting where you wrapped the stitches. To rectify this, you work back out across the entire row, closing the gaps by “picking up” the wrapped stitches:
Row 1: K to your first wrapped stitch, k the wrap and stitch together by picking up the wrap with the right needle from front to back, inserting the right needle into the stitch that is wrapped, and then knitting the wrap and the stitch together, wrp-t (you are now wrapping the stitch after the one you just worked, so now this stitch has two wraps on it).
Row 2: P to your first wrapped stitch, p the wrap and stitch together by picking up the wrap with the right needle from back to front, placing the wrap onto the left needle, over and behind the stitch it was wrapping, and purling together the wrap and the stitch that is wrapped, wrp-t.
Row 3: K to your next wrapped stitch, k both wraps and the stitch together, wrp-t.
Row 4: P to your next wrapped stitch, p both wraps and the stitch together, wrp-t.
Work as established until you have knit all the way across the stitches.
FOOT:
Change CC1 to MC. Transfer remaining sts back onto your needles.
Round 1: Knit around to end-of-round marker, sm.
Continue to knit around to end-of-round marker until foot measures ~4” (10cm) from heel.
Change from MC to CC1.
Round 1: Knit around to end-of-round marker, sm.
Continue to knit around to end-of-round marker until foot measures ~7” (18cm) from heel.
TOE: 8-Corner Decrease. Change to size US 13 (9.0 mm) dpns when needed.
Round 1: *K3, k2tog, repeat from * around to end-of-round marker, sm. (32 sts rem)
Round 2 (and all other even-numbered rounds): Knit around to end-of-round marker, sm.
Round 3: *K2, k2tog, repeat from * around to end-of-round marker, sm. (24 sts rem)
Round 5: *K1, k2tog, repeat from * around to end-of-round marker, sm. (16 sts rem)
Round 7: *K2tog, repeat from * around to end-of-round marker, sm. (8 sts rem)
Round 8: Knit around to end-of-round marker, sm.
Cut yarn leaving roughly 12” (30 cm), thread yarn through remaining sts, pull tightly, and secure on WS.
FINISHING:
Block and weave in ends.
I-CORD:
Using two dpns, CO 3 sts in CC1.
Slide the 3 sts to the other end of the dpn. Note that the working yarn is now coming from the 3rd stitch.
Bring yarn across the back of your sts and k the first st.
Give the yarn tail a tug and k across.
Work as established until I-cord measures ~8”.
Cut yarn leaving roughly 12” (15 cm), thread yarn through remaining sts, sew together with other ends of the I-cord to create a loop, and secure on WS of the back of stocking cuff.
I hope you had as much fun making this stocking as I did designing it for you! Don’t forget to follow Bears Den essentials on social media and to share your finished knits by tagging @bearsdenessentials and with the hashtag #bearsdeninthewild. Follow our blog (bearsdenessentials.com) to stay up-to-date on more patterns and designs in the future!
Find Bears Den Essentials on: Instagram | Pinterest | Etsy | Ravelry | Facebook | Youtube
DESIGNER AND PATTERN INFORMATION: All patterns, text, products, and photos are the property of Hannah Jaicks and Bears Den Essentials. Patterns and photographs cannot be distributed, copied in part or in whole, re-written, or re-sold without permission—electronically or physically. You may sell your finished products made using Bears Den Essentials patterns as long as you provide a direct link to this pattern in your listing and tag us on social media: @bearsdenessentials. For any other use, please contact us directly (Hannah: bearsdenessentials@gmail.com). Thank you for supporting artists by using and sharing our content ethically and legally.
Stay connected with Clover on Facebook | Twitter | Instagram | Pinterest | YouTube | Ravelry