Sunny Stocking HST Version- Sewing Tutorial
Happy December! My name is Faith Essenburg and I am back with another fun make, this time using one of my favorite holiday patterns from my friend Mary of Sunny Day Supply.
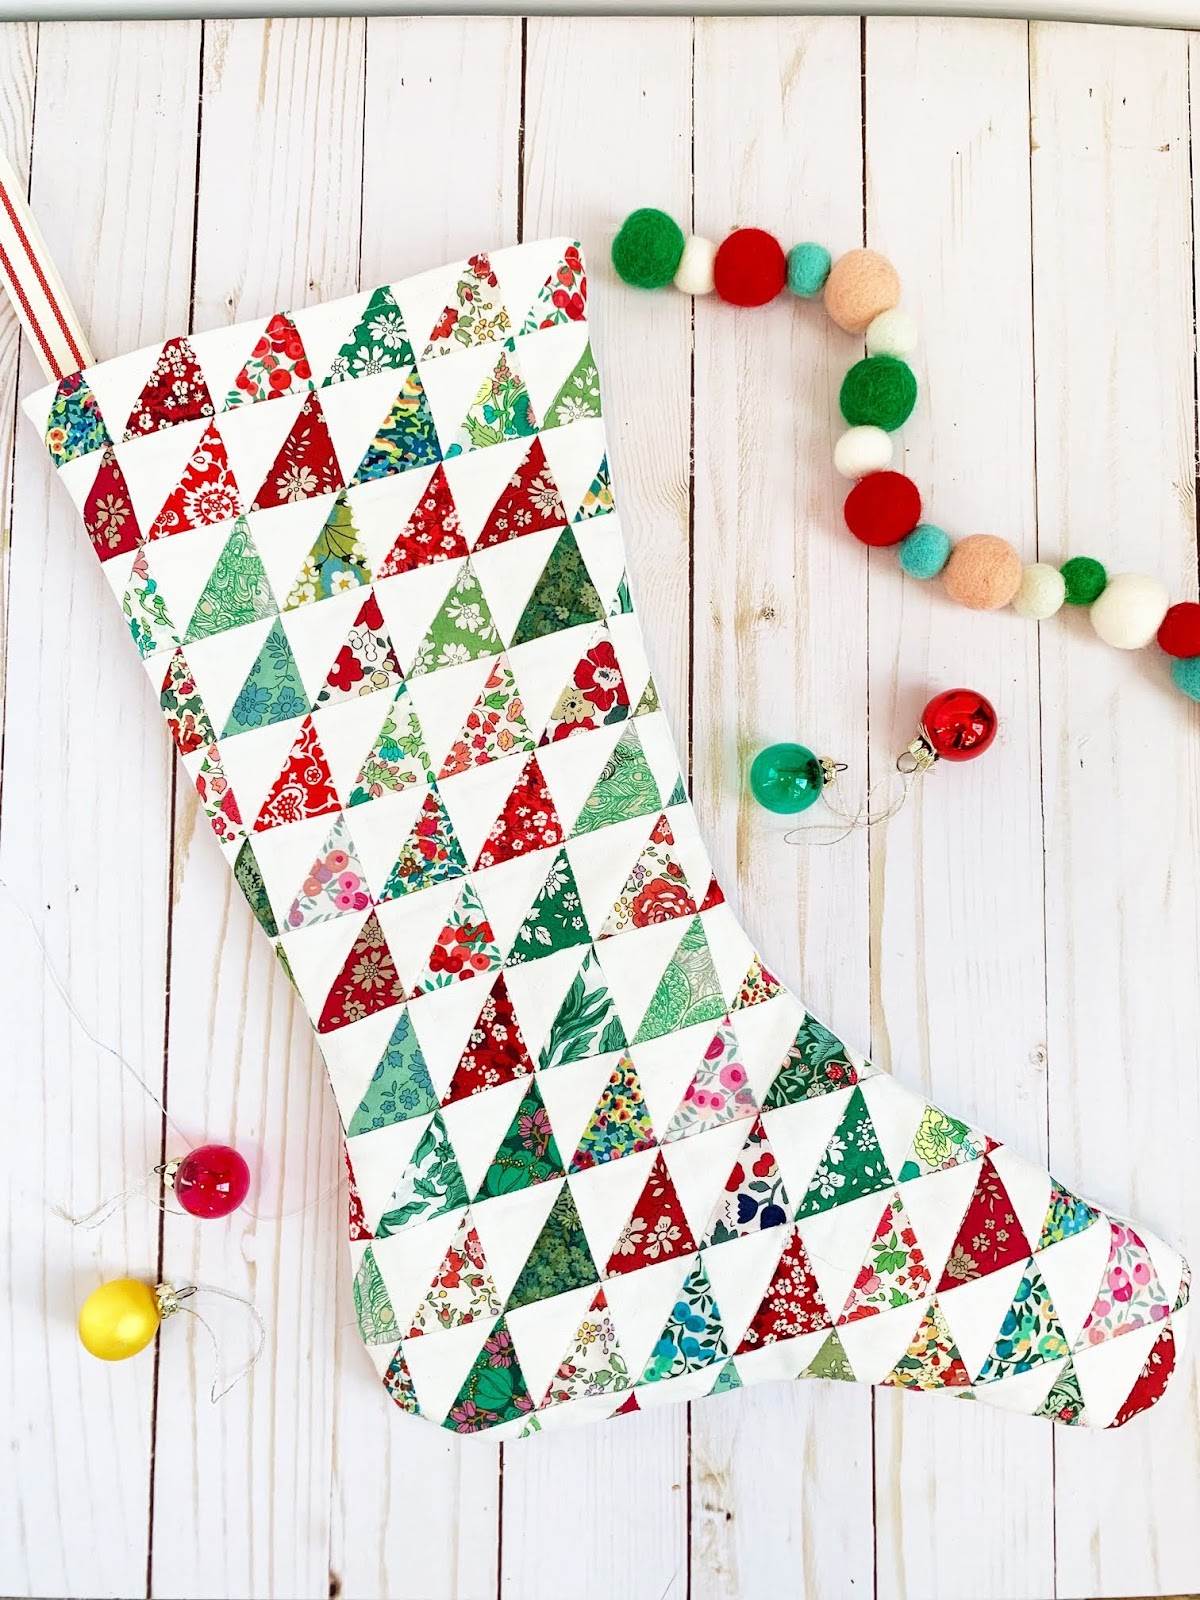
It’s the most wonderful time of the year and although this month can bring a whole lot of stress and pressure of expectations, we can also take time to slow down and enjoy the little things and carve out quiet moments, which for me have included sewing simple things, reading books with my boys and snuggling, lots of hot chocolate and Christmas lights. I am no expert, but I believe these “little” things are what our greatest memories are made of, the small moments, the handmade treasures made with love to be passed down to friends and family. This Sunny Stocking for me, equals happy sewing. I have made six of these in different designs and each one was so fun. Sunny Day Supply has a wonderful treasury of really great tutorials for Christmas makes that come with instructions and pictures to help any level of a maker. I had this Liberty HST version in my mind all year and finally set aside a little bit of time for a couple nights and sewed this one up.

Let’s get started!
For this version you will need:
- The free Sunny Stocking Template can be found in this post HERE.
- 24 prints in a variety of reds and greens, this is very scrap friendly
- White fabric for your HST (half square triangles)
- Fabric for backing and lining
- Batting for front and back
- Tools for cutting, sewing, and always Wonder Clips- Art No. 3185
For this 1.5-inch finished HST I cut my fabrics at 3 1/8 inches. You will need 24 solid white and 24 prints. On Pinterest, you can find charts for cutting sizes for various HST blocks and different methods for sewing them. I find this method the most straightforward.

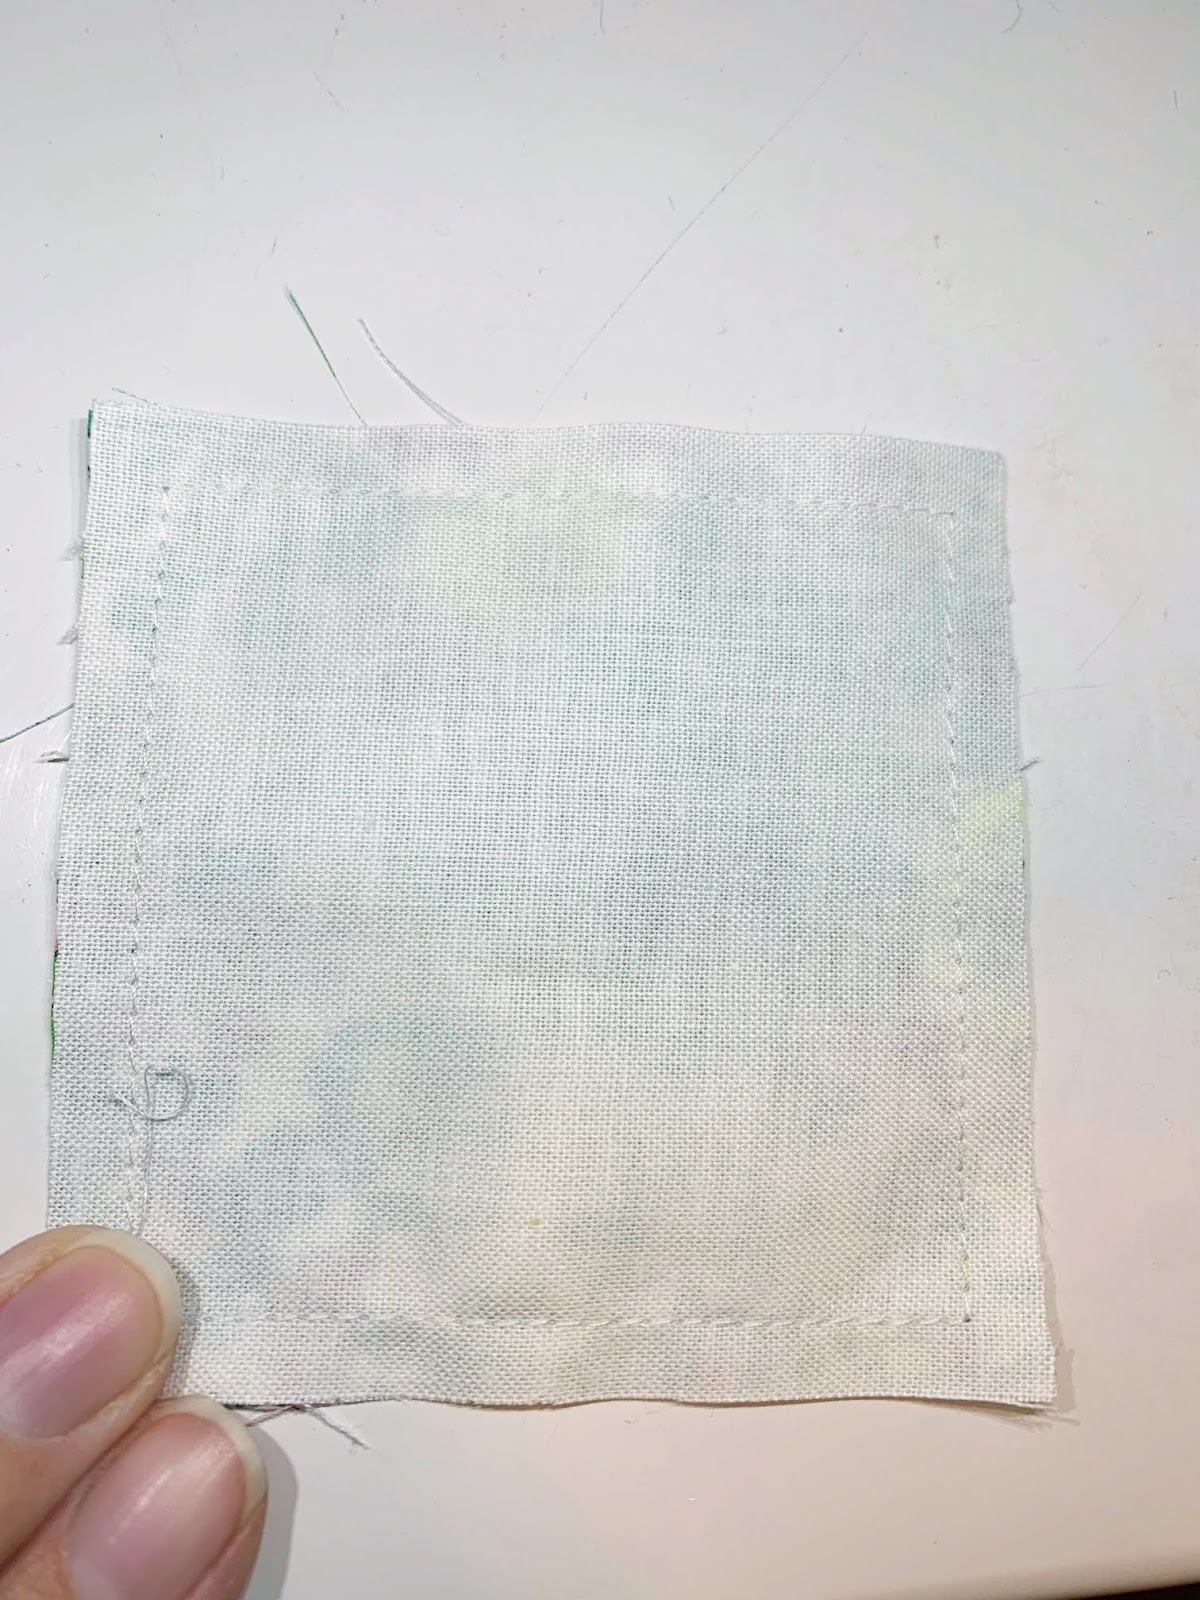
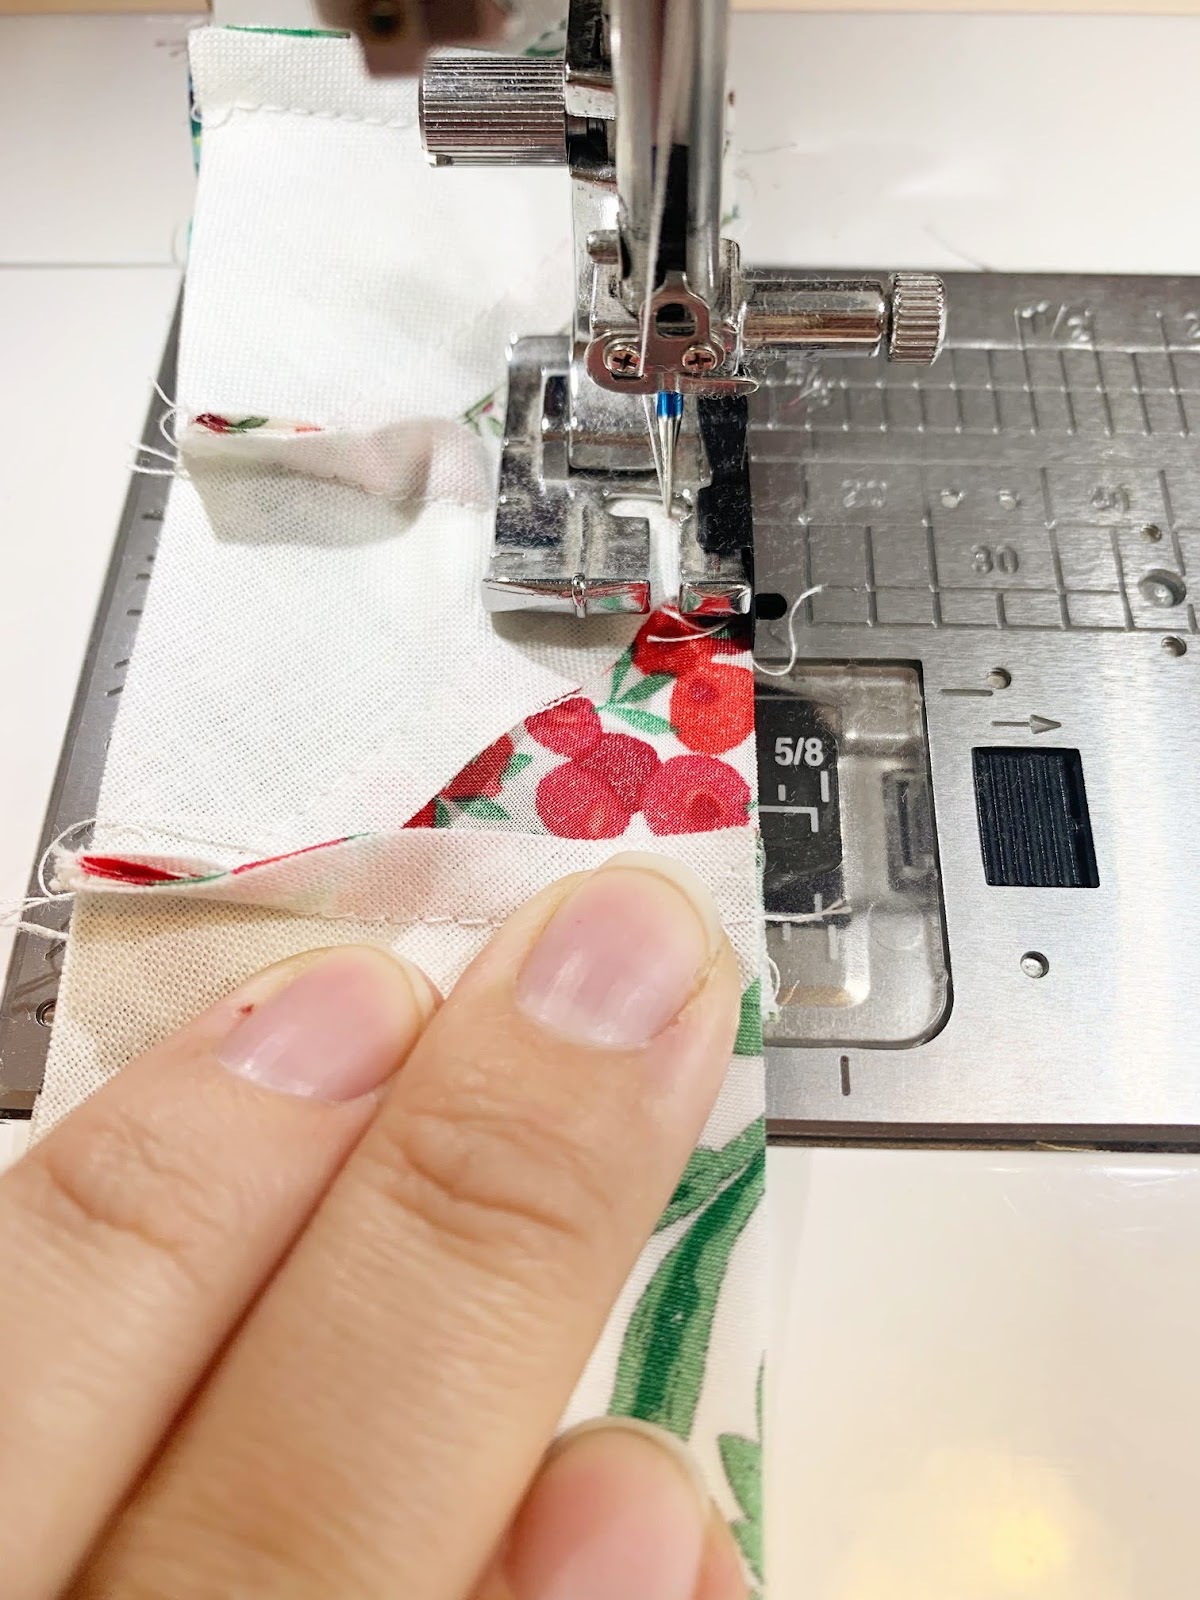
Place a print fabric face down on a solid fabric, use a 1/4 seam allowance and sew around all four edges.
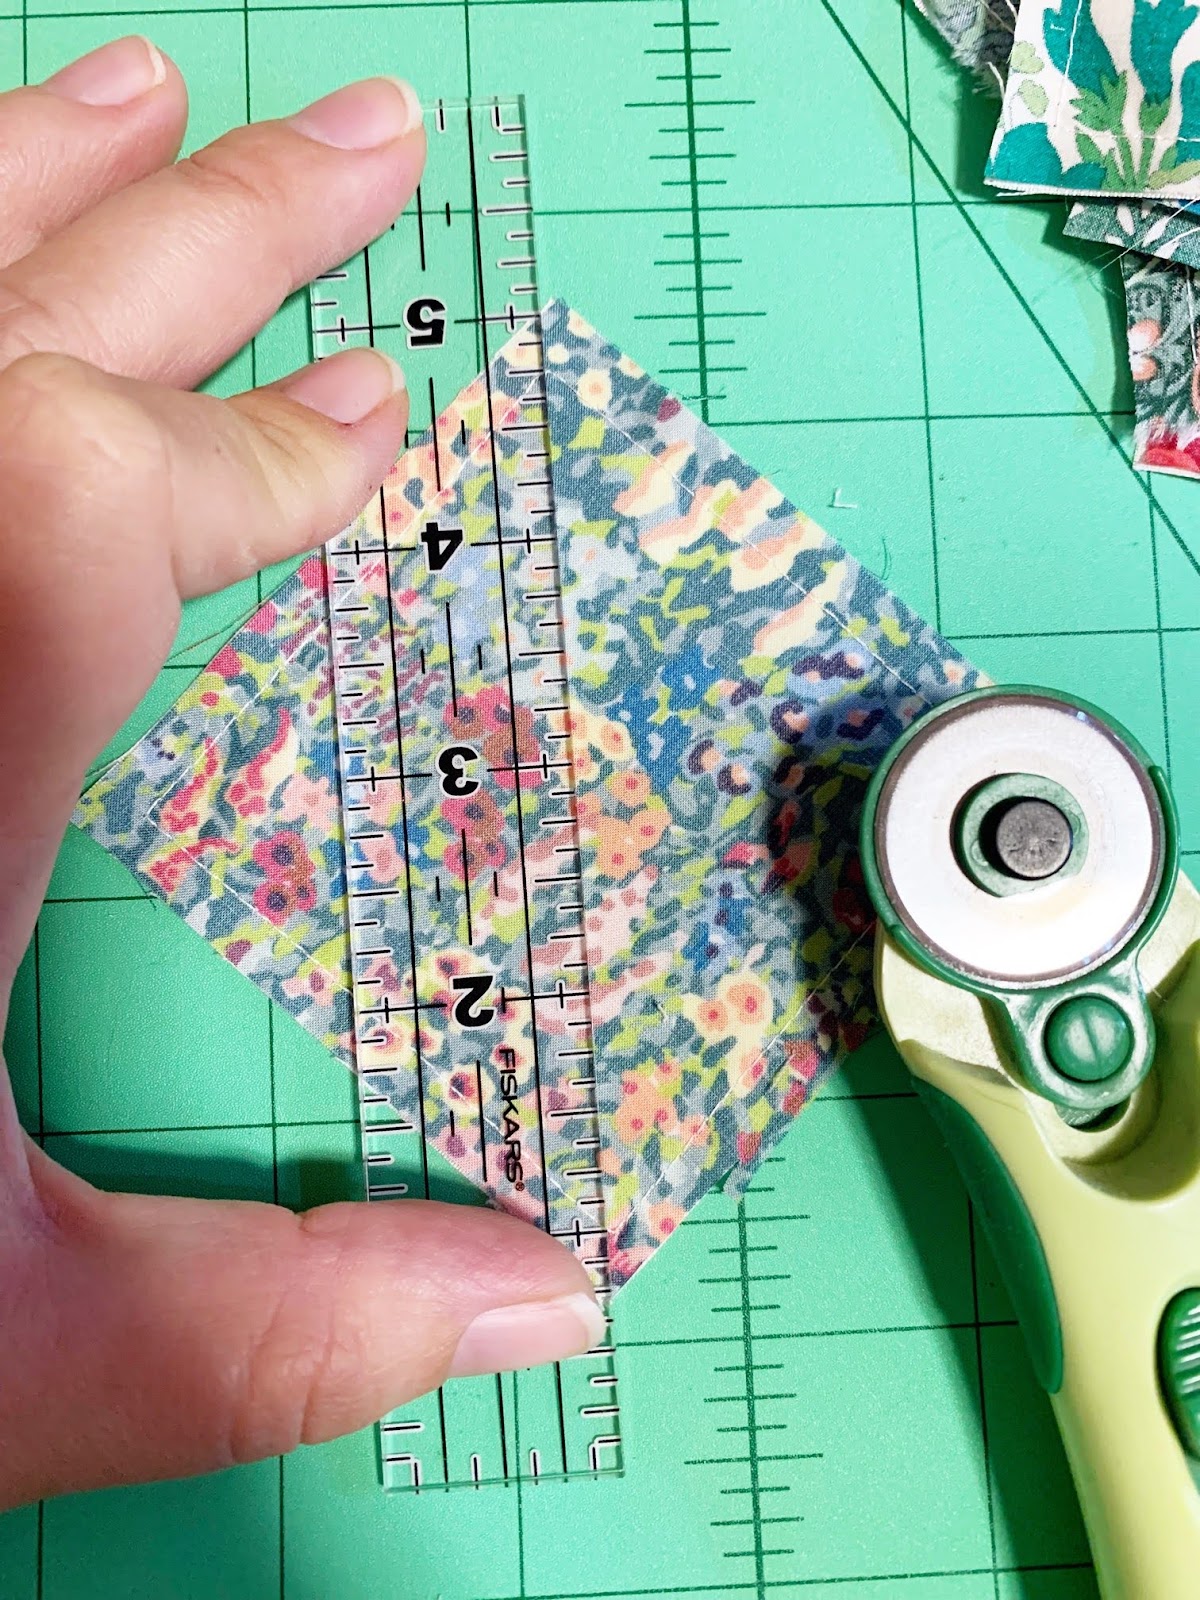

Next using a ruler and a rotary cutter, cut from corner to corner to cut four squares that open into HST.
Press your blocks open with the seam allowance going towards the printed side. Clip the corner ears off each block. I love using my small 4.5-inch sharp Clover scissors for this. Arrange your blocks into rows, I went random with no pattern. You will need 8 rows of 7, followed by 4 rows of 8 with the last one offset by one (see picture and don’t mind I had one block going the wrong way, I fixed it at the last minute), a row of 5 and lastly a row of three both lined up with the right edge.


I always use Wonder Clips to keep my little stacks of blocks in order while I work.

Start sewing your rows together, then nest your seams to help your points line up. I find it helpful if you hold the corners while you sew and give a little pull if need be to help your points line up. Having the squares cut this way gives them more bias movement, I hope you find this method works well for you too. Once all your rows are joined together, press the seams flat on the backside and then press the front flat. Using a mist of water helps too.
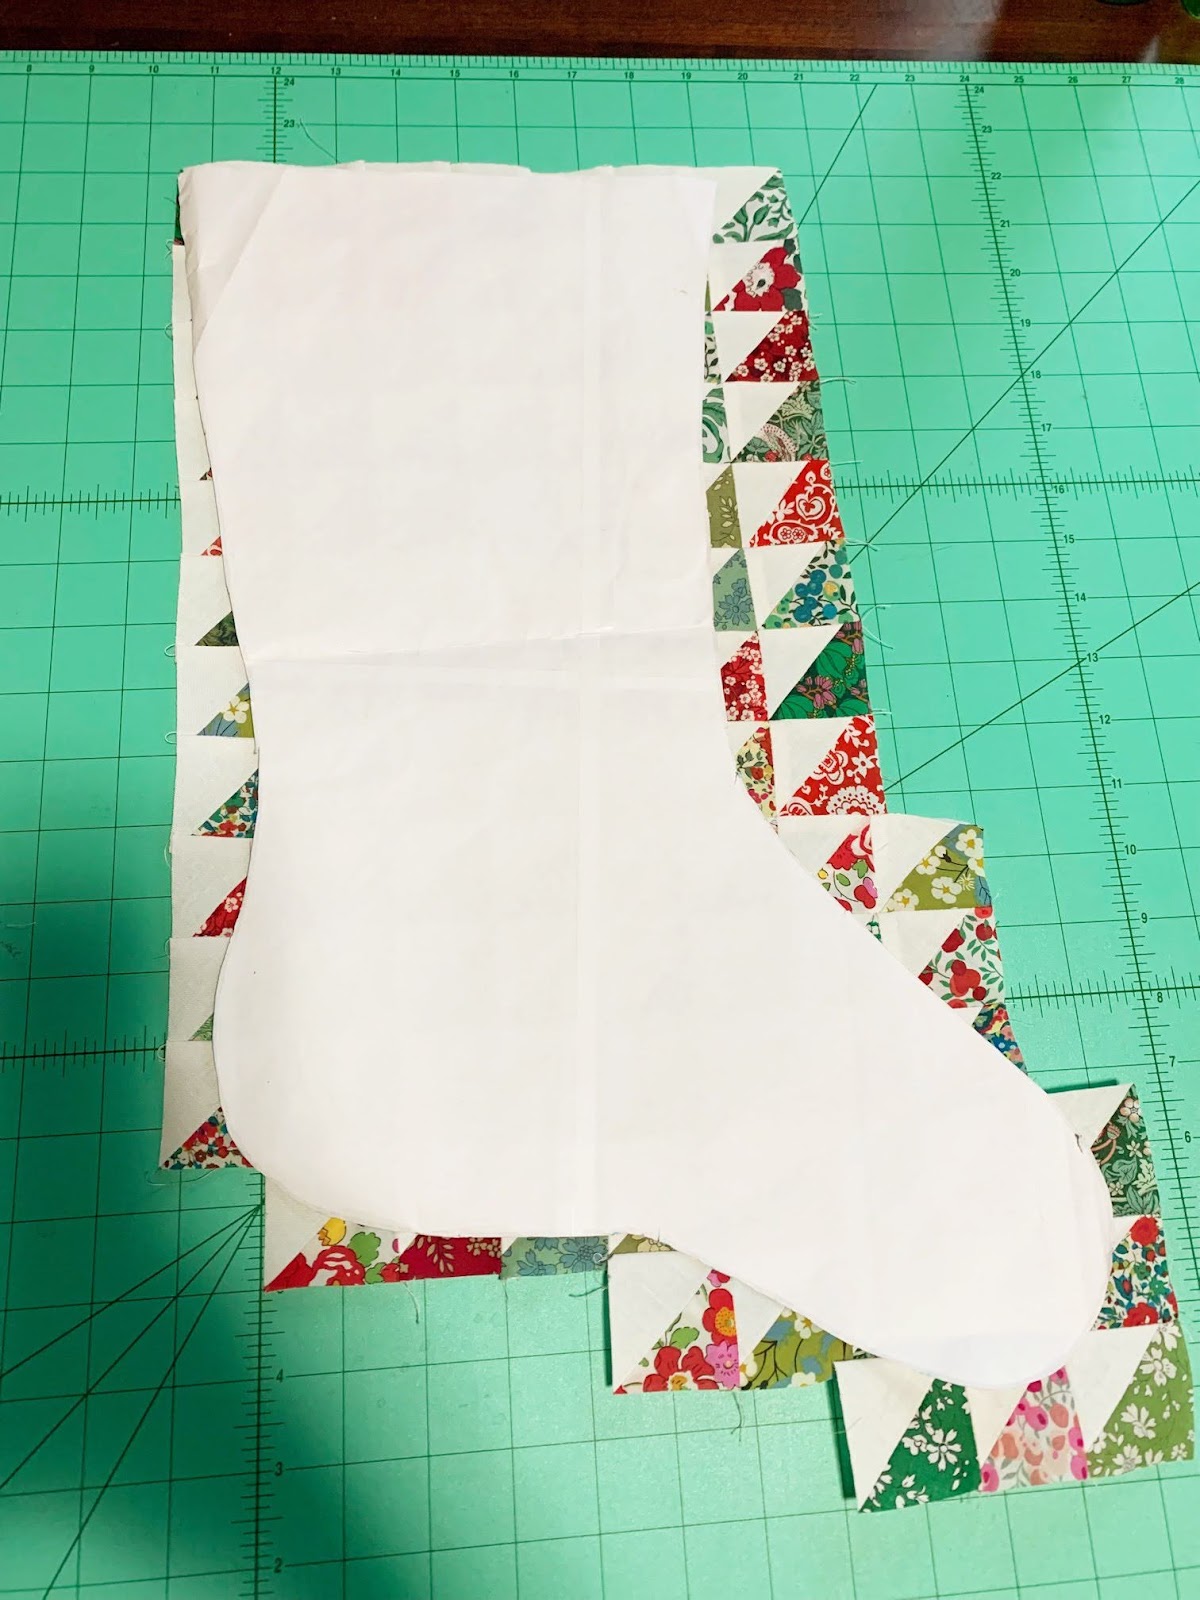

Now that you have your HST panel ready, follow the directions for cutting and sewing the rest of your Sunny Stocking. I cut my lining and batting out and then added simple lines of machine quilting on my front panel.
It felt good to sew up something that had been on my mind for so long. This HST Liberty version is just one way to make this Sunny Stocking unique. Mary has loads of tutorials on the Sunny Day Blog for different sizes, clamshell ones, how to make diamonds, and even a foundation paper pieced one. This is a pattern I come back to over and over again.


I hope you will make time for some easy sewing fun this month. I will be back the week of Christmas with another simple make. Until then you can follow me on Instagram @faithessenburg
Stay connected with Clover on Facebook | Twitter | Instagram | Pinterest | YouTube | Ravelry