Two Easy Quilt Binding Methods- Tutorial

Hi, my name is Faith Essenburg, I am back and excited to show you the two methods that I use for binding quilts that are quicker than hand binding. If you have been quilting for any length of time, you probably have a stack of unfinished quilts just waiting to be finished up. I thought since it’s September sewing, now was a good time to finish some of mine and I am so happy to say that I finished two quilts that were just tops this week. Once you have your quilts basted into quilt sandwiches choose your binding method from below and let’s get started.

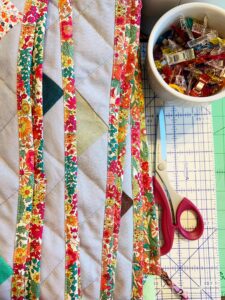
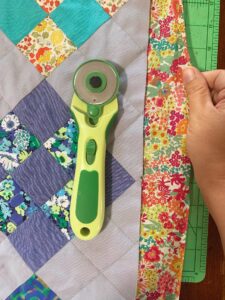
This is my normal binding method, I just wanted to show you how I make my binding for anyone who might be newer to quilting. I start with 2.5-inch strips and sew them together, iron them in half and you have your binding ready to go. I fold the beginning end this way to lessen the bulk where the two ends meet.
Using a 1/4 inch sewing foot, start sewing your binding on one side. I start about four inches down from the top of the binding strip so you can add the tail at the end, like a pocket.


Once the binding is attached, use Clover Wonder Clips to hold binding folded over the edges and corners. I don’t know what I would do without my Wonder Clips! To sew the binding on by machine, I use a blind hem foot and carefully sew along the edge of the binding on the front of the quilt. I use my fingers to feel where the edge of the binding is on the back as I sew, making sure that my needle is catching it. This can also be done using a normal sewing foot, just a little bit harder to keep things even.

You can see my stitching on the front and the back of the quilt. I know some quilters who love binding by hand but I have always found that I love being able to get the binding done quickly and since my quilts get used a lot and also washed a lot, I like knowing that the binding is on really secure and will hold up in washing.
This next method uses the backing as binding. This is a method I haven’t used as much, but when your fabric is this pretty I just had to and I absolutely love how it turned out.
When you baste your finished quilt top to the batting, instead of leaving excess batting around the edges trip the batting to be even with the top. I use the Clover Bordeaux Ultimate scissors that glide like butter. Once your backing is basted you can start quilting, make sure to lock your stitches in at the beginning and end since your stitches won’t be covered in binding on the back. Trim your backing fabric to two inches around all sides.
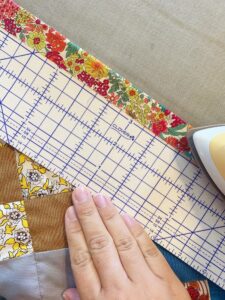
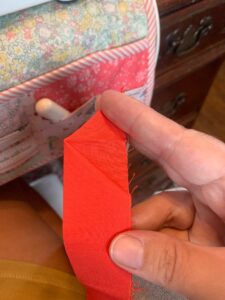
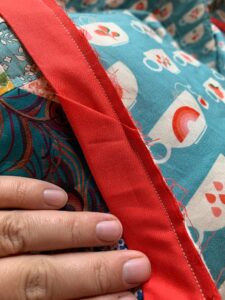
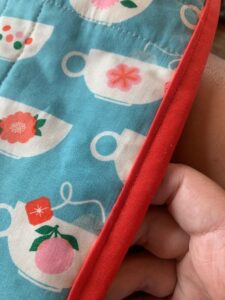
Using a Hot Ruler, fold the fabric in half (one inch) and iron. Next, fold in half again. This will help your binding fold over the edge neatly. I skipped this step at first but with this smooth lawn fabric, it kept twisting and not laying flat for me. Using the iron helped my binding lay flat and look really crisp and clean.


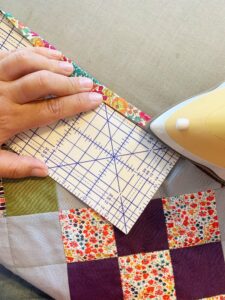
For the corners, I trimmed a little bit of the excess binding to get rid of some of the bulk. Using Wonder Clips fold your backing fabric over the edge and hold it in place.

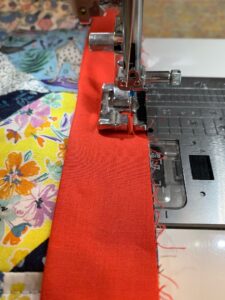
I used my walking foot and the binding went on so smoothly, just stitching very close to the edge. At the corners, you can backstitch a little bit to hold the folded edge making it more durable for washing.
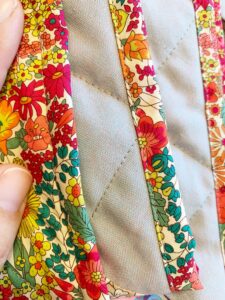
I’m not sure if it’s the Liberty lawn fabric or the ironing that helped, but I am just so happy with how this looks and will be using this method more in the future.
I love just being able to finish up a quilt (or two!) in a shorter amount of time by using either one of these methods because then I can get started on another quilt project sooner! I hope these tips helped you learn or try something new. I love picking up a couple new tricks to add to my quilting ideas. I have two more finished quilt tops that I would like to finish up this month and you can see those and more over at @faithessenburg. I will be back next month with some Fall fun and hope you will join me here.

-Faith
Stay connected with Clover on Facebook | Twitter | Instagram | Pinterest | YouTube | Ravelry