I Love Sewing Applique- Tutorial
Hello again! My name is Faith and today I’m back with another quick and fun project using some of my favorite Clover tools. You can find me on Instagram, feel free to tag me in your Clover makes and ask any questions you might have. Today’s project is an applique template that I’ve added to a sweatshirt. When I was little my grandma made my sister and I sweatshirts, mine simply said “me” in a tiny floral print and my sister’s had a small heart on it. I remember my sweatshirt was a pale pink and I was happy to find a similar one for this project.
Let’s get started!
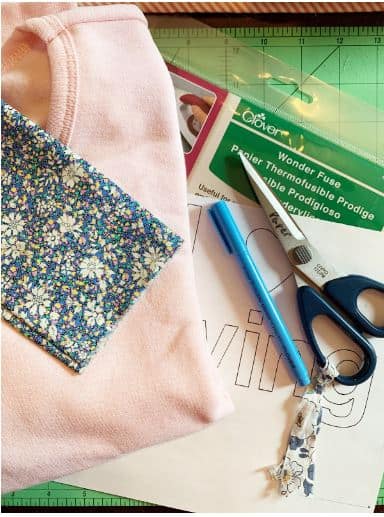
What you will need:
- I Love Sewing Template to print out and trace
- Wonder Fuse
- Shirt or sweatshirt
- Contrasting fabric for letters and coordinating thread
- Scissors that can be used on paper and pen (water soluble if tracing directly onto your fabric)
- Iron and sewing machine
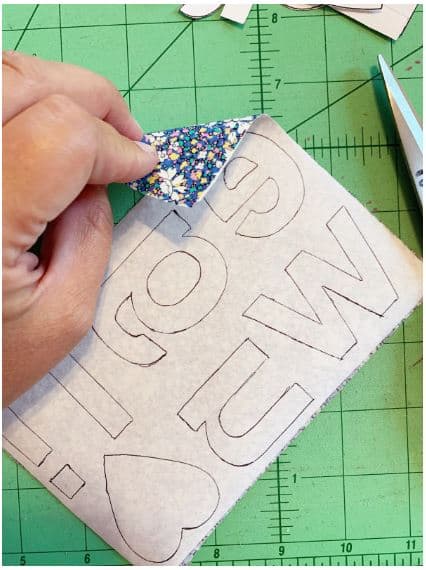
I always love a project that has an “arts and crafts” element to it, cutting out and tracing the letters was calming for me.
Once you have chosen fabric for your letters, take a piece of Wonder Fuse and iron it to the back side of your fabric. Follow instructions on the packaging to make sure you fuse the interfacing well. I have chosen a special Liberty fabric that a dear friend shared with me. I love to be able to use and enjoy fabrics that are shared with me. This print is a bit darker so I have chosen to trace the letters onto the back paper side of the Wonder Fuse making sure that letters are marked backward as needed. If you are using a lighter fabric I recommend using the Clover Water Soluble Pen and tracing directly onto the front of the fabric, that way you can use your traced lines as a stitch guide as well. Simply spray off with water once your project is finished.
Using scissors, cut around each letter and the heart shape, I cut about 1/8th inch away from my lines rather than cutting on the line but either way is fine.
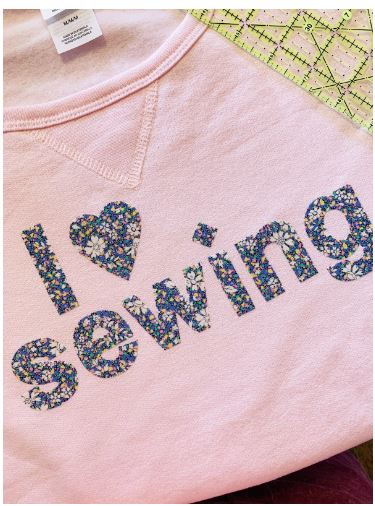
Place your letters on the sweatshirt and once you have the layout you want, peel the paper from the back of each and measure. I decided to offset my “I heart” to one side but you can move it around and see what fits for you. Using a warm iron, carefully press the letters, holding the iron and checking each one has adhered well.
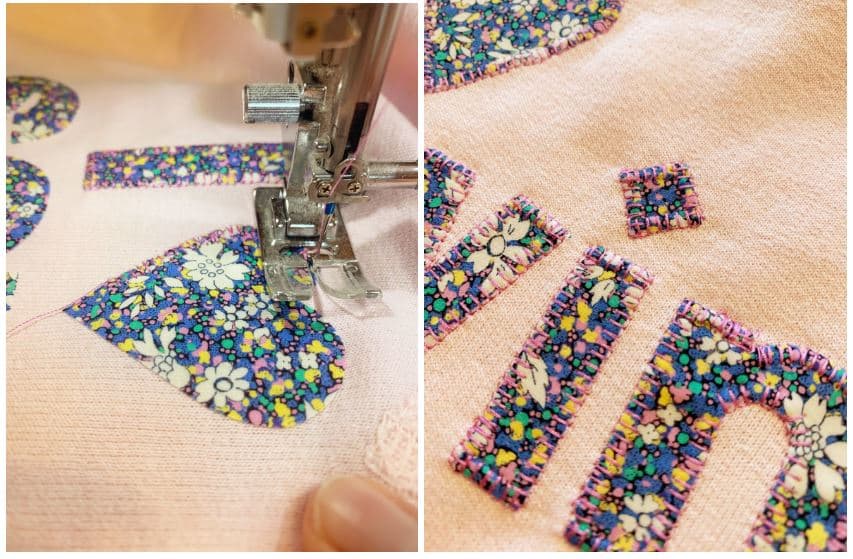
You are now ready to stitch the letters in place. I decided on a pink coordinating thread and a blanket stitch set to 4.0×2.50. Another idea is a zig-zag stitch or a straight stitch if you like the look of more raw edges that will fray over time. This part went much quicker than I had thought, even taking my time to go slowly around the curves and lifting my presser foot, and turning the sweatshirt. Be sure to backstitch or lock in your stitches at the end of each letter so they don’t unravel.
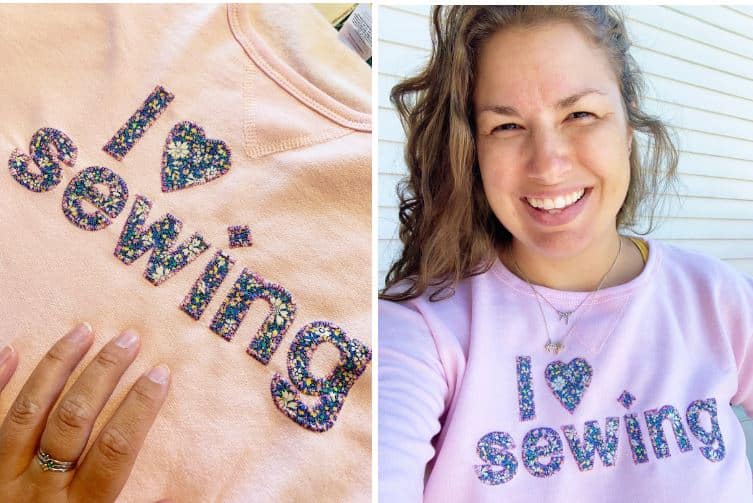
All finished and ready to wear! I will be living in this sweater in the Fall and you will definitely find me making more. Each of my boys has come up with something they want on a shirt for them and I might just need to recreate that “me” shirt that my grandma made for me so long ago.
Be sure to tag Clover on social media in your makes so we can see your work and check back here for more projects to make and love.
Faith
Stay connected with Clover on Facebook|Twitter|Instagram|Pinterest |YouTube|Ravelry