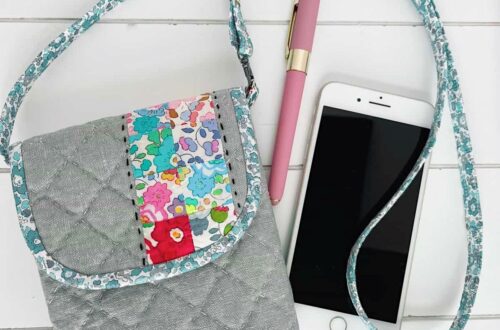
Check-Me-Out Tank- Crochet Pattern
Hi friends, it’s Christina from Citybrightknits, and I am thrilled to be sharing another one of my crochet pattern designs with you! This is the third pattern that Clover has kindly asked me to create for their blog, and I hope you enjoy it.
For this design, I am inspired by colorful checkered squares, which are very on-trend at the moment. I have used lots of contrasting colors and stitches to give this top a summery feel. Cotton is one of my favorite yarns to work with because I love that you can find oeko-tex and earth-friendly cotton yarn, plus it is a great material for summer. Cotton does have a little give to it when stretched over time, so if you choose to substitute an acrylic yarn, just make sure it is an Aran weight yarn to best meet the measurements in this pattern. All yarn amounts and sizing is included for you in this pattern. Grab your Clover Amour hook and let’s get started!


Skill Crochet (Intermediate)
Gauge 15 stitches x 8 rows = 4”
Final Measurements 17”L x 18”W (43 cm – 45 cm)
Materials
- 450 – 600 m / 492 – 656 yds total of medium weight Aran yarn – 10ply
- I use Drops Paris Cotton in a mix of colors. (50g balls)
- color A (white) – (1, 2, 3) balls
- color B (purple) – 2 balls
- color C (pink) – 1 ball
- color D (orange) – 1 ball
- color E (yellow) – 1 ball
Size (1) – 6 balls total, Size (2) – 7 balls total, Size (3) – 8 balls total
Tools:
- Hook Clover Amour – size 4.5 mm (US 7)
- Measuring tape
- Scissors
- 5 Stitch markers
- Tapestry needle
Abbreviations and Special Stitches
- Ch – chain
- Dc – double crochet
- Sc – single crochet
- Sk – skip
- Sl – slip stitch
- Sts – stitches
- Mc – main color
- Scallop stitch – {4 dc, sk 2, sc, sl st}
Sizing – To adjust sizing, it is based on measuring your squares un-joined. Every 5 stitches add ~1”. This adds 1” to your square both vertically and horizontally. You will simply chain more or less for the starting chain to make your width smaller or larger. For all sizes – chain in multiples of 5 + 2. Ex: ch 22 for a size small or ch 32 for a size extra large.
Sizes: (1) XS-S 30” bust, you will work your squares to be 4 x 4
(2) M-L 36” bust, you will work your squares to be 5 x 5
(3) XL-XXL 42” bust, you will work your squares to be 6 x 6
For size (1) your squares will measure 4” x 4” and consist of 4 rounds; size (2) your squares will measure 5” x 5” and consist of 5 rounds; size (3) your squares will measure 6” x 6” and consist of 6 rounds.
This pattern is written following measurements for size (2).
Notes- This pattern uses color change techniques. This is called the tapestry crochet method.
- When working in the main color, you will carry a secondary color inside the working color.
- Carry yarn at the end of rows without cutting.
- To get crisp edges of color, be sure to switch to the next color to complete your stitch when working the last stitch before a color change.
- On row color changes, switch to the next color to complete the last stitch on the row before turning work. Then begin working on the next row in the same color.
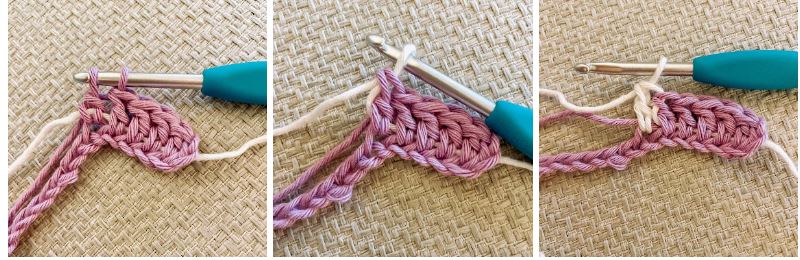
Working a double crochet color change:
- Insert your hook using mc, and pull up a loop, yarn over, and pull through.
- Change to secondary color, yarn over, and pull up a loop in the second color to complete the stitch.
- When switching back to the main color, repeat the technique. You will begin the stitch with the secondary color and complete the last part of the stitch in the main color.
Pattern Instructions:
Let’s get started!
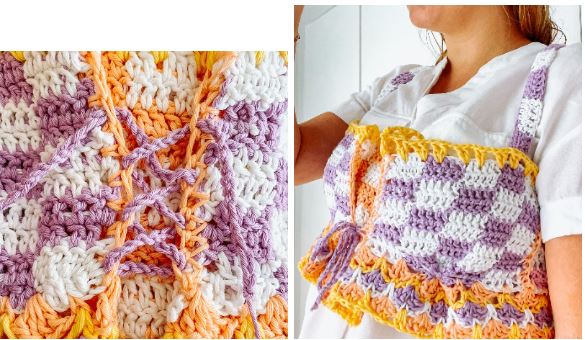
- Checkered Squares – Choose two colors for each square, and work two rows before alternating colors; this gives you the checkered look.
- You will create 6 squares. To make your squares begin by chaining (22, 27, 32) in mc.
- Row 1- using mc, dc into the 2nd ch from hook, work 5 dc, in second color dc 5, main color dc 5, second color dc 5, main color dc 5. (25 sts) * please note this is for size (2). If working another size you will have more or fewer rounds and a different stitch count.
- Row 2 – repeat row 1. Starting with a ch 2, and dc 4 in mc. Be sure to finish the final dc stitch in the second color for a crisp edge. Carry yarn without cutting.
- Row 3 – in second color, ch 2, dc 4, dc 5 in mc, dc 5 in second color, dc 5 in mc, dc 5 in second color.
- Row 4 – repeat row 3. Be sure to finish the final dc stitch in the mc for a crisp edge. Carry yarn without cutting.
- Continue working this pattern for 10 rows, changing colors after 2 rows.

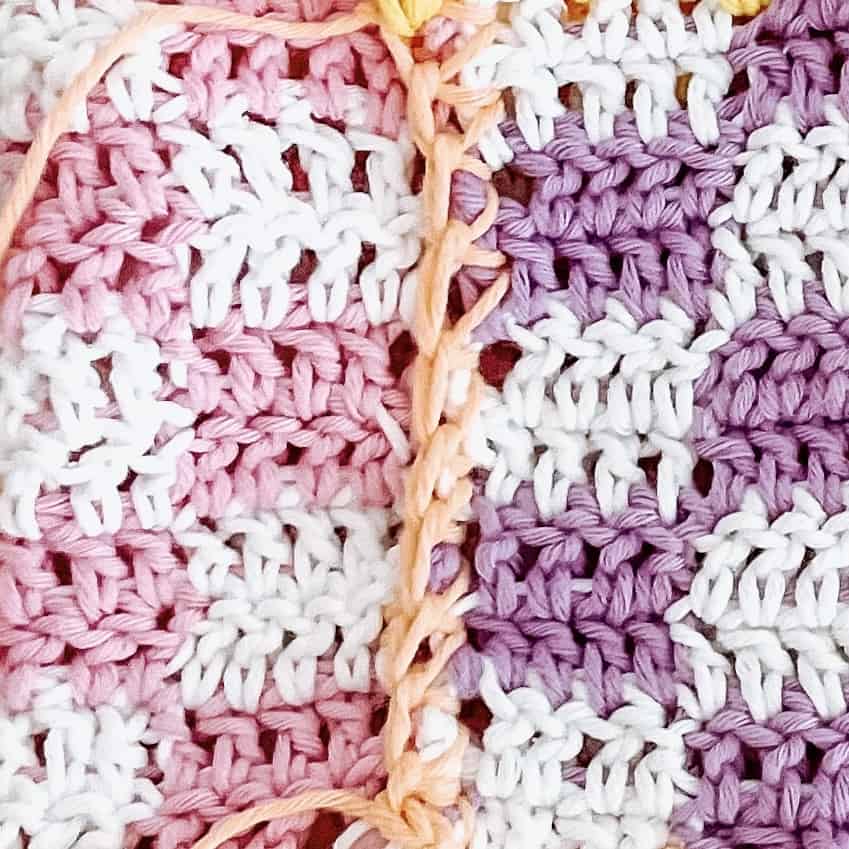
Assemble your squares-
Lay out 6 squares, so that you have 3 for the front and 3 for the back. Make sure wrong sides are touching with right sides facing outwards. Using a contrasting color you will single crochet to join; join vertically along the right side of the squares so that the sc shows on the front. See image.
- Body- Next we will build the body of the top in various stitch layers while changing colors.
- Layer 1 (Yellow)- once all 6 checkered squares are joined, you will work a granny stitch along the top. I use a contrasting color for this. Ch. 4, *skip 2, dc 2 into the next space, sk 3, ch 1, dc 2, sk 2, ch 1, dc 2*. You will continue this pattern, alternating skipping 3 sts and 2 sts, around.
- Layer 2 (Orange)- on the opposite (unworked bottom side), you will create a scalloped edge. Ch 2, dc 3 into the same space, ch 1, sk 3, sc 1, ch 1, sk 2, dc 4 into the same space. *Ch 1, sk 3, sc 1, sk 1, dc 4* around to end. Join with a slip stitch into the first shell.
- Layer 3 (Yellow)- work into layer 2, ch 4, *sc into the middle of the shell cluster from the previous row, ch 1, dc 2 into the sc from the previous row, ch 1* around. End with dc 1 into the final sc and slip into the ch 4 from the beginning.
- Layer 4 (Purple)- ch 3, work into the middle of the previous 2 dc, *dc 4, ch 1, dc 4 into the previous 2 dc, ch 1* around. Work 3 dc into the last 2dc space and join with a slip stitch to the ch 4 from the beginning.
- Layer 5 (White)- repeat layer 3, working your dc 2 into the previous sc from layer 3, and work your sc into the top of the shell from layer 4.
- Layer 6 (Orange)- repeat layer 4.
Continue adding layers until the desired length by repeating Layers 3 & 4, alternating colors as you go.
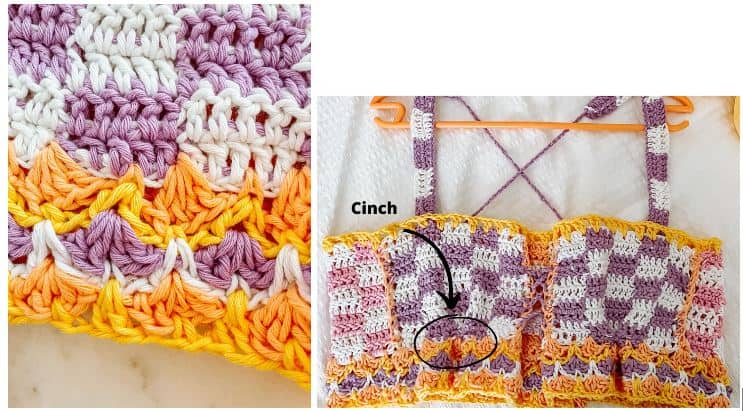
Front Corset– You will fold the front lengthwise to create a corset.
To create a bosom for the top, you will simply cinch along the front middle “checks” of your two front squares. Using your tapestry needle, you will cinch along the bottom front bust to create shaping. Midway through the second check, insert your needle, and weave back and forth over and under your stitches until you reach midway to the second to the last check. Cross your yarn and pull tight to secure, tie a knot and weave in ends to the backside of the work. Repeat for the other side. You may want to use stitch markers to help you identify where you will be stitching.

For the corset tie, chain 78 or desired length. Work your finished chain through the joining edge of your original checkered squares. You can bring the chain through every other sc for a lattice look, or you can tie a bow at the base to secure it.
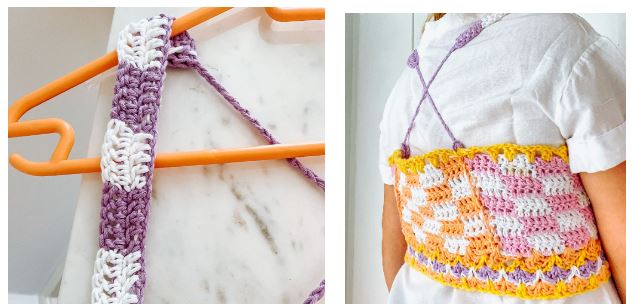
Straps– You will create two straps.
Begin with ch. 38, work the first two rows of the checkered squares pattern. Dc 5 in mc, dc 5 in second color, dc 5 in mc, dc 5 in second color, dc 5 in mc, turn. Repeat this row once more. Note: you will chain a multiple of 5+2 for the desired length, every 5 sts adds ~1”. For the second half of each strap; slip stitch into the first stitch, then chain 36 or until the desired length. Repeat for both straps. Attach the straps to the front and cross at the back before attaching for a crisscross.
Weave in all ends to the back side of the work. You have now finished your top!
I really enjoyed sharing this design with you, and I hope you share it with me @citybrightknits. You can follow me on social media @citybrightknits and find all my other designs at www.citybrightknits.com.
Care Instructions – Wash by hand with a mild detergent. Gently ring out excess water. Lay flat to dry. May require reshaping.
Stay connected with Clover on Facebook | Twitter | Instagram | Pinterest | YouTube | Ravelry