Shamrock Plushie Tutorial For St. Patty’s Day- Crochet Pattern
Hello! I’m Mary from MarysYarnBasket! Get into the St. Patrick’s Day spirit with my crochet shamrock pattern! It works up quickly and could be made in a variety of sizes just by switching up the yarn and hook size. You can also find the inexpensive pattern in a printable PDF version here. (etsy.com/shop/marysyarnbasket)
Abbreviations
(U.S. crochet terms)
ch – chain
sc – single crochet
hdc – half double crochet
dc – double crochet
MR – magic ring
sl st – slip stitch
() – stitches with-in parenthesis are worked into the same stitch
Materials
- 8mm crochet hook
- Scissors
- Yarn needle
- Poly-fil stuffing
- Bernat blanket yarn:
- Go-go green
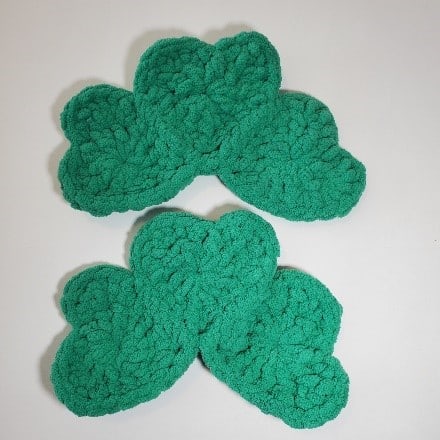
This finished product will measure approximately 8 inches tall and 8 inches wide.
If you would like to make this pattern with 4 worsted weight yarn, use a 4mm hook. The finished size will measure approximately 4 inches tall and 4 inches wide.
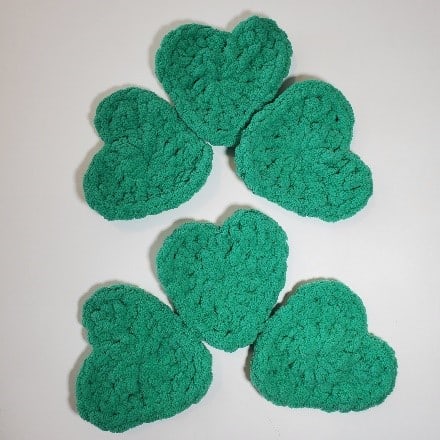
Shamrock leaves (x6)
Worked in the round.
- Place 12 dc into a MR (12)
- hdc, (4 dc), (hdc, sc), sc, sc, (hdc, dc), ch 1, (dc, hdc), sc, sc, (sc, hdc), (4 dc), (hdc, sl st) (23)
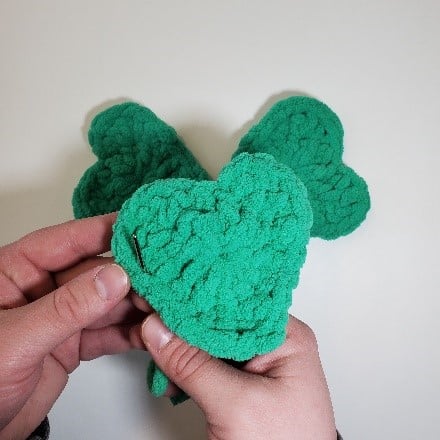
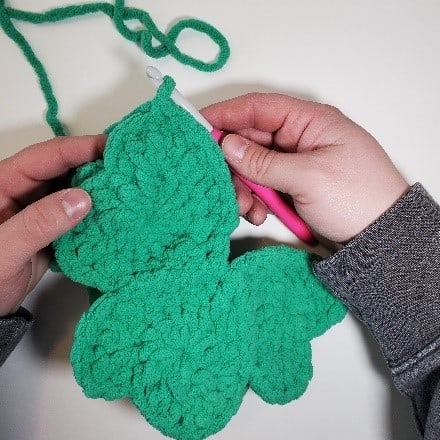
Assembly part 1: Lay three of the leaves together forming the shamrock shape. Attach yarn to the middle leaf at the hdc after the 4 dc group. Line up the left leaf (right sides out) and start whip stitching the two together. Continue down the side and place the last whip stitch into the ch space.
Next, line up the right leaf to the middle left (right sides out) and whip stitch them together, place the last whip stitch into the hdc before the 4 dc group. Weave in the tails. Do this again for the other side of the shamrock.

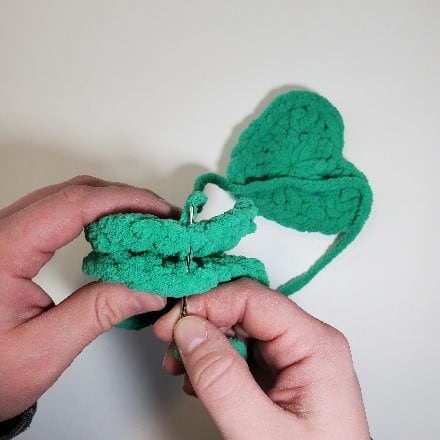


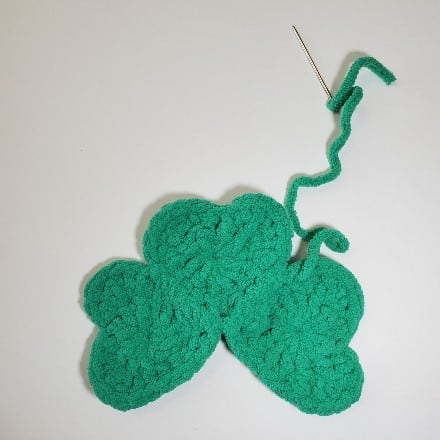
Assembly part 2: Line up the shamrock leaves (right sides out) and place your hook and attach yarn on the left side of the bottom of the shamrock where the stem would be. Start sc around the shamrock, keeping the stitches lined up. Stop with about 4 inches left and stuff the shamrock. Continue sc closed and stop when you have about an inch sized hole left.
Next, work 6 sc around the edge of the hole. Try to place them evenly around. This part may be tricky as there are no clearly defined spots for the sc to fit. Just do your best, it will not affect the outcome of the stem. Once the 6 sc are placed, continue sc in the round in each sc until you have reached a desired length for the stem. I made mine about 3 inches. Stuff your stem and close off using a yarn needle. Weave in the tails.


I hope you have enjoyed this pattern! I would love to see your finished creations! Feel free to tag me on Instagram @marysyarnbasket or use the hashtag #marysyarnbasket. You can also find me on TikTok as well at marysyarnbasket.
If you have any questions, don’t hesitate to contact me at marysyarnbasket@outlook.com