Macramé Pumpkin Hanger
Hey Clover family, it’s Danielle from sprinklesofzeal and I’m back this week to teach you how to create your own macramé pumpkin hanger using the Clover Plant Hanger Gauge. This plant hanger is multifunctional and super easy to create for beginner macrame enthusiasts. Alright, are you ready to get started? Grab your cording and let’s begin!
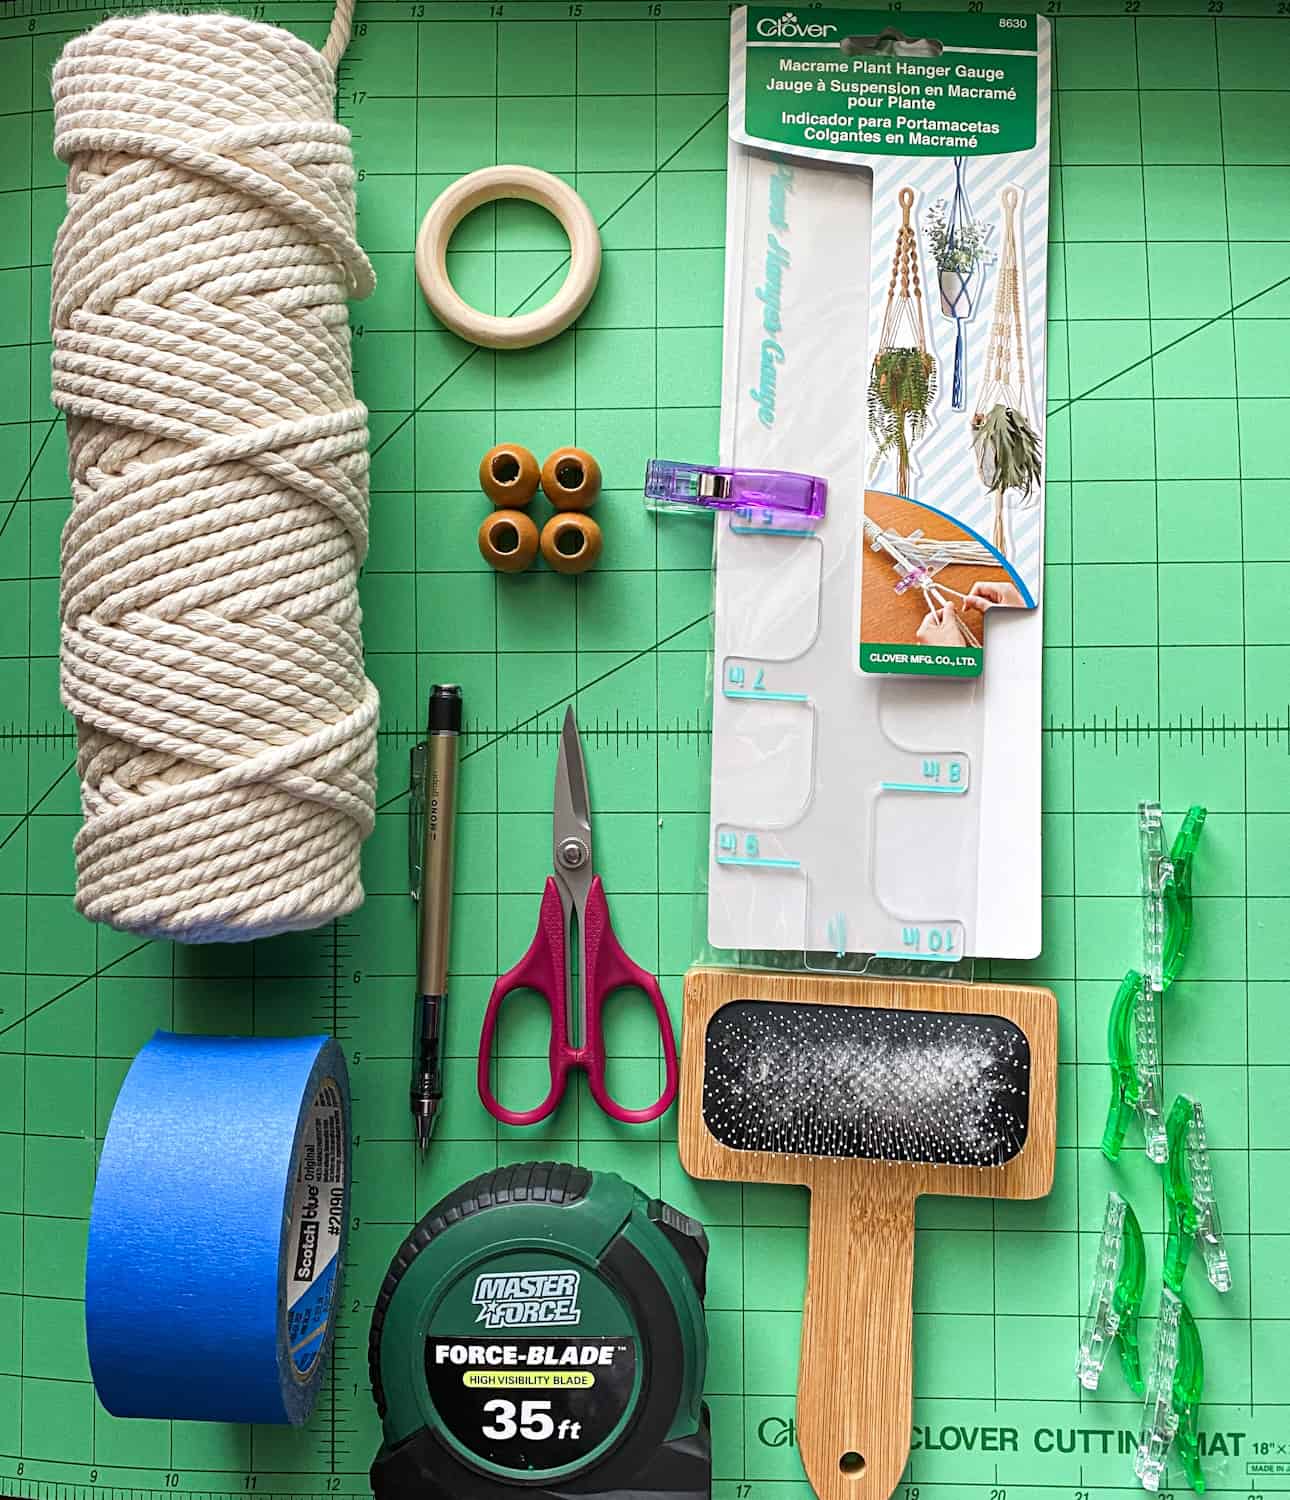
Supplies:
- Clover Plant Hanger Gauge Art No.8630
- Clover Bordeaux Ultimate shears 130 Art No.4940
- Clover Wonder Clips Art No. 3157
- Clover Cutting Mat Art No. 7520
- Wood Ring
- Wood Beads
- Masking Tape
- Cotton Cording (4mm)
- Macrame Brush
- Measuring Tape
Step 1. Review Clover’s plant hanger directions to understand the process of creating square knots and wrapped knots. These will be the main macrame knots used during this project.
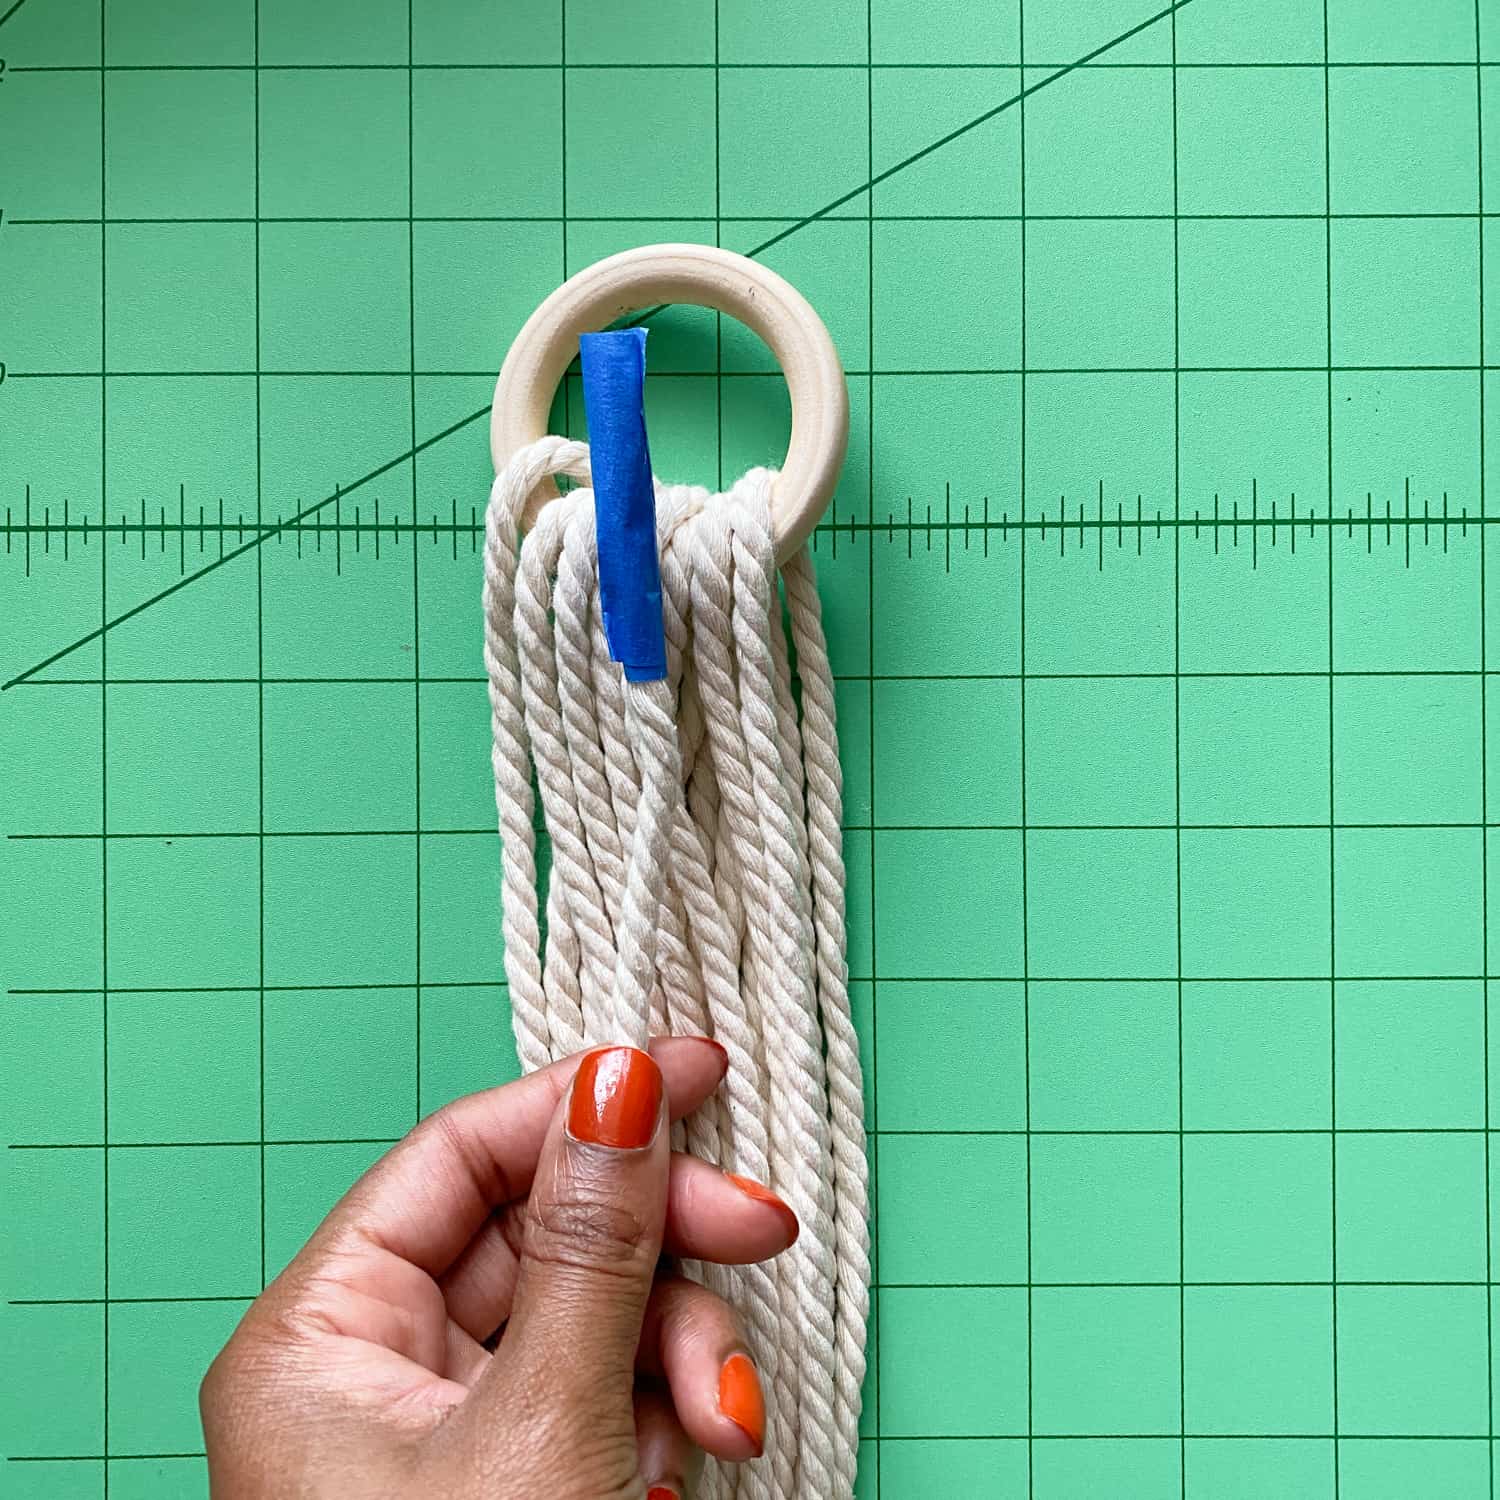
Step 2. Prepare the cording rope by cutting 9 pieces at 120 inches.

Add masking tape to the ends to prevent unraveling.

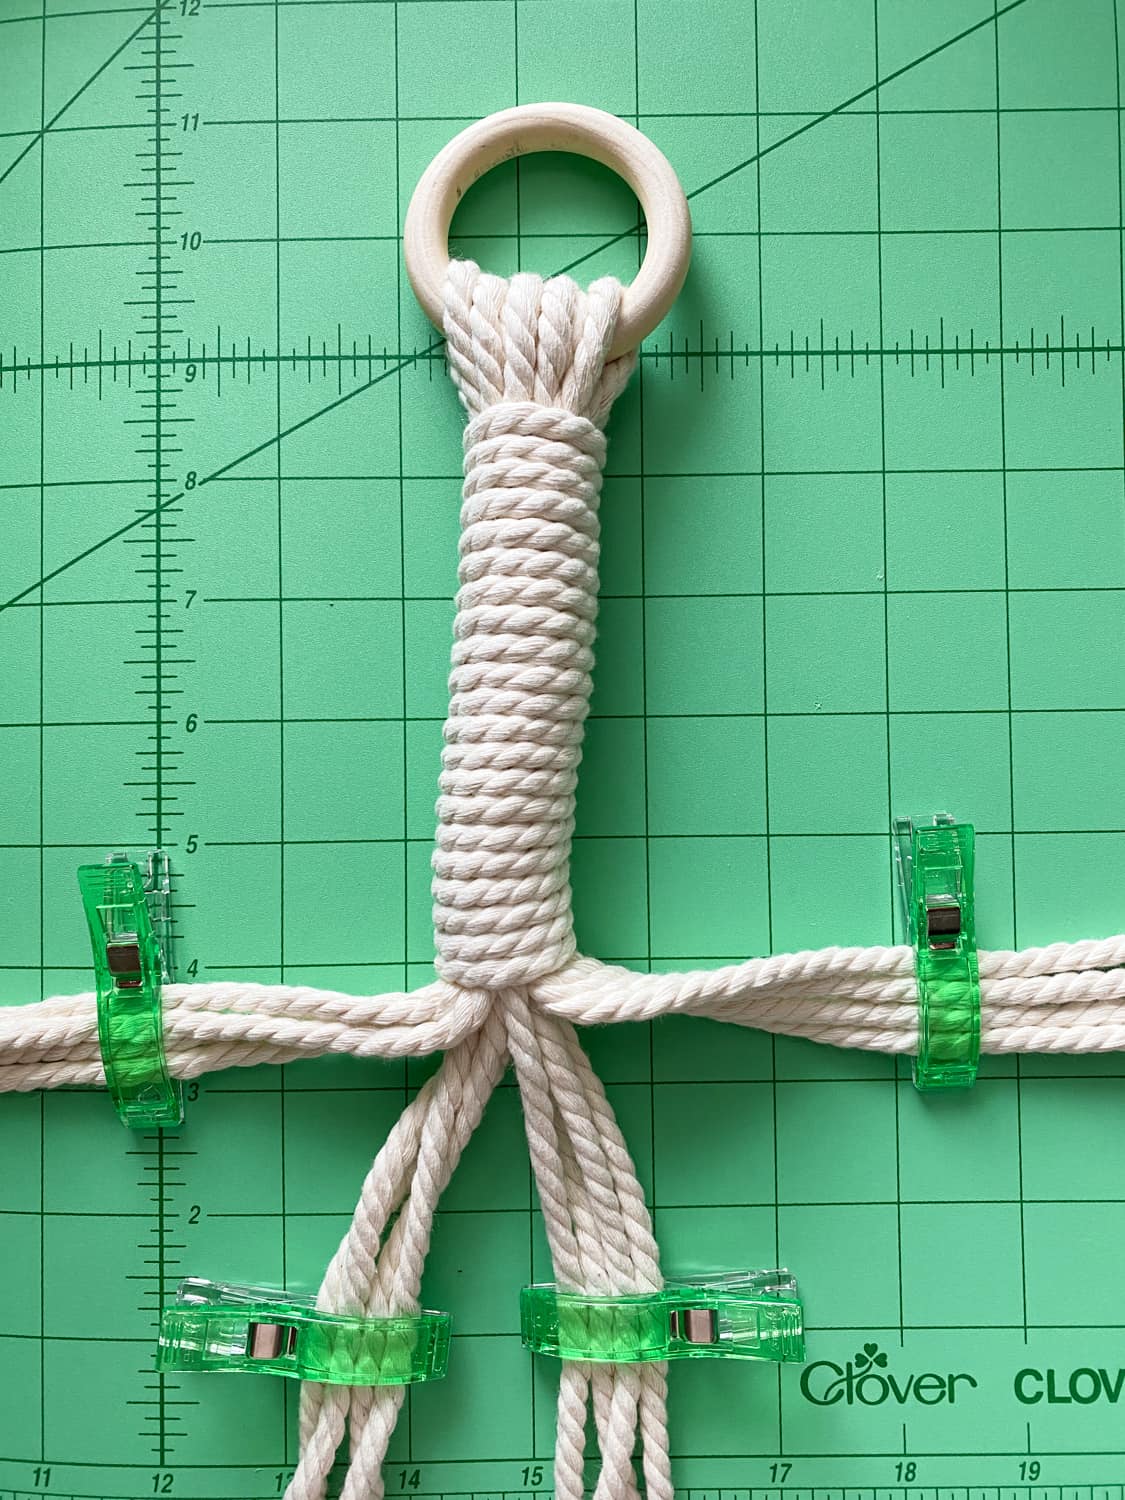
Step 3. Start the plant hanger process by looping 8 cords into the wooden ring. Then, use the additional cord to create a wrapped knot by closely following the images below.
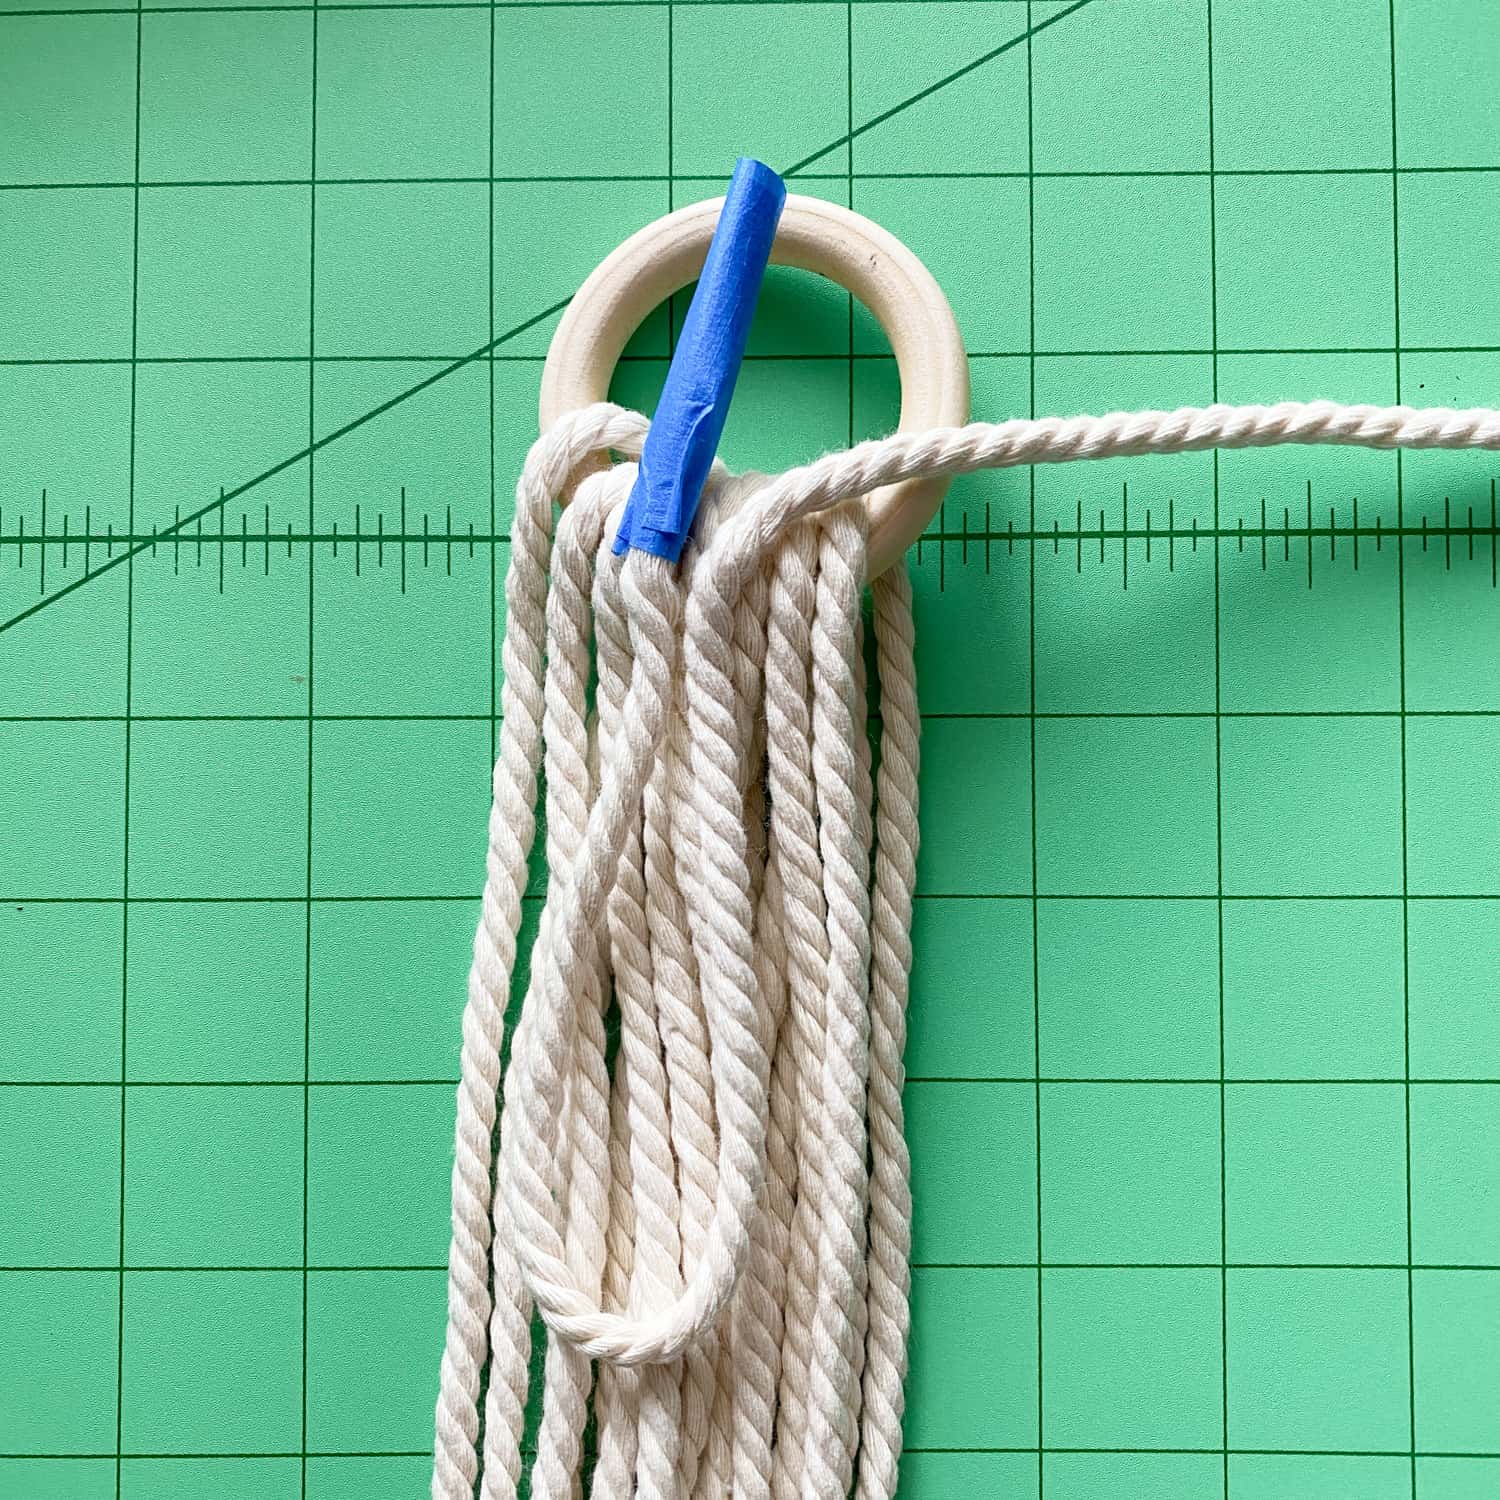
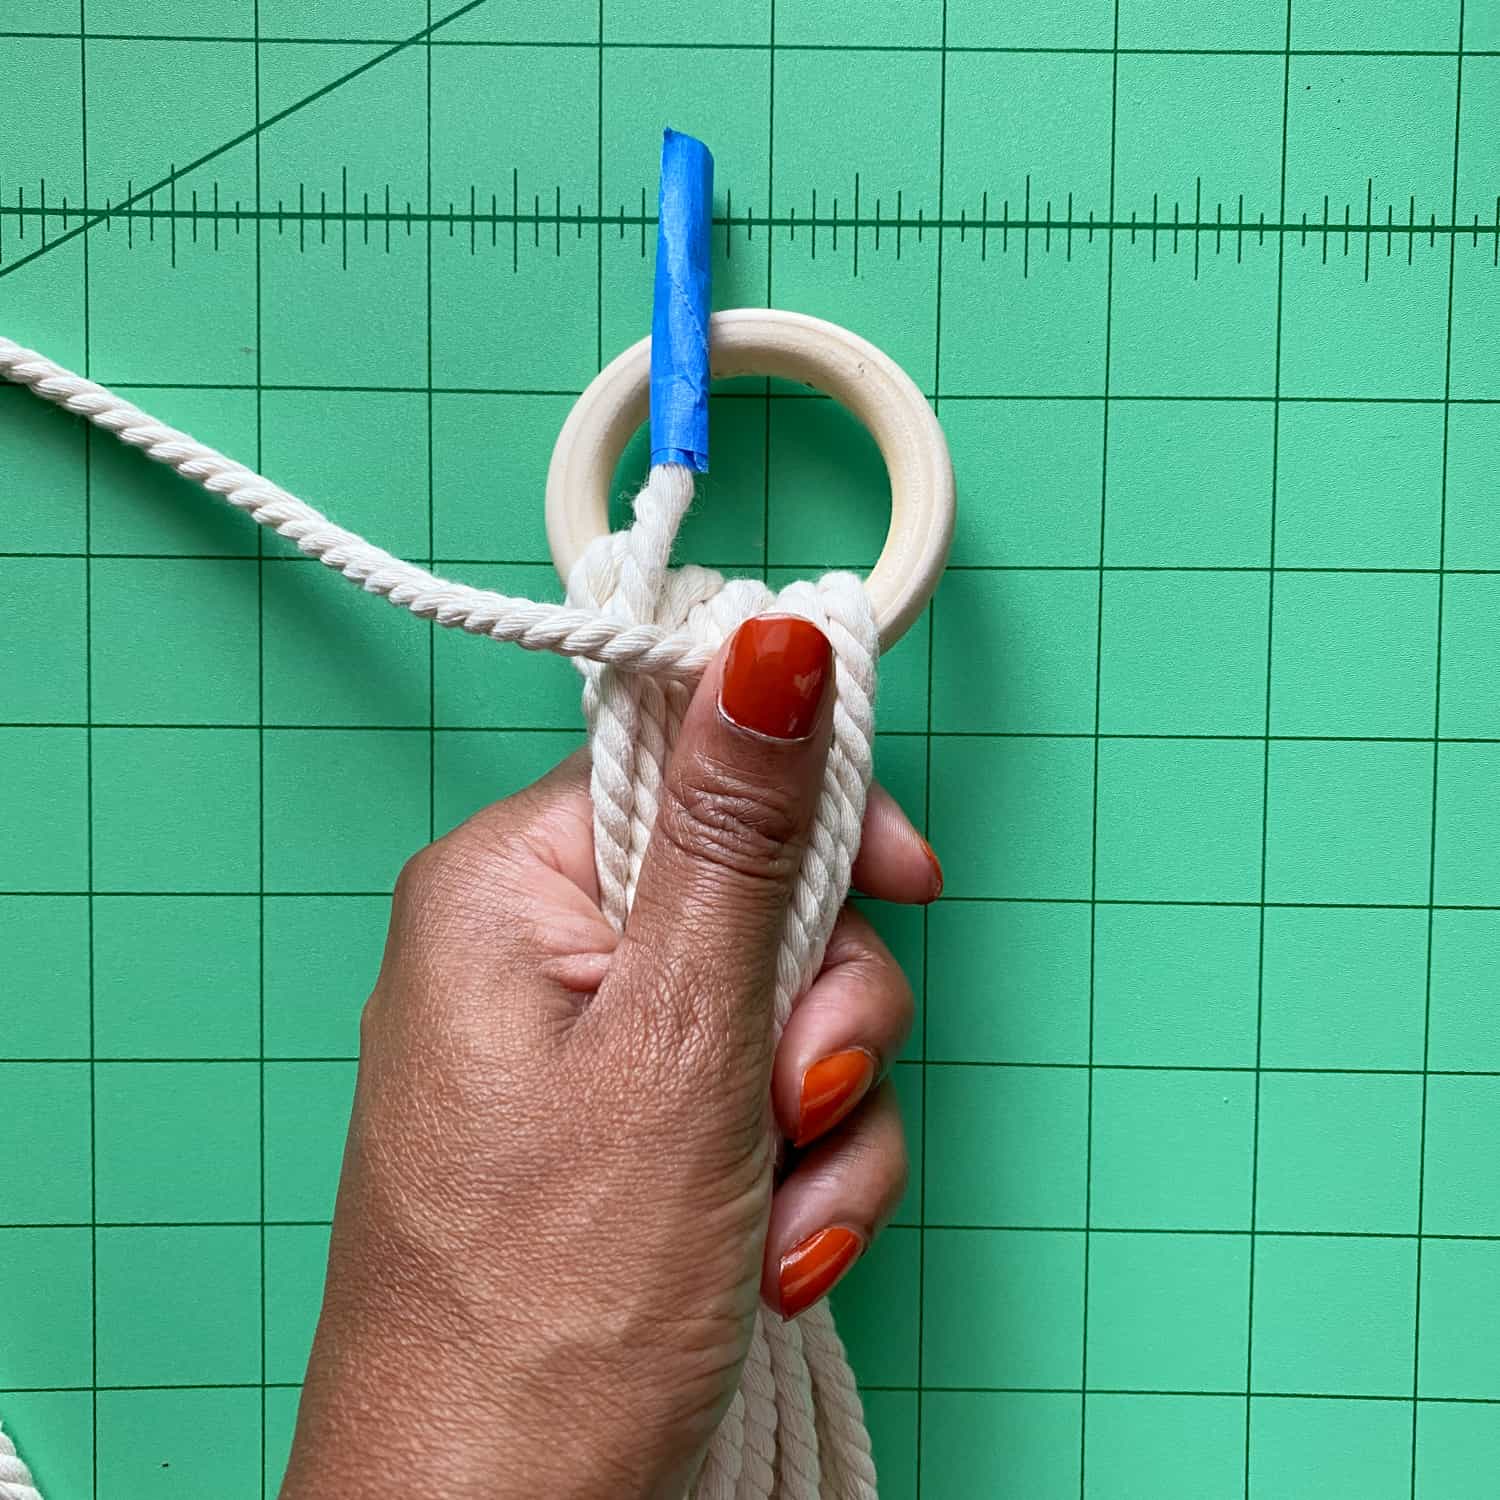

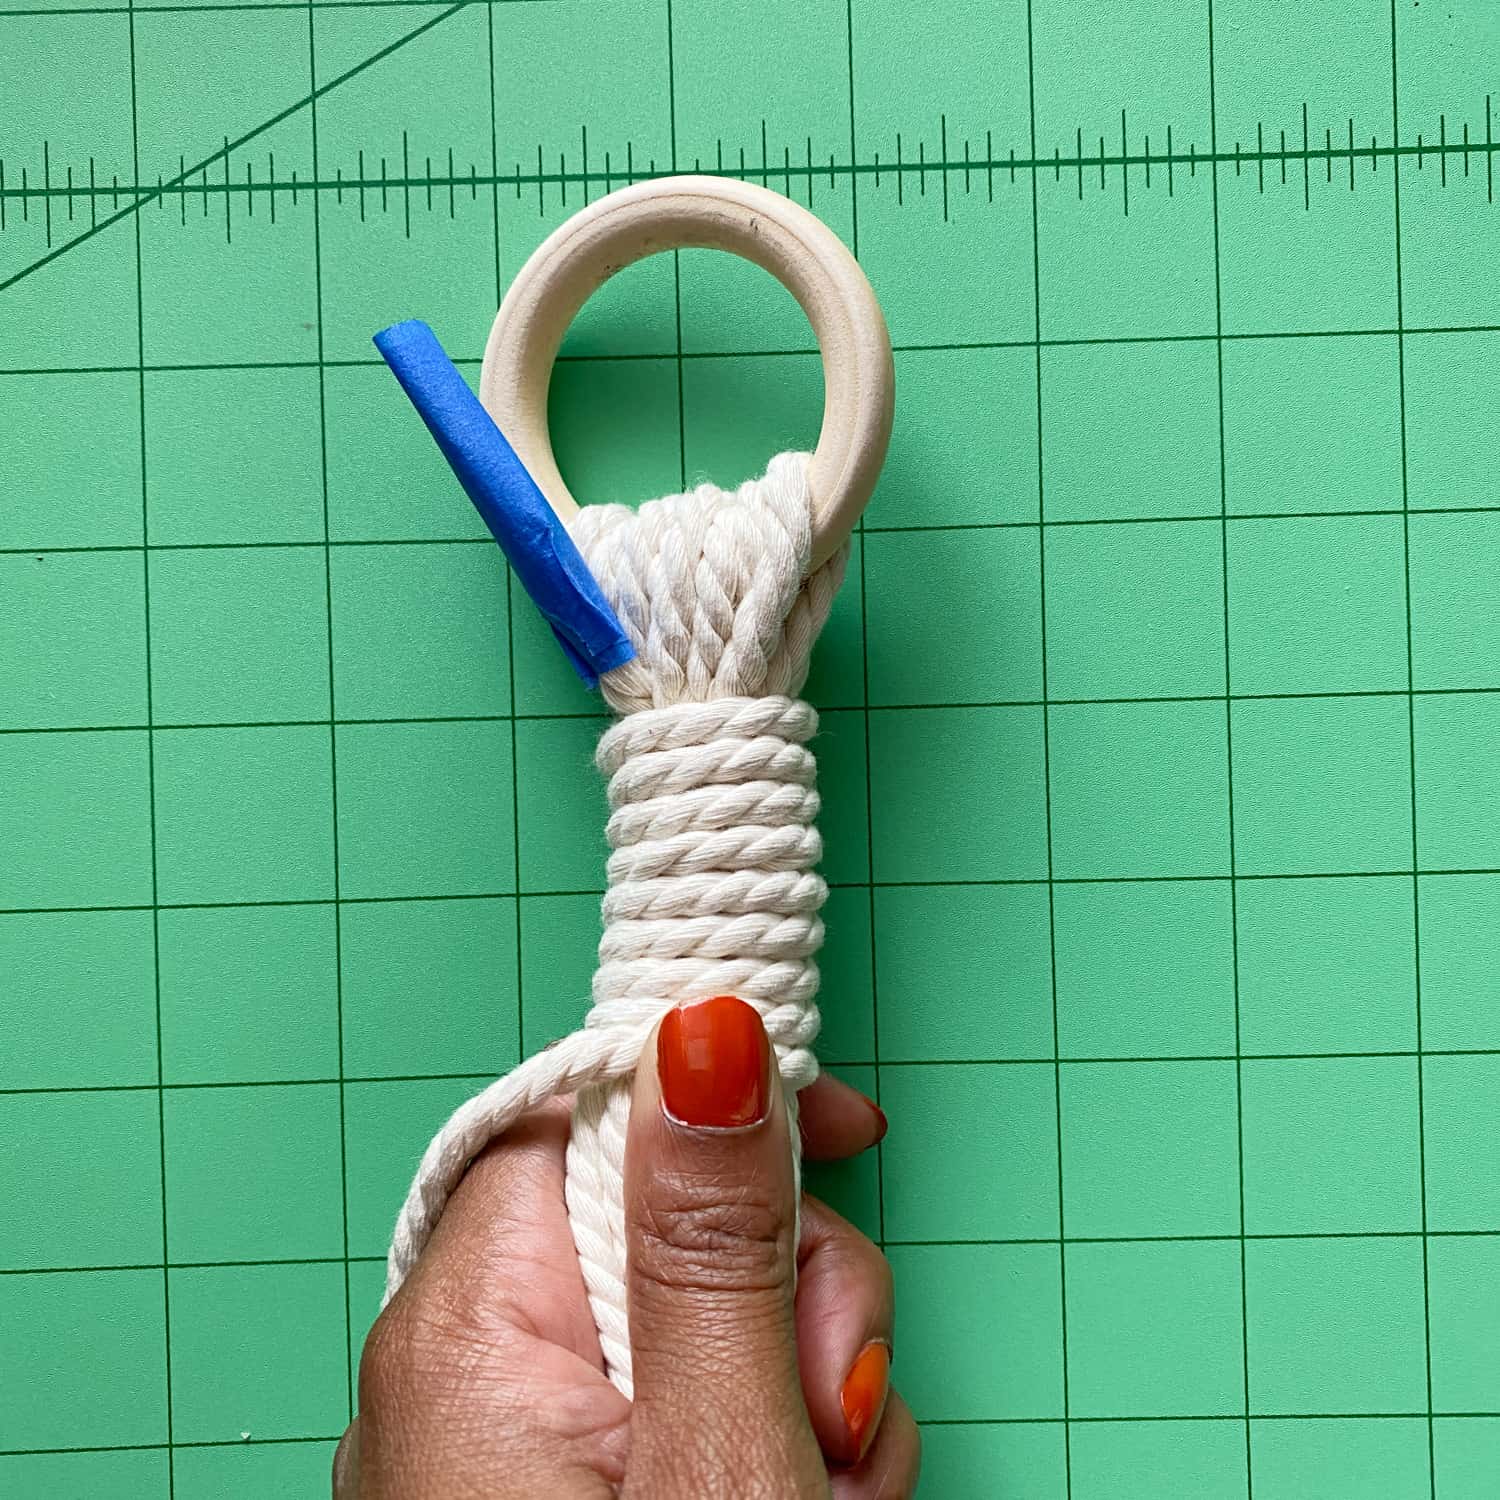
Wrap the cording around 20 times, then add place the bottom end through the loop.
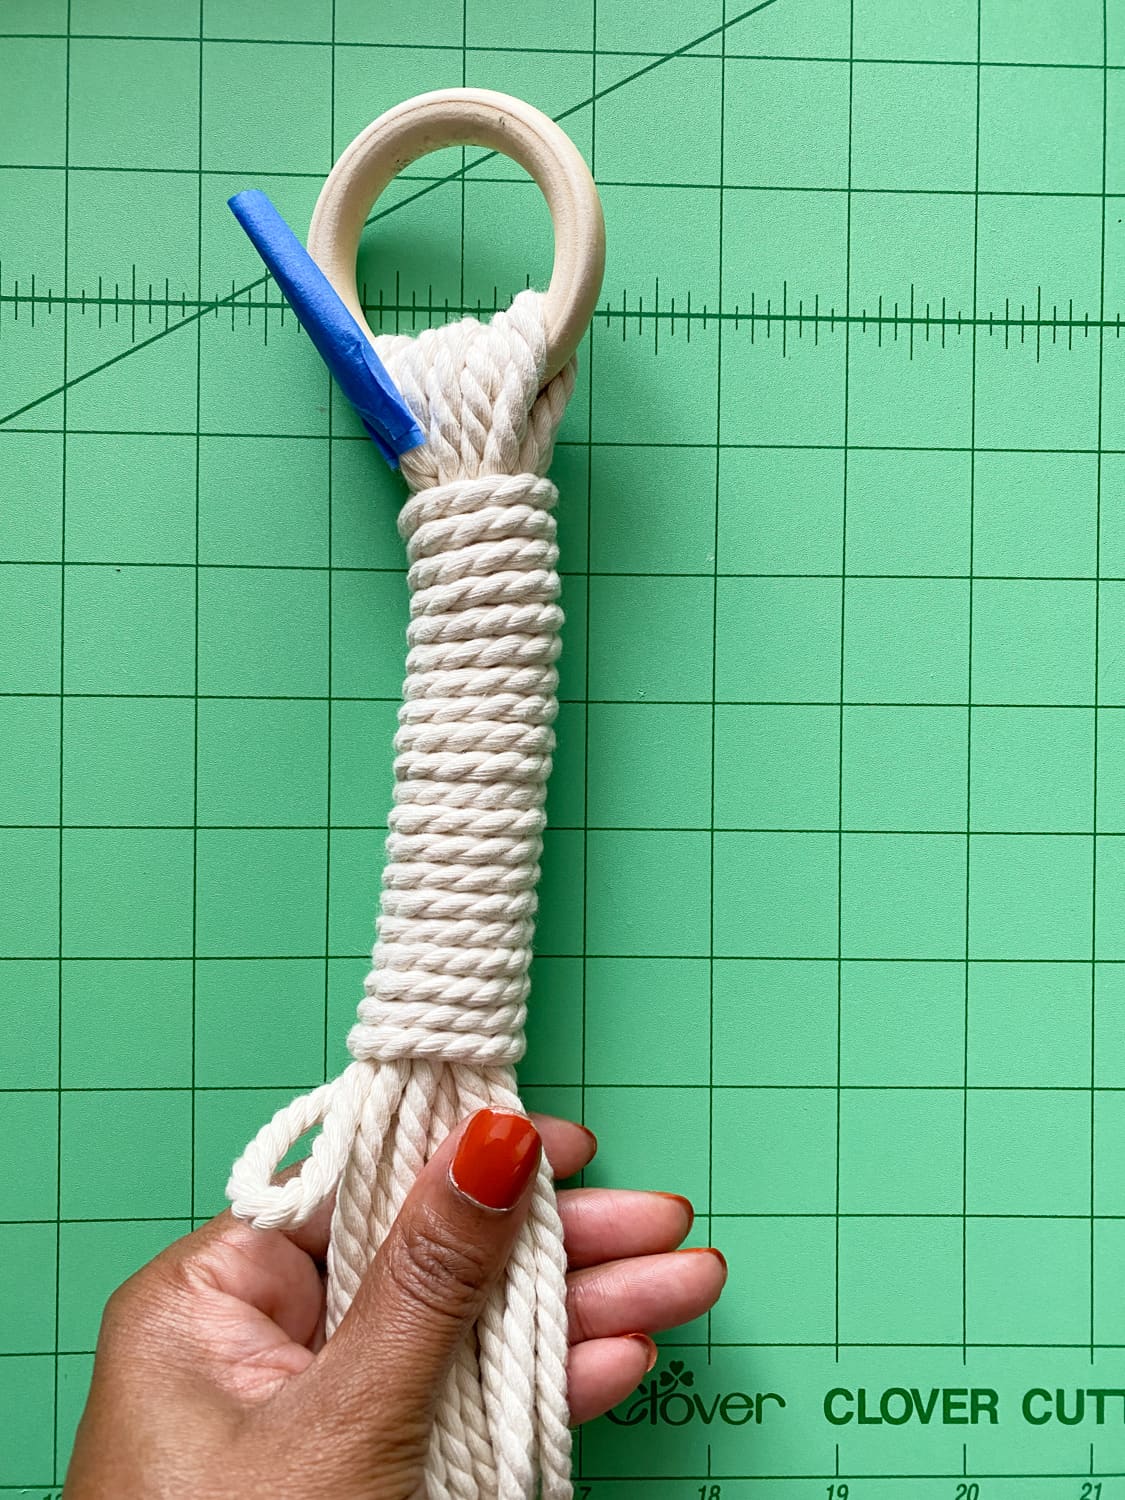


Pull the top and bottom cord to secure the wrapped knot, then trim the excess with the Bordeaux Shears 130.


Step 4. Separate the cotton cord by using the Clover Jumbo Wonder Clips.
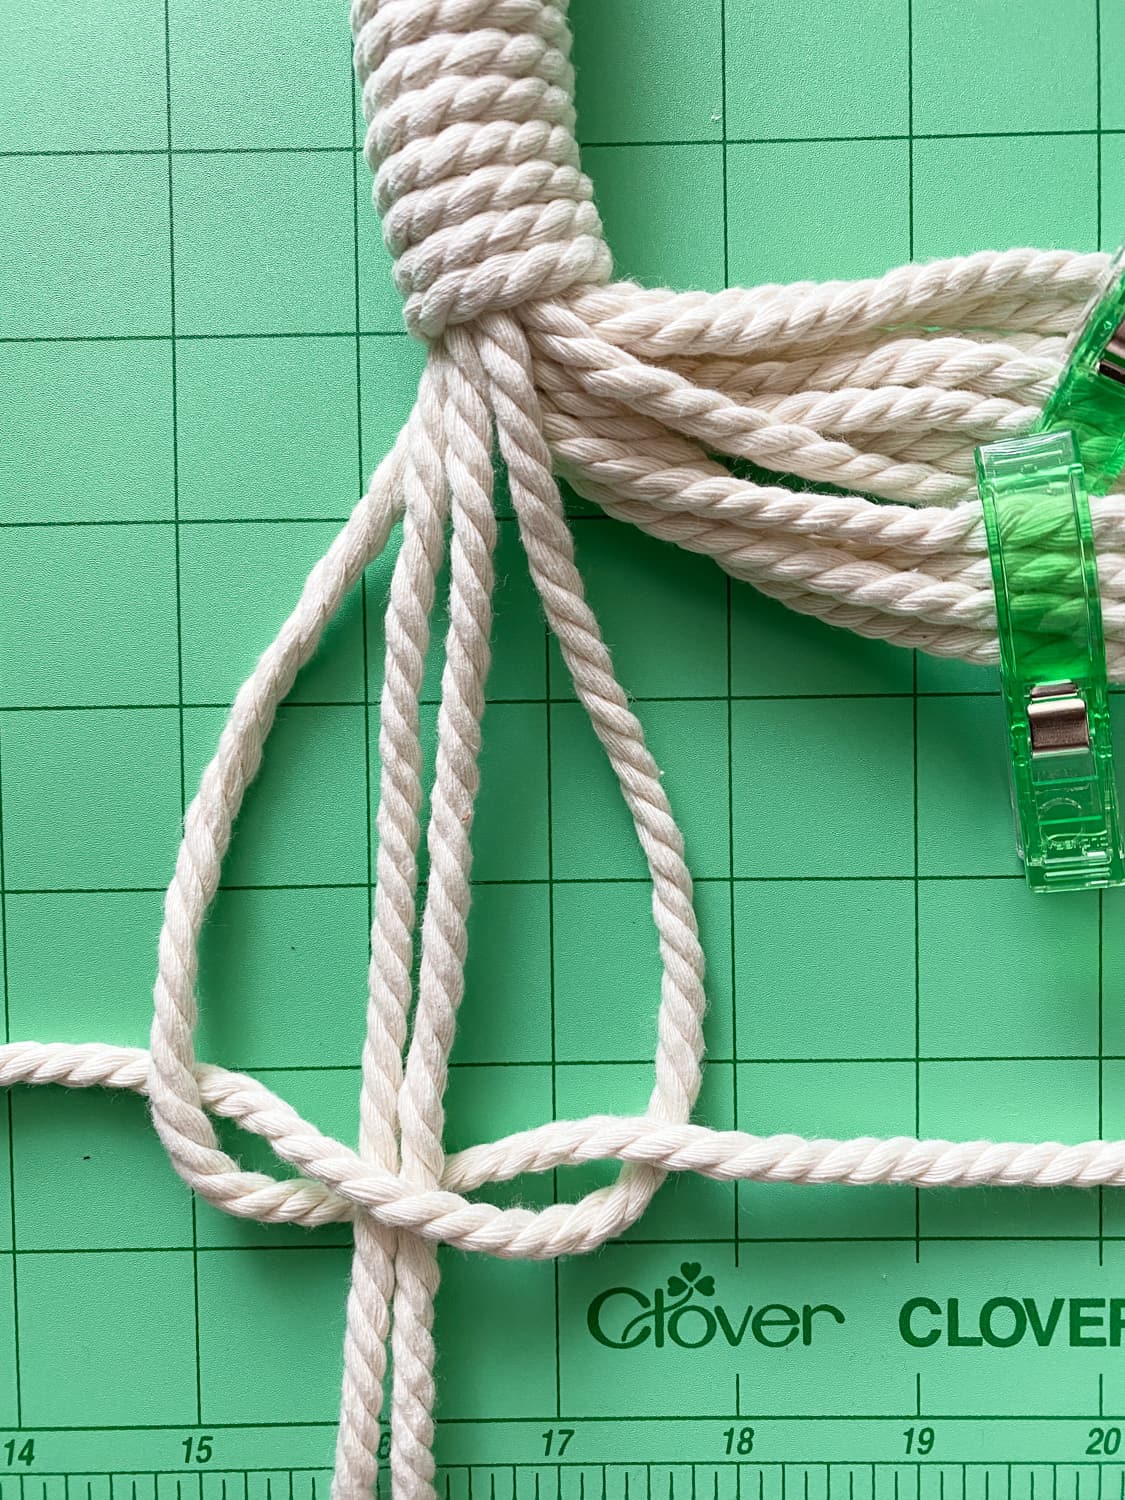
Step 5. Create 6 square knots.

In order to create a square knot, you will need to wrap the left cord over the front two center cords, then the right cord crossing the back.
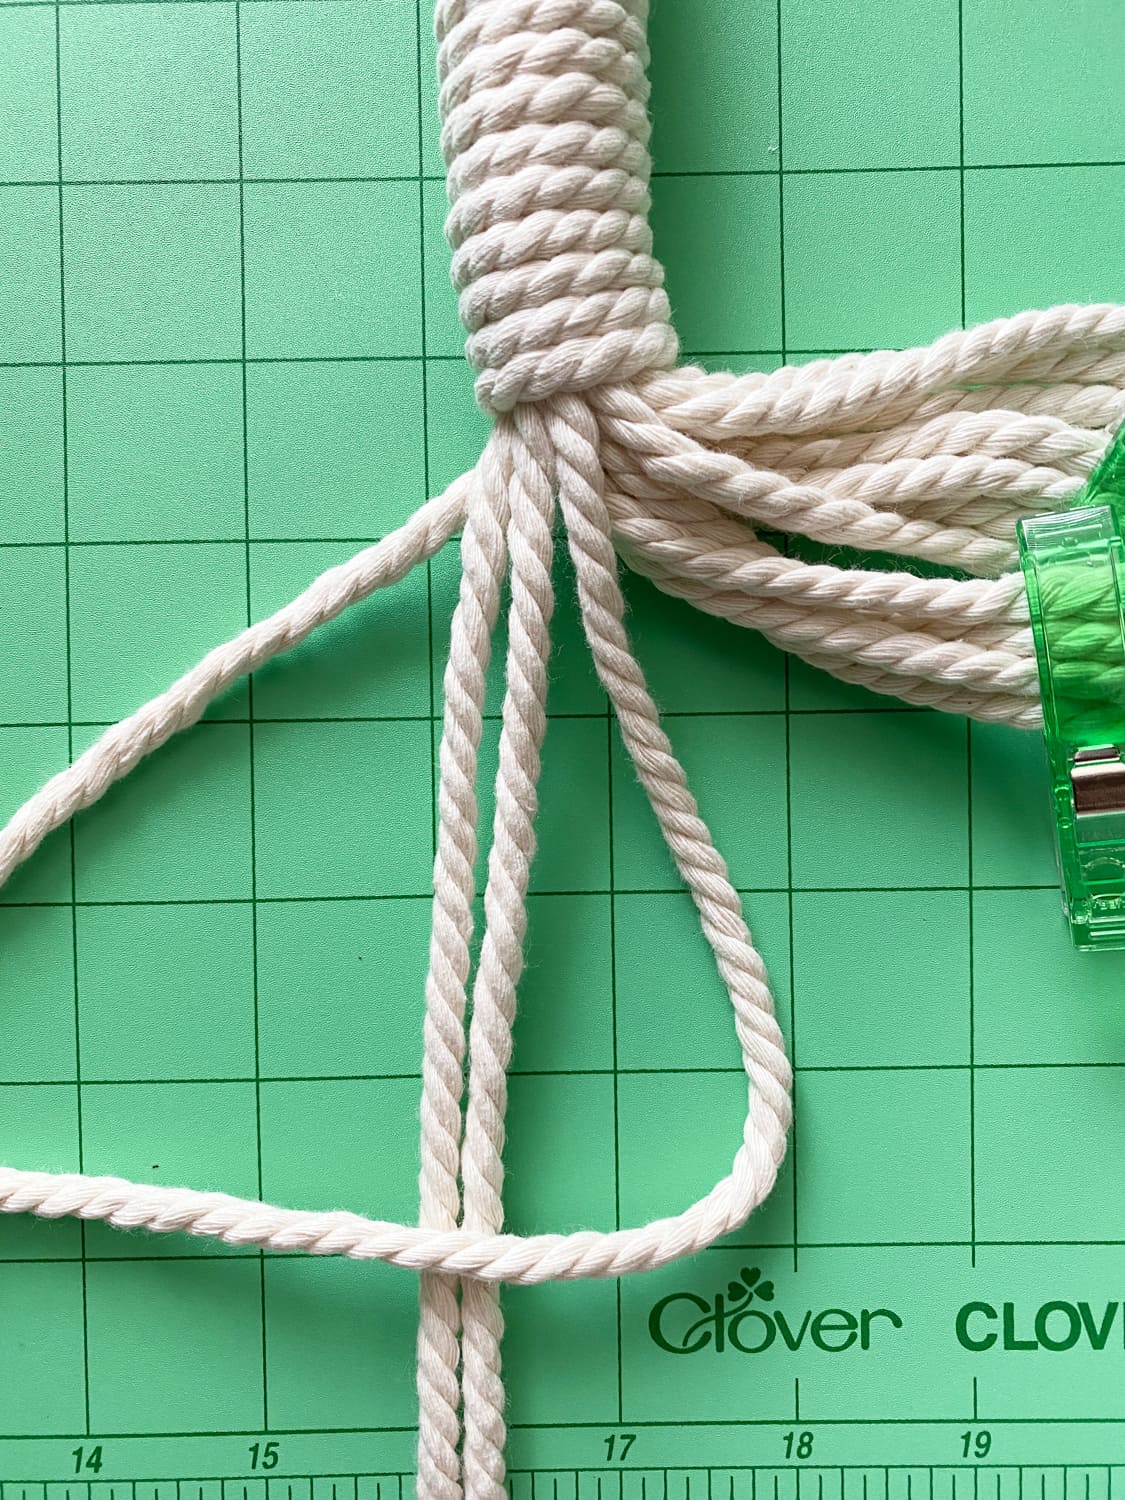

Next, you will loop the cording through the holes that are shown below, then repeat the step above starting with the furthest right cord. It’s important to understand that two alternating knots will complete one square knot. If you keep repeating a knot on the same side, you will create a spiral knot.
Step 6. Let’s get ready to add some beads. Use Clover’s plant hanger gauge to add 2 inches of space.
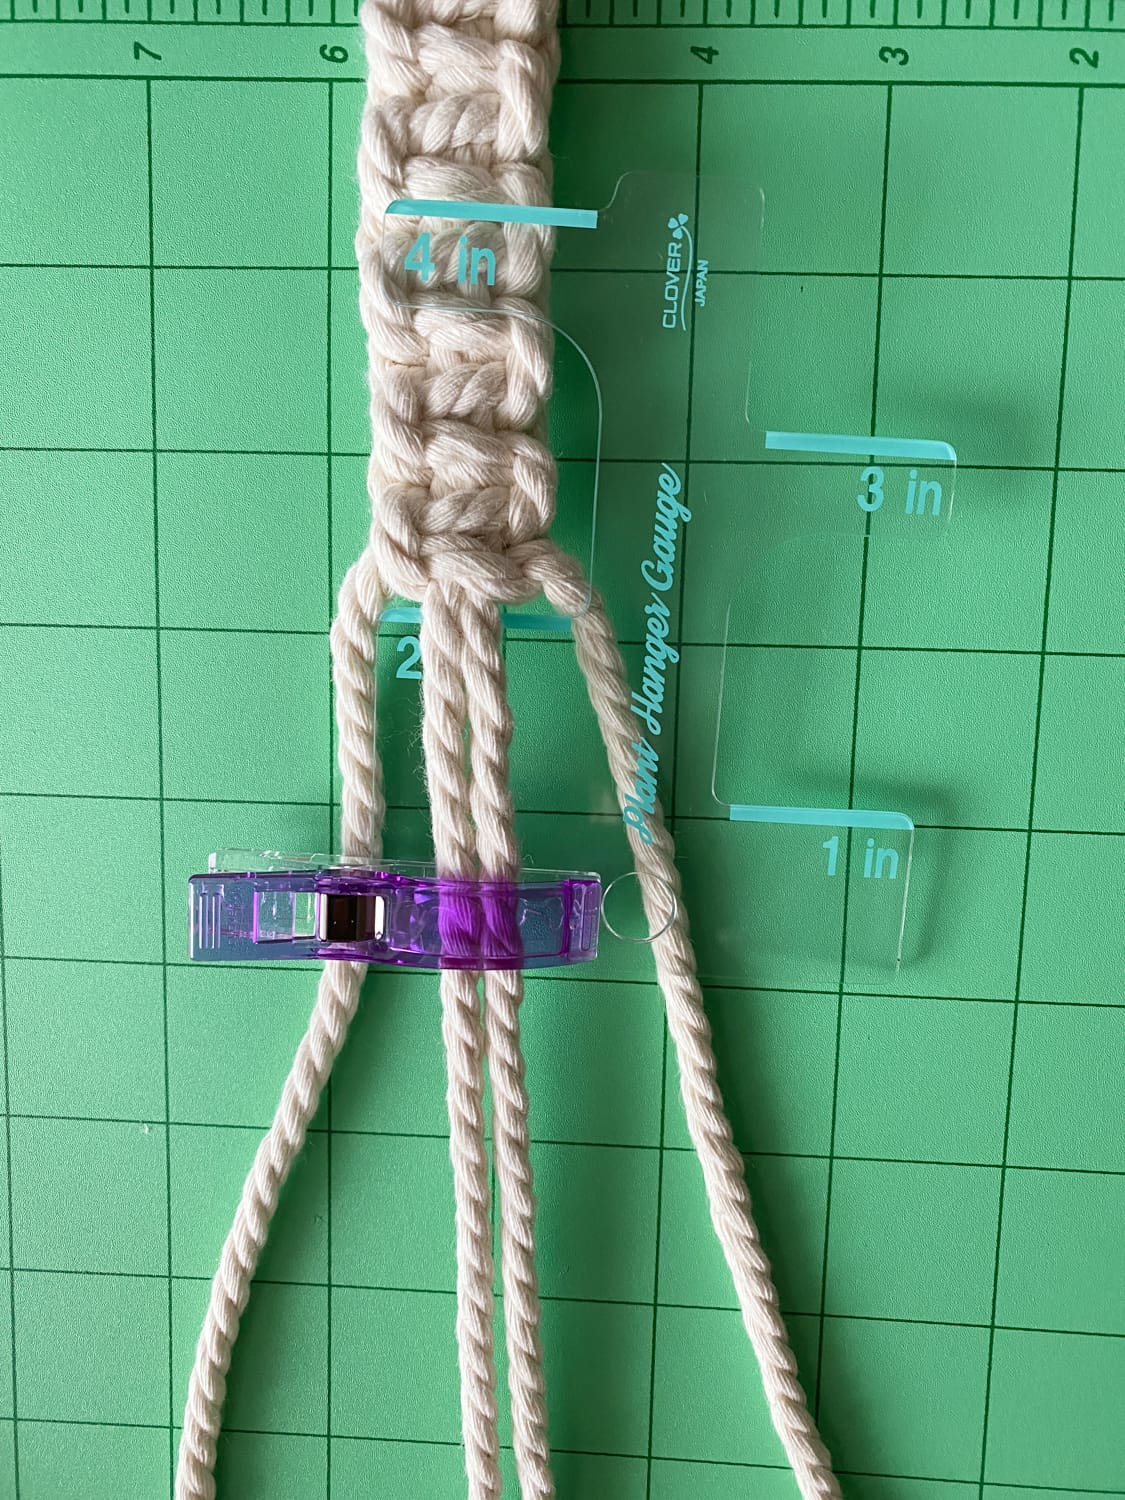
Create a square knot.

Add the bead.
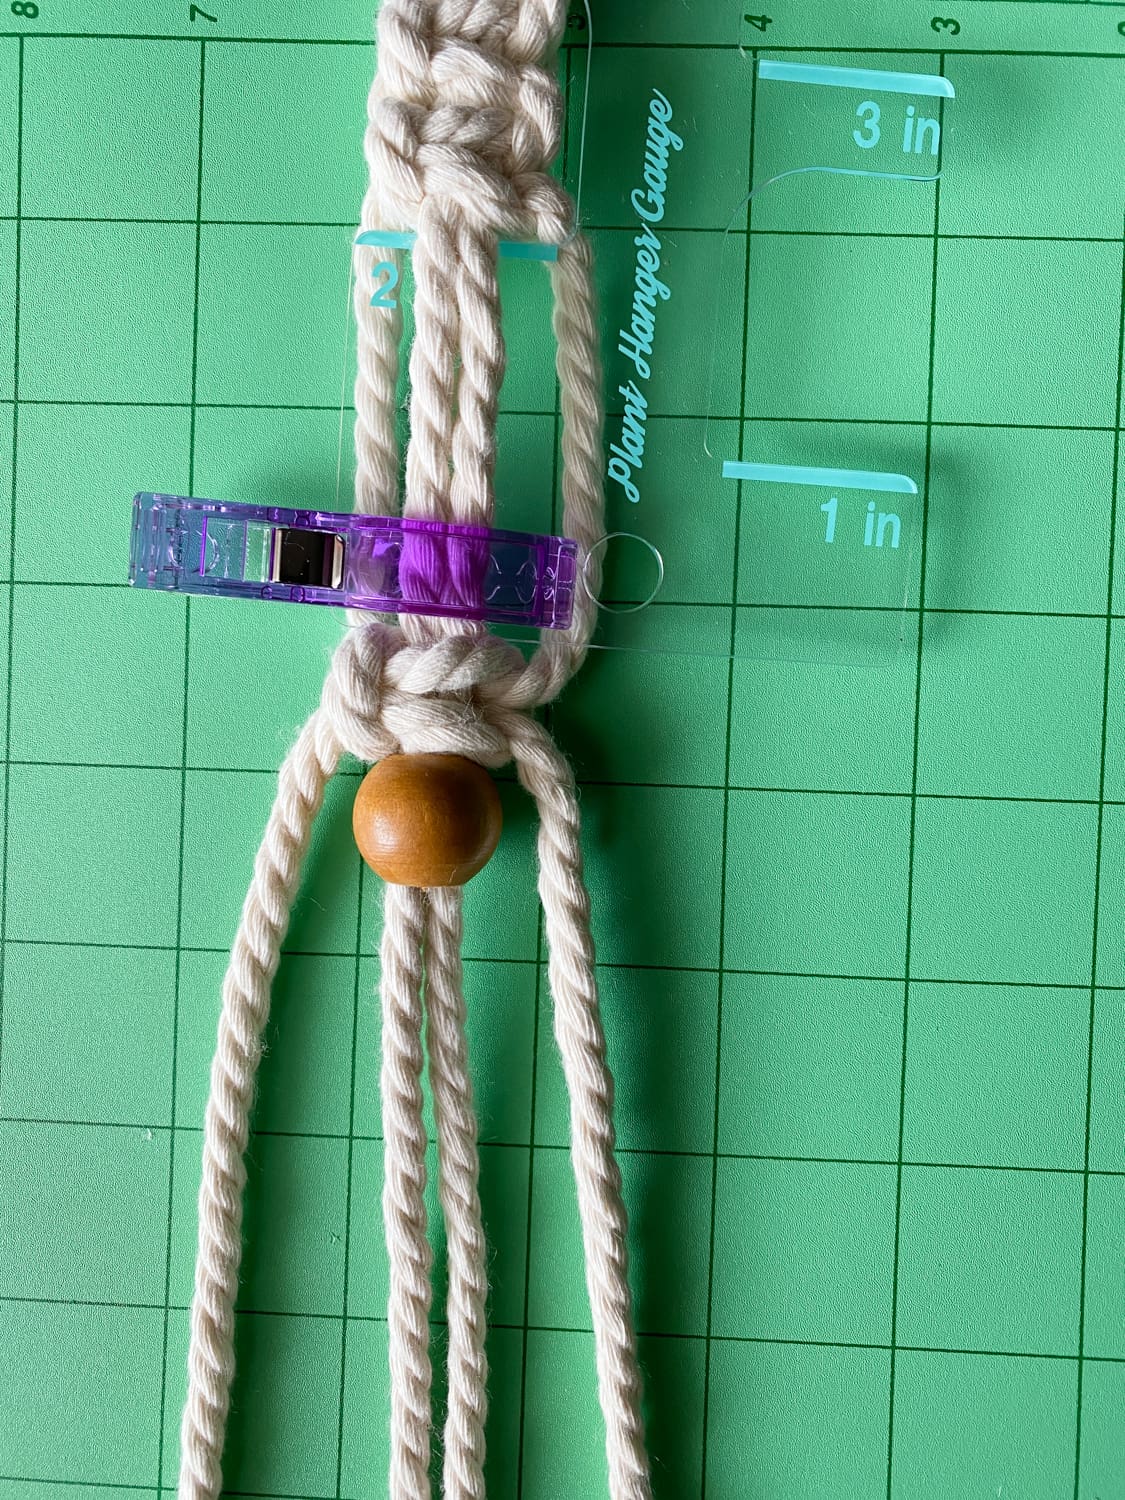
Secure the bead by adding another square knot.

Here’s how the pumpkin hanger looks so far.

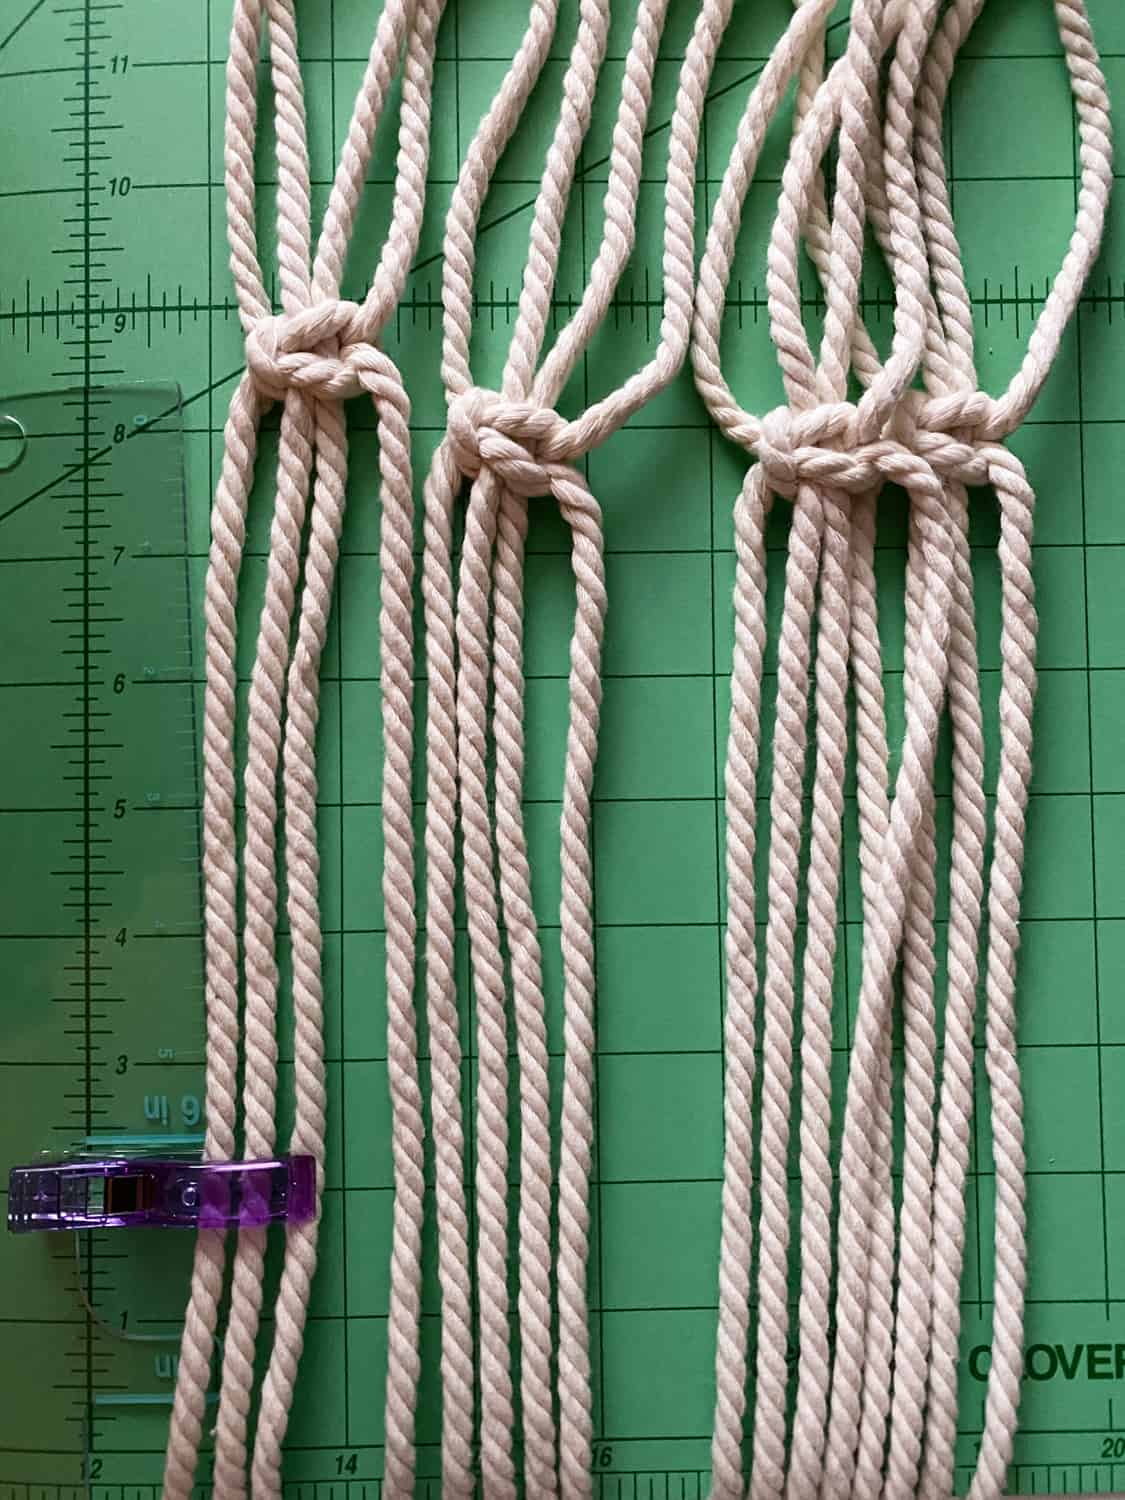
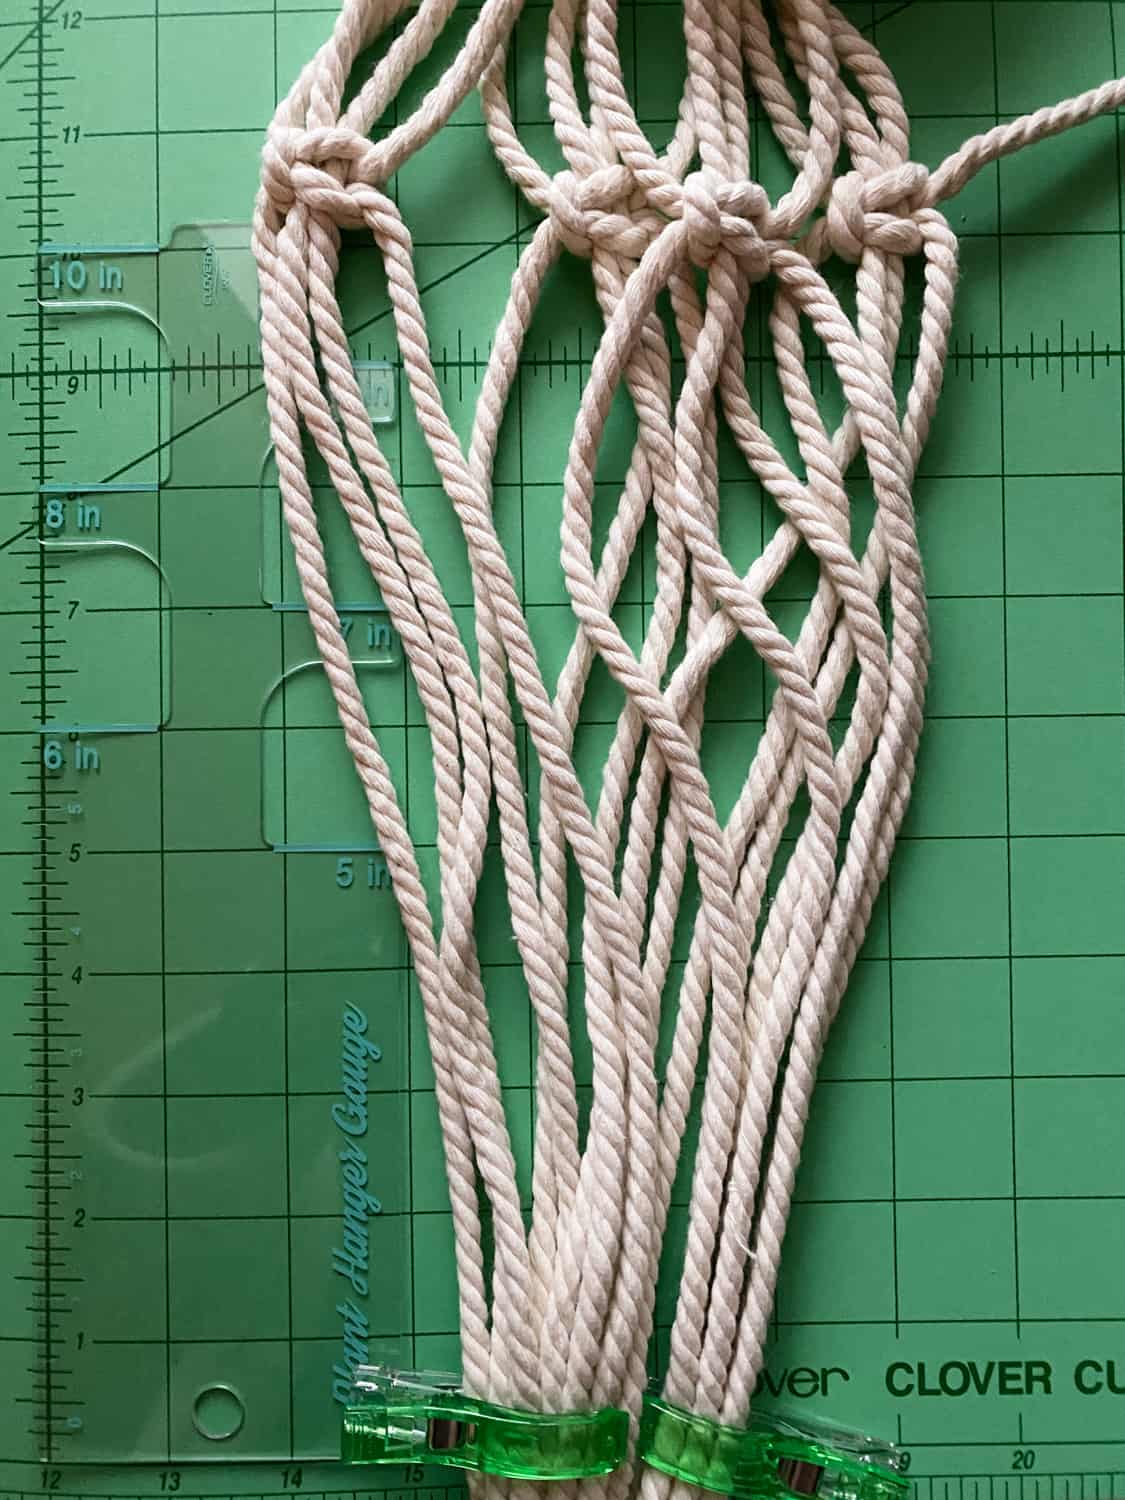
Step 7. Now it’s time to create the area that will hold the pumpkin in place. Measure 6 inches down from the last square knot, then add another square knot by connecting the two ends.

Connecting the two closest ends will create a strong webb to hold the pumpkin inside the hanger.
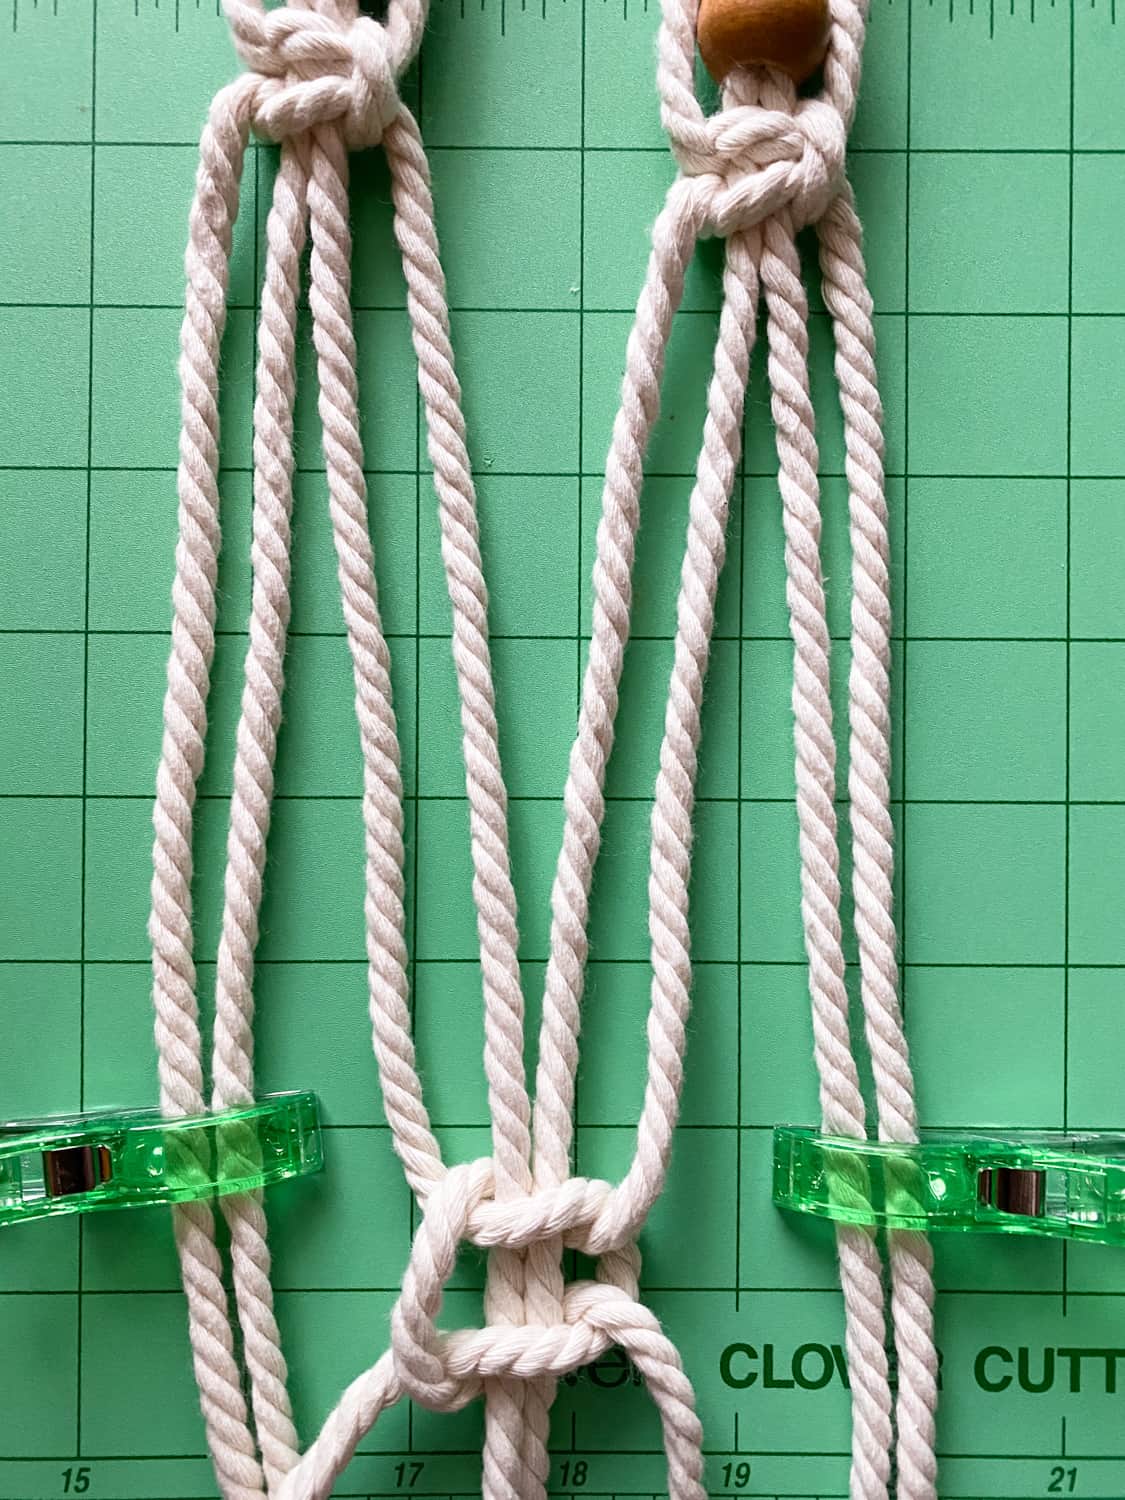
Measure another 6 inches down to complete one more set of square knots.

Step 8. After you have finished creating the pumpkin area, measure 10 inches down from your last square knot, then create another wrapped knot to finish the Macramé Pumpkin hanger.
Step 9. ( Optional) If you love fringe, use a macrame brush to unravel the cording. If not, then use the bordeaux shears to trim the cording evenly.


Alright, that’s it! If you enjoyed creating this macrame pumpkin hanger, be sure to tag #cloverusa and #makeitwithzeal in your finished project.
Well, until next time, have a craftastic day!
-Danielle
Want to check out more of my blogs and tutorials? Here are my social links below!
Blog | Instagram | Facebook | Pinterest | YouTube
Stay connected with Clover on Facebook | Twitter | Instagram | Pinterest | YouTube | Ravelry
[mc4wp_form id=”11289″]