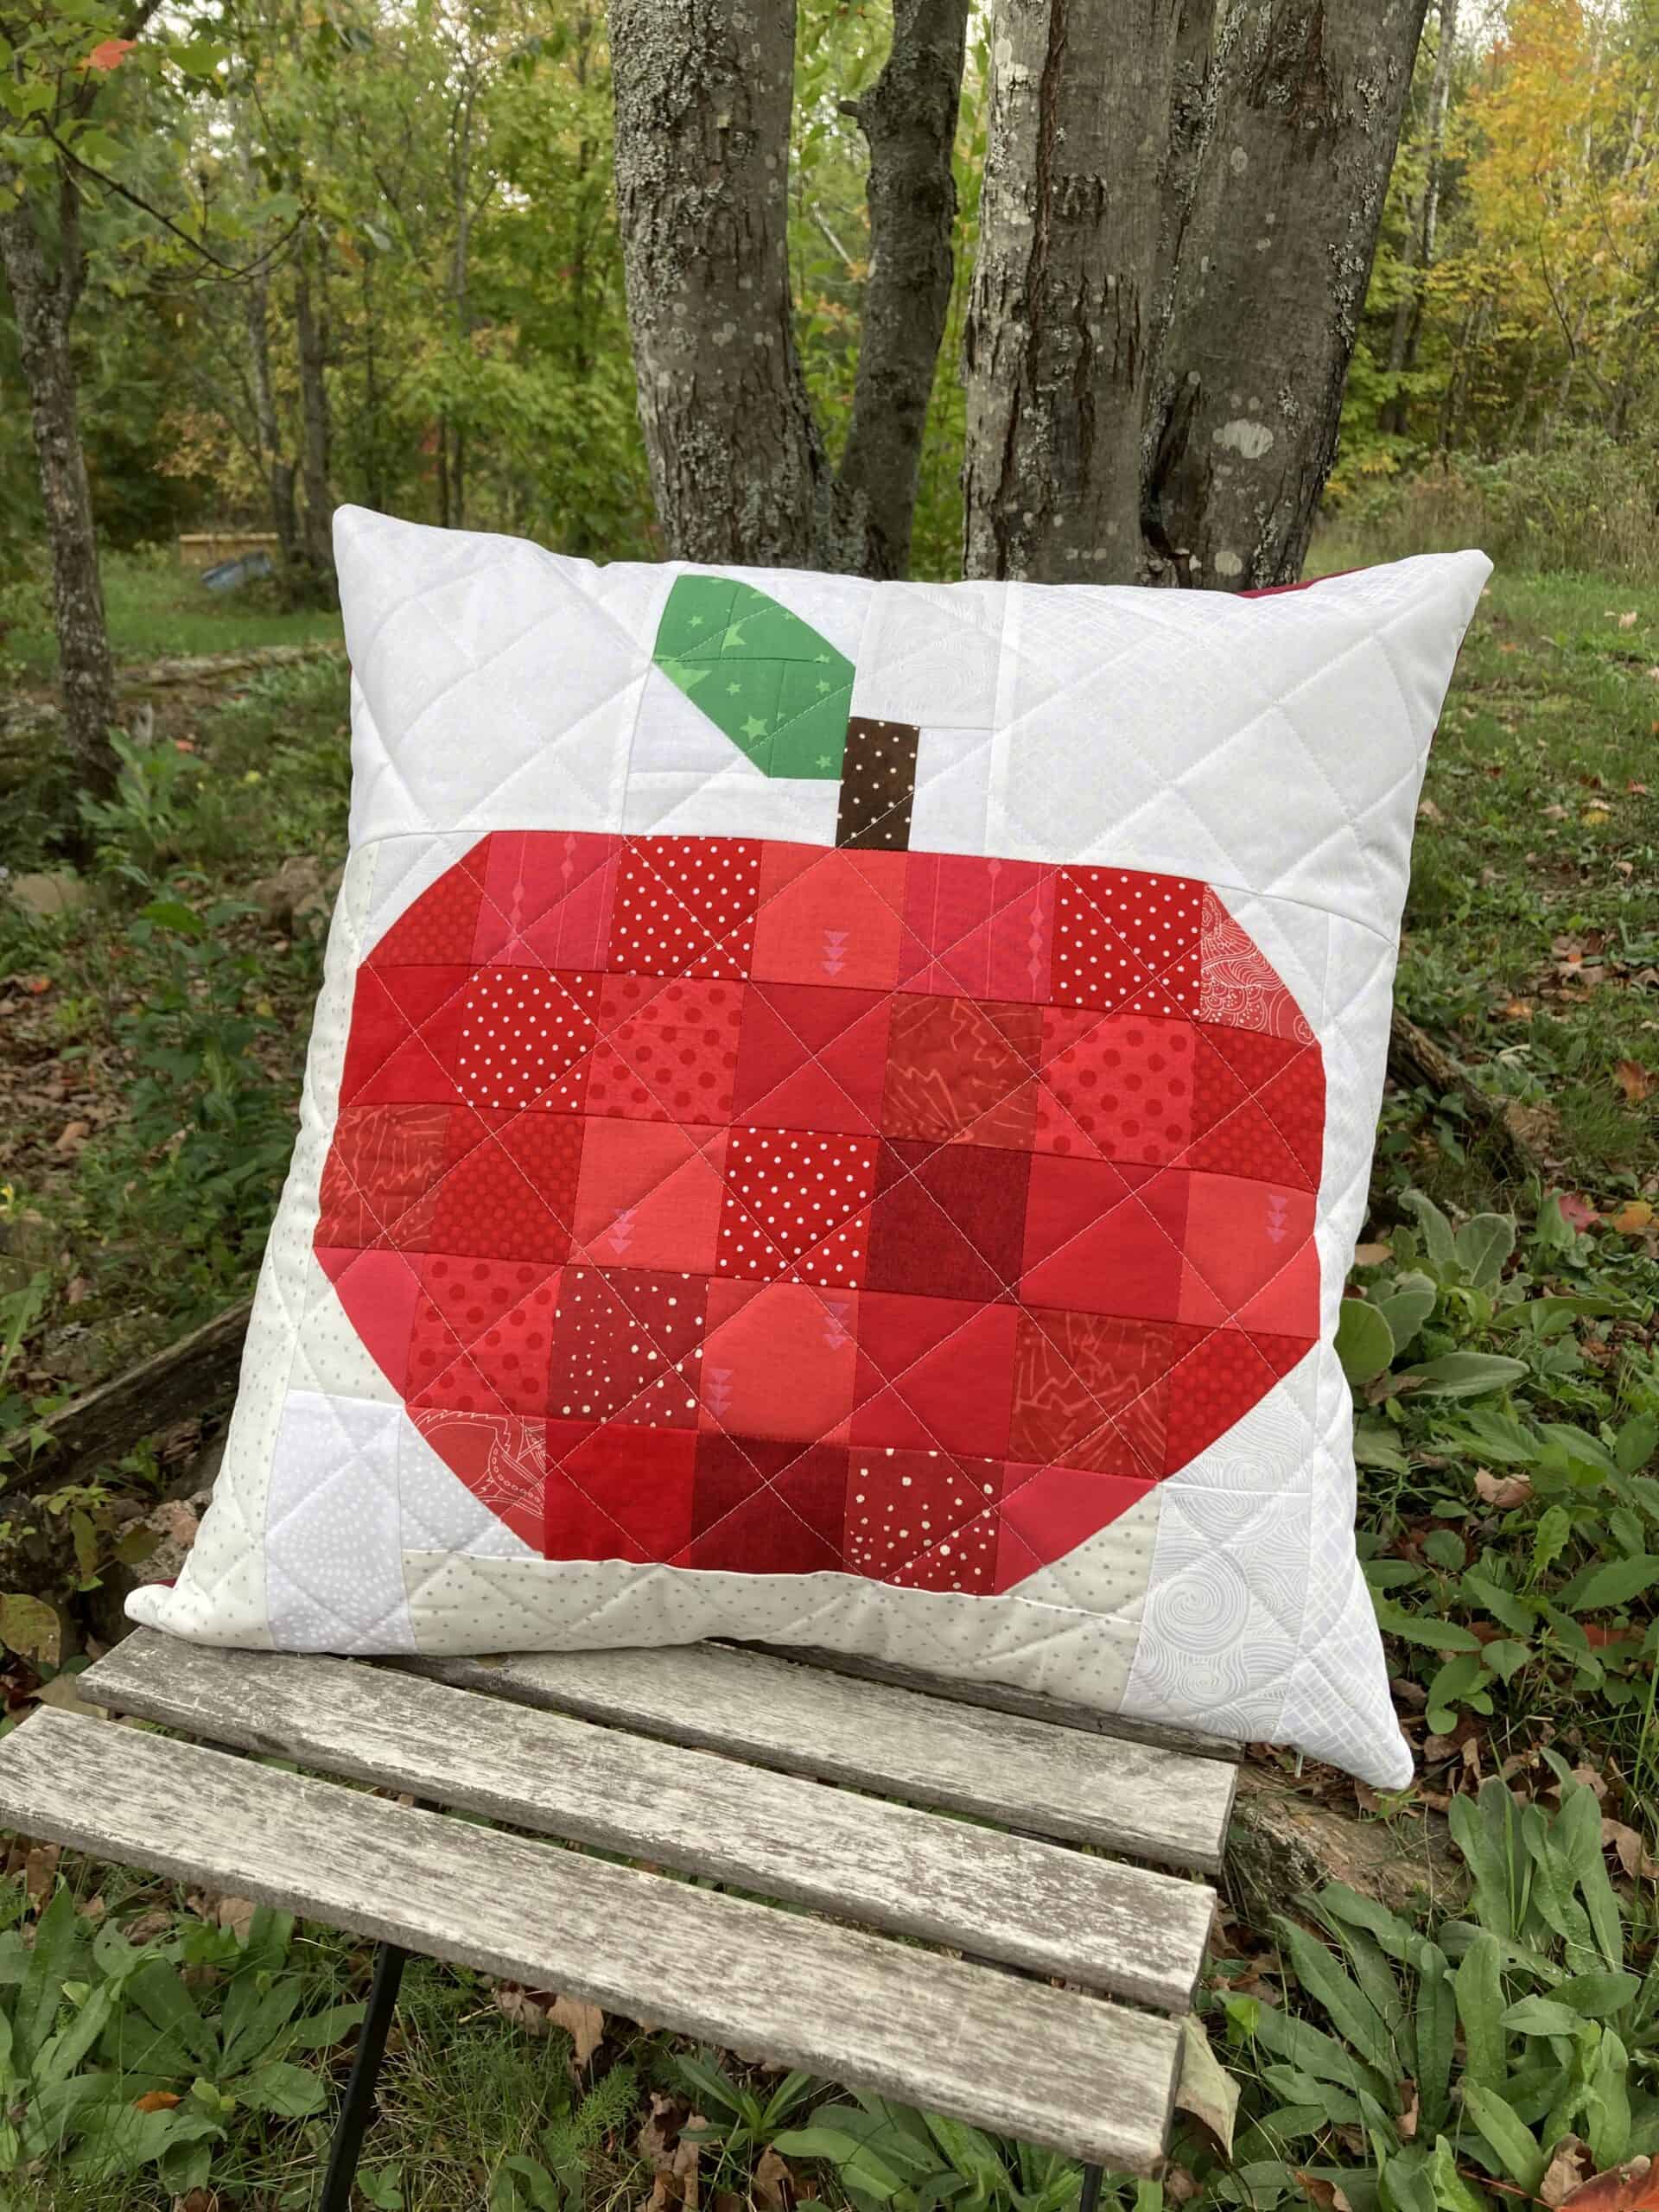
Quilted Apple Pillow Pattern
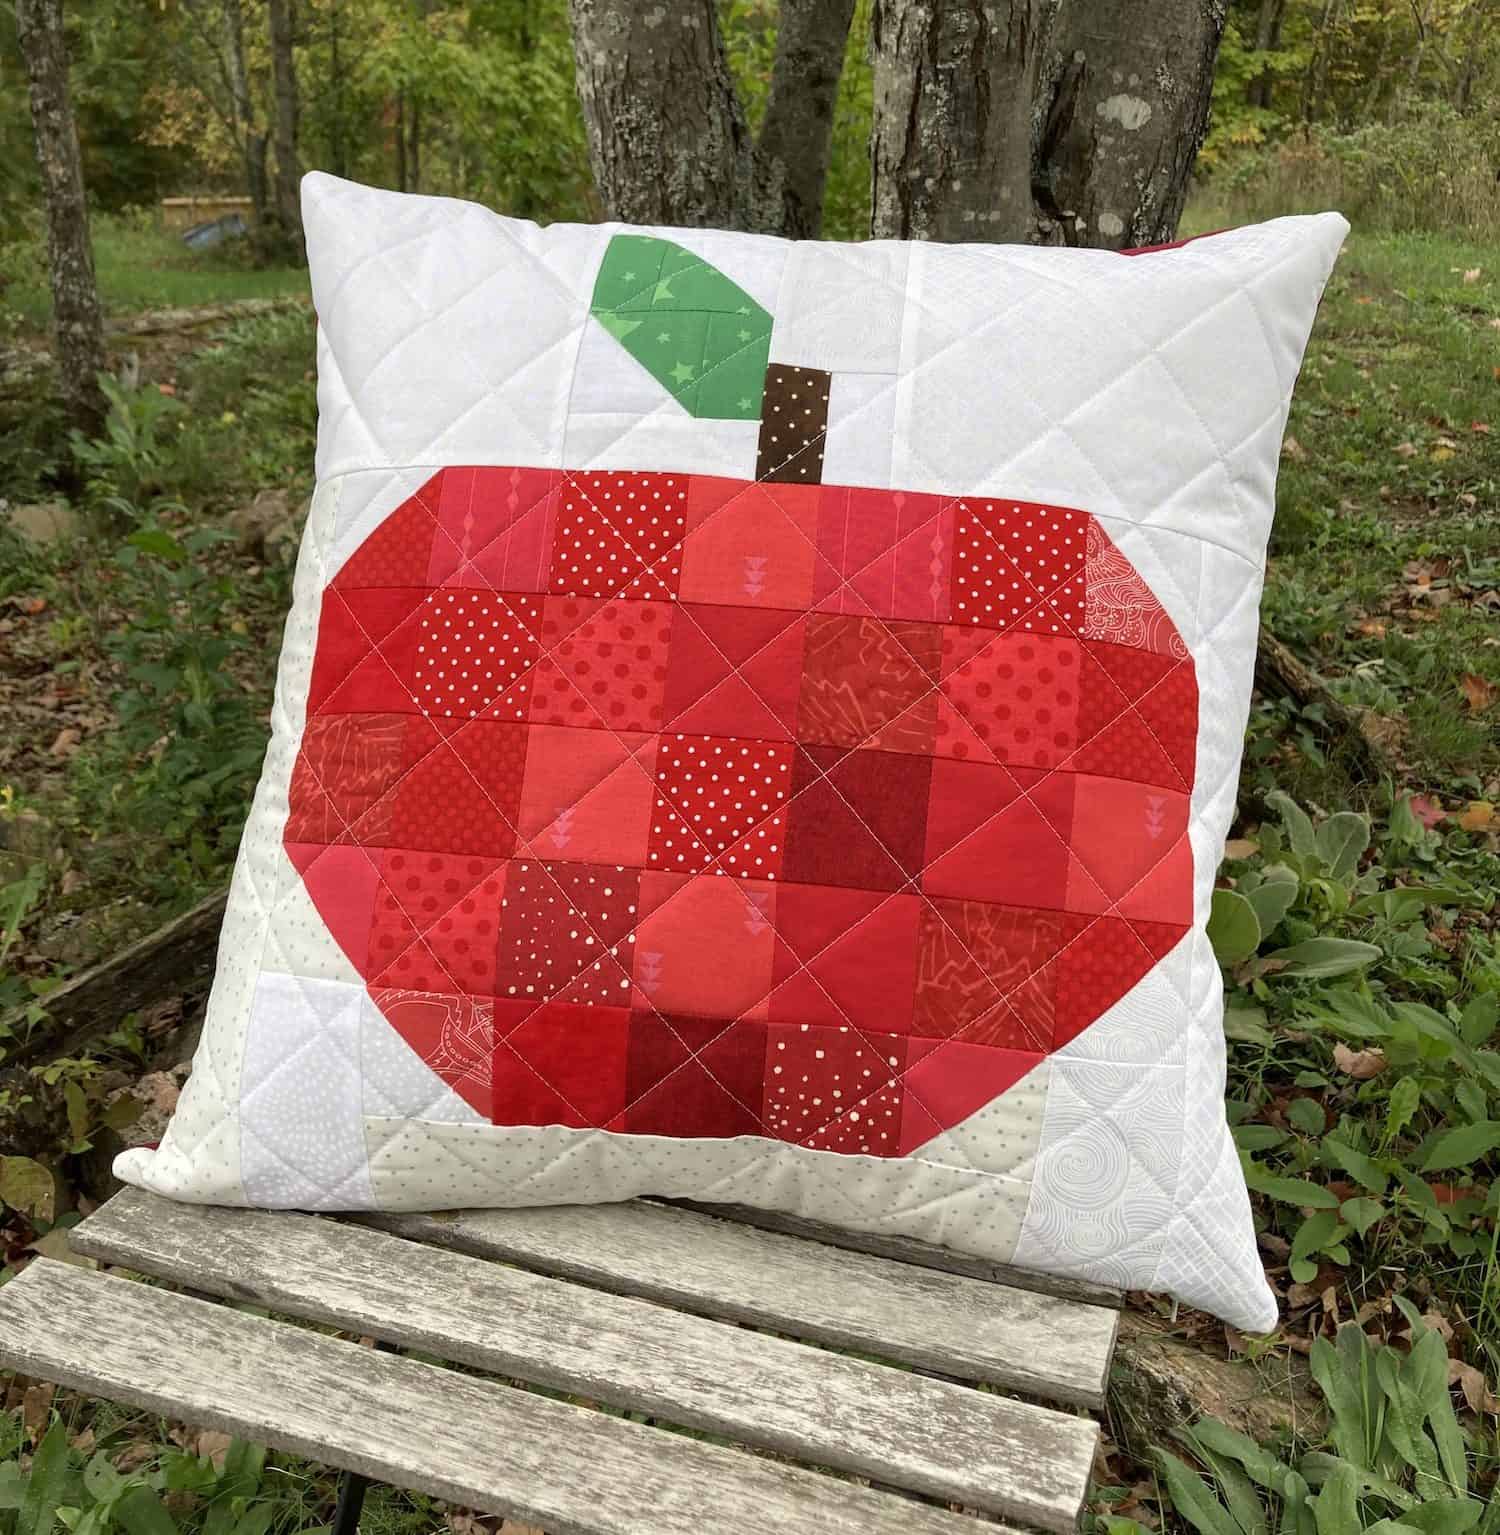
Dimensions: Approx. 19” x19” finished as a pillow, 20” x 20” block
Materials:
- A zipper foot for your sewing machine Straight pins
- Clover Wonder Clips Assortment – Art. No 3183
- Clover Hera Marker – Art. No 490/NV
- Clover Point 2 Point turner. – Art. No 7803
- Ruler, preferably 24” long
- Basting spray, pins, or needle and thread
For the Apple block:
Green fabrics for the leaf:
(1) 3” x 3” square
(2) 1.5” x 2.5” pieces
Brown for the stem:
(1) 1.5” x 2.5” piece
Various red fabrics for the apple: (3) 3” x 3” squares
(27) 2.5” x 2.5” squares Background fabric:
(4) 3” x 3” squares
(1) 1.5” x 2.5” piece (D)
(1) 1.5” x 3.5” piece (B)
(1) 2.5” x 3.5” piece (A)
(3) 2.5” x 5.5” pieces (C)
(1) 3.5” x 10.5” piece (G)
(2) 3.5” x 13.5” pieces (H)
(1) 7.5” x 7.5” square (E)
(1) 7.5” x 8.5” piece (F)
To quilt the block:
(1) 22” x 22” piece of batting
(1) 22” x 22” piece of muslin to back the block
For the pillow:
(1) 14”-16” zipper (regular, not invisible)
(1) 20” x 20” piece of fabric for the pillow back (1) 20” pillow form
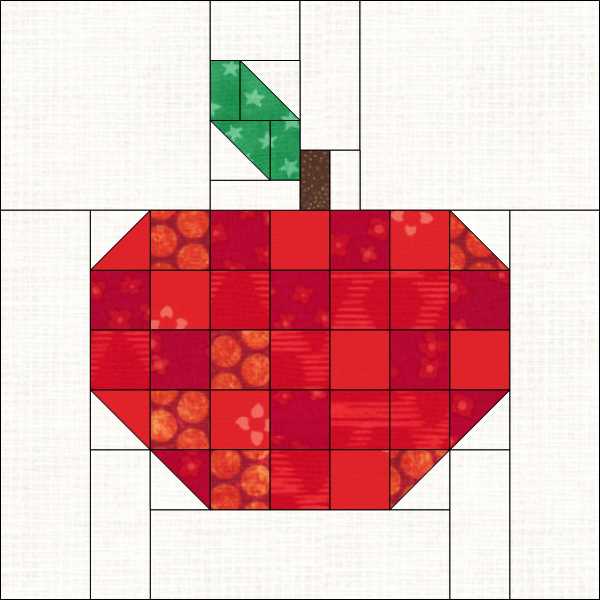
Making the block:
1. Make Half-Square Triangles (HSTs) using the 3” x 3” squares of background, red, and green fabrics. Draw a diagonal line on the back of each background square. Put each background fabric square on top of a red or green square, right sides together. Pin if you think they will shift under your sewing machine.
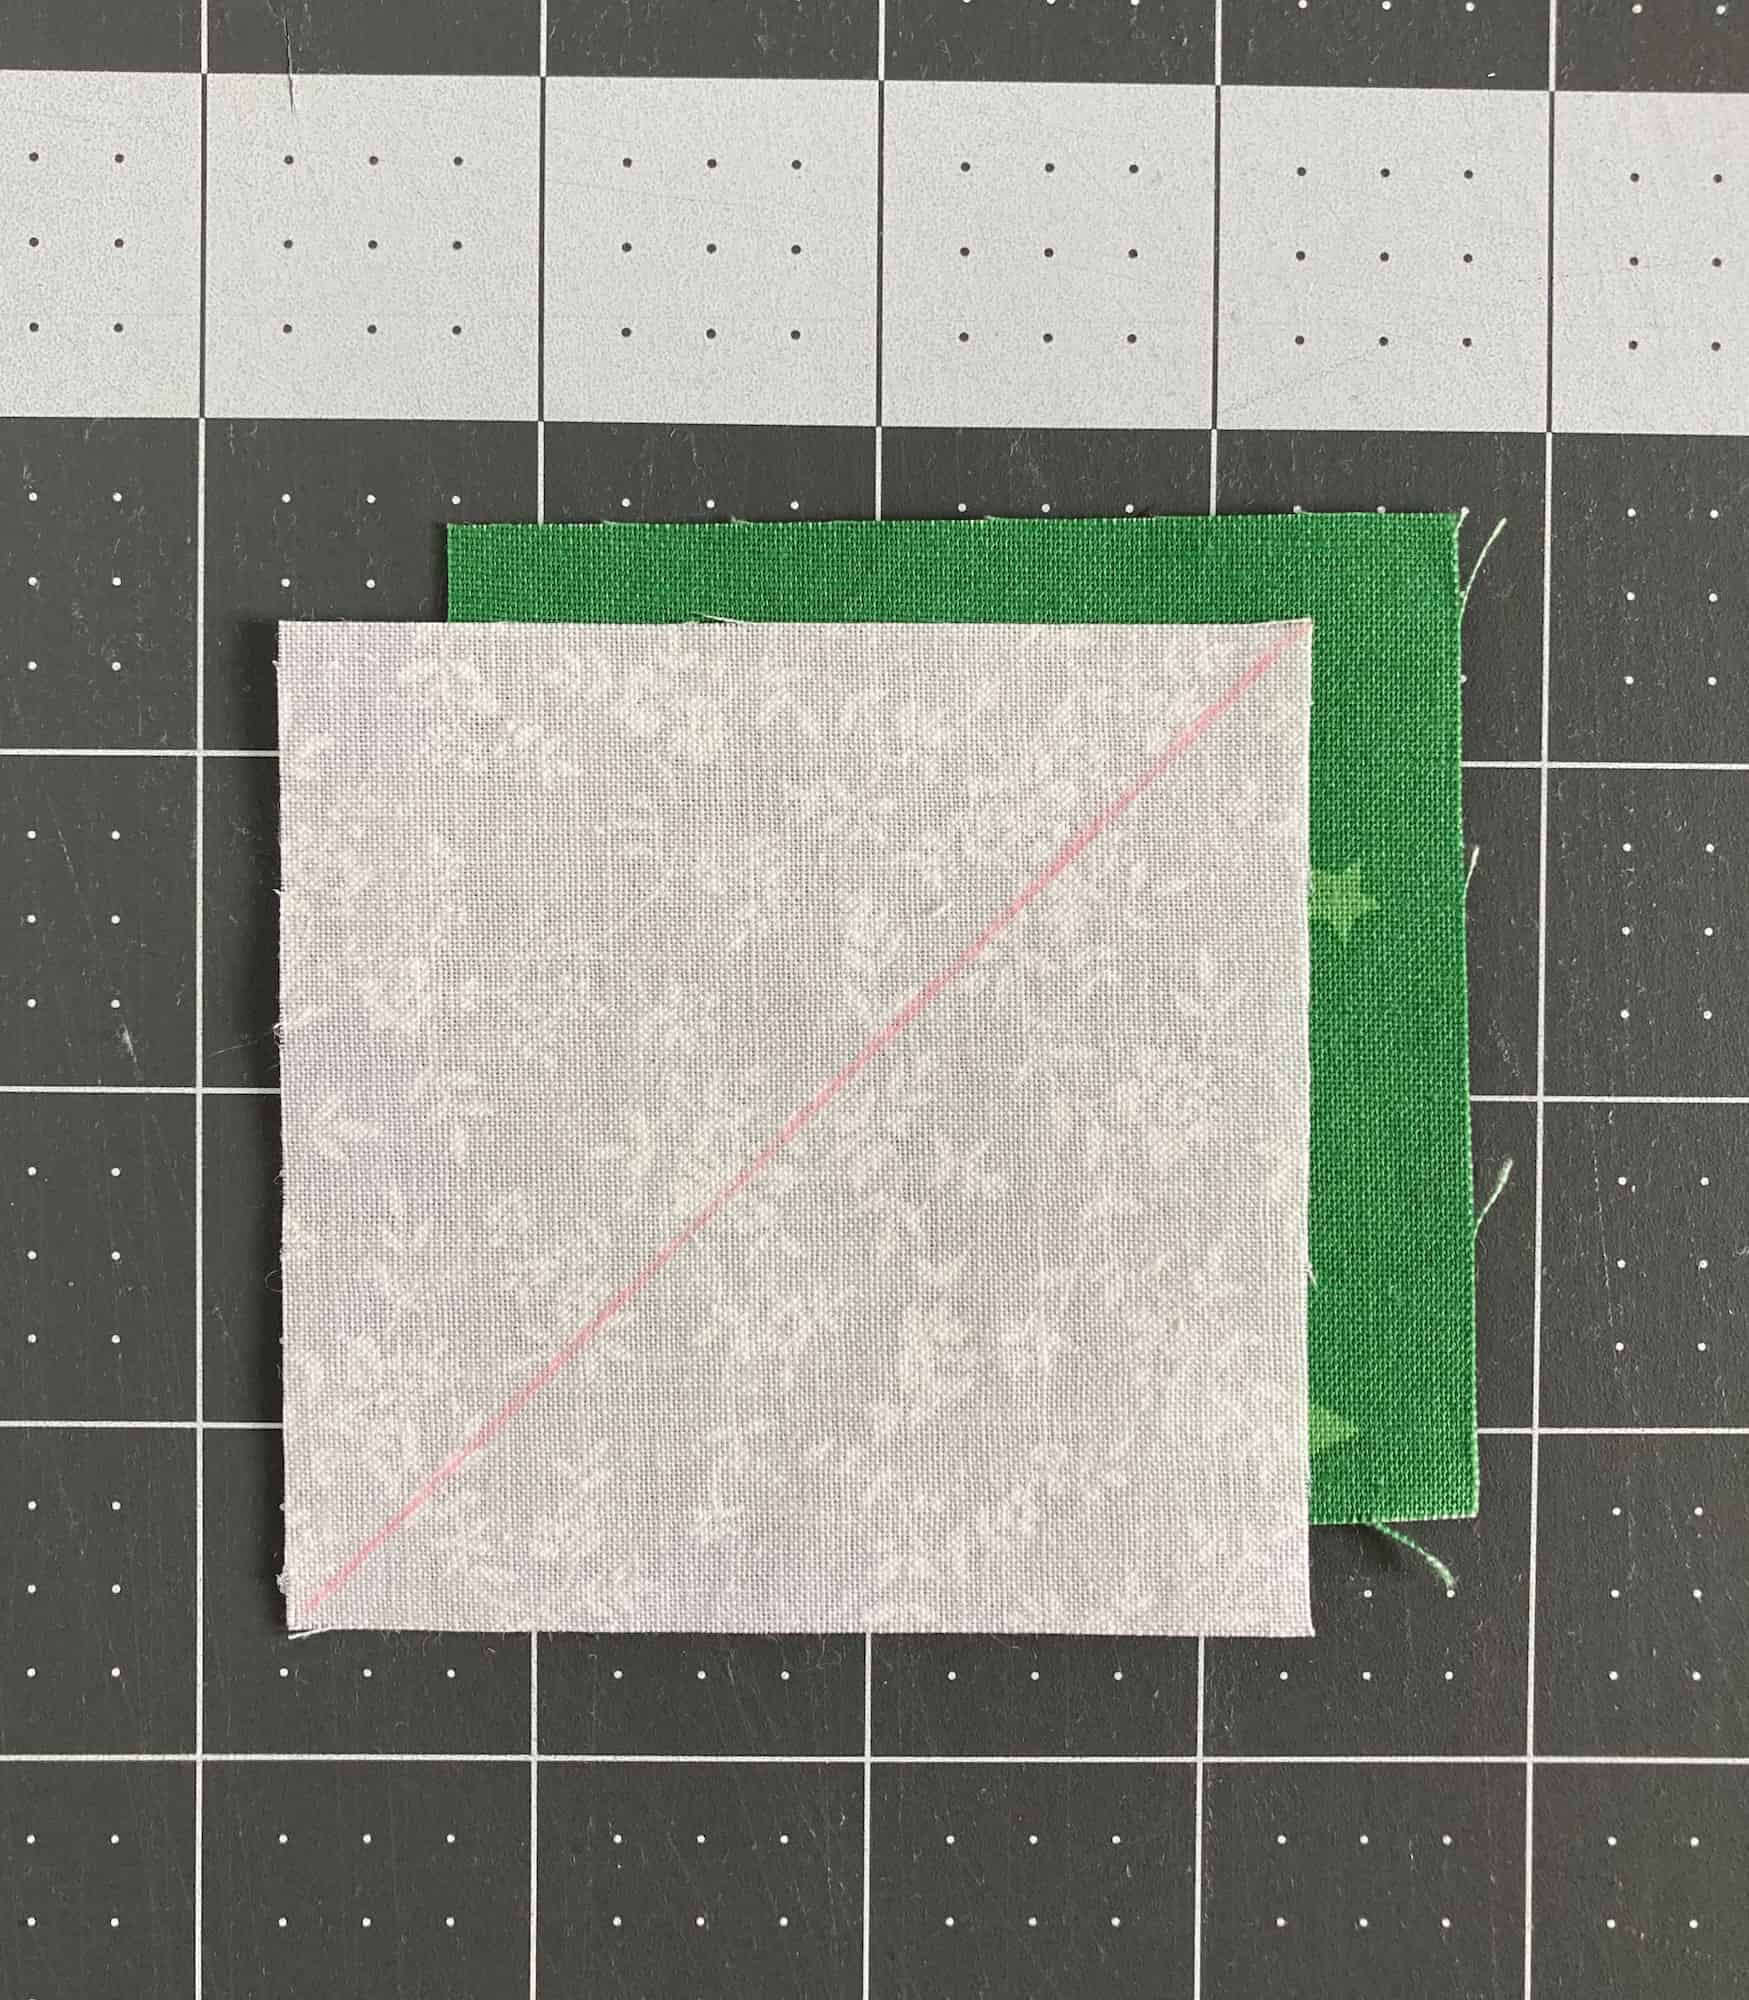
2. Sew 1/4” seam on both sides of the diagonal line. Cut along the diagonal line, set the seam by pressing it with the iron, then open the block and press again. Trim blocks to 2.5” square. You should have 6 red HST blocks, and 2 green HSTs.

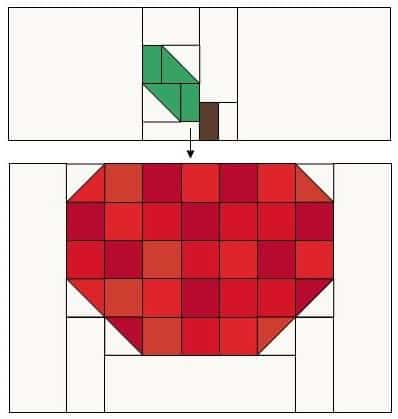
3. Sew together the leaf section.
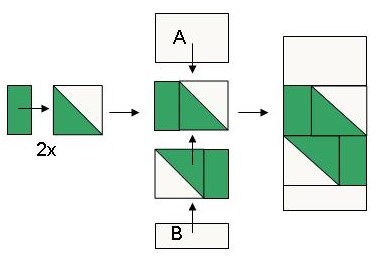
4. Sew together the stem section.
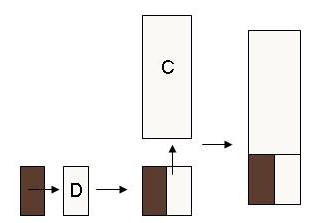
5. Sew together the top half of the block by sewing the leaf and stem sections together, then adding the side pieces of background fabric.
6. Sew the top four rows of the apple. Randomly pick red squares and HSTs, sewing them into rows first as show, then sewing the rows together into a block.
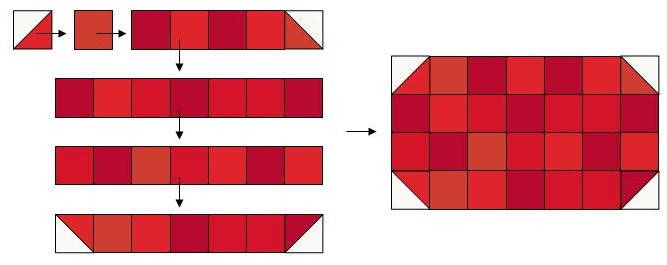
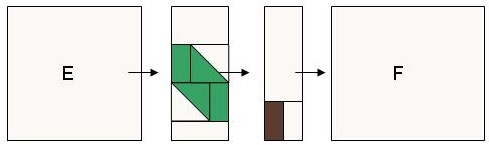
7. Sew the bottom part of the apple together. Make one more row of red squares and HSTs, then sew this row to the bottom background piece before sewing the sides to it.

8. Sew the two blocks together to make the body of the apple. Then sew the background pieces to the sides.
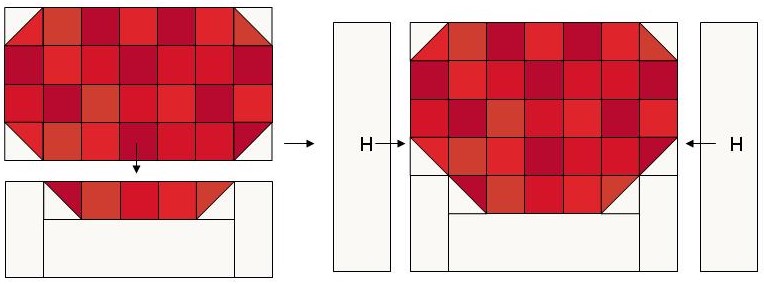
9. Join the apple and stem/leaf sections together to complete the block.
10. Make a quilt sandwich by layering the quilt backing (not the pillow back), batting and apple block and basting with your method of choice. I used spray baste.
11. Mark diagonal quilting lines 2” apart with a ruler and Hera marker.
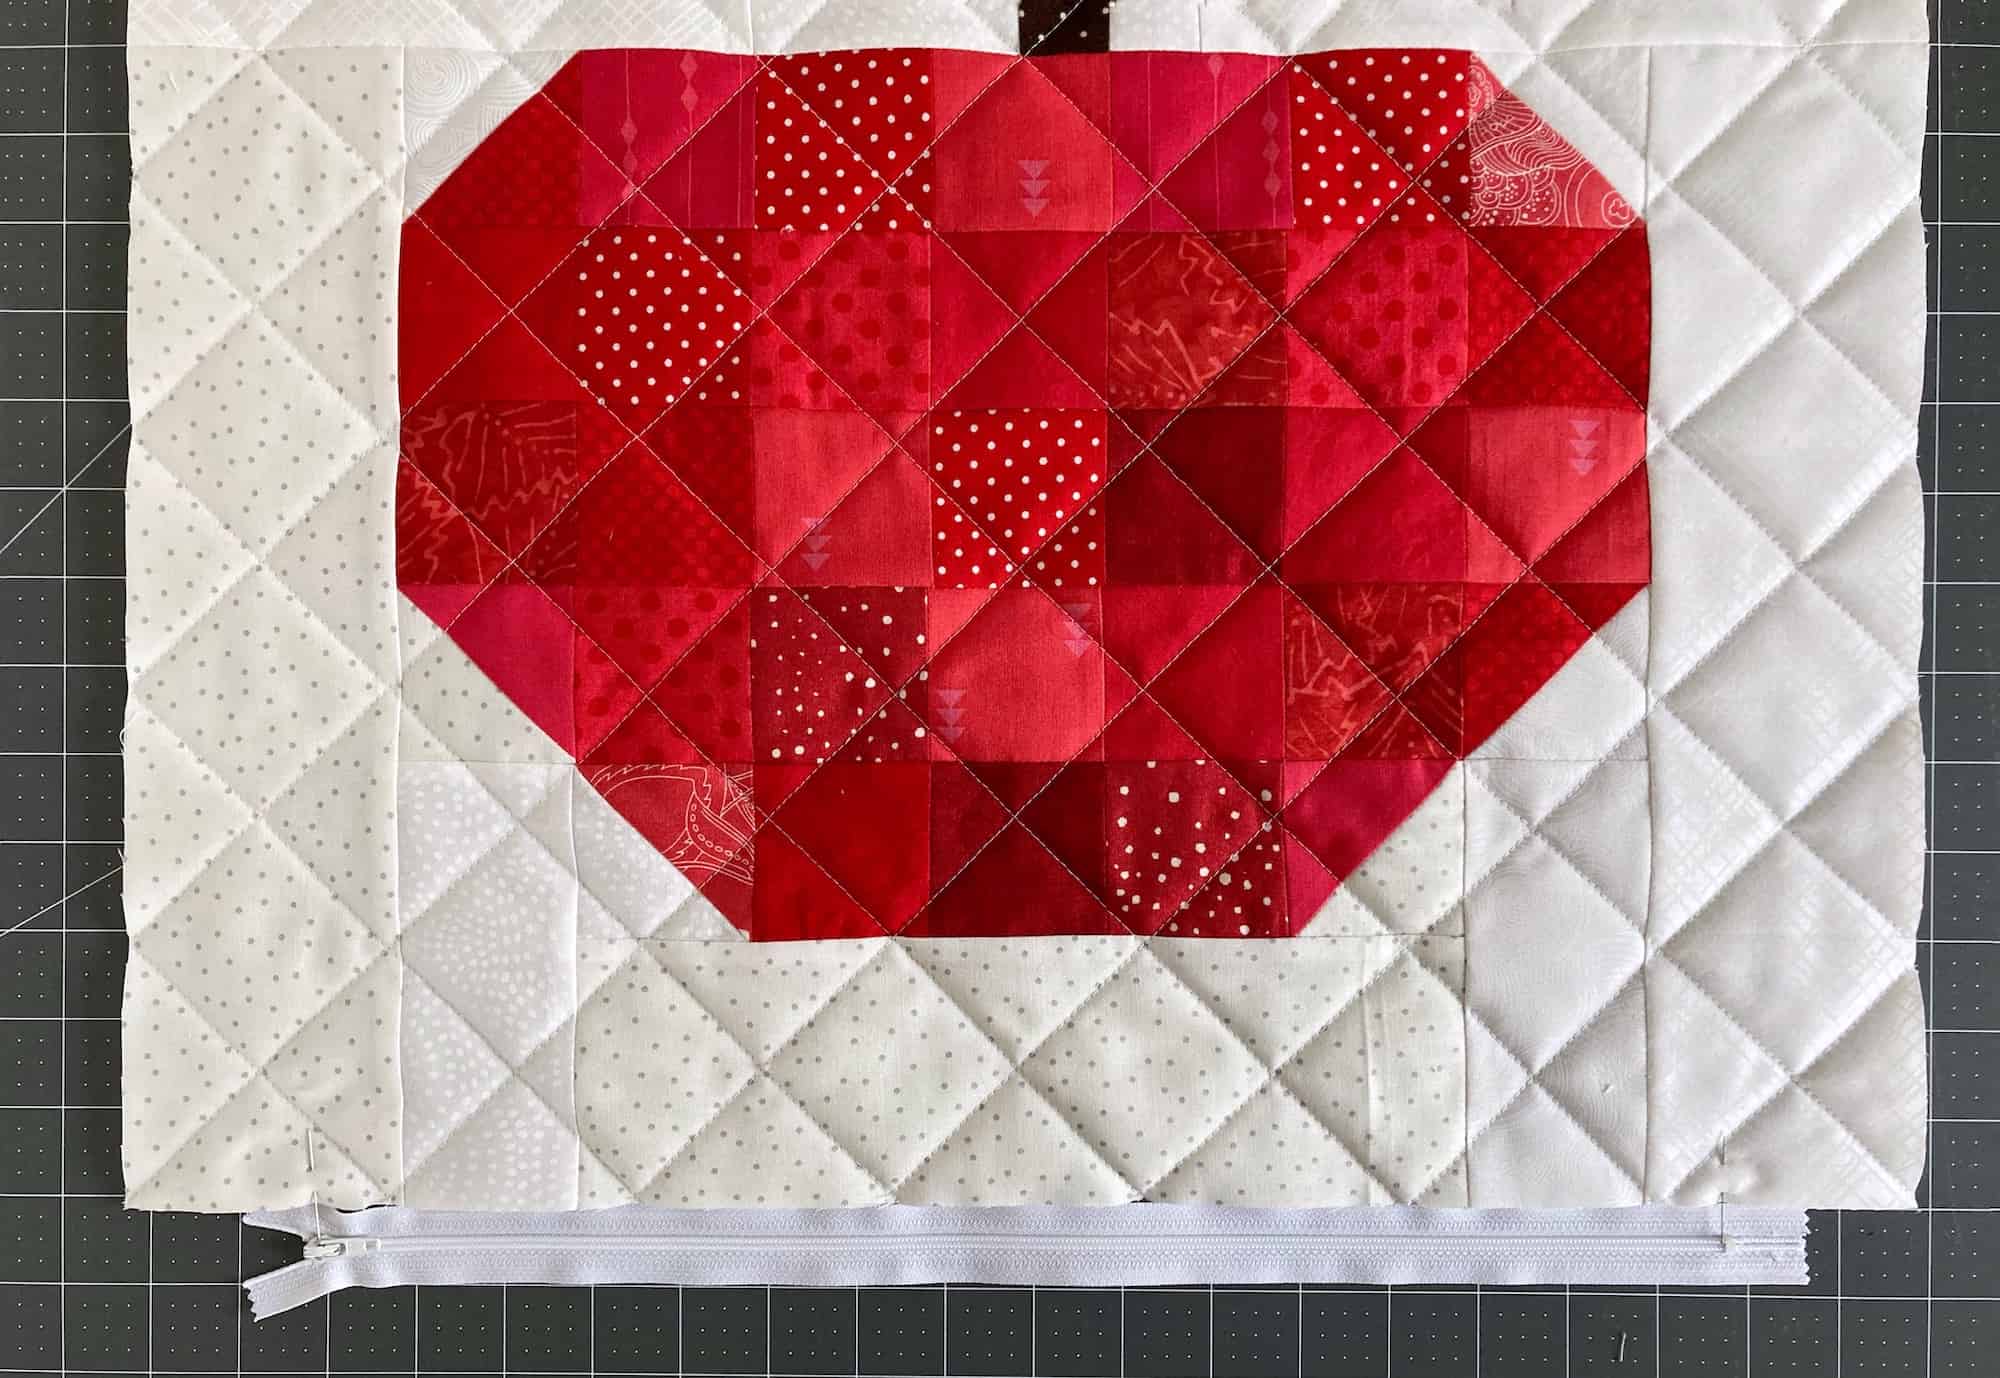
12. Quilt along the lines using a walking foot.
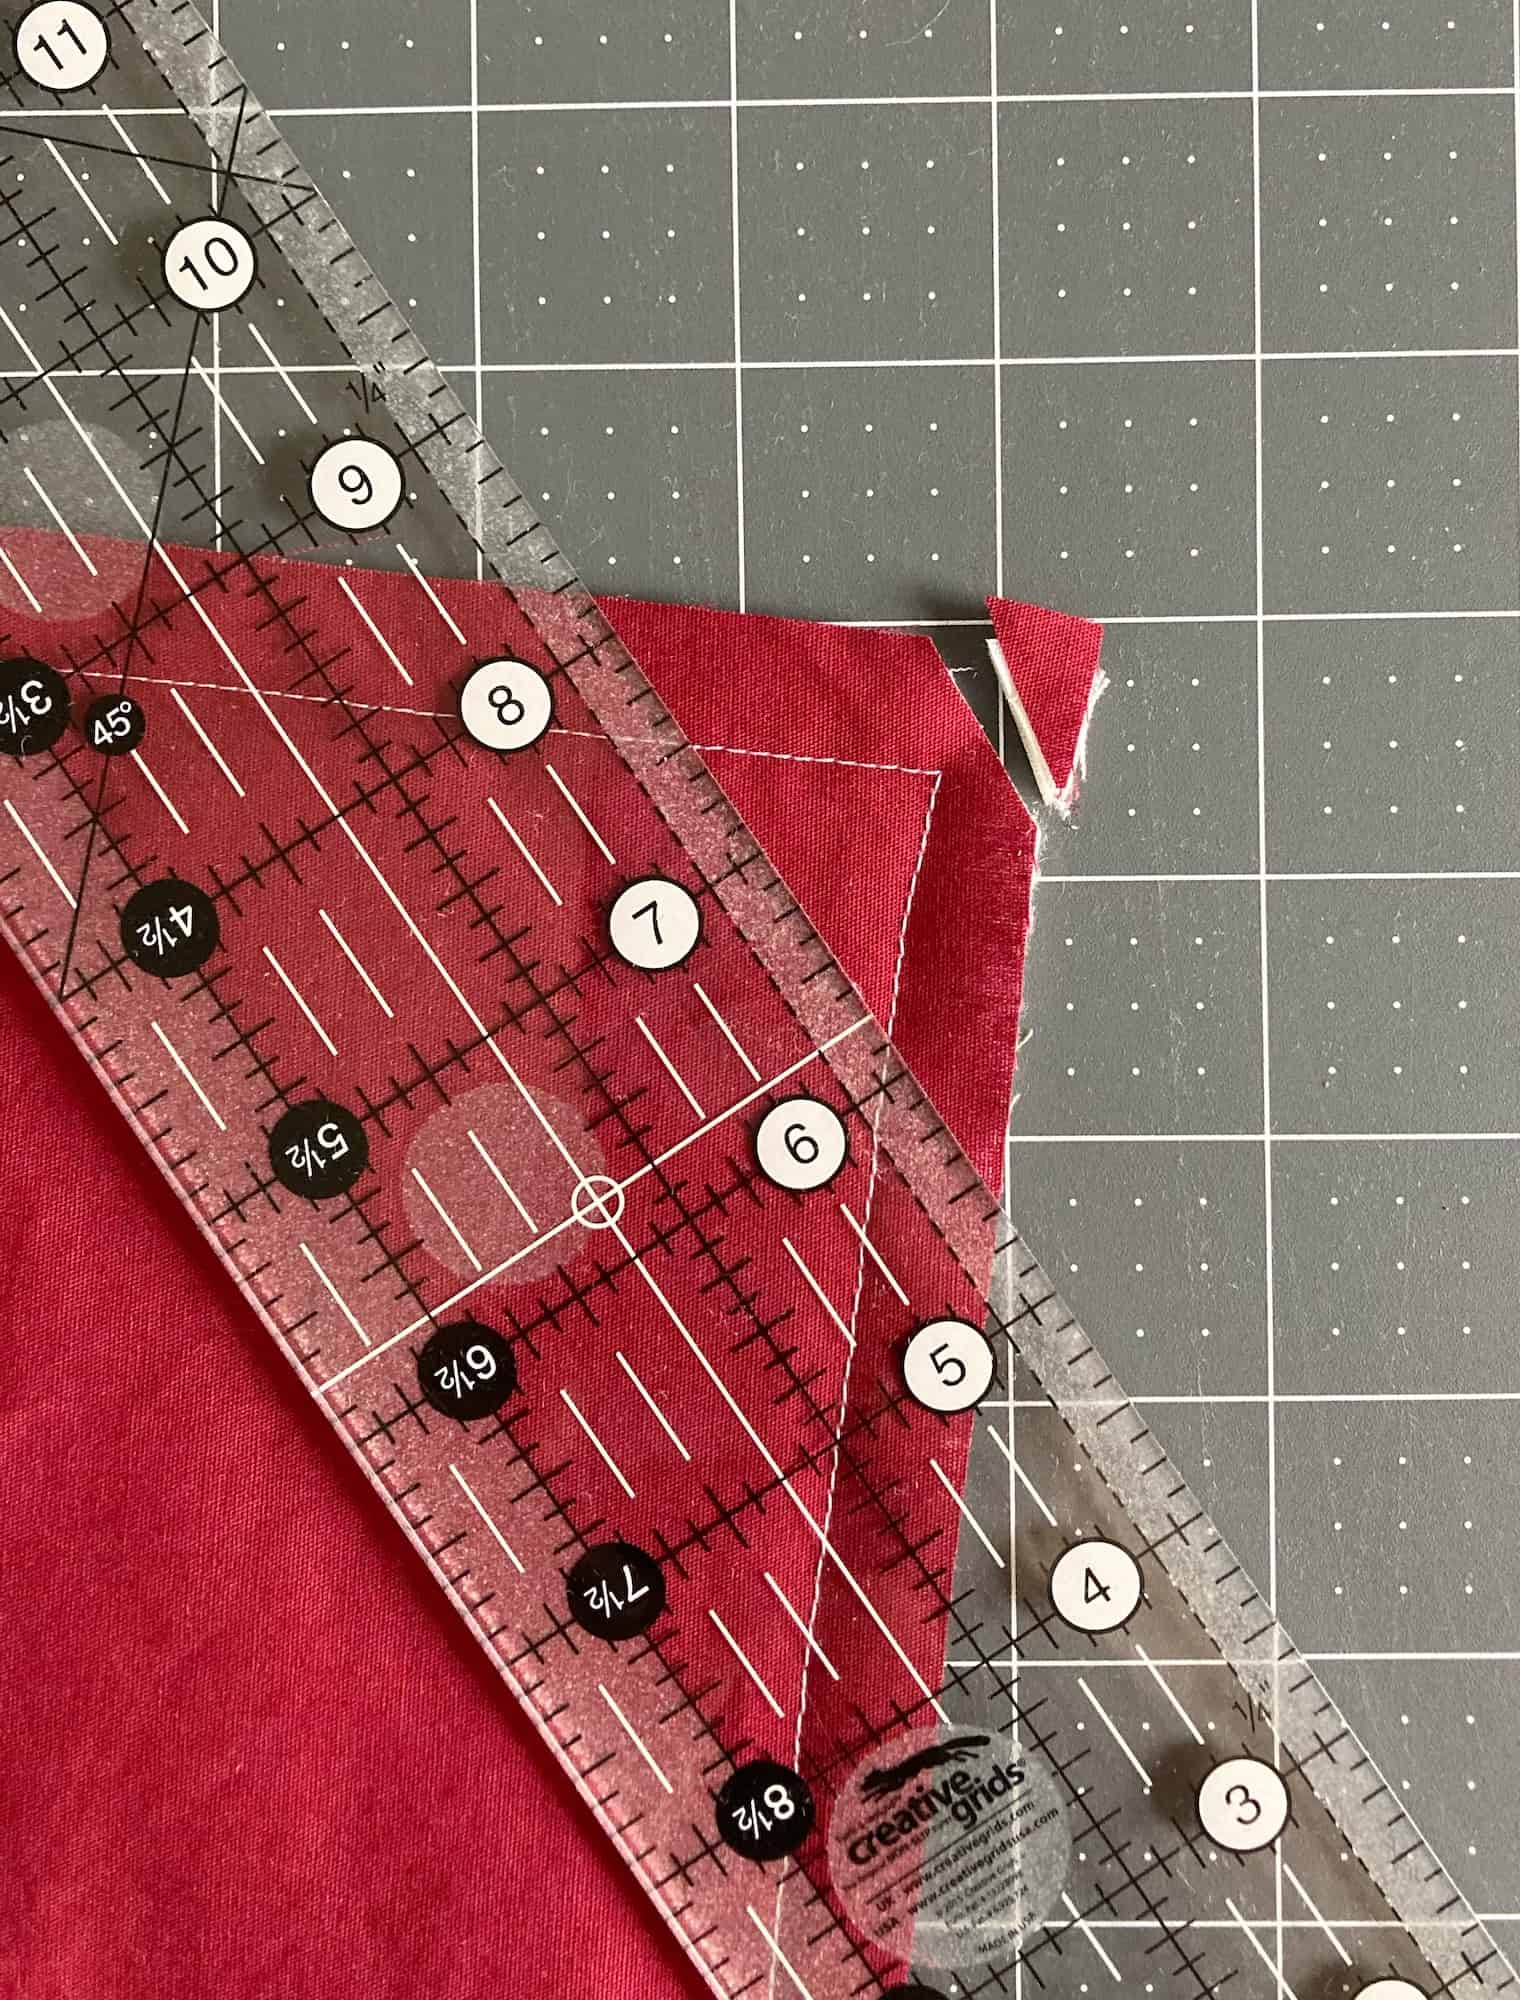
13. Trim the finished quilted block to size. At this point it’s likely closer to 19.5” square.
14. Cut the pillow back to match the size of the quilted block.
Sewing the pillow
15. Mark the placement of the zipper:
Place the zipper along the edge of the pillow top where you want to insert it (I prefer the bottom edge if the pillow pattern has a distinct top and bottom).
Insert a straight pin into the pillow top at both ends of the zipper to mark the start and end of the zipper. Make sure you mark the metal bits of the zipper, not the end of the ribbon. The metal bits is where the zipper starts and stops, the ribbons extend beyond that. Put the zipper aside.
16. Sew the first seams:
Lay the backing right side up, then put the pillow top on top of it, right side down. Hold in place with Wonder Clips.
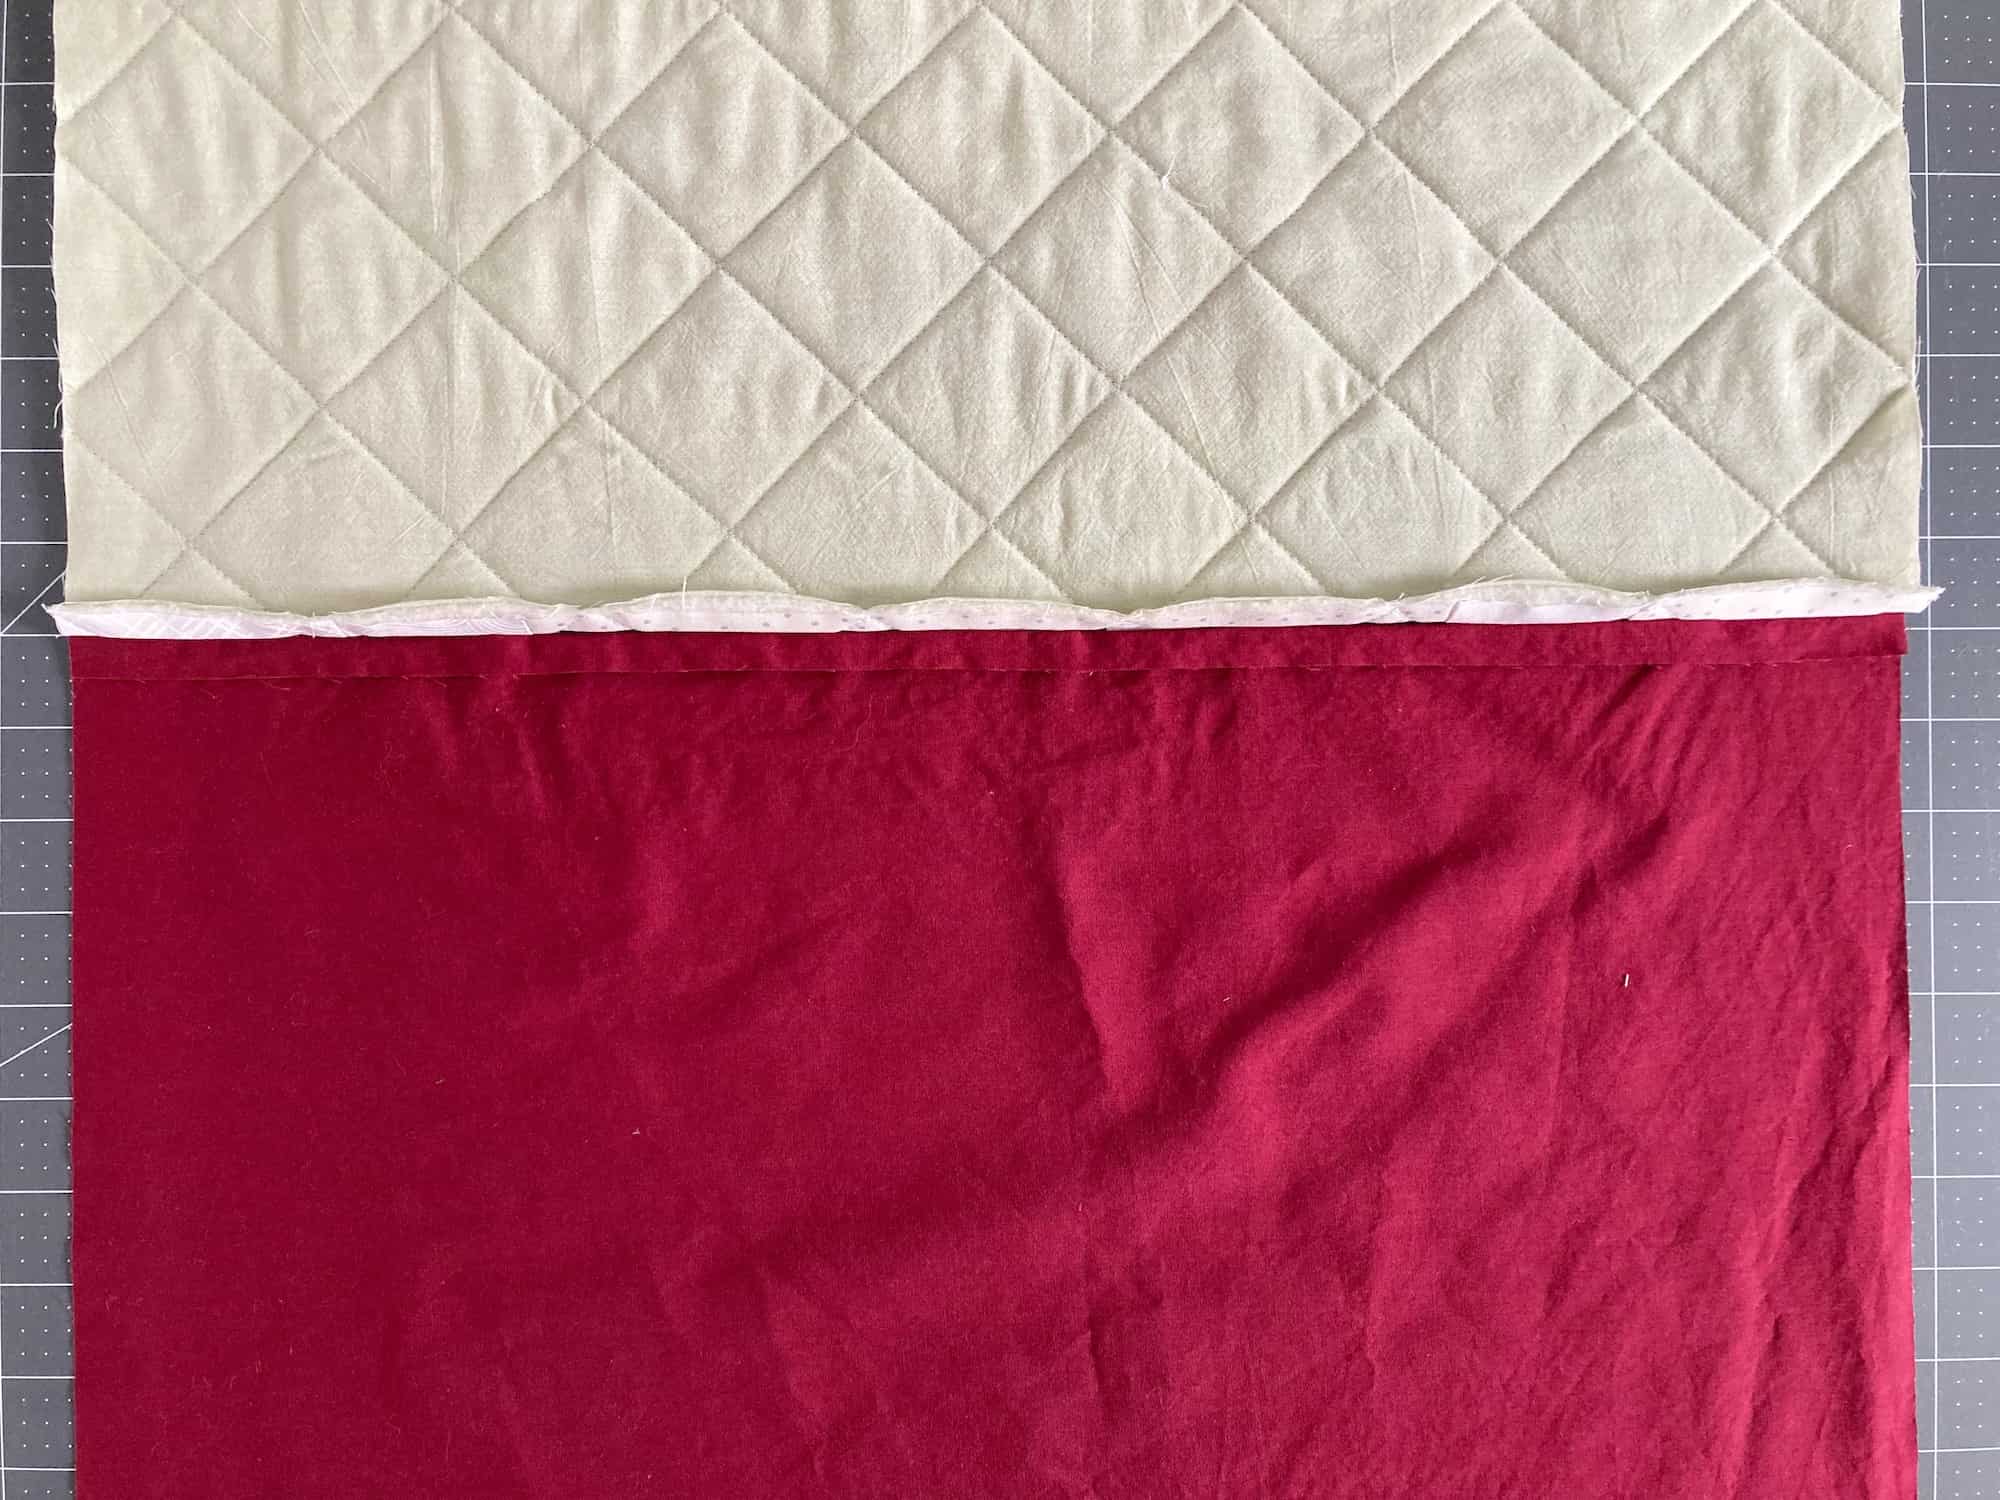
Sew a 1/2″ seam from the edge of the pillow to the pin, on both ends. Secure your stitches at the start and end of each of those two seams. The rest of that side of the pillow will have an open gap, that’s where the zipper will go in.
I flipped the “sandwich” over in the picture below so it’s easier to see my seams on the red backing.
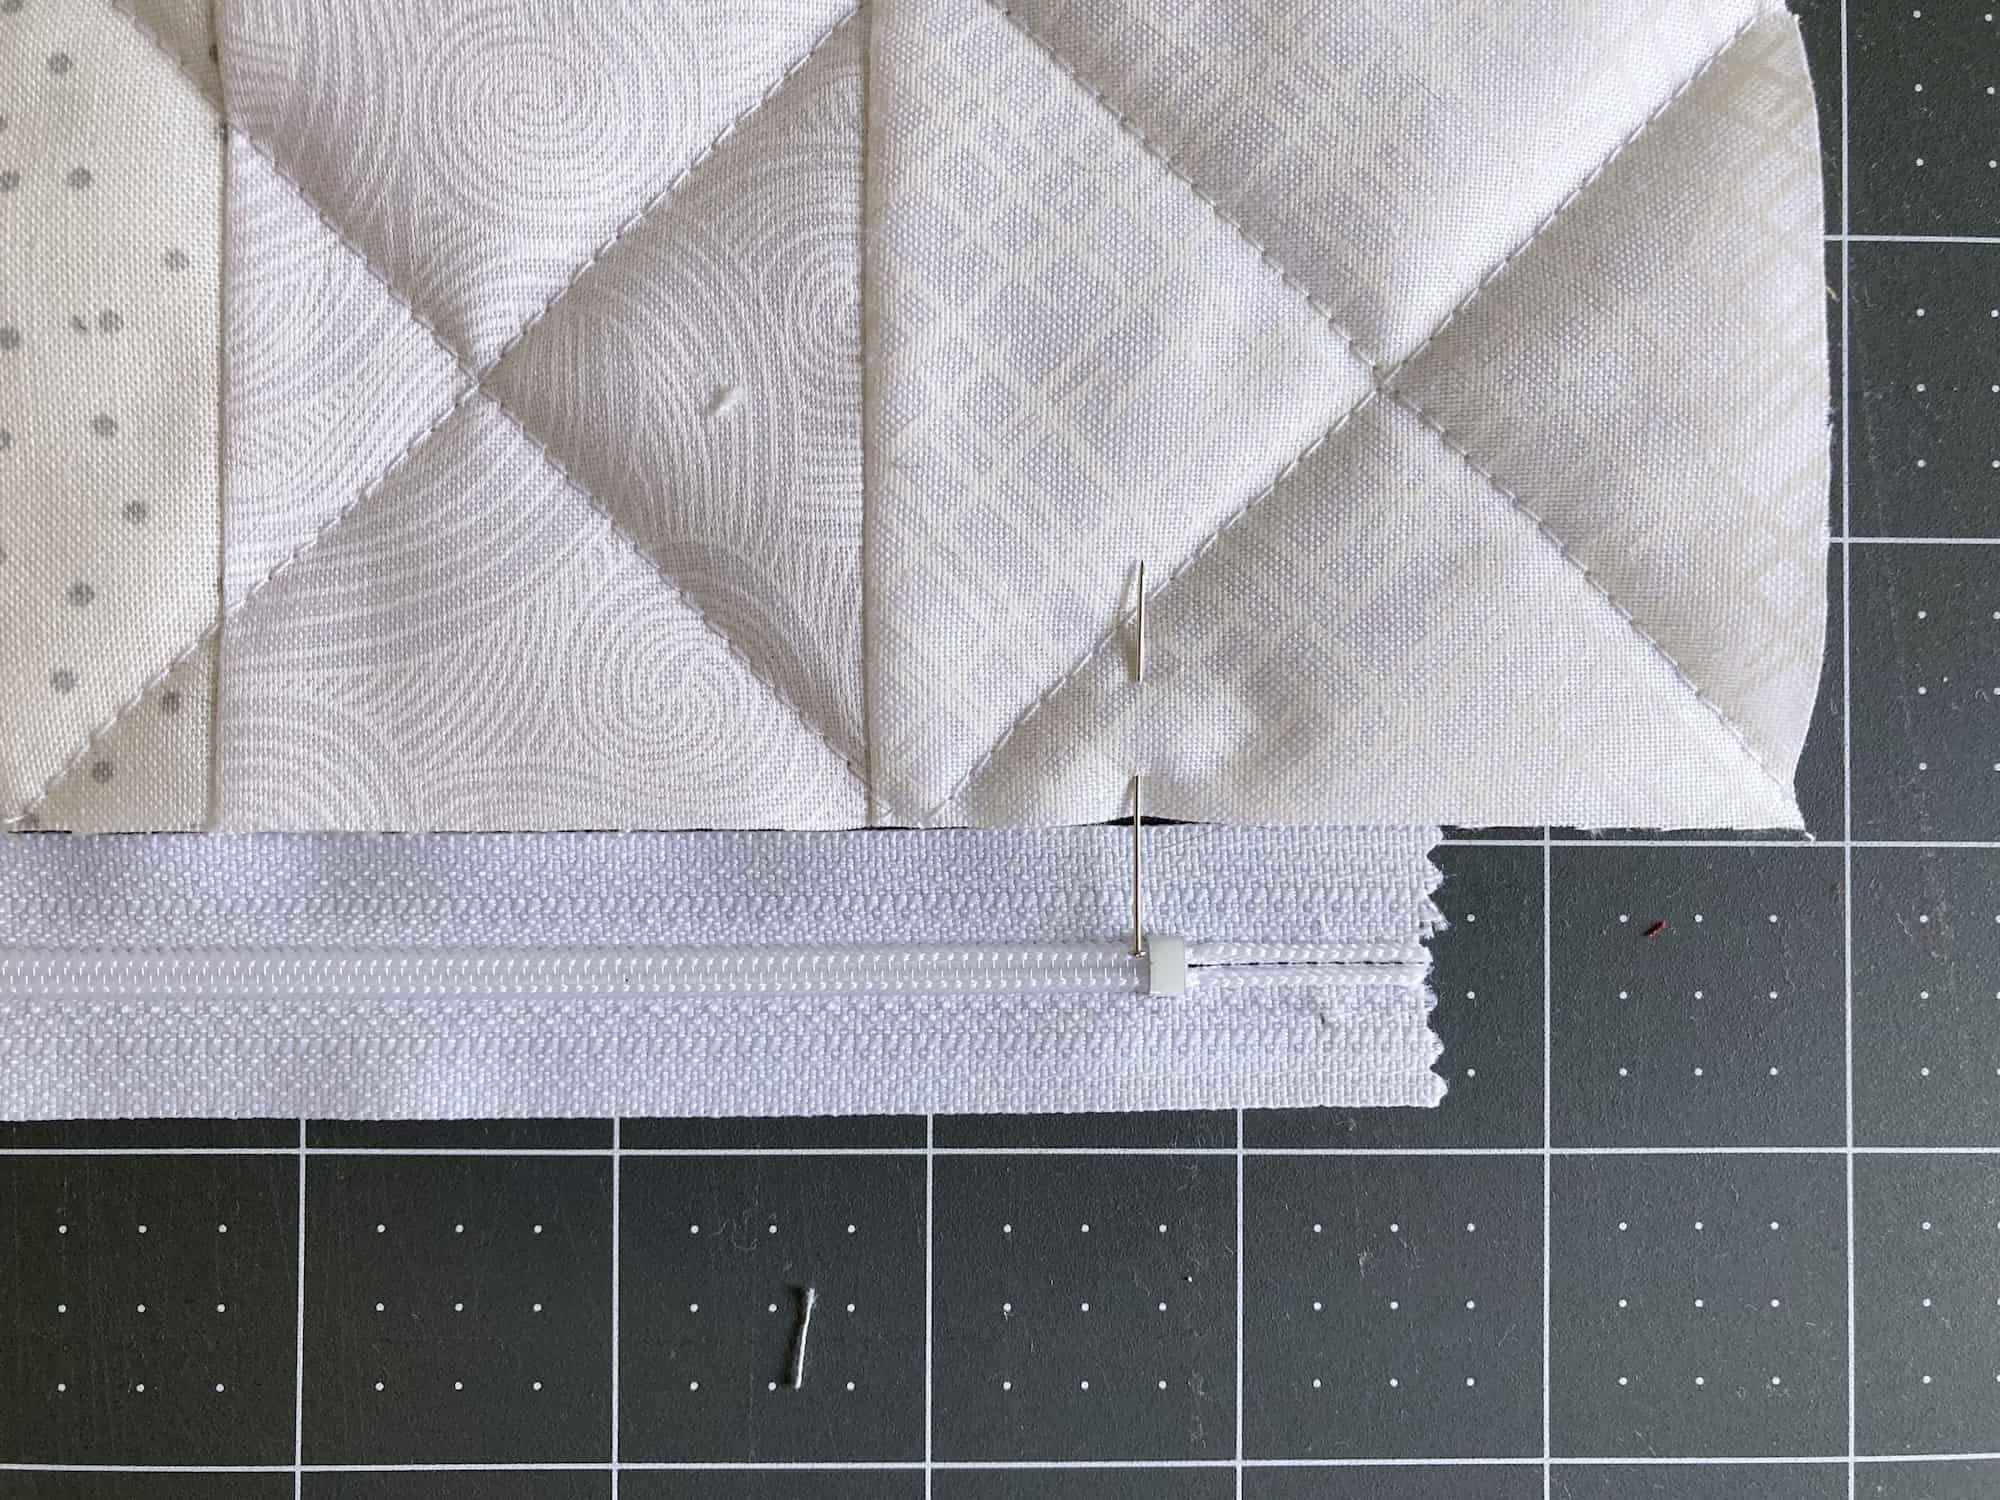
17. Pin the zipper in place:
Open up the two pieces of the pillow, place them right side down, and press the seam open with your fingers (or you can press with an iron, too), all the way across the opening. This should leave you with a pressed 1/2″ seam allowance along the gap, and that’s what you will attach the zipper to.
You can just about see the cutting mat peeking through the gap in the picture below.
Lay the zipper face down over top of the gap and check that the two seams come right up to the metal clamps on the ends of the zipper. Now secure one side of the zipper to the seam allowance on that side using Wonder Clips, making sure the zipper is still lined up properly in the gap.
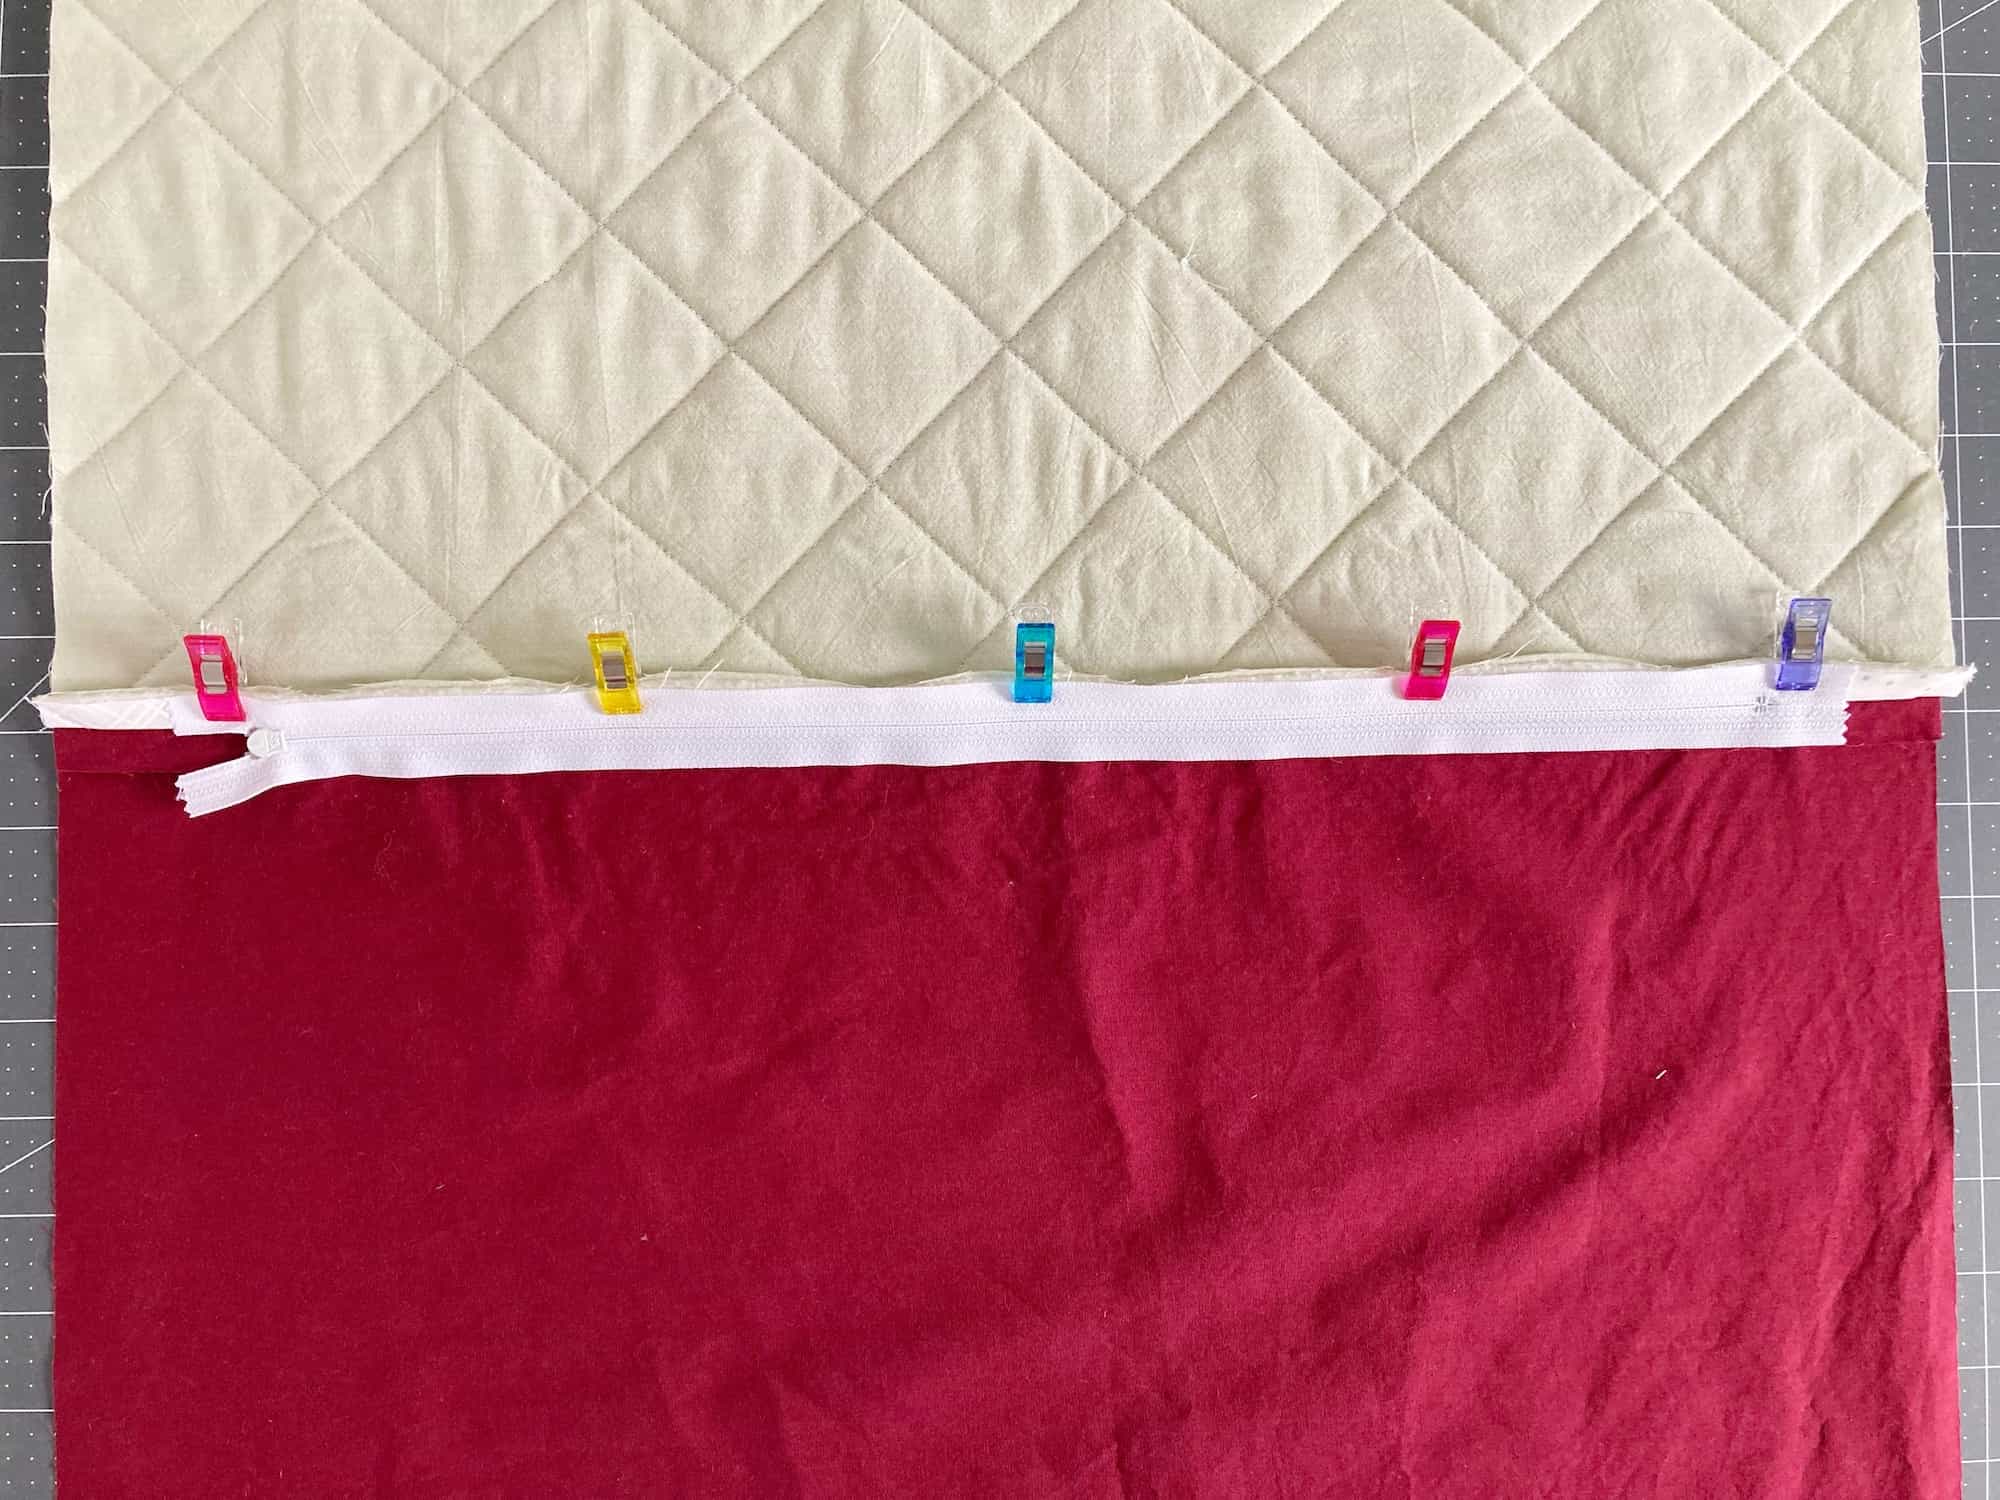
18. Sew in the zipper:
Install the zipper foot (and make sure you know how to use it, or keep the sewing machine manual handy) and sew one side of the zipper to the seam allowance. Note: The zipper gets sewn to the seam allowance only, make sure you do not sew through the front or back of the pillow.
When you get near the zipper pull, stop with the needle down, lift the presser foot and slide the zipper pull past the needle. Put the foot back down and continue sewing until you reach the end of the zipper ribbon. Secure your stitches at the start and stop.
Repeat this for the other side, securing the zipper in place along the seam allowance with Wonder Clips, then sewing it in, moving the zipper pull when you get near it.

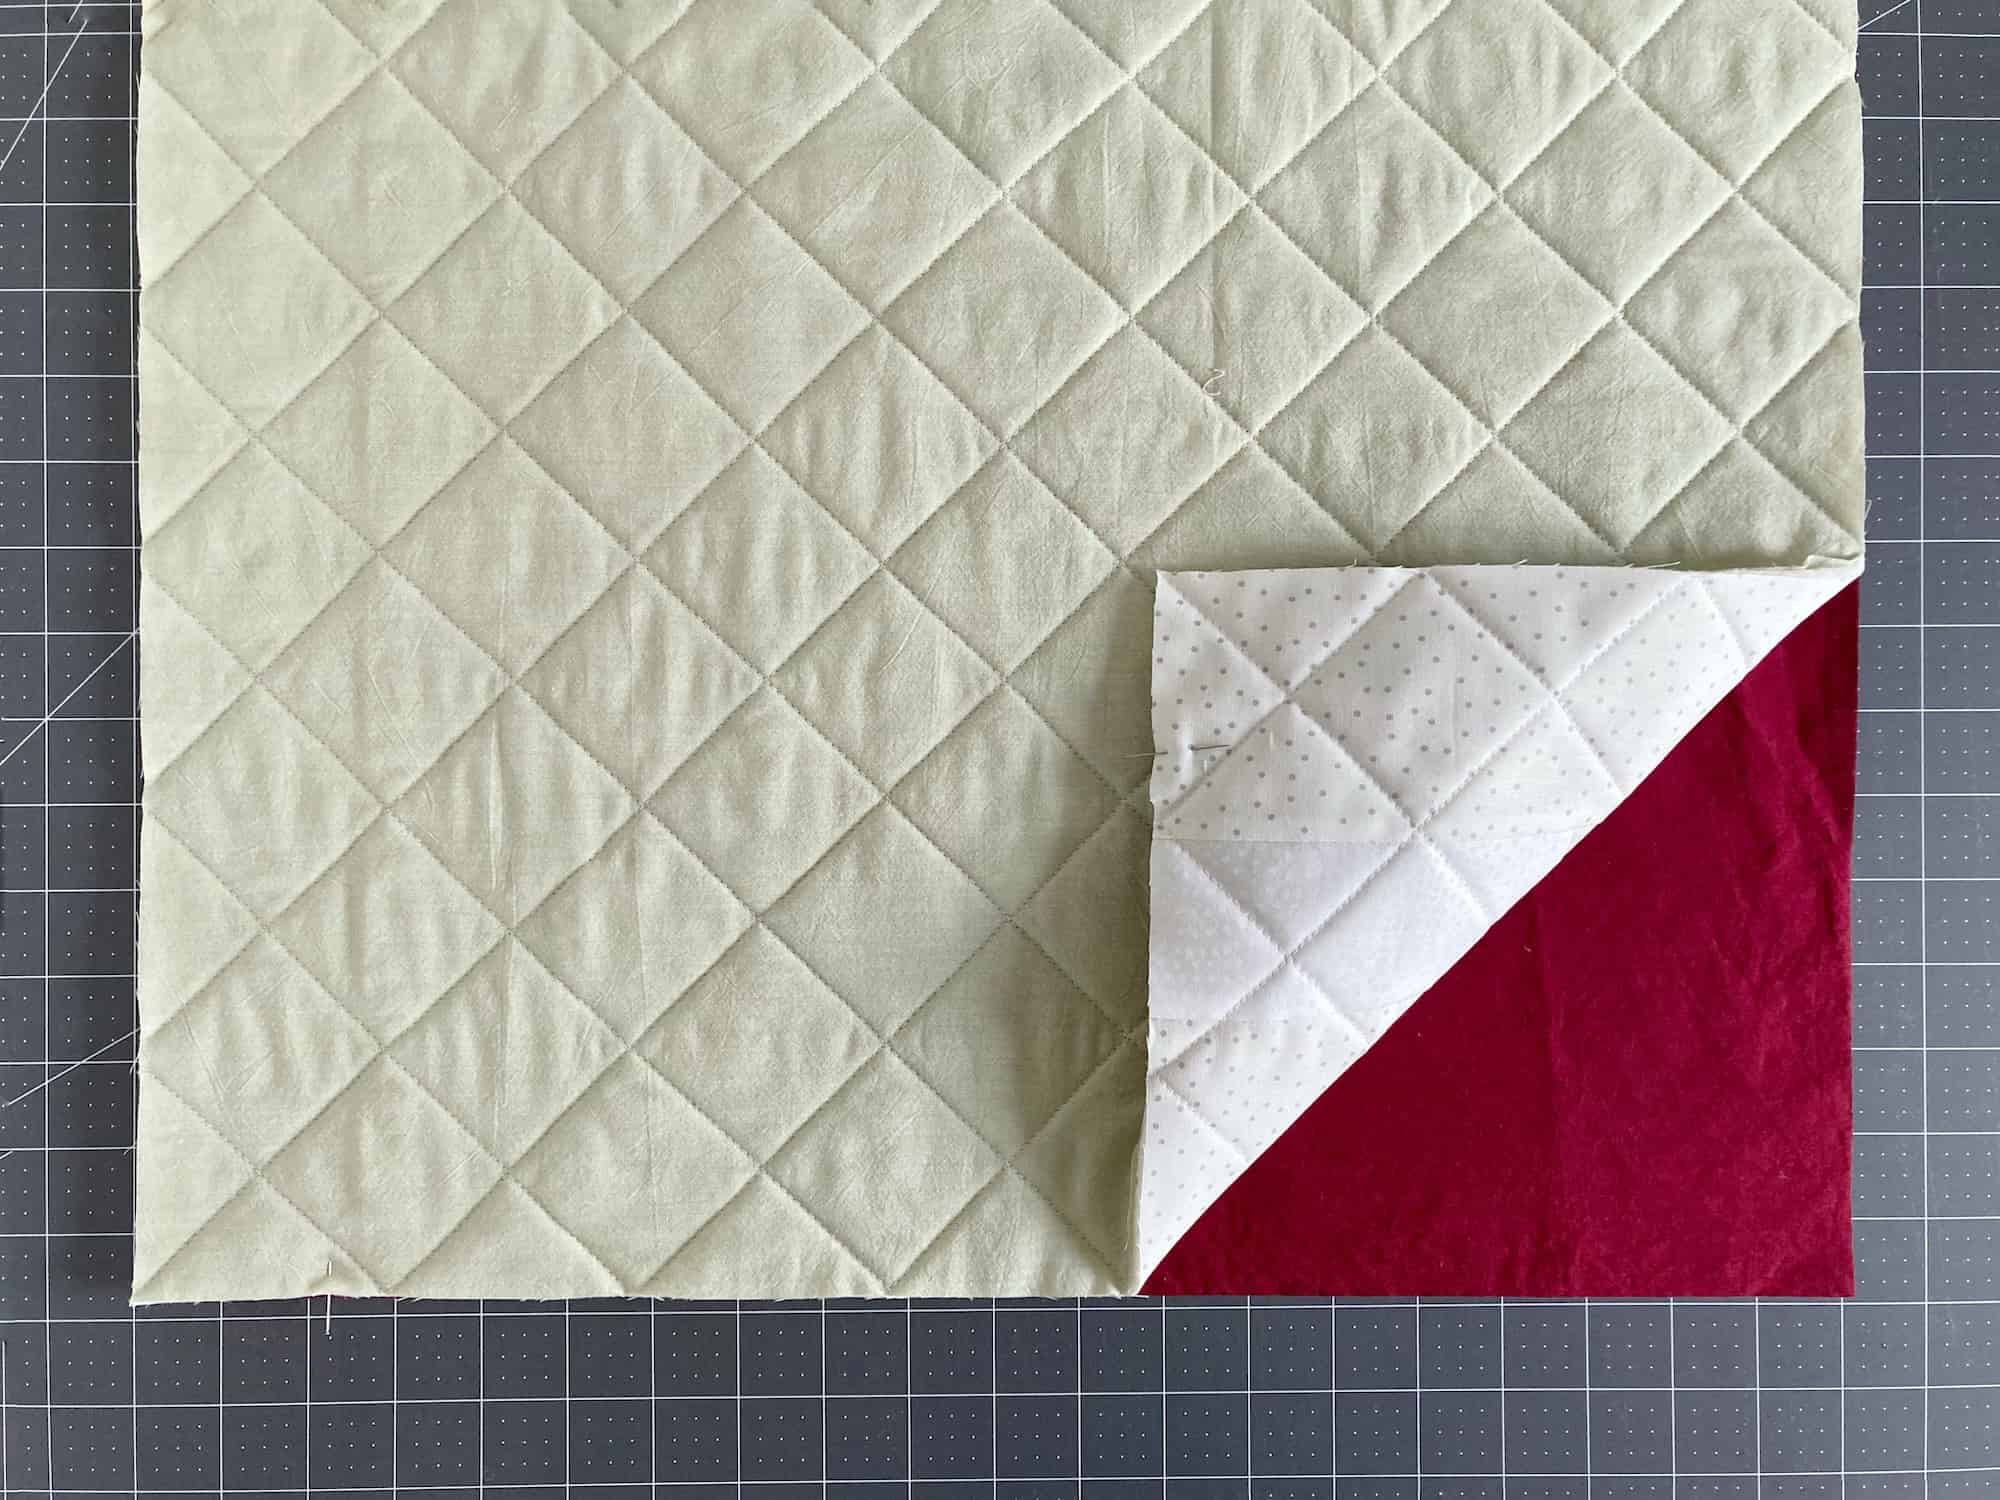
19. Finish the pillow:
And that’s it already for the zipper! Now all you have to do is finish sewing the pillow. Important: Open the zipper before you continue. You’ll need to turn your pillow right side out when you’ve finished the seams, and it will go through the zippered opening.
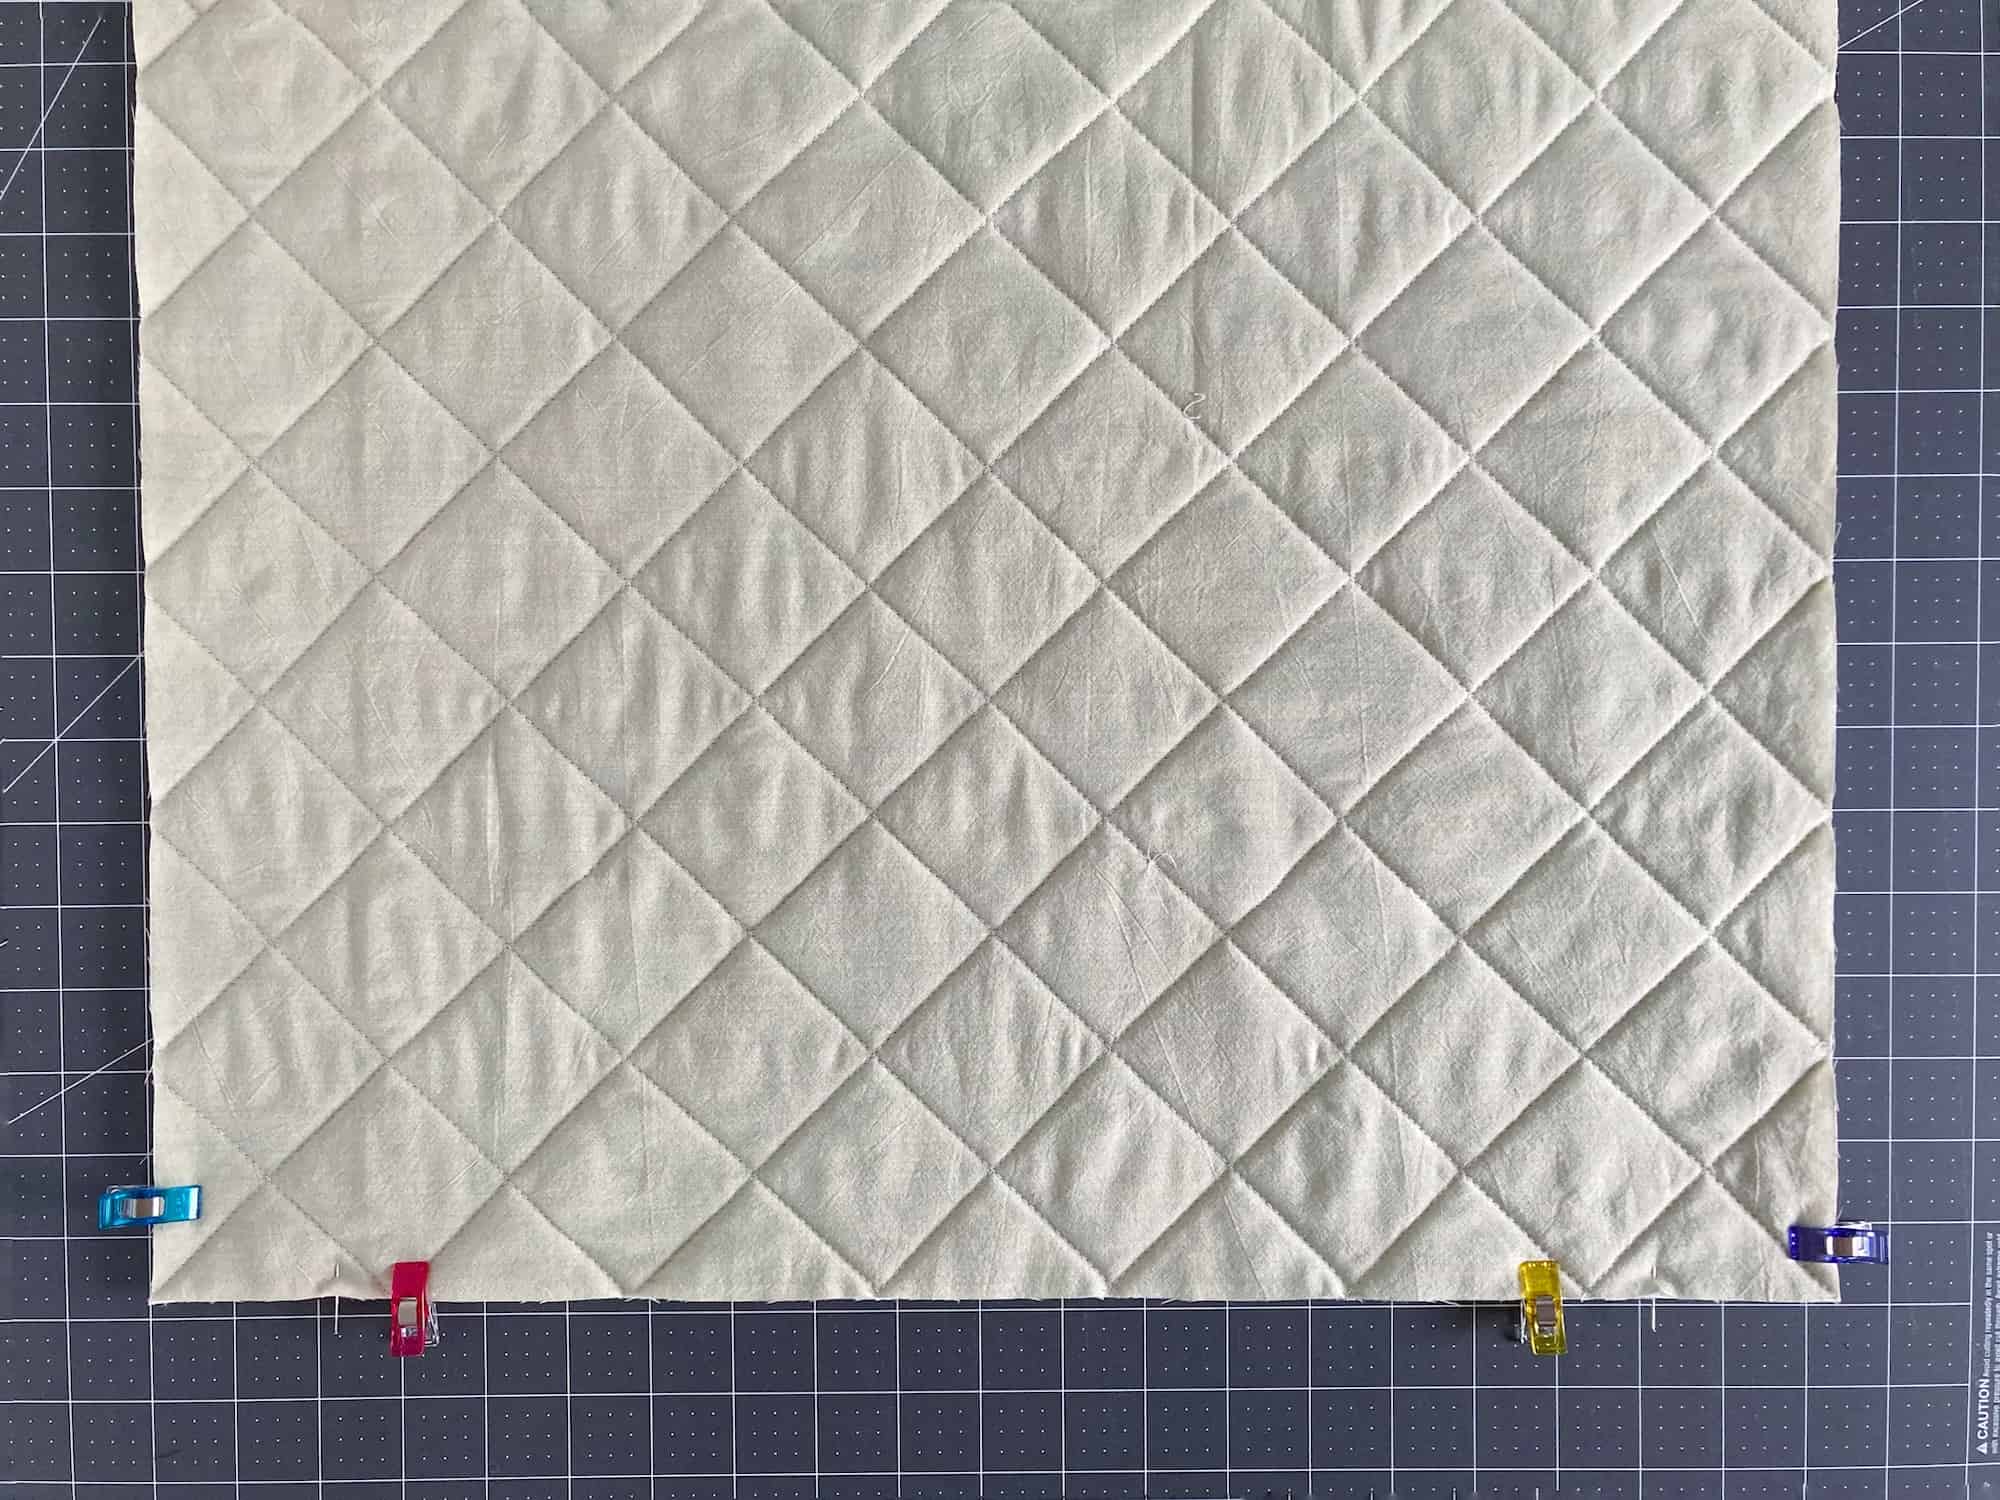
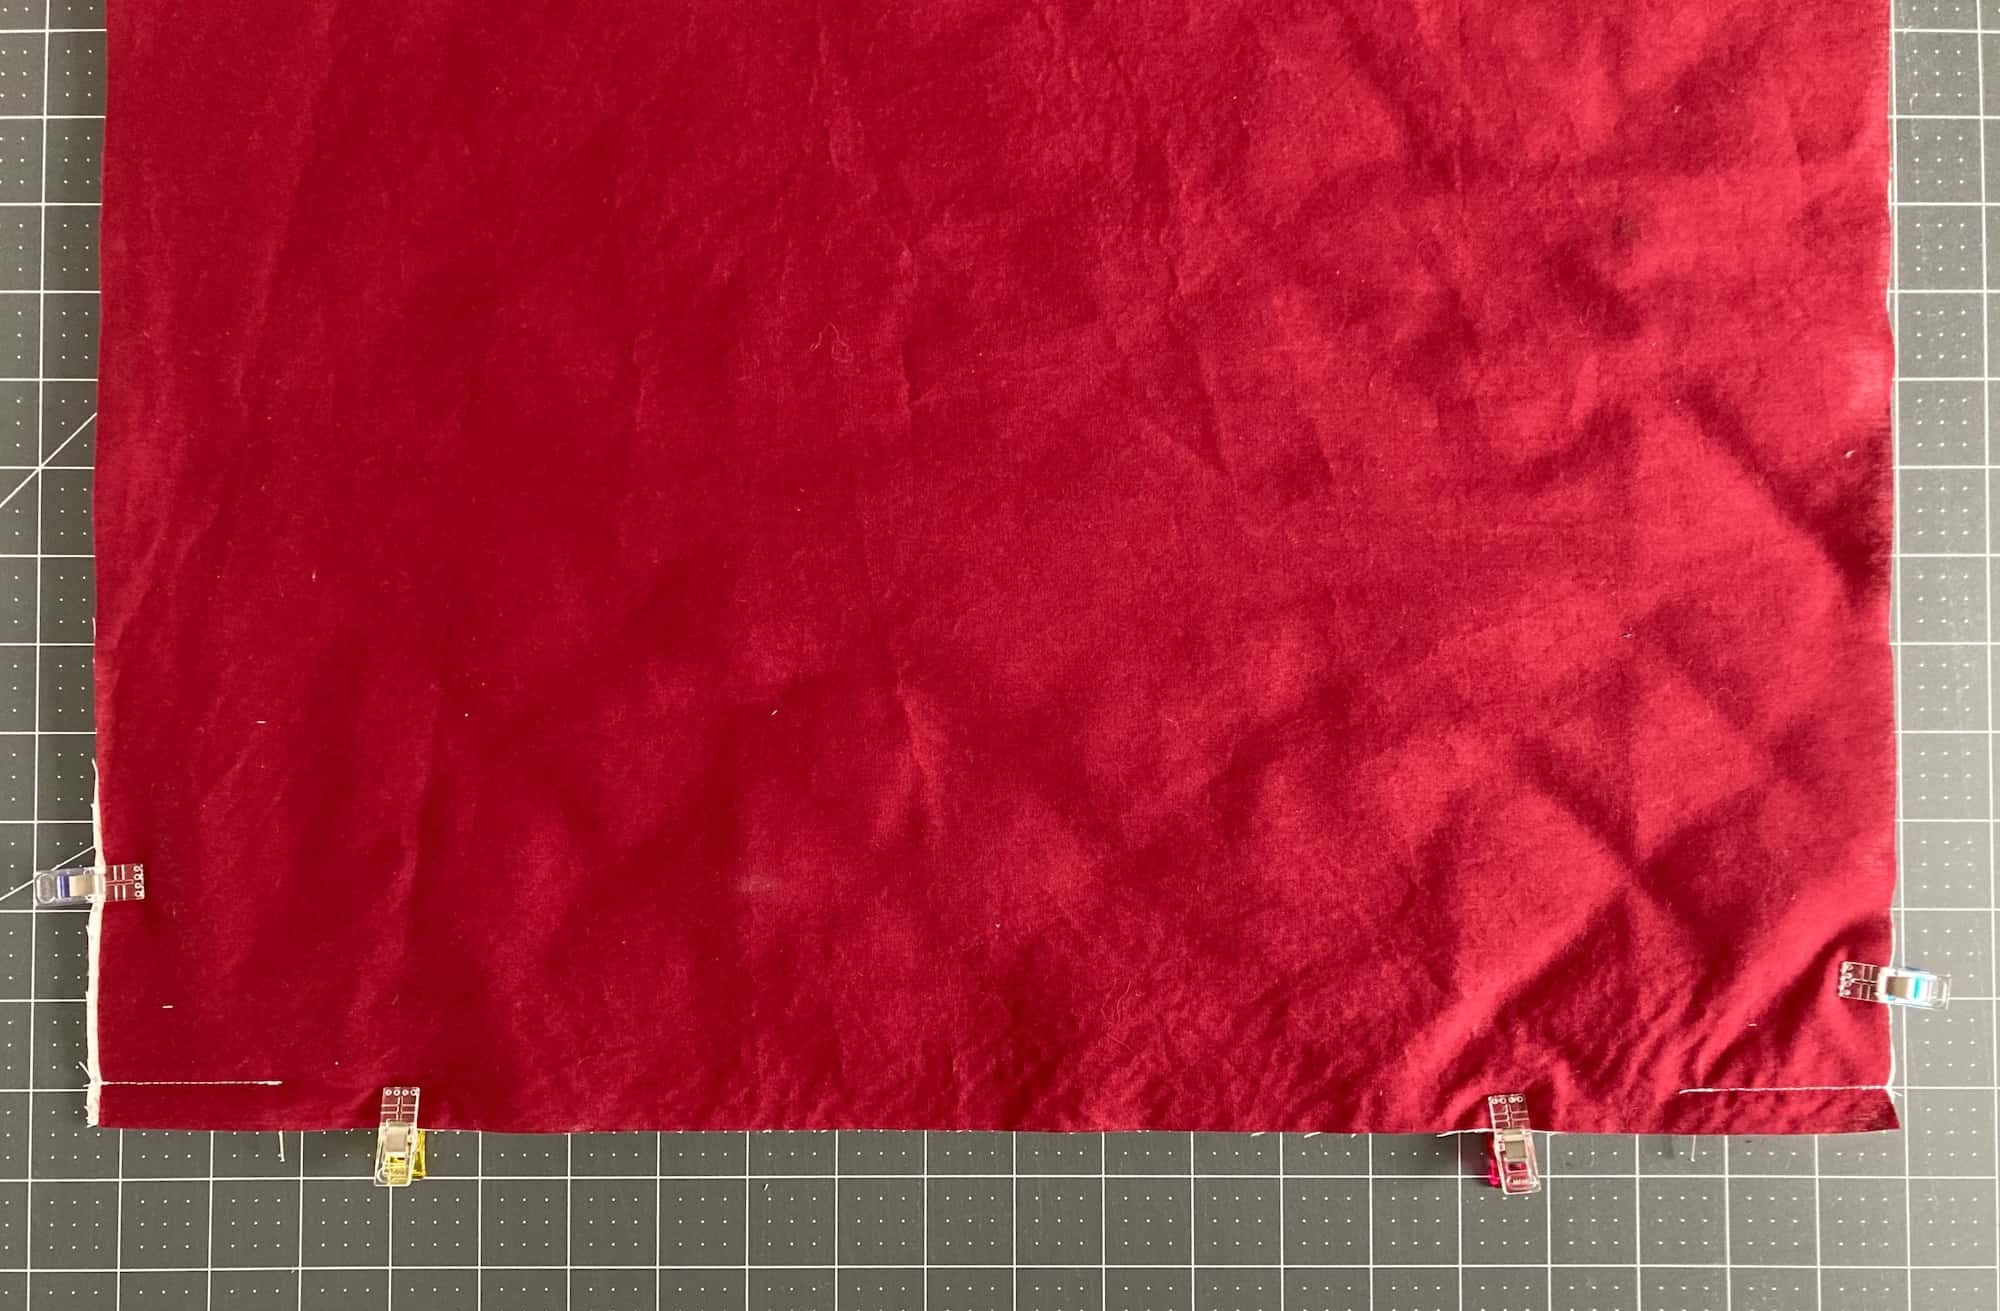
To finish the pillow, place the backing and pillow top right sides together again, matching up all the edges and corners. Hold in place with Wonder Clips.
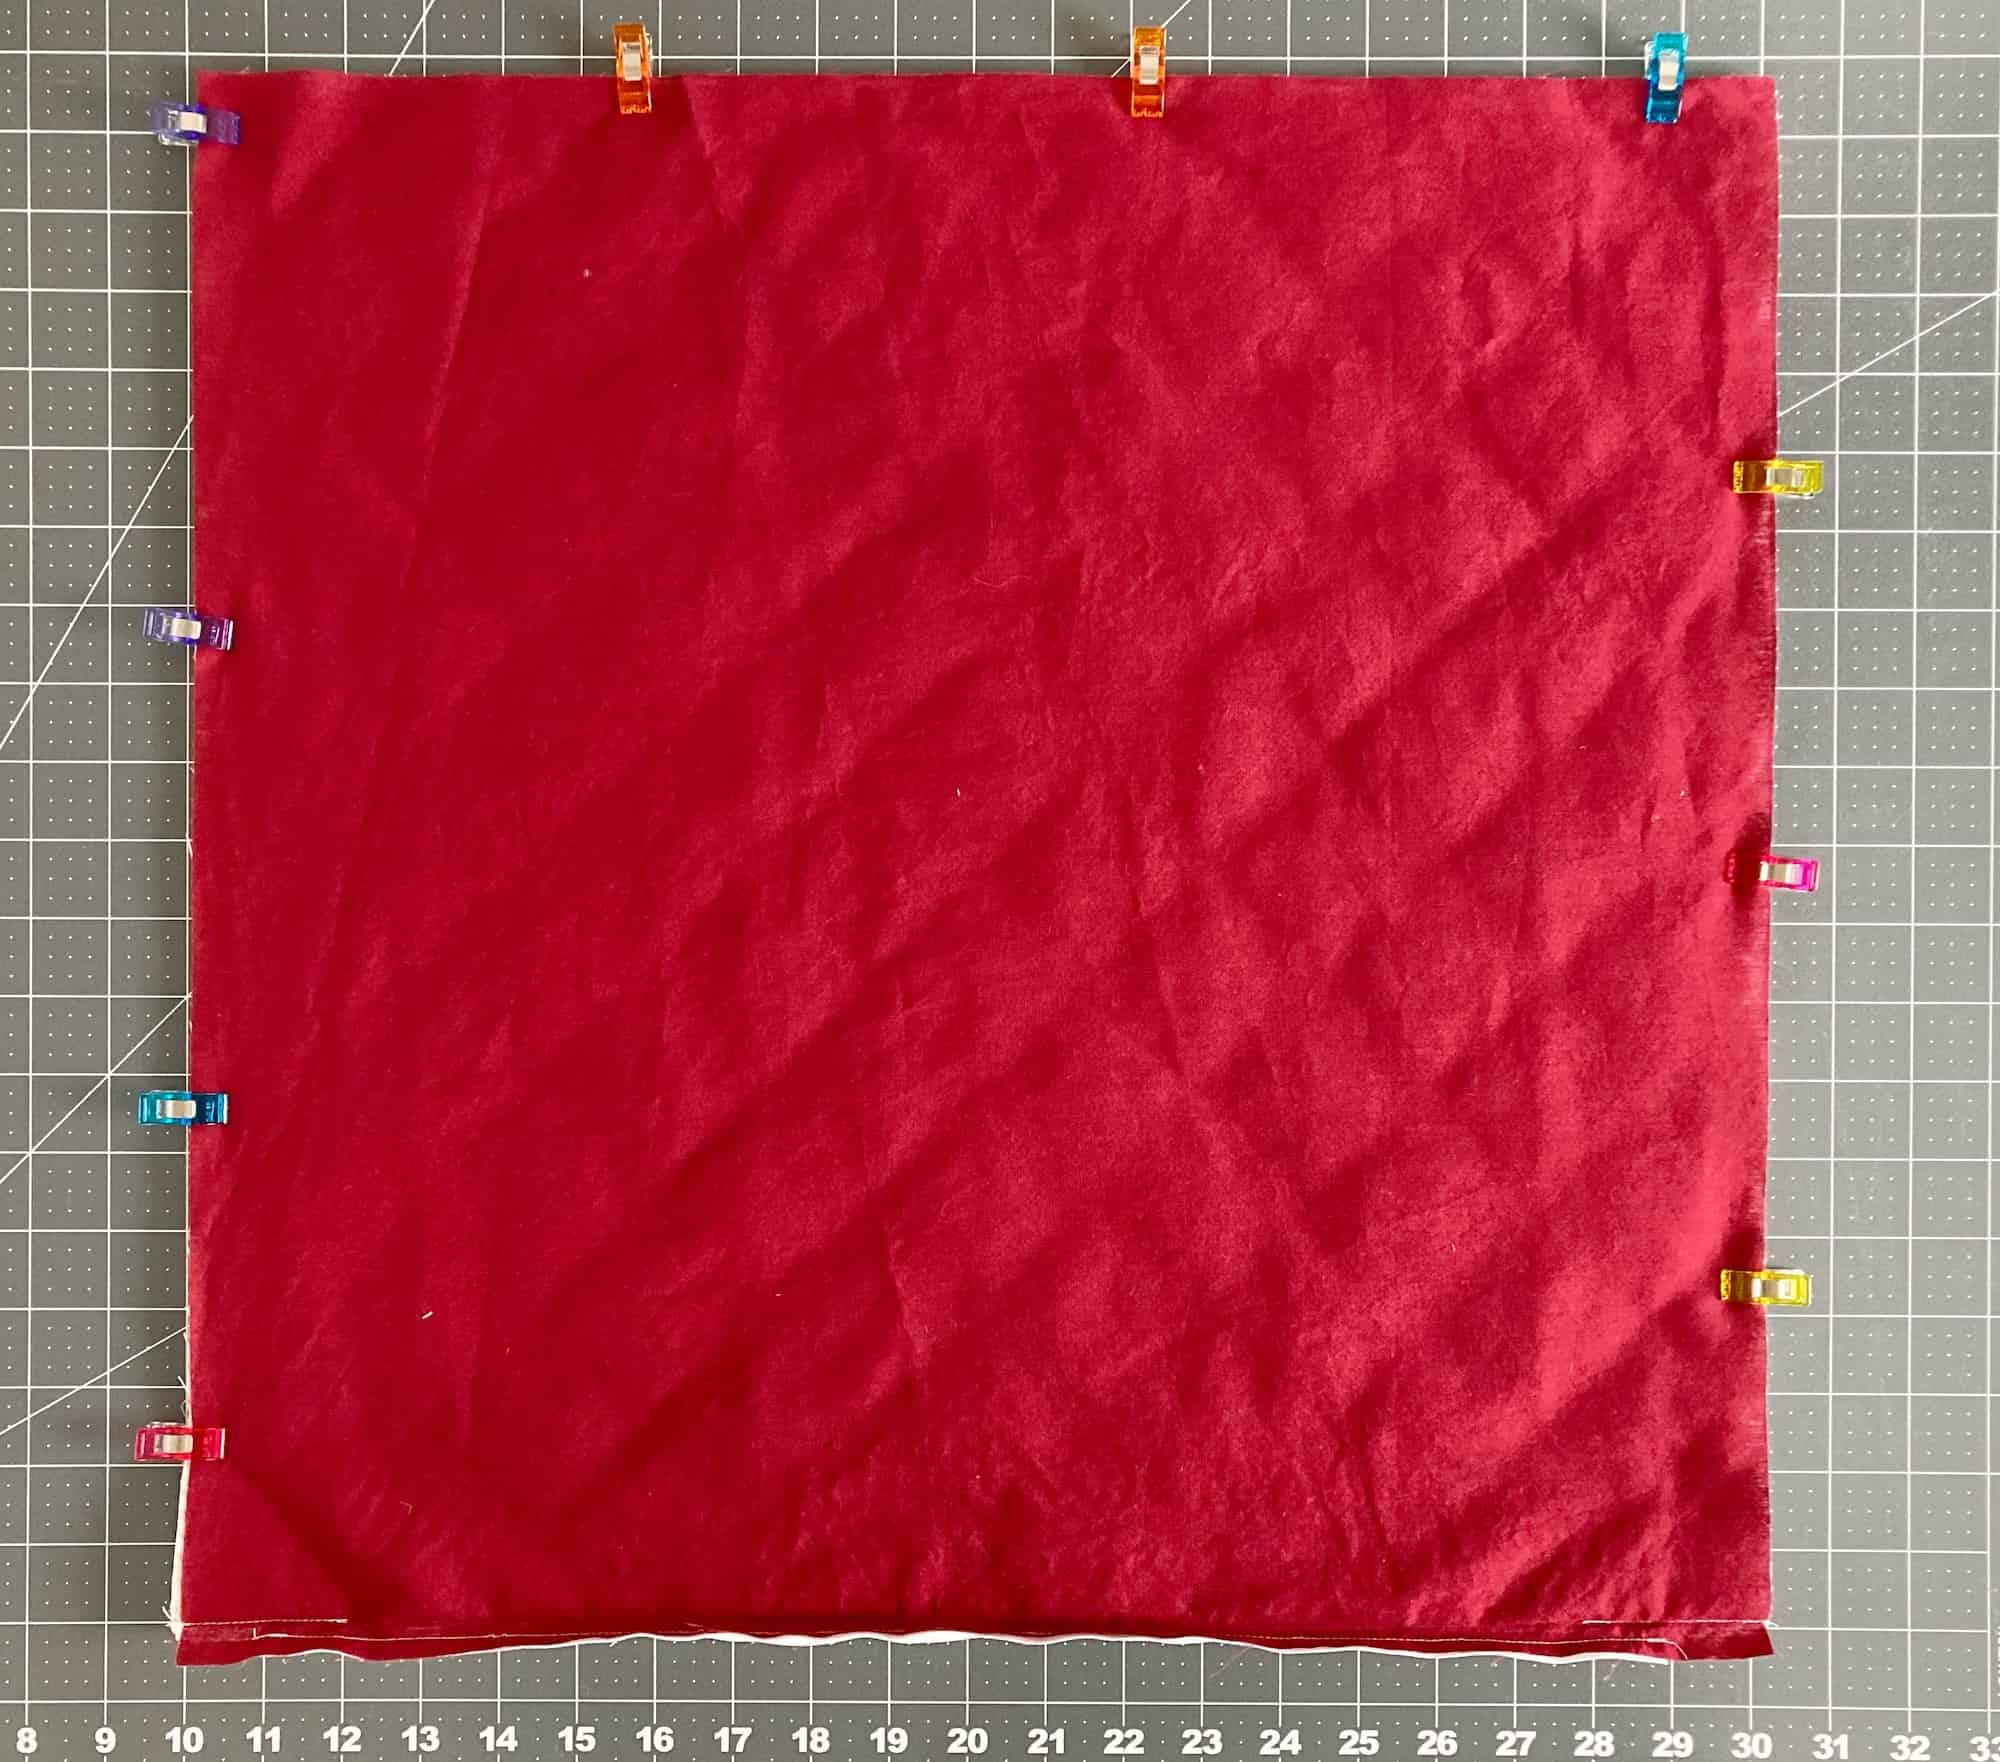
Sew all the way around with a 1/2″ seam (with your regular presser foot again, or use a walking foot).
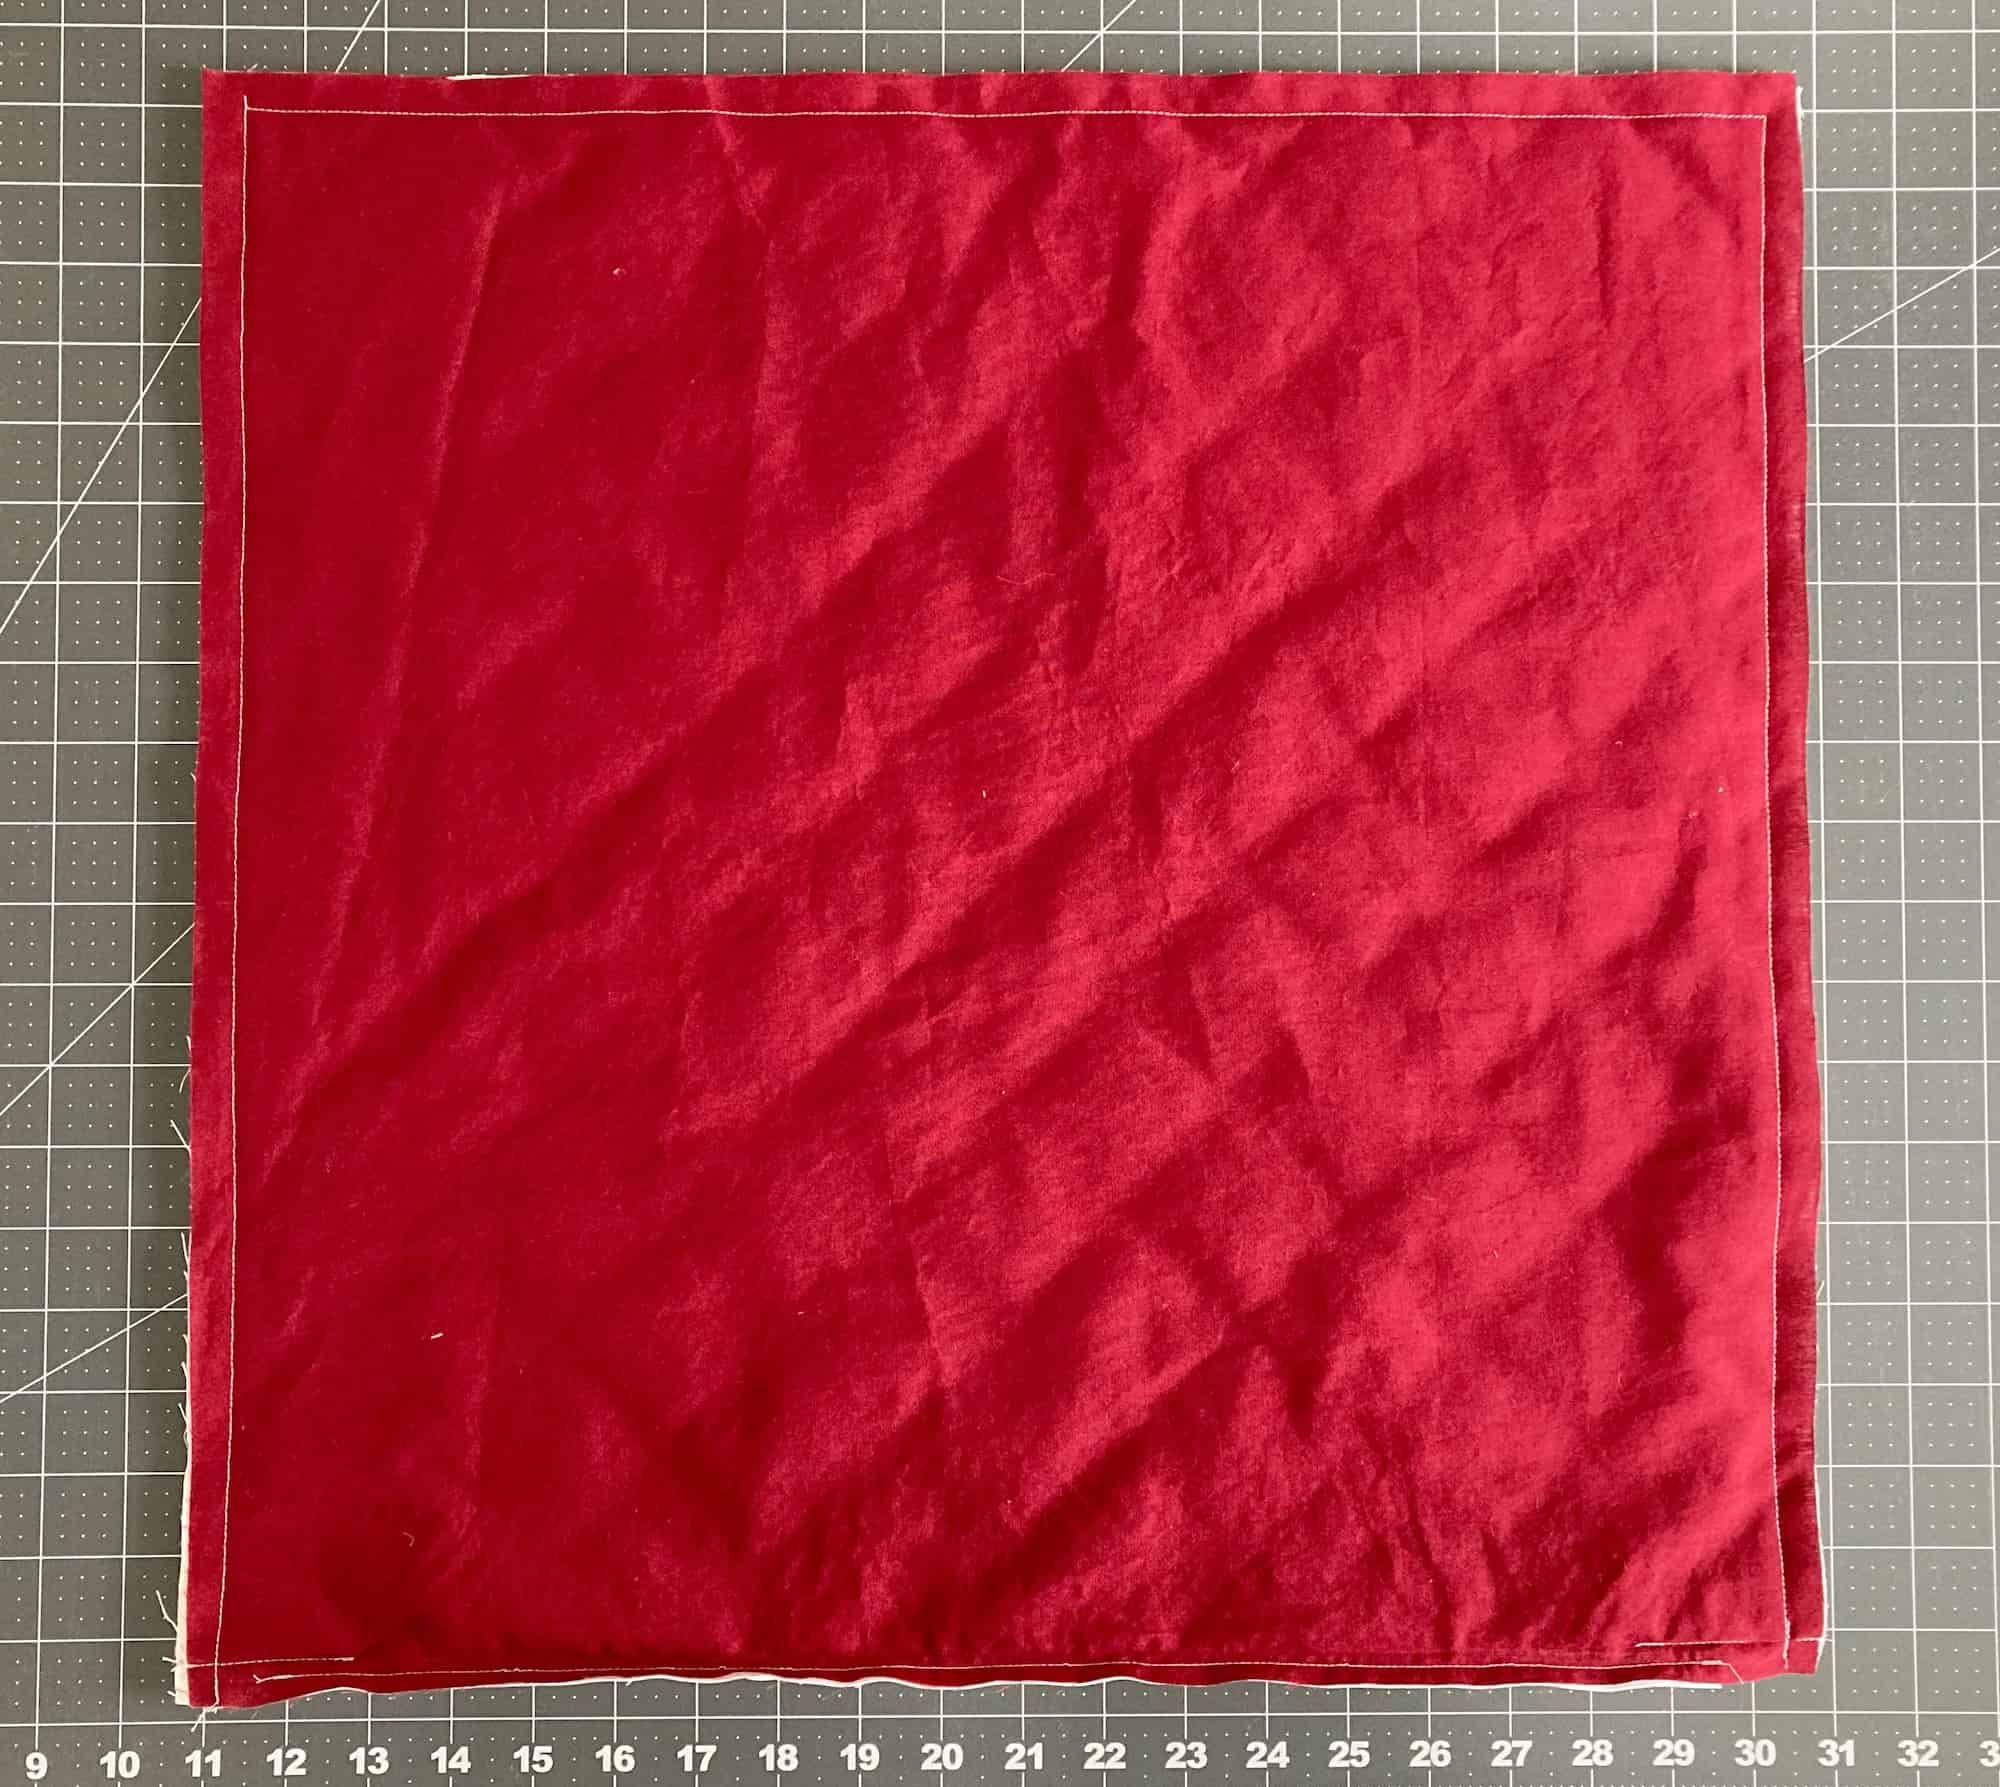
Trim off the corners on the diagonal, just shy of 1/4” from the seam, then flip right side out through the open zipper. Use a Point 2 Point turner, or a not-too-sharp pencil to carefully push out the corners.
Insert the pillow form, zip the zipper, fluff, and pat yourself on the back! You just made a zippered quilted pillow.
Designed by Monika Henry of Penny Spool Quilts